There has been quite a parade of camera bags launched on the market recently. Peak Design’s latest in their line of products with the Everyday Messenger Bag, achieved an incredible target on Kickstarter.
Check out Simon Ringsmuth’s review of the bag. ThinkTank Photo followed with the Lily Deanne bag, in the same price league but targeted more for women. Another Kickstarter venture by Progo gear successfully launched their carry-on/camera backpack in January of this year.
5 Hacks to curb the temptation to buy another camera bag
But, this article isn’t about reviewing yet another camera bag. Instead, it got me thinking no matter what camera bag that you may have, one fit doesn’t suit all. I’ll admit, I have a weakness for camera bags. There is such a vast array of camera bags on the market to suit every photographer’s needs. The types range from shoulder bags, backpacks, and rolling cases, to name just a few. However, when choosing a bag, the following factors should be considered:
- Materials: I have a preference for man-made, hi-tech materials like ballistic nylon as opposed to natural fabrics, such as cotton or leather – simply because they are lighter and generally offer better water resistance.
- Protection: Obviously, you want the best protection for your gear. This will mean a bag that has sufficient padding on the inside, and a material on the outside which protects against inclement weather. This can be the inherent material that the camera bag is made from, or a waterproof cover which you can pull over the bag if it rains.
- Capacity: This will be very subjective to the type of photographer you are. A travel photographer’s gear and bag(s) will be in sharp contrast to a photographer on a fashion shoot in a studio.
- Comfort: This is a very important factor. If you have to carry your bag at all, it should feel comfortable, and you shouldn’t really be aware of it. If you are, it’s a nuisance.
I do like features on so many different bag, and I wish that the sum of all these features were all rolled into one bag. But I am asking a lot here. So I thought, rather than buying another bag, why not customize or hack a bag that you already own?
Here’s my five hacks that may help you curb the temptation to go out to buy another camera bag – at least for now:
#1 Tent repair tape
The bottom of my camera bag isn’t really at all abrasion resistant, or waterproof. This was an initial concern for me when I was buying the bag. Most camera bags should, in my opinion, offer some degree of ruggedness to ensure the bottom of your camera bag will be protected for a number of years.
However, in the end, I decided to buy it, as it ticked most of the boxes for the type of bag I wanted. I came up with my own solution to safeguard the underneath part of the bag for general wear and tear.
Tent Repair Tape – found in most camping outdoor retail outlets.
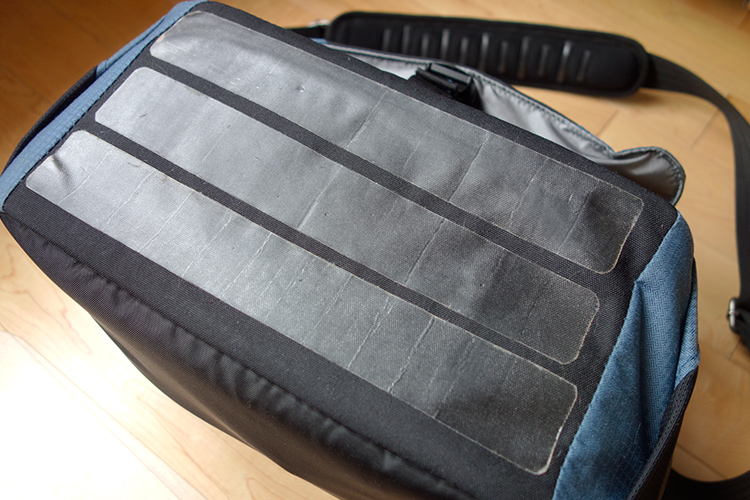
I cut 3 strips of the tent repair tape to suit the dimensions of my camera bag.
Cut strips of tent repair tape the same length as your bag and apply them length ways across the bottom. This tape is super strong and waterproof. I also added feet to the bottom, like you would see on most bags, not just camera bags. I have a neat way to add feet to the bottom of your bag, without taking away from the aesthetic look. See #5 below for more details.
Tip: By putting another layer of cell foam dividers flat across the inside bottom of your camera bag helps to give more padded protection. I seem to have gathered a collection of these over the years!
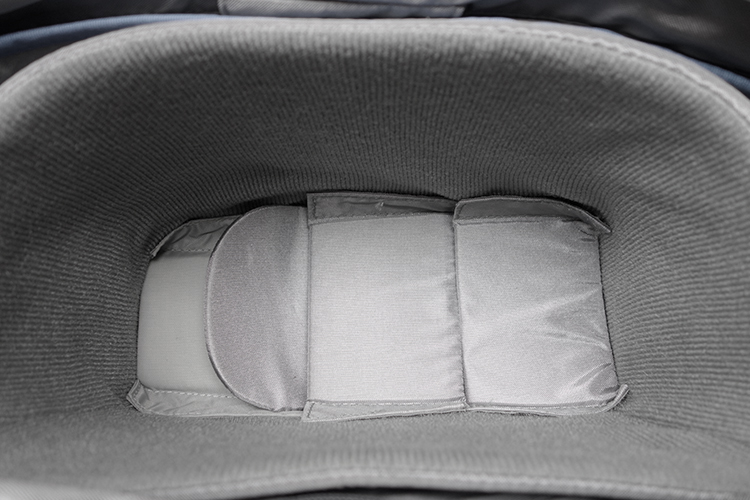
I added another layer of spare foam cell pads at the bottom of my already padded insert.
#2 Carabiner Rings
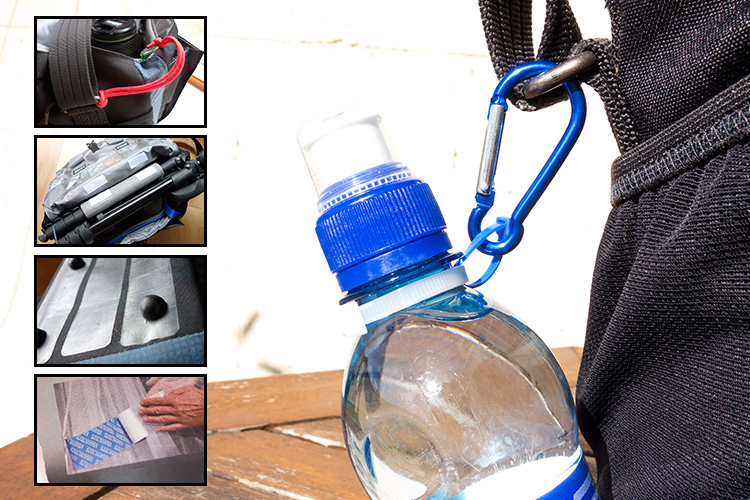
These aluminium rings are so versatile for attaching extra accessories, that you simply can’t fit inside the bag. For example, side pockets are great for adding a flash gun or a drink bottle. But, what if your camera bag doesn’t have a side pocket?
This solution should work for any type of drink bottle. You will need two cable ties, one longer than the other. Secure the longer one around the neck of the bottle and the smaller one acts as a ring to attach to the carabiner, which is then looped around one of the metal rings on the bag’s strap.
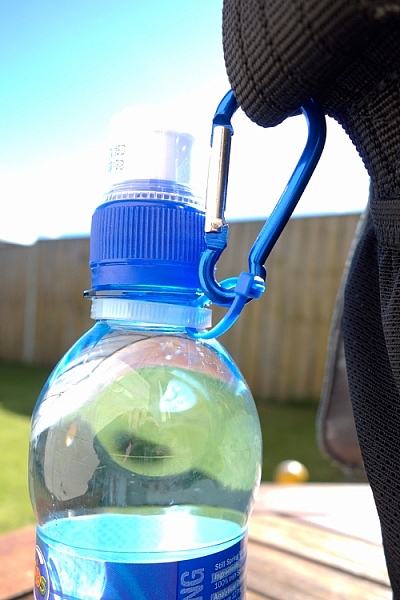
Water bottle attached to the camera strap, via the metal ring using two cable ties.
Tip: Water bottles can also serve as an extra weight to stabilize your tripod.
#3 Paracord
I wish every camera bag would come with at least two key fob straps. Of course, I don’t use mine for keys. Key fob straps are great for attaching the likes of SD/CF memory card wallet holders or other items that you may need to hand, without looking like a badger who is burrowing out of his nest.
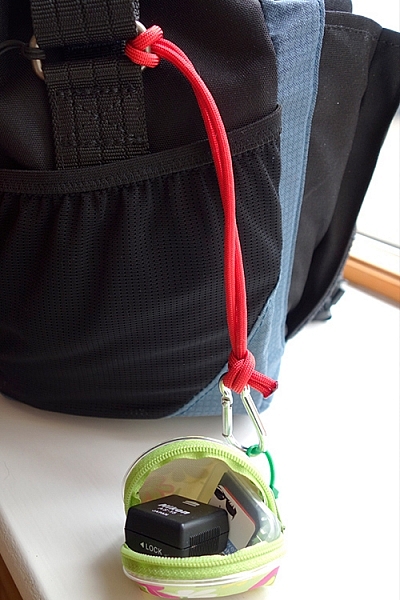
My hotshoe adaptor and spare SD card attached to my paracord strap, which also doubles up as a wrist camera strap.
This is a very simple method to add an extra key fob strap to any bag. Measure a length of a Paracord, in my case 27 inches. Tie both ends together. You will need to burn the ends of the cord, after the knot, to stop it from fraying. Loop one end around the bag’s strap ring on the outside and secure a plastic carabiner to the other end. See photo.
I used a plastic carabiner, as I don’t particularly like metal rings inside my camera bag. I have my business cards secured in their holder, attached to the carabiner. These are quick and easy to hand. No foraging around in your bag for what seems like an age looking for them!

A key fob strap made from paracord, using a plastic carabiner (even though it looks aluminum) attached to my business cards.
Tip: This strap can also double up as a camera wrist strap. See my other article for this tip and other DIY hacks.
#4 Insulation Foam Sleeves
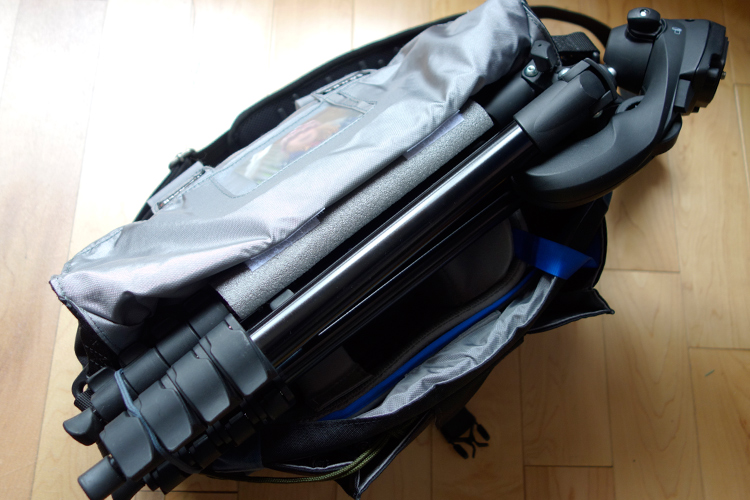
I like the option to be able to carry my travel tripod with me, as it also doubles up as a light stand. But there isn’t a designated tripod holder on this type of bag. However, as it has a big front flap. I came up with this idea of using a foam insulation sleeve.
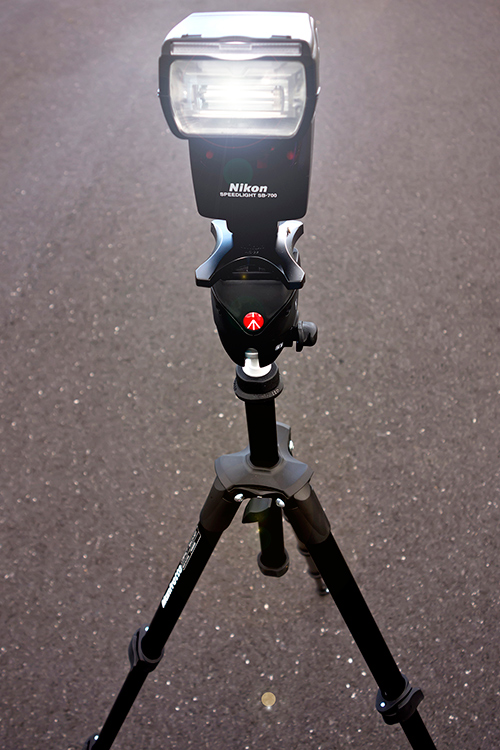
My travel tripod which I also use as a light stand.
These Economiser Polyethylene Pipe Insulation sleeves can be purchased at most DIY stores. Their function is to insulate heating pipes. I bought this 1/2″ Cosy Sleeve, 1 Metre length (3′ approx.) for less than $ 2.00 USD. It has a pre-cut slit down the length. To cut to the desired length is simple and quick.
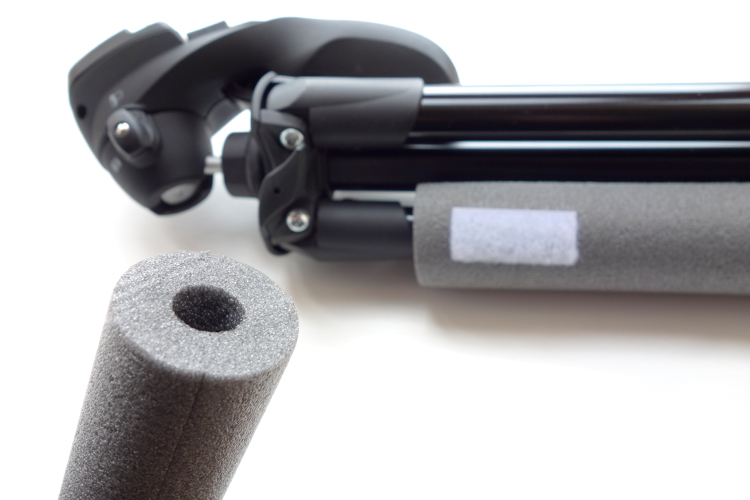
Foam insulation sleeve for heating pipes, found in DIY stores.
Place the sleeve around one of the tripod legs. Cut two small strips of self-adhesive velcro strips and stick them onto the foam sleeve and then under the front flap of the bag. The tripod is resting on top of the removable padded insert. When the front flap is closed, the sleeve acts as a cushion to keep it place.
Foam insulation sleeve attached to one of the tripods legs. Velcro adhesive strips are used to secure to the underneath part of the front flap.
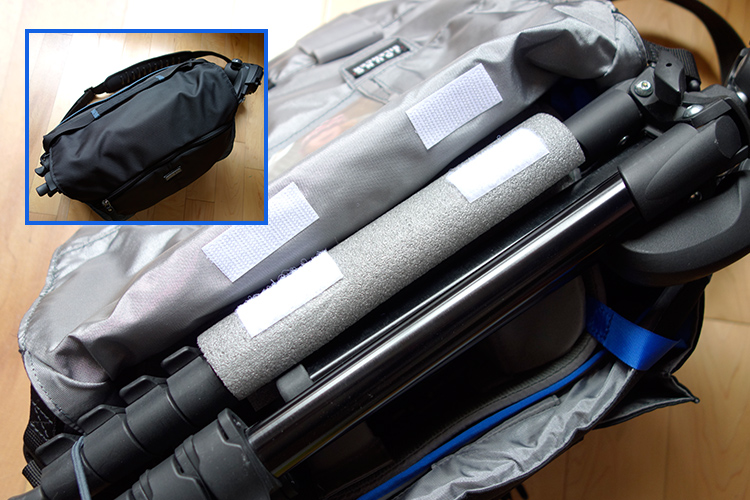
The tripod felt very secure, as it is resting on the inner padded insert, and when it is closed the sleeve acts as a cushion for a snug fit.
Tip: the foam sleeve can also be left on the tripod while in use to act as a cover (nicer on fingers in cold weather).
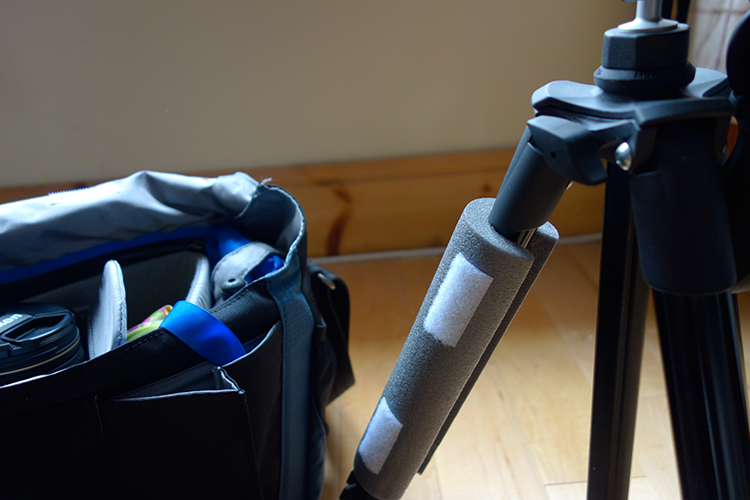
The foam sleeve can be left on the tripod when in use to act as a cover.
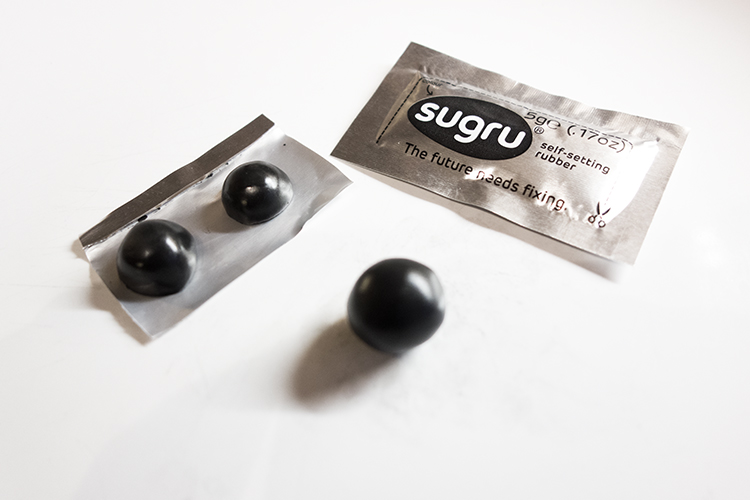
#5 Sugru
If you haven’t come across this product before, it’s simply brilliant, a DIYer’s dream. The company’s tagline is, “Mouldable glue that turns into rubber”. The methods or ways that it can be applied as fixes or hacks, are only limited to your own imagination.
You can create your own rubber feet for the bottom of your camera bag, to protect it against general wear and tear. I used a three pack ($ 13.50 for 3 packs) of pitch black Sugru to create these feet. Roll each one into a ball, and with a sharp kitchen knife, then cut each ball in half. Allow these to cure (set) for a day or two. In order to secure the feet to the bag, you will need some extra Sugru. (You can buy 8 packs for $ 22, which works out cheaper than 2 x 3 packs).
Rubber feet moulded from Sugru, for underneath my camera bag as added protection.
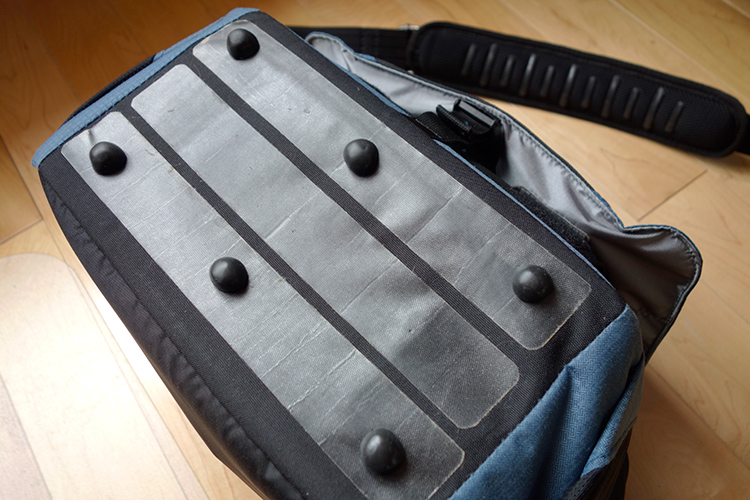
The rubber feet attached to my camera bag along with the tent repair tape.
Here’s another tip for using Sugru. If your camera bag strap has a cushion pad but no silicone strips to prevent it from sliding off your shoulder, or they have simply worn away, you can make your own by rolling out strips of Sugru and stick them firmly on to the pad.
Do you any other camera bag hack ideas that you would like to share? Leave a comment below.
Disclaimer: I was not approached or sponsored by any of the companies mentioned in this article. All opinions are by the author.
googletag.cmd.push(function() {
tablet_slots.push( googletag.defineSlot( “/1005424/_dPSv4_tab-all-article-bottom_(300×250)”, [300, 250], “pb-ad-78623” ).addService( googletag.pubads() ) ); } );
googletag.cmd.push(function() {
mobile_slots.push( googletag.defineSlot( “/1005424/_dPSv4_mob-all-article-bottom_(300×250)”, [300, 250], “pb-ad-78158” ).addService( googletag.pubads() ) ); } );
The post 5 Camera Bag Hacks to Help You Curb the Temptation of Buying More by Sarah Hipwell appeared first on Digital Photography School.

Digital Photography School


You must be logged in to post a comment.