RSS
 

Archive for May, 2016

Aide de Camp Camera Bag Review: Where Function Meets Style

13 May

If you’re a woman in the photography business, you’ve probably heard of Aide de Camp by now. Yeah, it’s the company that has literally took camera bag out of the box (the clumsy black box), and proved that practical can be stylish. In this post I’m sharing my hands-on review of Aide de Camp’s new offering, the elegant Nadine Camera Continue Reading

The post Aide de Camp Camera Bag Review: Where Function Meets Style appeared first on Photodoto.


Photodoto

 
Comments Off on Aide de Camp Camera Bag Review: Where Function Meets Style

Posted in Photography


5 Steps to Increase the Sharpness of Your Photographs

13 May

Image001

Here are five steps you can take which help to increase the sharpness of your photographs:

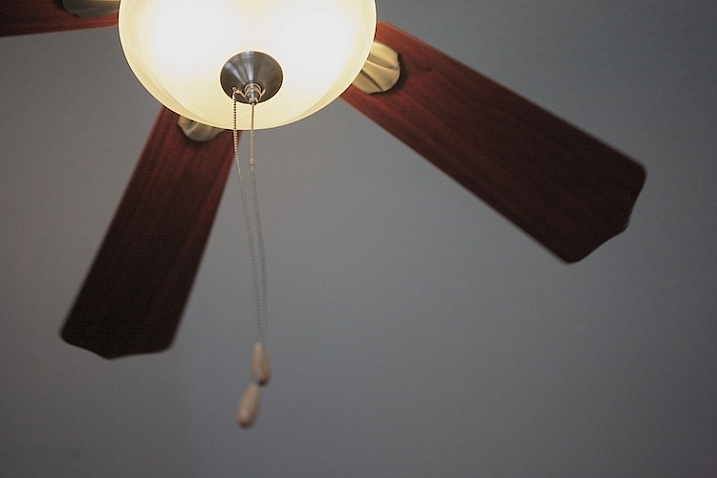
1) Keep your lenses, filters, and camera sensor clean

Somewhat of an obvious point, but a very important one nonetheless. If your lenses and/or filters have dust or debris on them, however small and unnoticeable to the naked eye, it can create ugly soft spots on your photograph. There have been countless times I was in such a hurry to go shoot, I didn’t check the glass to see if it needed a good cleaning. This especially holds true if the lens I am using has been sitting on my shelf for a while, collecting dust. Even if the lens has been wrapped up in a pouch with a cap on top, it can still accumulate dust on the outer element.

Quick side issue: This is why it’s a good idea to keep a protective filter over your lenses when they are resting on a shelf, or when you are traveling. Along with the front lens cap, a protective filter helps to keep dust off the lens glass. If you get scuff marks or dirt on a cheap protective filter, who cares? But if you scuff up the outer element on the lens, it’s costly to fix.

Back on point: It can be very frustrating to think you’ve got yourself a good shot, only to upload the images to your computer and see ugly spots scattered all over the image. You can use the Dust and Scratches Filter in Photoshop, use the healing brush, and/or clone away only so much before the smudges become a real time-consuming burden.

This is easily avoidable if you make it a routine to clean your glass before heading out to shoot.

Image002

2) Shoot at the lowest possible ISO

The higher the ISO, the more noise you introduce into the image.

Sometimes you absolutely have no choice but to shoot at a higher ISO. For example, if you are in a poorly lit gym shooting your kid’s basketball game, you are going to need a relatively high ISO to freeze the action, even with a fast lens. Newer cameras mitigate this issue somewhat, because they are able shoot at higher ISOs without a significant amount of noise.

Additionally, if you are only going to be displaying low resolution photographs on Facebook or elsewhere on the internet, or printing small 5X7 pictures, you can get away with some noise in the photo. But, if you are going to be creating larger prints, or will be showcasing the images on the internet at a high resolution, you want your images tack-sharp, and lower ISOs undoubtedly help. There are all kinds of software programs which can help reduce noise in a photograph, but the more noise you are correcting, the softer the image will become.

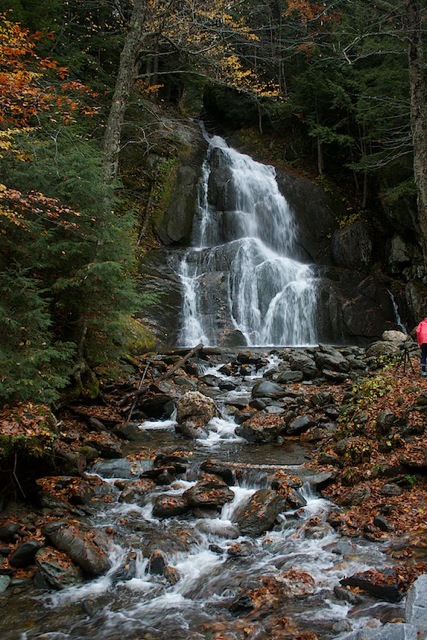
This segues nicely into the next step because, if you lower ISO, your shutter speed will slow down (assuming aperture is constant). One way to shoot tack-sharp photographs at slow shutter speeds is to use a sturdy tripod.

Image003

3) Use a sturdy, well-grounded tripod

On a tripod, you can shoot at any shutter speed and the camera and lens will (ideally) stay motionless. This assumes your camera is firmly fastened to the tripod head, and the tripod’s foundation is well anchored and balanced on the ground. Don’t take that for granted – just because you’re on a tripod doesn’t mean everything will stay locked in place. Make sure your tripod feet are solidly on the ground before setting up the camera (I usually press down relatively hard on the tripod to make sure the ground won’t give way…this is especially important on loose ground like mud, wet rocks, or sand).

Then, once your composition is set, make sure your tripod head is locked in position. Additionally, If your tripod has a hook beneath the centre column, hang something with a little bit of weight on it to further lock down the tripod (I usually hang my backpack on the center hook). Even a gentle gust of wind, or the vibration from a nearby car passing by, can introduce minor camera movement into a tripod setup, so you want that setup locked down as tightly as possible.

Image004

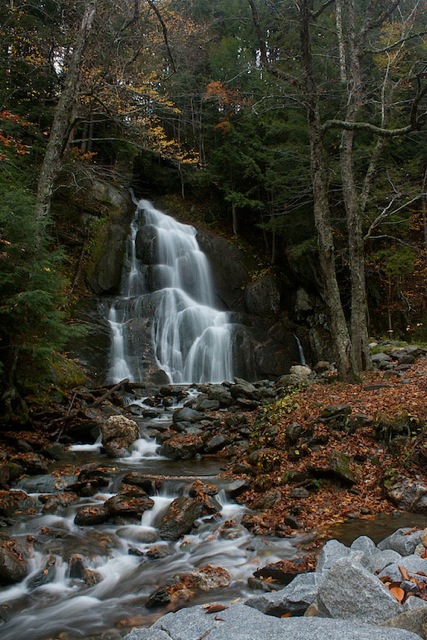
4) Mind your shutter speed

If you are going to hand-hold the camera, it is customary to choose a shutter speed that is at least as fast as the reciprocal of the focal length you are using. For example, if you are shooting with a 50mm lens, then you will want your shutter speed to be at least 1/50th, or faster, to get acceptable sharpness. Any slower and you risk motion blur. If you are shooting with a 500mm telephoto, then you want at least 1/500th or faster, and so on. The one caveat to this formula is if your camera or lens has some sort of additional stabilization, like Nikon’s Vibration Reduction (VR – called Image Stabilization or IS on other cameras). This will allow you to shoot at slower shutter speeds, usually by several stops, without introducing significant motion blur.

Image005

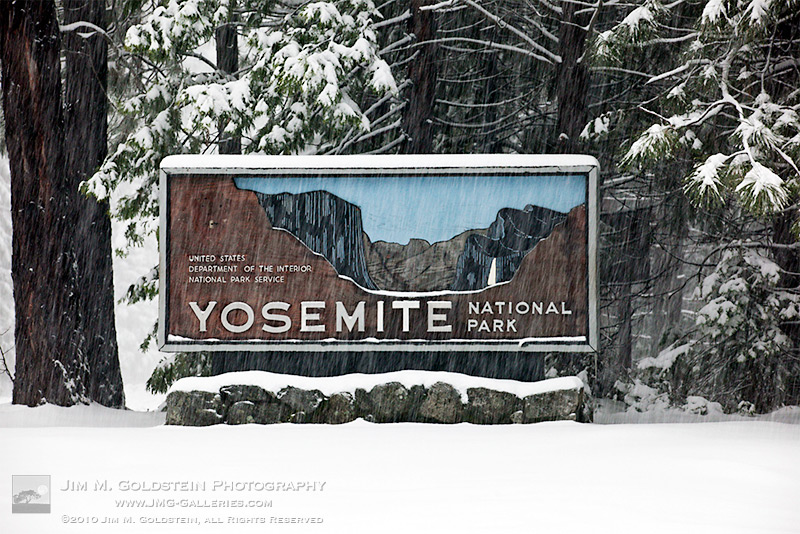
5) Lock-up the mirror before firing away

When you are looking through the viewfinder in a DSLR, what you see is the light which passes through the lens, but you don’t actually see it until it bounces off a couple of mirrors. The light of the scene enters through the lens, bounces off of a mirror that sits at an angle directly in front of the shutter/sensor, then it travels through a pentaprism or penta-mirror, before it finally reaches the viewfinder.

So, in order for the exposure to be taken, the mirror in front of the sensor has to flip up, then the shutter opens to allow light to hit the sensor. If the mirror flips up at the same time the shutter opens, there is the potential for very slight movement of the camera due to vibrations caused by the mirror flipping up.

Most modern DSLRs give you the option of locking the mirror up well before the exposure is taken. The Nikon D810, for example, gives you the option of locking up the mirror anywhere between one and three seconds before the shutter opens (Nikon calls it Exposure Delay Mode). I always choose three seconds, unless there’s a need to shoot quicker. That makes sure the camera is nice and still before the shutter opens and the exposure is taken.

Note: if you’re using a mirrorless camera you don’t have to worry about this step!

This is also helpful if you forgot to bring along a remote shutter. Pressing the camera’s shutter release almost always causes slight movement in the camera. But, if the camera waits a couple of seconds after the mirror flips up, it gives the setup time to become completely still again.

Image006

Do you have any additional tips or tricks to increase sharpnes in your images? Please share in the comments below.

googletag.cmd.push(function() {
tablet_slots.push( googletag.defineSlot( “/1005424/_dPSv4_tab-all-article-bottom_(300×250)”, [300, 250], “pb-ad-78623” ).addService( googletag.pubads() ) ); } );

googletag.cmd.push(function() {
mobile_slots.push( googletag.defineSlot( “/1005424/_dPSv4_mob-all-article-bottom_(300×250)”, [300, 250], “pb-ad-78158” ).addService( googletag.pubads() ) ); } );

The post 5 Steps to Increase the Sharpness of Your Photographs by Jeb Buchman appeared first on Digital Photography School.


Digital Photography School

 
Comments Off on 5 Steps to Increase the Sharpness of Your Photographs

Posted in Photography


An Exercise to Learn and Practice Shutter Speed at Home

13 May

Practice-shutter-speed-f11-1:60

One of the most important choices you make when taking a photograph is deciding what shutter speed to use. The shutter speed controls how much light comes into your camera, and how motion is recorded.

A faster shutter speed will freeze action and slower shutter speeds can create a blur. Both choices can produce great pictures. In this simple exercise that you can do at home with a ceiling fan, you will have the opportunity to practice setting your camera on different shutter speeds, and seeing how each affects motion in the image.

It’s best to do this during the day when there is some ambient light in the room. You might choose to shoot this with the ceiling lamp on or off, either will work. Or you might try both ways to see which you like better.

To get started, set your camera on shutter priority, or manual mode, and do a few test shots to check your exposure. Put your camera on a tripod for the most consistent results. I also chose to focus on the silver plate on the lamp of the ceiling fan to create consistency. It can be tricky in an exercise like this because your auto focus can get confused and focus on the ceiling, the blades, or the chain cord. (Note: you might try back button focus here, or use autofocus and then lock it or switch to manual).

Practice shutter speed using a ceiling fan/

f/8 at 1/125th, ISO 1600.

Start your series at 1/125th of a second. Notice that I focused on the metal plate on the lamp, and how sharp it is. The blurring in the fan blades is caused by motion.  Also look at the chain. It’s sharp toward the lamp, but the focus gradually falls off as it gets toward the pulls.

Now slow your shutter speed down to 1/60th, and see what happens. If you are shooting in manual mode, remember that when you change your shutter speed, you must also change your aperture or ISO too.

Practice shutter speed using a ceiling fan/

f/11 at 1/60th, ISO 1600.

Notice the blur in the blades at 1/60th. Next, look closely and you can also see that the pull chains show some movement. The depth of field is deeper as well, see how much is in focus between the metal plate on the lamp and the pulls.

Now, slow it down a little bit more.

Practice shutter speed using a ceiling fan/

f/13 at 1/40th, ISO 1600.

What do you notice at 1/40th? The blades seem to be moving faster because of the blur, but nothing has changed with the fan. There is a greater depth of field also, much of the pull chain is in focus now.

Let’s slow it down even more.

Practice shutter speed using a ceiling fan/

f/20 at 1/4, ISO 1600.

Now, at 1/20th, the blades have taken on a new look and the chain is more in focus. Let’s slow it down a little more and see what happens.

Practice shutter speed using a ceiling fan/

f/32 at 1/8th, ISO 1600.

At 1/8th of a second, the blades are almost indistinguishable, and note that the metal plate is not as sharp as in the other photos. Ceiling fans are seldom perfectly still when the fans are moving and you can see slight movement in the metal plate.

Now, let’s go back and speed things up. Try a shutter speed of 1/250th and see what happens.

Practice shutter speed using a ceiling fan/

f/5.6 at 1/250th, ISO 1600.

Compare this to the first image, which was shot at 1/125th of a second. You can see that the blades still have motion, and notice the difference in the depth of field. At f/5.6, the chain is considerably more out of focus than at f/32.

Next, change your shutter speed to 1/500th.

Practice shutter speed using a ceiling fan/

f/4 at 1/500th, ISO 1600.

At 1/500th, the fan blades show motion. Now try 1/1000th.

Practice shutter speed using a ceiling fan/

f/2.8 at 1/1000th, ISO 1600.

At 1/1000th of a second, the fan blades are frozen. It’s almost as if the fan isn’t turning. Notice the difference in the depth of field. The pull chain is out of focus due to the narrow depth of field at f/2.8.

Here are a couple of real world examples of how you might apply this to your photography:

Shutter speed 1/30th - the water is partly frozen.

Shutter speed 1/30th – the water is partly frozen.

Shutter speed 1/2 second the water becomes silky and smooth

Shutter speed 1/2 second the water becomes silky smooth

You can also do this exercise by keeping your aperture consistent and changing your ISO. So what did you learn by doing this exercise? Give it a try and share your photos and what you learned below.

googletag.cmd.push(function() {
tablet_slots.push( googletag.defineSlot( “/1005424/_dPSv4_tab-all-article-bottom_(300×250)”, [300, 250], “pb-ad-78623” ).addService( googletag.pubads() ) ); } );

googletag.cmd.push(function() {
mobile_slots.push( googletag.defineSlot( “/1005424/_dPSv4_mob-all-article-bottom_(300×250)”, [300, 250], “pb-ad-78158” ).addService( googletag.pubads() ) ); } );

The post An Exercise to Learn and Practice Shutter Speed at Home by Vickie Lewis appeared first on Digital Photography School.


Digital Photography School

 
Comments Off on An Exercise to Learn and Practice Shutter Speed at Home

Posted in Photography


Samsung unveils 256GB EVO Plus microSD card

13 May

Samsung has introduced the EVO Plus 256GB UHS-1 Class 10 microSD card. According to Samsung, the new EVO Plus card has the highest capacity in its class, and is able to hold up to 12 hours of UHD video, 33 hours of Full HD video and up to 55,200 photographs.

The Samsung EVO Plus 256GB microSD card offers write speeds up to 90MB/s and read speeds up to 95MB/s, as well as the maker’s ‘4-Proof’ durability — it is magnet-proof, temperature-proof, waterproof, and x-ray-proof. A 10-year limited warranty accompanies the durability promises.

Samsung will launch its new storage card in the U.S., Europe, China and beyond (totaling 50+ countries) next month for $ 249.99.

Via: Samsung

Articles: Digital Photography Review (dpreview.com)

 
Comments Off on Samsung unveils 256GB EVO Plus microSD card

Posted in Uncategorized


Benchmark performance: Nikon D810 in-depth review

12 May

I’m pleased to announce that our in-depth review of the D810 is now published. A lot of you will be asking why it took so long. That’s a good question. There’s no single, simple answer, but believe us when we say that over the past two years there has rarely been a day when we have not been working on the D810 review in some way or other.

As we started to dig deeper and deeper into things like its class-leading dynamic range, its 3D tracking autofocus and numerous other details, we realized that not only did we have to revisit some of our existing testing methods, but that to properly test a camera like this we had a responsibility to create entire new tests.

You’ve seen the results of those new testing methods in our reviews of other major cameras like the Sony a7R II and Canon EOS 5DS/R. When we started looking into shutter-induced vibrations at certain shutter speeds for example, we had to devote a lot of time to tedious repeated testing of several cameras, not just the D810, to figure out what was going on. We did that because we don’t like guessing. Because when we suspect that a certain camera (or class of camera) displays a behavioral quirk that photographers should know about, we like to be able to prove it.

This process of evolving old tests and developing new ones is ongoing. Ironically, none of our recent reviews of major new flagship cameras could have been written to the standard that they were without some of the tests we developed when working on the D810.  We’re just very sorry that it took so long before we could show you our workings. 

And with that – we hope you enjoy the review!

Articles: Digital Photography Review (dpreview.com)

 
Comments Off on Benchmark performance: Nikon D810 in-depth review

Posted in Uncategorized


2016 Roundup: Consumer Long Zoom Compacts

12 May

Bridge and travel zoom cameras are two of the very few categories of compact cameras to survive the smartphone. Whether it’s a travel zoom, which puts a 25X-30X zoom into your pocket, or a bridge camera which offers even more zoom, phones just can’t compete. 

While there are now enthusiast-level long zoom cameras with 1″-type sensors – such as Sony’s Cyber-shot RX10 series – there are still plenty of more budget-friendly models, though their smaller sensors don’t offer the image quality or depth-of-field control of the pricier models. The one product in the group that is a bit more competitive with the enthusiast cameras is the Olympus Stylus 1s, which has a 1/1.7″ sensor, rather than the smaller, and more common (in this class) 1/2.3″.

The following cameras are included in our roundup:

  • Canon PowerShot SX60 HS
  • Canon PowerShot SX710 HS
  • Nikon Coolpix P900
  • Olympus Stylus 1s
  • Panasonic Lumix DMC-FZ300
  • Panasonic Lumix DMC-ZS60
  • Sony Cyber-shot HX90V
  • Sony Cyber-shot HX400V

Of those eight cameras, three are pocket-sized and offer 30X zooms. The other five are bridge (SLR-style) cameras with focal lengths ranging from 600mm to an unbelievable 2000mm (35mm-equivalent).

And with that, let’s take a look at some consumer-level travel zoom cameras!

Articles: Digital Photography Review (dpreview.com)

 
Comments Off on 2016 Roundup: Consumer Long Zoom Compacts

Posted in Uncategorized


Welcome to Yosemite: The Man Behind The Sign

12 May

yosemite-sign2-edit-800c

If and when you enter Yosemite National Park you’re likely to see an iconic painted sign welcoming you to the park. I’ve passed by this particular sign at the northwest entrance numerous time. The difference on my last trip was that it was getting a fresh coat of paint and being restored by artist Mark Switlik. I should clarify, while technically it was being restored, it was also being transformed to have a much warmer, more realistic and colorful look. You can see how the sign used to look at the end of this post.

I consider myself quite lucky to have met Mark and had the opportunity to talk with him albeit quickly. He had been working on the sign for sometime before my trip and I had seen early photos from others of its transformation. I wasn’t sure if it’d be done by the time I made it to the park back in April. I don’t know about you but I like Mark’s take on the sign versus the old. It’s a bit more welcoming. What do you think?

yosemite-sign1-edit-800c

If you don’t remember what the old sign used to look like here is a photo I took of it in a snow storm several years ago. It has a much more stark appearance.

yosemite-sign3-edit-800c

The post Welcome to Yosemite: The Man Behind The Sign appeared first on JMG-Galleries – Landscape, Nature & Travel Photography.


JMG-Galleries – Landscape, Nature & Travel Photography

 
Comments Off on Welcome to Yosemite: The Man Behind The Sign

Posted in Equipment


Heavenly bodies: Nikon D810 & D810A field test

12 May

José Francisco Salgado is an Emmy-nominated astronomer, photographer and educator. Driven by a passion to show and explain our universe, José Fransisco’s work has taken him all over the world, even as his camera lens is aimed far beyond our atmosphere. José Fransisco joined us when we took Nikon’s D810 and D810A down to southern California recently, to capture the stunning desert vistas – and night skies – of the landscapes near Death Valley. 

The D810 is Nikon’s highest-resolution DSLR, and the D810A is a specialized version specifically designed for astrophotography. As well as a higher base ISO sensitivity, the D810A’s sensor is modified to capture the specific wavelengths of the light transmitted by distant nebulae. Watch our video to see how José – and the D810A – performed.

Waiting for the D810 full review? We’re pleased to tell you that it’s being readied for publication! For now we hope you enjoy watching this field test, with José Francisco Salgado.

If you want to learn more about astrophotography make sure to visit our Astrophotography Talk forum.


This is sponsored content, created with the support of Nikon. What does this mean?

Articles: Digital Photography Review (dpreview.com)

 
Comments Off on Heavenly bodies: Nikon D810 & D810A field test

Posted in Uncategorized


Transform Your Landscape Photography in a Click with our New Lightroom Presets (60% off Today)

12 May

NewImageDo you take landscape photos? Are you a Lightroom* user? Do you need a little help to lift your landscape shots to the next level?

Today we’re excited to announce the launch of our all new Adobe Lightroom® presets bundle: 101 Landscape Lightroom presets.

With our new presets pack, transforming your landscape shots is a breeze.

And for a limited time, the pack can be yours for the special introductory price of just USD $ 20 (that’s 60% off).

Check them out here.

In this massive pack of 101 presets you’ll get these 6 collections to suit all scenery seasons:

  • Spring / Summer collection
  • Fantastic Fall
  • Wonderous Winter
  • Stunning Black & Whites
  • Creative Horizons
  • Mono Toned
  • Plus you get a bonus Toolbox collection with 29 presets designed to be stackable for making simple adjustments.

Created by professional landscape photographer Sarah Sisson (co author of our best selling eBooks Living Landscapes which is all about how to take great landscapes and Loving Landscapes which is a guide to post processing landscapes), she’s done all the hard work for you so you can get the perfect edit for every photo without the fuss.

Simply apply the effect and adjust as desired… It’s that easy!

You’ll save a whole heap of processing time, while giving your images an instant “pop”. See Sarah demonstrate in the video below.

101 Landscape Lightroom Presets from Digital Photography School on Vimeo.

Transform your photos in just one click. Pick up our 101 Landscape Lightroom Presets today – while we’re still offering it at the introductory price.

*Please note: a copy of Adobe Lightroom is required to use these presets.

Also: Haven’t used presets before? No worries. Full instructions are included in the pack.

googletag.cmd.push(function() {
tablet_slots.push( googletag.defineSlot( “/1005424/_dPSv4_tab-all-article-bottom_(300×250)”, [300, 250], “pb-ad-78623” ).addService( googletag.pubads() ) ); } );

googletag.cmd.push(function() {
mobile_slots.push( googletag.defineSlot( “/1005424/_dPSv4_mob-all-article-bottom_(300×250)”, [300, 250], “pb-ad-78158” ).addService( googletag.pubads() ) ); } );

The post Transform Your Landscape Photography in a Click with our New Lightroom Presets (60% off Today) by Darren Rowse appeared first on Digital Photography School.


Digital Photography School

 
Comments Off on Transform Your Landscape Photography in a Click with our New Lightroom Presets (60% off Today)

Posted in Photography


A Mirage You Can Touch: Liquid Marble Installation Fools the Eye

12 May

[ By Steph in Art & Sculpture & Craft. ]

liquid marble 1

Even crueler than a real mirage, this convincing illusion continues to look like a real body of water until you reach down to touch its surface, only to find that it’s as solid as anything you’ve ever touched. Thankfully, this faux aquatic feature isn’t sitting in a desert somewhere to fake out unsuspecting travelers, but rather placed in the courtyard of the magnificent Domaine de Chaumont-sur-Loire Centre D’Arts et de nature, a garden center in France. The piece will be on display through November 2nd.

liquid marble 2

liquid marble 4

Designer Mathieu Lehanneur achieved the effect with a marriage of 3D computer software, hand-polished green marble and natural light, so it looks like wind is rippling on the surface of a river. What would have been a split second of scenic beauty, experienced and then forgotten by the naked eye or captured in a two-dimensional photograph, is now frozen in time, made into a durable object that could last thousands of years.

liquid marble 3

“I wanted to address the garden with water as my muse,” says Lehanneur. “The water whose presence we sense even before we first catch sight of it below the chateau, flowing uninterrupted to the sea. Some say the Loire is France’s last wild river; it shapes and nourishes the landscapes, it passes through without ever pausing along the way.”

liquid marble 5

“I hope that, when passing the Chateau gates, the visitor will experience something that comes close to a magic portal, to a forbidden place in so many fairytales. Everything is liquid in this space, evanescent, enlightened, and yet it is executed in a material that is one of the most solid imaginable.”

Share on Facebook


[ By Steph in Art & Sculpture & Craft. ]

[ WebUrbanist | Archives | Galleries | Privacy | TOS ]


WebUrbanist

 
Comments Off on A Mirage You Can Touch: Liquid Marble Installation Fools the Eye

Posted in Creativity