[ By WebUrbanist in Architecture & Offices & Commercial. ]
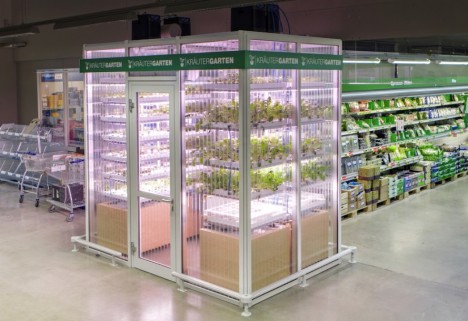
Taking farm-to-table approaches to new heights, a company in Berlin is putting small vertical farms directly inside of grocery stores to provide fresh produce and eliminate transportation costs. Its makers are boast that these are the first indoor farming installations of their kind, placed as they are directly in markets.
INFARM is currently testing live herb gardens in METRO Cash & Carry stores, integrating them into the layout of the shops and making their display part of the shopping experience.

Cutting down on transport costs and associated emissions is good both for the bottom line as well as the environment. These aquaponics systems use less water, energy and space than conventional farms and horizontal greenhouses. And, of course, there is nothing customers like more than the freshest possible ingredients, and these come right off the proverbial (or actual) vine.

The present year-long pilot program involves herbs and salad greens for now, but the same technology can also be deployed to grow other plants including tomatoes, peppers and other fruits and veggies. Next steps may include additional stores and chains but also inserting similar modules into places like restaurants and hotels looking to offer something unique to their clients and guests.

This is not the first green grocery innovation to take root in Berlin, Germany, which is also home to the world’s first packaging-free grocery store. Original Unverpackt is the first in a series of stores using a sustainable model similar to co-ops but at a larger scale and aimed at mass market consumers, adapting the package-free bulk approach to sell all of its unpacked goods directly to consumers.
Want More? Click for Great Related Content on WebUrbanist:

Floating Farms: Agricultural Barges to Yield 10 Tons Per Year
Powered by solar-paneled roofs overhead, these barge farms feature hydroponic space for produce above and support fish farming below, using extant …
Click Here to Read More »»
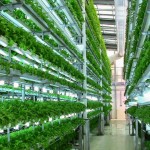
Veggie Factory: World’s First Vertical Farm Run Entirely By Robots
Taking vertical urban indoor farming efficiency to the next level, a new automated plant coming to Japan will be staffed entirely by robots and produce 30,000 …
Click Here to Read More »»
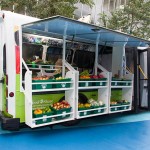
Urban Transformer: Bus Unfolds into Mobile Fresh Food Market
Bringing healthy and organic fruits and vegetables into low-income areas of Toronto lacking grocery stores, this converted bus is much more than a normal food …
Click Here to Read More »»
![]()


[ By WebUrbanist in Architecture & Offices & Commercial. ]
[ WebUrbanist | Archives | Galleries | Privacy | TOS ]


You must be logged in to post a comment.