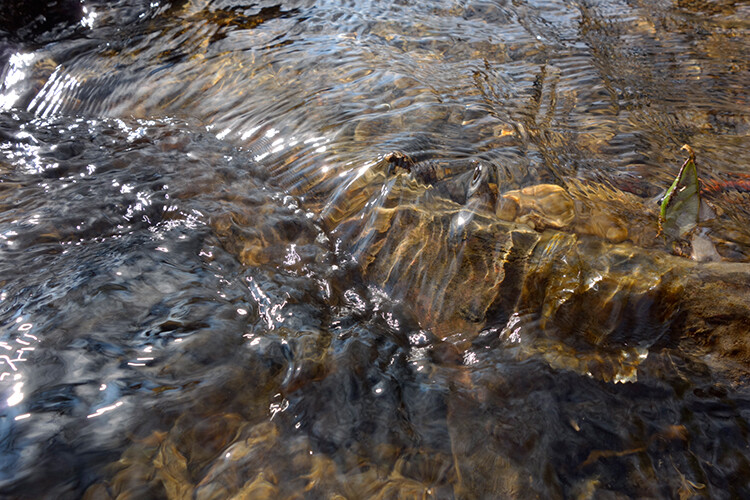
Smooth water effect edited in Affinity Photo using the Live Stacks feature.
Even if you don’t shoot landscape photography, photos of waterfalls with the smooth water and glassy appearance are awesome. The gist to achieving this, and I do stand corrected if I have this wrong, is as follows:
- Slow shutter speeds – the need for a tripod
- A remote shutter release or your camera’s timer
- Wide angle lens and the camera settings using a small aperture of f/22, ISO 100
- Neutral Density and/or polarizer filters, as you’ll be shooting long exposures during the day
- Of course the scene and by all accounts patience too
However, I personally don’t own ND or polarizer filters. These type of filters are required for long exposures during the day, so that your shutter speeds are slow enough, possibly one minute or more to get that misty look. On top of which, you have to get the exposure right, which requires a bit of math and experimentation. ND filters block out the light in terms of stops.
So taking long exposures during the day is an involved process, especially if you want to create that smooth, silky water effect in-camera. But, is there a way to simulate this effect in Photoshop or other post-processing software? Yes there is! It does require that you take multiple shots. I’m not advocating that this technique in post editing is a replacement to going out and achieving long exposures out in the field, far from it. But, I hope this technique may serve as a stepping stone or inspiration to go out and capture silky waters, clouds etc., in-camera.
This article will demonstrate how you can achieve a similar result by taking a bunch of photos in continuous mode without using any filters or a tripod. Although, I would recommend you use a tripod.
First, I’ll demonstrate this effect using a manual method in Photoshop CS6 (standard version). There is an automated way to do this with the Stack Mode feature, which I believe is in Photoshop CC. If you have previous versions of Photoshop, the Stack Mode feature is only available in extended versions, not standard, unfortunately. However, Gimp has this Stack Mode feature and it’s free. Then, I will compare the manual method in Photoshop with Affinity Photo, using Live Stacks. I was really impressed with this feature.
Photoshop manual method
Let’s begin. On the day I took these images, I was pressed for time. So I took a series of shots in continuous mode, and handheld the camera while I focused on this part of a small river. I would recommend that you use a tripod and give yourself some time. It will be easier to align the images later.
I took a bunch of images in continuous mode of this small river, close-up deliberately for this article.
You will need to load your images as layers into one document in Photoshop, as follows:
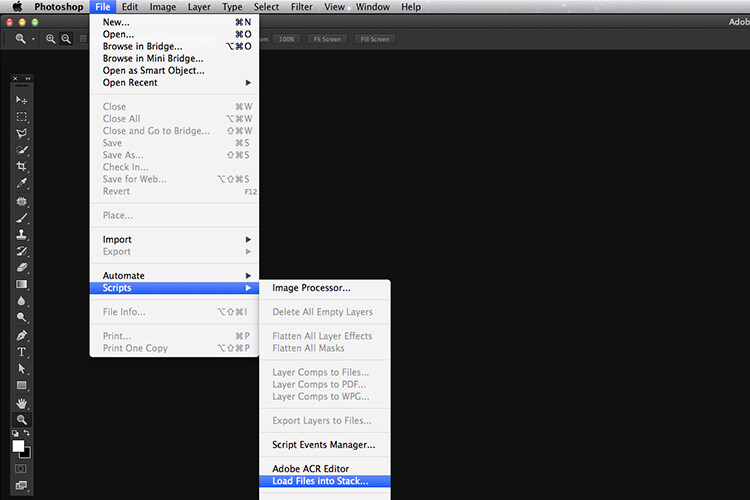
Loading multiple images into one document in Photoshop. File>Scripts>Load Files into Stack
Go up to the Menu Bar > File > Scripts > Load Files into Stack. As I didn’t use a tripod, I selected all the layers to align them. Go to Auto-Align under Edit. As you can see, Photoshop had its work cut out trying to align the images.
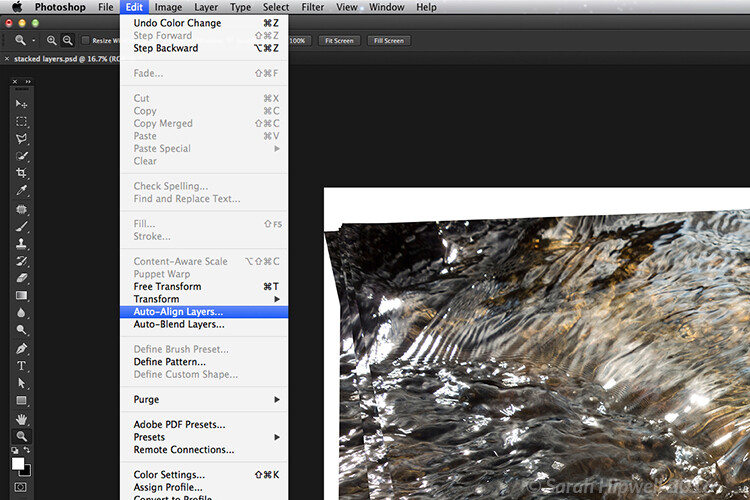
I handheld my camera when I took a bunch of shots in continuous mode. As you can see from this screenshot, I needed to use Auto-Align Layers in Photoshop. If you use a tripod the alignment will be much easier.
Now that the layers are stacked on top of each other. Start at the bottom and leave this layer at 100%, go to second layer above and reduce the opacity by 50%(100÷2=50). Continue with the next layer and reduce the opacity by 33%(100÷3=33).
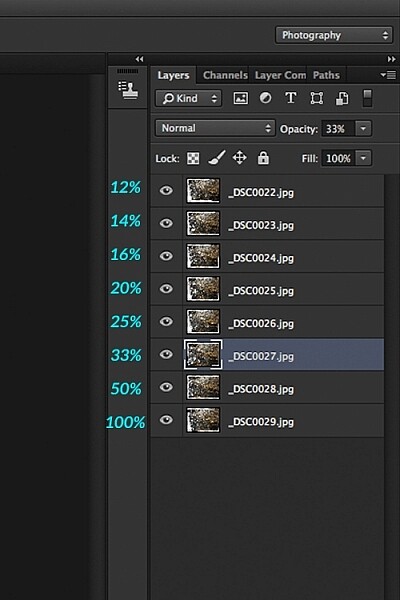
Reducing the opacity of each layer by dividing the number of the layer into 100%. The bottom layer remains at 100%. The second layer is 50% and so on.
Therefore, depending on the amount of layers you have, and where they come in the stack, divide this number into 100. So if you had 30 images, the opacity for the top layer in the stack will be 3% (100÷30=3). Remember the bottom layer is always 1=100%. What this is doing is averaging out the layers. This may sound complicated, but in practice, it’s more straightforward. Although it is a bit more tedious than the automated way.
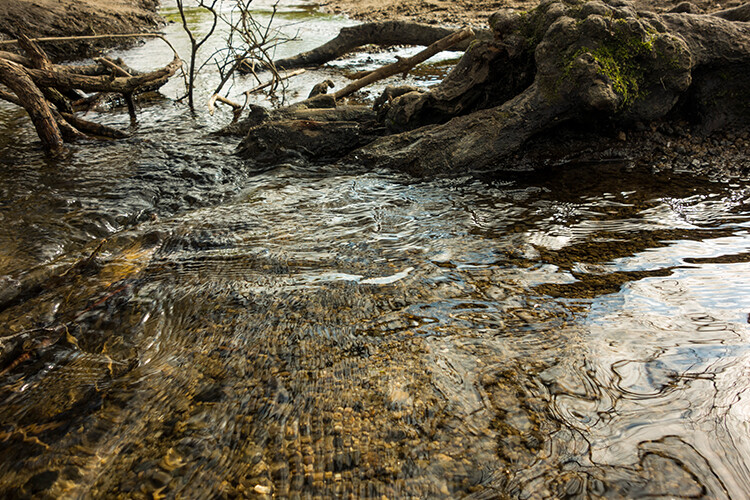
This is the effect of averaging out the layers in Photoshop – reducing the stacked layer’s opacity by X amount. I also had to crop this image, whereas the same image when edited in Affinity Photo kept more of the image. See below.
I have been keeping a close eye on Serif’s Affinity Photo. So I took the plunge and purchased it for (€39) $ 44 USD. That was a discounted offer. At such an affordable price, I was curious to see how this software performs and what it can do.
In Affinity Photo, there is a Live Stacks feature which is similar to Stack Mode in Photoshop. It was easy and simple to use, and the process was fast.
The equivalent Stack Mode feature in Photoshop is called Live Stacks in Affinity Photo.
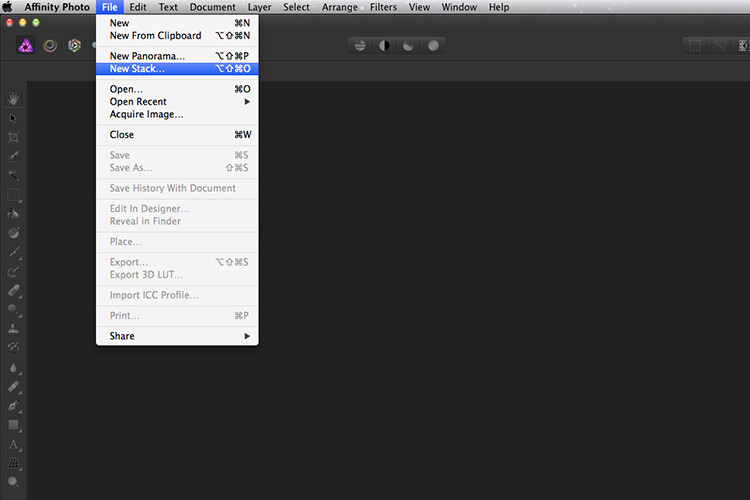
Go to File > New Stack. The pop up dialog box appears where you select your images. Make sure Automatically Align Images box is ticked. Click Ok. This takes a couple of seconds. It defaults to Median in the Live Stack Group, but scroll up to the next one and this is Mean. That’s the one you want.
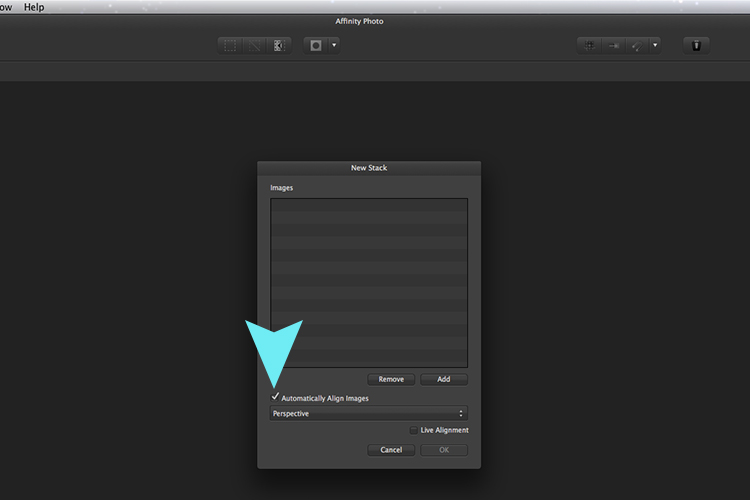
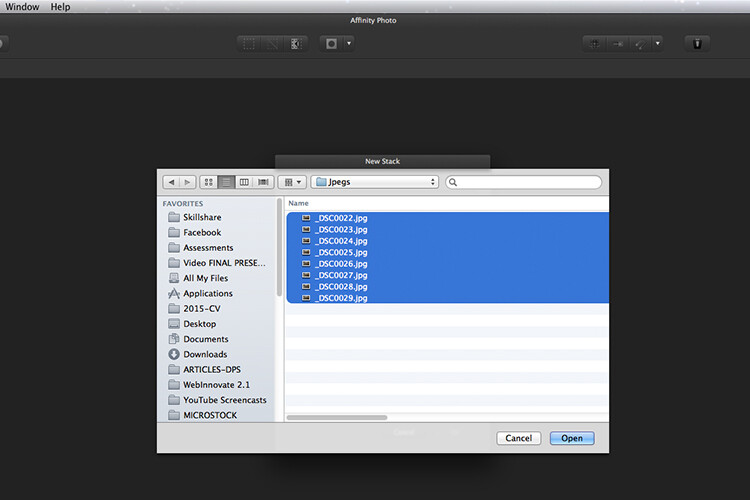
When you create a New Stack, the pop up dialog box appears. Select your images on your computer and click Open.
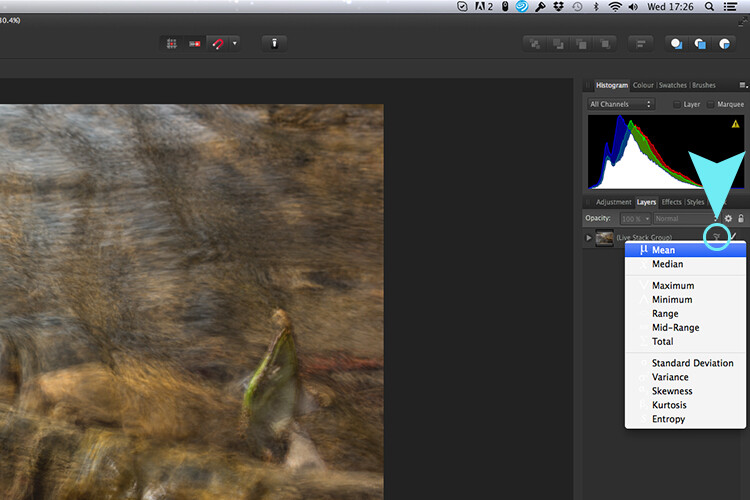
The stacked images are grouped into a folder called Live Stack Group. The different stack options are located by clicking on the small icon, circled in blue. It defaults to Median but I changed it to Mean.
The cool thing about this feature is when you scroll through each of the different stack modes, it shows the different results live.
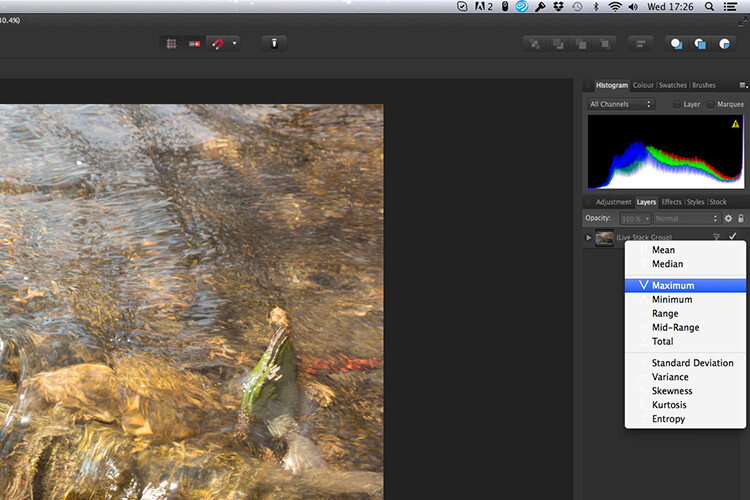
Different stack options can be scrolled through one by one, and the results can be seen live, which is impressive.
When I compared the two results from Photoshop and Affinity Photo, I could see no obvious difference, with the exception that I had to crop the image of the river more in Photoshop, whereas the auto alignment in Affinity Photo meant I didn’t lose much of the image at all.
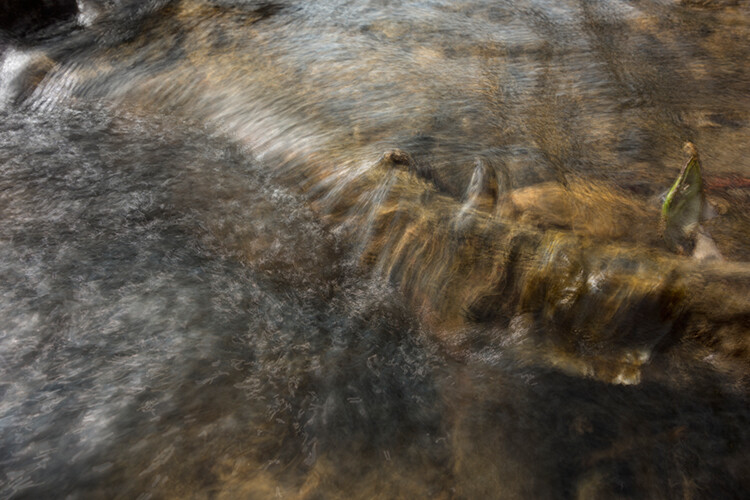
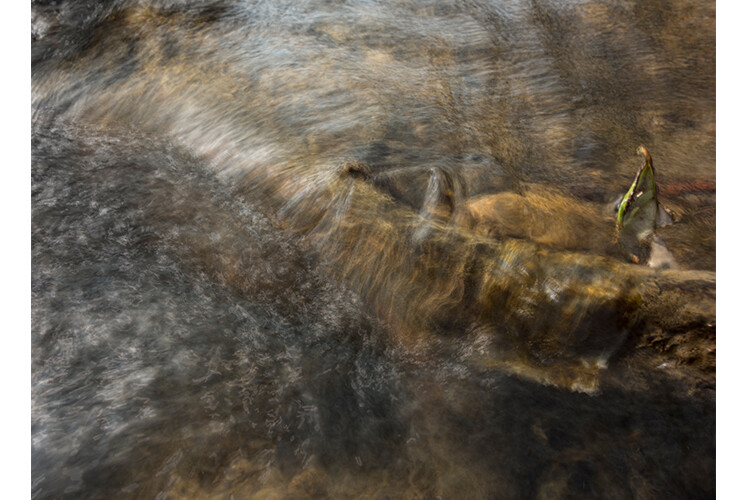
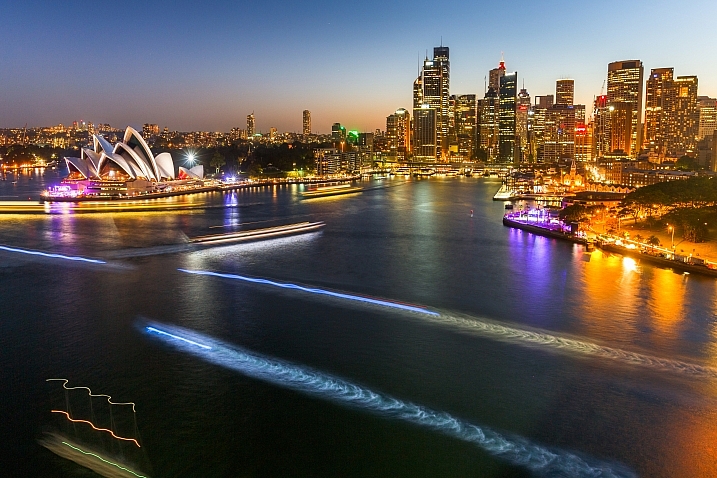
Here is another example of moving water.
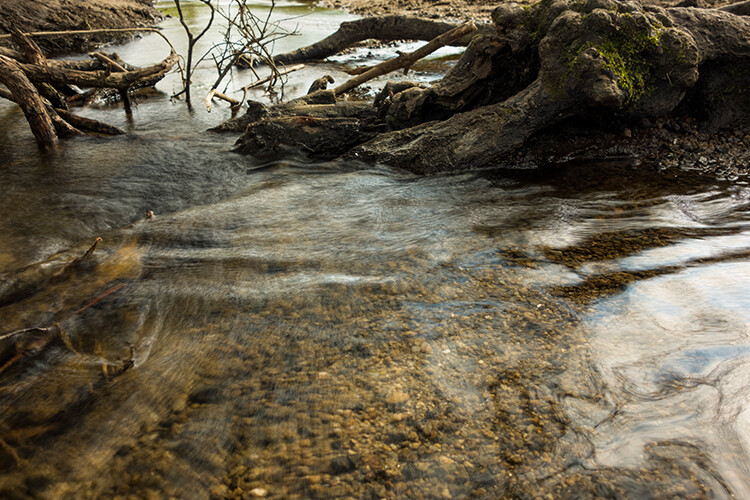
The same image as above edited in Affinity Photo using Mean in Live Stacks. I got the same result using the manual method in Photoshop.
Take away tip:
In my examples, I didn’t use a tripod. I would recommend using one. I also took only a series of 8-10 shots. I would recommend taking at least 15 or more.
I found this technique interesting and fun, and I am now inspired to go out and take images of waterfalls. The good thing about this technique is if you don’t have ND or polarizing filters, it doesn’t prevent you from going out and taking shots of waterfalls. Then when you get back to your computer, you can create your own silky, smooth effect.
Let’s see some of your examples below.
googletag.cmd.push(function() {
tablet_slots.push( googletag.defineSlot( “/1005424/_dPSv4_tab-all-article-bottom_(300×250)”, [300, 250], “pb-ad-78623” ).addService( googletag.pubads() ) ); } );
googletag.cmd.push(function() {
mobile_slots.push( googletag.defineSlot( “/1005424/_dPSv4_mob-all-article-bottom_(300×250)”, [300, 250], “pb-ad-78158” ).addService( googletag.pubads() ) ); } );
The post How to Create a Silky Water Effect in Post-Processing without Using Filters or a Tripod by Sarah Hipwell appeared first on Digital Photography School.


You must be logged in to post a comment.