RSS
 

Archive for March, 2016

Class 10 200GB microSD card on the way from Lexar

25 Mar

Memory manufacturer Lexar has announced a micro SDXC card with a capacity of 200GB and read speeds of up to 95MB per second. The company says the card is aimed at action cam users as well as owners of tablets and smartphones, and is suitable for both HD and 4K video recording. Lexar claims the 200GB capacity can hold over 15 hours of HD video footage, and that the UHS-1 card has a transfer speed rating of 633x.

The card comes packaged with a USB 3.0 card reader, a copy of the company’s Image Rescue recovery software, and a ‘limited lifetime warranty’. It will cost $ 129.99. For more details see the Lexar website.


Press release:

Lexar Announces 200GB High-Performance 633x microSDXC UHS-I Card

New High-Capacity Card Enables High-Speed Capture and Transfer of Multimedia Content

Key Messages:
* Delivers read transfer speeds up to  95MB per second 633x *
* Enables users to capture more than 17 hours of HD video; 33,000 photos; or 28,000 songs **
* Includes a USB 3.0 reader for high-speed card-to-computer transfer

Milpitas, CA, March 22, 2016 – Lexar, a leading global brand of flash memory products, today announced the new 200GB Lexar® High-Performance microSDXC™ UHS-I memory card. Designed for sports camcorders, tablets, and smartphones, the UHS-I, U1 microSDXC card has read transfer speeds up to  95MB per second (633x)* and can capture up to 17 hours of 4K and Full HD video; 33,000 photos; or 28,000 songs.**

“Professional and everyday photographers are now more passionate about shooting high-quality video, on everything from digital SLRs to sports and aerial cameras, said Steffi Ho, product marketing manager, Lexar. “With the Lexar 200GB microSDXC UHS-I card, photographers can continue to capture and store large amounts of content on the go, without having to worry about running out of space.”

The 200GB Lexar High-Performance 633x microSDXC UHS-I card comes with a USB 3.0 reader, which allows for high-speed file transfer of photos and videos from the card to a PC or Mac®. The reader is also backwards compatible with USB 2.0 ports and comes with a one-year limited warranty.

The 200GB Lexar High-Performance 633x microSDXC UHS-I card comes with a limited lifetime warranty and includes a lifetime copy of Image Rescue® software. Additionally, all Lexar product designs undergo extensive testing in the Lexar Quality Labs to validate performance, quality, compatibility, and reliability with more than 1,100 digital devices. The new card is currently available for purchase with an MSRP of $ 129.99. For more information about Lexar products, visit www.lexar.com.

Articles: Digital Photography Review (dpreview.com)

 
Comments Off on Class 10 200GB microSD card on the way from Lexar

Posted in Uncategorized


20 Cutest Newborn Baby Photo Props for Spring Session

25 Mar

The right photo props can upgrade your newborn baby shots from “just cute baby photos” to some truly moving images that even a Grumpy-cat-type of person would not resist. Every photo shoot is a whole new experience of capturing a baby’s and parents’ personalities. There are endless ways to make your photo session unique and beautiful using various photo props. Continue Reading

The post 20 Cutest Newborn Baby Photo Props for Spring Session appeared first on Photodoto.


Photodoto

 
Comments Off on 20 Cutest Newborn Baby Photo Props for Spring Session

Posted in Photography


Fujifilm X-Pro2 firmware update 1.01 now available

25 Mar

Fujifilm has released minor camera body firmware update version 1.01 for the X-Pro2, improving long exposure photo quality and fixing a rare bug that could reset customized menu settings to the factory default. The update can be downloaded now from Fujifilm’s support website; detailed instructions on how to upgrade are available here.


The firmware update Ver. 1.01 from Ver.1.00 incorporates the following issues:

  1. The Phenomenon is fixed that in rare cases, established customized menu settings are reset to factory default setting when the camera is turned off.
  2. Improvement of image quality when shooting in the long exposure mode.

Articles: Digital Photography Review (dpreview.com)

 
Comments Off on Fujifilm X-Pro2 firmware update 1.01 now available

Posted in Uncategorized


11 Stages That Every Photographer Goes Through

25 Mar

Get 25% OFF James’ ebooks: Essentials of Street Photography & Street Photography Conversations eBook Bundle now for a limited time only at Snapndeals.

How the $  *#$   do I use this thing!!?!

How the $ *#$ do I use this thing!!?!

While I hope you take this article as tongue and cheek, and realize that a decent amount of this is talking to my early self – the reality is that there is a pretty consistent learning curve that many photographers go through.

While hopefully your learning curve will not be this extreme, I think that understanding it will help you to have as much fun as possible progressing through the photography learning process.

Here is my belief about the typical progression, or the 11 stages a photographer goes through:

1. Auto mode and how the $ @&# do I use this thing!?

The camera sits like a brick for a couple months, except for when you switch it to auto mode to photograph your cat, or patio furniture in the snow. You take 12 self portraits with a hat on one day, staring at yourself in the bathroom. 12 years later, you still use this self portrait.

The reality is that you have heard about 5000 photography terms that you think you need to know, and it’s overwhelming. You just don’t know where to start. While there are only five or six things that you really need to learn at this point to get started, nobody tells you that. We will cover these things in a bit.

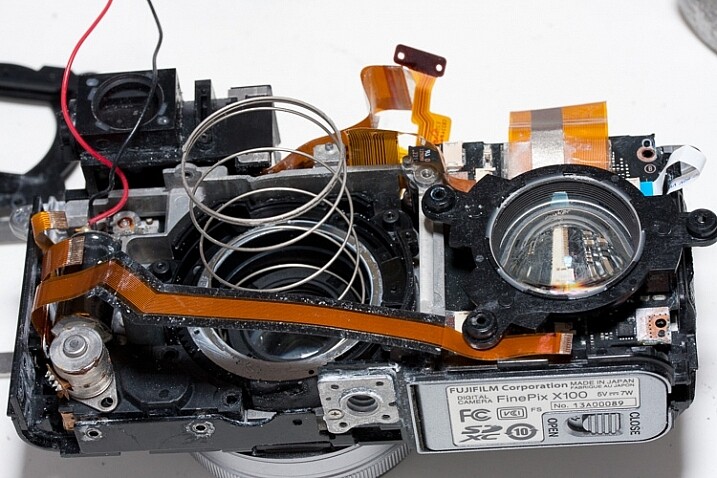
2. GEARRRRRR

The sharpest cat eye you've ever seen in a photograph.

Do you SEE how sharp those nose hairs are??!

When you think about your camera, your heart starts racing, your blood pressure rises, your hands get clammy, and you start sweating. Your camera system begins to morph into this awesomeness of sheer technology and power, that it was always destined to become.

Four lenses, five filters, a tripod that you tell everyone about that doesn’t actually work that well, a remote shutter release, a new camera strap, a flash unit, Lightroom, Photoshop, Silver Efex, a new monitor, a hard drive, a Wacom tablet, an ugly camera backpack where your gear can survive under water for 10 minutes, a light painting kit, 5,000 forum views, an HDR tutorial, and photo collages, oh my!

Occasionally, you just take your camera out to stare at it for awhile before your wife catches you, then you get on the internet to read fondly about its dynamic range, yet you have only taken your camera out into the world a couple of times.

Bonus points if you gave your wife a black eye due to your tripod hanging off your huge ugly backpack, on the way to catch a flight to an extended family vacation.

3. OMG, everything looks so awesome!

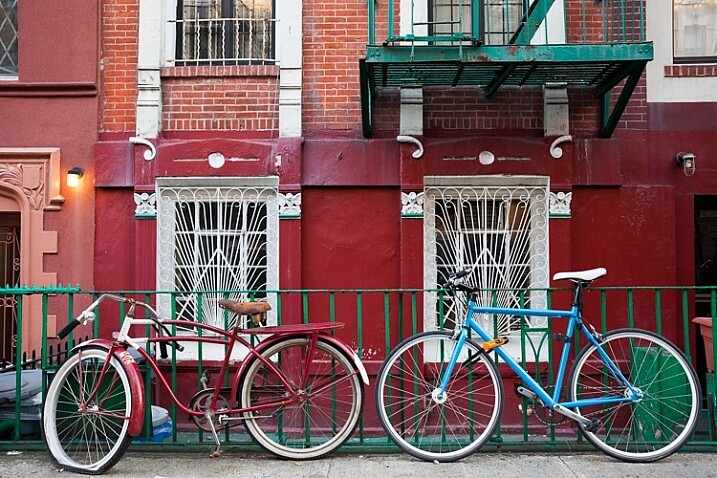
Bikes!

Bikes!

Macro, landscape, street photography, portraits, travel, wildlife, architecture, live music, sports, fashion, medical imagery and dental photography – it’s all so awesome!

Turn the saturation up to 20 baby! The world is my oyster. Colors, sunsets, old houses, doors, cobblestone, flowers, pots, bikes – definitely bikes!

4. Shutter speed, aperture, ISO, exposure compensation, white balance, and focal lengths

Shoot, I haven’t actually opened the camera manual yet. This is also known as the real step one. There are only six things that a photographer needs to learn at the very beginning (besides light, which we will cover later).

  1. Shutter speed
  2. Aperture
  3. ISO
  4. Exposure compensation
  5. White balance
  6. Focal length

You now engulf yourself in every type of training possible, and read, read, read. Keep in mind that the best photographers never stop doing this. You realize that different established photographers tell you completely different ideas about what to do, and it’s confusing. That’s actually a good thing. There are many different ways to get to the same endpoint with a camera.

5. I’m the best photographer ever

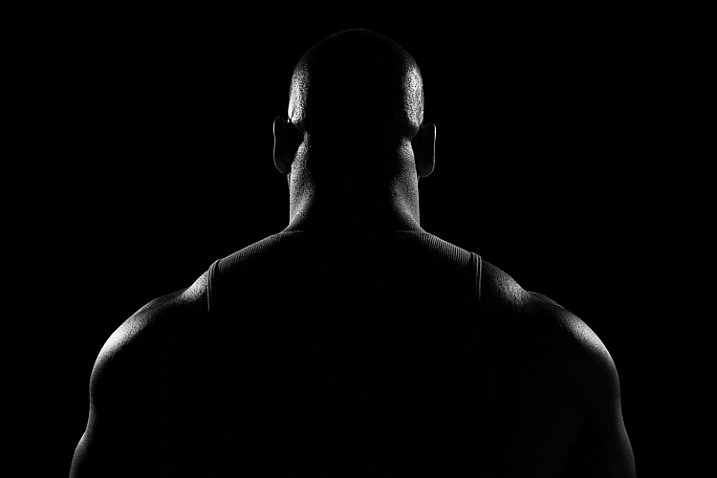
shoulders

“My knowledge of photography is unparalleled. Everyone else sucks. My neck muscles are huge because of the sheer weight of my awesomeness (and my camera bag with unnecessary equipment). I am ART. Everything is ART.”

This is a trap that can happen to some photographers. Needless to say, a small contingent get stuck on this step for longer than they should, but everyone else usually passes on to the next step a year or two later, which is…

6. OMG, everything sucks and I suck

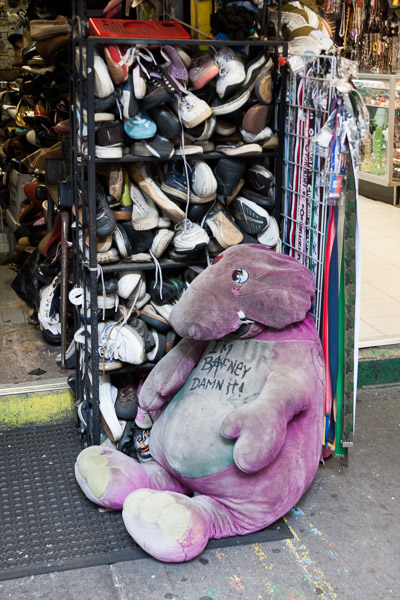
Anarchist Barney

“I hate it all. I’m the worst photographer in the world. I’ve tried everything and I can’t take a good image. I can’t look at another flower ever again. I hate sunsets. I hate bunnies. I hate children. I hate cookies. I am a sad, depressed photographer.”

This is the point when you get past the basics, and realizes how difficult photography really can be. It goes way beyond settings. Creating interesting photography is difficult.

7. Starting to see the light

Light!

Light!

Eureka! Photography is just painting with light. Did you know, it’s all about the light? Warm light, cool light, colored light, harsh and shadowy light, indoor and artificial light.

This step is so important, and learning about light sounds simple, but it actually takes most people a long time to start to see light well. It’s shocking how long it can take sometimes, because photographers tend to focus on so many other things, and particularly equipment at first. When learning to use your camera, light is the number one factor that goes into the equation. It should be the first thing that you learn before you even think about how to set up your cameras.

8. Traveling light

“Screw all that equipment. You know, photographers are too obsessed with equipment. One camera, one prime lens, a small (beautiful) bag, and a notebook that I’m never going to write in – that’s all I need. Life is beautiful. I can feel life and the wind in my hair.”

An optional black and white period often takes place here, and the gear fetish morphs into a camera bag fetish, but in reality this is an important step. For most types of photography, you just did not need all that equipment. Simple can be a lot better, more often than not.

9. Studying other photographers

11-study

“Wow, there were a lot of wonderful photographers throughout history, in all types of subject matter and all around the world. There are a lot of great photographers shooting now and doing it much better than I am!”

You spend time in bookstores and on the internet researching. You start building your photo book collection. This is usually a big turning point for photographers in their education. This can be both inspiring and humbling.

10. Focus, consistency, and subject matter

By this point, you have photographed enough where you really have put in the hours, and are starting to improve significantly. While it’s so important to put in the hours to study photography and photographers, nothing beats time spent photographing.

You become more intuitive with the camera, to the point where you start forgetting it’s there. Your subject matter, and the look of your photos, begin to become more consistent. You start to find specific content, and places that you like photographing the most.

You start creating a portfolio with images that all fit together. It’s no longer as much about the individual photograph, but about collections and sequences of photographs. You start to realize that you can create a narrative this way, that goes beyond what the individual image can often achieve.

11. Zen and a subtle feeling of inadequacy

5th Avenue, New York

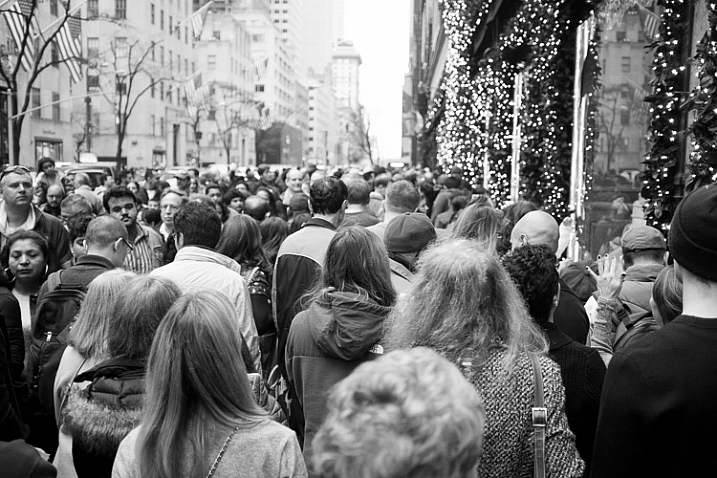
While the other steps might take five to 10 years to progress through, this one can stick around for the rest of your photography life. There are so many incredible photographers out there doing powerful work, it can be intimidating. It feels like there is always someone out there who knows more about a subject than you. Each day you come across another fantastic body of work, from someone you have never heard of.

But you have your own interests and unique point of view, and realizing this is what sets you apart. It’s not just about your knowledge of photography, but about the subject matter and perspective.

This is where you can gain true satisfaction from photography, and for just being a small part of all of this. There is a worldwide community of people interested in the same things as you are, but all doing it in slightly different ways. It is powerful and inspiring.

Bonus stage 12 – going to Cuba

This is the final step of any photographer’s life progress. Cuba is so hot right now. I’m not going to lie, I really do want to go to Cuba very badly, although I heard it was so much better two years ago.

Can you relate to these stages of your photography journey? What stage do you most identify with right now? Have you been through others? Please share in the comments below.

Get 25% OFF James’ ebooks: Essentials of Street Photography & Street Photography Conversations eBook Bundle now for a limited time only at Snapndeals.

googletag.cmd.push(function() {
tablet_slots.push( googletag.defineSlot( “/1005424/_dPSv4_tab-all-article-bottom_(300×250)”, [300, 250], “pb-ad-78623” ).addService( googletag.pubads() ) ); } );

googletag.cmd.push(function() {
mobile_slots.push( googletag.defineSlot( “/1005424/_dPSv4_mob-all-article-bottom_(300×250)”, [300, 250], “pb-ad-78158” ).addService( googletag.pubads() ) ); } );

The post 11 Stages That Every Photographer Goes Through by James Maher appeared first on Digital Photography School.


Digital Photography School

 
Comments Off on 11 Stages That Every Photographer Goes Through

Posted in Photography


Google offering Nik Collection photo editing applications for free

25 Mar

Starting immediately, Google’s Nik Collection of desktop image editing plug-ins is being offered free of charge. Nik’s Analog Efex Pro, Color Efex Pro, Silver Efex Pro, Viveza, HDR Efex Pro, Sharpener Pro and Dfine apps are all available as a free download from Google, a substantial savings over the previous $ 150 price.

Nik’s applications put a focus on ease of use and accessibility, compatible with Photoshop, Lightroom and Aperture. The company was purchased by Google in 2012, and prior to that each program cost around $ 100 for a total of up to $ 500 for the software suite. Google opted to offer the whole bundle for $ 150, and made it available for all of its supported applications via a single installer. 

To download the collection without dropping a dime, head to Google’s Nik Collection site.


System requirements:

Mac:

  • Mac® OS X 10.7.5 through 10.10
  • Adobe Photoshop CS4 (CS5 for HDR Efex Pro 2) through CC 2015
  • Adobe Photoshop Elements 9 through 13 (apart from HDR Efex Pro 2, which is not compatible with Photoshop Elements)
  • Adobe Photoshop Lightroom 3 through 6/CC
  • Apple® Aperture® 3.1 or later

Windows:

  • Windows Vista®, Windows 7, Windows 8
  • Adobe Photoshop CS4 through CC 2015
  • Adobe Photoshop Elements 9 through 13 (apart from HDR Efex Pro 2, which is not compatible with Photoshop Elements)
  • Adobe Photoshop Lightroom 3 through 6/CC

GPU Compatibility:

NVIDIA GeForce 8 Series, GeForce 9 Series, GeForce 100 Series, GeForce 200 Series, GeForce 300 Series, GeForce 400 Series, GeForce 500 Series, ATI Radeon HD2000 Series, Radeon HD3000 Series, Radeon HD4000 Series, Radeon HD5000 Series, Radeon HD6000 Series.

If no compatible card is available, GPU acceleration will be disabled and the CPU will be used.

Articles: Digital Photography Review (dpreview.com)

 
Comments Off on Google offering Nik Collection photo editing applications for free

Posted in Uncategorized


Taking it easy: Canon EOS 80D shooting experience

25 Mar
All of the images and videos on this page were shot using the new EF-S 18-135mm F3.5-5.6 IS USM kit lens. ISO 100, 1/1250 sec, F5.6. Shot at 18mm.

The Canon EOS 80D is an enthusiast-level DSLR geared toward photographers looking for a capable stills and video camera. The 80D sports a brand new 24MP APS-C sensor, a 3″ articulating touchscreen, a new 45-point AF system (with dual pixel AF) and 1080/60p video capture capabilities. Like its predecessor, the camera has a weather-sealed construction and a nearly-identical body design.

I had the opportunity to test the 80D having just finished field testing the Sony a6300, a mirrorless camera which also sports a 24MP APS-C sensor and a similar launch price. On paper, the a6300 out-specs the 80D in many categories, like 4K video capture, 11 fps shooting and most notably, its 425-point AF system. But don’t fall into the trap of thinking specs alone make the a6300 a better camera. In hand, it feels as if your holding a small magnesium rectangle jam-packed with cutting-edge technology, but to some degree, the operation and menus feel like a work in progress. In contrast, holding the 80D feels like you’re holding the product of 20+ years of R&D. Which is to say: the 80D feels more refined in operation and more intuitive to use than the a6300.

Of course there are also quite a lot of other APS-C sensor cameras on the market that fall into a similar price range and class to the 80D. Its closest DSLR competitor is most likely the Nikon D7200 (though the Pentax K-3 II also comes to mind). Both the Nikon and the Canon offer very similar still and video specifications, though the D7200 does not have a touchscreen, nor does it offer an equivalent to Canon’s dual pixel AF. There’s also the EOS 7D Mark II, Canon’s top tier APS-C camera. It offers features generally associated with more pro-level cameras like Intelligent Tracking and Recognition (which the 80D does not). And while the 7D Mark II is priced higher than the 80D, it is interesting to note that the 80D uses a newer sensor that we’ve found offers much better dynamic range than previous Canon cameras, including the 7D II.

General camera ergonomics

The 80D is very easy to operate with a single hand. The grip is extremely comfortable, and at 1.8 lbs, the 80D shouldn’t break your back. I do have few small frustrations though: the AF-on button is located next to two other identically-sized buttons and is the most difficult, at least for me, to hit of the three. I also find the switch to lock the back control wheel, which by default is set to Exposure Compensation, can be bumped into the lock position far too easily. In fact, every single time I went to adjust my Exposure Comp., it was locked.

The 80D has an articulating touchscreen, which I used to frame this shot. ISO 100, 1/200 sec, F10. Shot at 24mm.

Finally, I’ve found that the video record start/stop button isn’t quite as sensitive as it should be. I actually missed a few clips because I hit the start button, thinking capture had begun, when in fact it had not.

Of course, it is much easier and quicker to point out frustrations in a camera’s ergonomics, than list everything the company did right. Overall the 80D is a well-designed camera with terrific ergonomics, sensibly-organized menus, and mostly-logical button placement. And unlike most mirrorless cameras, the battery life on the 80D is frankly, a breath of fresh air. A whole day of shooting stills and video (about 700 stills, and 35 videos, most about 30 secs in length) resulted in only a 1/4 drain on the battery.

Dynamic range

Canon’s large-sensor cameras are not exactly known for their dynamic range. Pushing the exposure on a Canon Raw file even a couple stops (or just turning on vignetting correction) can result in the shadow detail starting to fall apart. But the 80D uses a spanking new sensor that supposedly offers better dynamic range than past Canon release. But does it?

Yes it does! We ran the 80D through our exposure latitude and raw dynamic test and found that the new sensor is substantially better than previous Canon sensor in terms of dynamic range. It’s not quite on the same level as the Nikon D7200 or other cameras using recent Sony APS-C Sony sensors, but the improvement is definitely something to cheer about if you’re a Canon shooter.

Original exposure, gently edited in ACR. ISO 100 1/500 sec at F16. Exposure pushed +2.5 stops, Shadows pulled up +50 in Adobe Camera Raw.

The silhouetted image above on the left was processed through Adobe Camera Raw without adjusting the exposure, while the image on the right was pushed a full 2.5 stops. Have a look specifically at the areas in the image on the right that were previously in the shadows. While this isn’t a perfect example, it should give you an idea of what kind of dynamic range the 80D offers.

Video

In the demo above, I used AF-C and selected an AF point in the center of the frame. Hunting is minimal as I move from subject to subject and acquisition is reasonably fast.

It is very easy to shoot nice-looking video with the 80D. The touchscreen is an absolute pleasure for selecting focus points, and Dual Pixel AF allows for continuous focus during video capture. In use, it is excellent, with minimal to no hunting and fast acquisition. When using the widest AF area option, called ‘Auto selection: 45 pt AF,’ the camera will automatically look for faces in the scene and focus on them. If it finds no face, it will instead focus on the nearest object.

Video quality looks decent. It can’t touch the quality of footage coming from the likes of the a6300, but for most enthusiast shooters, the quality will be good enough. And the inclusion of both a mic and headphone jack should add to the camera’s video appeal.

Video shot hand-held in 1080/60p.

Unfortunately, several video making tools that seem to be par for the course when it comes to other manufacturers, are absent in the 80D, specifically: Focus peaking, zebra stripes and a clean-HDMI out option. There is also no C-Log gamma option (a very flat tone curve useful for color grading).

Auto ISO

This was shot after I pushed the 80D’s Auto ISO minimum shutter speed default to its fastest setting. Out of the box, when using Auto ISO, the 80D offers a shutter speed about equivalent to 1 over the focal length. However, in the menus, there is a slider to bias the minimum shutter speed by 1, 2 or 3 stops above default (as well as 1,2 and 3 stops below the default). You can also assign a physical shutter speed number to be the camera’s default. ISO 100, 1/400 sec, F7.1. Shot at 135mm.

The default Auto ISO shutter speed often was not fast enough for the scenarios I was shooting. At one point while field testing the camera, a humming bird flew right up to me and hovered mid air for long enough for me to bring the camera to my eye and fire a shot. Unfortunately, the 80D decided that 1/200 sec was the most appropriate shutter speed. Needless to say, the resulting shot was blurred.

Canon has recently been updating its Auto ISO implementations to make them fully programmable (a la Nikon and now Sony), and it’s great to see this update in the 80D. You have two ways to control your minimum shutter speed when using Auto ISO. You can either pick a physical shutter speed, ranging in full stops, or use a slider to bias the default shutter speed to faster or slower than the default. If you use Auto ISO, I strongly recommend the first thing you do when picking up the 80D is push the shutter default to a faster setting.

AF features

Shot using touch-to-focus. ISO 100, 1/200 sec, F5.6. Shot at 50mm. Cropped in slightly using ACR.

The Canon 80D features a brand new AF system and an increase in AF points over its predecessor, from 19 to 45. Coverage area has also been improved, and all of the points are cross-type. One of the most note-worthy features of the 80D’s AF system comes in Live View, which now offers continuous AF (called AI Servo). It is only the second Canon camera to do this (the Rebel T6s was the first), but the 80D’s Dual Pixel AF is far more capable than the Hybrid AF system found on the T6s. This feature can be used during still or video shooting and should prove especially useful on the video end. That said, we’re also hopeful that it can be used to reliably subject track in stills mode as well (initial impressions are positive, but more on that below).

The 80D’s touchscreen has both touch-to-shoot and touch-to-focus capabilities. In use, the touchscreen is just OK – its operation can be a bit laggy, especially if you are trying to quickly move your AF point. The camera does have a sensitivity slider, but even adjusting it to its most sensitive setting doesn’t seem to help the lagginess much. 

I was disappointed to find out that the touchscreen can not be used as an AF track pad when one’s eye is to the finder. Many camera companies have been including this feature (like Olympus in the PEN F and Panasonic in the GX8, and Nikon in the D5500) and it is extremely useful. A missed opportunity on Canon’s part for sure. To be fair, the 4-way controller on the back of the camera can be assigned to direct AF point selection (but it’s mushy and not well-positioned for quick thumb access with your eye to the finder). You can also use the AF Point Selection button, though I found it frustrating to use when shooting with a single AF point.

I also discovered that there is no way to use touch-to-shoot in continuous drive. Even if you have the camera set to continuous drive, it will simply ignore your selection and default to single frame advance mode (the use cases for this may be limited, but I did find myself in a scenario where touch-to-shoot + burst would have been helpful). In general, I found that using the FlexiZone-Single option, while tapping to specify the area, gave me the best results when using both touch-to-shoot and touch-to-focus.

AF real world impressions

Continuous AF (AI Servo) using a single point gave me the best hit rate, as long as kept my point over the subject. ISO 100 1/500 sec, at F8 (I probably should have used a faster shutter speed).

My initial impressions of the 80D’s AF capabilities are largely positive. I shot quite a bit using the camera in AI Servo mode using either a single point or the Zone AF area mode, with mostly excellent results. Zone AF can sometimes get confused as to which point(s) to use to stay on your subject, so single point is still most reliable. Subject tracking is particularly limited compared to the EOS 7D Mark II, the company’s priciest APS-C offering, because the 80D lacks Canon’s Intelligent Tracking and Recognition. Still, I wanted to get some real impressions of advanced subject tracking ability, so I set AF area to the entire frame (Multi-Area AF) with a manually selected initial point – where the camera automatically moves the initial AF point throughout the entire grid to stick to an initially targeted subject, no matter where it moves to within the frame.

When shooting with one’s eye to the finder, the 80D isn’t great at staying on a subject once it has been identified. This is partly due to the fact that being a DSLR, the 80D cannot not use its image sensor to track (except in Live View mode of course) and likely does not use its metering sensor, which is essentially a low resolution image sensor, either. Although I got lousy results in my initial tests, subject tracking in viewfinder mode is somewhat case specific and has the potential to work well for subjects on non-complex backgrounds, and particularly subjects well isolated in depth (distance) at longer focal lengths.

On the other hand, my experience trying subject tracking in Live View mode was much more positive. When using the touch LCD to subject track, one can simply tap the screen to identify a subject. I had the chance to use this method while shooting candids of friends. The 80D did a great job staying on a subject once identified, which isn’t very surprising: using the image sensor to identify, understand, and track your subject is more reliable than using only distance information to subject track. Furthermore, if you do not tap the screen to identify a subject right off the bat, the camera will settle for the nearest face it finds (as long as you’re in Face + Tracking mode).

Of course, using Live View (the touchscreen) to shoot a burst means you only get the stop-action-style playback of images when firing, which can make it difficult to follow your subject.

Also shot using AI Servo, this one using the Zone AF area, placed in the center of the frame. Overall I found using a single point gave me better results when using continuous focus. For the record, the little guy was cruising real fast! I saw him coming down the sidewalk out of the corner of my eye, and only had time to snap two frames; the first was a little blurry, the second (shown here) was sharp. ISO 100, 1/500 sec, F7.1. Shot at 135mm.

Of course, continuous AF and subject tracking aren’t the only things that matters in an autofocus system, sensitivity is also important. Canon states the 80D’s center AF point is sensitive down to -3EV, which should translate to responsive AF performance using the center point, even in very low light. I ran a quick test in our studio to see if this was the case. Using the EF-S 18-135mm F3.5-5.6 kit lens, and with all lights off except for a dimmed incandescent bulb, I pointed the 80D at out studio test chart. But not before first switching the lens to MF and throwing focus way off (I then switched it back to AF before shooting). With my eye to the finder, I acquired focus and fired a frame. I did this several times at both the wide end and the tele end of the lens’ zoom range. In both cases, the 80D was able to acquire accurate focus nearly instantaneously, which is impressive, especially considering the F5.6 max aperture at the tele end.

And to give you a sense of how dim the above scenario was, when I was testing the low light AF performance at the kit lens’ widest end, I was shooting at ISO 16,000, at 1/30 sec F3.5, which gave me a proper exposure. This is good news for low light shooters, like myself. I’m especially fond of music photography and its encouraging to know that the AF system will perform, even in some of the lowest light scenarios the camera is probably capable of shooting an image in. For instance, with a 24mm F1.4 lens attached, I should be able to shoot at ISO 12,800 1/100 sec F1.4 while still enjoying accurate and responsive AF performance (well, as long as I’ve microadjusted).

The takeaway

It can be hard to get excited about enthusiast level DSLR updates. But in the case of the 80D, enough has been improved upon over its predecessor that while looking nearly identical, the 80D truly is a whole new camera (not just a granular update).

It offers reasonable specs, an easy-to-use interface (the touchscreen adds quite a bit to the camera’s ease of use) and a familiar design. Toss in the fact that it offers maybe the best dynamic range of any Canon DSLR to date, and the 80D has even more appeal. For Canon system users, specifically enthusiasts considering an upgrade from either a Rebel or an older camera, there is an awful lot to like about the 80D.

ISO 12,800 is a pretty high ISO, especially for an APS-C camera. This images was processed through ACR, but I’m fairly impressed with how good the high ISO image quality appears to be. But more testing is needed! ISO 12,800, 1/60 sec, F4. Shot at 27mm.

Canon EOS 80D Sample Gallery

Please do not reproduce any of these images on a website or any newsletter / magazine without prior permission (see our copyright page). We make the originals available for private users to download to their own machines for personal examination or printing (in conjunction with this review), we do so in good faith, please don’t abuse it.

$ (document).ready(function() { SampleGalleryGridV2({“galleryId”:”7982275943″,”isMobile”:false}) })

Canon EOS 80D real world samples

42 images • Posted on Mar 24, 2016 • View album
Sample photoSample photoSample photoSample photoSample photoSample photoSample photoSample photoSample photoSample photoSample photoSample photoSample photoSample photoSample photoSample photoSample photoSample photoSample photoSample photoSample photoSample photoSample photoSample photoSample photoSample photoSample photoSample photoSample photoSample photoSample photoSample photoSample photoSample photoSample photoSample photoSample photoSample photoSample photoSample photoSample photoSample photo

Articles: Digital Photography Review (dpreview.com)

 
Comments Off on Taking it easy: Canon EOS 80D shooting experience

Posted in Uncategorized


Cantone: Color-Labeled Beers Let You See What’s in the Can

24 Mar

[ By WebUrbanist in Design & Products & Packaging. ]

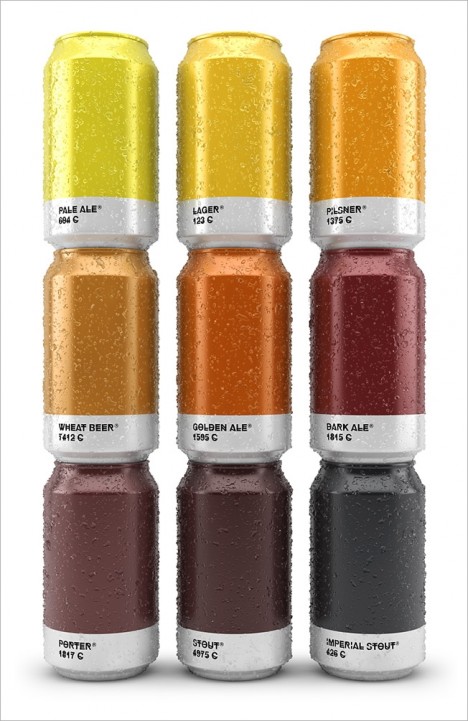
color coded beer cans

Connoisseurs may look to artisanal naming conventions when selecting their brew, but some of us (like books via covers) judge beers at least partly by their colors.

beertone colored can design

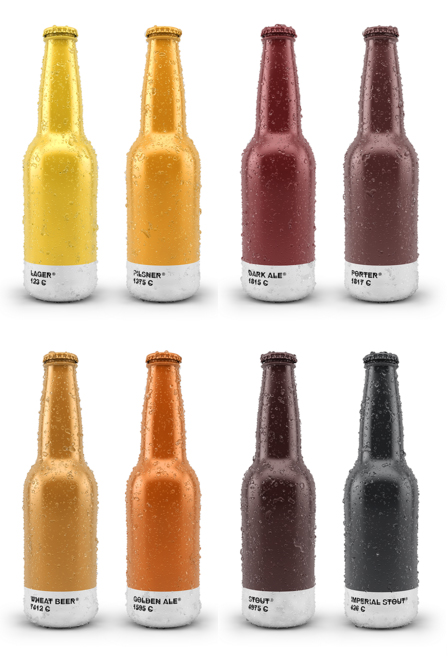
A Spanish design agency named Txaber has matched brew types with Pantone hues to create a collection of color-coded labels, providing sneak peaks to potential drinkers.

beer colored cans aluminum

Thanks to the recent comeback of the can (versus historical preferences for bottles), these might just make it on the shelves. In turn, can designs give designers a broader canvass to work on, wrapping 360-degree cylinders. As a display strategy, these are striking alone as well as side-by-side as well.

beertone

beertones

Similar project, dubbed “Beertone” by designers Alexander Michelbach and Daniel Eugster, provides RGB, CMYK and HTML code color values for a variety of extant Swiss beers, aided by the breweries.

beertone ad

There is something accessible and yet artsy about this all, distilling a brew to its color and letting those of us who are more into lights and ambers (pilsner’s in particular, if you aim to by this author a six-pack) avoid mistakenly winding up with a brown or black.

Share on Facebook


[ By WebUrbanist in Design & Products & Packaging. ]

[ WebUrbanist | Archives | Galleries | Privacy | TOS ]


WebUrbanist

 
Comments Off on Cantone: Color-Labeled Beers Let You See What’s in the Can

Posted in Creativity


Are You Obsessed with Shooting Wide Apertures – Here’s Why You Might Want to Hold Back

24 Mar

There’s a scene in the original Jurassic Park movie, that almost perfectly describes one lesson I have learned when documenting the world around me with my camera. In this scene Dr. Ian Malcolm, a brilliant mathematician who is visiting the prehistoric park, expresses severe reservations about the idea of resurrecting long-extinct species during a conversation with John Hammond, the director of the park. Hammond is gleefully explaining the incredible genetic breakthroughs that his scientists have achieved. “Our scientists have done things which nobody’s ever done before.” Incredulous, Malcolm responds with equal fervor and says, “Your scientists were so preoccupied with whether or not they could, they didn’t stop to think if they should.” The same holds true for camera lenses. Just because you can shoot wide open at f/1.4 or f/1.8, doesn’t mean you should.

ultra-wide-apertures-purple-flower

When I first got into serious photography work, I was amazed at the power and light-gathering ability of my 50mm f/1.8 lens. It opened up a whole new world of photographic possibilities, that I continue to explore today, and was capable of producing incredible images, even on my humble little Nikon D200. Unfortunately, like the scientists in Jurassic Park, I did not spend years in the trenches learning my trade and honing my skills in order to learn how to truly utilize the power of such wide apertures, and went through a phase where I shot everything wide open because of things like low light photos, depth of field, and of course bokeh. Always with the bokeh. Now it’s important to note that I don’t regret any of those early lessons but I do want to offer youa few simple things I’ve learned over the years, and a couple reasons why you might want to reign things in a bit and not shoot wide open with that fancy prime or ultrafast zoom lens just yet.

1. Depth of field can be way too shallow

I shoot most of my photos with three prime lenses: a 35mm f/1.8, a 50mm f/1.8, and my favorite, an 85mm f/1.8, that I call my supermodel lens. (Seriously, you could just about point that lens at a moldy old scarecrow, and get a portrait worthy of Vogue magazine.) Each of these lenses has its own set of unique advantages and limitations, but as you can probably already tell, the one thing they all have in common is a super wide maximum aperture. Certainly there are plenty of lenses available with even bigger apertures, like the Nikon 58mm f/1.4 or Canon 85mm f/1.2, but when push comes to shove an f/1.8, or even f/2.8 lens, is no slouch either. Wielding one of these ultra-wide beasts can be a bit like riding a tyrannosaurus rex, in that the sheer amount of power at your disposal is kind of insane. But, one advantage of fast primes like this, an ultra-shallow depth of field, can also be somewhat of a curse if not used properly.

I’m not going to lie, it’s a ton of fun to shoot things with your lens wide open but it took me a while to learn, that just like the scientists of Jurassic Park, maybe I should have held back a bit. This portrait of a college student is yet another time in which I had no good reason to shoot wide open, but did anyway, and the result was a photo that simply could not be used. Due to the wide f/1.8 aperture, and my proximity to the subject, it left me with a depth of field consisting of just a few centimeters. Her left eye (on the right side of the photo) is perfectly in focus while the other side of her face is blurry, and the result is a strange-looking picture that I had to discard. Thankfully, I quickly realized my mistake and got some other perfectly usable images by shooting at f/2.8 and f/4. But, this was one of those situations in which I thought it would be super cool to get the way awesome background blur of an f/1.8 aperture, but did not realize how I nearly destroyed the portrait in the process.

85mm, f/1.8, 1/750 second, ISO 400

85mm, f/1.8, 1/750 second, ISO 400

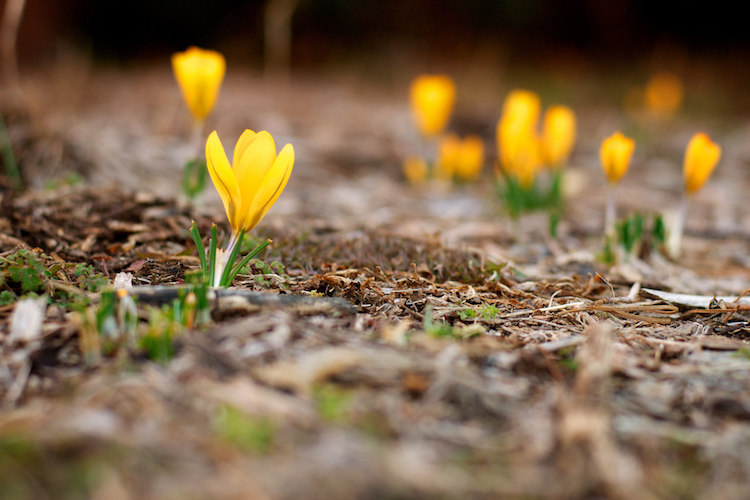
Here’s another example from when I first got my 50mm lens, and thought it was so cool to go around shooting all my pictures at f/1.8 – because my warped sense of logic told me that no depth of field could ever be too thin. As a result this picture of some crocuses contains an ugly streak across the center where one flower and a lot of dead grass is in focus while the rest of the image is a blurry mess. Shooting at a smaller aperture would have given me a smooth transition between in-focus and out-of-focus areas and a much more pleasing image overall.

50mm, f/1.8, 1/500 second, ISO 400

50mm, f/1.8, 1/500 second, ISO 400

2. Bokeh and background blur can get out of hand

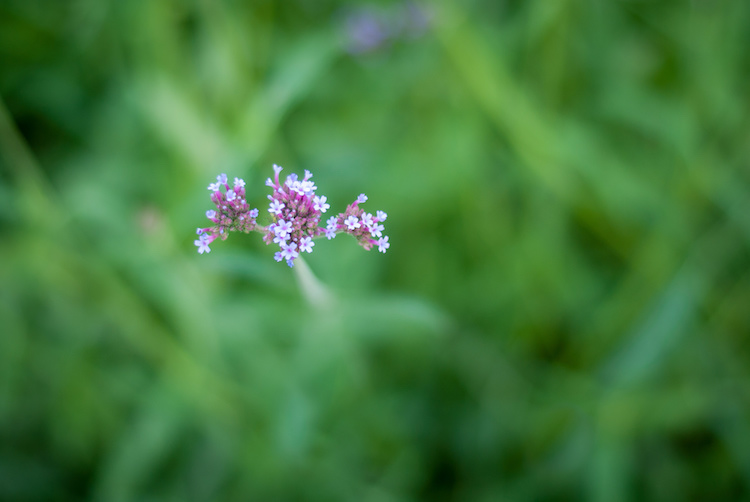
This is a bit subjective, and open to interpretation on the part of both the photographer and the viewer, but over the years I have found that shooting at the widest possible aperture in order to get the most possible bokeh, or background blur, things can go from artistic and interesting, to messy and incomprehensible very quickly. Bokeh is nice and can certainly be used to add an artistic flair to an image, but when overused, it can overpower the subject and ruin the picture. The following photo of a purple flower sticking up from a bed of grass shows this phenomenon in action.

ultra-wide-apertures-purple-flowers

The flowers are so removed from the background it’s almost like they are hovering in midair, and the effect is somewhat disconcerting, and borders on upsetting. Blowing out the background so much has removed any sense of place and context for the subject, and what’s left is a green and purple mess, that is neither artistically interesting, nor aesthetically pleasing.

3. Vignetting, chromatic aberration, and other optical oddities

Before I say too much on this subject perhaps I need to add a bit of a preface. Less expensive lenses can behave strangely when you shoot with them wide open, but more expensive glass is usually much better at this sort of thing. With that disclaimer out of the way, it’s important to understand some of the optical abnormalities such as vignetting, chromatic aberration, and softness, that often show up when your lens is opened up as far as it will go.

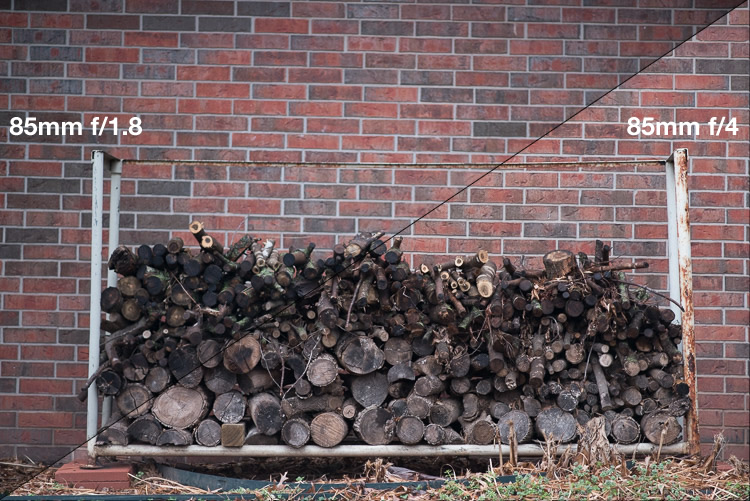
Vignetting is when the edges of your image look a bit darker than the rest of the picture, due to how light is manipulated inside your lens before it hits the image sensor inside your camera. It’s not too big of a problem on cameras with smaller sensors like APS-C or micro four thirds models, but it is certainly there, and even more so on full frame cameras.

Vignetting can be a major issue when shooting wide open. Notice how the centers of both images are equally exposed but the corners are much darker at f/1.8.

Vignetting can be a major issue when shooting wide open. Notice how the centers of both images are equally exposed but the corners are much darker at f/1.8.

If you shoot in RAW, you can use Lightroom, Photoshop, or other such applications to mitigate most of the effects of vignetting if you want. Of course another solution is to use a smaller aperture, which tends to eliminate most vignetting altogether. Vignetting is not always a dealbreaker, and many photographers, myself included, actually prefer the subtle effects of a well-used vignette. You may find that you fall into this camp, in which case go right ahead and shoot at f/1.8 or f/1.4 to your heart’s content.

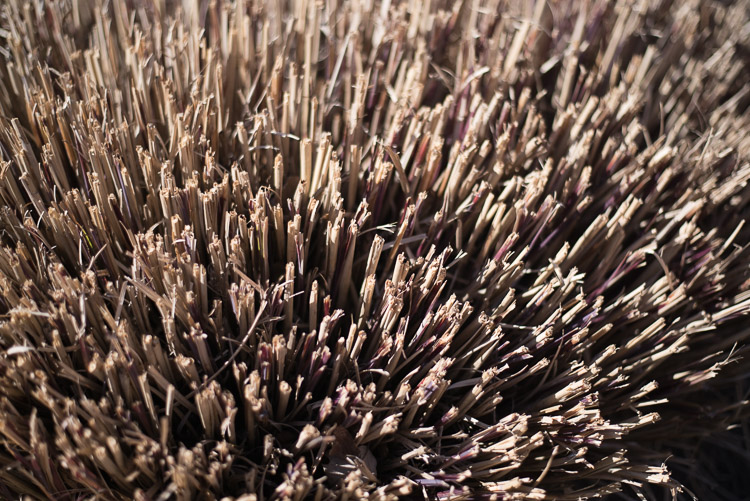
The other optical abnormality that often rears its ugly head at wide apertures is chromatic aberration, which might be a much bigger problem if you are not ready for it. This usually manifests itself as purple or green outlines or fringes, around places in your pictures with harsh contrast between dark and light. For example the image below was shot at f/1.8, and upon first glance, looks perfectly usable.

50mm, f/1.8, 1/3000 second, ISO 100

50mm, f/1.8, 1/3000 second, ISO 100. It looks Okay on first inspection, but all is not well up close.

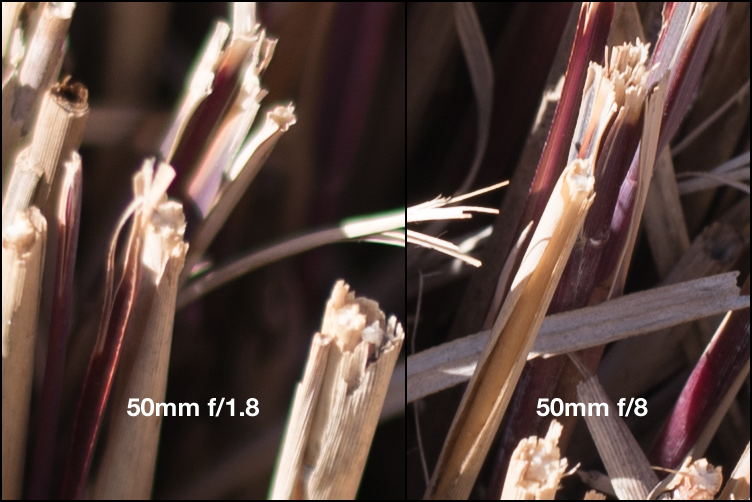
Take a closer look and you will notice a big problem around the edges of most of the dry stalks of grass. Ugly green halos show up all over the place, and this is a direct result of shooting wide open, due to how the incoming light is transformed by the lens on its way to the camera. Here’s a 100% crop of the image next to the exact same picture shot at f/8.

Green outlines abound on the left side while stopping down to f/8 eliminates them entirely.

Green outlines abound on the left side while stopping down to f/8 eliminates them entirely.

This optical imperfection can often be mitigated somewhat in Lightroom, by using its: Remove Chromatic Aberration option in the Develop panel. But even then the results are not ideal, and you will often be left with images that still show some green or purple artifacts, or lose a bit of color from other parts of your picture. Rather than mess around with fixing these issues in post-production, I like to just avoid it from the start and shoot at a slightly smaller aperture. It usually fixes the problem, and still leaves me with the same overall composition I would have had with a wider aperture.

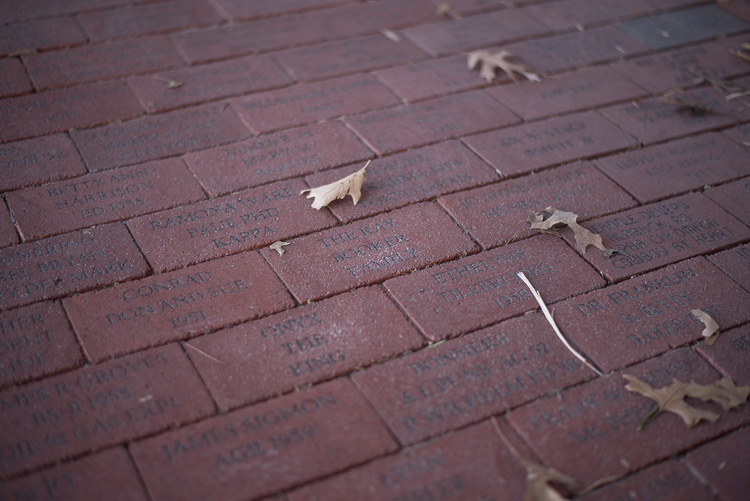
The last weird characteristic of most lenses at their widest apertures might not be that big of a problem unless you are painstaking examining your pictures on a per-pixel basis, but it’s something you should know about nonetheless. Almost all lenses are a bit softer when used at their widest apertures, which can result in pictures that are not quite what you want. The picture below was shot at f/1.8 and looks decent upon first glance, but a closer inspection reveals a very different story.

50mm, f/1.8, 1/125 second, ISO 100

50mm, f/1.8, 1/125 second, ISO 100. Seems decent but once again a closer look reveals a much different story.

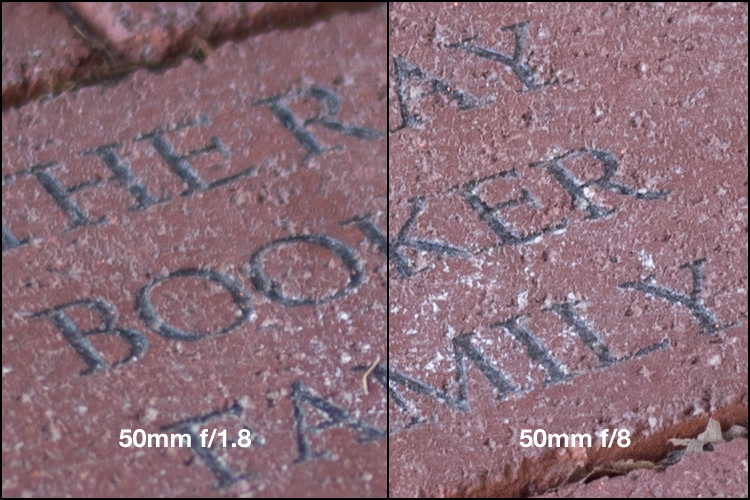
Zooming in on the exact center of the image, the point at which I locked focus, shows two very different pictures when this is put next to the very same picture shot at f/8.

Focus was locked precisely on the letter "K" and yet the image on the left, shot at the widest aperture on my lens, is much less sharp.

Focus was locked precisely on the letter “K” and yet the image on the left, shot at the widest aperture on my lens, is much less sharp.

Once again this sharpness problem can be corrected to some degree in post-production, but my ideal solution is to avoid shooting at f/1.8 unless I specifically need the light-gathering ability, background blur, or other effects that such a wide aperture offers. Photography is all about tradeoffs, and while closing down the aperture on my lens resulted in a picture that was sharper, it also gave me an image that had much wider depth of field, which made the overall composition less pleasing.

4. Use wide apertures sparingly to maximize their impact

The Roman philosopher Marcus Tullius Cicero once said, “Never go to excess, but let moderation be your guide.” This nugget of wisdom is applicable not only to life in general, but also speaks volumes about how to approach photography. I like to treat the widest aperture on my lenses like flooring the gas pedal on my car. It’s fun, but if I went around driving full speed everywhere I went, it would quickly lose its appeal. (Though in my 1998 Toyota sedan I would probably lose a race to a skateboarder, but you get the point.)

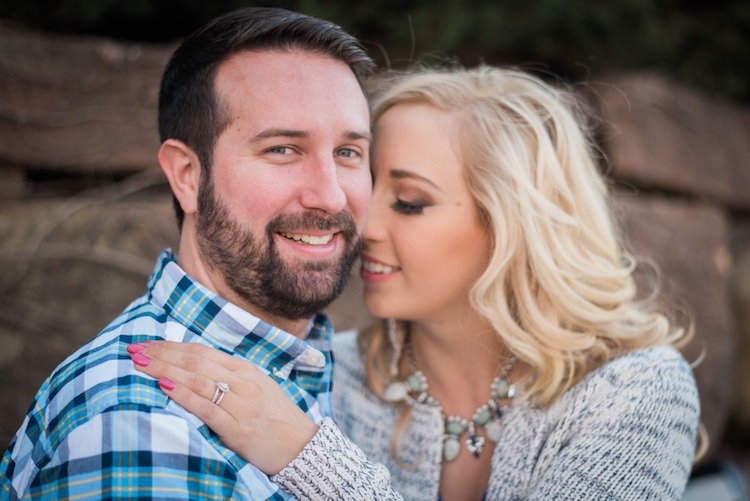
Your lenses have wide apertures for a reason and they are meant to be used to get good images, particularly if you are aware of some of the quirks and idiosyncrasies of using them like this. If you like shooting wide open, and don’t mind some of the potential tradeoffs like a bit of vignetting and chromatic aberration, then go for it! However, my own personal rule of thumb is to only use f/1.8 when I really need it, otherwise the creamy backgrounds and bokeh balls start to lose a bit of their luster. When I’m doing a portrait session I keep f/1.8 in my back pocket for when I really need it, otherwise I shoot most pics at f/2.8, f/4, or smaller.

I took most photos of this couple at smaller apertures, which made this one at f/1.8 really stand out.

I took most photos of this couple at smaller apertures, which made this one at f/1.8 stand out among the rest.

After hearing this list of reasons to hold back a bit when shooting wide open, I almost feel like I should write a similar article about the benefits of taking photos at the largest aperture possible. I don’t want to give the impression that you should never use your equipment to the fullest of its capabilities, just that there are a few things to know before you go around taking all your pictures at the widest possible aperture your lenses can use. You might end up with a few problems, just like the ill-fated scientists of Jurassic Park, but hopefully yours won’t be quite as lethal, and along the way you could very well manage to take some incredible photos too.

I’d like to know what your thoughts are on all of this, and if you have any favorite shots taken at not-quite-wide apertures, please post them in the comments below!

googletag.cmd.push(function() {
tablet_slots.push( googletag.defineSlot( “/1005424/_dPSv4_tab-all-article-bottom_(300×250)”, [300, 250], “pb-ad-78623” ).addService( googletag.pubads() ) ); } );

googletag.cmd.push(function() {
mobile_slots.push( googletag.defineSlot( “/1005424/_dPSv4_mob-all-article-bottom_(300×250)”, [300, 250], “pb-ad-78158” ).addService( googletag.pubads() ) ); } );

The post Are You Obsessed with Shooting Wide Apertures – Here’s Why You Might Want to Hold Back by Simon Ringsmuth appeared first on Digital Photography School.


Digital Photography School

 
Comments Off on Are You Obsessed with Shooting Wide Apertures – Here’s Why You Might Want to Hold Back

Posted in Photography


The Top Shared Professional Pictures On Social Media in 2013

24 Mar

It’s nice to get paid for an image but if you can’t get paid for an image, you can at least get praised for it. Through social media, that’s easy. Build a following, put up a great picture and watch those likes, shares, views and comments flood in.

Of course, for some photographers, accounts and timelines that’s easier than for others. These are some of the most popular images that were passed around on social media. Expect to see some quality, some surprises… and a few groans.

Facebook

fbgmc

Photography: Graham McGeorge

Like many social media platforms, Facebook doesn’t make it easy to track down the most shared or viewed images uploaded to the site. Although the company’s billion-plus users upload around 350 million photos every day, there’s no way to pull out the picture that did the best. And the site also uses a range of different stats to measure popularity: likes, comments and shares all indicate that people appreciated the shot.

This image of a camouflaged owl by Graham McGeorge wins in all categories. Placed on the National Geographic timeline in July, it’s since picked up more than 212,000 likes, around 60,000 shares and over 10,000 comments.

Those stats though were probably boosted by the post that came with it. National Geographic invited followers to help them to caption the photo, a bit of audience participation that is likely to have helped bring in comments and distribute the image around the site.

Graham McGeorge is a professional photographer, but you don’t have to be a professional to win those kinds of plaudits on Facebook, even on National Geographic.

gunjansinha

Photography: Gunjan Sinha

This image of a shelf cloud in the Canadian prairies was photographed by Gunjan Sinha. It generated more than 175,000 likes, over 51,000 shares and more than 6,200 comments. It was submitted as part of National Geographic’s Your Shot program.

Twitter

Move away from Facebook towards Twitter and the most popular images get a bit more celebrity. Not all of them though are poor quality. This shot of Lea Michele and Cory Monteith posted shortly after his death received nearly 400,000 retweets and favorites.


coreymontheith

Photo from Lea Michele

It could be a selfie but judging by the reflection in Lea Michele’s sunglasses, it appears to have been taken by someone else. And judging by the quality of the portrait, that someone knew what he was doing.

Instagram

That isn’t true of the most popular image on Instagram. The shot that won the popularity prize on Facebook’s billion-dollar picture property in 2013 was… a picture of Justin Bieber with “Uncle” Will Smith. More than 1.5 million people liked that picture. Fewer, surely, liked the hat.

smithandbieber

A long way behind but shot by a professional — a professional Instagram photographer no less — is this nature shot by Michael O’Neal. A former art director, O’Neal has more than half a million followers on Instagram and is a member of Tinker Mobile, a collective of Instagrammers used by brands to promote their products.

His shot of trees and mist picked up more than 17,000 likes. Not Justin Bieber, but not bad.

moneil

Photography: Michael O’Neal

Pinterest

According to research from Curulate, pictures that do best on Pinterest have multiple colors, particularly reds, little white space and if they include people, they shouldn’t show faces. Those are the kinds of images that are most likely to appeal to the women who use the site and share pictures of fashion, accessories and home décor.

But those aren’t the only photos to win popularity on Pinterest. This image of The Caves Resort in Jamaica outdid many of the most popular fashion images to win nearly 6,000 pins and 540 likes.

caves
Pinned from escapenormal.com.

500px

500px is thankfully free of celebrities and while few of its users are professionals, many of the images they produce are professional quality. This shot by Laszlo Folgerts of pedestrians crossing a damp road is reminiscent of Cartier-Bresson… or would be if Cartier-Bresson had picked up about 11,500 views on 500px.


500px


Flickr

Identifying the most popular images on Flickr isn’t easy either but this landscape photograph by Mark Littlejohn, a landscape photographer in Scotland, has to be one of the most successful. It’s picked up more than 6,600 views and over 300 likes.


flickr

Success on social media can be seen in the numbers but those figures are never just about the quality of the image. They also show the quality of the photographer’s networking. That may sound unfair but what’s true on social media is also true in business.


Photopreneur – Make Money Selling Your Photos

 
Comments Off on The Top Shared Professional Pictures On Social Media in 2013

Posted in Equipment


Leica Q In-depth Review

24 Mar

The Leica Q (Typ 116) is a high-end, fixed-lens compact camera with a 24MP full-frame sensor and a 28mm F1.7 Summilux stabilized lens. It represents a new product line for Leica, and was the first full-frame Leica to incorporate an autofocus system.

Leica – one of the most traditional of traditional camera manufacturers – has been pretty innovative in recent years, bringing us the luxuriously black medium-format S-series, the full-frame mirrorless SL, and the innovative, stylish (if not particularly likable) Leica T.

The Q is styled in a similar way to Leica’s high-end M-series rangefinders, but with the addition of a high resolution electronic viewfinder and touch-sensitive LCD screen. Unlike the Leica T, where Leica made the touchscreen absolutely central to the handling experience, the Q’s touchscreen is essentially optional, and works in concert with several conventional (physical) control points. This combination of classic and modern is central to the Q, which melds manual control with electronic assistance fluidly in its ergonomics.

The Q’s full-frame image sensor and fast wide-angle lens are its two most important features. In combination, our tests show that they are capable of extraordinarily sharp images. It also turns out that shooting with the Q is just, well, a lot of fun. A lovely mechanical manual focus ring makes focusing a pleasure, but fast and accurate autofocus is on hand if you’d prefer. Likewise for manual aperture and shutter speed control; both have dedicated dials, but both can also be left on ‘A’ for auto. Images can be composed on the rear LCD if you like, but a built-in EVF offers a bright and detailed view of the world beyond the lens. While the design of the Q is reminiscent of the Fujifilm X100T, philosophically its closest match is the Sony RX1R II.

Leica Q key features

  • 24MP full-frame CMOS sensor
  • Fixed 28mm F1.7 ASPH lens with image stabilization
  • ISO 100-50000
  • 3.68M dot-equivalent LCOS electronic viewfinder
  • 3″ fixed touchscreen LCD with 1.04 million dots
  • 10 fps continuous shooting
  • 1080/60p HD video capture
  • Wi-Fi and NFC connectivity with dedicated Leica app
  • Magnesium-alloy body
  • Mechanical (leaf) and electronic shutter

Leica may be known for making cameras that help photographers slow down their process, but the Q also has the ability to help speed things up. It offers 10 fps bursts, even when capturing full resolution DNG images. The camera is ‘smart’, offering both Wi-Fi and NFC, and has a dedicated app for remote shooting and viewing images. Video is captured at 1080p at either 30 or 60 fps.

If the 28mm lens feels too wide, there is a feature called ‘digital frame selector’ that drops frame markers in the field of view, equivalent to your choice of 35 or 50mm. Of course you will lose some resolution cropping in. And for street shooters, options like face detect and touch-to-focus/touch-to-shoot (using the LCD) can be very effective, especially when shooting from the hip. Of course you can always pre-focus manually using the focus depth scale, if you prefer.

Compared to Sony Cyber-shot RX1R II

As mentioned above, in terms of specification, the Leica Q’s closest competitor is Sony’s Cyber-shot RX1R II. On paper, the main differences between the Leica and the Sony involve their sensors and the different lens specifications. You’ll find a detailed breakdown of key specifications below.

  Leica Q Sony RX1R II
Sensor 24MP Full Frame CMOS 42MP Full Frame BSI CMOS
Lens 28mm F1.7 35mm F2
ISO range (expanded) 100-50,000 50-102,400
Built-in viewfinder Yes Yes
LCD specs 3″ touch LCD with 1.04M dots 3″ tilting LCD with 1.2M dots
Burst 10 fps 5 fps
Video 1080/60p 1080/60p
Pop-up flash No No
Hot shoe Yes Yes
Macro mode Yes Yes
Wi-Fi enabled Yes, with NFC Yes, with NFC
Weight 640 grams 507 grams

Pricing and Availability

The Leica Q retails for $ 4250 and is available now.

If you're new to digital photography you may wish to read the Digital Photography Glossary before diving into this article (it may help you understand some of the terms used).

Conclusion / Recommendation / Ratings are based on the opinion of the reviewer, you should read the ENTIRE review before coming to your own conclusions.

We recommend to make the most of this review you should be able to see the difference (at least) between X, Y, and Z and ideally A, B, and C.

This article is Copyright 1998 – 2016 and may NOT in part or in whole be reproduced in any electronic or printed medium without prior permission from the author.

Articles: Digital Photography Review (dpreview.com)

 
Comments Off on Leica Q In-depth Review

Posted in Uncategorized