If there is one thing in photography that every photographer can work on, it’s composition. Like many of the other techniques in photography, your composition will improve the more you practice. Very often, photographers seem to go to their comfort zone of the rule of thirds. I personally like the rule of thirds as a starting point, not every photograph however, needs to be composed on the rule of thirds. In fact, it is a good idea to shoot the same scene in a few different compositions, even depth of field can be used as a compositional tool.
A good way to work on your composition is to start with the rule of thirds, then change it up, try a few different compositions and see how that works. The challenge is this, what other compositions can you use? Let’s take a look at some advanced compositional techniques that you can try out on your next shoot.
1. Left to right
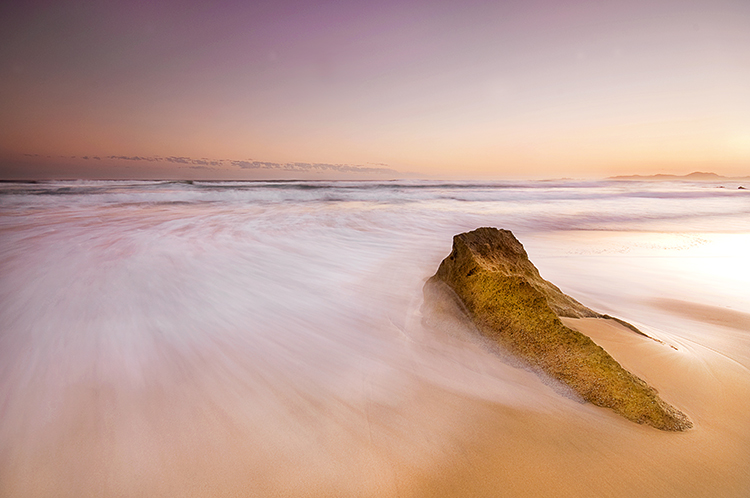
The smooth curving water leads your eye to the rock on the right of the image
In the western world, we read the words on a page from left to right. It is logical to think that when someone views your image, they will generally begin on the left side of the image, and move to the right. You can use this technique in a few ways.
Firstly, you could place your subject on the right hand side of the frame with a leading line drawing the eye to your subject. The leading line could be a river, a road, or a railway track – it doesn’t really matter, all that it needs to do is allow the eye of the viewer a natural entry point, then lead them to the subject.
Secondly, if you were shooting street photography, you might have a person in the frame on the left hand side, looking toward your subject on the right. You might even have a vehicle such as a car or a motorcycle, moving from left to right. These techniques will immediately draw the eye to the right side of your image.
2. Use shapes – both seen and unseen
In many images, there are hidden and visible shapes. Window frames are square or rectangular, doors are rectangles, and so on. Look for shapes in your images, look beyond what the actual object is and see its shape. You can also compose the scene to create a shape. Sand dunes can become triangular shapes, open fields can be green rectangles, so look for shapes in your scene and compose your image to include them.
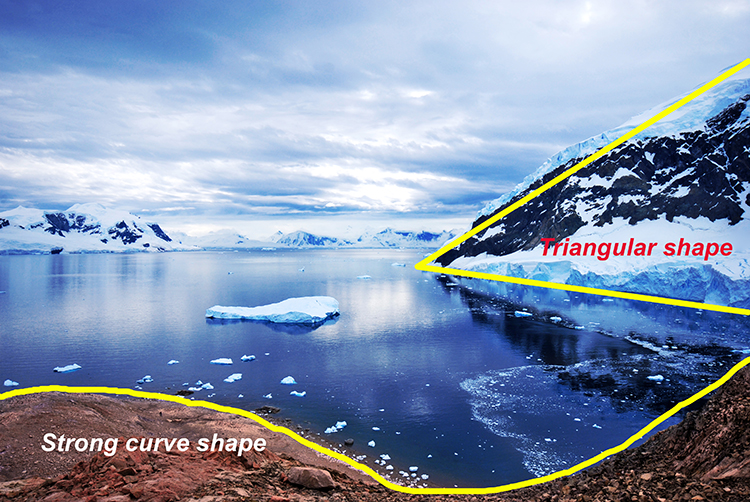
There are many shapes in each scene, use them to enhance your composition
3. Use numbers – not literally!
If you are shooting a scene with trees or leaves, or even a river with some exposed rocks, try and use odd numbers of things. Odd numbers tend to create a dynamic feel in your scene – three trees or rocks will feel more dynamic than two trees or four rocks. This also works well for groups of people. If you have a large group of say 12 people, try not to make three rows of four people, maybe have them pose in two rows, one with seven people and one with five. For people photography, you can also try and create a triangle shape with your subjects. Three people naturally creates a triangle, give it a try!
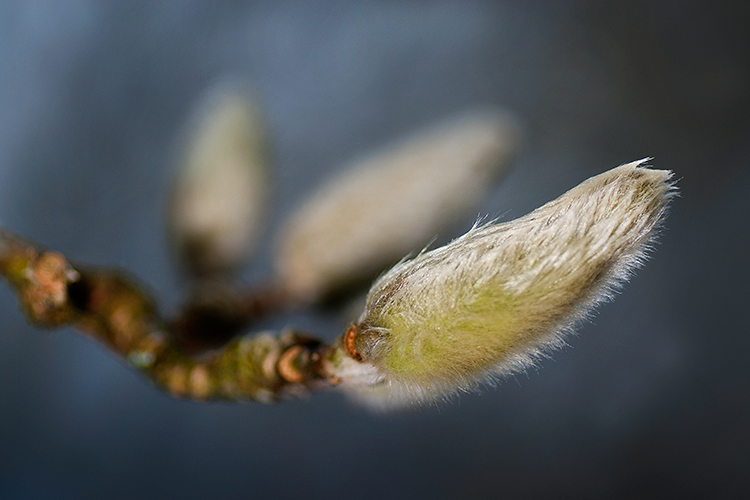
Odd numbers work well in most images
4. Use negative space
Negative space can really make an image interesting. Negative space is essentially blank space, but really, it helps to anchor your image. It provides really important information about the image. A blue sky can be used to create negative space. The blueness of the sky tells the viewer that it was a sunny day. Your blue sky may have one small cloud in it and that can make the negative space seem interesting.
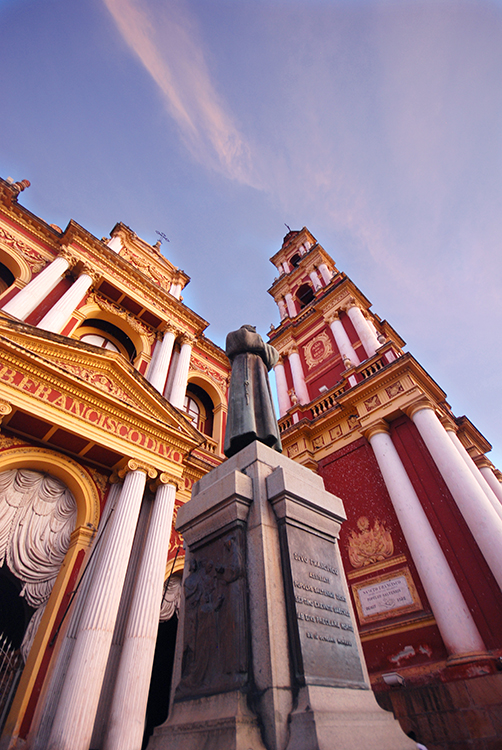
The blue sky and the hint of a cloud makes this negative space interesting
5. Framing
Framing can be used very effectively to showcase your subject. You can use a window, a door, or even trees to frame a subject. The idea is to create a frame around the subject that does not distract from the subject, but causes the viewer to know immediately where to look.

A tree, framed by an old wooden door.
When you are looking at a scene for the first time, try some of these techniques, or try a combination of them. Shoot from different angles and move around your subject before settling on a composition. You will find that by looking at the scene in many different ways, you will unlock more creativity. Your best shot, may not be your first compositional choice. Composition is one of the more flexible tools in your creative toolbox. You don’t need any particular piece of equipment to change it, you simply need to move your camera around. Give it a try, load your results up in the comments!
googletag.cmd.push(function() {
tablet_slots.push( googletag.defineSlot( “/1005424/_dPSv4_tab-all-article-bottom_(300×250)”, [300, 250], “pb-ad-78623” ).addService( googletag.pubads() ) ); } );
googletag.cmd.push(function() {
mobile_slots.push( googletag.defineSlot( “/1005424/_dPSv4_mob-all-article-bottom_(300×250)”, [300, 250], “pb-ad-78158” ).addService( googletag.pubads() ) ); } );
The post 5 Ways to Change Your Composition For Better Photos by Barry J Brady appeared first on Digital Photography School.


 When you have found the exact optical density, build your own shutter speed conversion table. Another possibility is the PhotoPills app for your iPhone, the only one that allows you to convert the shutter speed for non-standard f-stop reductions.


You must be logged in to post a comment.