The word photography comes from the ancient Greek words for “light” and “drawing”. With the presence of light being a rather important constituent in the making of a photograph, it is no wonder that low-light conditions are often a photographer’s nemesis.
While so many other lighting variables have an immense impact on your images – the quality, direction, color temperature, and intensity – but if you don’t have enough light to begin with, none of these really matter.
This article will walk you through my approach to post-processing an image taken in poorly lit conditions.
With a little Lightroom sorcery, poorly lit images can be brought back to life.
The key is to start with as strong a foundation as possible, which is to maximize the quality of the image captured in camera. For more detailed advice on how to accomplish this, have a read of:
- How to Shoot in Low Light – 9 Commonly Asked Questions
- A Guide to Shooting Outdoors in Low Light Conditions
- Another great resource to bookmark is Cheat Sheet: What Gear and Settings to Use for Low Light Photography
It is also worth noting that, as far as I’m concerned, the debate over whether to shoot in RAW or JPEG does not apply here. If you are shooting in low-light conditions, shooting in RAW is imperative. You want to ensure that you have as much latitude as possible to maximize post-processing efforts.
I will also echo the sentiments of others when I say, you should not rely on editing software as a crutch. Don’t be lazy. Make every effort to use lower ISO settings, noise reduction (NR) features, use slower shutter speeds, etc., in camera first.
What is low-light?
So what do I mean by low-light anyway? I believe this is one factor which contributes to the confusing nature of this topic to begin with. When I think of shooting in low-light, I imagine a scenario where I have a hard time seeing well enough to frame the shot, the camera may struggle to find focus, and without some work, the final image will make it apparent that shooting conditions were challenging.
This is when having better quality equipment pays off. Those of you with camera bodies which can produce clean shots at high ISO settings (just take a look at the Sony A7s) have a distinct advantage from the get go. Throw in a wide aperture, fast, lens and the quality of images these device can capture in near pitch dark is absolutely incredible – especially compared to 10 years ago.
With experience, you will learn the limits of your equipment and editing software to achieve the results which you consider acceptable.
Example
I will work with this street photo I snapped in Santa Monica, California as an example. It was taken long past sunset, with only some dim illumination from distant store windows and street lights. Some hoodlums had dumped soap into a fountain which had then churned into a frothing mess when this passerby stopped, grabbed a handful and blew the suds into the air.
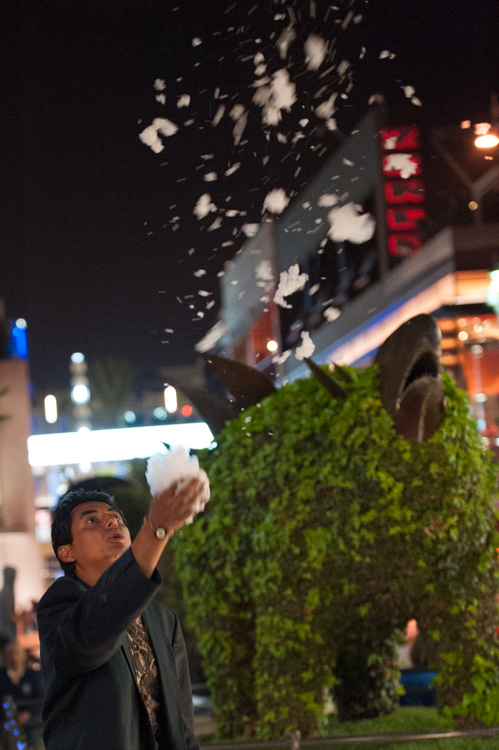
A night shot taken in poor lighting with a Nikon D700 at 70mm, f/2.8, ISO 4,000 and 1/60th of a second.
The combination of the image being a RAW file, and the less-than-ideal conditions it was taken in, has resulted in an image that is flat, has inaccurate color temperature, is low contrast, and has some noise. There is no exact process that can be replicated on every image, but I will walk you through the steps I toook to bring this photo back to life.
1. Check for clipped highlights, shadows
You can do this in two ways:
- Hold the Alt key while clicking on the highlights or shadows slider
- Hover the mouse over the small triangles in the upper corners of the histogram.
This will quickly and easily identify the areas of the photo which contain no information, and therefore no details to recover.
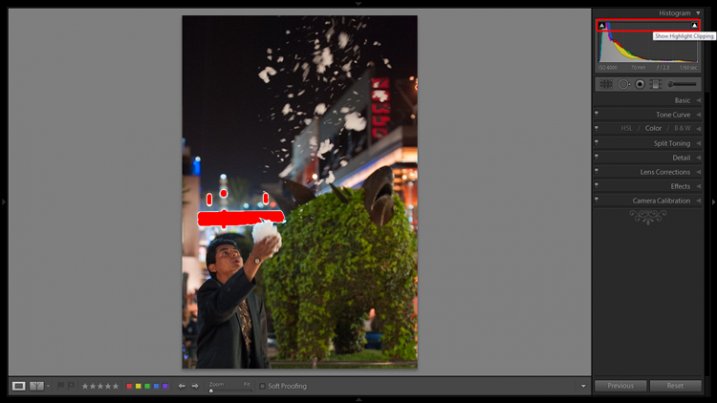
Hovering the mouse over the triangle in the upper right corner of the histogram will illuminate all clipped highlights.
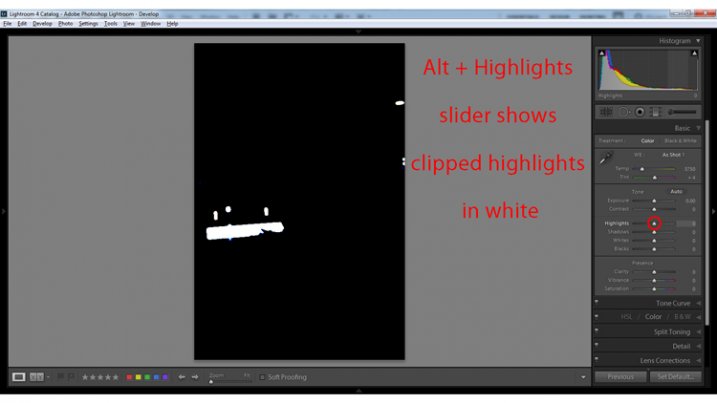
Alt + clicking on the Highlights slider shows clipped highlights
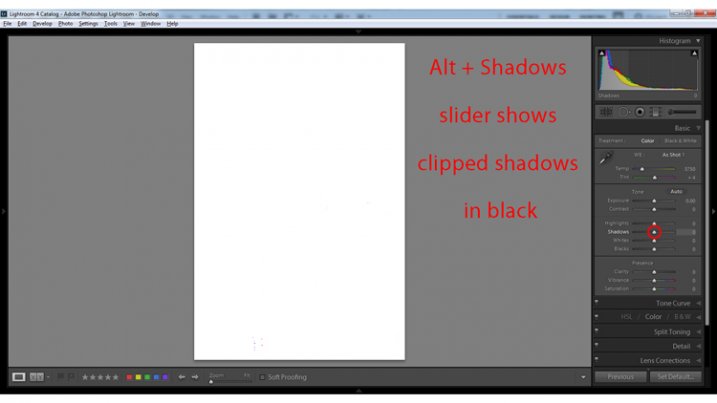
Alt + Shadows slider shows all clipped shadows. This photo has no clipped shadows.
For shooting in low light, you will most often be concerned with clipped shadow areas. If details important to the image are clipped, it may not be salvageable – this is a judgment call to make on an individual basis.
Although it is underexposed, the image has no clipped shadows, and only a small bit of clipped highlights.
2. Adjust exposure correctly for the subject
For this image, the person is the subject so I want him to be properly exposed therefore I will zoom in on him and set the exposure. I want his face to be a bit brighter and clearer so I’ve increased exposure 9/10 of a stop (+0.90).
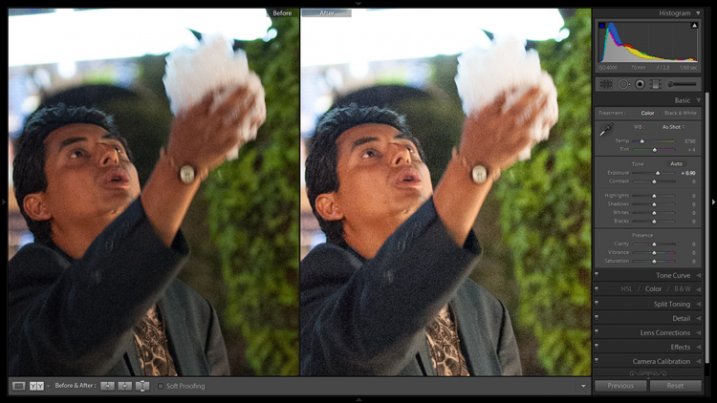
The exposure was increased to brighten the subject. Before and after of exposure adjustment.
3. Increase contrast
This is going to involve a process of trial and error, adjusting several sliders, and analyzing the effects they have on the image in combination with one another.
From what the histogram showed me, and what is obvious by looking at the image, there are significant portions of the image that are dark – the sky, the subjects jacket, etc. These dark areas have nothing to add to the image and after increasing the exposure, have become a lighter shade of gray and have created more noise.
Therefore, I am going to purposefully clip some of these shadowed areas by decreasing the Blacks slider value. I prefer to drag the slider all the way to -100, and start increasing it until the image looks good. At -70 the shadows obscure unimportant details which brings more attention to highlighted areas.
Contrast can be adjusted further in the Tone Curves panel. If this is uncharted territory for you, the article Lightroom’s Tone Curve Explained is a good place to start.
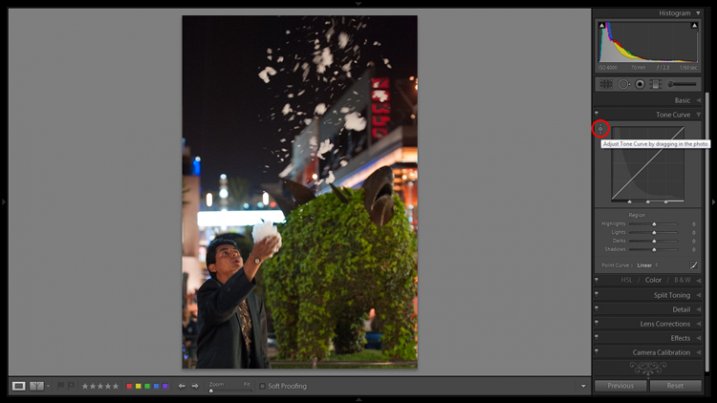
A shortcut for adjusting all similar tones in an image can be found in the Tone Curve panel.
TIP: Using the click and drag tool in the upper left hand corner of the Tone Curves panel is a quick and easy way to adjust tones in your image. Click the tool to activate it; place it over the tone in the image that you wish to adjust (shadows, highlights, etc.); click and drag the tool up or down and it will adjust all similar tones in your image automatically.
4. White balance
As exposure and contrast affect the colors in an image, I prefer to make those adjustments before dialing in the white balance. There are two ways to accomplish this:
- Click and drag the Temp slider
- Use the Eye Dropper (targeted adjustment) tool to let LR attempt to correct the white balance automatically
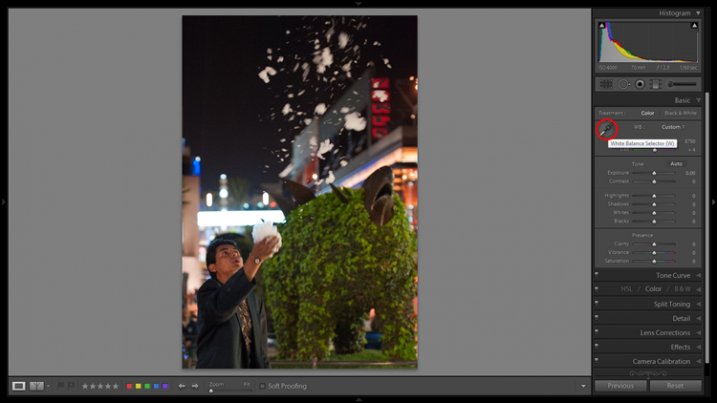
The Eyedropper tool is an automated feature that will approximate correct white balance for you.
The key to the Eye Dropper tool is to select an object in your image that should be pure white (or anything that you know is a neutral tone like black or gray). I find the tool can sometimes give you a starting point from which to work, but very rarely gives you an accurate result straight away.
As a result of the sodium vapour street lights, this image is far too warm, has turned the subject’s skin orange, and has made the greens too yellow. I’ve reduced the white balance color temperature from 3,750 degrees to 3,300.
TIP: In the Develop Module, the forward slash key toggles between before and after, so you can quickly see the adjustments you have made. You can also click the the box in lower left with two Y’s, which shows a before and after side-by-side comparison (if that tool bar is not showing, click T on your keyboard to show/hide it). Although this can help guide any changes you make to your image, I find it particularly useful to toggle back and forth when correcting white balance.
5. Clarity
The Clarity slider changes local contrast, especially in the midtone areas of your image. Increasing clarity can help define the edges of objects and add depth to an image, while decreasing clarity will soften details and add a dreamy glow.
Raising the Clarity slider to +25 adds a bit more pop to this image. Adding too much clarity can accentuate blemishes in portraits and dull colors, so use it sparingly.
6. Noise Reduction
Noise and color noise are the downfall of many lo- light photos, especially those taken on less capable cameras. Noise adds a general grainy haze, and color noise shows up as little little specks of random colors, which can look like big splotches on shadowed areas.
It’s often most noticeable in the dark areas of an image but can wreak havoc on skin tones as well. Luckily, it’s easy to fix in LR and doesn’t decrease image quality too much. It does have its limits so always shoot at the lowest ISO possible.
Since this photo was taken on a camera with legendary low-light capabilities (in its day), noise levels aren’t too bad even at ISO 4,000.
The Noise Reduction slider is found in the Details panel underneath the Sharpening sliders. For this image I increased the Luminance slider to +30 and the Color slider to +15.
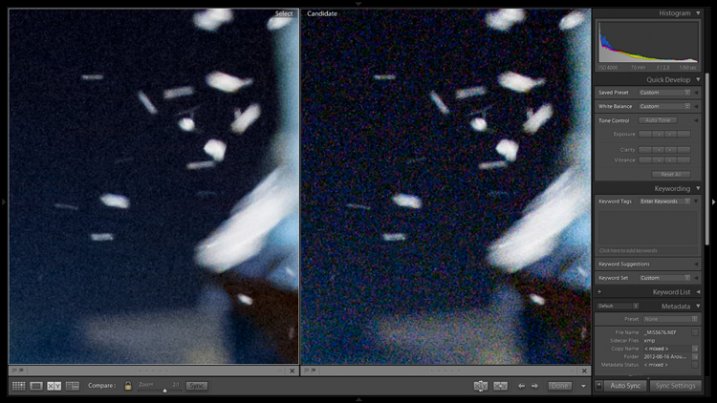
The noise is this image was fairly minimal and Lightroom easily reduces it. Image showing before (right) and after (left) noise reduction.
A side effect of noise reduction is decreased detail so don’t be too heavy handed.
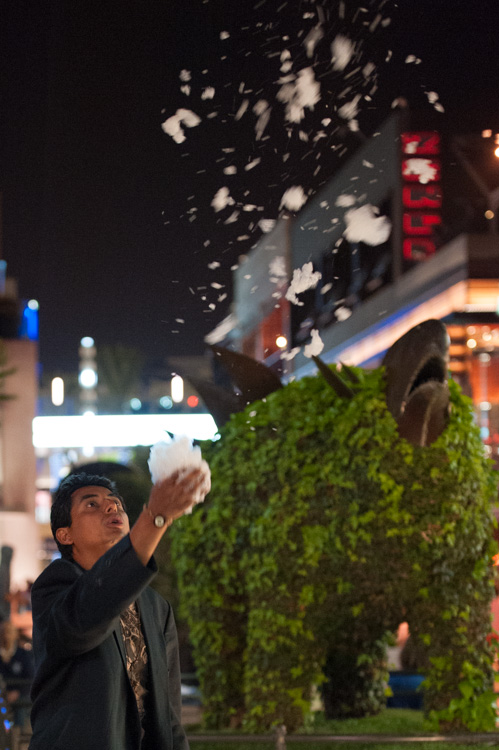
The original image before any post-processing.
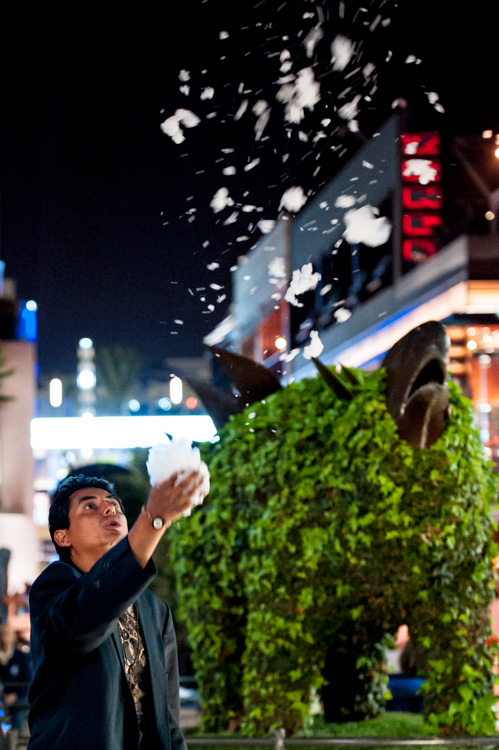
The original image after post-processing.
That is a basic walk-through of my approach to a photo shot in low-light, or poor conditions. Although the editing process could go much further and get more technical, this is a good starting point to breathe some life back into poorly lit shots.
Do you have any other good post-processing tricks for low-light images to share?
googletag.cmd.push(function() {
tablet_slots.push( googletag.defineSlot( “/1005424/_dPSv4_tab-all-article-bottom_(300×250)”, [300, 250], “pb-ad-78623” ).addService( googletag.pubads() ) ); } );
googletag.cmd.push(function() {
mobile_slots.push( googletag.defineSlot( “/1005424/_dPSv4_mob-all-article-bottom_(300×250)”, [300, 250], “pb-ad-78158” ).addService( googletag.pubads() ) ); } );
The post 6 Easy Steps for Post-Processing a Low-Light Photo in Lightroom by Jeremie Schatz appeared first on Digital Photography School.

Digital Photography School


You must be logged in to post a comment.