Das Bild des Tages von: Andreas Levers

Dieses großartige Landschaftsfoto von Andreas Levers ziert heute unseren Ausblick.
kwerfeldein – Fotografie Magazin | Fotocommunity
Das Bild des Tages von: Andreas Levers
Dieses großartige Landschaftsfoto von Andreas Levers ziert heute unseren Ausblick.
kwerfeldein – Fotografie Magazin | Fotocommunity
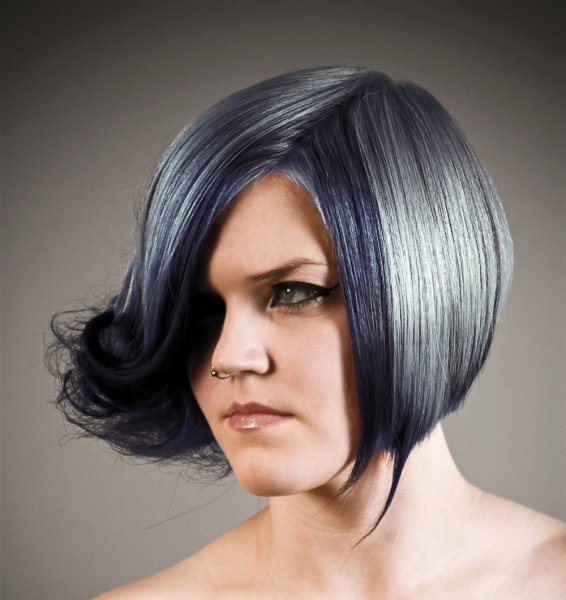
For those who follow trends you’ll know there is a move to “metallic” hair colors for both men and women, and this is especially evident in fashion photography.
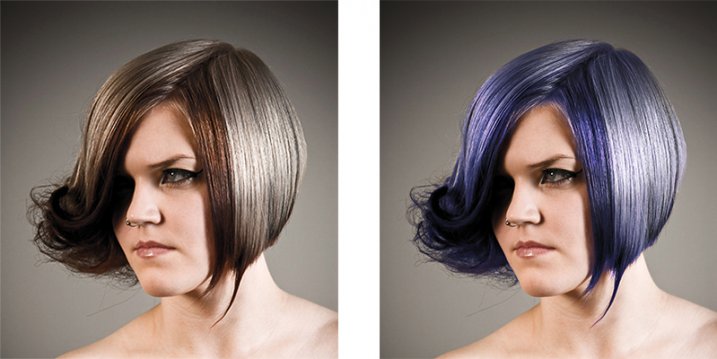
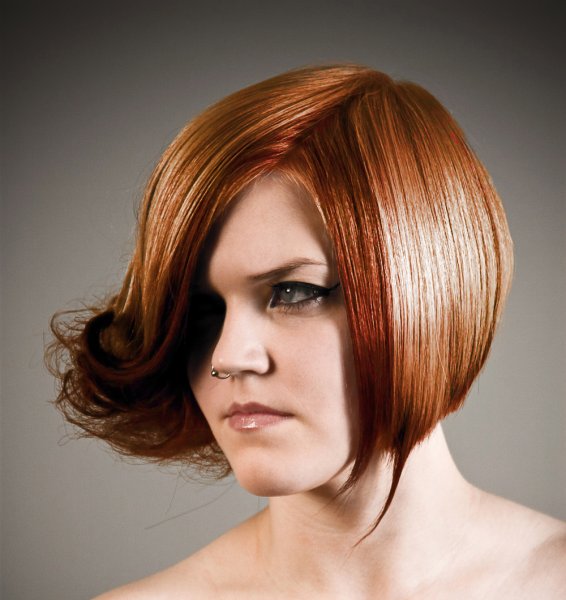
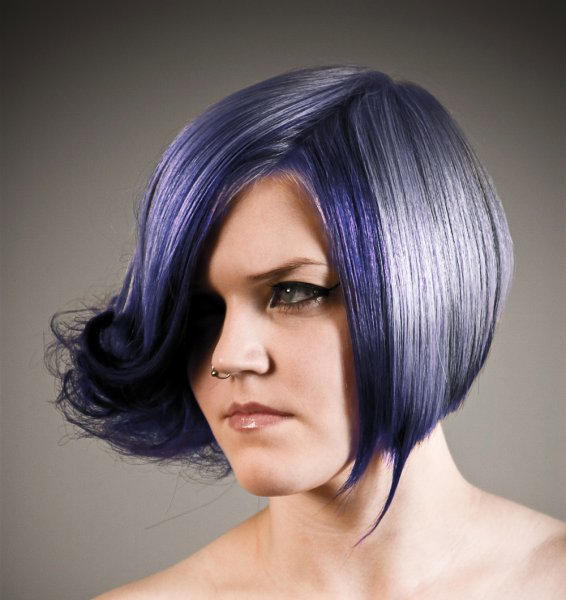
From this, to this in 3 steps using Photoshop
Whether you want to add extra pizzazz to a fashion shot, jazz up a promotional photo without having your models spend hours (and probably big bucks) at the salon, or to simply see what you’d look like with a different or metallic hair color – this simple process will help you change the color of a subject’s hair color in a realistic way, with no frustration. You can even use this technique to create fantasy animals for your artistic digital manipulations, by changing the color of their fur with the same steps.
Editing hair has often been a challenging process. Even with the most meticulous editing, the results were often unrealistic, and obvious as manipulations. This workflow changes all that.
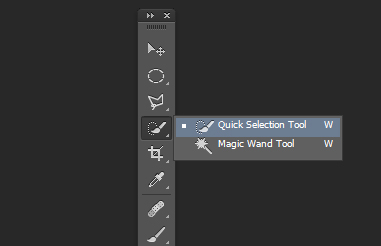
Thankfully Photoshop’s Quick Select tool makes masking hair a breeze. Open the image you want to edit. Select the Quick Selection Tool from the tool palette.
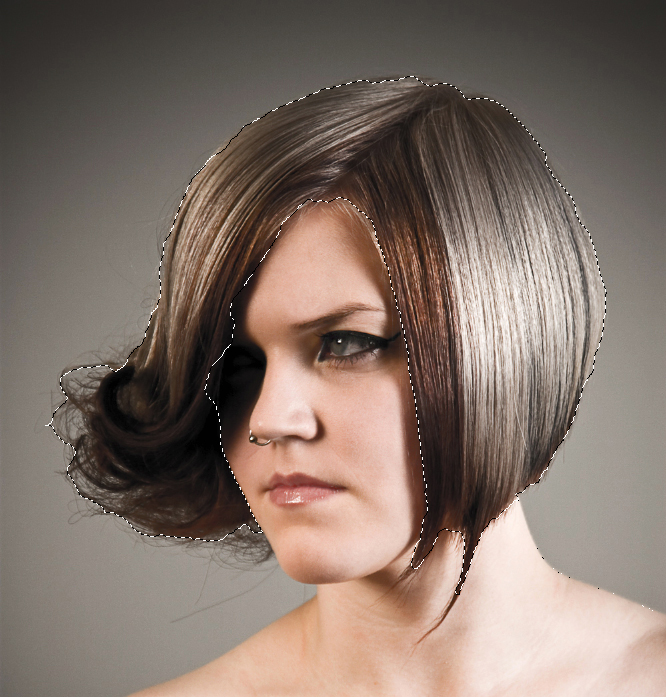
Change the size of the brush by using the square brackets keys on the keyboard, you’ll find these next to the “P” on most keyboards. Now select the hair using the selection brush – you’ll see the famous marching ants as you make your selection. If your selection extends too far use the CTRL key to subtract the selection.
When you have the hair selected, click on the Refine Selection button in the top context menu. This will allow you to soften the edges and add some transparency to the selection to make it very realistic. You’ll see a new palette pop up with some edge options to choose. First, select On White from the View Mode dropdown. This will enable you to see only the hair selection. Next select the Brush from the left hand side, and make the radius between 1.5 and 2.5, this will vary with your image. Now you can brush to bring back some of the transparency around the edges, especially where there are fine hairs such as the bottom left in this image.
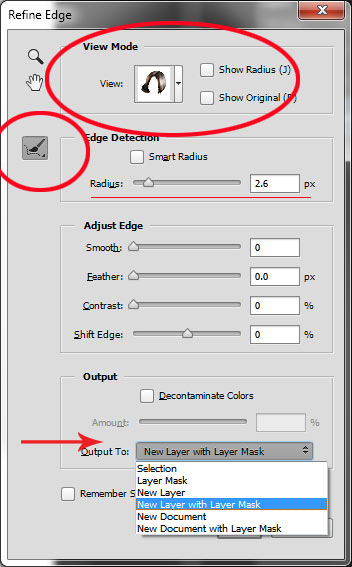
Once you’ve refined the edges, go to the Output section and select New Layer with Layer Mask. This will output your refined edge selection on a new layer, which you’ll use in the next step.
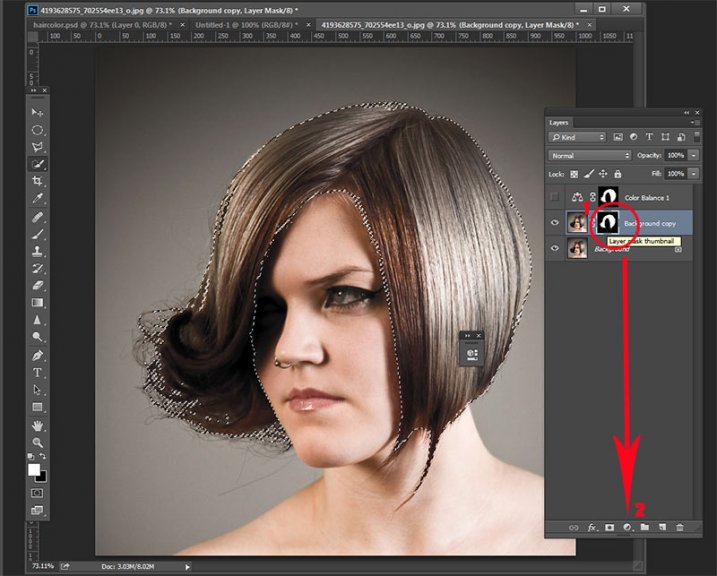
Here’s your opportunity to bring our your inner stylist. First, go over to the Layers Palette. Here, you’ll make a special Adjustment Layer using Color Balance adjustment. To do this first make sure that the layer mask thumbnail on your recently created layer is active. Don’t click on the thumbnail of the photo. What you’re doing here is telling the Adjustment Layer you’re creating, to ONLY affect the hair selection.
Now CTR+click in the layer mask thumbnail to get the marching ants selection on your image. Next, at the bottom of your layers palette, click on the Adjustment Layers icon to create your new adjustment layer. From the pop-up menu, choose Color Balance. You’ll now see your new adjustment layer called Color Balance, at the top of your stack.
Now make the Color Balance layer active by clicking on the scales icon thumbnail. This will bring up the color balance sliders where you can now create the color for your hair. Remember to also use the top drop-down in the slider pop-up to also adjust the highlight and shadow tones.
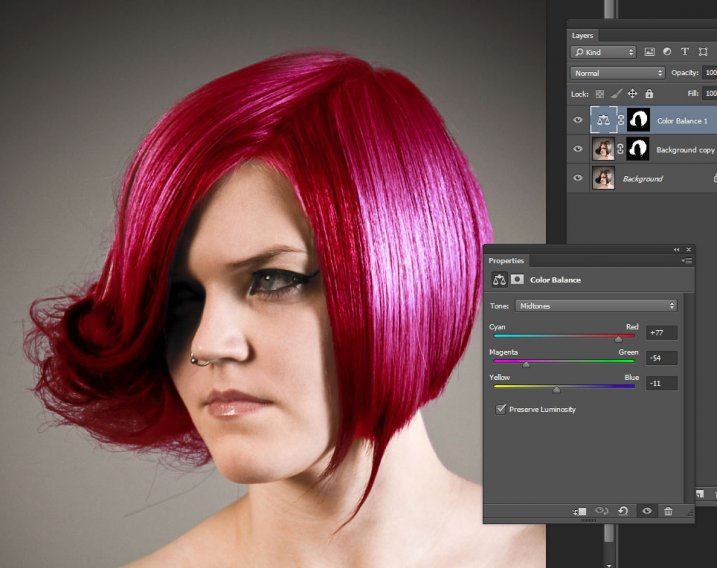
You’re now ready to apply your color. Depending in whether you’re going for a bold and artistic look, or fashionable and metallic, your color choice will be made here in the color balance adjustment layer. Play around with changing all the colors, and note the results. In the final step you’ll be adjusting the intensity and the opacity of the color to make it look realistic, no matter what style you want to show.
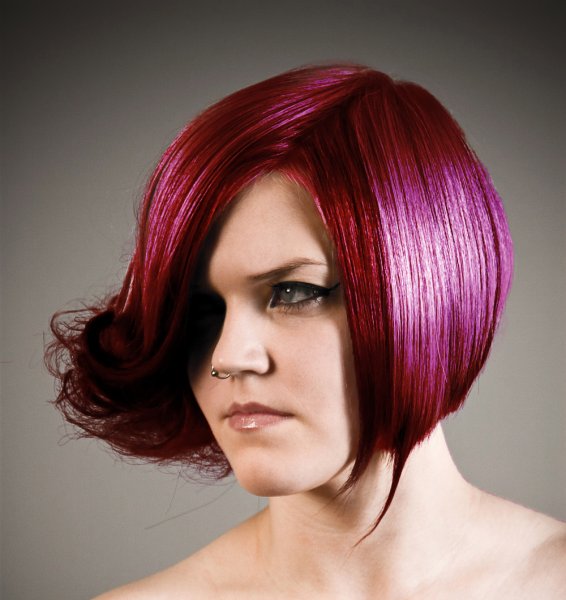
At this point, you’re ready for the fine detail adjustments to ensure your new hair color looks realistic, and not Photoshopped. All you need to do now is adjust the opacity and the blend modes of your color balance layer. T0 achieve the metallic look try blending mode HUE with an opacity of 75%.
For bolder looks try SATURATION or SOFT LIGHT. Depending on what colors you’re using you can also achieve great looks with DARKEN and SCREEN.
Here we have four totally different looks. They are all from the same file and one adjustment layer, just by changing colors with color balance; and varying the intensity using opacity and blending modes.
Here’s the PSD file for you to practice with (zip format). Download it to your computer. Unzip and open the PSD in Photoshop.
The original image is used under the Creative Commons license and is attributed to Looking Glass.
googletag.cmd.push(function() {
tablet_slots.push( googletag.defineSlot( “/1005424/_dPSv4_tab-all-article-bottom_(300×250)”, [300, 250], “pb-ad-78623” ).addService( googletag.pubads() ) ); } );
googletag.cmd.push(function() {
mobile_slots.push( googletag.defineSlot( “/1005424/_dPSv4_mob-all-article-bottom_(300×250)”, [300, 250], “pb-ad-78158” ).addService( googletag.pubads() ) ); } );
The post 3 Steps to Easily and Realistically Change Hair Color in Photoshop by Alex Morrison appeared first on Digital Photography School.
Photography and web design are going hand in hand. A good-looking website requires stylish photo content to attract audience, as well as to compete with other web pages. And as photography gains more popularity year by year, this rivalry becomes much fiercer. So, acquiring good looking, attractive, creatively different photo web page is a high-priority task for every photographer who Continue Reading
The post MotoCMS 3.0: The Best Option to Build a Photo Portfolio Website appeared first on Photodoto.
It’s been quite the week, both in the world of camera technology and beyond… way beyond. We’ve been making steady progress on our full review of the Sony Cyber-shot DSC-RX100 IV, Panasonic announced the first-even 20MP Micro Four Thirds camera, and us earthlings got our first good look at Pluto. Join us as we look back at a week of leaps and bounds. Read more
Articles: Digital Photography Review (dpreview.com)
Featuring miniaturized versions of himself as the lone character in his surrealist, cartoon-like scenarios, Achraf (pronounced ash-raaf) Baznani’s conceptual imagery incorporates symbolic elements like tea cups, lightbulbs, and glass jars. His images create a dream-like mix of fantasy and the real world. Check out his work and find out more about him. Read more
Articles: Digital Photography Review (dpreview.com)
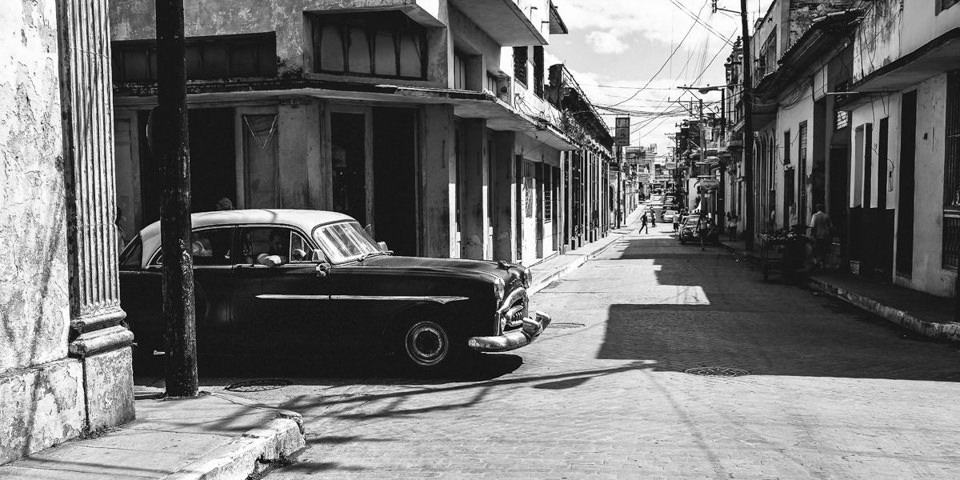
Ein Beitrag von: Moritz Jansen
Bis in die Ewigkeit? Vielleicht nicht ganz – Kuba ändert sich momentan schneller, als man einen Mojito mixen kann. Die jüngsten Nachrichten aus dem Karibikstaat am Rande des Golfes von Mexiko ließen uns aufhorchen: Der Sozialismus auf der Insel geht dem Ende entgegen und damit auch die Beschaulichkeit und Ursprünglichkeit. Kuba stand für uns als Reiseziel schon lange fest, ist aber mehrfach verschoben worden.
kwerfeldein – Fotografie Magazin | Fotocommunity
[ By Steph in Art & Street Art & Graffiti. ]
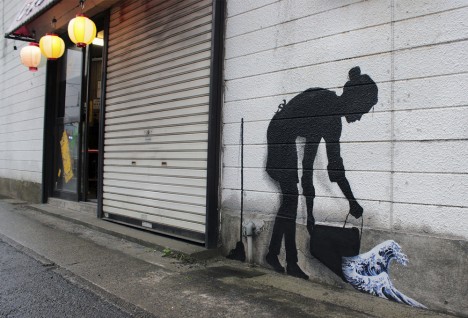
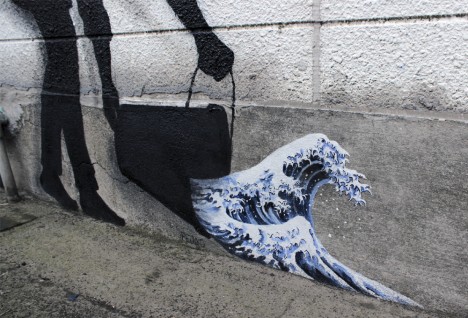
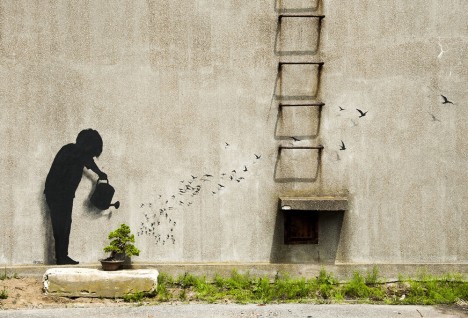
Spanish street artist Pejac both praises and criticizes elements of various Asian cultures in a new series of outdoor paintings making use of iconic traditional imagery and symbols. Human figures are represented as mere silhouettes, allowing reproductions of The Great Wave off Kanagawa or three-dimensional elements like bonsai trees to take center stage in each work.
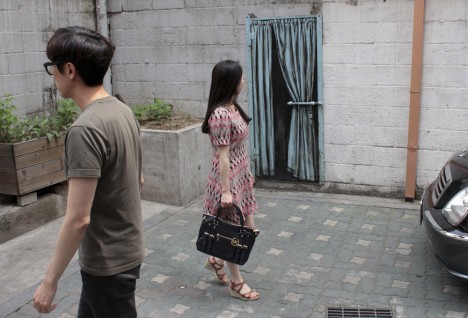
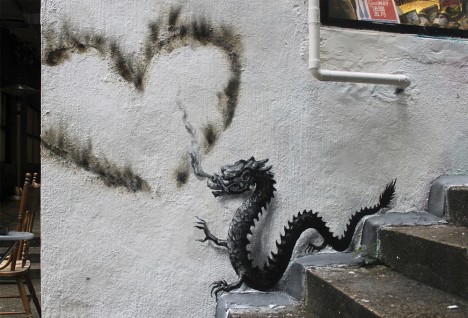
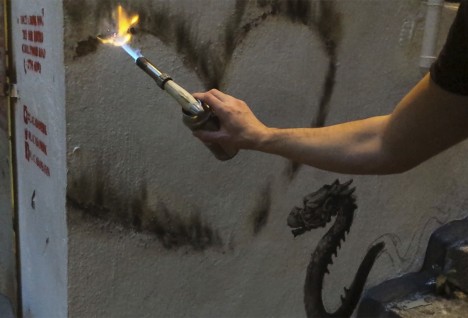
The works may say just as much about how a foreign artist perceives the culture of cities like Tokyo, Seoul and Hong Kong as they do about the places themselves. Pejac makes use of some of the most common symbols that outsiders associate with Asian cultures and traditions, like a Chinese dragon beside a heart-shaped scorch mark.
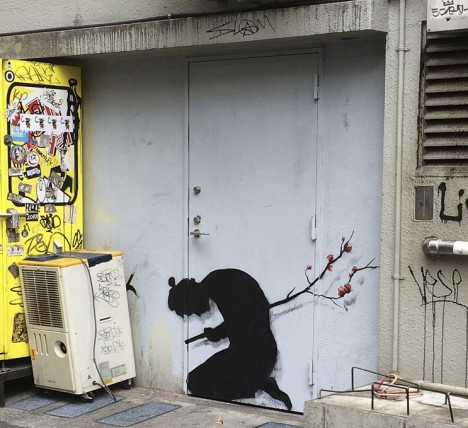
A piece entitled ‘Seppuki’ in Tokyo depicts what looks like the silhouette of a samurai doubled over as if mortally wounded, impaled by a cherry tree branch instead of a sword. “I couldn’t help but make this sort of tribute as a manner of thank you to the Japanese culture for the inspiration that drove me to create in the first place.”
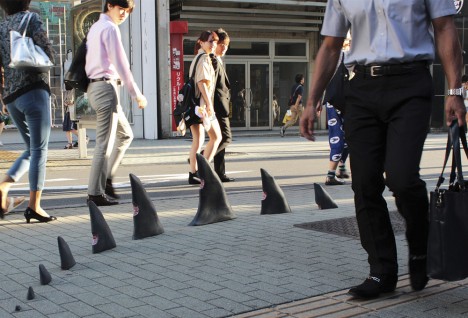
A three-dimensional installation of shark fins sticking out of the pavement in Tokyo is a tad harsher in its appraisal, with human bite marks taken from each one. Pejac makes use of “classic anime aesthetics” to calla attention to the environmental impact of shark fin soup, which is popular in Japan.
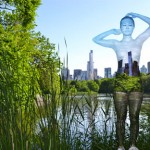
Unlike some other prominent artists working with more seamless urban camouflage in strange or offbeat settings, this work in NYC by Trina Merry allows for …
Click Here to Read More »»
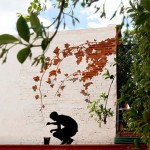
White wall frames cracked red bricks shaped like rust-colored autumn leaves, all trailing down to a black silhouette of a painter and his bucket – but …
Click Here to Read More »»

Simple black-outlined, white-filled, faux-three-dimensional shapes that render urban happenstance into something with a humorous sense of mathematical order.
Click Here to Read More »»
![]()


[ By Steph in Art & Street Art & Graffiti. ]
[ WebUrbanist | Archives | Galleries | Privacy | TOS ]
To have a strong shadow you must have a hard light source, one that is small and harsh. That includes:
Have a look on an overcast day – you cannot see your own shadow.

By Oiluj Samall Zeid
This week it’s your job to find and photography some shadows (like these). Keep in mind what a good shadow photograph is:
On the other side of the coin also consider what is not a shadow:

By Hernán Piñera
The image above is a silhouette not a shadow. The light is coming from behind the subject and while there is a shadow the outline of the subject is the actual person not a shadow. This is the key difference.

By Stefano Corso
In the image above the outlines are reflections, not shadows.
Be clear on the difference between the three when you head out to shoot your shadows like these:

By Marina del Castell

By TumblingRun

By Loren Kerns
Shadow selfies work great sometimes too. Watch for them as you go about your day:

By KimManleyOrt

By Todd Lappin

By Hernán Piñera

By John Sonderman

By Scott Schiller

By Ian Sane
Simply upload your shot into the comment field (look for the little camera icon in the Disqus comments section) and they’ll get embedded for us all to see or if you’d prefer upload them to your favourite photo sharing site and leave the link to them. Show me your best images in this week’s challenge. Sometimes it takes a while for an image to appear so be patient and try not to post the same image twice.

By Stefano Corso

By Kumar’s Edit

By Evelyn Berg

By Ruben Steeman
googletag.cmd.push(function() {
tablet_slots.push( googletag.defineSlot( “/1005424/_dPSv4_tab-all-article-bottom_(300×250)”, [300, 250], “pb-ad-78623” ).addService( googletag.pubads() ) ); } );
googletag.cmd.push(function() {
mobile_slots.push( googletag.defineSlot( “/1005424/_dPSv4_mob-all-article-bottom_(300×250)”, [300, 250], “pb-ad-78158” ).addService( googletag.pubads() ) ); } );
The post Weekly Photography Challenge – Shadows by Darlene Hildebrandt appeared first on Digital Photography School.
A group of industrial design students in South Africa has introduced SOOC Studio, a portable photography studio with integrated LED lighting sold in limited regions by their company WhiteBison. SOOC Studio folds into a compact shape with a handle and shoulder strap easy for carrying. When unfolded, it transforms into a white photography studio with integrated 6000K LED strips. Read more
Articles: Digital Photography Review (dpreview.com)
Das Bild des Tages von: Martin W.

Im Ausblick: Surreale Tiere, Bruce Gilden und iranische Psychiatrien.
kwerfeldein – Fotografie Magazin | Fotocommunity
You must be logged in to post a comment.