RSS
 

Archive for June, 2015

A commerical photographer accuses Taylor Swift of being a hypocrite, Swift’s management company responds

25 Jun

In case you missed it, Taylor Swift, one of the most successful commercial pop stars of all time, recently penned an angry Tumblr post aimed at the soon-to-be-launched streaming service Apple Music. She called for Apple to respect the rights of creatives. However, commercial photographer Jason Sheldon found this statement to be more than a little hypocritical. Read more

Articles: Digital Photography Review (dpreview.com)

 
Comments Off on A commerical photographer accuses Taylor Swift of being a hypocrite, Swift’s management company responds

Posted in Uncategorized


Naturally

25 Jun

© Bertil Nilsson

Bertil Nilsson wuchs in Schweden auf und verbrachte als Kind viel Zeit im Wald. Heute lebt und arbeitet er in London und vermisst die Natur. Seine Serie „Naturally“ führt ihn zurück. Zusammen mit Tänzern und Zirkusartisten experimentiert er in wunderschönen Landschaften: Wälder, Felsen und Strände sind die Hintergründe seiner Bilder. Es ist ein großes Abenteuer für ihn und den Ursprung der Serie sieht er in seiner Kindheit in den schwedischen Wäldern.
kwerfeldein – Fotografie Magazin | Fotocommunity

 
Comments Off on Naturally

Posted in Equipment


Samsung NX500 firmware upgrade improves autofocus and enhances video features

25 Jun

Samsung has released a firmware update for its NX500 mirrorless camera. Among other things, the update enhances autofocus performance in several areas, increases the 4K video bit rate to 70Mbps, and reads out a larger areas of the sensor for improved 1080/60p video quality. More details

Articles: Digital Photography Review (dpreview.com)

 
Comments Off on Samsung NX500 firmware upgrade improves autofocus and enhances video features

Posted in Uncategorized


Android Dreams: Google’s Neural Network Reveals AI Art

25 Jun

[ By Steph in Gaming & Computing & Technology. ]

google AI dreams 8

Those of us working in creative fields have often consoled ourselves that although automation may claim many other jobs, at least robots can’t make art. That’s not exactly true for a variety of reasons (depending on how you define ‘art’), but it really goes out the window when you look at these astonishing images released recently by Google. The landscapes produced on the company’s image recognition neural network reveal the answer to the question, “Can artificial intelligence dream?”

Screen Shot 2015-06-24 at 5.40.06 PM

It turns out that it can – sort of. Google created a method to ‘teach’ its neural network to identify features like animals, buildings and objects in photographs. The computer highlights the features it recognizes. When that modified image is fed back to the network again and again, it’s repeatedly altered until it produces bizarre mashups that belong in a gallery of surreal art.

google AI dreams 2

Suddenly, an image of a knight on a horse is filled with ghostly impressions of frogs, fish, dogs and flowers. The knight’s arm seems to have sprouted a koala head, while the head of another unrecognizable animal emerges from beneath the horse’s tail. In another image, a tree and field turn cotton candy pink, and the clouds transform into conjoined sheep monsters.

google AI dreams 7 Google AI dreams 6

Technically, it’s more like the computers were fed psychedelics and asked to paint, rather than capturing random images that might flash through their artificial ‘minds’ when they’re idle. The computers look for patterns and edges within the photos and paintings when they’re trying to identify objects and shapes, leading to those strange ghostly images scattered randomly throughout. Those edges are brought out more in each successive layer until the network starts thinking it sees all sorts of things within them.

google AI dreams 3

Google describes it as “inceptionism,” saying “We know that after training, each  layer progressively extracts higher and higher-level features of the image, until the final layer essentially makes a decision on what the image shows.”

Screen Shot 2015-06-24 at 5.39.47 PM

“So here’s one surprise: neural networks that were trained to discriminate between different kinds of images have quite a bit of the information needed to generate images too. Why is this important? Well, we train networks by simply showing them many examples of what we want them to learn, hoping they extract the essence of the matter at hand (e.g., a fork needs a handle and 2-4 tines), and learn to ignore what doesn’t matter (a fork can be any shape, size, color or orientation).”

“If we choose higher-level layers, which identify more sophisticated features in images, complex features or even whole objects tend to emerge. Again, we just start with an existing image and give it to our neural net. We ask the network: “Whatever you see there, I want more of it!” This creates a feedback loop: if a cloud looks a little bit like a bird, the network will make it look more like a bird. This in turn will make the network recognize the bird even more strongly on the next pass and so forth, until a highly detailed bird appears, seemingly out of nowhere.”

Check out lots more examples on Google’s research blog.

Share on Facebook


[ By Steph in Gaming & Computing & Technology. ]

[ WebUrbanist | Archives | Galleries | Privacy | TOS ]


WebUrbanist

 
Comments Off on Android Dreams: Google’s Neural Network Reveals AI Art

Posted in Creativity


Adobe Creative Cloud trials reset to offer preview of 2015 features

25 Jun

Adobe recently updated its Creative Cloud suite of software, and to give users a chance to test the new features it has reset its product trials. This includes trial versions of Illustrator CC, InDesign CC, and Photoshop CC. Users, even those who have previously taken advantage of Adobe’s 30-day free trial, can start a new trial by opening the software application and clicking ‘Update’. Read more

Articles: Digital Photography Review (dpreview.com)

 
Comments Off on Adobe Creative Cloud trials reset to offer preview of 2015 features

Posted in Uncategorized


24. Juni 2015

25 Jun

Das Bild des Tages von: Nico Zumstein

Lichtkreise schweben vor einem Bergmassiv.

Im Ausblick: Filme kochen, Lost Places und Fotografie studieren.
kwerfeldein – Fotografie Magazin | Fotocommunity

 
Comments Off on 24. Juni 2015

Posted in Equipment


One Speedlight Portrait Lighting Tutorial

25 Jun

If you’ve ever wondered how to improve the look of your portraits using only one speedlight, then make sure you read every single word on this page. It isn’t so much the type or quality of the speedlight you are using; it is more about how you modify and shape the light, that will help you to improve the overall look of your portraits.

Craigbecktabts

Let’s break speedlight portrait lighting down into three simple action steps that are easy for you to follow:

Step 1: Get the speedlight off-camera

Start by first getting your speedlight off of your camera. In order to trigger your strobe once it is off of your camera, you will need a remote trigger such as a Cactus V6 that I am using in the video below. You can also use a Pocket Wizard or any number of different triggers that are available on the market. The key is to be able to remotely fire your speedlight, so you are free to modify, and position your light source for more flattering results.

Check out the video below for a video demonstration of a one light, speedlight beauty lighting set up.

Step 2: Add a light modifier

Next step is to increase the size of your light source by using a speedlight modifier. The key to improving the quality of the light is this; the larger the light source and the closer the light is to your subject, the softer the light will appear. As a general guideline for a starting position, I suggest you put your light roughly the same distance as its diameter from your subject.

CraigBeckta1

For example if your speedlight modifier is three feet (36″) in diameter (or 91cm), you can start by placing your modifier the same distance from your subject. In the image above I placed my light in the butterfly lighting position and used a white reflector for fill. This type of lighting is often referred to as ClamShell lighting or Beauty lighting.

Craigbeckta2

Step 3: Place your focus on the subject

Once you have your lighting in place, shift your focus to making a connection with the person you are photographing. Pay close attention to the pose and the expression; tests have shown that 60% of people look more attractive from their left side. So make sure you experiment with your subject to find their most flattering side right at the beginning of the portrait session. You can ask them if they have a side they prefer, or you can make a guess based on where they part their hair.

Once you have that figured out, focus on capturing an expression that makes them appear confident in from of the camera. You can have the best lighting in the world ,but if you don’t nail the right expression, you will miss the shot. Look for the position of their eyes and mouth, confidence is portrayed from the eyes and it is something that can make or break a shot.

Craigbeckta3

Any article about photography isn’t complete unless we talk about the gear used to create the shots. The first image in this series was shot on the Canon 5D MK III with the Canon 100mm Macro lens at ISO 100, f/5.6 and shutter speed 1/160th. The reason you should use a shutter speed of 1/160th on the Canon 5D MK III is to stay within the flash sync-speed. If you shoot at a shutter speed of 1/200th, or faster, you may see a black line in your image because are shooting at a faster shutter speed than your camera can handle when using flash.

Screen Shot 2015 06 01 at 8 19 33 AM
Lighting diagram showing the setup for these images.

The other two images in this series were both shot on the Canon 5D MK III with the Canon 135mm f/2 lens. Both lenses are tack sharp and are great portrait lenses but if you prefer a better bokeh, then I would choose the Canon 135mm f/2. The reason is that the lowest aperture is f/2, and the longer focal length of 135mm will give you a more out of focus background when shot at f/2.

CraigBecktaDPS

If you have any questions about the video or article above, I would be more than happy to answer them for you. Just post your questions in the comment section below.

googletag.cmd.push(function() {
tablet_slots.push( googletag.defineSlot( “/1005424/_dPSv4_tab-all-article-bottom_(300×250)”, [300, 250], “pb-ad-78623” ).addService( googletag.pubads() ) ); } );

googletag.cmd.push(function() {
mobile_slots.push( googletag.defineSlot( “/1005424/_dPSv4_mob-all-article-bottom_(300×250)”, [300, 250], “pb-ad-78158” ).addService( googletag.pubads() ) ); } );

The post One Speedlight Portrait Lighting Tutorial by Craig Beckta appeared first on Digital Photography School.


Digital Photography School

 
Comments Off on One Speedlight Portrait Lighting Tutorial

Posted in Photography


Enter the Void: 14 Creatively Concave & Sliced-Out Structures

24 Jun

[ By Steph in Architecture & Public & Institutional. ]

concave twin moon 2

Cutting curves or slices into the facades of buildings doesn’t just make them more visually dynamic, it can create terraces, divert prevailing winds, concentrate sunlight and direct the eye to particular views.  These seemingly random depressions and voids completely transform the shapes of each structure, often leading to an alien appearance.

Twin Moon Cut-Outs

concave twin moon 3

concave moon 5

concave twin moon 1

Two buildings set side-by-side look like they were dented by a massive sphere, the concave cut-out creating two moon shapes recessed into the concrete facades. Architect Moon Hoon designed the mixed-use Two Moon buildings for a South Korean client who needed one building for himself and another for his brother. The structures were envisioned as twins, with one sitting ever-so-slightly closer to the street than the other.

TEK Building by BIG Architects

concave tek 2

concave tek 3

concave tek 4

concave tek

Each ‘slice’ that you see in the main volume of the TEK building by BIG Architects is a functional step, with the entrance spiraling throughout the interior to create one big continuous outdoor staircase leading to a series of terrace-like spaces before finally exiting onto the roof. The building, which is full of exhibitions paces, conference rooms, shops, restaurants and galleries, consists of a system of stacked plate-like pieces that also create solar shading for the interior spaces.

Barn House Sliced Like a Cake

concave barn house 1

concave barn house 2

concave barn house 3

This barn-shaped house looks like a massive black-frosted cake that’s had slices randomly taken from its perimeters, revealing its white interior. These concave cut-outs act as terraces, reflecting and maximizing natural light.

DUO Skyscrapers with Concave Walls

concave duo skyscrapers

Singapore’s historic Kampong Glam district is set to get a pair of curving skyscrapers arranged in a half-circle, one containing apartments, the other offices and a hotel. The DUO towers by Buro Ole Scheeren feature a stepped design that creates large outdoor spaces at various levels, and are covered in a distinctive grid of hexagonal windows.

The Bow by Foster + Partners

concave the bow 1

concave the bow 2
Calgary’s tallest building, The Bow by Foster + Partners is a 58-story wave-like structure with a concave side gathering sunlight and a convex side reducing the load of prevailing winds. Atriums within the concave side separate the glass facade from the offices within, offering meeting spaces, lounges and sky gardens.

Next Page – Click Below to Read More:
Enter The Void 14 Creatively Concave Sliced Out Structures

Share on Facebook


[ By Steph in Architecture & Public & Institutional. ]

[ WebUrbanist | Archives | Galleries | Privacy | TOS ]


WebUrbanist

 
Comments Off on Enter the Void: 14 Creatively Concave & Sliced-Out Structures

Posted in Creativity


Tips for Getting Proper Exposure for Night Photography

24 Jun
Proper Exposure at Night - Millenium Bridge example

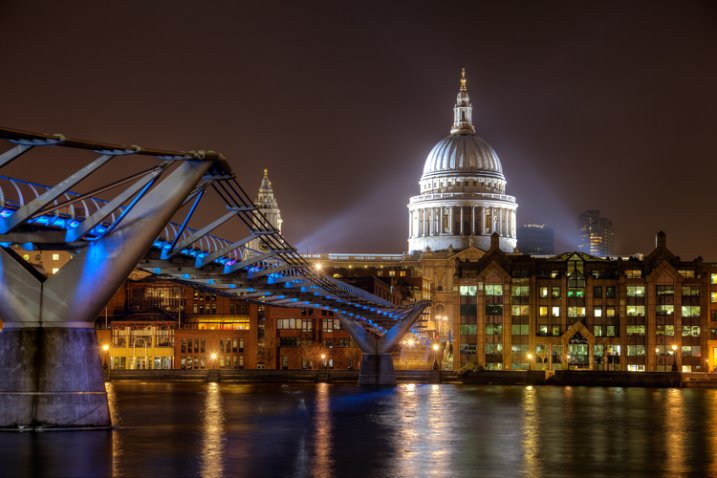
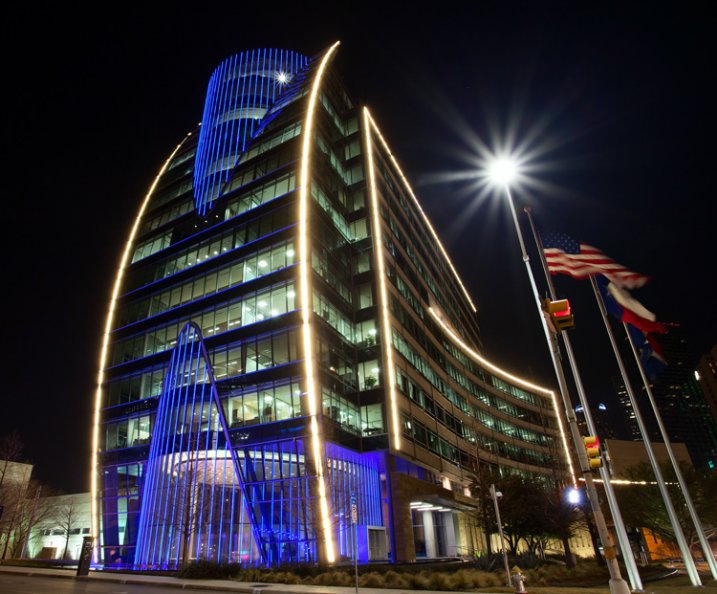
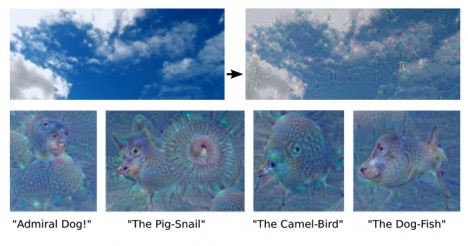
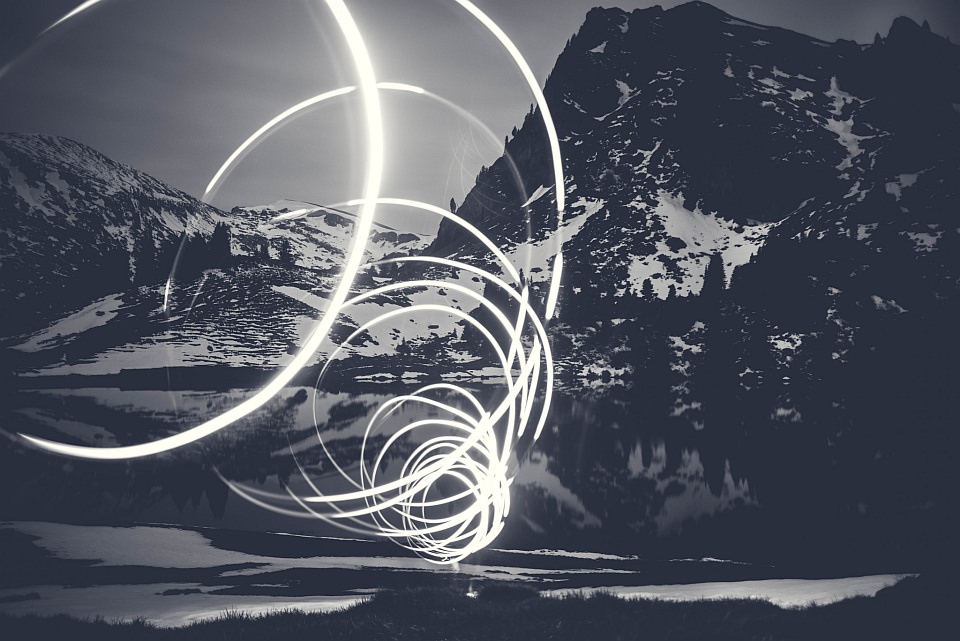
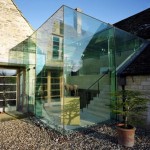
Exposure settings for this shot: Shutter speed of 4 seconds; aperture at f/5.6; ISO 400.

Night photography can be much more rewarding than photography during the day. Because everything looks different at night, you don’t need to go somewhere exotic to get great pictures. Bridges, attractions, and buildings are usually brightly lit at night, and places that might seem rather pedestrian during the day – can make stellar photography subjects at night. Further, you can take your time when photographing at night, more so than during the day. There are generally less people out, and you don’t have to worry about the light changing.

The main challenge when photographing at night is getting a proper exposure. During the day, you can just walk around and hand hold your camera without worrying about camera shake. In addition, because of the amount of available light during the day, you don’t need to worry about shooting at a high ISO and the resulting digital noise. At night, however, hand holding is generally not an option and digital noise can be a major problem.

The principles of exposure work the same way at night as during the day – you will just need a lot more time to allow light into your camera. It goes without saying that you will need a tripod to stabilize your camera, and a remote shutter release to keep from moving anything during the exposure. But with these changes made, you can get out and explore the night with your camera. When you do, here are some tips to keep in mind to help you maximize the experience.

Proper Exposure at Night - ouvre example

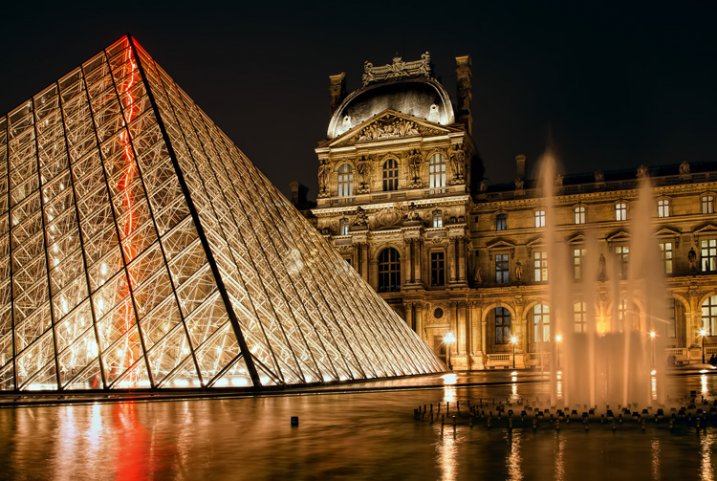
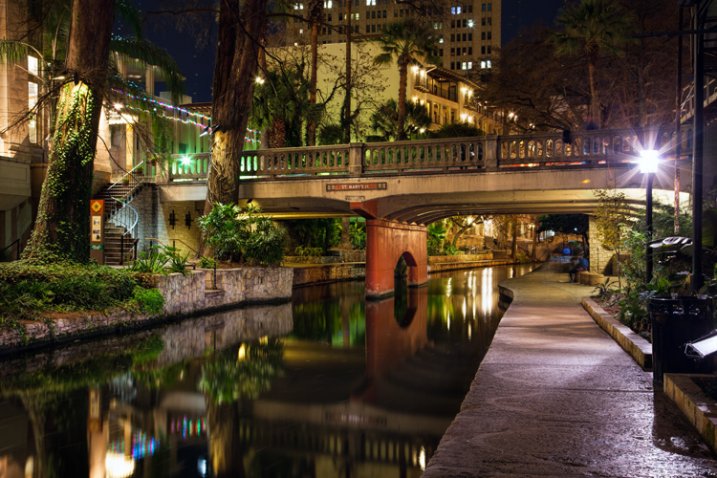
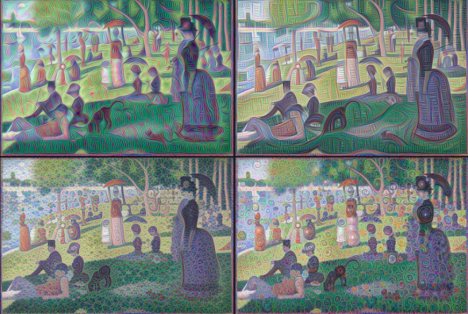
Exposure settings for this shot: Shutter speed of 4 seconds; aperture at f/11; ISO 400.

# 1.  Work in Manual Mode

The first tip is to make sure you are shooting in Manual mode. In Manual mode, you will set the shutter speed, aperture, and ISO. This puts you in complete control over you camera.

When shooting at night, your camera will be on a tripod and you will be working slowly. There is no need to use any automatic mode because of the speed provided. Further, there might be a little trial and error with the exposure settings (the camera can be easily fooled by the great differences in bright and dark areas of the picture) and you want to make sure you have plenty of control over this process. Manual mode gives you that control.

#2.  Make sure you are comfortable with Bulb Mode

Manual mode only works for exposures up to 30 seconds. If you need a shutter speed that is longer than 30 seconds, the only option for getting a proper exposure is Bulb mode. Therefore, while you should generally shoot in Manual mode, you should also be comfortable with Bulb.

In Bulb mode, the shutter stays open as long as you hold the shutter button down. When you press the button, the shutter opens. When you release the button, the shutter closes. To avoid introducing any shake or movement into the exposure, using a remote shutter release is imperative when using this mode.

With Bulb mode you can make your exposure several minutes long. If your remote shutter release does not have a timer built-in to it, make sure you keep another timer handy (your phone may have one). If your remote does not have a timer, make sure it has a locking feature so you do not have to hold it the entire time.

Proper Exposure at Night - Pigeon Point example

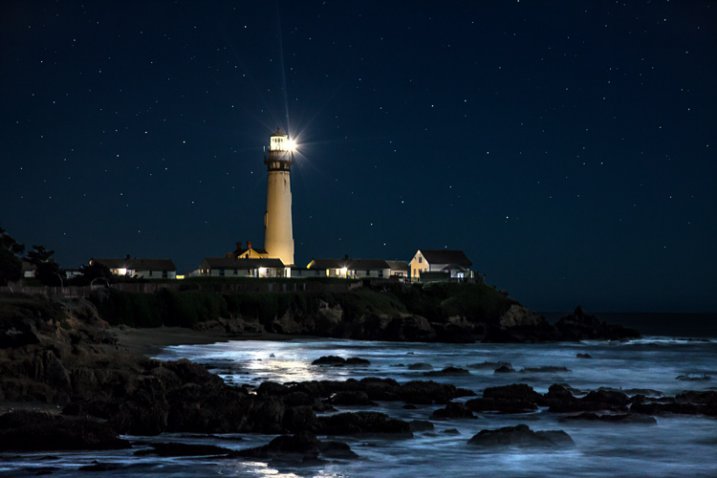
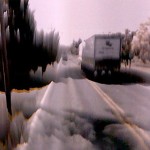
Exposure settings for this shot: Shutter speed of 6 seconds; aperture at f/5.6; ISO 1600.

#3.  Shoot in Raw

When shooting at night, it is particularly important to make sure you are shooting in Raw format. The Raw files coming out of most cameras are 14 bit files, whereas JPEGS are only 8 bit files. The more bits, the higher the range of available colors and the smoother the transitions between them.

The reason shooting in Raw is even more important at night, is that most of the colors that a camera can capture are at the top (bright) end of the scale. The range of available colors at the low (dark) end of the scale is extremely limited. At night, your pictures will almost always include a large dark portion. A JPEG file, with its reduced color options, you will likely introduce banding in your pictures.

#4.  Bring a flashlight

Knowing your camera controls really well pays dividends at night. You can make changes to the settings without being able to see everything. Nevertheless, a small flashlight is tremendously useful. Keep one handy to make sure you can see everything on your camera and tripod. It occasionally comes in handy for lighting areas of your picture as well.

Proper Exposure at Night - Brooklyn Bridge

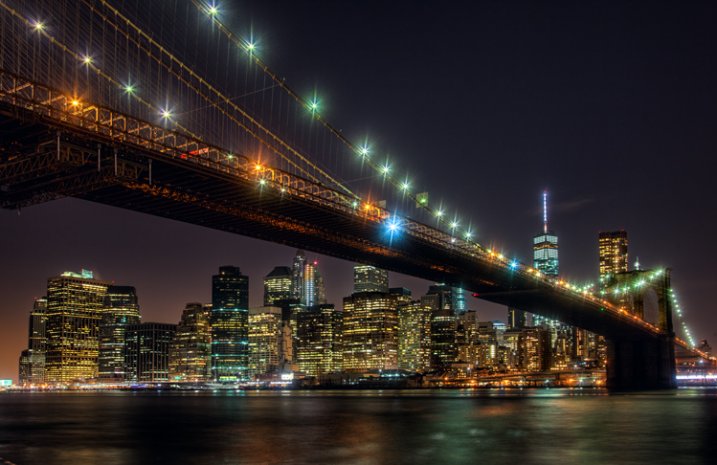
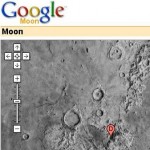
Exposure settings for this shot: Shutter speed of 10 seconds; aperture at f/9.0; ISO 200.

#5.  Choose proper settings

Proper settings will always depend on the situation. Nevertheless, there are some ways you should bias your settings when shooting at night. Here are a few:

  • Aperture: Open up your aperture more at night than you would during the day (i.e., use a lower f/number). Most night photographs tend to be of shots on a narrower plane than shots during the day. Further, the background and sky will be black anyway and you will not need as large a depth of field. The larger aperture also has the benefit of letting more light into the camera.
  • ISO: Keep your ISO setting as low as you can. Night photography always means there will be dark areas in your pictures, and these dark areas inevitably lead to digital noise. Raising the ISO will compound the problem.
  • Shutter speed: Whereas shutter speed might be the first exposure setting you worry about during the day, it should generally be the last one you think about at night. Since you will be shooting from a tripod, you can let the shutter stay open as long as you need. If you have traffic (streaking lights), a fountain, or running water in your picture, the longer shutter speed will actually benefit your pictures anyway. The only exception is high winds, or other instability impacting your rig.

One other setting to check is the Long Exposure Noise Reduction, which will be in your camera’s menu. If you enable this option, the camera will make two exposures, one normal and one with the shutter closed, which the camera will use as a comparison to filter out noise from the normal picture. Photos taken with this option enabled will take twice as long to expose, but will be less noisy.

#6.  Meter for the highlights

Determining the proper exposure level can be tricky at night. Each metering mode presents its own challenges. If you use evaluative metering, the camera is likely to be confused. If you use spot or partial metering, the meter will jump around depending upon whether you are aimed at a bright light or the dark background.

One answer to this problem is to use spot metering and to expose for the highlights. Set your meter between +1 and +2 as you meter on the highlights. The +1 -2 setting will keep your highlights looking bright, but at the same time, will keep the highlights within the dynamic range of the camera. Do not worry as much about the dark portions of the picture. If the dark areas happen to turn black, well, it is nighttime after all, and there is supposed to be some black. Take a test shot and adjust as necessary.

Proper Exposure at Night - Dallas example

Exposure settings for this shot: Shutter speed of 5 seconds; aperture at f/16; ISO 400.

#7.  Take a test shot at a high ISO

Speaking of test shots, you should make liberal use of them when shooting at night. However, you don’t want to sit around for 30 seconds, a minute, or even longer, waiting to see if the test shot is going to work out. The best way to get a test, without wasting a lot of time doing so, is to take tone at a much higher ISO than you would ordinarily use.

For example, let’s say you think the proper exposure settings for a given shot are: 30 seconds at f/5.6 with an ISO of 400. Rather than taking that shot and waiting around 30 seconds for the exposure, crank up the ISO and speed up the shutter speed by the same number of stops. The exposure level will be the same, but it will take a lot less time to expose the test picture. In this case, I would raise the ISO by four stops to ISO 6400 (raising it one stop to moves it to ISO 800, one stops increases it to ISO 1600, three stops to ISO 3200, and four stops gets you to ISO 6400). That allows you to reduce your shutter speed by four stops to only 2 seconds (reducing the shutter speed by one stop shortens it to 15 seconds, two stops shortens it to 8 seconds, three stops to 4 seconds, and four stops gets the shutter speed down to 2 seconds).

When you are satisfied with your exposure, just decrease the ISO and increase (lengthen) the shutter speed by an equal amount to get back to the final settings.

#8. Bracket your photos

Night photography is one area where you will want to bracket your photos. Blending and HDR can work wonders at night, but even if you are against such processing, bracket your photos anyway. Think of it as exposure insurance.

Proper Exposure at Night - San Antonio Riverwalk example

Exposure settings for this shot: Shutter speed of 30 seconds; aperture at f/11; ISO 200.

#9.  Verify the exposure with the Histogram

After you have taken your exposures, check them on the LCD on the back of your camera. The picture on the LCD will show you if the exposure is close to correct, but it is better to also check the histogram to make sure the exposure is within the dynamic range of your camera. Remember to keep the highlights on the right side of the histogram, but avoid a spike on the far right. If the dark areas spike on the left side the histogram, that is okay since parts of your picture are supposed to be black. In general, however, keep as much of the image as possible within the range of the histogram, but err on the side of keeping the highlights from blowing out.

Exposing at Night

If you are not totally comfortable with exposure, then doing some night photography will get you there in a hurry. You will have your camera on a tripod in unchanging light, so you can take as much time as you need to think through the exposure, and get it right. You’ll be forced to take into account the highlights and shadows when you meter, then study them on your histogram. Taking test shots, and making adjustments, will help you see the interrelationships between the exposure controls.

When you follow these steps, you are likely to get some great shots. Every city lights up its major attractions, bridges, and museums – often in colorful ways. A scene that might be boring during the day could be a great photo at night. Often, because of the effects of the lights, you’ll actually be surprised at what you end up with. Taking your time and applying these tips to nail the exposure will help you maximize the experience.

googletag.cmd.push(function() {
tablet_slots.push( googletag.defineSlot( “/1005424/_dPSv4_tab-all-article-bottom_(300×250)”, [300, 250], “pb-ad-78623” ).addService( googletag.pubads() ) ); } );

googletag.cmd.push(function() {
mobile_slots.push( googletag.defineSlot( “/1005424/_dPSv4_mob-all-article-bottom_(300×250)”, [300, 250], “pb-ad-78158” ).addService( googletag.pubads() ) ); } );

The post Tips for Getting Proper Exposure for Night Photography by Jim Hamel appeared first on Digital Photography School.


Digital Photography School

 
Comments Off on Tips for Getting Proper Exposure for Night Photography

Posted in Photography


7 Shades of Effective Boudoir Photography Marketing (18+)

24 Jun

Despite an emerging popularity of boudoir photography, there’s often certain confusion and misinterpretation surrounding this division of the photographic services causing many photographers to avoid it and thus, lose quite a profitable source of income. This post is going to help you define the specific nature of boudoir photography and suggest some best practices of boudoir photography marketing. The specifics Continue Reading

The post 7 Shades of Effective Boudoir Photography Marketing (18+) appeared first on Photodoto.


Photodoto

 
Comments Off on 7 Shades of Effective Boudoir Photography Marketing (18+)

Posted in Photography