Having had a few weeks now to spend significant time exploring Flickr 4.0, I thought I’d write up another more detailed post about my ongoing thoughts on the recent update by Flickr.
1. Autotagging. Autotagging has received a mixed reception by the Flickr community as well as the broader press. Initially a lot of the Flickr diehards have very vocally opposed it.
On the one hand, every time Flickr makes any change whatsoever a certain segment of the community will vocally oppose it no matter what the change is. The “who moved my cheese” crowd is strong and vocal at Flickr, so it’s easy to dismiss at least some of the initial criticism from the community as typical and predictable. On the other hand, many people have spent hundreds of hours organizing their tags on their Flickr photos and have a certain sort of emotional connection around tagging as it relates to their photos, which are very personal.
Any time you try to use image recognition software to recognize things you will get false positives. This is no different at Flickr. The more sensational the press can spin a story, the more clicks they end up getting. This week you saw news outlets like the Daily Mail come out with stories highlighting that Flickr was tagging concentration camps jungle gyms and black people apes. CNN reported that “Flickr’s new auto-tags are racist and offensive.” This is bad because most of the general public make assumptions based on headlines without thinking deeper about the issues at hand and most are not intimately involved with the inner mechanics of Flickr.
We also saw Google called racist this week because the White House was associated with a search for a derogatory racial term.
Personally, I’m more optimistic about Flickr using image search technology going forward and hope that the bad PR doesn’t set their efforts back there. Flickr and Yahoo are not racist (either is Google). The people who work there are a very well meaning and forward thinking group. I’m sure they will work on their algorithm to get it more and more accurate, but part of that accuracy involves getting feedback from their community when inaccuracies arise. Longer-term I think we will all benefit from having more accurate and complete search available through Flickr.
There is also part of me that wonders if Flickr’s autotagging efforts are not part of a longer-term effort to better organize this content in order to eventually partner with their community in a more significant way with stock photography. Stock photography is a multi-billion dollar business. Flickr is probably the most potentially disruptive site out there to this industry. As Yahoo thinks about monetizing Flickr in a more meaningful way, the better organized their library the more successfully they might be able to do this.
I do think Flickr should offer a setting to opt out of autotagging and I’m guessing they probably will eventually. If autotagging is on by default 99.9% of Flick users will still be using it. By creating an setting to opt out this would be an immediate way to deflect the criticism from the vocal power users that dislike it.
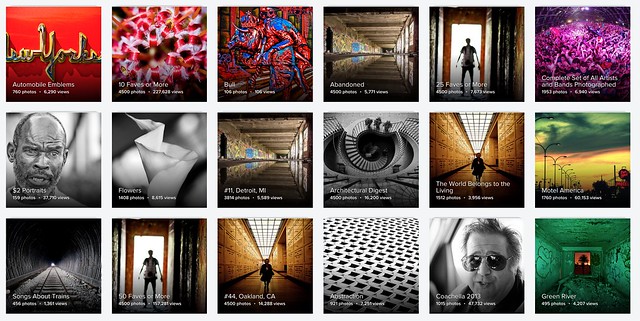
2. Search. Unfortunately my initial enthusiasm for search has been fading fast the past two weeks. While search looks cleaner and I do like the new view of smaller thumbnails that allow me to browse search results quickly, I’ve lost one of the most important functions of search, which is to search by my contacts.
Over the past 10 years I’ve carefully and methodically built a very large number of contacts whose photography I like and want to see more of. When I’m interested in photos of a particular subject, location, event, etc., I always do searches filtered by my contacts. This allows me the highest quality search results and gets rid of all the noisy, watermarked, junky, inaccurate images that oftentimes come up a broader search of everybody’s photos.
With the new search functionality this filtering capability is completely broken for me. What bums me out even more is that this broken functionality for my search experience is most likely affecting only people with a large number of contacts (like me) and thus is not likely to be addressed or fixed by Flickr for a long, long time.
Search is one of the most significant ways I use Flickr and with the update it is now dramatically worse for me.
Also, although I do like the two smaller view options Flickr gives you for search (a small sized photo or a thumbnail option), I do find myself missing the old larger views at the same time. Sometimes you want to search Flickr with images small so you can go fast, but other times you want to search Flickr to more carefully examine photos and here at least a medium view option would be nice to have back.
Maybe Flickr could have three possible views, medium, small and thumbnail.
One of the new features with the new search is that you can now search by date taken in addition to date posted. While date taken and posted are somewhat similar, I do see how date taken will become more and more useful over time, especially when using Flickr to search for breaking news.
3. As far as the Camera Roll and the uploader, I’m finding that I’m not using either. This doesn’t mean they are not important though. For more casual users having a view like this makes sense as a way to try to organize their offline photos in the cloud. I think this is really important for most casual users and as a way for Flickr to appeal to a broader general audience.
Personally, I carefully keyword all of my photos in Adobe Lightroom before uploading them to Flickr and then I use Jeremy Brook’s brilliant program SuprSetr to build albums based on these keywords. The only negative with this approach is that Flickr limits my sets to 4,500 photos when using Jeremy’s SuprSetr. 
Magic view was fun to look at once, but I probably will never use it or go back. I prefer the way that I’ve organized my photos more than Flickr’s auto-organization.
I don’t use the uploader because for me Flickr is not a personal shoebox for all of my photos. Rather, for me, Flickr is a place to present and share my photos to the world. I don’t want random photos from my hard drive cluttering up my Flickr photostream even if they are private. 99.99% of the photos I publish to Flickr are public and the current web page uploader does a good enough job getting two batches a day up for me (except not last weekend).
4. The Flickr mobile app. To me the new Flickr mobile app is slightly better than the old app but it’s still far from ideal.
My biggest criticism is that sometimes it is so slow, laggy and clunky. Again, some of these issues may affect me more adversely than others because of the way I power use Flickr, but I find that going to my notifications can take 20-60 seconds sometimes on an LTE or wifi connection and that is just too long to have to wait. Sometimes it does go faster, but typically after not using it for a period of hours it frequently is just painful to use. It comes and goes, but I don’t have a consistent, fast experience with the mobile app. Facebook, Twitter, Google+ and most of all Instagram are so much responsive for me when I use them than the Flickr app.
Another problem I have with the app is that frequently I’ll want to favorite a photo and so I double tap on it to do this, but Flickr misreads my attempted double tap and thinks I want to open the photo up and see it large instead. I’m not really sure that there is a solution to that problem, but it’s one that frustrates me that I don’t have with Instagram.
I also find that if I look at my contact’s photos for more than about 10 minutes or so I run out of photos to look at and Flickr defaults “suggested” photos that I’ve already seen and favorited months ago. Sometimes I’ll be sitting on the train for more than 10 minutes, or working out, or doing something where I want to spend more than 10 minutes browsing my contact’s photos and wish that Flickr could expand the number of photos I’m allowed to see from my contacts on the mobile app.
I don’t use the camera or the camera roll on the Flickr app at all. I use my iPhone’s camera and then edit with Snapseed or Priime which offer far more robust editing capabilities.
5. The new album view. The new album view is more of a postscript to the new Flickr 4.0 than a part of the initial release. Earlier this week Flickr changed the primary album view on Flickr incorporating supersized huge photos into the album view layout. I really like this change. I think photos look sooooooo much better full-sized and large (which is one of the reasons why I enjoy Ello so much). Predictably many in the help forum hate this new view as they hate all change.
I do think the header in the new album view is too large. I also think that Flickr should only choose photos to enlarge that are high res originals and that fit the crop format of their large view. Small sized photos or mobile photos don’t look as good as DSLR photos when blown up huge. Also having a bad crop on a large view, really makes that view look bad.
In other news around Flickr’s new release, Bernardo Hernandez, who was managing Flickr resigned shortly after the new launch. I like Bernardo a lot and think that he was a very good leader for Flickr. After so many years in the wilderness with really ineffective management, I think Bernardo (and Markus Spiering before him) did a really good job promoting positive change at Flickr. I hope that whoever ends up replacing him is as strong and committed to the potential for what Flickr can become. After leaving Flickr, Bernardo did tweet that Flickr would be offering up support for RAW photos, this was the first time I’d seen this mentioned anywhere online and think that RAW support would be a huge positive for Flickr — especially given that Google is supposedly coming out with something new in the photo sharing space potentially as soon as the end of this month.
It’s been refreshing watching how serious a contender Flickr has become in the photo sharing world since Marissa Mayer took the helm at Yahoo. Along with Bernardo and Markus, she and everyone working on the Flickr team deserve a ton of credit for orchestrating such a remarkable turnaround over the course of the last several years. Flickr continues to get better and better and really is turning into something much better than I ever would have thought 4 years ago. I still can’t believe that I’ve been on Flickr over 10 years now and am definitely looking forward to the next 10.
Thomas Hawk Digital Connection


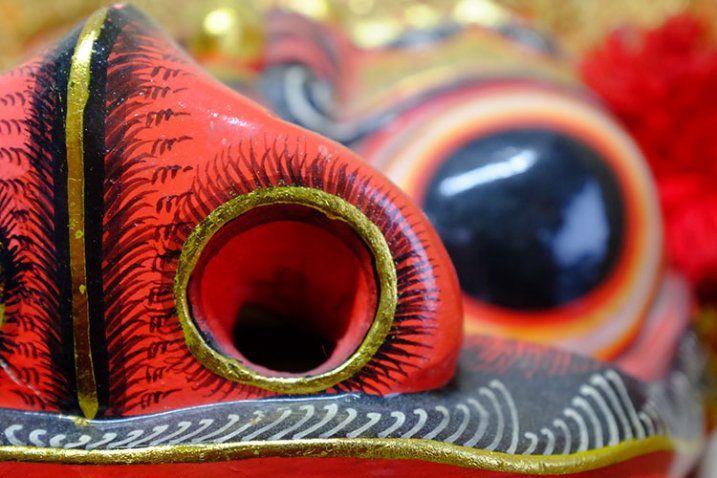


 Want to learn more about macro photography? Check out Ed Versosky’s


You must be logged in to post a comment.