LensRentals received its first Canon EOS Rebel T6s/760D and T6i/750D units and has identified a sensor problem with a number of those cameras. Out of about 10 copies of each model, 6 contained sensors with noticeable defects in their sensor stacks. These layers of glass on top of the sensor contain a pattern of dust-like spots or particles that are visible when studied under angled light. Read more
Month: May 2015
-
No Exit: Bricked Train Door Blocks German Subway Commuters
[ By WebUrbanist in Art & Installation & Sound. ]
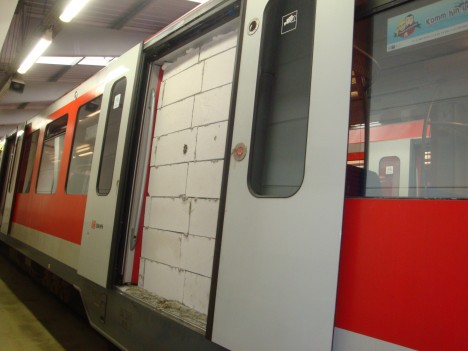
Presumed a prank at first by online skeptics, authorities have since confirmed that these precisely-stacked cinder blocks were indeed carefully assembled and bonded together to fully block the door of an S-Bahn train in Hamburg.
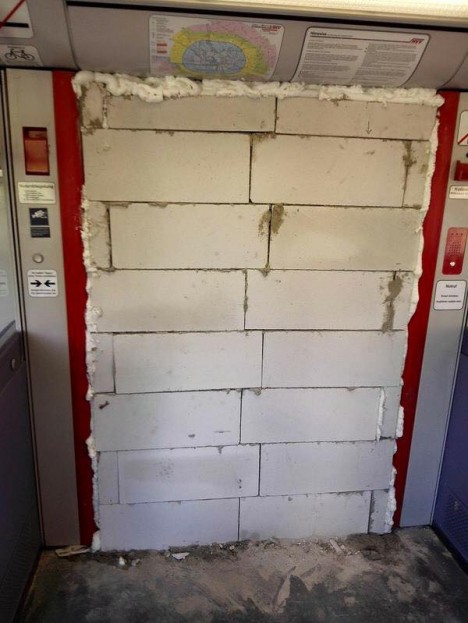
Placed inside the actual sliding doors, the bricks proved a surprise when the aperture slide open to reveal the blockage. Passengers who managed to board before the intervention was reported were forced to exit at an upcoming station while an investigation was performed and the problem ultimately fixed.
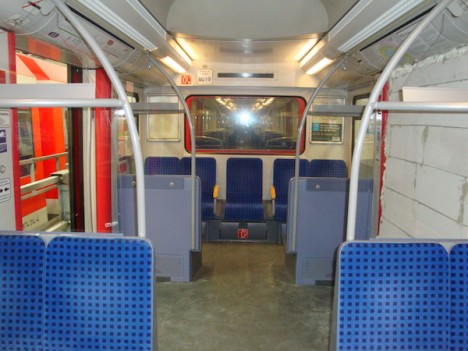
While some may be amused and no one was trapped inside the car, blocked by blocks, the impacts were significant for those faced with cleaning up after this vandalism. The train was routed to a depot and the wall carefully broken down piece by piece, the story ending 12 hours and an estimated 10,000 dollars later.
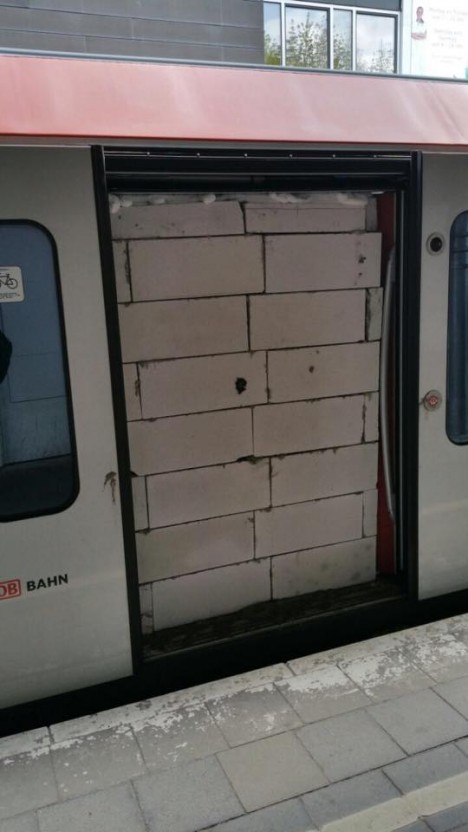
With no sign of the perpetrators, the biggest clue is the professionalism with which the wall was assembled, apparently by a team of people with construction expertise. With no one claiming credit, overtly or anonymously, one is left to wonder whether some reference to the Berlin Wall was intended or if this was an attempt at some other kind of art or message.
Want More? Click for Great Related Content on WebUrbanist:
Subway Parasite: Stealth Projector Lights Up Train Tunnels
Here to lighten the mood a bit during the duller parts of your nighttime or subterranean transit is a quirky little projector that suctions to vehicular shells.
Click Here to Read More »»
Graffiti Sites: Train, Wall, Street & Subway Photos
Though it’s found all over the world, graffiti tends to accumulate on the same spaces in each location. Most commonly: trains, walls, city streets, and subways.
Click Here to Read More »»
Transits Of Venus: 8 Women-Only Subway & Train Cars
Subway sandwich: good if you’re hungry, bad if you’re a female commuter. These 8 women-only transit cars offer groups of gals a grope-free rail road trip.
Click Here to Read More »»


[ By WebUrbanist in Art & Installation & Sound. ]
[ WebUrbanist | Archives | Galleries | Privacy | TOS ]
-
How to See the World as a Photographer
How often have you seen something, a group of people having fun, a sunset or some other picturesque scenario, and snapped a photo of it, only to end up disappointed in your end result? This can be discouraging, especially if you’ve been shooting all day and expect to find a bevy of great images. The problem is that your eyes Continue Reading
The post How to See the World as a Photographer appeared first on Photodoto.
-
Long Exposure Photography Without a Tripod
For me, as a travel photographer, the size and the weight of the photography equipment that I carry around is very important. Over the years, I learned how to carry only the items absolutely necessary for shooting in order to eliminate anything unessential.
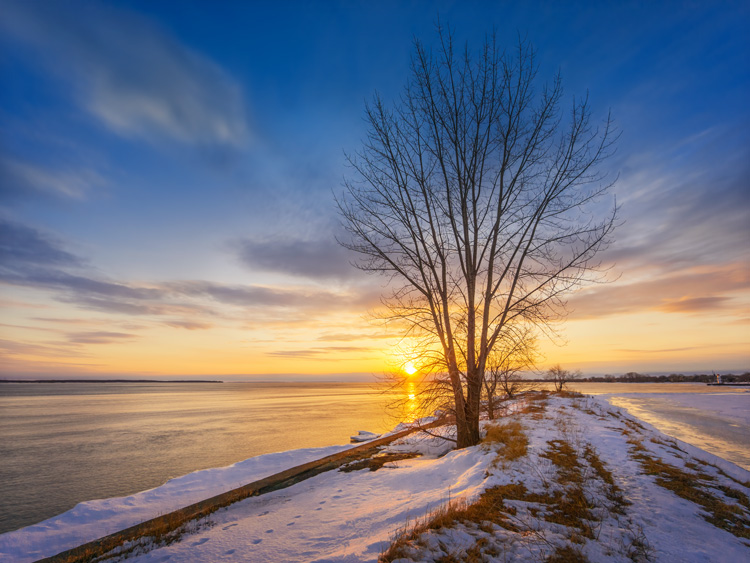
Long exposure photo shot without a tripod, using the Align+Blend technique.
I was able to replace some of the pieces of equipment with software. For example, I stopped using ND Graduated filters a few years ago. For me, it was easier to take bracketed shots and blend two images in Photoshop or simply use the graduated filter in Lightroom. Next, I left behind the remote trigger because I learned that using the two second delay function on the camera allowed me to achieve the same result without an extra piece of equipment.
A couple of months ago, I pulled the trigger on the biggest change in my photography universe when I switched from a Canon DSLR to a Sony Mirrorless (read my article here 5 Lessons Learned Switching from DSLR to Mirrorless for Travel Photography). That drastic switch resulted in cutting the weight and the size of the equipment I carry around by more than half.
During my latest photography trip to Hawaii and Northern California, I did quite a bit of hiking and realized that, after the switch to mirrorless, the biggest and by far the bulkiest, piece of equipment I carried was my tripod. I love my Feisol tripod because it is light, tall, and steady like a rock. But, sometimes it is just impossible to bring with me.
Even though I learned how to take bracketed shots handheld and merge them effectively to HDR in Photomatix and Photoshop HDR Pro (read Natural Looking HDR in Photoshop and Lightroom in 5 Easy Steps), without a tripod I still could not accomplish one of the most important types of photography, which is long exposure photography.
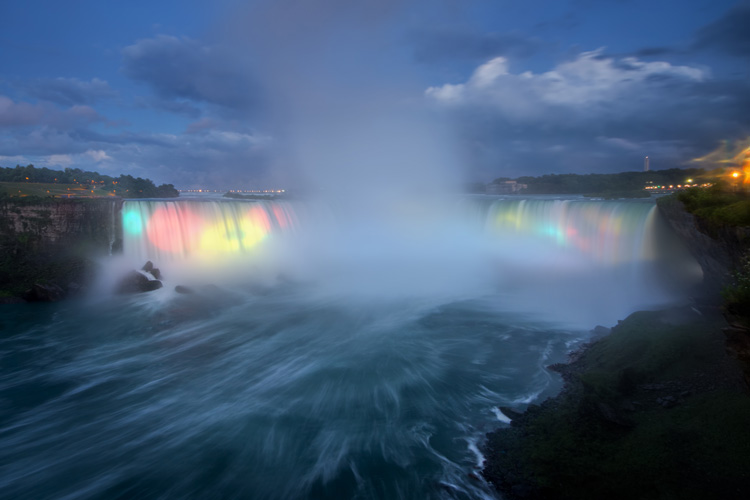
Long exposure photo – shot with a tripod.
I use long exposure photography quite a bit, especially when shooting seascapes, and of course, I have plenty of seascapes in my portfolio. Longer shutter speed allows me to achieve beautiful, smooth and silky looking water plus, it works just as well for the sky.
Lately, I’ve been experimenting with a few techniques in an attempt to achieve the same long exposure effect in the water and the sky by shooting handheld without a tripod. After I started to produce predictable results on a consistent basis, I am now ready to share the technique with you.
Shooting
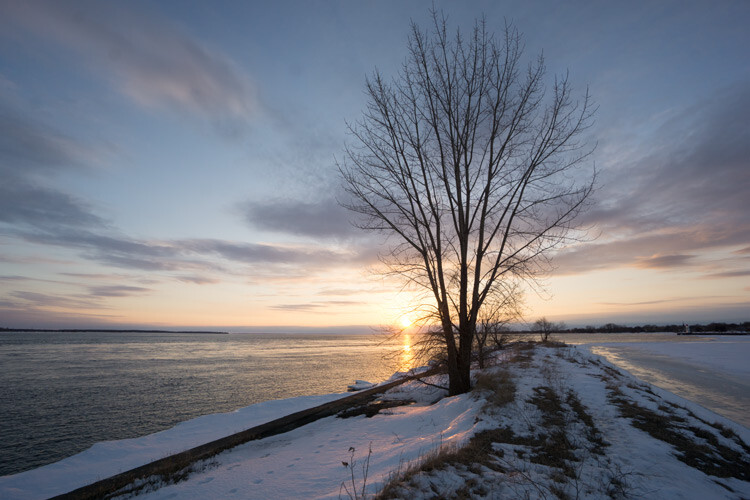
Below is the effect I achieved using my new technique that I call Align+Blend.
Normally, I shoot in bracketing mode, taking at least three exposures. In order to use the Align+Blend technique, I had to switch from bracketing mode (AEB) to the Single Shot Mode. I shot 10 consecutive shots of the scene, trying to be as steady as possible, without too many movements. I was shooting at an approximate speed of one shot per second and, it took me nine seconds to complete the series. In order to get the sharp images, I used a shutter speed of 1/200th of a second.
Single RAW image, unprocessed (1/200 sec).
That was it. The shooting part was done. The rest was accomplished in post-processing.
Processing
Step 1 Import
I imported the 10 RAW files into Lightroom.
Step 2 Process in LR
I applied one of my landscape presets to the entire set making sure that each image had an identical look (If you are interested you can download my free preset collection on my blog).
Step 3 Open as layers in Photoshop
I selected 10 images in Lightroom and opened them in Photoshop as layers in the same document (right/option click).

Step 4 Align Layers
I used the Auto Align Layers feature in Photoshop to align all 10 layers with Projection set to AUTO. The Auto Align is a fairly sophisticated tool, and Photoshop had no issue aligning all of the 10 individual layers.

Step 5 Convert to one Smart Object
I converted the 10 layers to one single Smart Object (right/option click).

Step 6 Set Stack Mode
I used the following command to blend the 10 original layers inside of the Smart Object. Layer > Smart Object > Stack Mode > Mean. This resulted in a long exposure effect by moving elements of the scene (water, sky).

Step 7 Fix any areas with issues using a layer mask
At the same time, the windy weather created some unwanted effects by moving tree branches and the grass in the foreground. To fix the blurry effects I placed one of the 10 original RAW images on top of the Smart Object layer and blended together two layers with the help of transparency (layer) masks. I used the area of the water and the sky from the smart object layer and, the rest of the scene from the single RAW layer.

I managed to achieve the long exposure effect without a tripod and without sacrificing the quality of the final image.
This technique also works as the replacement for Neutral Density filters. In broad daylight, even when you have a tripod but the smallest aperture (f/22) is still not small enough to slow down the shutter speed, take multiple shots and blend them together later in Photoshop in a similar manner.
Here’s the final image again:

googletag.cmd.push(function() {
tablet_slots.push( googletag.defineSlot( “/1005424/_dPSv4_tab-all-article-bottom_(300×250)”, [300, 250], “pb-ad-78623” ).addService( googletag.pubads() ) ); } );googletag.cmd.push(function() {
mobile_slots.push( googletag.defineSlot( “/1005424/_dPSv4_mob-all-article-bottom_(300×250)”, [300, 250], “pb-ad-78158” ).addService( googletag.pubads() ) ); } );The post Long Exposure Photography Without a Tripod by Viktor Elizarov appeared first on Digital Photography School.
-
Nikon D7200 First Impressions updated
Our Nikon D7200 First Impressions Review gets a significant update today with dynamic range test results, studio scene analysis and a detailed breakdown of the camera’s controls and menus. The D7200 is Nikon’s flagship crop-sensor DSLR, with a 24MP sensor, updated 51-point AF system and much-improved continuous shooting buffer depth. We’re hard at work on the full review – take a look at how the D7200 has performed so far in our testing. Read more
-
Leica M Monochrom Type 246 offers live view and boosted ISO range
Leica has introduced an updated version of its black-and-white-only digital rangefinder. The M-Monochrom Typ 246 uses a full frame 24MP CMOS sensor that, like its predecessor, has no color filter array. The model that came before it used an 18MP CCD sensor, so the upgrade to a CMOS chip provides several improvements such as live view and video recording capabilities. Read more