RSS
 

Archive for May, 2015

Metz mecablitz 26 AF-1 Quick Review

07 May

While plenty of DSLRs also have a built-in flash, the feature has been out of favor with mirrorless manufacturers, prioritizing miniaturization. This is where the Metz mecablitz 26 AF-1 digital steps in. Small compared to standard hotshoe flash units, it’s still a good deal larger than those that come in the box with most mirrorless cameras. Read review

Articles: Digital Photography Review (dpreview.com)

 
Comments Off on Metz mecablitz 26 AF-1 Quick Review

Posted in Uncategorized


Creative Ways toPhotograph FlowersIn Your Home

07 May

For many of you, the harshness of winter has finally come to a close. (Yay!)

In its place you now have the beauty of spring, which means flowers are everywhere.

We’ve already starting making the most of this new and colorful season with our recent guide on frozen flower photography.

Now we’re gonna share four more ways to get creative with flower photos right in your own home.

So go pick some flowers and let’s get shooting!

Creative Ways to Photo Flowers Indoors

(…)
Read the rest of Creative Ways to
Photograph Flowers
In Your Home (497 words)


© Taylor for Photojojo, 2015. |
Permalink |
No comment |
Add to
Photograph Flowers
In Your Home”>del.icio.us

Post tags:


Photojojo

 
Comments Off on Creative Ways toPhotograph FlowersIn Your Home

Posted in Equipment


Canon PowerShot SX60 HS real-world sample gallery posted

07 May

Canon’s flagship superzoom is its PowerShot SX60 HS, which sports a 21-1365mm equivalent lens – not quite Coolpix P900 territory but still very impressive. It also features a fully articulating LCD, Wi-Fi with NFC, and 1080/60p video. We’ve spent some time shooting with the SX60 and have put together a gallery of rusting trucks, sunsets, snowy owls and even snowier mountains. See gallery

Articles: Digital Photography Review (dpreview.com)

 
Comments Off on Canon PowerShot SX60 HS real-world sample gallery posted

Posted in Uncategorized


Die junge Fotografie und die Romantik I

07 May

© Marit Beer

In den letzten Jahren tauchen bestimmte Motive immer wieder in der jungen Fotografie auf. Wobei der Begriff „junge Fotografie“ nicht als zu statisch angesehen und überstrapaziert werden sollte. Aber einige dieser Motive, die stark an den Leitgedanken der Romantik erinnern, möchte ich ein wenig mehr beleuchten, da die Häufigkeit ihres Auftauchens und die Reaktionen darauf kontroverser nicht sein könnten.
kwerfeldein – Fotografie Magazin | Fotocommunity

 
Comments Off on Die junge Fotografie und die Romantik I

Posted in Equipment


Cardboard Contradictions: 13 Clever Corrugated Creations

07 May

[ By Steph in Design & Products & Packaging. ]

cardboard shigeru ban 2

Flimsy and disposable, cardboard doesn’t exactly seem like a natural fit for applications like architecture, furniture, surfboards or bike helmets, yet these 13 unexpected applications show off its hidden strength. These products and structures take advantage of the structural properties, light weight and affordability of corrugated cardboard, with surprising results.

Cardboard Surfboard

cardboard surfboard 1

cardboard surfboard 2

Enest Packaging Solutions teamed up with Signal Snowboards to create a surfboard that won’t disintegrate in the water, despite being made almost entirely out of cardboard. The board features a cardboard honeycomb core surrounded by a thin layer of transparent fiberglass indicated with waterproof polyurethane. The honeycomb structure is so stiff, it can be sanded like a foam surfboard, enabling it to be shaped.

Cardboard Foosball Table

cardboard foosball table

cardboard foosball table 2

‘Kartoni’ is a regulation-sized foosball table using cardboard for almost its entire construction, other than the wooden handles. It can be quickly assembled without glue, fasteners or tools and you can even print out your own custom faces and logos for the players. The table has built-in cup and smartphone holders.

Re-Fold Cardboard Standing Desk

cardboard standing desk

cardboard standing desk 2

You might wonder just how strong and stable a cardboard desk could actually be, but the Refold can support the full weight of an average-sized adult. This portable standing desk adapts to changing needs in a workplace and could also be used by students, designers, retailers and emergency responders. It folds and slots together in less than two minutes without tape or connectors of any kind.

Cardboard Bike Helmet

cardboard bike helmet 1

cardboard bike helmet 2

You might think woodpeckers would get brain damage from all that head movement, but their skulls have adapted to withstand repeated heavy impact with a corrugated cartilage structure that separates the beak from the skull. This naturally-occurring design inspired the creation of the Kranium, a helmet with a cardboard structure that allows a range of movement to help absorb force three times better than expanded polystyrene while remaining 15 percent lighter.

An Entire Pop-Up Cardboard Office

cardboard pop up office 3

cardboard pop up office 2

An entire home office appears out of a flat sheet of cardboard when it’s opened and laid flat on the ground. This all-in-one cardboard furniture set includes a desk and a chair. Unlike the portable standing desk, however, this design is just for show, and can’t actually support much weight.

Simple Cardboard Cart for Moving Boxes

cardboard cart parts

cardboard cart parts 2

A handle, wheels and a few connectors are all you need to easily move big, heavy boxes from one place to another – and they’re made of cardboard, too. The Move-It Kit is a set of lightweight, inexpensive self-adhesive parts envisioned especially for people who have to walk uncomfortable distances with boxes in tow. Can’t you just see these being sold at IKEA?

Google Cardboard

cardboard google 3

cardboard google 2

cardboard google 1

Sometimes cardboard is integrated into technology, too, becoming the product itself rather than just the packaging. Experience virtual reality on your smartphone with Google Cardboard, a simple viewer that works with accompanying Google Cardboard apps that add new layers to the world around you. Buy a pre-made one in a variety of colors and designs for $ 20-$ 30, or make your own using a provided template.

Next Page – Click Below to Read More:
Cardboard Contradictions 13 Clever Corrugated Creations

Share on Facebook


[ By Steph in Design & Products & Packaging. ]

[ WebUrbanist | Archives | Galleries | Privacy | TOS ]


WebUrbanist

 
Comments Off on Cardboard Contradictions: 13 Clever Corrugated Creations

Posted in Creativity


Exploring Abstract Photography: History, Philosophy, Inspiration

07 May

How do you as an artist express an emotion, an idea or a concept without referring back to something already loaded with meaning? How can you explore new visual territory hidden within old subjects you know well? Or what can you do to find some new inspiration and break out of your photographic rut? Abstract photography has the potential to be Continue Reading

The post Exploring Abstract Photography: History, Philosophy, Inspiration appeared first on Photodoto.


Photodoto

 
Comments Off on Exploring Abstract Photography: History, Philosophy, Inspiration

Posted in Photography


Exposure Lock Button – What is it and How to Use it?

07 May

Nestled quietly on the back of most cameras is a button that is often ignored or misunderstood, particularly by those who have recently upgraded to a DSLR or Mirrorless camera. It’s the Exposure Lock button, and it can be a tremendous asset to photographers who are looking for ways to get more control over their cameras and ultimately their photography in general.

students

Using the exposure lock button helped me get the correct exposure on this picture of two students studying for final exams.

To understand what this button does it’s helpful to know a bit about how your camera calculates the exposure using aperture, shutter speed, and ISO sensitivity.

In Full Automatic mode these are all handled by the camera itself, producing images that are often pretty nice but can sometimes turn out too dark, too bright, or otherwise not exactly how you intended. In Manual mode you are required to set all three parameters yourself, which can sound intimidating at first, but is quite easy once you get the hang of it. However if you shoot in one of the semi-automatic modes like Aperture Priority, Shutter Priority, or Program Auto you have a high degree of control while still letting your camera figure out a few things too.

In Aperture Priority you set the aperture and ISO, while your camera figures out the shutter speed to use for a properly exposed photo. But, in Shutter Priority you set the shutter speed and ISO to use, while letting your camera set the aperture. In these so-called Creative modes the automatic parameters (whichever settings are handled by your camera, not you) are constantly changing depending on what you point your camera at in order to get a nice, even overall exposure.

stairway

I didn’t have much time to get this shot, so using the Exposure Lock button was a quick way for me to get the image I was looking for.

This is where the Exposure Lock button comes in; it freezes whichever exposure parameter was set by your camera until you take a picture. At first this might sound like a silly thing to do but makes a bit more sense when you understand how it can be used.

I shot the picture below in Aperture Priority with my aperture set to f/2.8 while my camera selected a shutter speed of 1/500. Unfortunately my camera was looking at the entire scene, not just the subject, and chose a shutter speed that resulted in my subject being far too dark. The tradeoff was that the background was properly exposed, but my camera did not know that I was more concerned with the teddy bear than the scenery outside. To correct the problem I simply pointed my camera down at a darker spot in the foreground, pressed the Exposure Lock button, and held it down while recomposing my shot to the original framing. When I locked the exposure my camera selected a slower shutter speed of 1/30 which resulted in my subject being well lit even though the background elements were a bit too bright.

bear-underexposed

I shot this in Aperture Priority at f/2.8 but with the bright light through the window, my camera picked a shutter speed of 1/500 second. The outside looks great, but my subject is horribly underexposed.

Aperture Priority, f/2.8, 1/30, ISO 200.

By pointing my camera down, locking the exposure, and then recomposing the result was f/2.8 with a shutter speed of 1/30 second. Far too slow for the background to be properly exposed, but my subject looks just fine.

You might look at this photo and wonder where the background went, but remember what happened in the original when the background was visible – the subject was too dark. By locking the exposure such that my subject was well lit, the background ended up far too bright. It worked out just how I wanted, because it was the bear that mattered to me, and not the scenery outside the window. I could have also employed another method to get my subject properly exposed such as center-weighted metering or adjusting the Exposure Compensation, but in this case I found the Exposure Lock function to be quick and easy enough to get the job done. It’s a handy tool to have in your back pocket for those times when you need to quickly over or under expose your shot.

rooftop

The Exposure Lock button came in handy here as well, and helped me get both a background and foreground that are well lit.

If you’re interested in trying your hand at Exposure Lock, most camera manufacturers make it fairly painless. On Nikon cameras the button says “AE-L/AF-L” and is located about an inch from the right-hand side of the camera (on the back), while Canon’s button is a bit smaller and marked with an asterisk. You can even customize it on some cameras so that exposure is locked until you take a picture or as long as you physically press the button. Sony, Pentax, Olympus, and others have this button too but its exact appearance and location varies depending on the manufacturer and model.

exposure-lock-button

Most Nikon bodies have the Exposure Lock button in the top-right corner, but the exact location on your camera may be a bit different.

The Exposure Lock button is a nice tool to have at your disposal, but it’s not quite the same as shooting in Manual mode while reading your light meter and histogram to make sure your exposure is nailed precisely how you want it. Still, it’s a fantastic way to adjust your exposure quickly, without changing any metering modes or other shooting parameters. I often find myself using it when I need to over or under expose the scene in a pinch, and once you get the hang of it you might find it useful in a similar fashion.

Are you a fan of the Exposure Lock button, or do you have any other photography tips to help your curious camera-owning counterparts get photos that are properly exposed? Leave your thoughts in the comment section below.

googletag.cmd.push(function() {
tablet_slots.push( googletag.defineSlot( “/1005424/_dPSv4_tab-all-article-bottom_(300×250)”, [300, 250], “pb-ad-78623” ).addService( googletag.pubads() ) ); } );

googletag.cmd.push(function() {
mobile_slots.push( googletag.defineSlot( “/1005424/_dPSv4_mob-all-article-bottom_(300×250)”, [300, 250], “pb-ad-78158” ).addService( googletag.pubads() ) ); } );

The post Exposure Lock Button – What is it and How to Use it? by Simon Ringsmuth appeared first on Digital Photography School.


Digital Photography School

 
Comments Off on Exposure Lock Button – What is it and How to Use it?

Posted in Photography


How to Shoot in Low-Light Conditions Without Using Flash

07 May

Photography is all about capturing the subject beautifully in the available light. Sometimes as the photographer you have more than optimum light (e.g., bright sunlight, halogens, etc.) to work with while some other times you have to work in suboptimal or low-light conditions. If you are not a pro photographer then it is always a great challenge, and sometimes it’s a nightmare, to capture great shots in low-light conditions.

Aperture 1

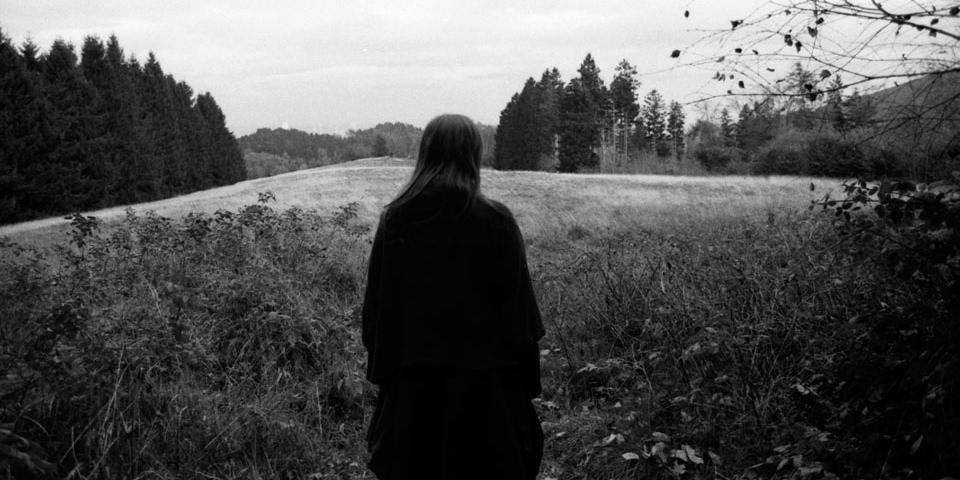
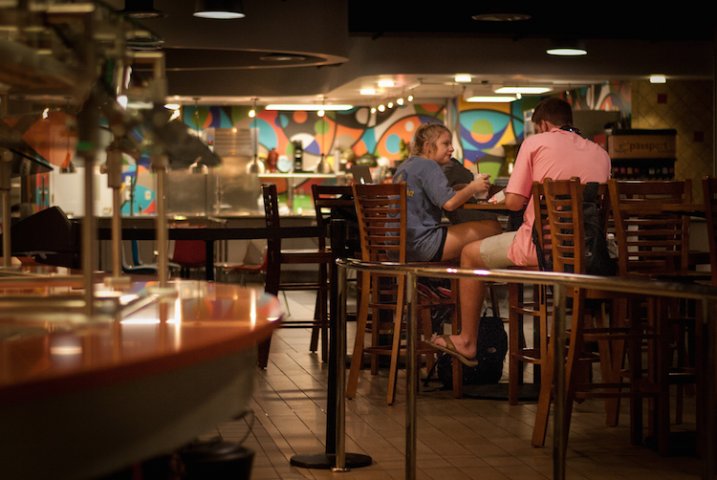
Exposure info: f/1.8, 1/50th at ISO 3200

In order to face the challenges that low-light conditions come with, I will be sharing five techniques that you can use to capture your subjects, effectively. For better understanding, I have divided these techniques into two categories: technical and non-technical considerations.

Technical considerations

  • Use of high ISO
  • Use of large aperture
  • Use of slow shutter speed

Non-technical considerations

  • Capture image(s) in raw format
  • Use of remote shutter and a tripod

Use of high ISO

ISO is the sensitivity of your camera (sensor) towards available light. It is measured in numbers (for example 80, 100, 200, 400 etc.) The higher the number, the greater the sensitivity of your camera is towards light and thus, more light can be captured.

The amount of light captured is directly proportional to the selected ISO. In other words, at ISO 200 you can capture double the light than you can at ISO 100. Similarly, at ISO 800 you can capture 8 times more light than at ISO 100. Thus, in low-light conditions, you should use a higher ISO in order to capture your subject effectively.

Iso 2

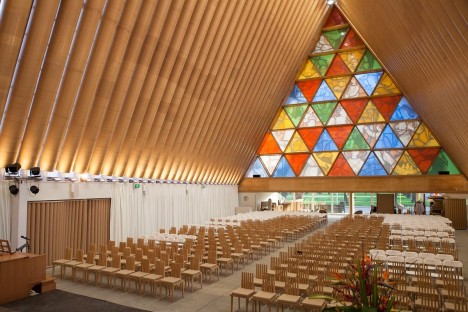
Exposure info: f/3.2, 1/5th at ISO 1600

Limitations of using a high ISO

As it also impacts the image quality that your camera (sensor) produces, ISO comes with its own limitations. By image quality, I mean, the ability of your camera to produce noise (grain). At a higher ISO your camera will always produce more noise (grain) than at a lower ISO. So, you will have to test and check what the ideal ISO setting is (for your camera) at which you can capture your subject with optimum light, along with maintaining good image quality.

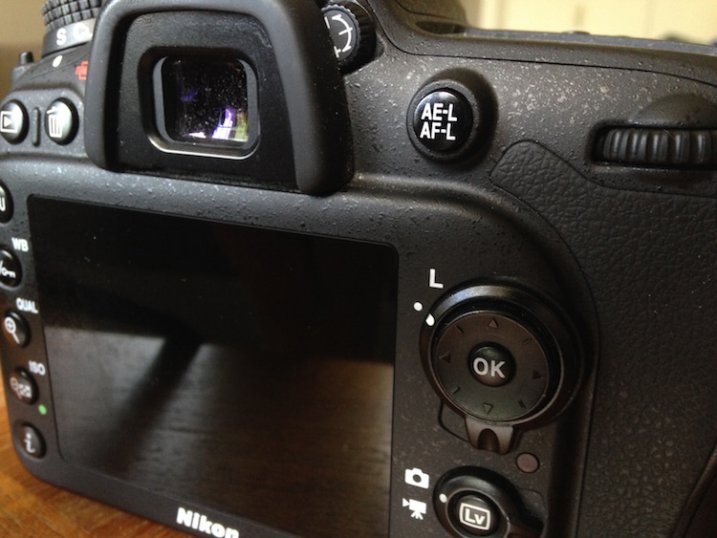
NOTE: ISO is a feature of the camera and not the lens that you are using.

Iso 1

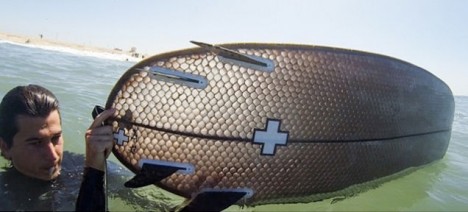
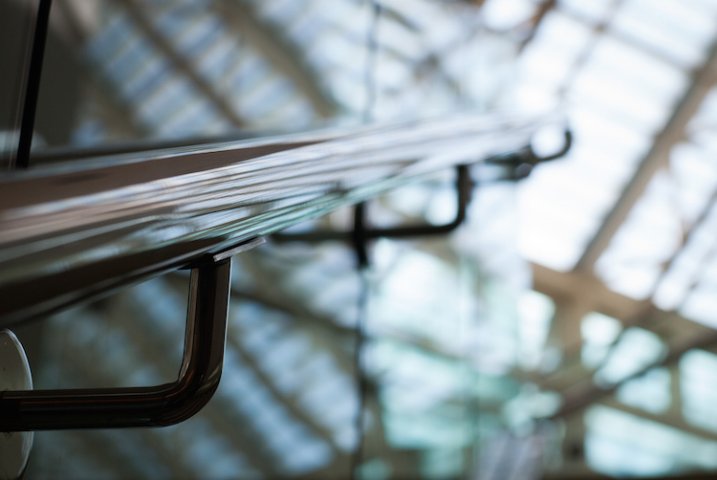
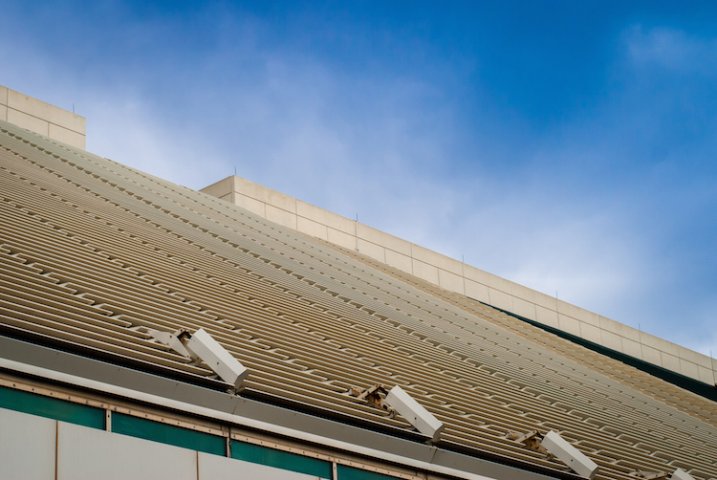
Exposure info: f/5, 1/125th at ISO 2500

Use of large aperture

Aperture is the opening (eye or hole) in the lens, through which light enters into the camera. Aperture size is also represented in numbers (for e.g., f/1.4, f/1.8, f/2.2, f/2.8, etc). The smaller the number, the wider the opening is and thus, more light can be captured.

The amount of light captured is inversely proportional to the selected aperture. Say, for a lens with aperture values of f/1.4, f/1.8, f/2.2, f/2.8, f/3.3, f/4.0 etc., the amount of light captured at f/1.4 will be double the light than at aperture f/1.8. Similarly, at f/1.4 you can capture 8 times more light than at f/2.8. Thus, in low-light conditions, you should use a larger aperture (smaller value) in order to capture your subject effectively.

Aperture 2

Exposure info: f/1.8, 1/5th at ISO 400

Limitations of using a large aperture

As it also impacts the depth of field (sharpness or clear visibility) of the subject in your image, aperture comes with its own limitations. By depth of field, I mean, the ability of your lens to keep the subject in focus.

Generally, using a small aperture (higher f/number) you will be able to keep your entire subject in focus which is not possible using a large aperture (lower f/number). Again, you will have to test and check what the ideal aperture size is at which you can capture your subject with optimum light, keeping it in focus.

NOTE: Aperture is a feature of the lens and not the camera that you are using.

Use of slow shutter speed

Shutter speed, also known as camera exposure, is the length of time a camera shutter remains open in order to capture the light. Shutter speed is also represented in numbers (for e.g. 1/2, 1/4, 1/8, 1/16, 1/32, 1/64, 1/125, 1/250, etc.) The higher the number, the longer the camera shutter remains open and thus, more light can be captured.

The amount of light captured is directly proportional to the selected shutter speed. For a camera with shutter speed values of 1/4, 1/8, 1/16, 1/32, 1/64, 1/125 etc., the light captured at 1/2 second is double the amount of light than that at a speed of 1/4 second. Similarly, at a shutter speed of 1/2 you can capture 8 times more light than at a shutter speed of 1/16th. Thus, in low-light conditions, you should use a slower shutter speed in order to capture your subject effectively.

Shutter speed 2

Exposure info: f/3.2, 1 second at ISO 400

Limitations of using a slow shutter speed

As it also impacts the motion or movement of your subject, shutter speed comes with limitations. If you want to freeze the motion of your subject then you should use a higher shutter speed (e.g., 1/250, 1/500, 1/1000, etc.) While if you want to capture your subject with a motion blur then you should use a slower shutter speed (e.g., 1/8, 1/4, ½, etc.) Once again, you will have to test and check what the ideal shutter speed is at which you can capture your subject with optimum light, freezing or blurring its motion.

Shutter speed 1

Exposure info: f/10, for 8 seconds at ISO 200

NOTE: Shutter speed is a feature of the camera and not the lens that you are using.

Capture images in Raw format

A Raw image captures much more detail and information about the subject that you are shooting than a JPEG file. You get the luxury of improving the exposure, color, sharpness, etc., of the subject (using an editing software like Adobe Photoshop or Lightroom) while still preserving all the detail of the subject which is usually not possible while editing a JPEG file.

Raw 1 1

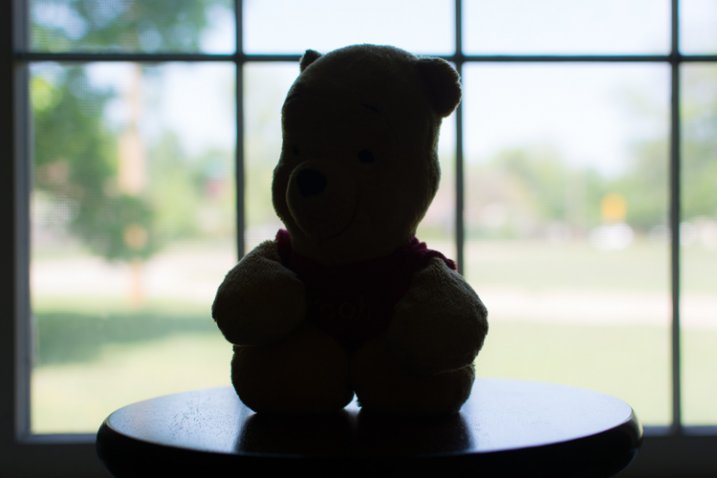
Exposure: f/3.2, 1/5th at ISO 400, before editing

Raw 2

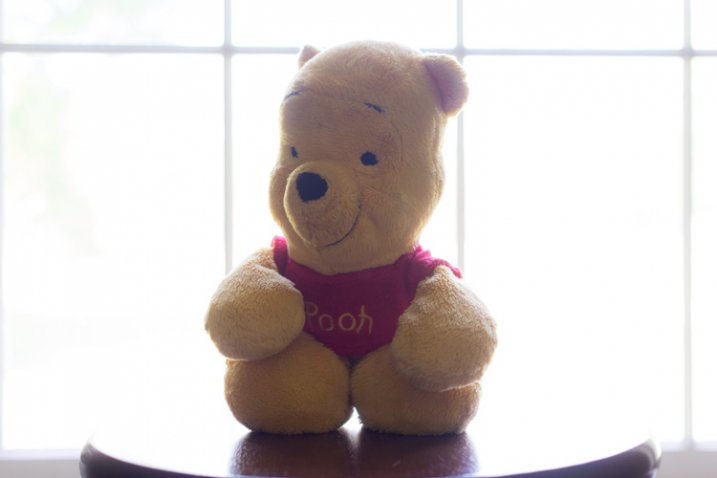
Exposure: f/3.2, 1/5th at ISO 400, after editing

Note: the editing has been taken overly far just to show you the amount of detail in the Raw file.

Limitations of capturing images in raw format

  • Not all cameras can produce images in Raw format. Only selected higher-end cameras can. Most SLRs and Mirrorless camera can shoot Raw format as well as a few point and shoot models (check your manual if you are unsure, look for file formats)
  • Size of a Raw image is usually 4-5 times larger than the JPEG file that the camera produces. Thus, you will need more space for storing these images.
  • Only a handful of software can read and recognize Raw format files. Thus, you need specialized software (like Adobe Photoshop, Lightroom, etc.) to edit these images.
Raw 1

Exposure: f/2, 160th at ISO 2200

NOTE: I believe that capturing images in raw format comes with more advantages than disadvantages and that it is always better to shoot in Raw format.

Use of remote shutter release and a tripod

If you want to capture a stationary or slow moving subject in low-light conditions then it is always better to do so using a remote shutter release and a tripod. This will help you avoid possible camera shake and you will have a greater chance of capturing your subject, effectively.

NOTE: While most of the cameras can be mounted on a tripod, a smaller fraction of them can be used syncing with a remote shutter.

Conclusion

I have discussed in this article five techniques which you can use in order to take great photographs in low-light conditions. These techniques are: use of higher ISO, use of larger aperture, use of slower shutter speed, capturing images in Raw format and use of a remote shutter and a tripod. Almost all these techniques come with limitations, but they are also very effective, if tested properly for the camera and lens combination that you are using.

Which particular technique do you use for taking those challenging shots in low-light conditions? Did I miss any other technique which can be equally effective? I would love to have your thoughts regarding this issue.

googletag.cmd.push(function() {
tablet_slots.push( googletag.defineSlot( “/1005424/_dPSv4_tab-all-article-bottom_(300×250)”, [300, 250], “pb-ad-78623” ).addService( googletag.pubads() ) ); } );

googletag.cmd.push(function() {
mobile_slots.push( googletag.defineSlot( “/1005424/_dPSv4_mob-all-article-bottom_(300×250)”, [300, 250], “pb-ad-78158” ).addService( googletag.pubads() ) ); } );

The post How to Shoot in Low-Light Conditions Without Using Flash by Anshul Sukhwal appeared first on Digital Photography School.


Digital Photography School

 
Comments Off on How to Shoot in Low-Light Conditions Without Using Flash

Posted in Photography


Samsung Galaxy S6 units found to be using different image sensors

07 May

When the Galaxy S6 and S6 Edge were launched earlier this year there was no talk of the ISOCELL technology previously used by the Galaxy S5’s and Note 4’s in-house image sensors, so it was believed the 16MP 1/2.6 CMOS chip in the S6 was provided by Sony. However, rumors have emerged that in some units Samsung sensors are used instead of the Sony variant, and a company spokesperson has confirmed that different sensors are used. Read more

Articles: Digital Photography Review (dpreview.com)

 
Comments Off on Samsung Galaxy S6 units found to be using different image sensors

Posted in Uncategorized


6. Mai 2015

06 May

Das Bild des Tages von: Konrad Winkler

Felsen ragt aus Wald heraus

Im Ausblick: Ein verrücktes Foto, ein Tierbuch und Opernhäuser.
kwerfeldein – Fotografie Magazin | Fotocommunity

 
Comments Off on 6. Mai 2015

Posted in Equipment