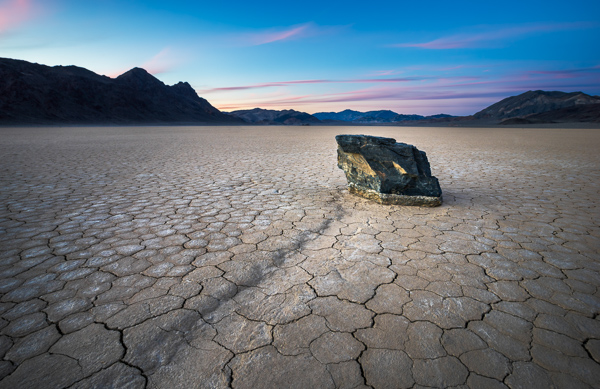
A hard graduated neutral density filter worked great here to darken the sky.
There are three types of photographers in the world; those that try to get it right in camera, those that simply rely on post-processing, and those who believe that both mindsets together lead to the best possible outcome. I try to always keep the mindset of that third type. If I can get everything right in camera (and save minutes or even hours in post) I will. I also have always loved post-processing and the art of making an image come to life. When shooting landscapes, you are more often than not at the mercy of mother nature. You can certainly schedule your time wisely and shoot at the best times of day but that doesn’t always mean that you’ll be able to capture everything in camera, as it is.
I’ve been using filters in one way or another for the better part of four years now. I started off with those bloody screw in filters (my gosh were those a pain in the rear). I remember very vividly just how frustrating it was to need a separate filter for each and every lens. I also remember how long it took to get to a scene, set up my tripod, look at the scene, decide I needed a filter, realize the filter I needed doesn’t fit the lens I had on, switch lenses, get the filter out of its case, screw it on, refocus and then finally take a shot.
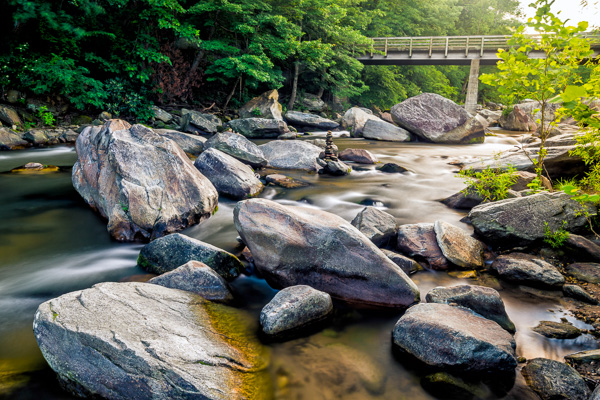
I used a my Formatt-Hitech 105mm circular polarizer here to remove glare from the rocks and water. The images without the filter were virtually unusable.
My brief stint with LEE Filters
After giving up on the screw-in filters, I eventually discovered the LEE Filter system. Those LEE filters are dang near impossible to get your hands on. I had to put my name on a waiting list at a camera store just to get the foundation system to attach the filters to my lenses. I then had to buy my filters on eBay and pay over retail to get them. My absolute favorite filter from LEE was (and still is) the Big Stopper. The Big Stopper is a 10 stop neutral density filter that will slow your shutter speeds down by…well…10 stops. This is a long exposure filter that is meant to slow time down drastically. You can easily get one to two minute exposures in broad daylight. The problem with the Big Stopper is that it’s a glass filter. This means that you have to be very careful with it and any time it’s on your person, you have to be extra cautious.

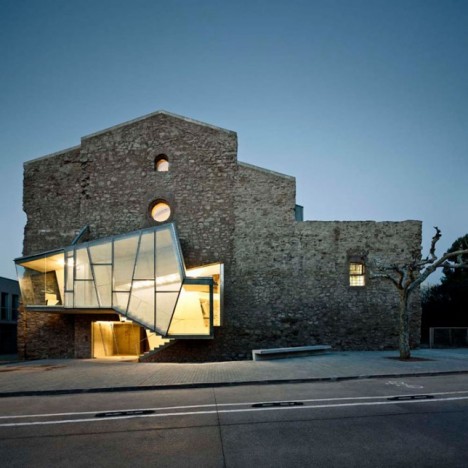
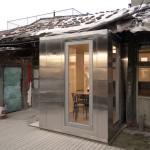
This two minute exposure caused the hundreds of tourists in the scene to disappear completely! © James Brandon
So what went wrong with LEE? Well, I’ll tell you…
Back in 2013, I was in California and was traveling up the coast from San Luis Obispo to San Francisco with my buddy Brian Matiash. We made it up to Big Sur and were trying to get down to Pfeiffer Beach for sunset. As we made our way up Highway 1, we pulled over to photograph Big Creek Bridge. I decided to put my Big Stopper to good use and started grabbing some long exposures of the bridge with the waves crashing against the shore below. I got a few shots where I was standing but soon decided to switch lenses and try something else. When I’m out in the field and need to switch lenses, I always point my camera down to the ground so that minimal dust will get into the censor during the swap. I pointed the camera down toward the ground (while still on the tripod) and then reached for my filter pouch to take off my Big Stopper before changing lenses. That’s when it happened. I felt a big thud against my shoe and then heard the terrible sound of glass hitting the gravel beneath my feet. Ugh…
It turns out the LEE filter holder can’t support the weight of a heavy Big Stopper. I’m not sure if this is a design flaw or what, but it certainly seems like oversight to me. With LEE filters (just like Formatt-Hitech) you have to screw an adaptor onto the lens you’re using (I just leave these adaptors screwed on most of the time). The filter holder then clips onto the adaptor via a pull pin on one side. This pull pin is angled away from the lens to match the shape of the ring adaptor. Because of the angle of this pull pin, you can actually just pull the filter holder off of the adaptor with surprisingly little force. Of course this will never happen if your camera is pointed out toward the horizon, but who among us never points their camera down? I got lucky that day because the filter hit my shoe first before hitting the ground. It didn’t bust the entire filter but one of the corners did however get a big chunk taken out of it.
My introduction to Formatt-Hitech
Colby Brown has been a friend of mine for a couple years now. I met him during the very, very early days of Google+ when a group of five or six of us would do hangouts almost daily. I have had the pleasure of watching his career virtually explode over this time and was really excited to see him land a signature edition filter kit with Formatt-Hitech. I’ll be the first to admit, I was pretty skeptical about trying any other type of filter besides LEE. Still to this day, I love my Big Stopper. However, that “event” in Big Sur really left me uneasy and nervous about using the LEE holder. So when Colby offered to send me his kit to review, I said what the heck, let’s see how it stacks up (see what I did there?) against LEE.
Unboxing
Don’t worry, I’m not posting one of those monotonous unboxing videos where I show you how the filters were packaged or how much paperwork is included. I’m including this section because of one thing; when I pulled the Formatt-Hitech filter holder out of the box, I knew instantly that it was better than LEE. It just feels better. It’s aluminum instead of plastic for one, but on top of that – the filter holder has a fastening screw to attach to the adapter ring instead of the little notched pull tab that’s on the LEE system. At first I wasn’t really sure this would be any better because, after all, you’re essentially just tightening the filter holder onto the adapter ring with a single screw. As it turns out though, the filter holder fits very snuggly onto the adapter ring, so when you tighten the screw the filters aren’t going anywhere. It takes a very strong push to cause it to budge at all, and no amount of filters will ever weigh that much. The LEE, on the other hand, requires surprisingly little force (see the video above).
Quality between LEE and Formatt-Hitech
The Colby Brown Signature Edition Landscape Filter Kit comes with basically everything you need to get started and stay satisfied using filters in the field for a very long time. I went all out and got the 100mm Premier Kit which comes with two graduated ND filters, a 6 Stop ND filter, the aluminum filter holder and to top it all off, a 105mm circular polarizer. Everything in the kit is extremely high quality and I use the filters on virtually every photo trip I take.
In all honesty, there isn’t a massive difference in the quality of images that come from either filter. Some will disagree with me on this of course. The LEE Big Stopper puts out a very obvious blue color cast in your images while Formatt-Hitechs new Firecrest filters put out virtually zero color cast. I’m actually quite fond of that blue/cool color cast though and have left it in several of my images to some extent. It’s also very easy to correct with a simple white balance adjustment so I’ve never considered it a huge deal.
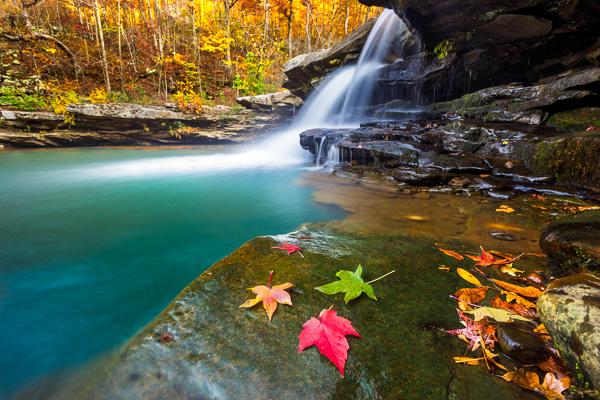
I used my Formatt-Hitech 105mm Circular Polarizer for this shot to remove the glare from the rocks in the foreground.
Where Formatt-Hitech wins
There are three main areas where Formatt-Hitech Filters excel and where LEE falls short.
- The first of those areas is the one I already covered; a superior filter holding system constructed of durable aluminum and a tightening mechanism that won’t fail in the field when pointed at a downward angle.
- The second area where Formatt-Hitech wins is availability. The simply produce and ship enough filters so photographers like you and me don’t have to be put on waiting lists, or pay over retail to acquire their products.
- The third reason Formatt-Hitech takes the cake is that they continue to push to boundaries of what filters can do. They continue to innovate and advance. Their new line of Firecrest filters can stop down a scene by up to 16 stops! That means you could shoot in broad daylight at f/8, ISO 100 and a shutter speed of 1/1000th of a second and as soon as you slide that filter on, you’re shutter speed will drop all the way down to 1 minute. That’s insane!

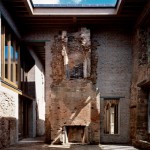
Here I used my 10 stop neutral density filter to slow the shutter speed way down. This was a 25 second exposure taken before sunset. The clouds coming over the Sierras in the background is actually smoke from the rim fire that occurred back in 2013.
Conclusion
Both LEE and Formatt-Hitech make great filters (although Formatt-Hitech has a slight edge in my opinion). However, the fact that I simply can’t trust the filter holder from LEE was enough to make me look at other options. Sure, I could have just stuck with LEE filters and got a new filter holder system, but I like to be all in with the brands I associate with in the industry. The failure of the LEE system caused me to look into Formatt-Hitechs options and when I did, I was pleasantly surprised to find a superior company making superior products. I’m not sponsored by Formatt-Hitech, I just honestly believe their products are top notch. Let me know if you have any questions below.
googletag.cmd.push(function() {
tablet_slots.push( googletag.defineSlot( “/1005424/_dPSv4_tab-all-article-bottom_(300×250)”, [300, 250], “pb-ad-78623” ).addService( googletag.pubads() ) ); } );
googletag.cmd.push(function() {
mobile_slots.push( googletag.defineSlot( “/1005424/_dPSv4_mob-all-article-bottom_(300×250)”, [300, 250], “pb-ad-78158” ).addService( googletag.pubads() ) ); } );
The post Why I Switched From LEE Filters to Formatt-Hitech for Landscape Photography by James Brandon appeared first on Digital Photography School.


 Mirrorless cameras are small, compact, and very well built. They are made with high grade materials, and just by holding them you know you’re not using a generic point and shoot. To some photographers this is a huge selling point as they look to get away from their heavy camera gear. It also makes it easier to blend into the background without a big DSLR pointed at someone. Some of these cameras are even fully weather sealed, or have a flip out display, and just about all of them have a hot shoe for an external flash.


You must be logged in to post a comment.