RSS
 

Archive for January, 2015

How to Capture Fantastic Photos in Low Light

21 Jan

It is a simple, unavoidable fact that light is necessary for photography. Life, however, doesn’t restrict itself to times when the sun is bright and plentiful. Unless you only shoot in a controlled environment, chances are you’re going to want to takes photos when the lighting is less than ideal. You are not powerless, though. It is possible to make Continue Reading

The post How to Capture Fantastic Photos in Low Light appeared first on Photodoto.


Photodoto

 
Comments Off on How to Capture Fantastic Photos in Low Light

Posted in Photography


21 January, 2015 – Time For A Change

21 Jan


It’s been a long time coming.  Like a reliable car that continues to get you where you need to go Luminous-Landscape has been there and going for quite sometime. During the last few years though things have been changing with internet content delivery and the old reliable LuLa was just keeping up.  We have been working very hard for a while now and today we want to share a preview of the NEW Luminous-Landscape.   

Our latest article Time For A Change will walk you through the new look of the site and what to expect in a few weeks when we launch.  This is an exciting time for us and you as the reader.  Everything we have done is to make the experience you have more enjoyable and to deliver more content your way.  Get a preview of the article and come back on February 14, 2015 when the new Luminous-Landscape makes its debut.


The Luminous Landscape – What’s New

 
Comments Off on 21 January, 2015 – Time For A Change

Posted in News


How to Crop Like a Boss in Photoshop

21 Jan

I have a habit of shooting for the crop (see my previous article ‘No Telephoto lens No Problem – Shoot for the crop‘) which often means that my final vision is a 4:2 proportion, or even a 4:1 panorama style image, instead of the most common 3:2 that is the default for most digital cameras.

With Photoshop’s latest crop tool this has never been easier, so let me show you how to crop like a boss!

How to crop like a boss in Photoshop

Step 1 – Load the Crop Tool in Photoshop

With your image open in Photoshop, press the ‘C’ button on your keyboard. This loads the crop tool; you’ll know this by the appearance of the marquee (square) which has been drawn around your image. You can now begin to draw the crop shape you want simply by dragging the corners of the crop marquee, but I’m going to show you a cleaner way to do this.

How to Crop in Photoshop CC

Step 2 – Choose an Aspect Ratio

If you want to keep your existing aspect ratio but simply want a smaller crop you can hold down the shift key while dragging one of the corners of the marquee. But, what if you want to get creative and want a different aspect ratio?

We do this by clicking in the very first drop down menu in the crop tool properties (usually displayed at the top under your main Photoshop menu).

Photoshops Crop Tool

For now I’ll specify an aspect ratio of 2:1 and I do this by entering the number 2 in the ‘width’ box and the number 1 in the ‘height’ box.

2:1 Ration in Photoshop crop tool

I’ve also specified the ‘Rule of Thirds’ grid (image below) because it closely matches the grid that I use on my camera when shooting. There are several to choose from, pick a grid that works for you.

Rule of Thirds grid in Photoshops crop tool

What About Custom Sizes?

You may decide that you’d rather not conform to an industry norm so you’re free to crop to a custom size and ratio. Either leave the aspect ratio boxes empty or press Clear if you’ve already played around. You can then drag the marquee tool to whatever size or shape you like. If however, you intend to send your image to a print lab, you’ll discover that they charge more for custom sizes so it’s often a good idea to choose the closest aspect ratio to your artistic vision. I just saved you $ $ $ $ , you’re welcome.

Step 3 – Place the Crop

The really cool thing about Photoshop crop tool is that now you’ve specified your aspect ratio you can then move the image around within those crop constraints. All I do is click on the image and drag to position. In this case all I’m doing is dragging the image slightly higher so that the bridge is perfectly centred in the middle box of the grid.

Drag Photoshops crop tool to place your crop

Step 4 – Now Experiment

Before you decide to apply the crop, it’s worth playing around a little to see if you can spot a better composition. For fun, I’m going to reverse the aspect ratio by entering 1 in the width box and 2 in the height box. This gave me a crop like this:

Vertical Crop in Photoshop

Step 5 – Apply the Crop

When you’re happy with the crop you’ve found, it’s time to apply it. You need to decide on whether or not you’d like to commit to this crop or if you’d like to keep the ‘cropped’ pixels. There’s a checkbox entitled ‘Delete Cropped Pixel’ which is ticked by default. Simply apply the crop by hitting ‘enter’ on your keyboard.

Delete cropped pixels

If you uncheck this box it doesn’t really crop your image, it just displays the cropped version while you view it in Photoshop. This is called ‘non-destructive’ editing.

With this option, you can save the image after you’ve cropped and although you’ll be looking at the cropped version in Photoshop, the original is still intact. If you want to recall the original (uncropped) image, just open the image file, load the crop tool and then enter the original aspect ratio to revert back to its original crop state (3:2 in most cases).

Confused? Yeah, it sounds kind of silly if you’re not used to Photoshop logic. I personally prefer to have the ‘Delete Cropped Pixel’ checked and then I simply save the cropped image as a separate TIFF file, leaving the original image unsaved and untouched. That’s just good old fashioned file keeping.

To Cancel the Crop

If you get nervous and want out of the crop tool, just hit your ESC key repeatedly until the crop tool vanishes. You can also press the M key to go back to the ‘Rectangular Marquee Tool’ which cancels the crop tool quicker.

How to Use Aspect Ratios

There’s a brilliant article by Elliot Hook called Aspect Ratios in Landscape Photography where he explains all of the standard aspect ratios that most print labs can handle. Try some of the ones that he mentions to see if they work for your image crops.

Try it with Your Images

I’d love to see some great examples of images that you have cropped using this technique. I often say that you can learn a lot about composition simply from carefully cropping existing images to create new compositions. It’s fun and easy to get busy with the crop tool and now you’ve learned how to crop like a boss!

googletag.cmd.push(function() {
tablet_slots.push( googletag.defineSlot( “/1005424/_dPSv4_tab-all-article-bottom_(300×250)”, [300, 250], “pb-ad-78623” ).addService( googletag.pubads() ) ); } );

googletag.cmd.push(function() {
mobile_slots.push( googletag.defineSlot( “/1005424/_dPSv4_mob-all-article-bottom_(300×250)”, [300, 250], “pb-ad-78158” ).addService( googletag.pubads() ) ); } );

The post How to Crop Like a Boss in Photoshop by Gavin Hardcastle appeared first on Digital Photography School.


Digital Photography School

 
Comments Off on How to Crop Like a Boss in Photoshop

Posted in Photography


Straßenfotografie und das poetische Bild

21 Jan

alex webb und rebecca webb

Ein Beitrag von: Alex Webb, Rebecca Norris Webb

Straßenfotografie ist ein Genre in der Fotografie, das ich nicht nur praktiziere, sondern ich versuche auch, meine Sammlung an Büchern zum Thema mit interessanten Werken zu erweitern.

Dieses Jahr hatte ich mir daher auch das neu erschienene „Street Photography and the Poetic Image“* des Fotografen-Ehepaars Alex Webb und Rebecca Norris Webb zugelegt. Außerdem habe ich auch den Blog der beiden abonniert.

Auf diesem Weg erfuhr ich dann von einem Workshop, den die beiden Anfang Dezember in Miami abhielten. Zwar war meine Bewerbung um einen ausgeschriebenen kostenlosen Platz in diesem Workshop nicht erfolgreich, aber ich kam mit Alex und Rebecca ins Gespräch und sie waren bereit, mir einige Fragen zu „Street Photography and the Poetic Image“ und zu „Memory City“* zu beantworten.

Während „Street Photography and the Poetic Image“ eine Art Lehrbuch zum Thema Straßenfotografie ist, dokumentiert „Memory City“ symbolisch am Beispiel der Stadt Rochester, Sitz der Kodak-Zentrale, das Ende der analogen Fotografie, wie wir sie kennen.

Mehrere Personen stehen auf der Wiese, hinter ihnen ist das Meer zu sehen.

Eine Straßenszene in einer Kleinstadt in den USA.

Der Magnum-Fotograf Alex Webb und die poetische Fotografin Rebecca Norris Webb, deren künstlerisches Schaffen mit Lyrik ihren Anfang fand, sind für mich ganz unverkennbare Vertreter einer sehr intuitiven Herangehensweise ans Bildermachen.

Die Straßenfotografie von Alex Webb ist mit wenigen Ausnahmen frei von direkt auffälligen Effekten, ironischen Momenten oder geplanten Szenen. Es ist, als ob er im Vorbeigehen Szenen aus dem Augenwinkel beobachtet und genau diese Momente mit der Kamera festhält.

Bei Rebecca Norris Web dagegen ist es nicht der Mensch, der im Zentrum der Geschichte steht, sondern die Wirkung und die poetische Kraft, die ihre Bilder von Objekten und menschenleeren Szenen auszeichnen. Oftmals nutzt sie auch Reflexionen, um mehrere kontrastierende Bildebenen zu erzeugen.

Das nachfolgende Interview nimmt direkten Bezug auf die beiden Bücher, die ersten Fragen beziehen sich schwerpunktmäßig auf „Street Photography and the Poetic Image“, im zweiten Teil geht es um „Memory City“.

Ein Junge schaut an der Kamera vorbei.

Gemalte Gebeine an einer Häuserwand.

Zum Einstieg eine Frage an Alex und Rebecca: Ihr führt sehr erfolgreich Fotografie-Workshops durch und Euer Buch „On Street Photography and the Poetic Image“ ist auf seine Art ein Lehrbuch, aber weit davon entfernt, sich in die Gilde der üblichen Kochrezept-Führer einzureihen, die man auch in der Fotografie so oft sieht. An wen, von Euren Kursteilnehmern einmal abgesehen, habt Ihr gedacht, als Ihr dieses Buch konzipiert habt und was sollte der Leser nach der Lektüre „gelernt“ haben?

Rebecca Norris Webb (RNW): Das sind alles sehr gute Fragen. Wie kann man dieses eher ungewöhnliche Lehrbuch am besten beschreiben? Ich denke, der nigerianisch-amerikanische Schriftsteller, Fotograf und Kunsthistoriker Teju Cole, einer unserer ehemaligen Studenten bei Aperture, hat es in seiner Einleitung zum Buch treffend ausgedrückt:

„On Street Photography and the Poetic Image“ ist ein ungewöhnliches Fotobuch, seine Umrisse definieren sich über die vielen Dinge, die es nicht ist: Keine Monografie, kein Geschichtsbuch, keine Vorgangsanleitung im herkömmlichen Sinn; dankenswerterweise unberührt von Fragen zu verwendeten Gerätschaften oder Technik; welches Objektiv ideal ist oder welche Kamera man kaufen sollte – hier kein Thema; uninteressiert daran, welche Apps dem Lernenden helfen könnten, eine Abkürzung um die Geduld herum zu finden, die die Fotografie verlangt.

Für den ernsthaften Fotografen, gleich mit welcher Erfahrung, ist es gleichermaßen geistreich und freundlich, Einblicke bietend in das Wesen der Fotografie, wie der Fotograf sie denken sollte.

Ein Blick durch eine Tordurchfahrt. Wir sehen einen Mann entlang gehen.

Alex Webb (AW): Seit dem Erscheinen des Buchs überrascht uns, dass nicht nur Fotografen, sondern auch Schriftsteller und andere Kunstschaffende sich für dieses Buch interessieren. Vielleicht, weil es Parallelen gibt zwischen unserem Verständnis des kreativen Prozesses in der Fotografie und dem in anderen Disziplinen.

Zudem beginnt das Buch mit einer Aussage, die poetische Schöpfung betreffend, die der Dichter und Romancier Denis Johnson mir gegenüber einmal gemacht hat und das berührte mich, weil es dem fotografischen Prozess, der Rebecca und mir zueigen ist, so sehr verwandt ist, ein Prozess, der eher intuitiv als rational ist, eher erforschend als festgeschrieben.

RNW: Alex studierte an der Hochschule Literatur, ich verfasste damals Lyrik, als Lehrende und als Fotografen kommen wir daher immer wieder auf die Literatur und andere Künste zurück, die uns helfen, kreative Räume in uns und anderen zu schaffen.

Schlussendlich, der Versuch, Kreativität zu lehren ist ein schon fast mystischer Prozess per se und es gelingt am besten, wenn man Position gegen den Strom bezieht, „at a slant“, um Emily Dickinson zu zitieren, eine meiner Lieblingsdichterinnen.

Fotografie ist zudem eine visuelle Kunst, wir empfinden die 50 Bilder – unsere eigenen wie die anderer Fotografen, die uns beeinflusst oder inspiriert haben, wie Lee Friedlander, Ralph Eugene Mayard, Joseph Koudelka, Andre Kertesz – als genauso instruktiv, wenn nicht mehr, als unsere Texte im Buch. Mit der Kunst verhält es sich oft so: Schweigen ist der beste aller Lehrer.

Menschen in grünen Shirts auf einem Friedhof.

In der Vorbereitung für dieses Interview habe ich „On Street Photography and the Poetic Image“ das zweite Mal von der ersten bis zur letzten Seite gelesen. Das erste Mal schien es so offensichtlich, von wem welches Bild stammte. Beim zweiten Mal habe ich mich immer wieder gefragt, ob es denn wirklich zwingend so sein muss, wie es sich darstellte: Gibt es einen Alex Webb, der diese eindrücklichen Momente, meist ohne die Präsenz von Menschen, einfängt? Und gibt es eine Rebecca Norris Webb, die Szenen auf der Straße dokumentiert, in denen Menschen, Licht und Farbe so perfekt harmonieren?

AW: Unausweichlich, wir sind immerhin 20 Jahre zusammen, gibt es Überlappungen in unseren Arbeiten, schließlich haben wir über diese Zeit auch zu einer immer engeren Zusammenarbeit gefunden. Ich vermute, wenn man die Reflexionen betrachtet, die in meinem Istanbul-Buch zu finden sind, dann könnte man diese als Widerhall zu Rebeccas Buch „The Glass Between Us“ interpretieren.

Und weil die Art der Fotografie, wie wir sie praktizieren, unsere Welt widerspiegelt und wir auf imaginäre, fiktionale Bilder verzichten, kommt es notwendigerweise zu Ähnlichkeiten zwischen unseren Bildern, gerade dann, wenn wir uns am selben Ort befinden.

Ein altes Haus und davor ein altes Sofa.

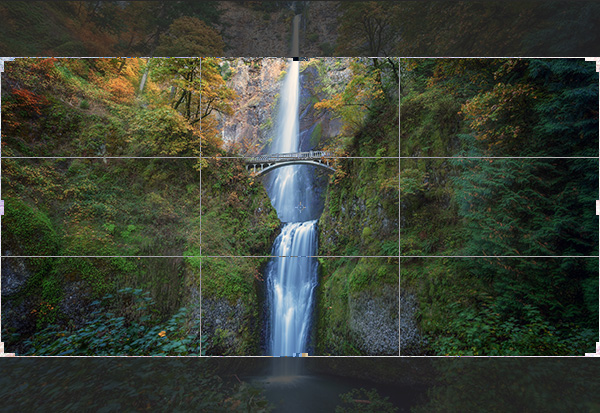
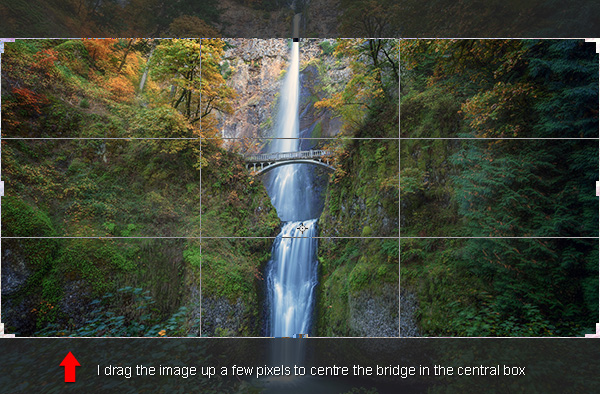
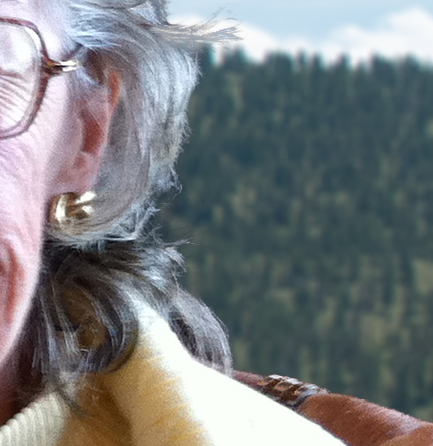
Dennoch unterscheidet sich unsere Sicht der Dinge oft deutlich. Wenn man sich unsere Bilder zum Thema „The Day of Remembrance“ in „Memory City“ ansieht, ein Jahrestag, der an die Afrikaner erinnert, die auf den Sklavenschiffen auf der Fahrt über den Atlantik zugrundegegangen sind: Mein Bild ist mit vielen Menschen bevölkert, Rebeccas ist ruhiger, ein Baum wie ein Haiku und ein Vogel, dessen Silhouette wie im Traum durch eine rot-schwarze Flagge zu sehen ist, im Wind, der vom Ontariosee herüberweht.

Letztendlich bin ich durch meine Beziehung zu Rebecca offener geworden für einen sanfteren, freundlicheren Ausdruck, beispielsweise in meinem Bild „St. Patrick’s Day“ in „Memory City“. Vielleicht ist sie, wegen der mit mir verbrachten Zeit, empfänglicher geworden für eine intensive Farbpalette, wie in ihrem Bild „Our Mother of Sorrows Church“ im selben Buch? Mag sein. Aber die fundamentalen Ausrichtungen gehen in der Gesamtansicht unseres Werks doch in unterschiedliche Richtungen.

Eine Brücke und man sieht einen Surfer auf dem Fluss.

Als Münchner hat mich das Bild des Eisbachsurfers, der im Fadenkreuz erscheint, direkt angesprochen. Es erscheint dennoch, verglichen mit den anderen Bildern im Buch, eher als überaus gekonntes Handwerk denn als Kunst. Aufgenommen 1991 ist es auch eines der älteren Bilder und die Frage stellt sich, wie es im Vergleich mit neueren Bildern zu bewerten ist.

Es erscheint unglaublich schwer, bis alle Faktoren zusammentreffen, die das Bild ausmachen, aber lösbar, während die anderen Bilder oftmals einen „sechsten Sinn“ für Komposition, Farbe und Timing erfordern, der schwer zu lernen oder, einfacher gesagt, zu imitieren ist.

AW: Das kann man so sehen. Der Surfer ist ein Foto, das mehr über die visuelle Überraschung als die gefühlsmäßige Komplexität funktioniert. Es fesselt kurzfristig, hinterlässt aber weniger langanhaltenden Widerhall als ich dies von meinen anderen Bildern erhoffe. Die Welt ist manchmal tiefgründig und manchmal ganz leicht. Es scheint, als ob der Moment nur dieses kurze Flackern anbieten konnte.

Viele Männer sitzen an einem Tisch und klatschen. Hinter ihnen ein Bild mit Menschen darauf, die ebenfalls an einem Tisch sitzen.

Beim Betrachten der Bilder von Orten wie Haiti, Kuba oder Mexiko habe ich mich unwillkürlich gefragt, wie lange es dauert, bis man einen neuen Ort wirklich ergründet hat. Es gab ja mehrere Reisen in diese Länder; wie lange dauert es, bis die Neuheit des „Touristischen“ der Essenz des Orts weicht?

Für mich jedenfalls ist das immer eine Herausforderung, weil ich so viele Dinge sehe, die mir erst fremd sind und ich das Gefühl habe, ich müsse das erst überwinden, bevor ich den eigentlichen Charakter einer anderen Kultur, eines anderen Lands oder einer Stadt zu verstehen beginne.

AW: Wenn ich ein Projekt beginne, dann ist das wie der Aufbruch zu einer Reise ohne klares Ziel in Sichtweite. Ich besuche einen Ort, sehe einen Moment und dann setze ich mich in Bewegung, erlaube der Kamera und meinen Erfahrungen, mich dahin zu führen, wohin sie mich ziehen, aufmerksam für das, was vor meinen Augen passiert.

Ich bin nicht frei von Voreingenommenheit und Vorurteilen – wer ist das schon? – aber ich versuche, das von mir wegzuschieben und auf den Moment zu reagieren. Der Prozess kommt ganz aus dem Bauch heraus. Je mehr Zeit ich an einem Ort verbringe, je mehr ich herumschlendere – speziell, nachdem ich mir einige meiner Bilder angesehen habe und zurückgekommen bin – desto eher entwickle ich ein Gespür dafür, wohin ich gehen muss, um mein Projekt abzuschließen. Das mögliche Ende kommt in Sicht und gewinnt an Kontur.

Meine Vorgehensweise auf der Straße bleibt durchgängig intuitiv, nicht rational. Ich treffe spontane visuelle Entscheidungen, getrieben von Wahrnehmung, Instinkt, Drang, nicht durch einen rational gesteuerten Denkprozess.

Ein Mädchen steht hinter einer Fensterscheibe und blickt nach unten.

Die von Rebecca gemachten Kommentare verleiten zur Annahme, dass die Fotografie mit Film in den nächsten Jahren verschwindet. Zwischenzeitlich hat Leica eine neue analoge Kamera vorgestellt und zumindest um mich herum sehe ich eine ganze Reihe von Fotografen zum Film zurückkommen, manchmal sogar für Auftragsarbeiten. Ist das Ende des Films wirklich gekommen oder gab es da inzwischen einen Perspektivwechsel?

RNW: Wim Wenders hat einmal bemerkt, dass Fotografie wie „ein letzer Blick auf die Welt“ ist. Neben anderen Aspekten ist „Memory City“ ein letzter Blick auf die Welt, in der Film als Medium dominierte, für eine Mehrheit, um alles zu dokumentieren von intimen familiären Erinnerungen bis zum Festhalten von Momenten, die Geschichte machten.

„Memory City“ befasst sich unter anderem mit der speziellen Beziehung, die Film und Erinnerung haben. Es wirft Fragen auf, die die breiteren Auswirkungen auf unsere Kultur betreffen, wenn eine wachsende Zahl an Bildern und Dokumenten nicht mehr in stofflicher Form existieren, sondern als rein virtuelle Daten in der Cloud.

Ganz konkret frage ich mich, wie das uns, die Generation Baby Boomer, betrifft, deren Kindheitserinnerungen so eng mit diesem Schuhkarton voller Bilder oder diesem Fotoalbum verknüpft sind, die oftmals ungeschminkt und ungestellt unsere Vergangenheit wiedergeben. Um es mit Keats zu sagen: „Berührungen haben eine Erinnerung.“

Ein blaues Kleid im Wind.

Es gibt Kontaktabzüge kompletter Filme in „Memory City“, die auf jedem Bild nur ein Kleid zeigen. Ich empfand diese Serien als sehr eindringlich, fast schon gruselig, speziell da, wo auf manchen Aufnahmen auf einmal Kinder auftauchen und wieder verschwinden. Als ob man die Bilder einer Überwachungskamera ansieht und von Bild zu Bild merkwürdige Dinge passieren. Mich hat das sehr an „Paranormal Activity“ erinnert. Was war die spezielle Intention, diese Kontaktabzüge ins Buch und seinen Anhang einzubinden?

RNW: Es ist interessant, dass Du das Wort „gruselig“ benutzt, um Kontaktabzüge von festlichen Kleidern zu beschreiben. Während ich an meinem dritten Buch, „My Dakota“, arbeitete, einer Elegie auf meinen Bruder, der sehr unerwartet verstarb, habe ich gelernt, dass Wiederholung ein integraler Teil des Verlusts ist.

In der Dichtung sind es sich wiederholende Textzeilen oder Bilder, die kennzeichnend für Elegien sind und sie stellen ein Echo dar für diesen geheimnisvollen, schmerzlichen und an Obsession grenzenden Vorgang, in dessen Verlauf jemand oder etwas, das einmal ein untrennbarer und körperlicher Bestandteil des Lebens war, in die reine Erinnerung transformiert wird, lebendig nur noch im Herzen des Hinterbliebenen, nur noch für sein geistiges Auge sichtbar.

Eingedenk dessen traf ich die Entscheidung, die festlichen Kleider der Frauen von Rochester als eine Metapher für den Film selbst zu verwenden, diesen dünnen Streifen aus Zelluloid, der mich zu jedem Ereignis begleitet hat, das ich jemals fotografierte. Diese Kontaktabzüge – mit ihren immer wiederkehrenden Ansichten des gleichen Kleidungsstücks – wurden somit zum elegischen Refrain von „Memory City“: Mein Weg, den Film zu verinnerlichen – in die Erinnerung zu überführen – meine lange Beziehung dazu und zur Stadt Rochester selbst.

Kinder in roten Jacken in einem Park.

Im Gegensatz dazu zollt Alex seiner langen Beziehung zu Kodak-Film durch die Verwendung seiner letzten Rollen Kodachrome Anerkennung. Ein Film, den er mehr als 30 Jahre lang benutzt hat und dessen Produktion bei Kodak 2009 zum Ende kam. 2010 wurde dann auch die Entwicklung des Films im traditionellen Prozess eingestellt. Heute kann Kodachrome nur noch schwarzweiß entwickelt werden, was den Bildern einen mitgenommenen, verwitterten Eindruck verleiht, als ob sie lange Zeit gealtert seien.

Ich mag es besonders, wie diese schwarzweißen Kodachromes wie ein visueller Halbreim mit meinen Kontaktabzügen zusammenfallen, denn auch diese Bilder sind manchmal ziemlich eindringlich und verstörend, wie „Mt. Hope Cemetery“, dieses grobkörnige Foto eines Grabsteins an einem düsteren, regnerischen Tag in Rochester, aufgenommen von Alex.

Ein Mann mit Kapuze und ein anderer Mann mit Mütze.

Die Frage kam so schon in ähnlicher Weise in anderen Interviews, ich versuche daher, das aus meinem Blickwinkel zu ergründen: Wie funktioniert Eure Zusammenarbeit als Fotografen, speziell bei der Auswahl der Bilder für dieses Buch? Wie schwer gestaltet sich das, wenn man die Arbeit des Ehepartners auf professioneller Ebene kritisiert? Ist es in der Zusammenarbeit bei beruflichen Projekten eher ein Vorteil oder ein Nachteil, wenn man verheiratet ist?

AW: Unser Auswahlprozess läuft normalerweise so ab: Wenn ich meine eigene Auswahl zu einer Sammlung meiner Bilder getroffen habe, dann ist Rebecca die erste Person, die sie zu Gesicht bekommt – und umgekehrt.

Wenn das Projekt umfangreich wird, sei es als Einzelprojekt oder als Gemeinschaftsprojekt, dann hängen wir unsere Selektionen auf. Zeit ist der beste Kritiker: Wenn man mit seinen Bildern tagein, tagaus lebt, wird es relativ schnell klar, welche Bilder funktionieren und welche nicht. Je länger wir an einem Projekt arbeiten, desto mehr Fotografien kommen hinzu und wir beginnen, mit ihnen zu spielen, um zu sehen, wie sie zusammen harmonieren.

Wir bilden Paare. Wir finden erste Abfolgen von Bildern. Häufig sind Anfang und Ende eines Buchs ziemlich offensichtlich, weit vor dem Mittelteil. Besonders wichtig ist, dass wir uns von unseren Bildern wirklich leiten lassen. Die Selektion wird so genauso instinktiv wie das Fotografieren auf der Straße selbst.

RNW: Für mich war immer besonders passend, was die Dichterin C. D. Wright über ihre Zusammenarbeit mit der Fotografin Deborah Luster geäußert hat:

Eine Riss tut sich auf zwischen einem Mitwirkenden und dem anderen – so findet das Licht seinen Weg.

Die Künstlerin Joyce Kozloff sagt, dass der schwierigste Weg, den ihr Werk zurücklegen muss, der vom Studio zur Tür hinaus ist. Denn ihr Ehemann, der Straßenfotograf und Kunstkritiker Max Kozloff begutachtet das Geschaffene immer, bevor es der Welt präsentiert wird.

Glücklicherweise ist es bei uns eherne Regel, dass der Künstler immer das letzte Wort hat.

Vielleicht ist das mit der Grund, wieso unsere Ehe schon 15 Jahre überdauert. Aber das führt auch dazu, dass unsere gemeinsamen Projekte, wie „Violet Isle“* und „Memory City“ sich komplizierter gestalten als unsere Monografien.

* Das ist ein Affiliate-Link zu Amazon. Wenn Ihr darüber etwas bestellt, erhält kwerfeldein eine kleine Provision, Ihr zahlt aber keinen Cent mehr.

Alle hier gezeigten Bilder sind aus dem Buch: Memory City, von Alex Webb and Rebecca Norris Webb, publiziert bei Thames & Hudson 30th June 2014. All photographs © 2014 Alex Webb and Rebecca Norris Webb.

Das Interview wurde von Tilman Haerdle auf Englisch geführt und anschließend von ihm für Euch ins Deutsche übersetzt.


kwerfeldein – Fotografie Magazin | Fotocommunity

 
Comments Off on Straßenfotografie und das poetische Bild

Posted in Equipment


Nikon D750 flare investigated: Why we’re not worried

21 Jan

Much of the talk on the internet since the launch of the D750 has been about flare, or rather the appearance of dark bands when bright light sources are just outside of the frame. Not all models are affected, and Nikon will service cameras that are affected for free. Nonetheless we wanted to see for ourselves what the problem looks like and how much of a cause for concern it should be for D750 owners. Read more

Articles: Digital Photography Review (dpreview.com)

 
Comments Off on Nikon D750 flare investigated: Why we’re not worried

Posted in Uncategorized


Made in China: World’s First 3D-Printed Apartment Complex

21 Jan

[ By WebUrbanist in Architecture & Houses & Residential. ]

3d printed apartment complex

The same company known for printing 10 home in less than 24 hours is back with a new record-breaking construction project: a multistory apartment structure built using recycled building materials and fast-hardening cement, paired with an ornate villa assembled using the same technologies.

3d printed villa exterior

Construction waste forms the aggregate base of WinSun‘s quick-drying concrete, while a huge 3D printer array is responsible for building the large prefabricated parts that are then built on site with steel reinforcement and regulation insulation.

3d printing extrusion interior

In a twist that will able to those who enjoy truth in architecture, much of the extrusion process is evident on the interior and exterior walls of the villa component as well.

3d printing apartment

Drawing on CAD files, the printer lays out the pattern like a cake decorator squeezes out frosting, creating space-frame gaps for insulating materials, plumbing and electrical – a high-tech process to quickly create a pair of low- and mid-rise buildings.

3d printed villa design

According to WinSun, “This process saves between 30 and 60 percent of construction waste, and can decrease production times by between 50 and 70 percent, and labour costs by between 50 and 80 percent. In all, the villa costs around $ 161,000 to build.”

3d printed walls demo copy

While the company has yet to reveal just how big of a structure they can build using their existing equipment, their future goals include larger buildings, perhaps even prefab skyscrapers, and possibly bridges or other infrastructure. From 3Ders, “Today’s press conference attracted more than 300 building industry experts, investment bankers as well as media reporters. Ma Yi He, CEO of WinSun explained: the company’s success is due to their unique and leading techniques. First is their exclusive 3D printing ‘ink,’ which is a mixture of recycled construction waste, glass fiber, steel, cement and special additives. According to Ma, waste from recycling construction and mine rest produces a lot of carbon emissions, but with 3D printing, the company has turned that waste into brand new building materials. This process also means that construction workers are at less risk of coming into contact with hazardous materials or work environments.”

Share on Facebook


[ By WebUrbanist in Architecture & Houses & Residential. ]

[ WebUrbanist | Archives | Galleries | Privacy | TOS ]


WebUrbanist

 
Comments Off on Made in China: World’s First 3D-Printed Apartment Complex

Posted in Creativity


Open Source Homes: 6 Free Plans Put High-End Design in Reach

21 Jan

[ By WebUrbanist in Architecture & Houses & Residential. ]

free open source houseboat

Rendering luxury-class house designs accessible to the public is just part of the beauty of Paperhouses, an endeavor to raise the quality of free house plans and and explore the potentials for architecture to be as open as technology can be. As with Wikihouse, anyone is welcome to download and begin construction on any of the uploaded homes without paying an architect fee.

open source houseboat system

The latest submission to Paperhouses is a houseboat by Carl Turner Architects composed of prefab parts and design to move freely in narrow urban waterways and allow for expansion in ever-more-crowded European capitals.

open source modular house

As with other homes in the database, this one is intended to be flexible, able to be adapted to different conditions and clients. While intended to float, the modular construction allows the design to be built on land with equal ease while an adjustable pallet of colors and materials allow it to be individualized by each builder or owner.

open winter cold house

open house private sky

open house urban context

Our Private Sky by Florian Busch Architects is part of the same initiative but approaches modularity through the idea of privacy and views. The primary focus of the structure is upward, while variable windows can be added, moved or removed depending upon its context.

open source modular blocks

open source free plan

open house plan layout

The Module House by Tatiana Bilbao is based on series of same-sized blocks that can be arranged and oriented depending on the layout of a site and desired directions relative to the sun, featuring concrete walls and cantilevers to balance daylight and shade.

Next Page – Click Below to Read More:
Open Source Homes 6 Free Plans Put High End Design In Reach

Share on Facebook


[ By WebUrbanist in Architecture & Houses & Residential. ]

[ WebUrbanist | Archives | Galleries | Privacy | TOS ]


WebUrbanist

 
Comments Off on Open Source Homes: 6 Free Plans Put High-End Design in Reach

Posted in Creativity


Dicapac WP-S10 Underwater Housing Review

21 Jan

Peter-West-Carey-Case2014-1229-7411
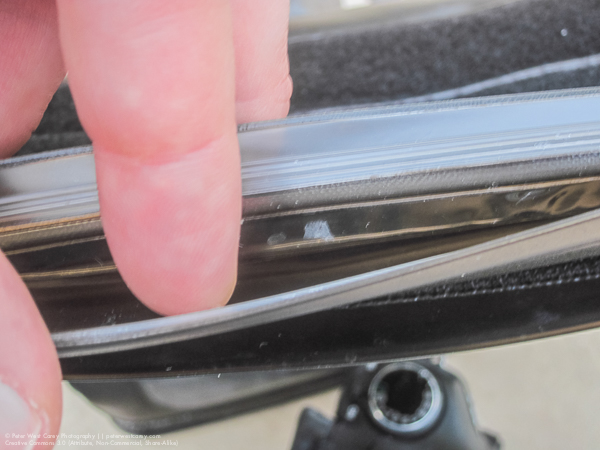
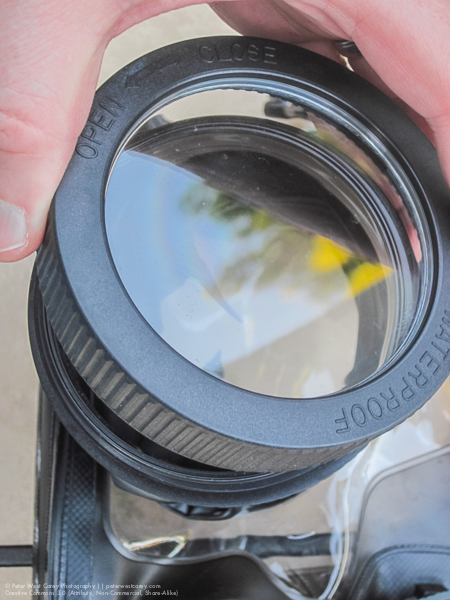
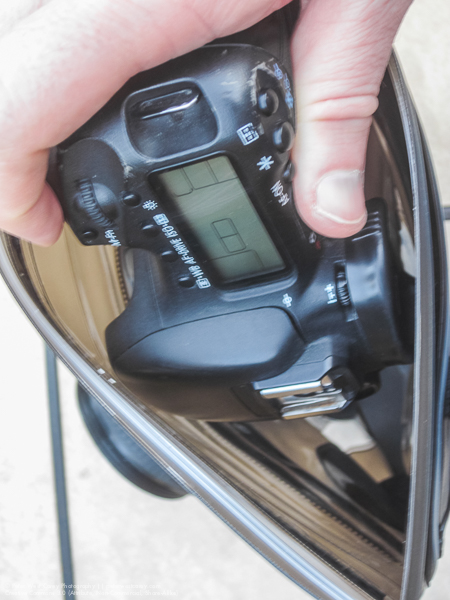
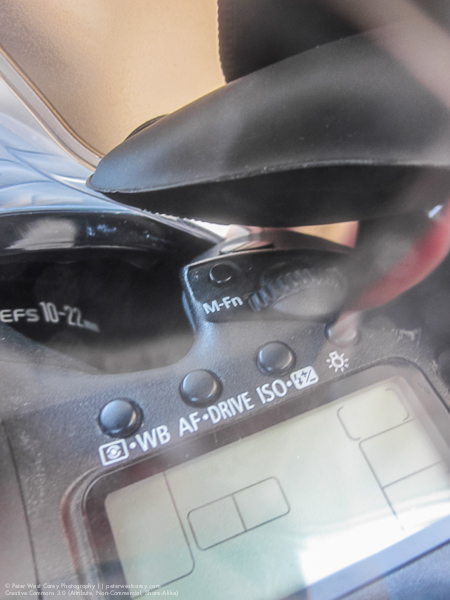
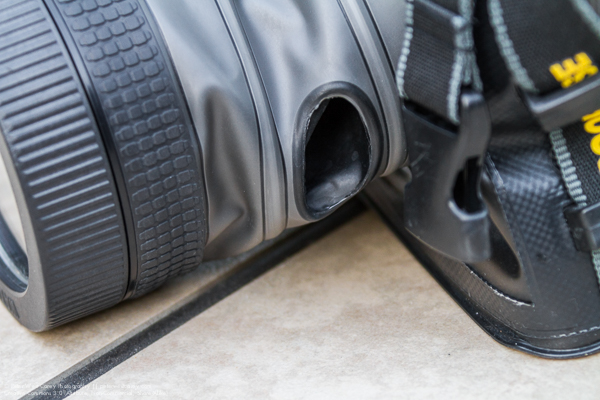
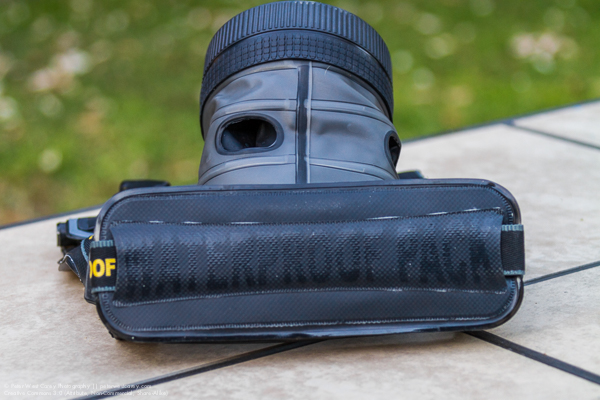
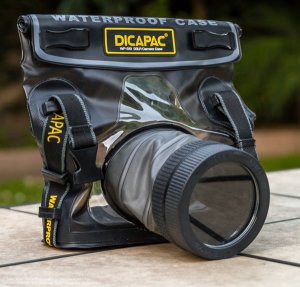
In an industry known for getting what you pay for, I am always skeptical of cheap, new solutions where only expensive ones existed previously. But curiosity got the better of me before a trip last year to Barbados when I wanted to take photos of turtles underwater, but lacked funds for a $ 3000 underwater housing for my DSLR. That’s when I dropped $ 60 on a housing and prayed it would not kill my Canon 7D.
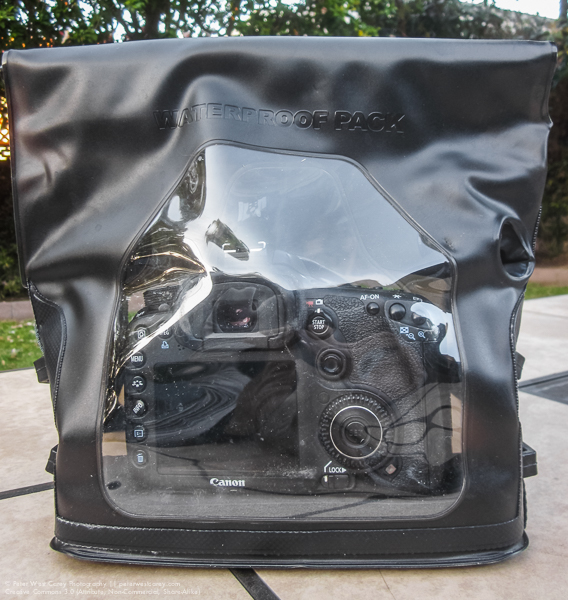
The housing I chose is from a company you probably have never heard of – Dicapac USA. They have a few models for different sized cameras and mine is the WP-S10 model, suitable for normal size DSLRs (they have smaller size bags for point and shoot as well as mirrorless cameras).

The lay of the bag

For lack of a better term, the Dicapac is a heavy duty Ziploc bag with a special port for your lens. But unlike your average sandwich bag, the plastic on the Dicapac is heavy duty PVC/TPU and the seams are all welded tight on the inside.

With a clear plastic back, LCDs are easy to view and there is a softer rubberized plastic opening for a shutter release finger. Extending out the front of the bag is the lens tube with a special screw on port for the end. The tube also has two of the finger holes to allow for adjustment of zoom (typically on zooms that use a dial, rather than push/pull type) and focus. It is also conceivable to activate side-of-lens controls, such as VR/IS or manual focus modes.

Peter-West-Carey-Case2014-1229-1298

The top of the bag is where the sealing happens. There is a double industrial plastic clamping zip along the top and then strips of Velcro to hold things in place.

Peter-West-Carey-Case2014-1229-1287

Inside, the bag is fairly sparse but it does come with a one inch thick foam pad to place beneath your camera.

How it works

Following trial and error and then searching the Internet, I found it easiest to insert my camera with the lens off. I was using a Canon 7D without the standard battery grip. This made it easy to slide in the top with the zip open. I was then able to take off the front port and insert my Canon EF 10-22mm lens, attaching it to the body inside the bag. A smaller camera, like the Digital Rebel lineup of cameras, would probably fit easily without removing the lens. For me, it wasn’t required, but it was easier.

Peter-West-Carey-Case2014-1229-1288 Peter-West-Carey-Case2014-1229-1289

I then checked the front optics of my lens for smudges or dirt before screwing on the lens port. It was a little tricky finding the beginning thread but easier after a couple of practices. Now, like any Ziploc, I had to squeeze out the excess air and then clamp shut the top zip. This isn’t a sandwich in a bag so this too took a few practice tries to get most of the air out. So far, nothing earth shattering.

Next, you need to roll down the zip a few times and then attache the first velcro strip to hold it in place. Lastly, you attach one last, larger velcro strip, to hold everything closed. There is also an additional neck strap that can be clipped into the buckles, but I usually didn’t use it.

In use

As an operational note, I practiced zipping up the bag with only paper towels inside a few times. I then dunked the unit in my bathtub to make sure no water got inside. I suggest new owners do the same to ensure their unit is not faulty.

Peter-West-Carey-Barbados2014-0808-1330

After a few very boring photos of the drain in my bathtub, and a flight to the Caribbean Island of Barbados, it was time for a real world test of the case. With no pretty coral out front our hotel, I took some inspiration from Clark Little and decided to shoot through wave tubes toward the setting sun.

The camera was already in the bag when I realized my best bet was to use manual focus and simply set it to a given depth, rather than miss shot after shot in the fast breaking surf. With the holes in the side of the lens tube I was able to switch over to manual focus without much problem. Setting my focus took a little more effort as the holes don’t allow a wide range of movement. Meaning I had to spin my focus ring about half an inch at a time. No biggie, it just takes longer and won’t work well for lots of fast action.

Because my lens didn’t fully fill the lens tube, I had to pull back on the tube with my fingers in both tube holes to keep the port flush against the front of my lens. In time this causes fatigue and after about 30 minutes of shooting I was starting to feel cramps in my hands. Not bad, but I wouldn’t want to shoot a weddings with this setup.

This is what happens if you don’t pull back on the tube with a wide angle lens installed:

Peter-West-Carey-Barbados2014-0808-1202

But it can be used to create a nice “porthole” effect:

Peter-West-Carey-Barbados2014-0809-2878

Shutter activation was easy but most controls, especially the rear wheel, on my camera were not accessible. This meant I had to think ahead and set the frame rate to continuous and choose my metering mode as well as shooting mode. I could spin the front/top dial which controlled my aperture but the back dial was useless as I couldn’t reach it.

Here is the range of motion you can expect from the activation access hole. That black thing at top is my finger:

Peter-West-Carey-Case2014-1229-1291

I was able to adjust my zoom with the same effort needed for focusing. So, again, not swift but doable.

Peter-West-Carey-Case2014-1229-7420

How did it do?

My first run with the bag in the surf showed me that it could take a pounding but after a while I needed to check to make sure the top Velcro was still tight. It needed to be adjusted a couple times because of this specific use and I noticed a few droplets of water on the inside of the case. nothing much. I was able to dry the bag off with a towel on the beach, remove it (this time leaving the lens on so as to not let water get in the threads of the front port) and review images. After making some adjustments, I placed the camera back in and waded back to the surf for more.

Peter-West-Carey-Barbados2014-0808-1330

Closing down my aperture made motion blur possible:

Peter-West-Carey-Barbados2014-0808-1903

While use of the viewfinder is possible, it is difficult in waves with goggles on. Later, when I was snorkeling and shooting turtles, I was able to better line up shots. But truth be known, it was just easier to shoot blindly and let experience help me line up the shots. Use of the rear LCD in LiveView mode is also possible with slower moving action, like the turtles.

For my three times taking the the bag into the saltwater, including duck-dives in the waves and 15 foot dives to meet turtles, the bag never leaked significantly. It does get a little hard to hold after a while as your hand is in a non-normal grip.

Peter-West-Carey-Barbados2014-0809-2553

A hawksbill sea turtle (Eretmochelys imbricata) swims directly a

Gliding Along Peter-West-Carey-Barbados2014-0809-2376

Conclusion

For the money and intended use, this bag is worth the expense. As proof, I have already sold a stock photo of one of the turtles, which covered the cost of the bag.

This bag is good for recreational use but not SCUBA. It is rated to 16’/5m (JIS IPX8 standard). Some people have voiced concerns about cameras overheating but I left my camera on inside the bag for over two hours with no problem (the 7D has a warning when it gets too hot).

Peter-West-Carey-Barbados2014-0809-2912

It also works well as a general dry bag and I think it would be great for times you want to keep spray or sand out of your gear. It would be idea for whitewater rafting or piece of mind while ocean kayaking. I heard talk of an adapter which helps the front port attach to your lens as a filter would, which would greatly aid in shooting and cramps. I have not yet found it.

I will be heading to Mexico, Belize, Alaska, Jamaica, Australia and New Zealand this year and plan to take the bag with me for each trip. I will also get a small bottle of Rain-X to help with beading when taking wave shots.

PROS

  • Cheap – $ 70 on Amazon.
  • Can be used with multiple cameras.
  • Packs small for traveling as compared to hardshell housings.
  • No need for different ports for different lenses. Would work well with a 100mm macro, for instance.
  • Viewfinder use is possible, but not often used.
  • Port window comes off for easier camera and lens insertion.
  • Neck strap and loops you can clip to keep it with you, hands-free, while swimming.
  • Functions as a drybag out of the water.

Peter-West-Carey-Case2014-1229-7421

CONS

  • Limited button and dial control. You have to think ahead about some settings.
  • It takes practice to seal properly.
  • It’s hard to zoom and focus quickly, but it can be done.
  • Holding the lens to the port is tiring.
  • While not holding the camera, it flops around inside the bag.
  • Lens port has a coating which makes polarizing filter use impractical (shows rainbows). Otherwise, it is fairly neutral.
  • No flash use, internally nor with external flash, although it may be possible with a wireless transmitter.

If you have specific question, I am happy to answer them in the comment section below.

googletag.cmd.push(function() {
tablet_slots.push( googletag.defineSlot( “/1005424/_dPSv4_tab-all-article-bottom_(300×250)”, [300, 250], “pb-ad-78623” ).addService( googletag.pubads() ) ); } );

googletag.cmd.push(function() {
mobile_slots.push( googletag.defineSlot( “/1005424/_dPSv4_mob-all-article-bottom_(300×250)”, [300, 250], “pb-ad-78158” ).addService( googletag.pubads() ) ); } );

The post Dicapac WP-S10 Underwater Housing Review by Peter West Carey appeared first on Digital Photography School.


Digital Photography School

 
Comments Off on Dicapac WP-S10 Underwater Housing Review

Posted in Photography


20. Januar 2015

21 Jan

Das Bild des Tages von: Fabian

Blick auf einen Marktplatz in Schwarzweiß

Fotolinks des Tages

1. Von Kameras, die keine sind

Dass Smartphone-Hersteller die Fotoindustrie sehr stark unter Ihre Fittiche nehmen, ist sicher keine Neuigkeit. So wundert es sicher keinen, dass Apple auch 2014 zu den führenden Unternehmen gehört, deren Kameras genutzt werden. Warum Chip also von einer „überraschenden Statistik“ spricht, können wir nicht ganz nachvollziehen, finden die Auseinandersetzung mit dem Thema jedoch wichtig. → ansehen

2. Offengelegte Sectio caesarea

In den letzten Tagen haben wir häufig über Menschen berichtet, die den Status-Quo der Fotografie hinterfragt oder einfach übergangen haben. Heute wurden wir in diesem Zuge auf den Franzosen Christian Berthelot aufmerksam, der Neugeborene unmittelbar nach einer (=Kaiserschnitt) fotografiert. Berthelots Aufnahmen werden von Rezipienten hitzig diskutiert, denn es stellt sich die Frage, ob dies wirklich sein muss. Wir finden: Ja, das darf sein, denn auch die Geburt ist ein Teil des Lebens, über die es gar nicht genug gute Fotografien geben kann. → ansehen

+ Auch der Stern hat die Thematik angeschnitten und stellt Bilder vor, die in der Klickstrecke auf Spiegel Online nicht zu sehen sind.

3. Von Professionen, Luft und Liebe

Kann man mit Leidenschaft für ein Thema realistisch davon ausgehen, auch beruflich in diesem Bereich Fuß zu fassen? Die Fotografin und Psychologin Jenna Martin bejaht dies, und zwar mit guten Argumenten. Sie ist der Auffassung, dass Leidenschaft über das normale Maß an Begeisterungsfähigkeit hinausgeht und sich die Frage nach dem Markt für die Tätigkeit dadurch löst, wie proaktiv die Sache angegangen wird. Unbedingt lesen. → ansehen


kwerfeldein – Fotografie Magazin | Fotocommunity

 
Comments Off on 20. Januar 2015

Posted in Equipment


How to use Photoshop’s Quick Selection Tool to Change a Background

20 Jan

It’s the question I get asked the most in my workshops and classes – “How do you change the background of an image?” Or “How can I cut my subjects out of an image and place them on a new background?”

A quick capture of my parents at a coffee shop.

A quick capture of my parents at a coffee shop. The BEFORE image.

Perhaps, despite your best efforts at placing your subjects in a pleasing, non-distracting environment, the situation made it impossible. Maybe you used your smartphone to capture a spontaneous moment and now the image needs a little background work? Maybe you want to cut your subjects out of the background to isolate them or use them on a website banner or other marketing material? Whatever the reason, this task has challenged every photographer, beginner or pro, since the invention of the camera! I’m going to show you how to use one of Photoshop’s most underrated tools for easily extracting your subjects from the background.

This photo (above) was a very spontaneous iPhone capture of my mom and dad, the photo itself isn’t great (lots of things wrong with it technically) but it has big sentimental value for me. It’s the last photo I have of my parents together.  But it also has a busy background which typically causes problems for many photographers when trying to use Photoshop’s Selection Tools to remove it. In previous Photoshop versions, selection tools like Magic Wand and Lasso would get confused by the similar colors, and patterns of this type of background, making it a difficult and frustrating project. But with a relatively new selection tool it’s pretty straight forward, so this is a good example photo for learning the technique.

In this demonstration, you can make this a stronger image by removing the cluttered background to make it less like a snapshot and more like a portrait. The secret of any image editing is to use the right tool for the job. In this situation you want to use the Quick Select Tool to remove your subjects from an image and place them on a different background.

How to use the Quick Select Tool

In the past, you may have avoided most of the Selection Tools in Photoshop because they were not easy to use. The Quick Select Tool has changed all that. It has never been easier to make selections that don’t look like they were “cut and pasted.” There are two, or sometimes three steps.

Choose the Quick Selection Tool from the Toolbox palette:

tool

It works like a Brush so you can change the size of the tool by using the [ –  ] keys on your keyboard (  [ to make it smaller, and ] to make it larger).  Give the tool a size that makes it easy to select your subject.

Step 1: Make your selection

Just drag the tool over your subject and stop when the “marching ants” get to the edge. The tool is smart and can detect the change in pixels so most of the time it will stop on the edge correctly. If it selects something that you don’t want it to, just click on the Alt key to switch to “deselect” mode and drag the selection back to where it should be.

selection

The Quick Select Tool selecting the subject with the “marching ants” outline.

Step 2: Refine the Edge

Once you’ve got everything selected as you want it, click on the Refine Edge button on the top menu. In this area, you’ll adjust the pixels around the edges of the selection. This will make the “cut” more smooth and realistic.

refine-edge


The refine Edge tool opens a pop up that looks like this:

refine-edge-palette

From here you can select how you want to view your selection against a few background options. You can select the Mask overlay which you may be familiar with if you’ve used layer masks before. This view allows you to see the background as well as your selection. But you can also check it against a black background, which I like, so you can clearly see how your edge looks and if you have selected everything accurately. To change views, click the drop-down to get the View Options box. Scroll through these to get a feel for how they display your data. The Adjust Edge sliders give you many options to smooth, feather, and further refine your edge if needed.

For now, select Black & White view mode. Hover over the Black & White Box and click.

popup

You should see something like this (below). You can see your edges very well against the black. You can see that the edges look okay, they are well defined, and not pixelated or blocky. But what about that hair? My poor dad with his fine and wispy (almost no hair), and my mom who had recently undergone chemo also has fine baby-like hair, making the hair selection task a bit of a challenge. But the Quick Selection Tool has a method for this too!

b+wmask

Click the Edge Detection Smart Radius box and move the slider to the right just a bit. watch how the edge around the hair change to be a bit more transparent. Be sure to watch the rest of your edges to make sure they don’t change too much.

Step 3: If needed, use the Edge Detection Brush

If you still need to get more transparency for hair, make sure the brush icon on the left is selected and carefully brush around where you need more transparency. You can switch between the View modes to see what is being displayed or removed. If you remove too much you can click and hold the Refine Edge brush to reveal the Eraser which lets you undo your brush strokes, much like a regular layer mask.

Untitled-2

When you’re happy with your results, Look for the Output section at the bottom of the Refine Edge box, and click on Decontaminate Colors and select a small number as the amount, 2 is usually good, depending on your image.  Change Output To: New Layer with Layer Mask.

This is what you should see now:

layermask

Note: to see the transparent background you must turn off the visibility of the bottom layer.

Your cluttered background is gone!  You have a nice transparent background and all on new layer. This will be your main image.

Add your new background layer

Open the image you want to use as your new background, and using the Move Tool, drag the new background into your main image. Voila! You have a great new background layer and your subjects look very realistic and not like cut and paste paper dolls.

You may have to drag the new background layer under the subject layer – the one with the mask. I’ve deleted the original Background layer and replaced it with the scenery background and called it new background. You could also make any existing background layer invisible if you don’t want to display it.

almost-done

Here’s a 100% close up look at the job the Quick Select tool and Refine Edge brush did on my mom’s hair (yes the image is a bit shaky at 100%, but I think you can see that took works pretty well to give you very realistic extractions, with the right amount of transparency and detail preservation).

100crop-hair

The finishing touches

So for the final image, let’s balance the colors a bit and give this photo a nice warm tone, by using a layer mask and a warming Photo Filter.

layermaskto-photofilter

photofilter

And here is the final image:

final-warming-filter

Final image AFTER changing the background. Not a snapshot any more!

What do you think? Is it better than the original? Was it worth the 10 minutes to edit and give it a new background? Just imagine, with a well captured image (not a shaky iPhone capture) think  of all the new possibilities you will have if you master this process.

Why not give this nifty tool a try and post your results here – I’d love to see how you use this. If you have questions or problems, just let me know, I respond to my comments and questions regularly.

googletag.cmd.push(function() {
tablet_slots.push( googletag.defineSlot( “/1005424/_dPSv4_tab-all-article-bottom_(300×250)”, [300, 250], “pb-ad-78623” ).addService( googletag.pubads() ) ); } );

googletag.cmd.push(function() {
mobile_slots.push( googletag.defineSlot( “/1005424/_dPSv4_mob-all-article-bottom_(300×250)”, [300, 250], “pb-ad-78158” ).addService( googletag.pubads() ) ); } );

The post How to use Photoshop’s Quick Selection Tool to Change a Background by Alex Morrison appeared first on Digital Photography School.


Digital Photography School

 
Comments Off on How to use Photoshop’s Quick Selection Tool to Change a Background

Posted in Photography