RSS
 

Archive for August, 2014

Return of Film: Snowy Sunrise at Gates of the Valley

22 Aug

It’s been 10 years since I last took photographs with film. My backing a pinhole camera Kickstarter project, the Ondu camera, is what swayed me to take another stab at shooting film. The camera I chose from the project is a 6×12 medium format pinhole camera. It has an aperture equivalent to f/133 and a focal length of roughly 40mm (in 35mm camera terms).  I’ve never used a pinhole camera so it’s been quite an exciting exploration of a very primitive form of photography. No view finder, no glass lens, no CF cards, no histogram and being an extended piece of the camera as the human shutter (I open and close it) is a sure fire way to kick oneself into a new way of thinking and seeing.

Even with my digital camera I’ve been in a “slow photography” mode. Ironic considering I have been shooting a lot of time-lapse work. While my camera is running capturing a time-lapse I usually have a second camera in the wings where I very selectively take a dozen or so photos. To take that approach to another extreme I picked up the pinhole camera to capture a few frames here and there. I get 6 photos per roll with this camera so depending on the lighting conditions I’ll run through a roll quickly during the day or use the same roll of film over a few night shoots.

The photo above of a very foggy and snowy view of Gates of the Valley in Yosemite National Park was taken this past March. This brief window in the fog lasted but a minute. This was one instance when I was in the right place at the right time. Expect to see a few more pinhole photos in the future. As I venture around in the coming months we’ll see what other “right place at the right time” photos come about.


Copyright Jim M. Goldstein, All Rights Reserved

Return of Film: Snowy Sunrise at Gates of the Valley

The post Return of Film: Snowy Sunrise at Gates of the Valley appeared first on JMG-Galleries – Landscape, Nature & Travel Photography.


Related Stories

  • Exhibit & Book Not To Miss – Carleton Watkins: The Stanford Albums
  • Exhibit & Book Not To Miss – Carleton Watkins: The Stanford Albums – Enclosure
  • In Defense of Pretty Pictures – Enclosure


JMG-Galleries

 
Comments Off on Return of Film: Snowy Sunrise at Gates of the Valley

Posted in Equipment


Getting Started Guide to Macro or Close-Up Photography

22 Aug
Close up photos of flowers can make for interesting colours and shapes

Close-up photos of flowers can make for interesting colours and shapes

There is something magical about seeing a subject up close and personal. This opens up a whole new world of options for you as a photographer. Close-up photography, or macro photography, can be a very rewarding form of photographic expression. The great thing about it is that you can do this from your basement at home, if necessary. Of course you can, and should, go outdoors too and setup shots in a forest or at the sea, but you can also setup shots of everyday subjects and shoot them up close.

Think of an old watch, a flower or even some food items that could be shot on your kitchen table. The shapes, textures and colours come to life in the world of macro photography, but it can be tricky and fidgety. Sometimes beginners are put off by this aspect and assume they need specialist skills to make close-up images. This is not necessarily true. Like any other aspect of photography, you need to understand how your camera works, and work within the limits of the equipment you have. Do you NEED to have a macro lens? In short, no. There are a few other cheaper options that you can experiment with before investing in a macro lens. Let’s take a look at how you can get going in close-up photography. This is really an introduction article, and I will be putting together some more detailed articles on the various aspects of macro photography, but first, let’s start with the basics.

Sometimes overexposing or underexposing can add to the image

Sometimes overexposing or underexposing can add to the image

1. Get as close as you can

This sounds obvious, but try it. Set your camera up on a tripod, choose a subject (anything will do really) and get your camera up close to the subject. Switch your camera to Manual focus. You can try autofocus, but generally you will be able to focus a little closer on manual focus. If you are using manual focus, the tripod will be important. There is nothing worse than trying to get your subject in focus when you are off balance, or you keep moving, so use the tripod. Once you have your subject in clear focus, look at the composition, just as you would with any other image. Use the various composition guidelines to put your image together and take the shot.

This is just the beginning, you will find that you will make minor adjustments and shoot another shot and so on. I find that when I do close-up or macro photography I get lost in this small world of intimate details. When you look through the viewfinder, try and visualize it as a small world or a small landscape scene. Pretty soon you will find that you will be totally swept up in it and that is the fun part.

Getting in close will help to isolate the subject and throw the background out of focus

Getting in close will help to isolate the subject and throw the background out of focus

2. Do I need a macro lens?

To do some great close-up shots, you won’t need a macro lens. You can use almost any lens to make close-up images. Bear in mind that each lens has a minimum focusing distance. This can range from a few centimetres (1-3″) to half a meter (20″) depending on the lens. Telephoto lenses will have a longer minimum focusing distance, while medium range lenses (24-70mm) will have a closer focusing distance. The difference between macro lenses and non-macro lenses is that a macro lens has a much shorter focusing distance (30cm/1 foot or closer) in most cases.

Also, a macro lens has a magnification ratio of 1:1. What that means is that the lens can reproduce the subject onto the sensor at it’s actual life size. So if your subject is 20mm in size and it is captured as 20mm on the sensor, that means it has a 1 :1 ratio.  Some lenses can only reproduce a 1:2, or 1:3, ratio which means that the subject will be half the size or less, on the sensor, relative to the size of the subject. I would suggest that you try close-up photography with the range of lenses you have. See which one works best. Prime lenses are usually a good place to start as they have great clarity and sharpness. I used my 50mm f/1.8 for a long time before I invested in a macro lens. Once you feel that you are limited by your lenses or that you think macro photography is a genre you want to expand on, only then consider buying a macro lens.

This image was shot with an old 70-300mm lens at F4

This image was shot with an old 70-300mm lens at f/4

3. What can I photograph?

The beauty of close-up photography is that – when one properly, a shot of a cup of coffee can be fascinating.  Suddenly the pattern in the latte cream looks amazing, the bubbles and cup shape become very intriguing. We very rarely look at everyday subjects up close and when we do, they can be really interesting. The same is true for flowers, an aged piece of wood, electronic goods, even a knife and fork, just about anything can become a subject for macro photography.

Some of the more challenging subjects are those that move. Subjects like insects, flowers, leaves, grasses and any other subject that is outdoors. For these, you will need more patience and better timing. Photographing a close up of a flower on a windy day will be really tough. If you want to do macro photography outdoors, maybe start off doing it on a windless day or in a sheltered area. Alternatively, you could go and buy some cut flowers and set them up in a vase, setup the shot and take a few images. The controlled environment of the flowers in a vase will make things much easier. Insects are even more challenging. They sit still for very short periods and move very quickly.

The name of the game to get good insect macro shots, is to be patient. To get some honeybee images in the past, I have set up my camera on a flower and attached my cable release. I then manually focused the lens to the flower and simply waited until a bee or another insect was in the right place and snapped off a few shots. Generally one in ten shots were usable and I was pretty happy with that, but they take time and patience.

Be patient and set up your shot beforehand when shooting insects

Be patient and setup your shot beforehand when photographing insects

4. Where to from here?

I found that I really enjoyed close-up photography. Once I got into it, I spent many hours trying to get some unusual images of flowers or insects. You may find this too. Get your tripod, cable release, choice of lens and set up a scene either indoors or outdoors. Get in a close as you can and start working with the scene. Change your depth of field until you are happy with what is in focus and what is out of focus. If you are using a macro lens, be careful about shooting with a very shallow depth of field. F/2.8 will mean that a VERY thin sliver of your scene is in focus, and that can be difficult to work with at first. Start at f/8 and work from there.

Experiment with different exposures, sometimes a slightly overexposed macro scene can look good, so play around with that. Above all, have some fun. Use it as an exercise in learning more about photography, and try and get some dynamic images too! In a future article, I will go into more details about settings and exposure modes. In the mean time, start shooting some close up images and let’s see how things look.

A close up of a poppy flower, the details are what is mesmerising!

A close-up of a poppy flower, the details are what is mesmerising!

For more information on macro or close-up photography check out these dPS article:

  • Equipment for Macro Photography – Video Tips
  • 6 Tips for Near-Macro Photography with a Telephoto Lens
  • How to Focus-Stack Macro Images using Photoshop
  • The Wonderful World of Macro Lenses: Close-Up Photography Lesson #4
  • Reverse Lens Macro: Close Up Photography Lesson #3
  • Extension Tubes: Close Up Photography Lesson #2
  • Getting Up Close with Close-Up Lenses

The post Getting Started Guide to Macro or Close-Up Photography by Barry J Brady appeared first on Digital Photography School.


Digital Photography School

 
Comments Off on Getting Started Guide to Macro or Close-Up Photography

Posted in Photography


Where’s the red dot? Leica releases new M-P Digital rangefinder

22 Aug

Under the slogan ‘Perfect understatement’ Leica has quietly released a new M-series rangefinder, the M-P Digital (240). Featuring a full-frame 24MP CMOS sensor and 2GB of built-in RAM, Leica claims that the new M-P digital is ‘twice as fast’ as the standard M (Typ 240). The original Leica MP (no hypen) announced in 2003, took the film M-series back to its 1950s roots by featuring unflashy ergonomics inspired by the M3. The new model updates the same approach, omitting the iconic Leica red dot. Click through for more details.

Articles: Digital Photography Review (dpreview.com)

 
Comments Off on Where’s the red dot? Leica releases new M-P Digital rangefinder

Posted in Uncategorized


Windowless Flights: 2 Planes to Stream Live Panoramic Views

21 Aug

[ By WebUrbanist in Technology & Vehicles & Mods. ]

windowless jet panoramic projection

The latest contender for ‘most scary yet exciting passenger cabin ever designed’ has trumped its predecessor – the first version boasted horizontal strips of screen on both sides of the plane’s interior while this latest one features effectively see-through ceilings as well as walls.

windowless plane in flight

windowless jet interior view

The S-512 being developed by Spike Aerospace boasts a four-hour flight time from New York to London, in part due to the reduced engineering requirements of a windowless cabin (and leading to at top speed of 1375 MPH).

windowless jet plane shot

windowless plane both sides

In this audacious private jet, the windows and their supporting infrastructure are instead being replaced with view screens that stitch together live footage being shot of the plane’s surroundings while it is in flight.

windowless concept cruising altitute

windowless plane city view

windowless plane mountain view

Meanwhile, six months later, Technicon Design has released concept drawings of Ixion, which likewise uses cameras mounted on the fuselage and wings to capture images for interior high-resolution display, but with an added dimension of also disappearing the rooftop of the cabin.

windowless jet night cruising

windowless plane architectural section

windowless plane walls roof

windowless plane space view

The nearly-continuous visual experience would be segmented by strips providing lights and air conditioning, and in theory the projections could be shifted on demand, from realtime scenery to other full-surround displays. For now, though, only the first is a series proposal for a real private plane – the latter is a conceptual design pushing the idea further but with no plan for actual deployment.

Share on Facebook


[ By WebUrbanist in Technology & Vehicles & Mods. ]

[ WebUrbanist | Archives | Galleries | Privacy | TOS ]


WebUrbanist

 
Comments Off on Windowless Flights: 2 Planes to Stream Live Panoramic Views

Posted in Creativity


20 More Photography Tips Every Travel Photographer Must Know

21 Aug

Pick up Oded’s new SnapnGuide (a dPS sister company) Snapn Travel here for only $ 7, a lifetime of travel memories in a snap. Traveling is fun and rewarding, but sharing memories of your journeys with friends, family, and the world through your own beautiful images can be even better.

Traveltips Georgia 2

Georgia (the country)

Here are 20 more tips for great travel photography:

(You can read Part One 20 Photography Tips Every Travel Photographer Must Know here)

Before you go:

1. Make the visual decisions

For most of us, deciding where and when to go is based on many decisions, not necessarily related to photography. But there are some small decisions you can make to turn an ordinary trip into a photo-worthy one. For example, let’s say you are going on a business trip. You can squeeze a few hours of photographing between meetings. But a much better option would be to take a day or two off and spend this extra time photographing on location.

Or when planning your next family vacation, add a little visual research before the trip. Is there a nice festival or a market worth visiting at your destination? Is there something unique like an interesting ethnic group or unusual landscape that’s worth documenting? These small visual decisions can make a huge difference in your photographic experience during your trip.

2. Build a shot list

A “shot list” is a term from the movie industry. It’s a list of shots that are planned for a specific day. Want to come back home with better travel photography results? Then the shot list is your tool for the job.

Traveltips thailand 2

Thailand

First, make a list of visual ideas as your “I won’t come home without” image list. Combine the iconic images with more creative ideas. For example, if you’re going to Paris, don’t skip the Eiffel tower. As a true symbol of Paris, it should be on your list. But make sure to add creative visual ideas, such as boutique wine shops, farmers markets, or anything to your liking. The shot list is there to help you, not restrict you. When you’re on the road, with so many new sights and smells competing for your attention, the shot list will keep you organized and be a continual inspiration for creating the next shot.

3. Smart gear choice

Don’t take all of your equipment with you! Match the gear to the destination. Do you really need that flash on the beaches of Thailand? Or that 50 mm prime lens for the safari trip to Tanzania? Choose wisely and you’ll worry (and carry) a lot less.

4. Photo boot camp

If you’re not making images on a daily basis, it will probably take you a few days on location just to “get in shape”. Get a jump-start by warming up at home by creating a daily photography routine at least one week before departure. This will make sure you’re at your best as soon as you step off the plane.

Traveltips thailand 1

Thailand

5. Coordinate expectations

Apart from our photographer’s “hat”, we all wear other hats, such as “father,” “spouse,” or “friend”. When traveling with others, we must wear many other “hats”. You must coordinate expectations with your travel partners to make sure the importance you’re placing on your photography during the trip won’t cause problems. Think and plan together about places you all can visit that would be great for even those who don’t take pictures: vantage points with scenic views, colorful markets, religious centers, etc.

When you get there

6. Location scouting

This is another movie industry term. It means that before even taking out your camera, it is wise to get familiar with your surroundings. Take at least a few hours to learn the area. Understand if there are any interesting places around your hotel, visit one or two places that are on your shot list and adjust it accordingly.

Traveltips Uzbekistan

Uzbekistan

7. Get up early

Yes I know, this one is a crazy ratings downgrade. But hey, travel photography is not for the lazy! The most precious thing on a trip is your time. Do not waste the hours of golden light of morning (or afternoon) on sleeping. Especially if you are traveling with non-photographers, it’s your time to do your best shots. You can save sleeping in for weekends at home.

8. Markets first!

Colors, food, local people, culture; markets are a photographer’s paradise. It’s always better to visit open markets (for the daylight) rather than covered ones. Some of the best markets I visited happen only once a week, be sure to be there.

Traveltips china

China

9. Diversify your shoots

You took a landscape photo with a wide lens? Excellent, now do it again with a telephoto lens.

You’ve got the main square in daylight? Wonderful! Come back at night with a tripod and shoot long exposures. Make the most out of your once-in-a-lifetime trip as your diversify your shoots and portfolio.

10. Get out of your comfort zone

We all have places that are less comfortable for us, but visiting a new place is an excellent opportunity to get out of your comfort zone. Do you not have the courage to approach strangers in the street in order to take their portrait? This is an excellent opportunity. You might be surprise how easy and fun it is to do this with strangers.

Traveltips thailand 3

Thaliand

11. Go iconic – but from a different point of view

We all know how Times Square, The Taj Mahal, and the Eiffel tower look. Don’t come back with the same, “we’ve seen it all before” images. You don’t have to skip those iconic places, they usually are truly worth the visit. But think of new and fresh ways to feature them. Try using a fish-eye lens, creative editing process, or reflections – the sky is the limit.

Traveltips Uzbekistan 2

Uzbekistan

12. Get inspired!

When I’m on a photography assignment, I always try to pay a short visit to a local gallery. Yeah, it sounds bit snobbish, but seeing the photography, paintings, or any other local art forms acts as a huge inspiration for my travel photography. We all want to create different and unique images. This is great way to do just that.

13. Setting a trap

I love this technique. Instead of jumping from place to place, looking for interesting subjects to photograph, I suggest to stay put and start building your frame with the background. Find an interesting vantage point on the street. You can even do this sitting at a sidewalk café. Establish your frame by determining the composition and exposure setting. Then wait for something interesting to enter your frame.

Traveltips Dominican Republic 4

Dominican Republic

14. Join forces with a local

From experience, in travel photography, there is nothing like working with a local photographer. Use a social platform (Facebook, Flickr, couchsurfing) and find a local photo enthusiast like yourself, who can show you all the best places to photograph. Of course, there are always risks when meeting strangers from the internet. Use your common sense and don’t meet them somewhere secluded at first.

Coming back home

15. Backup

I cannot stress how important this tip is. Don’t wait until it’s too late. Laptop, hard drive, cloud storage, you name it. Backup your images on more than one source.

16. Clean your gear

Before you store your stuff, you should clean it. Sea salt, sand, or even just fingerprints on the lens, can damage your gear. Keep your equipment in good shape and you will enjoy it for many years.

Traveltips Kyrgyzstan 3

Kyrgyzstan

17. Have a successes and misses notebook

In the past, I was recording a notebook of all my “almost got it” frames. Those fuzzy, overly bright, and “what the heck is this thing in the background” images.

I kept this notebook in order to learn how to not repeat my mistakes (and because we photographers like to be angry at ourselves from time to time). Then, I realized that it is just as important to understand why I failed as it is to understand why I succeeded. So, even today, after every assignment, I write ten things to keep and ten things to work on until the next trip.

18. Rest from it

I know it’s tempting, but resist the urge to filter, edit, and post-process your images the minute you get home. Give yourself at least a week before you do so. We tend to emotionally connect to our images, usually by the degree of investment and hard work we put into creating them. Give yourself time to disengage yourself from the experiences of your journey. This will help you see your images with less bias.

Traveltips laos 2

Laos

19. Get feedback

After learning from your successes and mistakes by yourself, use the help of someone else. Choose a friend, (preferably one with tact) and get his/her opinion on the images. It doesn’t matter if they’re a photographer or not. They should be honest, sincere and non-competitive with you.

20. Get it out to the world

Now, after resting from it, seeing it again with a new perspective, and hearing someone else’s advice, it’s time to get your art out to the world.

Choose up to 15 photos (not more). It is important to pay careful attention to the opening and closing images. Each image must stand on its own and together as a set. Add some text and post it to the world.

Note: the author would like to thank Nicholas Orloff for his help in writing this article.

Traveltips India

India

The post 20 More Photography Tips Every Travel Photographer Must Know by Oded Wagenstein appeared first on Digital Photography School.


Digital Photography School

 
Comments Off on 20 More Photography Tips Every Travel Photographer Must Know

Posted in Photography


Roberts Rüstzeug

21 Aug

Anfang Juli war es schwül und heiß in Saigon. Die tropische Sonne brannte mir auf den Pelz und ein zähes Gemisch aus Abgasen und meinem eigenen Schweiß in den Augen.

Ich stand auf einer Autobrücke, wollte eine Langzeitbelichtung des mir entgegenströmenden Mopedschwarms machen und hatte meine Hasselblad Mittelformatkamera auf’s Stativ gesetzt.

Als ich durch den Schachtsucher das Bild komponieren wollte, merkte ich, wie mein Rüstzeug abrupt an Boden verlor, weil eine in Gegenrichtung des übrigen Verkehrs vorbeifahrende Hand nach ihm griff. Geistesgegenwärtig umklammerte ich das Stativ und konnte dadurch größeres Übel verhindern. Als ich den Kopf hob, sah ich, wie zwei helmlose Halunken auf ihrem Moped davonknatterten.

Beinahe hätte meine treue Begleiterin unfreiwillig den Besitzer gewechselt. Durch das Gerangel war sie auf den Asphalt gekullert, Sucher und Mattscheibe waren herausgesprungen, das Magazin vom Gehäuse gesprengt. Sollte das etwa ihr Ende sein?

Hasselblad 500C und Zubehör

Hasselblad 500C und Zusatzbesteck für Langzeitbelichtungen. Adox produziert den abgebildeten Film leider nicht mehr. Eine gute Alternative ist aber der neue Rollei RPX 25.

Innerhalb der vergangenen paar Jahre hat mein Apparatefuhrpark mehrfach Metamorphosen durchlaufen. Einige analoge Kleinbild- und Mittelformatkameras sind durch meine Hände gegangen sowie diverse zugehörige Objektive, meist mit normaler bis weitwinkliger Brennweite.

Ein Apparat, dem ich allerdings seit fünf Jahren treu geblieben bin, ist meine Hasselblad. Ich habe mich sehr an das quadratische Mittelformat gewöhnt. Ist es manch einem vielleicht zu starr, gefällt mir die Ruhe und Ausgewogenheit, die sich da hinein komponieren lässt.

Blick vom Ufer der Donauinsel in Wien auf die Skyline der neuen Donaucity.

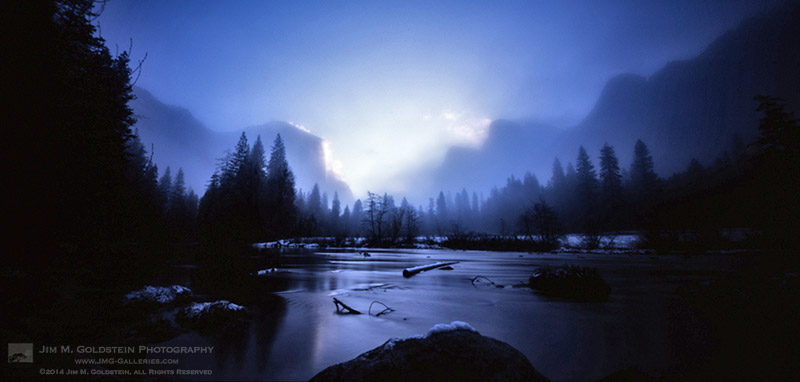
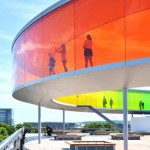
Donaucity, Wien, Juni 2014. Aus der Serie „60-second slices of present“.

Ich verwende sie häufig in Kombination mit einem 80 mm f/2.8 Carl Zeiss Planar Normalobjektiv und seltener mit einem 40 mm f/4 Carl Zeiss Distagon Weitwinkelobjektiv. Das zweite kommt inzwischen weit öfter an einer anderen Kamera zum Einsatz. Mehr dazu aber später.

Für Langzeitbelichtungen setze ich sie auf das oben bereits erwähnte Stativ – ein älteres Manfrotto-Modell. Abgesehen von seiner ausgezeichneten Standfestigkeit, finde ich, dass es auch eine ästhetische Symbiose mit der Kamera bildet (siehe Artikelbild). Mit dem 141RC 3-Wege-Stativkopf lassen sich Stadt- und Architekturaufnahmen präzise komponieren.

Da ich meist konzeptionell und über längere Zeit parallel an verschiedenen Bildserien arbeite, nutze ich zwei 6×6-Rollfilmmagazine. Eins ist für gewöhnlich gefüllt mit niedrigempfindlichem Schwarzweißfilm (dem recht neuen Rollei RPX 25), dem optimalen Material für meine städtischen Langzeitbelichtungen.

Das andere Magazin ist stets gefüllt mit Farbfilm, vorzugsweise mit Kodak Portra 160* oder 400*, da mir die milde Farbwiedergabe dieses Films gefällt.

Ein Glas türkischer Tee steht auf dem Fenstersims einer Bosporus-Fähre in Istanbul.

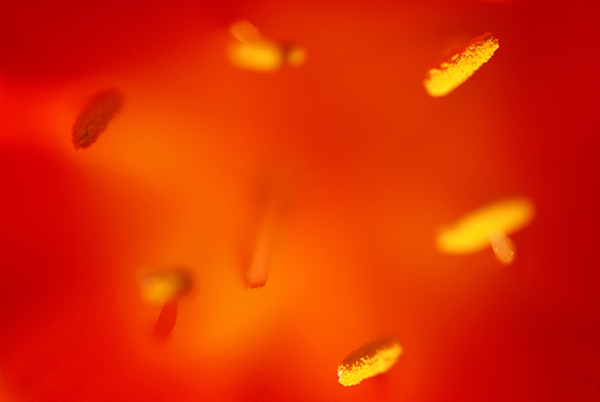
Istanbul, März 2014. Belichtet auf Kodak Portra 160.

Obwohl ich inzwischen immer seltener im analogen Kleinbildformat fotografiere, versuche ich, ihm treu zu bleiben. Ein bisschen Nostalgie muss sein, denn damit hat bei mir vor vielen Jahren alles angefangen.

Aus diesem Grund habe ich mir vor einiger Zeit eine Leica M6 und das Voigtländer 35 mm f/1.2* gegönnt. Diese Kombination bereitet mir sowohl auf der Straße als auch bei der Dokumentation von Familienfesten sehr viel Vergnügen.

Das (nicht zu) weitwinkelige, lichtstarke Objektiv ist beispielsweise im Zusammenspiel mit einem Ilford HP5+* auch bestens für Aufnahmen im Zwielicht und Halbdunkel geeignet.

Ein älterer Herr mit Lesebrille blättert in einem Buch.

Greife ich etwas tiefer in meine Werkzeugkiste, dann findet sich darin noch eine besondere Perle – eine Voigtländer Avus 9×12 Plattenkamera.

In Anbetracht ihres Alters von fast hundert Jahren ist es faszinierend, dass sie noch immer einwandfrei funktioniert. Sie kommt nicht besonders oft, aber doch regelmäßig zum Einsatz; immer dann, wenn ich wieder einmal Lust verspüre, mich an Portraitfotos zu versuchen.

Hatte ich sie zunächst mit einigen Testaufnahmen auf Planfilm auf Funktion überprüft, so nutze ich sie inzwischen überwiegend in Verbindung mit einem Rollfilmrückteil. So reize ich zwar nicht ihr volles Format aus, kann sie dafür aber bequemer und weniger kostspielig anwenden.

Voigländer Avus 9x12 Plattenkamera mit Rollfilmmagazin

Für Architekturdokumentationen und Auftragsarbeiten arbeite ich mit einer Nikon D800*. Neben dem am opulentesten auflösenden Sensor, den der DSLR-Markt derzeit hergibt, finde ich sie zudem auch noch verhältnismäßig handlich.

Allerdings sagt das einer, der für gewöhnlich mit einem Acht-Kilo-Rucksack und einem massiven Stahlstativ über der Schulter Stadtspaziergänge unternimmt.

Da ich als Linienfetischist besonderen Wert auf die Eliminierung stürzender Linien lege, nutze ich oft das Nikon 24 mm f/3.5 Tilt-Shift-Objektiv*. Was mir an diesem Objektiv besonders gefällt: Es ist relativ kompakt.

Ist es etwas schummriger, bietet sich der Einsatz meines Einbeinstativs* mit Kugelkopf und Actiongriff* an. Bei guten Lichverhältnissen kann ich mit dem Objektiv aber auch problemlos aus der Hand fotografieren. Das wiederum begünstigt, situativ und mit einem reportagebeeinflussten Ansatz zu arbeiten.

Oft genug gibt es Situationen, in denen es meiner Ansicht nach genauso interessant ist, ein Gebäude im Zusammenhang damit zu zeigen, was in ihm und in seiner Umgebung geschieht, als es ausschließlich als isolierten menschenleeren Baukörper darzustellen.

links: das Museum für Kunst des 21. Jahrhunderts in Rom, rechts: das Museum für Architekturzeichnung in Berlin

Links: das Museum für die Kunst des 21. Jahrhunderts in Rom, rechts: das Museum für Architekturzeichnung in Berlin.

Meiner Shiftwut musste ich im vergangenen Jahr erneut nachgeben, als ich auf ein fantastisches Accessoire stieß, das eine ungeahnte Potenzsteigerung meiner Nikon versprach. Aufgrund des verhältnismäßig hohen Anschaffungspreises und der Tatsache, dass nur wenig Referenzmaterial im Netz dazu zu finden war, kontaktierte ich kurzerhand den Hersteller.

Es stellte sich heraus, dass Zörk, das mittelständische Unternehmen mit Sitz in München, seit nunmehr einem Vierteljahrhundert spezialisiert ist auf die Herstellung verschiedenster abenteuerlicher technischer Erweiterungen für analoge und digitale Kamerasysteme und damit offenbar schon lange eine lukrative Nische bedient.

Herr Zörkendörfer persönlich rief mich außerhalb seiner Werkstattzeit zurück, um mich eingehend über die Funktionsweise des Adapters meiner Wahl zu beraten. Sehr kundenorientiert, sehr sympathisch.

Zwei Wochen später war ich stolzer Besitzer eines Adapters, der mir erlaubte, meine Hasselblad-Objektive an der Nikon zu verwenden. Der Adapter nutzt überdies den wesentlich größeren Bildkreis der Objektive aus; durch einen Shiftweg von insgesamt 40 mm (etwa das Doppelte der herkömmlichen Shiftobjektive), lässt sich durch nachträgliches Zusammenfügen der Teilbilder die Sensorgröße der Kamera effektiv bis auf das Zweieinhalbfache erweitern.

Ein Gebäude des Wangjing Soho Architektur-Ensembles von Zaha Hadid Architects.

Das neue Wangjing-Soho-Gebäudeensemble in Peking.

Obwohl ich aus Gewohnheit lieber mit Festbrennweiten arbeite, befindet sich auch das Zoom-Nikkor 24 – 70 mm f/2.8G ED* in meinem Besteckkasten. Eier legt es zwar nicht, als Wollmilchsau würde ich es aber schon bezeichnen, da es den für meine Zwecke nützlichsten Brennweitenbereich anstandslos abdeckt.

Ein Objektiv, das ich mir immer öfter für Aufträge leihe, ist das 14 – 24 mm Weitwinkelzoom*. War ich anfangs skeptisch ob der enormen perspektivischen Verzerrung, die es am unteren Anschlag im Bild verursacht, so habe ich inzwischen gemerkt, dass es sich doch sehr gut für die Abbildung von kleinen Innenräumen eignet.

Ja, und dann finden sich da noch das Nikon SB 900 Blitzgerät, diverse Filter, Adapter, Drahtauslöser oder lose Teile, die im Orbit um meine Kernausrüstung kreisen und deren einziger Zweck es zu sein scheint, verloren zu gehen, verschlissen oder vergessen zu werden.

Die Katalogisierung, Zusammenfügung und Bearbeitung meiner Bilddaten nehme ich in Adobe Lightroom* vor. Komplexere Pixelarbeit, wie beispielsweise das Enfernen von Chipdreck und Negativkratzern oder das Setzen aufwändigerer Auswahlmasken erledige ich in Photoshop und mithilfe eines Wacom Grafiktabletts*.

Für meine analogen Taten habe ich einen hybriden Workflow entwickelt. Gebe ich die Filme zunächst ins Labor meines Vertrauens, digitalisiere ich sie anschließend selbst mittels eines Epson V700. Danach durchlaufen sie den gleichen Prozess wie digitale Aufnahmen.

Roberts Arbeitsplatz

Ein Arbeitsplatz ohne eine Tasse guten Kaffees: Undenkbar. So aufgeräumt sah er allerdings nur für’s Foto aus.

Und was wurde nun eigentlich aus der Hasselblad nach ihrem Sturz auf den Asphalt? Sie hat ihn überlebt und mich anschließend noch weitere drei Wochen in Asien begleitet. Auf dem Tiananmen-Platz in Peking gewann ich mit ihrer Hilfe gar das Vertrauen eines mich vernehmenden Staatssicherheitsbeamten, indem ich sie ihm unbefangen in die Hände legte.

Mit dieser Geste gelang es mir, jeglichen Verdacht auszuräumen, ich könnte möglicherweise für eine dem chinesischen Staat feindliche Organisation tätig sein. Ironischerweise blockierte der Aufziehmechanismus der Kamera just am ersten Tag zurück in Deutschland. Jetzt ist sie beim Doktor, aber ich bin sehr zuversichtlich, dass sie es schafft.

* Das ist ein Affiliate-Link zu Amazon. Wenn Ihr darüber etwas bestellt, erhält kwerfeldein eine kleine Provision, Ihr zahlt aber keinen Cent mehr.


kwerfeldein – Fotografie Magazin | Fotocommunity

 
Comments Off on Roberts Rüstzeug

Posted in Equipment


Trending to the Unknown

21 Aug
Unknown Beach, Point Lobos

Unknown Beach, Point Lobos

Updates have been sparse as of late thanks to a full schedule and increasing demands at home. We’re approximately T-minus 21 days from our 2nd son arriving. As you’d imagine that means a lot of preparation, stress, and wondering.

Some of the more pleasurable prep work has been enjoying time with my 1st son, who is nearly 4, going to places like Yosemite and Point Lobos. I can’t say when I’ll take both sons to such beautiful locations to appreciate nature, but odds are its not going to be for a while. I’ve really enjoyed the ability to experience these locations with my son. Not only has it been an amazing experience to see his reaction, but it has also let my mind wander pondering what son #2 will be like.  In my minds eye I see him as a figure on the edge of a void lacking distinguishing characteristics. Characteristics I long to know hair color, eye color, what his laugh & voice will sound like, what interests he’ll have, etc. Waiting for the arrival of a new child is an interesting experience. The best way to describe it is trending to the unknown… a steady and slow movement to meet someone one step away from a void only to turn around and journey with them into the unknown of life.

Copyright Jim M. Goldstein, All Rights Reserved

Trending to the Unknown

The post Trending to the Unknown appeared first on JMG-Galleries – Landscape, Nature & Travel Photography.


Related Stories

  • Return of Film: Snowy Sunrise at Gates of the Valley
  • Wilderness Protection – Only As Strong As The Wilderness Act
  • Wilderness Protection – Only As Strong As The Wilderness Act – Enclosure
Feed Ads by FeedBlitz
powered by ad choices


JMG-Galleries

 
Comments Off on Trending to the Unknown

Posted in Equipment


Exhibit & Book Not To Miss – Carleton Watkins: The Stanford Albums

21 Aug

“The Yosemite Valley from the ‘Best General View,’” 1866

There is a lot we take for granted about National Parks, in particular the likes of Yosemite National Park, which are steeped in history particularly in the realm of nature conservation. If you’re a fan of Yosemite you may already know this year is the 150th Anniversary of the Yosemite Act of 1864. This single piece of legislation put the wheels in motion for the  eventual creation of our National Park system with the help of then U.S. President Abraham Lincoln.

What is particularly fascinating about this anniversary is that it may never have happened without Carleton Watkins photographing Yosemite in the early 1860′s with a camera capable of producing stereo views and another camera capable of holding 18×22 glass negatives. These 18×22 plates became known as the “mammoth plates”.    Watkins had a rough ride of it as a professional photographer losing his studio in the great San Francisco earthquake of 1906, but some of his photographs survived. (3) three of his albums reside at the Stanford University Libraries and select photos from these albums are now on display through August 17th, 2014 at the Cantor Art Center. Even more notable for Yosemite fans worldwide is the release of these 3 albums via a large format photo book aptly titled the Carleton Watkins: The Stanford Albums. Remarkably this beautiful large format book, containing 280 pages, is only $ 40. I received my copy this past week and it’s amazing. I highly recommend it both for the beautiful photos, rich history, and fine quality of the book. Before there was Ansel Adams there was Carleton Watkins and his photos are a rare glimpse into Yosemite Valley’s past.

Side Notes

What did I find so amazing about the images in this book?

  1. It reveals a view of San Francisco when it was still forming.
  2. It shows Yosemite more barren and populated in a different fashion than we see today.
  3. It shows how a single photographer first visualized wild landscapes setting the visual tone for future photographers to emulate for decades to come.

Copyright Jim M. Goldstein, All Rights Reserved

Exhibit & Book Not To Miss – Carleton Watkins: The Stanford Albums

The post Exhibit & Book Not To Miss – Carleton Watkins: The Stanford Albums appeared first on JMG-Galleries – Landscape, Nature & Travel Photography.


Related Stories

  • Exhibit & Book Not To Miss – Carleton Watkins: The Stanford Albums – Enclosure
  • Return of Film: Snowy Sunrise at Gates of the Valley
  • Wilderness Protection – Only As Strong As The Wilderness Act


JMG-Galleries

 
Comments Off on Exhibit & Book Not To Miss – Carleton Watkins: The Stanford Albums

Posted in Equipment


The Insightful Landscape – A New Landscape Photography Book

21 Aug

The Insightful Landscape - A New Landscape Photography Book

Announcing a new landscape photography book: The Insightful Landscape

A very special collaboration has been made by 26 highly talented landscape photographers including Guy Tal, Michael E. Gordon, Andy Biggs, Tim Parkin, Gary Crabbe, Floris van Breugel, Richard Wong, Alister Benn, myself and many more. (see the complete list below)

If you love Landscape Photography then you’ll want to pick up a copy. This book was put together to share our passion for nature and help make a chartable donation to the Cystic Fibrosis Foundation on behalf of a participating photographer’s son, who is fighting the disease.

Purchase The Insightful Landscape in print or digital format today


Complete Contributing Photographer List:

Dan Ballard

Alister Benn

Andy Biggs

Floris van Breugel

Peter Carroll

Bill Chambers

David Chauvin

Gary Crabbe

Ken Cravillion

Matthew Cromer

David Fantle

Jim Goldstein

Michael E. Gordon

Jack Graham

David Leland Hyde

Youssef Ismail

Joseph Kayne

Chuck Kimmerle

Colleen Miniuk-Sperry

Lon Overacker

Tim Parkin

Rafael Rojas

Jim Sabiston

Scott Schroeder

Guy Tal

Richard Wong

Copyright Jim M. Goldstein, All Rights Reserved

The Insightful Landscape – A New Landscape Photography Book

The post The Insightful Landscape – A New Landscape Photography Book appeared first on JMG-Galleries – Landscape, Nature & Travel Photography.


Related Stories

  • 101 Landscape Visionary Insights Not To Miss – A New eBook & Video Series
  • 101 Landscape Visionary Insights Not To Miss – A New eBook & Video Series – Enclosure
  • Wilderness Protection – Only As Strong As The Wilderness Act
Feed Ads by FeedBlitz
powered by ad choices


JMG-Galleries

 
Comments Off on The Insightful Landscape – A New Landscape Photography Book

Posted in Equipment


Sony a7S used to shoot Chevrolet commercial

21 Aug

Film industry accessory manufacturer Cinoflex was recently tasked with rigging up a new Sony a7S mirrorless camera for use on a Chevrolet commercial. After some testing, the Cinoflex Type SA7S Camera System was created to allow the filmmakers to attach the necessary range of auxiliary equipment needed on a high budget commercial shoot. Read more

Articles: Digital Photography Review (dpreview.com)

 
Comments Off on Sony a7S used to shoot Chevrolet commercial

Posted in Uncategorized