RSS
 

Archive for July, 2014

How to Make Instagram Filters in Photoshop: Amaro & Mayfair

25 Jul

With over 100 million users worldwide on both iOS and Android devices, Instagram’s success as a mobile platform and social network is clear to see. These days, it has an expanded web presence, so there are more opportunities than ever to show off your photography skills. Instagram’s 20 filters that fit a handy app are a great playground for photographers Continue Reading

The post How to Make Instagram Filters in Photoshop: Amaro & Mayfair appeared first on Photodoto.


Photodoto

 
Comments Off on How to Make Instagram Filters in Photoshop: Amaro & Mayfair

Posted in Photography


CASE Remote is a smartphone remote for your DSLR

25 Jul

Many modern digital cameras can be remote controlled via dedicated apps on your smartphone and a Wi-Fi link. Unfortunately this option is not available on older or lower spec models that come without a built-in Wi-Fi module. CASE Remote, currently available for pre-order on indiegogo.com, is compatible with a large number of Nikon and Canon models and slots into your camera’s hotshoe. Click through to read more at connect.dpreview.com.

Articles: Digital Photography Review (dpreview.com)

 
Comments Off on CASE Remote is a smartphone remote for your DSLR

Posted in Uncategorized


Meine innere Reise

25 Jul

Ein Beitrag von: Daniel Dankelmann

Jedes meiner Bilder ist ein Selbstportrait. Ich befinde mich nun seit 21 Jahren auf dieser Reise. Seid knapp einem Jahr halte ich einen Teil davon fotografisch fest.

Da ich nun schon seit einigen Jahren auch videografisch unterwegs bin, war es nur eine Frage der Zeit, bis ich eine neue kreative Ausdrucksform für mich entdeckte – die Fotografie. Somit ersetzte ich meine gammelige „Suff-Knipse“, die überwiegend auf Partys und Skate-Touren zum Einsatz kam, gegen eine Kleinbildfilmkamera. Mein Kleiderschrank wurde daraufhin zur Dunkelkammer und eine neue Leidenschaft war geboren.

Ich betrachte meine Fotografie als Dokumentation meiner persönlichen Reise. Diese führt mich derzeit durch das Skateboard-Filmprojekt „Wild Boyz“, das von mir filmisch und fotografisch festgehalten wird. Einen Trailer wird es in den nächsten Wochen oder Monaten dazu geben, erscheinen wird der Film Anfang 2015 auf DVD. Fotografisch werde ich das Projekt weiterhin dokumentieren. Ob daraus noch ein größeres Fotoprojekt resultiert, ist noch nicht sicher.

Ich liebe es, zu beobachten, zu dokumentieren, zu interpretieren und zu erschaffen. Die Kamera gibt mir die Möglichkeit, diese Liebe mit anderen zu teilen.

Ein Skater cruist schräg durch die Straße.

Ein Skater mit freiem Oberkörper und Shirt auf dem Kopf.

Diese Fahrt geht nicht geradeaus, sie nimmt Kurven, Kreuzungen und Umwege.
Wir balancieren auf einem schmalen Pfad zwischen Licht und Schatten.

Wir sind auf dem Weg des Lichts,
wenn wir größer denken als unser Schatten uns demütigen kann.

Skater auf einer Flutmauer, neben ihm das Meer.

Skater mit freiem Oberkörper liegt auf dem Boden und hält eine Hand ins Wasser.

Wer gegen den Strom schwimmt, stößt auf die Wand des Widerstandes.
Wer mit dem Strom schwimmt, gerät in die Welle des Untergangs.

In der Ruhe liegt die Erkenntnis von systematischer Manipulation und
menschlicher Natur.

Man droht zu ertrinken und die Sicht ist verschwommen.
Die Quelle schickt uns einen Begleiter,
um unseren Horizont zu erweitern.
Du bist niemals allein, wir sind alle eins, in unserem Sein.

Zwei Männer im Meer und viel Filmkorn.

Mich fasziniert das Duett von Schwarz und Weiß auf Film. Das gibt dem Bild die gewisse Balance. Ich mag es gern kontrastreich und habe eine Vorliebe für Korn. Das liegt nicht an der emsländischen Saufkultur, da bin ich eher der gemütliche Biertrinker.

Wenn ich nicht gerade mit meinen „Boyz“ und dem Rollbrett durch die Straßen ziehe, wandere ich auch gern allein durch die Wildnis des menschlichen Seins. Das ist für mich wie eine Art Meditation. Den Verstand abschalten und von der inneren Führung leiten lassen.

Eine Frau steht hinter einem fein verzierten Tor und schaut in die Kamera.

Täglich laufen wir an uns selbst vorbei. Jede Begegnung ist ein Spiegel Deines Selbst.

Solange wir uns der Manipulation des Systems hingeben, stehen wir hinter Gittern.
Wir sind unwissend gefangen in einer Zelle des egoistischen Verstandes.
Wir leben in Angst.
In dieser Angst verschließen wir unsere Öffnung für die universelle, göttliche Liebe.
Du trägst den Schlüssel zum Tor der Freiheit in Dir.
Es ist an der Zeit dieses Tor zu öffnen.

Seit frühester Kindheit verspüre ich das Bedürfnis, mich frei zu entfalten, wobei ich stets auf der Suche nach mir selbst war und bin. Diese Suche hat mich auf eine Reise geschickt, die mich zum Sinn meiner Inkarnation führt.

Mit der Fotografie habe ich eine Kunst gefunden, die mich bei dieser Reise auf kreative, dokumentarische und spirituelle Weise inspiriert und unterstützt. Dafür bin ich sehr dankbar.


kwerfeldein – Fotografie Magazin | Fotocommunity

 
Comments Off on Meine innere Reise

Posted in Equipment


Bench to Bedroom: Urban Furniture Turned Homeless Shelters

25 Jul

[ By Steph in Design & Guerilla Ads & Marketing. ]

raincity housing project shelter

Whereas London and Montreal have installed spikes on the sidewalks to keep homeless people from getting too comfortable, Vancouver offers a kind welcome with benches that transform into mini-shelters. A nonprofit called RainCity Housing teamed up with Spring Advertising to create the modified public benches in order to provide a covered place to sleep while simultaneously raising awareness.

Bench Homeless Shelter 1

RainCity provides specialized housing and support services for the homeless in Vancouver. This two-part project highlights the importance of RainCity’s work without a hint of the exploitation that’s often seen in homeless awareness campaigns, avoiding stereotypical images of derelict people and focusing on a solution instead.

Bus Bench Homeless Shelter 3

Bus Bench Homeless Shelter 4

The first bench, which reads ‘FIND SHELTER HERE,’ has a built-in roof that can easily be folded up when needed. The second features the message ‘This is a bench’ during the day. At night, glow-in-the-dark ink highlights the text ‘This is a bedroom.’

bench bedroom homeless shelter

The Vancouver campaign is one of many thoughtful projects that meet at the intersection of activism and urban design. An open-source street store that’s easy to set up in any city offers free clothes for the homeless, and 14 thought-provoking ideas seek new ways to manage the issue of homelessness whether by meeting the immediate needs of people who live on the streets or providing more long-term transitional living spaces.

Share on Facebook


[ By Steph in Design & Guerilla Ads & Marketing. ]

[ WebUrbanist | Archives | Galleries | Privacy | TOS ]


WebUrbanist

 
Comments Off on Bench to Bedroom: Urban Furniture Turned Homeless Shelters

Posted in Creativity


How to do Great Portraits with One Light

25 Jul

When you first start experimenting with lighting it’s easy to become overwhelmed. Never has the old expression K.I.S.S. (keep it simple stupid) been more appropriate. The most important step is to master what you can achieve with one light source before you start adding others.

1b

Besides, what you CAN achieve with only one light source, used correctly, is quite remarkable.

For this article I have delved into my back catalogue and sourced images that were shot with a single speedlight off-camera. I hate carrying tons of equipment and even now, for 80% of my commercial work, I will try to use one light source only when possible.

2

Shot with a Canon 600EX-RT Speedlite bounced into a 40” white Profoto umbrella

In the below business portrait a diffused umbrella gives us nice catch lights in the subject’s eyes, while allowing for rapid fall away to bring out the shadows. The portrait is shot against a pop-up Westcott black background. A diffused umbrella is a great low-cost investment that massively improves the quality of light from your speedlight, and is easily set up and transported.

3

Lit with a Canon RT600 Speedlite into a Phottix Para-Pro diffused umbrella

To create the image below I had to expose for the blue sky and then pump as much light into the subject as possible – this is a speedlight at the limit of its capability – the umbrella helps to increase the size and evenness of the light spread. The image was shot at 24mm so the umbrella is as close to the subject as possible without being in the frame.

4

Lit with a Sony HVL-F58 speedlight bounced into a 40” white Profoto umbrella

It is entirely possible to create professional results without spending a fortune – this cropped cutaway headshot used a Sony SM58 speedlight with an Orbis ring-flash modifier handheld over the top of the speedlight. For this modifier to be effective you really need to be quite close into your subject, as the flash output is significantly reduced by the modifier. Used properly though it can create some great results.

5

Lit with a Sony HVL-F58 speed light and an Orbis Ring Flash modifier

6

Another example of a portrait shot with the same modifier, lit with a Sony HVL-F58 speed light and an Orbis Ring Flash.

Notes for doing one light portraits:

  • When you are shooting single light setups, you need to remember to keep it simple
  • You can create some great shadows with a single light source
  • Watch out for hotspots created by undiffused light
  • Try blend your added light with the ambient light
  • Using large modifiers can help to spread your light more evenly
  • Move your subjects, not the light, to fine tune your images
  • Experiment by changing your position to the light source
  • Work with the distances, subject to light source, to change the hardness and softness of the light

Below is an example of blending the ambient light with artificial light. The speedlight in this instance is to camera right on a light stand about six feet from the model, and slightly in front of her. Shot at full power with no modifier it is hitting the model and the tree. While by no means perfect the image does work as the over exposure on the tree gives a little separation.

7b

Lit with a Sony HVL-F58 with no modifier

We can see the same model here closer to sunset; shot with a speedlight fitted with an orange gel, bounced into a 30” silver umbrella to emphasize and enhance the already warm available light.

8

Lit with a Sony HVL-F58 speedlight, gelled, bounced into a 30” Profoto silver umbrella

Reflectors can also be used to great effect with a single light source, especially when mixing the ambient reflected light with flash fired directly into the reflector will give your images that extra pop. In the portrait below, the natural light and sun were not enough to light the model. A half-power flash from a speedlight helped to improve the overall lighting of the image, and really make the catch lights in the sunglasses stand out.

9

Lit with a California Sun Bounce gold/silver and a Sony HVL-F58 speed light

Sometimes ambient light is almost enough. In the below portrait 95% of the light is coming from a window camera left. A thin white blind diffused the light beautifully and evenly but didn’t give the catch lights in the eyes. To fix this I used a diffused umbrella with a speedlight on ¼ power, slightly to camera right. Because of the low power setting the artificial light doesn’t really change the ambient light but does give the eyes that needed brightness to make the image.

10

Lit with natural window light a Sony HVL-F58 and a Phottix para pro diffused umbrella

In conclusion

Everything you see here was lit with a single speedlight, and reasonably priced, easily set up modifiers.

Modifiers used – Silver and white umbrellas, a diffused umbrella and an Orbis Ring Flash all of which can be purchased for a few hundred dollars.

Have you done any portraits using only one light? Do you have any additional tips or questions? Please share or ask in the comments below.

For more portrait help try these:

  • Using Off-camera Flash to Fix Lighting Problems for Outdoor Portraits
  • Tips for Great Beach Sunset Portraits
  • 6 Portrait Lighting Patterns Every Photographer Should Know
  • Portrait – Lighting the Shot, a dPS ebook

The post How to do Great Portraits with One Light by Leo Edwards appeared first on Digital Photography School.


Digital Photography School

 
Comments Off on How to do Great Portraits with One Light

Posted in Photography


500px now supporting Lytro ‘Living Pictures’, offering users $250 rebate on Illum

25 Jul

Photo sharing site 500px has announced that it is now supporting images uploaded in Lytro’s unique ‘Living Pictures’ format, and is offering its customers a $ 250 discount on the purchase of Lytro’s Illum camera (MSRP $ 1599). The Illum is available now for pre-order and is expected to start shipping within the next couple of weeks. Click through for more information.

Articles: Digital Photography Review (dpreview.com)

 
Comments Off on 500px now supporting Lytro ‘Living Pictures’, offering users $250 rebate on Illum

Posted in Uncategorized


Sony expands image sensor production for mobile devices

25 Jul

Reuters has reported that Sony is planning to invest 35 billion yen (approximately US$ 345 million) to expand its manufacturing capacity of smartphone and tablet image sensors. Sony says the investment will allow for a 13 percent increase in production to 68,000 wafers per month in 2015. Sony leads the market for smartphone imaging sensors, and supplies the sensors for Apple’s iPhones and a large number of Android smartphones. Read more at connect.dpreview.com

Articles: Digital Photography Review (dpreview.com)

 
Comments Off on Sony expands image sensor production for mobile devices

Posted in Uncategorized


Book of Shadows: 2D Shape Cutouts Cast Silhouettes on Pages

24 Jul

[ By WebUrbanist in Design & Products & Packaging. ]

motion train animated example

A children’s book with an interactive twist, Motion Silhouette engages readers through pop-up pieces that require lighting to animate shadow pictures on each page.

motion train moving page

motion train other page

motion womans face page

motion butterfly shape page

The idea is to add elements of manual animation that are necessarily subjective – each person will hold, turn and highlight the cutouts in different ways.

motion animated book shadow

motion silhouete tree city

motion silhouette

Secondary readers or viewers (young kids watching over parents’ shoulders) will also have their own unique experience each time.

silhoutte book one

silhouette spider web

silhouette plant shapes

silhouette cross page

silhouette bird page

Motion Silhouette is actually a sequel to another book, simply titled Silhouette (excerpts shown above), a work which similarly uses slightly less-developed pop-up pages to create a more basic multi-dimensional experience.

motion silhouette book

From its Japanese creators, Megumi Kajiwara and Tathuhiko Nijima: “I will begin to talk about the story and illustrations shadow falls on top of the page overlap. In this work, you can enjoy the animation of shadow phantasmagoric by you move the light. Trees and become bigger and bigger, which aims to train a distant star. Story that changes depending on the page falling shadows, shadows move around the top of the page.”

Share on Facebook


[ By WebUrbanist in Design & Products & Packaging. ]

[ WebUrbanist | Archives | Galleries | Privacy | TOS ]


WebUrbanist

 
Comments Off on Book of Shadows: 2D Shape Cutouts Cast Silhouettes on Pages

Posted in Creativity


How to Master Your DLSR in One Afternoon a Beginner’s Guide

24 Jul

As the Editor-in-Chief of CLARITY, I believe that photography is one of the most unique forms of visual art. As a photographer, you must possess an ability to express yourself visually and also be technically proficient with the tools of your craft.

Thankfully, the technology is relatively simple to understand. Given a small amount of time, anyone can master the mechanics of their DSLR very quickly. I’m referring to the technical side of photography, or more specifically, how to use your camera.

photographybb-pentax-k7

I’m sure you’ll agree, digital SLR cameras are pretty appealing contraptions. They constantly evolve with new bells and whistles, and shiny attractive buttons and dials, but at their very essence, a camera is quite simply a box that captures and records light through a small opening. Light enters the camera and hits a sensor for a certain period of time, and that’s it. Too much light and the photo will be over-exposed (too bright). Not enough light and the photo will be under-exposed (too dark). By the end of this article, if feel stuck in Automatic Mode you will be able to break free and let your true creativity reign!

So how do you know when you have the optimal amount of light? Thankfully, when you are shooting in Manual mode, your camera has a built-in light meter to show you if your exposure is going to be too dark, too bright, or just right. You simply need to know how to control the amount of light that enters your camera, and for how long the sensor is exposed to that light.

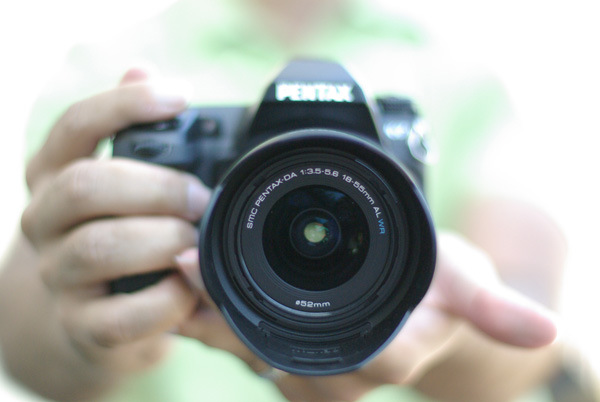
Start Right Here – learn how to master your DSLR

There are three ways to control the amount of light that enters your camera, and all three are used to make your photograph either brighter or darker.

The Exposure Triangle

The first is the size of the opening through which light enters, called the aperture of your lens. The next is the duration of time that your camera sensor is exposed to the light, referred to as the shutter speed. The final option controls how sensitive the camera is to light, known as the ISO. These three controls all interact with one another in a give-and-take relationship, and the following “Exposure Triangle” is a great tool to help you understand the dynamics of these relationships.

Now, the trick is to balance these three options to achieve a perfect exposure. Typically, you will choose two ways of controlling how light enters the camera, and then compromise on the third. The two choices you make are solely dictated by the aesthetic you would like to achieve. Aperture size, shutter-speed, and ISO all have individual benefits, but they also produce side-effect consequences that lend an aesthetic component of their own. Let’s explore how they work in more detail.

Part One – Aperture

The size of the “hole” through which light enters your camera is called the aperture. Mechanically, the aperture is a little diaphragm inside the lens that you can widen or narrow by telling your camera what f-stop you would like to use. The f-number is a funny measurement because a small f-number (like f/2.0) equates to a wide opening, whereas a large f-number (like f/22) equates to a small opening. As you would imagine, a large opening allows more light to enter the camera resulting in a brighter photograph, and a small opening lets in less light resulting in a darker photograph. Pretty straightforward stuff so far right?

Side Effect of Aperture

The aesthetic effect of varying the aperture is that light entering a wide aperture translates into less focus between the foreground and the background in the photograph. This is how photographers blur out the backgrounds in their photos. When you want to isolate a subject by blurring out the background, you would use a wide aperture.

DOF f2 8 Dave Seeram

Light that enters through a smaller, tighter, aperture is more focused than light entering a wide aperture, and light that is more focused translates into sharper focus through the foreground-to-background depth in a photograph. So if you want everything as sharp as possible through the depth of your scene, you would want to use a narrow aperture.

DOF f16 Dave Seeram

Part Two – Shutter Speed

The shutter is basically a little curtain that opens and closes behind the aperture. It can be open for a long amount of time (like seconds, minutes, or even longer), or a short amount of time (like quick fractions of a second). As the shutter stays open longer, more light is captured by the sensor resulting in a brighter image. The shorter the shutter speed, the less light is captured resulting in a darker image.

Side Effect of Shutter Speed

The aesthetic effect here is that a fast shutter speed allows you “freeze” any motion in the scene, whereas a slower shutter speed blurs any motion. Imagine taking a photograph of a falling water droplet. If your shutter speed was set to 1/1000th of a second, the shutter is open for such a brief fraction of time that the drop would appear frozen in mid-air when photographed.

Fast ss dave seeram

Alternatively, if you set a much slower shutter-speed such as half a second, then the movement of the falling drop would be captured as a blur.

Photographybb traffictrails1

Give-and-Take

Typically, fast shutter speeds require a larger aperture for the sensor to capture enough light to produce a well-exposed photograph. Conversely, slow shutter speeds tend to require a smaller aperture to limit the amount of light coming in over the longer duration. You can see how these factors are all starting to work together.

Part Three – ISO

The third way of adjusting the overall brightness of your photograph is the ISO, which controls how sensitive the camera sensor is to light. A low ISO (like 100) results in a darker photograph, while a high ISO (like 6400) results in a brighter photograph.

Side Effect of ISO

Of course, there is a trade-off here too. The aesthetic compromise of using a higher ISO means that while you will produce a brighter image, a higher ISO also introduces more grain (or “noise”) into a digital photograph.

Usually, you will first decide upon your aperture and shutter speed based on the combination of their aesthetic effects to your vision for the final image, while aiming to keep your ISO as low as possible. If you know that you need a certain shutter speed along with a certain aperture and the resulting image is still too dark, that’s when you increase the ISO.

Generally speaking, when you’re shooting in an environment that is dark or dimly lit, you’ll want to raise the ISO to make the sensor more sensitive to light. When the lighting conditions are bright, you can keep the ISO low.

It’s all about finding a balance between these settings to achieve the best exposure. Once you decide upon one or two of these settings, the camera will require some compensation on the other.

Photographybb exposure triangle

The Exposure Triangle is a great reference to demonstrate how increasing or decreasing any one of these three settings affects the exposure of the image. This stuff can be learned quite quickly, but it’s best to experiment with these settings to see how they operate in the real world. This will help you gain a technical understanding of how to use your camera, but there’s still a long way to go with regards to making photographs that communicate. Remember, photography is a visual language. Once you learn how to use the camera, you can then learn to translate your vision into captivating photographs.

Both the technical and artistic aspects play important roles in the making of a beautiful photograph. At CLARITY, we show our readers how to quickly learn the technical side, but we go even further to teach the importance of developing your creativity. We’ll show you step-by-step techniques to making stronger photographic compositions, and what to do when you feel like your vision and results don’t line up. Join other DPS readers, and we’ll give you everything you need to know to make great photographs with ease, in any situation. Get a subscription to CLARITY on sale now at SnapnDeals.com.

SNAPNDEALS CLARITY BANNER

The post How to Master Your DLSR in One Afternoon a Beginner’s Guide by Dave Seeram appeared first on Digital Photography School.


Digital Photography School

 
Comments Off on How to Master Your DLSR in One Afternoon a Beginner’s Guide

Posted in Photography


24. Juli 2014

24 Jul

Ein Beitrag von: Juergen Modis

Ein alter Ast liegt am Strand. Eine Polaroid-Fotografie.


kwerfeldein – Fotografie Magazin | Fotocommunity

 
Comments Off on 24. Juli 2014

Posted in Equipment