RSS
 

Archive for June, 2014

Adobe Lightroom Mobile now available for iPhone

19 Jun

lr-mobile_ipad_iphone_sync_1400x80011.jpg

Adobe has announced that Lightroom Mobile – first released for the iPad back in April – is now available for the Apple iPhone. Available for owners of Lightroom 5 for desktop, Lightroom Mobile essentially allows you to work on images on an Apple iPad or iPhone and sync adjustments between mobile and desktop versions of the software. Click to read more at connect.dpreview.com

News: Digital Photography Review (dpreview.com)

 
Comments Off on Adobe Lightroom Mobile now available for iPhone

Posted in Uncategorized


Adobe announces new ‘Focus masks’ feature in CC update

19 Jun

adobe_cc.jpg

Following last week’s video teasing the release of a new feature coming to Photoshop CC, Adobe has made the update official. In addition to the ‘Focus Masks’ feature that we already knew about, today’s official announcement brings a host of mostly minor new features including new blur effects, updates to content aware fill, and improvements to tools like smart guides. Read more

News: Digital Photography Review (dpreview.com)

 
Comments Off on Adobe announces new ‘Focus masks’ feature in CC update

Posted in Uncategorized


Amazon Fire phone packs 6 cameras for 3D effects and object scanning

19 Jun

fire1.jpg

Amazon has officially announced its much-rumored smartphone, the Fire. Packing in six cameras in total, four of them are dedicated to enabling a new ‘Dynamic Perspective’ 3D-user interface possible, whereby the device can track a user’s face and change how content is displayed. The main 13MP rear-facing camera has an F2 aperture and optical image stabilization. As well as being used for capturing photographs is also enables a new feature called Firefly, which can scan and identify millions of items. Read more

News: Digital Photography Review (dpreview.com)

 
Comments Off on Amazon Fire phone packs 6 cameras for 3D effects and object scanning

Posted in Uncategorized


18. Juni 2014

19 Jun

Ein Beitrag von: Karo Krämer

Aussätziger © Karo Krämer


kwerfeldein – Fotografie Magazin | Fotocommunity

 
Comments Off on 18. Juni 2014

Posted in Equipment


10 Reasons Why a Pro is Using a Mirrorless Camera for Personal and Paid Jobs

19 Jun

Image01

Everyone can take a picture, but as photographers (professional or aspiring), we have the skill set and the tools to create great images in any situation. We have the ability to turn the ordinary into extraordinary through photography. As the saying goes, the shoemaker’s kids have no shoes, and similarly, we often don’t put the same emphasis on images for ourselves and our family as we do for others and their families.

Personally I’ve always struggled with feeling like the “photographer” during personal affairs; I don’t feel right bringing a big DSLR, lens and flash to a family function, vacation or personal outing. Often this means that I either trust others to take pictures, or I take my own quick snaps with a point-and-shoot or with my iPhone.

My wife and I welcomed our first daughter Ava last March, and as a photographer, I know the importance of documenting those young, tender moments, and how impactful it can be to tell the story of childhood through photography. At the same time, I didn’t want to be “that Dad” who is always lugging around a camera bag. Quick aside: if that’s you, that’s perfectly fine, it just doesn’t work for me personally. I wanted to get great pictures of Ava on vacation, I wanted to be in the pictures myself, I wanted to capture happy moments around the house and I wanted to document her first Christmas. All the while, I wanted to leave the “big guns” in the studio.

Image02

With my mirrorless camera (I use the Fuji X-T1, X-E2 and the X100S), I can still take those great images while not standing out as a photographer. In fact, all of the images in this blog post are taken with my Fuji mirrorless cameras, and you probably didn’t know the difference

Creative Loop Versus Business Loop

Let’s back-up to 9 years ago. My story of discovering photography is not all that different from most photographers. I got into it because I loved the creative side of photography: the art, the composition, the lighting and the medium’s storytelling ability. We all start out in a “Creative Loop” that is a cycle of being creatively inspired, practicing, educating ourselves, learning and then gathering feedback.

Once you start out in business as a photographer, though, priorities often shift. As an entrepreneur, we have so many other aspects to think about outside of the creative process, such as marketing, pricing, branding, clients, workflow, customer service, and so on. We enter into the “Business Loop” that pulls our energy and attention away from the creative side.

For me, after a few years of being a professional photographer, I was becoming recognized, awarded, and known for my skills as a photographer. I became comfortable with my creative abilities and therefore much of my focus shifted to the business side of being a photographer.

Mirrorless Love

In October 2013, I attended a workshop with world-renowned photographer David Beckstead where he taught his approach to light, shadows and composition. What inspired me the most though was David’s shooting style with his Fuji X-E1, and how it forced him to be purposeful, be intentional and slow down. From the moment I looked through the electronic viewfinder (EVF) and saw the ability to shoot in Black and White and see in terms of tone and mood. I was hooked.

Fast forward to today and I am now shooting 60% of my professional work with my Fuji mirrorless camera, and 100% of my personal work with it. Here are the 10 reasons that I love shooting with a mirrorless camera.

Mirrorless Photography Love #1: Intentional and purposeful photography

I photograph mostly with my Fuji camera set to B&W mode and my Nikon full-frame camera set to colour, so when I am photographing, I am intentionally choosing to create an image in colour or B&W as I shoot. It is almost as if I am post-processing my images as I shoot. What I love most about this process is that it makes me think about these things before I press the button and it makes me photograph with greater purpose.
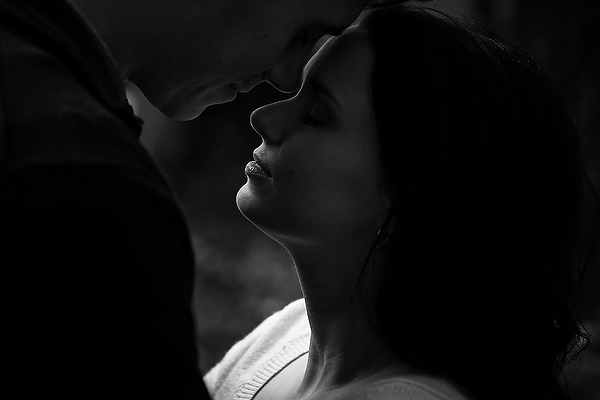
Image03

Mirrorless Photography Love #2: More thoughtful photography

Admittedly, the processing and usage of most mirrorless cameras aren’t as “snappy” and quick as the high-end DSLRs, but I actually like that. My Fuji mirrorless cameras makes me more thoughtful and forces me to slow down and be more methodical about my compositions and timing. This has made me a better photographer with more intentional images and less “spray and pray” sequences.

Mirrorless Photography Love #3: Seeing light, tone and mood

The electronic viewfinder (EVF) in my mirrorless cameras opens up a whole new world of possibilities. You’re looking at a processed image as it’s happening, it’s “what-you-see-is-what-you-get”. This has several benefits:

  • You can see the image as you are capturing it, which means you don’t have to review and look at the screen (chimp) afterwards.
  • You can see the exposure as you’re creating it, so you can more accurately fine-tune your exposure and get it right in the camera with more accuracy.
  • In my case, where I shoot in B&W mode, it allows me to see that monochrome image as I’m making it so I am free from distraction of colour. It allows me to focus more on the light, tone and mood.
  • When I’m shooting in colour mode, I can see the image in its “enhanced” state – with saturation, contrast, tone and sharpening adjustments applied. Sometimes I’m seeing an image better than what it looks like in real life!

Mirrorless Photography Love #4: Saves time

It’s obvious to see how shooting with a mirrorless camera, and an EVF specifically, will save you a ton of time on the back-end of your workflow. Shooting with greater purpose, while seeing mood and light more effectively and making exposure adjustments as you shoot, will result in more refined images right out of the camera, which eliminates a lot of post-processing work.

Mirrorless Photography Love #5: Low-profile presence

The physical appearance of a mirrorless camera is closer to that of a point-and-shoot instead of a DSLR. This is a good thing if you’re a photographer, like me, who wants to “blend in” with a crowd and not stand out.

Image04

Mirrorless Photography Love #6: Lighter and smaller

The smaller physical size also takes significant weight off of my shoulders and back, which I appreciate during a 12-hour wedding day. It also means that I can have a smaller camera bag. For the travelling photographer, you’ll appreciate the compactness as well.

Mirrorless Photography Love #7: Being a part of the picture-making process

This is highly subjective, but for me, the physical form factor of my mirrorless camera has a certain “feel” to it that makes me feel as though I am a part of the picture-making process. The raw, hard, mechanical and manual feel to my Fuji camera is so much more inviting and intimate. This inspires me to shoot differently and puts me in a different place creatively.
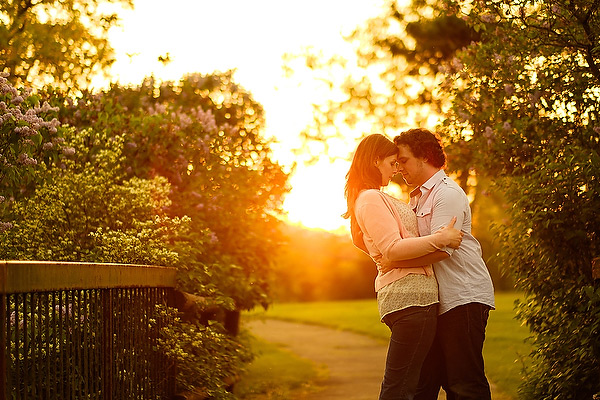
Image05

Mirrorless Photography Love #8: Improved autofocus

The benefit of not having a mirror involved in the picture-making process means that there is less to go wrong in terms of autofocus. The accuracy of autofocus in mirrorless cameras is significantly better than DSLRs because of this. Secondly, because the mirrorless camera doesn’t have to rely on a separate phase-detection AF chip to focus, the focus points aren’t limited to the center of the frame. This means that your autofocus points have great coverage and more flexibility.

Mirrorless Photography Love #9: Easier AF refinement

The EVF in mirrorless cameras means a whole new world of possibilities with regards to manual-focus. Specifically, split-image and focus-peaking are huge benefits that make manual focus and AF focus refinement much easier with a mirrorless camera.

Mirrorless Photography Love #10: More intimate subject engagement

The LCD screen on a mirrorless camera is the same as the EVF, and therefore you can use them both interchangeably without limitation. Being able to use the LCD screen has a huge benefit in that it allows me to engage and have eye-contact with my subject when it’s needed.

Image06

The Future of Photography

What does the future of photography look like? Is mirrorless a part of it? I believe so. There are three main reasons why I feel that mirrorless cameras and the mirrorless market will shape the future of photography:

Technology

The technological gap between the mirrorless line-up and the DSLR line-up is narrowing. Already there are so many reasons that mirrorless cameras are better for many photographers, as I’ve outlined above. The remaining areas where DSLRs have the leg-up on the competition are diminishing. My estimate is that within the next two to three years, the mirrorless technology will have caught up, and in six to eight years, the only real option on the market will be mirrorless cameras.

Innovation

The attention that mirrorless cameras have been getting has done wonders for the photography industry. What I love most about it is that it’s no longer a monopoly, and competition ultimately fuels innovation. Every camera manufacturer needs to be thinking forward, and this will push the industry and the technology in a positive direction.

Why Not?

Lastly I ask – why not? Why shouldn’t mirrorless technology be a part of the future? Maybe I should ask this a different way – why do we need the mirror in cameras today? It’s an old technology that is clunky, outdated and unnecessary. If we can use the same sensors, have the same kind of processing power, have the same autofocus, and ultimately achieve the same kinds of images without the mirror, wouldn’t you just say that it’s one more thing to break or to worry about?
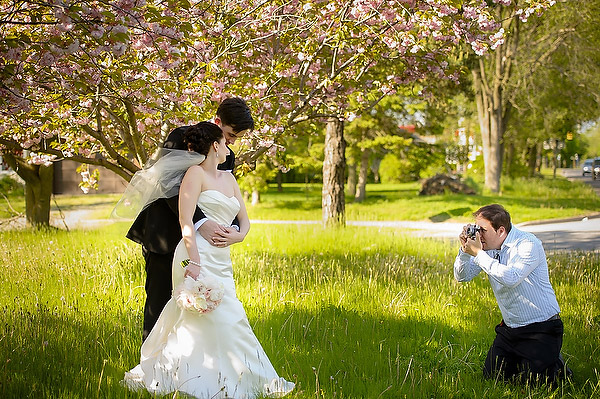
Image07

Further Discussion

If the topic of mirrorless photography intrigues you and you’d like to further the discussion, I would love to talk! Please post your comment in the section below.

The post 10 Reasons Why a Pro is Using a Mirrorless Camera for Personal and Paid Jobs by Bryan Caporicci appeared first on Digital Photography School.


Digital Photography School

 
Comments Off on 10 Reasons Why a Pro is Using a Mirrorless Camera for Personal and Paid Jobs

Posted in Photography


Adobe CC Announcements: What you need to know

19 Jun

shared:AdobeLogo.png

This morning Adobe announced a new photography-focused plan for Creative Cloud subscribers, new feature additions to Photoshop CC and two apps – an iPhone version of Lightroom Mobile and Photoshop Mix. We’ve written about all of these things individually, but if you’re thoroughly confused about what it all means, click through for the main takeaways.

News: Digital Photography Review (dpreview.com)

 
Comments Off on Adobe CC Announcements: What you need to know

Posted in Uncategorized


7 Extreme Human Habitats & Unexpected Urban Wonders

18 Jun

[ By Steph in 7 Wonders Series & Travel. ]

Strangest Cities Main

Humans have established settlements in the strangest of places, from the base of an extremely lethal volcano in Japan to a platform of oil rigs built on the remains of seven ships in the Caspian Sea. These 7 cities are among the weirdest and most unusual in the world, requiring residents to wear gas masks or sort through trash for a living.

Gas Mask City: Lethal Japanese Settlement at the Base of a Volcano
Strangest Cities Miyake Gas Masks 1
Strangest Cities Miyake Gas Masks 2
Strangest Cities Miyake Gas Masks 3

Eerie black-and-white images depict groups of people – including a wedding party – gazing at the camera through the darkened eyeholes of old-fashioned gas masks. Were these created for some kind of movie or photography project? Nope. Wearing gas masks was part of everyday life for residents of Miyake-jima, a lethal settlement at the base of the extremely active Mount Oyama volcano in Japan. The volcano spews sulphuric gas even when it isn’t in the midst of an eruption, an air raid siren warning inhabitants to put on their masks when the levels get too high. An eruption in June 2000 forced the evacuation of all residents, and the island was closed to human habitation for more than four years, but nearly 3,000 people decided to return in 2005, retaking the abandoned structures they had left behind. A third of the island is still off limits to human travelers, and residents must undergo mandatory health checks.

Neft Dashlari: Floating City of Oil Workers in the Caspian Sea
Strangest Cities Oil Rocks 1
Strangest Cities Oil Rocks 2

Neft Dashlari (Oily Rocks) is – was – a Soviet city in the middle of the Caspian sea. Just after World War II, as Russia tried to recover from the Nazi invasion, the nation’s government began to daydream about the vast oil reserves believed to be far below the sea in what is now the independent state of Azerbaijan. In 1949, Soviet engineers struck top-quality oil at a depth of 1,100 meters below the seabed at a location mariners called “Black Rock.” Certain that they had found the answer to their problems, the Russian government began to build an entire city with the foundation consisting of seven sunken ships including ‘Zoroaster,’ the world’s first oil tanker. They constructed a network of oil platforms linked by hundreds of miles of roads, filled with apartment blocks for 5,000 oil workers, a cinema and even a park. For a while, it was a ‘Stalinist utopia for the working class,’ but with the collapse of the Soviet Union and the discovery of more accessible oil fields came neglect. Most of the workers left, and the waves began to claim the architecture. Today, a small number of oil workers continue to live and work there, and the settlement is closely guarded, but it’s only a matter of time before the entire network crumbles.

Makoko: Village on Stilts in the Lagos Lagoon
Strangest Cities Makoko 1
Strangest Cities Makoko 2
Strangest Cities Makoko 3

Highly dangerous for outsiders, Makoko is a shantytown in the Lagos Lagoon of Nigeria with a population of 250,000. The twisting canal system between hobbled-together houses has given sway to the tongue-in-cheek nickname ‘Venice of Africa,’ and while most the residents make a living from the traditional fisherman’s way of life, they’re also constantly at risk of disease from the cramped quarters as well as the threat of local gangs. What began as an 18th century village has ballooned thanks to an influx of new residents from Lagos, Nigeria’s largest city.

In 2013, the Nigerian government declared Makoko illegal and scheduled it for demolition. Men with chainsaws cut through the stilts holding up homes, schools and churches. Left homeless, many residents had no choice but to live in their boats. Can the community be saved? One project that offers some hope for the future is Makoko Floating School by architecture firm NLE, an ached floating structure that can accommodate up to 100 adults, even in bad weather conditions. Currently a school, the design could also be used for events spaces, clinics or markets.

Trash City: Cairo’s Neighbor is One Big Dump
Strangest Cities Garbage Cairo 1
Strangest Cities Garbage Cairo 2
Strangest Cities Garbage Cairo 3

Just on the edge of the largest city in the Arab world lies Manshiyat Naser, better known as ‘Garbage City,’ where residents make a living sorting and processing Cairo’s refuse. Trash is stacked on sidewalks and rooftops, propped against walls within dwellings, and spread out across the floors. It may sound unpleasant and unsanitary, but for the Zabbaleen – literally ‘garbage people’ – it’s a way of life. They recycle 80% of the trash and feed the remaining organic matter to pigs in an incredibly efficient system that’s unrivaled anywhere else in the world. The city has no running water, sewers, electricity or official governing body; it was established by Coptic Christians known for herding swine within the city. However, the pigs were removed by the Egyptian government in 2009 due to the threat of swine flu, putting the Zabbaleen’s system in danger of falling apart. Without the pigs, managing the trash has become much more of a challenge, especially as Cairo produces more waste than ever with each passing year.

Next Page – Click Below to Read More:
7 Extreme Human Habitats Unexpected Urban Wonders

Share on Facebook


[ By Steph in 7 Wonders Series & Travel. ]

[ WebUrbanist | Archives | Galleries | Privacy | TOS ]


WebUrbanist

 
Comments Off on 7 Extreme Human Habitats & Unexpected Urban Wonders

Posted in Creativity


How to Convert Photos to Black and White in Lightroom

18 Jun

Andrew’s book Mastering Lightroom III is on sale now at Snapndeals for 40% off. This is a limited time offer, grab it while it’s available.

Black and white conversions in Lightroom

Today I’m going to show you just how easy to use, and effective Lightroom is, for converting colour photos to powerful black and white images.

The key to getting the best out of it is to use the Raw format rather than JPEG. The extra bit depth means they contain far more information for Lightroom to use. The end result is that you have more options and get smoother conversions.

This article concentrates on global adjustments – those that affect the entire image (I’ll leave local adjustments to another article).

There are two ways to convert an image to black and white in Lightroom:

  1. Set Treatment to Black & White in the Basic panel
  2. Go the B&W tab in the Color/HSL/B&W panel

Let’s take a look at each of these in turn.

Set Treatment to B&W in Basic panel

A good way to start is with a colour image that has already been processed. Before you start, set Saturation and Vibrance to zero, and adjust the White Balance sliders to give a neutral colour balance (the Auto setting works well most of the time).

Black and white conversions in Lightroom

This preps the image for the conversion. Here’s my starting image.

Black and white conversions in Lightroom

And this is what it looks like with Treatment set to Black & White.

Black and white conversions in Lightroom

The next step is to refine the conversion using the Tone sliders. These are the most useful ones, working in order from top to bottom:

Exposure – sets the overall brightness of the image. Adjust this first. If you started with a processed colour image, you may not have to.

Contrast – sets the overall contrast. Most black and white images benefit from higher contrast than you would use for colour processing. Set Contrast second.

Shadows – adjusts the darkest tones in the photo independently of the others. Use this to make the shadows lighter or darker.

Highlights – adjusts the lightest tones independently of the others. Use it to make the highlights lighter or darker.

With my photo I increased Contrast, moved the Highlights slider left to make the model’s skin darker, revealing texture, and the Shadows slider left to darken the shadows and add drama. Here’s what it looks like so far.

Black and white conversions in Lightroom

There are three other sliders you may find useful:

Clarity – increases mid-tone contrast, emphasizing sharpness and texture. A side effect is that the image often becomes a little darker when you increase Clarity, so you may need to return to the Exposure or Shadows sliders to lighten the photo.

My article Four Ways to Improve Your Photos With the Clarity Slider in Lightroom goes into the topic in more depth.

White Balance – after you have used the other sliders, you can go to the Temp or Tint sliders and move them to see the effect they have on your conversion. These sliders change the colour balance in the original photo, which in turn alters the tones in the image. Experiment with these to see if they improve the tones in your image.

These three images show the difference it can make. Moving the Temp slider altered the skin tones (see second image), and moving the Tint slider mostly affected the green background (see third image). The differences are subtle, you may have to look closely to see them.

Black and white conversions in Lightroom

Activate the B&W tab in the Color/HSL/B&W panel

The second option for converting photos to black and white in Lightroom is to go straight to the B&W tab in the HSL/Color/B&W panel.

Black and white conversions in Lightroom

Again, it is a good idea to start with a processed colour photo with a neutral colour balance and Vibrance and Saturation zeroed.

Black and white conversions in Lightroom

The eight sliders under this tab let you make the tones corresponding to the colours in the original photo lighter or darker.

For example, if you move the Blue slider left Lightroom makes any grey tones converted from blue darker. Move it right and it makes them lighter. The most obvious use of this slider is for making blue skies go dark and dramatic in black and white.

Black and white conversions in Lightroom

The other coloured sliders work the same way. Alternatively you can use the Targeted Adjustment Tool. To do so, click on the Targeted Adjustment Tool icon (see below red arrow on the left) and move the mouse over the grey tone you wish to adjust in the image. The Targeted Adjustment Tool icon and a cross-hair appear (see below, arrow on the right). Hold the left mouse button down and pull the mouse down to make the tones underneath the cross-hair darker, or up to make them lighter. Lightroom analyses the colours under the cross-hair and moves the appropriate colour sliders accordingly.

Black and white conversions in Lightroom

Be careful not to move the colour sliders too far or you will introduce unwanted artefacts and haloes into the image. The point at which this happens depends very much on the content of your photo. The best approach is to get in the habit of zooming to 100% and checking to make sure that there are no haloes around edges, and that the transitions are smooth in the affected colours.

This screenshot shows what happens when you push the sliders too far (in this case the Blue slider to -58). The edge of the sculpture is marked by a thin halo that isn’t present in the original photo:

Black and white conversions in Lightroom

Note that the initial position of the colour sliders in the B&W tab depends upon a setting in the Presets tab in Preferences. If the Apply auto mix when first converting to black and white box is unticked, the sliders will be in their zeroed positions.

If it is ticked, then Lightroom sets them according to what it calculates will make a good conversion. My preference is to have the colour sliders zeroed, and it’s what I advise you to do. If you’d like to see Lightroom’s conversion, you can press the Auto button at the bottom of the B&W tab at any time.

Black and white conversions in Lightroom

After you have finished in the B&W tab you can go to the Basic panel and make further adjustments with the sliders as explained above. Of course, if you elected to go to the Basic panel first, you can then go to the B&W tab to make changes there. In reality you may find yourself switching between the two panels as you refine the image.

How do you know which panel to go to first? That depends on the image. If it’s a photo with strong colour, then the B&W tab will probably be the most useful. But if the colours are not so strong, then the Basic panel may be better. It’s a judgement call that becomes easier with experience.

I’ve only touched on the topic of black and white conversion in this article. Now you have learnt how to make global adjustments. In my next article I will show you how to make local adjustments to really bring your black and white images to life.

Andrew’s book Mastering Lightroom III is on sale now at Snapndeals for 40% off. This is a limited time offer, grab it while it’s available.


Mastering Lightroom: Book Three – Black & White

Masterlng Lightroom: Book Three – Black & White by Andrew S GibsonMy ebook Mastering Lightroom: Book Three – Black & White goes into the topic of black and white in depth. It explains everything you need to know to make dramatic and beautiful monochrome conversions in Lightroom, including how to use the most popular black and white plug-ins. Click the link to visit my website and learn more.

The post How to Convert Photos to Black and White in Lightroom by Andrew S. Gibson appeared first on Digital Photography School.


Digital Photography School

 
Comments Off on How to Convert Photos to Black and White in Lightroom

Posted in Photography


Adobe to offer Lightroom and Photoshop CC for $9.99 monthly

18 Jun

1_Adobe_2014_CC_Release.jpg

Adobe has announced a new pricing plan for photographers that bundles Lightroom 5 and Photoshop Creative Cloud together for $ 9.99 per month. This plan makes it possible for photographers whose only interest is image editing to make use of both of these apps without signing up for a much costlier subscription to the complete Creative Cloud suite. No previous version of Photoshop is required. Read more

News: Digital Photography Review (dpreview.com)

 
Comments Off on Adobe to offer Lightroom and Photoshop CC for $9.99 monthly

Posted in Uncategorized


Philosophy Magazine With Eszter Boldov

18 Jun

Philosophy Magazine No3 - Photo by Bojana Tatarska with model Alisa Ahmann as featured on Fashion Photography Blog (FashionPhotographyBlog.com)FashionPhotographyBlog.com had the privilege to speak to Eszter Boldov, the editor-in-chief of Philosophy Magazine. Philosophy is a new experimental online magazine based in Budapest that was developed to provide a platform for talented young artists such as photographers, fashion professionals, models and writers. When she showed me her latest edition of the biannual online magazine, No3, I knew I had to ask her about her work with the publication.

Philosophy Magazine No3 - Photo by Bojana Tatarska with model Alisa Ahmann as featured on Fashion Photography Blog (FashionPhotographyBlog.com)

Launched in 2013, Eszter Boldov developed the this fresh medium from the idea of providing a platform for talented young Hungarian artists like photographers, fashion professionals, models and writers to have the opportunity to introduce their works in a free fashion magazine. Philosophy’s mission is to provide the missing gap, that was not available at the time, for talents, both professionals and emerging, as well as increasing the awareness of Hungarian fashion and art and to create pathways to reach international audiences.

Philosophy Magazine No3 - Photo by Bojana Tatarska with model Alisa Ahmann as featured on Fashion Photography Blog (FashionPhotographyBlog.com)

When asked the editor on how she sees Philosophy in comparison to the other magazines in the marketplace, both digital and print, she replied that “What our readers like about it the most are the sophisticated design and the quality of our content. I actually think that a publication should always have interesting writings, even if it’s a fashion magazine that puts emphasis on pictures. The half of our content is text which we actually really care about. If you have the patience you can read very deep interviews and reviews besides the inspiring photographs. For our foreign readers the inspiration from Hungarian fashion and design can be something interesting, the upcoming talents of Hungary can bring a bit of fresh air.”

Philosophy Magazine No3 - Photo by Bojana Tatarska with model Alisa Ahmann as featured on Fashion Photography Blog (FashionPhotographyBlog.com)

So how did the idea for creating Philosophy come about? It seemed to be a natural progress that came out of a need as Eszter explained, “Well, I started my career in fashion as a model, so in the past 3 years I had plenty of opportunities to make connections and friends in this world. I started my own fashion blog 2 years ago which gave me a lot of experience and confidence that I could be successful in this field. The directors of my agency (VM Model in Budapest) came up with an idea of making a fashion magazine in Hungary because they’ve seen that I’ve been quite passionate about writing and editing. So we made the first issue a year ago with Hungarian contributors, who were mostly friends. Since then we published two issues and we are preparing the next one for this October.”

Philosophy Magazine No3 - Photo by Bojana Tatarska with model Alisa Ahmann as featured on Fashion Photography Blog (FashionPhotographyBlog.com)

Now with the release of the third edition and now working on the forth, you wonder where does the inspiration come from for creating the themes for each of Philosophy’s issues. The editor stated that it comes from team collaboration, “We always have a brainstorming meeting when we start the editing of each issue. We listen to the ideas of the photographers, writers and other creatives and if we find something common in all the conceptions than we can work on it and come up with a solution that is suitable for all of them.” Ezster believes that the secret to her success with the magazine is having a good team and not being afraid to communicate ideas. The magazine now uses Calameo, which is a free publishing system and makes the editions available for everyone online.

Philosophy Magazine No3 - Photo by Bojana Tatarska with model Alisa Ahmann as featured on Fashion Photography Blog (FashionPhotographyBlog.com)

You can find all information about Philosophy Magazine on the website where the issues are also available: www.philosophy-magazine.com, you can also visit:

Facebook: https://www.facebook.com/PhilosophyMagazine

Instagram: http://instagram.com/philosophymag

Tumblr: http://philosophymagazine.tumblr.com

Contacts: http://philosophy-magazine.com/contacts


Photo Credits:


A big thank you to the team at Philosophy Magazine for allowing images from the magazine to be featured here on FashionPhotographyBlog.com – We want to acknowledge the contributors and other editors whose work are essential for putting the issues together, these include:

Featured photographer: Bojana Tatarska

Featured model: Alisa Ahmann

Picture editor: Roland Rab (who is also a photographer)

Art editor: Anna Kudron

Graphic Designers: Eniko Deri and Kristof Kiss Benedek

Casting director: Balint Petho.


Fashion Photography Blog

 
Comments Off on Philosophy Magazine With Eszter Boldov

Posted in Uncategorized