The MagMod speedlight modifier solves several problems and challenges posed by other systems.
Until now, most speedlight modifiers on the market have been pretty inconvenient to use. I’m not talking about the quality of their output– just the lengths we’ve had to go in order to attach them to our flashes, and– perhaps more importantly– get them to stay on our speedlights over the course of a photo shoot. If your flash has a permanently attached strip of Velcro, or you have a collection of assorted straps, bands, tapes, attachment accessories, and other DIY solutions for your modifiers, you know what I’m talking about. If you’ve ever had a gel break, tear, bend, or just blow away in a stiff breeze, you’ve probably found yourself wishing for something better at least once or twice.
Enter the MagMod system. Made from high-quality silicone rubber, each piece of the MagMod system is compact, easy to attach, and gets the job done with minimal hassle.
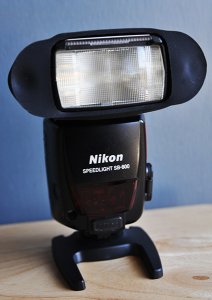
The MagGrip
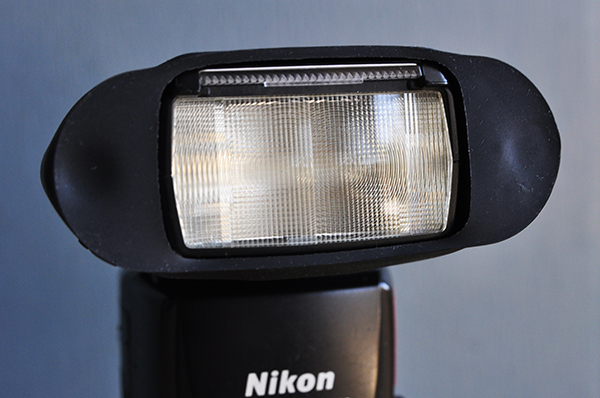
The MagGrip is the foundation of the MagMod system. Designed to fit virtually any hot shoe flash available, the MagGrip fits tightly and securely around the flash head. Despite my best efforts to shake it off or “accidentally” dislodge it from a Nikon SB800, it wouldn’t budge. At all. It’s easy enough to remove when you want it off, but there’s no need to worry about it while on a shoot.
Another key feature of the grip are the two neodymium (rare earth) magnets that hold the actual modifiers in place. I won’t bore you with the research I did into the science of these magnets. All you need to know is that they are the strongest type of permanent magnet commercially available, which means they’ll do their job without losing any of their magnetism over time.
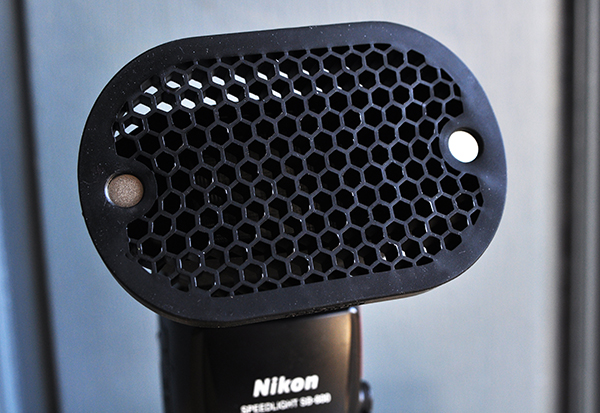
The MagGrid
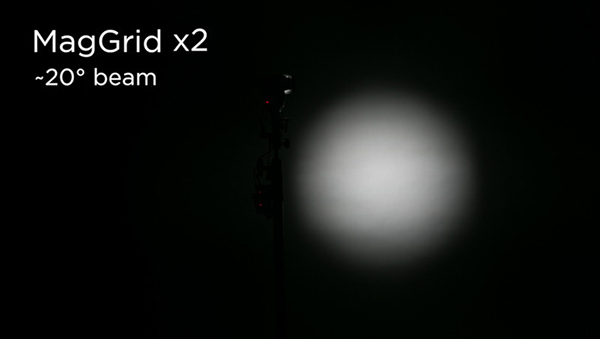
The basic purpose of a lighting grid is to give you more control over where the light falls, either on the subject or the background. It can be a useful tool for highlighting the subject, a specific part of the frame, or for creating interesting background effects. The MagGrid attaches magnetically to the grip in pretty much the blink of an eye. With no need for attachment straps or bands, I was able to spend more time on shooting and less on managing the equipment.
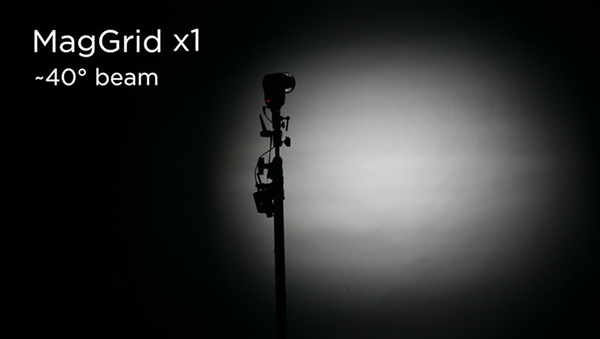
The single grid included in the basic kit casts a -40° beam with minimal spill and hot spots. The beam can be narrowed even further by attaching a second or third grid to the first. The grid is made from the same silicone rubber as the grip, which prevents the grid cells from cracking or chipping–a fairly common problem with hard plastic grids.
The images below illustrate how stacking multiple grids affects your ability to concentrate the light precisely where you want it.
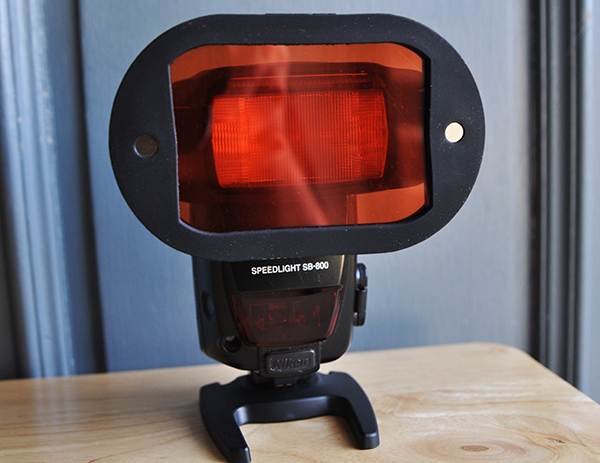
The MagGel Kit
Let’s face it–gels are awesome, but they are also a pain. They help you fine-tune your lighting, but they are also flimsy, often difficult to attach, and need to be replaced fairly regularly. The rigid sheets of the MagGel Kit, however, are made to last and are held securely in place through tension and friction. They are also stackable, giving you more freedom to create different lighting effects.
The Basic Gel Kit includes one of each of the following:
- Full CTO (Rosco #3407)
- 1/2 CTO (Rosco #3408)
- 1/4 CTO (Rosco #3409)
- 1/2 Blue (Rosco #3204)
- 1/2 Tough Plusgreen (Rosco #3315)
- 1/2 CT Straw (Rosco #3442)
- 3-stop Neutral Density (Rosco E-211)
- Opal Frost Diffuser
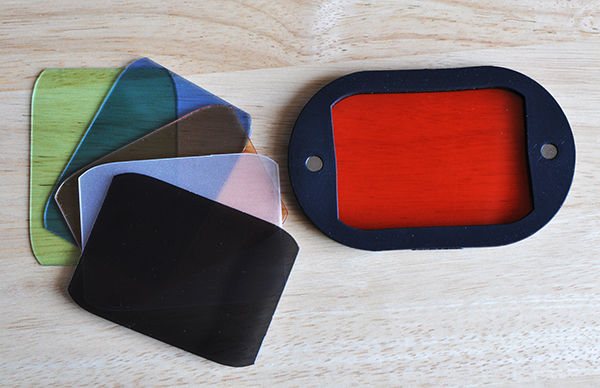
Gel sheets from the Basic Gel Kit. The MagGel can hold multiple sheets at once. In this photo, it’s holding three warming gels.
The Creative Gel Kit includes one each of the following:
- Purple
- Blue
- Teal
- Green
- Yellow
- Orange
- Red
- Magenta
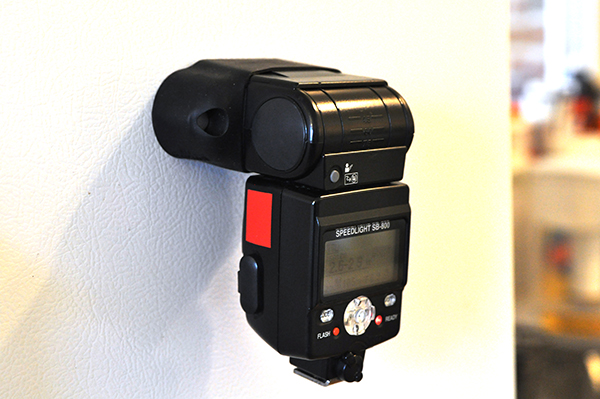
Probably not the smartest idea to use a speedlight as a refrigerator magnet, but you get an idea of how strong these magnets are.
Wrap-up
Speedlights have become more powerful and versatile than ever before. When combined with a solid grasp of off-camera lighting techniques, speedlights can often narrow the technical and creative gaps between small flashes and their bulky studio counterparts. The MagMod system closes that gap even further, simply by making some of photography’s most basic lighting modifiers easier to use. Obviously, it doesn’t address every lighting scenario or every type of modifier. While the gel kit does include a diffuser, for instance, it’s certainly not going to address the needs of the photographer who relies heavily on softboxes or umbrellas for casting a wide spread of light. It does, however, address some of the most common lighting challenges facing photographers who depend on speedlights to tell their stories.
For more information, check out the MagMod website.
The post The MagMod Speedlight Modifier – a Review by Jeff Guyer appeared first on Digital Photography School.


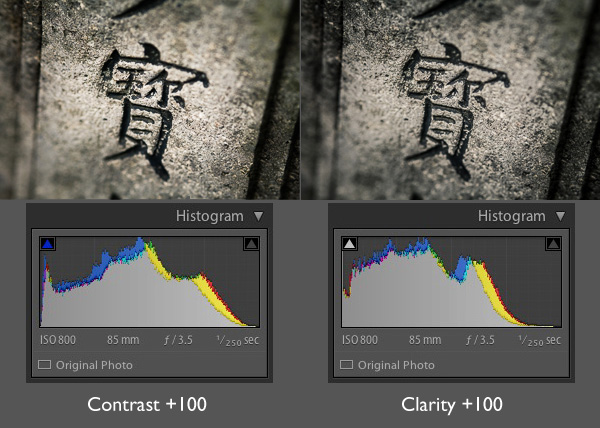
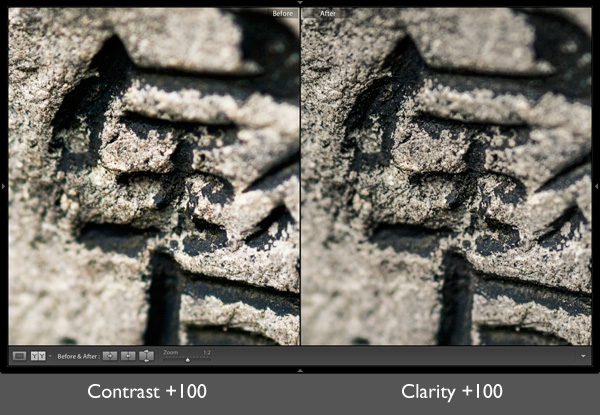
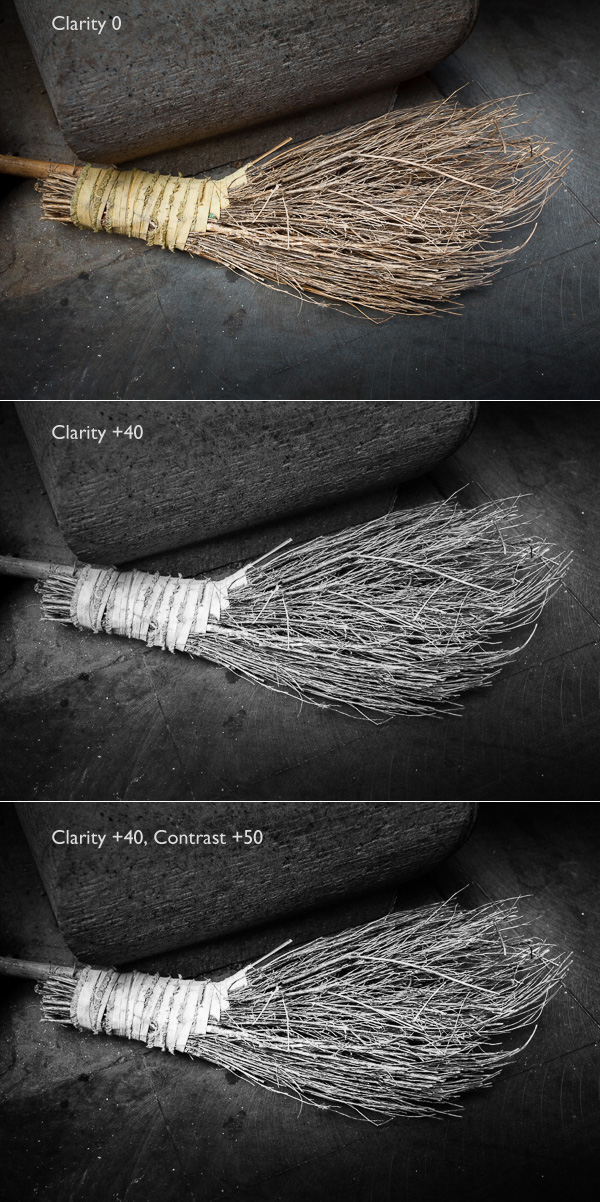
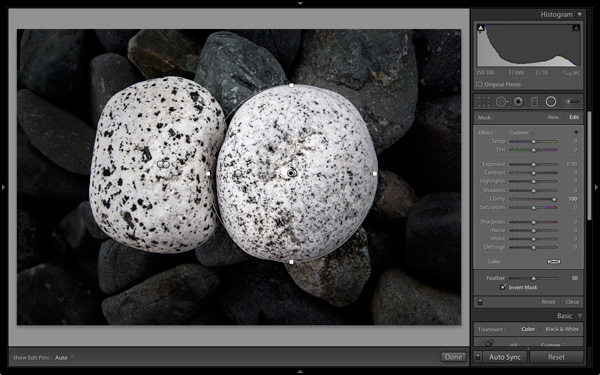
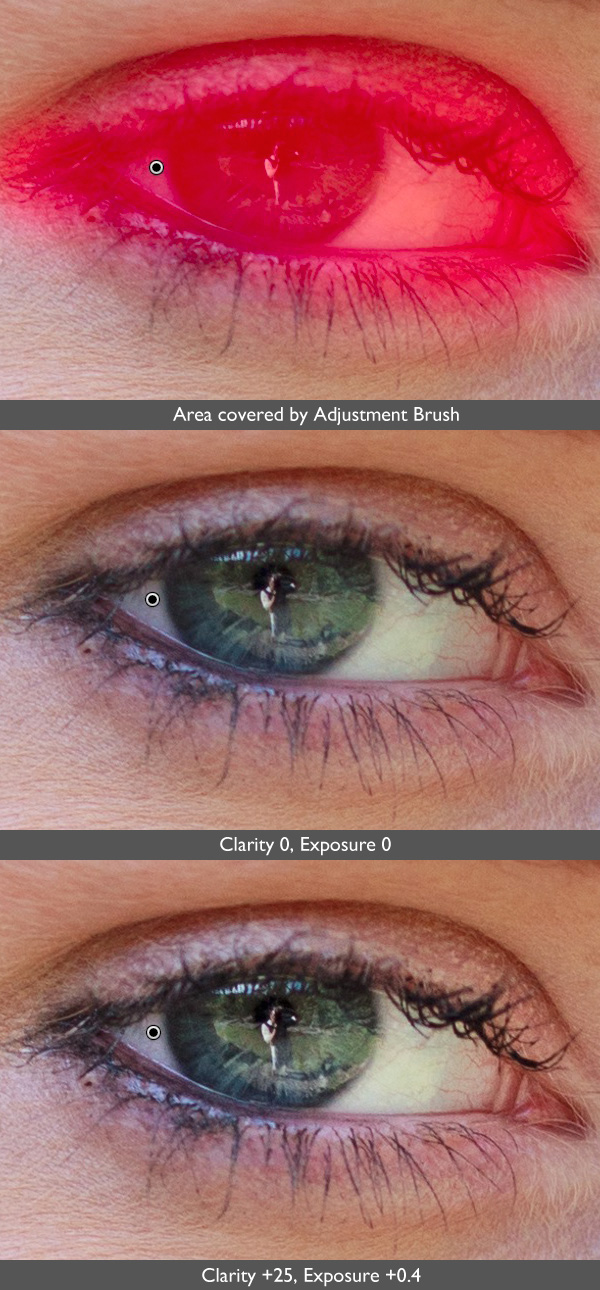
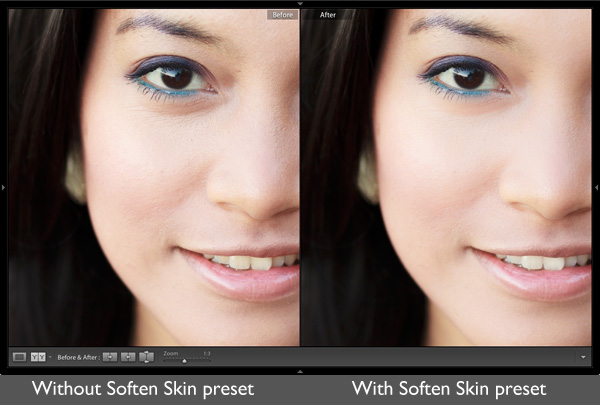
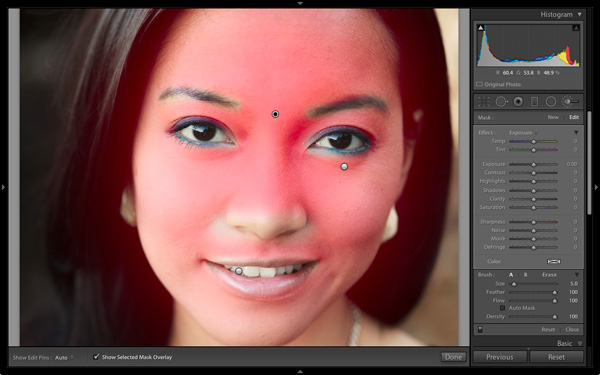
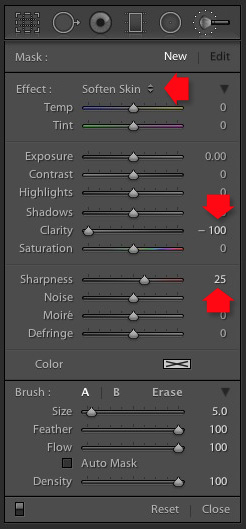
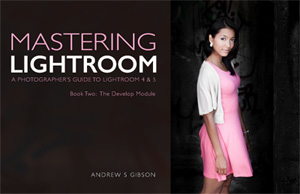 My new ebook Mastering Lightroom: Book Two – The Develop Module teaches you how to process your Raw files in Lightroom for spectacular results. Written for Lightroom 4 & 5 it takes you through every panel in the Develop module and shows you how to creatively edit your photos. It’s now 40% off at Snapndeals for a limited time only.
You must be logged in to post a comment.