In my last article I gave you five reasons to use natural light for portraiture. The next step in creating the perfect portrait shoot is planning. The more details you figure out in advance, the more likely you are to come away from the shoot with some beautiful portraits to make you proud.
Generating ideas
The creative side of portrait photography is something that some photographers seem to find easy, and others really challenging. One approach to generating ideas is to look at the work of others and let their portraits inspire you.
You’re probably familiar with the main photo sharing sites already (Flickr, 500px and 1x) and there’s no doubt that you will find plenty of inspiration if you take the time to search them. To help you out I’m going to give you a short list of portrait photographers and websites to look at. The work you will see here will open your eyes to the possibilities within the world of portrait photography.
For high quality black and white portraits take a look at the work of Betina la Plante, Eduardo Izq and Phil Sharpe (Phil has a lot of colour portraits in his portfolio too).
For beautiful colour portraits view the portfolios of Cristina Hoch, Alex Benetel, Alessio Albi, Emily Soto, Ling Li, Anna Karnutsch and Sarah Ann Wright. You can gain greater insight into how some of these photographers work by checking out my interviews with portrait photographers.
Other websites where you can see more work by portrait photographers are Faded & Blurred (leans towards the fine art and documentary side) and The D Photo (leans towards the creative side).
Creating mood boards
If you’ve had a good look through some of those links you’re probably feeling a little confused. That’s no surprise, I selected the photographers because they represent a wide variety of styles and techniques. So, how do you make sense of it all?
My favourite technique is to create a mood board with Pinterest. A mood board is a place where you gather photos that you like in order to communicate the feel or mood that you want to create. You’re not copying the photos you’ve added to your mood board, but using them for inspiration and to communicate to potential models what you’d like to achieve.
Creating mood boards is easy with Pinterest. You can make as many as you like, pin photos and move photos between different boards. Here is one of mine as an example, containing black and white portraits of men or this one on the dPS board – Portrait Inspiration.
Mood boards are also a good way to get a handle on what sort of portraiture appeals to you. When I look at my mood board of black and white portraits of men, it tells me that I like dark, moody portraits taken with natural light. As you look at your own mood boards you will see patterns emerge as to what style of portrait appeals to you. Use this feedback to inspire your portrait shoots.
Finding locations
Finding locations depends on where you live and the style of portrait photography you’d like to pursue. You may shoot in a studio and that makes the decision easy. Others may prefer to shoot outside, utilizing local beauty spots and other interesting locations. Here are some things to consider:
Are you looking for an urban environment or a rural one? If your mood boards contain photos taken in natural environments like forests or fields, then that is the sort of location you should look for. Going back to my mood board of black and white portraits, I can see that I have mostly chosen ones taken in gritty urban environments. I need a similar location to create portraits consistent with the feel of the images in this mood board.

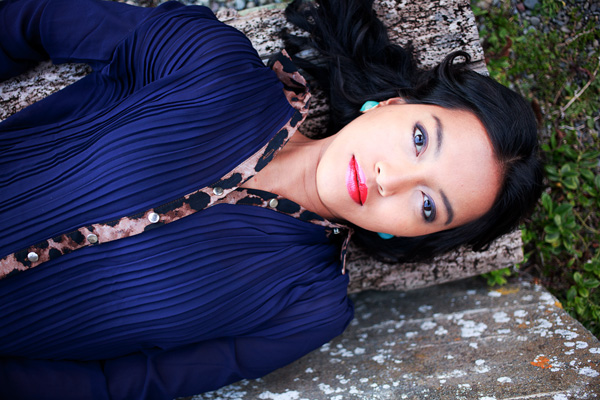
The background in this photo was a bush, giving it a rural feel. Can you imagine how different this portrait would be if it had something like a concrete wall as a background? The atmosphere would be completely different.
How public or private is the location? You may prefer quiet places without many people around where you can concentrate on your portrait shoot.
Choose a lens
What lens will you be using? This is important when choosing a location. If you use a wide-angle lens, you will be including a great deal of the location in the photo. If you use a telephoto lens, you may only utilize a small part of the location, and that may be out of focus if you shoot at a wide aperture. Telephoto lenses give you more freedom when selecting locations because they can transform a small area such as a fence or wall into a beautiful background.

The portrait on the left was taken with a wide-angle zoom (focal length 26mm) and the one on the right with a short telephoto lens (85mm). Can you see how the focal length affects the background? Wide-angle lenses include more of the background, therefore you need a location suitable to this approach. Telephoto lenses include much less, and can turn mundane locations into interesting backgrounds.
Read my article How to Choose the Perfect Portrait Lens for more information on this topic.
What will the light be like at your location when you are there? Think about what time of day you will be shooting, and where the light will be coming from. The weather is a major factor, the nature of a location and its suitability for portrait photographer depends on both the weather conditions and time of day.

This portrait was taken at the end of the day as the sun was setting, casting a beautiful soft light with a red glow over the scene.
Build a dossier of locations
With these things in mind build up a mental dossier of locations close to where you live that you can use for portrait shoots. Keep your eyes open when you are out and about and you will find yourself seeing the potential of locations in a new way.

I took this portrait in a children’s playground. Every day places like this can become interesting locations. Take note whenever you find somewhere new that could one day be used for a portrait shoot.
Finding models
The final step is finding models to work with. By now you should have a fairly good idea of what type of portraits you’d like to create, and where you’d like to take them. Now you need a model to make that happen.
You may be lucky enough to have friends or family members who would make good models. If have to search a little harder, a good place to start is Model Mayhem. There are other websites where models and photographers can connect, but Model Mayhem is my favourite because it lets you search by location. You can centre the search around the city or town you live in, and save time wading through profiles of models from other parts of the country.
The good thing about websites like Model Mayhem is that its members are people genuinely interested in modelling. You will find that the models who come up in your search range from inexperienced to professional. You may feel most comfortable looking for somebody whose experience matches yours. For example, if you are new to portrait photography then you may feel a little intimidated by an experienced model, and prefer to approach somebody who is also starting out.
Bear in mind that if you have the budget, one advantage of using professional models is that you will benefit from their experience and expertise with posing. Inexperienced models will expect you to direct them. Depending on the style you are pursuing, you may learn quicker and create better portraits with a professional.
There are downsides to websites like Model Mayhem. Some of the models you approach won’t respond and others won’t like your style of photography. Some might let you down at the last minute. But on the whole, my experience has been positive, and I’ve found some of my best models here.
Here are a couple of other ideas that photographers I know have used successfully for finding models. One put up a sign at her local university (where she was also a student) and found models that way. Another friend of mine had some business cards made and approached people in the street to ask them if they would like to model for him. Not all responded, but he found a few good models that way.
By the way, if you’re a model based near Wellington in New Zealand, then feel free to get in touch. Contact details on my website (link below).
Perhaps the readers can share some of their experiences about searching for models. I would like to hear your stories, both the positive experiences and the negative.
Putting it all together
Hopefully these ideas have given you a head start in planning the perfect model shoot. What are your experiences with creating portraits? What advice would you give other photographers? Let us know in the comments.
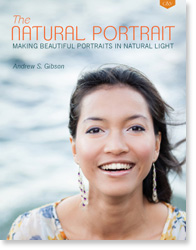 The Natural Portrait
My ebook The Natural Portrait teaches you how to take beautiful portraits in natural light. This 240 page ebook, published by Craft & Vision, takes you through the entire process of natural light portrait photography through from finding a model, deciding where to shoot, working with natural light and post-processing your images. Click the link to learn more or buy.
The post How to Plan the Perfect Portrait Shoot by Andrew S. Gibson appeared first on Digital Photography School.


![© Streetw[o]rk](http://kwerfeldein.de/wp-content/uploads/2014/04/ausblick.jpg "© Streetw[o]rk")


You must be logged in to post a comment.