RSS
 

Archive for November, 2013

Living Staircase: Spiral Stairs Wrapped in Organic Greenery

21 Nov

[ By WebUrbanist in Architecture & Offices & Commercial. ]

living stairs viewing platform

Boldly curved and cantilevered into midair, these plant-wrapped stairs are designed to provide more than just a means of moving from one floor to another.

living steps atrium view

Stepping onto them takes occupants temporarily away from concrete floors and columns, then into and through a unique miniature ecosystem of warm and living materials.

living staircase concrete floors

This staircase by Paul Cocksedge for the Ampersand building in London is punctuated by platforms overlooking a central atrium.

living steps top floor

These circular areas act as impromptu self-contained break and gathering spaces removed from the bustle of each main office floor.

living hand rail supports

Standing out not just physically but also materially, the lively-grained wooden curves are bedecked with thin stem-like strands of white metal. In turn, these support planters that supplant the role of traditional hand rails while still providing physical and psychological safety and support.

living stairs axon drawing

Each set of stairs is supported by the floors themselves, thus rendered structurally independent of a more ordinary central-column approach.

living steps design diagram

living steps upper level

Further interactivity is woven into the biological side of the design in the form of herbs that employees can nurture, grow and ultimately pluck from the rails, facilitating a sort of in-office garden and adding a bit of mint to their tea or spice to their lunch.

Share on Facebook


[ By WebUrbanist in Architecture & Offices & Commercial. ]

[ WebUrbanist | Archives | Galleries | Privacy | TOS ]


WebUrbanist

 
Comments Off on Living Staircase: Spiral Stairs Wrapped in Organic Greenery

Posted in Creativity


Adobe now offers Photoshop and Lightroom for everyone

21 Nov

shared:AdobeLogo.png

When Adobe announced a version of Creative Cloud for photographers in September, there was a catch — you had to already own Photoshop CS3 or later to qualify for the special pricing. Now Adobe is lifting that requirement for a limited time. Through December 2, 2013, the $ 9.99 per month subscription is available to everyone. Learn more 

News: Digital Photography Review (dpreview.com)

 
Comments Off on Adobe now offers Photoshop and Lightroom for everyone

Posted in Uncategorized


Guide to DIY Photo Booth Backdrops

21 Nov

Extra photos for bloggers: 1, 2, 3

Party time! Excellent!

‘Tis the season for some serious partying and these days no party is complete without a photo booth.

Setting up a photo booth is as simple as providing a backdrop and encouraging your pals to point their smartphones toward it.

We’re here to help you with that first part (you herd your own friends in front it).

We’ll teach you three easy-peasy ways to craft a party poppin’ backdrop.

Give your party photos that extra schwing and have your friends chanting “we’re not worthy! we’re not worthy!”

Learn to Make 3 Simple Festive DIY Backdrops

(…)
Read the rest of Guide to DIY Photo Booth Backdrops (490 words)


© Karla for Photojojo, 2013. |
Permalink |
No comment |
Add to
del.icio.us

Post tags:


Photojojo

 
Comments Off on Guide to DIY Photo Booth Backdrops

Posted in Equipment


Herzerfrischende Kinderportraits

21 Nov

Ein Beitrag von: Jessica L.

Kinder sind herzerfrischend! Sie stecken voller Neugierde, Träume und Lebensfreude. Ihre Welt ist bunt, sorglos und fantasievoll. Sie leben den Moment, ohne an das Morgen zu denken oder an das, was war. Diese unbeschwerte Kindheit vergeht wie im Fluge und die Erinnerungen verblassen leider viel zu schnell.

Darum ist es mir wichtig, meine Kinder auf ihrer Entdeckungsreise zu begleiten und die unbeschwerten Momente ihrer Kindheit einzufangen, um den Zauber für die Ewigkeit festzuhalten.

© Jessica L.

© Jessica L.

Wer kennt das nicht, „kurz vorm Abendbrot noch etwas auszuhecken“? Wer erinnert sich nicht gern zurück an die eigenen Abenteuer aus längst vergangenen Tagen? Ich hatte das Glück, als Wald- und Wiesenkind aufwachsen zu dürfen, immer auf der Suche nach neuen Erlebnissen.

Ob mit den Nachbarskindern im Wald eine Höhle bauen, durch verwilderte Gärten stromern, verletzte Vögel aufpäppeln oder über Blechdosen am Band kommunizieren, Langeweile kam nie auf. Leider habe ich nur wenige Fotos aus meiner Kindheit und bin froh, dass meine Kids dieses Problem später einmal nicht haben werden.

© Jessica L.

© Jessica L.

Ich möchte meinen Kindern auch eine naturverbundene Kindheit ermöglichen. Gerade in der heutigen Zeit, in der Medien und Digitaltechnik schon früh eine große Rolle spielen, sind freies Spiel und Bewegung in der Natur sehr wichtig für die körperliche und geistige Entwicklung.

Natürliche Freiräume regen die Fantasie der Kleinen an und fördern die Kreativität, sie können Erlebtes verarbeiten und praktische Erfahrungen sammeln. Deshalb gehen wir oft und gern zum Entdecken in den Wald, zum Drachensteigen auf die Wiese oder zum Verstecken in die Felder.

© Jessica L.

© Jessica L.

Es müssen nicht immer große Ausflüge mit langen Anfahrten sein. Oft reichen die kleinen Dinge in der Nähe, um große Begeisterung auszulösen. Im Gepäck ist dann meine Kamera, denn wenn die Kleinen „Kind“ sein dürfen, erleben sie tolle und spannende Sachen. Dabei entstehen die natürlichsten und schönsten Kinderportraits!

Gerade meine Zwillingsmädchen sind oft so in ihr Spiel versunken, dass sie es nicht bemerken, wenn sie fotografiert werden. Solange sie den anderen in der Nähe wissen, fühlen sie sich sicher und vergessen die Welt um sich herum. Das enge Band zwischen ihnen ist etwas ganz Besonderes und mein Ziel ist es, diese tiefe Seelenverwandtschaft im Bild sichtbar machen.

© Jessica L.© Jessica L.

© Jessica L.

Mein Großer ist schon in einem Alter, in dem er das Fotografieren bewusst wahrnimmt. Dadurch werden natürliche Schnappschüsse schon schwieriger, aber nicht unmöglich. Wenn der Ausflug Spaß macht, vergisst er auch ganz schnell, dass Spazieren uncool ist.

Der Weg sollte etwas abenteuerlicher sein, Möglichkeiten zum Klettern muss es geben oder Höhlen zum Erforschen. Manchmal kommt er auch mit einer guten Fotoidee auf mich zu und wir ziehen dann beide allein los. Dann dreht sich in diesem Moment mal alles nur um ihn und das genießt er sichtlich, wie man bei der Luftballonserie sieht. Nicht nur die Sonne strahlt.

© Jessica L.

© Jessica L.

Aber nicht alle Bilder entstehen spontan und ungeplant. Es gibt auch Shootings, bei denen ich mir im Vorfeld Gedanken mache, was den Kindern gefallen könnte oder was mir früher Spaß gemacht hätte. So ist auch meine Serie „unterm Apfelbaum“ entstanden. Ich habe schon immer von einer Schaukel unter einem alten Baum geträumt und als im Mai die Obstbäume in voller Blüte standen, hatte ich dieses Bild im Kopf.

Also habe ich schnell eine provisorische Schaukel gebaut, die Leiter ins Auto gepackt, einen Baum gesucht, die Schaukel aufgehängt und meine Kinder überrascht. Sie hatten großen Spaß und es sind ein paar wunderschöne Bilder entstanden, wenn auch nicht ganz zufällig.

© Jessica L.

© Jessica L.

Gelegentlich bekomme ich Anfragen von Freunden und Bekannten, ihre Kids zu fotografieren. Da meine Studioausrüstung sehr überschaubar ist und ich das halbe Esszimmer umstellen müsste, um die Leinwand aufzubauen, vereinbare ich am liebsten Termine draußen. Für die Kinder ist es dann in erster Linie ein lustiger Ausflug, die Eltern sind entspannt und die Aufnahmen wirken authentisch und fröhlich.

Das Rezept für meine herzerfrischenden Kinderportraits ist kein Geheimnis. Meine Bilder leben von der Einzigartigkeit meiner kleinen Modelle und der Schönheit der Natur. Mit folgenden Zutaten kann jeder seine Kinderschnappschüsse künstlerisch ein wenig aufwerten:

© Jessica L.

© Jessica L.

Du brauchst eine geeignete Location.

Ich erkunde meine Shooting-Plätze meistens allein bei meinen Streifzügen durch nahegelegene Wälder, Parks oder Wandergebiete. Da ich auch leidenschaftlich gern Landschaften fotografiere, bin ich immer viel in der Natur unterwegs und weiß, wo es sich lohnt, mit den Kids hinzugehen.

Ob ein bunter Herbstwald voller Moos, Pilze und kleiner Krabbeltiere, ein wogendes Getreidefeld oder ein Sonnenblumenlabyrinth – man muss sich nur mal in der näheren Umgebung umschauen. Gute Möglichkeiten gibt es überall.

© Jessica L.

Ganz wichtig ist Dein Licht.

Ich liebe es, wenn meine Bilder leuchten. Es unterstreicht einfach die Lebensfreude, die besonders die Kleinen an den Tag legen. Deshalb bin ich oft am späten Nachmittag unterwegs, wenn die Sonne tiefer steht, die Schatten länger werden und das Licht sich in den Grashalmen verfängt. Um das Leuchten einzufangen, fotografiere ich auch gern gegen das Licht und freue mich über jeden Lichtreflex im Bild. Gegenlicht macht süchtig.

© Jessica L.

Du brauchst gutes Glas.

Offenblende macht auch süchtig. Am liebsten fotografiere ich mit meinen lichtstarken Festbrennweiten mit einer Blende von f/2.8 oder offener. Wenn man einmal damit anfängt, kann man nicht mehr aufhören. Lichtstarke Festbrennweiten gibt es schon für 100 € und steigern das gestalterische Potenzial einer günstigen Einstiegs-DSLR enorm. Ich mag die selektive Schärfe und das sahnige Bokeh.

Oft benutzte ich auch Zweige oder Blüten, indem ich sie direkt vor das Objektiv halte und sie in Unschärfe verschwimmen lasse, um dem eigentlichen Motiv mehr Tiefe zu verleihen oder es gekonnt einzurahmen.

Ich habe zwar nur meinen „Fuß-Zoom“, aber dafür setze ich mich viel mehr mit dem Motiv auseinander. Immer seltener muss ich nachträglich über die Bildbearbeitung den geeigneten Schnitt wählen, weil der Bildaufbau stimmt.

© Jessica L.

© Jessica L.

Bringe Spannung in Deinen Bildaufbau.

Bei meinem Blick durch den Sucher wende ich intuitiv gestalterische Regeln der Fotografie an, aber breche sie auch ganz bewusst. Um mehr Spannung in den Bildaufbau zu bringen, nutze ich Dinge, die vor Ort gegeben sind. Zäune, Wege, Stufen, Äste oder ähnliches können dem Bild sowohl räumliche als auch inhaltliche Tiefe verleihen.

© Jessica L.

Verleihe Deinem Bild die nötige Würze.

Um meinen Aufnahmen den letzten Schliff zu geben, peppe ich sie ein wenig mit Bildbearbeitung über Photoshop auf. Ich nehme alle Fotos in RAW auf und bearbeite sie zunächst im RAW-Konverter. Ich stelle die Grundeinstellungen wie Belichtung, Kontrast, Sättigung und Farbtemperatur ein und prüfe, wie das Bild in Schwarzweiß wirken würde. Gegebenenfalls füge ich eine Vignette ein oder entferne störende chromatische Aberrationen.

© Jessica L.

Dann öffne ich das Bild in Photoshop und wende nach Gefühl folgende Bearbeitungsschritte an:

Zur Anhebung des Kontrasts nutze ich die Gradationskurve. Um das Original nicht zu verändern, dupliziere ich das Bild und führe alle Veränderungen an der Kopie aus. Wenn bestimmte Bereiche zu dunkel oder zu hell sind, lege ich eine Ebenenmaske an, male mit dem Pinselwerkzeug die betroffenen Stellen frei und stelle an der Deckkraft die gewünschte Stärke ein. (Wer gerade „nur Bahnhof“ versteht, sollte sich vielleicht eine entsprechende Lektüre über Photoshop zulegen).

Meistens drehe ich dann über die Farbbalance noch ein wenig an den Farben und wenn nötig, korrigiere ich bestimmte Farbtöne über die selektive Farbkorrektur.

© Jessica L.

Bei der Haut- und Gesichtsretusche muss bei Kindern nicht viel gemacht werden. Leuchtende Kinderaugen verstärke ich, indem ich die Lichter mit dem Abwedler aufhelle oder hier ebenfalls die Ebenenmaske nutze und in der Kopie Helligkeit und Kontrast übertrieben anhebe, um dann mit einer geringen Deckkraft den Kontrast mit dem Pinselwerkzeug über die Hauptebene zu malen. Kleine Hautunreinheiten entferne ich mit dem Ausbesserungswerkzeug.

Als abschließenden Schritt entferne ich störende Elemente im Bild mittels Kopierstempel. Sicher gibt es noch viele andere Möglichkeiten, die zu einem noch besseren Ergebnis führen würden. Ich bin immer offen und dankbar für Tipps und Anregungen. Dennoch möchte ich nicht stundenlang an einem Bild sitzen und es völlig verfremden. Meine Aufnahmen sollen in erster Linie die Natürlichkeit von Kindern unterstreichen.

Zu guter Letzt ist ein Quäntchen Glück auch nicht zu verachten.

© Jessica L.

Ich hätte nie gedacht, dass sich aus meinen anfänglichen Kinderschnappschüssen eine so große Liebe zur Fotografie entwickeln würde. Es ist viel mehr als ein Hobby.


kwerfeldein – Fotografie Magazin

 
Comments Off on Herzerfrischende Kinderportraits

Posted in Equipment


Bounce House for Adults: Blow-Up Bubble Strung with Nets

21 Nov

[ By Steph in Architecture & Public & Institutional. ]

Inflatable Bounce House for Adults 1

Admit it – you’re jealous of the little kids who get to romp in those inflatable bounce houses. Once we reach a certain age (or weight), we’re just not welcome in those primary-colored playgrounds any longer. But some lucky kids-at-heart got a chance to relive the fun of that experience with ‘Net Blow-Up,’ most recently installed near the waterfront in Yokohama by Croatian-Austrian design collective Numen/For Use.

Inflatable Bounce House for Adults 2

The inflatable play structure looks like a big white bubble in its spot beside the water, glowing like a lantern once the sun goes down. Inside, it’s strung with multiple levels black netting that’s just stretch enough to climb, jump and flip to your heart’s desire.

Inflatable Bounce House for Adults 3

Inflatable Bounce House for Adults 4

Watching it from the outside might be almost as fun as bouncing around within it, as the soft-sided structure deforms and mutates with each movement of those inside. “The outer membrane acts both like a ‘soft box’ diffuser of the outside light, or a projection screen in case of inner illumination of the installation,” say the designers.

Inflatable Bounce House for Adults 5

Inflatable Bounce House for Adults 6

Inflatables are popular as temporary installations, since they’re so easy to install and take down. Plus, they tend to have a lighthearted, comical look. Two recent examples include the Bridge in Paris and the world’s first inflatable concert hall, the Ark Nova.

Share on Facebook


[ By Steph in Architecture & Public & Institutional. ]

[ WebUrbanist | Archives | Galleries | Privacy | TOS ]


WebUrbanist

 
Comments Off on Bounce House for Adults: Blow-Up Bubble Strung with Nets

Posted in Creativity


20. November 2013

21 Nov

Ein Beitrag von: Adde Adesokan

© Adde Adesokan


kwerfeldein – Fotografie Magazin

 
Comments Off on 20. November 2013

Posted in Equipment


Portrait Gear Essentials – by dPS eBook author Gina Milicia

21 Nov

portrait-gear-essentials-02

My Portrait Gear Essentials – Images by Gina Milicia

What’s the best equipment for taking amazing portraits?

portrait-gear-essentials-12

I’m often asked what the best equipment is for taking great portraits. Many people assume that a great camera will take great portraits. That is simply not true. A quick scan through Flickr, Instagram or any photo sharing site will reveal thousands of beautiful portraits, some taken on mobile phone cameras, and yet others using very basic entry level equipment.

A great photographer can take great photos using any kind of camera. A great camera in unskilled hands will still deliver mediocre photos. Before you invest the big bucks in high end gear take the time to learn the craft first.

I started out my professional career with a borrowed camera and very cheap lens. I worked this way for a few years and then invested in a high end second hand camera and lens. If I were starting out again now I would do exactly the same thing. My advice on buying a camera is always buy within your means and upgrade as your skills start to improve.

Most girls love buying shoes and handbags. I admit I’m a self-confessed gear-a-holic!

It’s taken me 25 years to accumulate this gear. My gear is subjected to punishing workouts, with my average shoot being approximately 2000-3000 images. I need gear that is built to last and won’t curl up and cry for its mama when I push it too far.

My portrait gear essentials – what’s in my bag

Cameras

  • Canon 1Ds Mark III – this is a pro-level camera, so it’s more expensive and a lot heavier but it’s designed to survive heavy usage. I would say I use this camera for 80% of my shooting.
  • Canon 5D Mark II – I’ll favour this camera body if I know I have to shoot with a high ISO (in very low light or on a night shoot). At 400-1600 ISO this camera is amazing.

Lenses

I like to work with a focal length between 70mm and 200mm. With a long lens, facial features are slightly compressed, which is really flattering for portraits.

The workhorse

Canon EF 70-200mm f/2.8L IS lens – this lens is my workhorse and I use it for 70% of my shoots. It’s fast, sharp and consistently gives amazing results.

I like working with zoom lenses because they give me the luxury of zooming in to get tight head shots and mid-shots, or zooming out to get full length shots. All without moving my camera. As a result, I can stay out of my model’s personal space, which can be intimidating or confronting, and keep the momentum of the shoot flowing.

The traveller

Canon EF 24-105mm f/4L IS lens – this is the lens I use for events, lifestyle and travel shoots. It’s light, compact and my go to lens when travelling.

Makes my heart skip a beat

Canon EF 85mm f/1.2L lens – it’s expensive, heavy, and slow to focus but I quickly forget all of this when I see the gorgeous results. I love using this lens for head shots, beauty, portraits, and events.

This lens will give amazing results in very low light conditions and the shallow depth of field will eliminate any background clutter giving me the luxury to use it lens in any location.

Tripods

portrait-gear-essentials-11

Most of my portraits are shot using tripods. I like to set up my shot, position my model and then focus on their expression. Keeping my camera fixed in one position allows me to do this and really suits my shooting style.

Having my camera on a tripod also allows me to focus 100% of my attention on my model and frees me up to gesture with my hands, or step away from the camera without breaking the shot.

I have four tripods:

  • Manfrotto 190XPROB – small, light-weight tripod that I use when I travel
  • Manfrotto 475B Pro – great sturdy tripod for location shoots
  • Manfrotto 058B – heavy duty tripod for studio use
  • Manfrotto 679B Monopod – for film, TV stills, and theatre

portrait-gear-essentials-07

Remote flash triggers

PocketWizards

I have six PocketWizard remote flash triggers because I’ll often have three different sets running. I love the PocketWizards because they are reliable and rarely misfire.

Light meter

This model isn't available any more, try one in the Sekonic line

I believe the light meter is an essential tool in good portrait photography and would never leave home without one. When you use a light meter you know you have most accurate readings.

Minolta IV (not available any more) – I’ve had this light meter for over 23 years now and I’ve grown rather fond of it. As a basic meter it’s excellent, reading ambient light or flash, and it’s perfect for most lighting conditions.

Lighting

Speedlights

portrait-gear-essentials-01
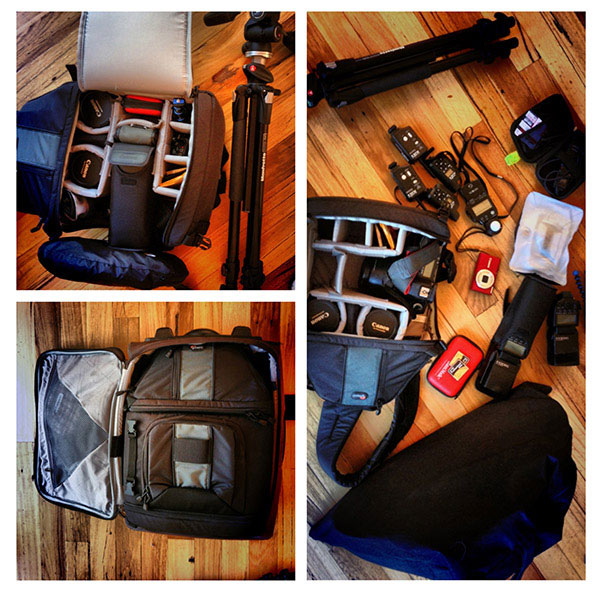
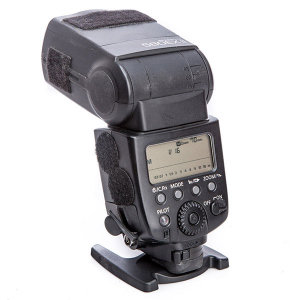
I use a speedlight off camera for about 20%-30% of my photo shoots. Like any piece of gear, they have their pros and cons, but they can light you out of some tight spots (quite literally).

I use Canon 580EXii speedlights as my preferred lighting when I am travelling or need to work quickly or in tight locations. I will also use a Photoflex medium size softbox that folds flat, and is perfect for lighting one person and couples.

portrait-gear-essentials-09

Portrait of Vito shot on location at my Sicily Photography workshop

My complete travel location portrait photography kit:

  • One Canon 5D MKII (much lighter than the Canon 1Ds Mark III 
  • Two Canon 580EXii speedlights
  • Four PocketWizard remote flash triggers
  • Six 8GB memory cards. I prefer smaller cards because I don’t like to have an entire day’s worth of images on one card. I’ve had several cards fail over the years ,and also lost one once.
  • Minolta IV light meter (this model is no longer available, try one in the Sekonic line)
  • Canon EF 24-105mm f/4L IS lens
  • Canon EF 85mm f/1.2L lens  or Canon EF 70-200mm f/2.8L IS lens

portrait-gear-essentials-04

Studio lighting

Elinchrom Lights

60% of my shoots require studio lighting, so I need heavy duty monolights with fast recycle times, and a high quality of light. When I’m working on location, I still need a great quality of light and I give my Elinchrom Rangers a work out in those situations.

portrait-gear-essentials-06

Behind the scenes for Piperlane.com

Large Softboxes

portrait-gear-essentials-08
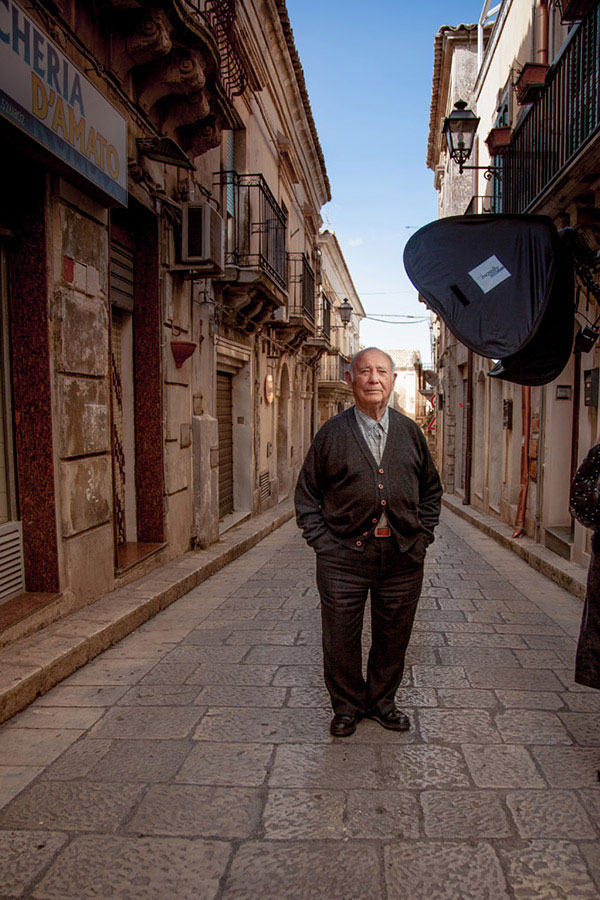
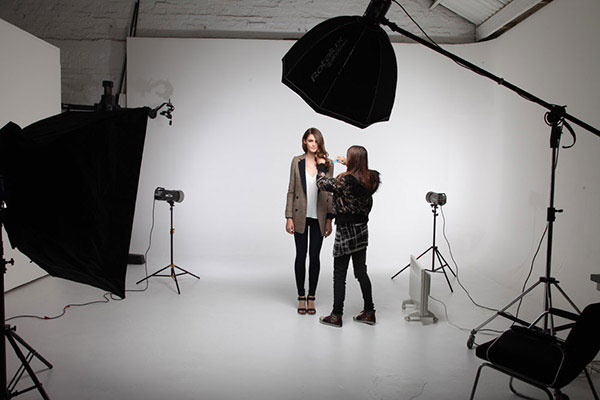
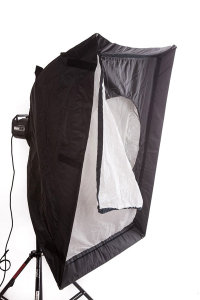
If I could only pick one light modifier to take to a deserted island, it would have to be a softbox. Small, medium or large this little puppy is my go to light source for 80% of my shoots.

Why? The quality of light is soft, flattering and malleable. Changing the angle and proximity of the softbox to the subject, easily changes the quality and direction of light.

A softbox, I feel, recreates the effect of soft daylight through a window.

I think what I like most about softboxes is that they are subtle. Highlights gently merge to shadows.

If it’s a studio shoot I love using my Chimira Medium softbox, with white reflective interior. The white interior creates a softer light and this particular softbox has an extra layer of diffusion on the inside, adding even more softness to the light.

portrait-gear-essentials-05
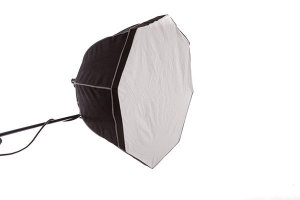
Rotalux Deep Octabox

Rotalux deep octabox would be the result if a softbox married a beauty dish and made babies. This, as far as I’m concerned, is a match made in heaven for lighting single person portraits.

Laptop

MacBookPro 15”

portrait-gear-essentials-10

Shooting tethered to a computer has made my life as a photographer so much easier, because I can use my computer as a teaching tool. ?I can show my model a series of great images, with slightly different poses. We can talk about how the poses are different and what I want them to do in the next series. They can see what I mean and it makes more sense, straight away.

Note from the Editor

For more information on how Gina works and does her portraits, pick up her dPS eBooks “Portraits Lighting the Shot” and “Portraits Making the Shot”

You also might want to grab our brand new eBook “Photo Nuts and Gear – know your gear and take better photos” if you’re trying to decide what equipment you need to purchase. Spend a little on an eBook, so you don’t spend a lot on the wrong gear.

Post originally from: Digital Photography Tips.

Check out our more Photography Tips at Photography Tips for Beginners, Portrait Photography Tips and Wedding Photography Tips.

Portrait Gear Essentials – by dPS eBook author Gina Milicia

The post Portrait Gear Essentials – by dPS eBook author Gina Milicia by Gina Milicia appeared first on Digital Photography School.


Digital Photography School

 
Comments Off on Portrait Gear Essentials – by dPS eBook author Gina Milicia

Posted in Photography


21 November, 2013 – Video Interview with Master Printer and Scientist Ctein

21 Nov

Our newest video was done by Michael with Ctein – master printer, scientist and writer. The conversation covers Ctein’s journey from Film and Dye-Transfer printing to Digital Cameras and Inkjet Printers.

Topics of discussion include the mastering of quarter-tones in inkjet printing, the current state of cameras and inkjet printers in 2013, a look at the future of both cameras & printers, and a close look at some of Ctein’s recent prints.

The duration of the video is 60 minutes, and the cost is just $ 10 from our new store. The video is free to all current and new subscribers.


The Luminous Landscape – What’s New

 
Comments Off on 21 November, 2013 – Video Interview with Master Printer and Scientist Ctein

Posted in News


How to Calculate Your Cost of Doing Business – And Other Necessary Numbers

21 Nov

Cards on the table time. Math and I are not friends. Never have been. From those dreaded flash cards in elementary school to my scary geometry tutor in high school, math and I have always been at odds with each other. In college, when it was suddenly optional, I avoided the subject like the plague. Even in my professional life, I’ve managed to get a handle on what I need to know and not much else. Thankfully, this mutual disdain that the mathematical arts and I share, seems to have skipped a generation. My 12-year-old son is doing high school algebra this year, and has been instructed by my wife to never, EVER, ask me for help. Ever.

Into every life, however, some math must fall, even those of professional creative types like photographers. Most of us don’t have the resources to hire business managers or year-round accountants to crunch the numbers, tell us what they mean, and how they need to change (although hiring such an individual is top priority when I win the lottery this weekend). Since we are left to our own mathematical devices, it is crucial for us, as photographers, to have a solid grasp on the numbers and how to calculate them. A common mistake among photographers is that they don’t take a methodical approach to calculating things like their creative fees, licensing fees, or even just the photography itself. Many seem to just pluck a number out of thin air. The difference between knowing, and not knowing, how to do this properly can be the difference between staying in professional photography or going to work at Starbucks, and I don’t drink coffee.

cost-of-doing-business-digital-photography-school1

Cost of Doing Business – What it Is and How to Figure it Out

Before you can even think of  putting a number on any of your services, you need to have a solid grasp and understanding of your cost of doing business (may be referred to as CODB). By the name alone, you’d think this would be an easy calculation. It certainly can be, but only if you take a logical, comprehensive approach.  Your cost of doing business is the result of an equation. Non-reimbursable expenses, plus your desired salary, equals your total annual costs. Your total annual costs divided by your number of billable days equals your cost of doing business.

I can practically see your eyes glassing over right in front of me. Stick with me, all will be made clear.

What are “non-reimbursable” expenses? These are the costs associated with keeping the lights on and the doors open. Rent, computers, phones, internet, insurance, gear, office supplies, etc., fall into this category. The American Society of Media Photographers has a great online calculator to help you with this, as does the National Press Photographers Association.

Obviously, we all want our salaries to be as high as possible. But, as with all things, you need to be realistic. Would you rather have the occasional, higher-paying assignment and sit around worrying the rest of the time, or maybe price yourself a little lower and work more consistently? Be realistic.

Billable days is exactly what it sounds like. As photographers, we don’t really work a “normal” week. We work early in the morning, late at night, on weekends, and everything in between. That doesn’t mean, though, that we don’t need time off. I know that I keep throwing the word “realistic” around, but it’s crucial for coming up with accurate numbers. There’s no way you can profitably work seven days a week, 52 weeks a year. Sick kids, your wife’s birthday, your anniversary, vacations, emergencies, car repairs, stopping to smell the roses and not just photograph them – there are going to be plenty of days where you can’t work or simply don’t want to. Being able to set a number of billable days is important to setting your fees (and maintaining your sanity).

Instead of thinking in terms of “billable days,” you may find it easier to think in terms of your number of shoots per month. You can download a basic Monthly Cost of Doing Business Worksheet here. As you can see, it requires taking a long, detailed look at your monthly expenses, both professional and personal, and it is by no means an exhaustive list. Everybody’s list will be different. You may find it useful to spend one full month accounting for each and every expenditure and seeing where it falls on the worksheet. Once you have a handle on your expenses, dividing that number by the total number of photo shoots you can do each month determines your monthly cost of doing business.

Once you’ve properly calculated your CODB, you are in a must better position to do the same for your creative and photography fees.

Setting Creative Fees

Unfortunately, this is not a fee that you can charge just for sitting around and thinking creatively. If it was, I’d be a multi-billionaire living in a medieval castle on my own private island. Instead, the creative fee is charged by the photographer for his or her efforts in bringing a project to a successful completion. In addition to time spent, the creative fee may be calculated to include factors like the photographer’s experience, special expertise, or anything that contributes to the overall creative effort. While this is where some of the intangibles like reputation, etc., can come into play, this is no place for your ego. You still have to start with your CODB. It is the foundation of your house. If it’s weak, everything else is going to crumble around you. You may be left with some nice stuff, but without the walls and the roof, you won’t have it for long.

cost-of-doing-business-dPS2

Pricing Your Photography

KNOW YOUR MARKET

Just as with the salary variable in calculating CODB, we all want to be able to price our photography as high as possible, but if you are going to succeed over a sustained period of time, you also have to be realistic (there’s that cursed word again!). For starters, you need to know what the market will bear.

A photographer in Manhattan is likely to have much higher expenses and overhead than a photographer in Detroit. On the other hand, a photographer in a more remote area might be able to charge similar rates to the New York photographer because the client may have fewer local options. Photography is a service industry and is subject to the same prevailing economic factors as any other. This is where research, networking, and relationships come into play. If you aren’t sure what your market will bear or why, you absolutely need to find out. Talk with other photographers, not only within your market, but within your specialty as well. If you are a commercial portrait photographer, knowing the value of wedding photography isn’t going to do you a whole lot of good.

KNOW YOUR CLIENT

You should also remember that you can (and should) charge different amounts for the same photograph under different circumstances. I may photograph a cup of coffee for a local coffee house identically to how I would photograph it for Starbucks, but guess who’s paying more for it?

KNOW YOUR PRODUCTION COSTS

Another factor in pricing your photography has to be your production costs for the specific assignment. Recurring production costs will show up in your cost of doing business analysis, but individual shoots can, and often do, require job-specific expenses. Will you have to rent equipment or studio space? Will you have to cater meals for your models and crew? Will you need to secure permits in order to shoot at your preferred location? These are just a few of the questions you need to ask yourself in order to evaluate your own investment in the shoot. How much do you have to make on this particular shoot in order to cover not only your CODB, but any additional expenses that it requires?

Convincing the Client

You already know you’re good. Now it’s time to make sure the client knows. You can have your Monthly CODB Worksheet all filled out. You can know everything about your market and specialty. You can even know how much your time is worth down to the penny. To the uneducated client, though, the biggest question they want answered is, “Why does this cost so much?” You need to be ready with an answer and it had better be a good one.

Now is the time for confident, not cocky. You need to be ready to explain exactly why your quote is what it is. Remember that old line, “Never let them see you sweat”? The moment a prospective client senses a lack of confidence, you’ve lost them. You already know the question is coming, so be prepared with a good answer. As with all things client-related, you have to listen to them and be ready to lay their objections and concerns to rest. Yes, I am an artist, but I’m also a businessman (I’m sure much to the chagrin of my high school geometry tutor). I have a family to feed and I can’t always be drawing lines in the sand around my artistic principles. If that means looking for compromises, so be it. If I know my CODB, though, I’m in a much better position to negotiate those compromises and create added value for the client.

Knowing When to Walk Away

Your cost of doing business is not just a number. It’s a ruler, against which you can measure many things, including the potential success or failure of a project. Remember that this number is a minimum. The rock bottom number that you need to meet on every job just to make sure your business survives another month. If this client isn’t going to let you do that, you have to be prepared to walk away. Do it nicely. Do it respectfully. Agencies, art directors, publishers all talk to each other. What do you want them to say about you?

Despite our differences, math and I have reached a sort of detente. I’d describe our relationship as being more of cautious respect than admiration, but we work well enough together to get the job done.  Now if my 12-year-old could just graduate college already, and become my bookkeeper, I’d be all set.


Post originally from: Digital Photography Tips.

Check out our more Photography Tips at Photography Tips for Beginners, Portrait Photography Tips and Wedding Photography Tips.

How to Calculate Your Cost of Doing Business – And Other Necessary Numbers

The post How to Calculate Your Cost of Doing Business – And Other Necessary Numbers by Jeff Guyer appeared first on Digital Photography School.


Digital Photography School

 
Comments Off on How to Calculate Your Cost of Doing Business – And Other Necessary Numbers

Posted in Photography


14 Apps for Architects, Interior Designers & Homeowners

20 Nov

[ By Steph in Gadgets & Geekery & Technology. ]

Architect Apps Main

Need to quickly calculate square footage, design a building digitally using its real-world setting, match an exact shade or sketch out an idea? There are apps for all of those things, whether you’re a casual homeowner looking to redecorate your living room or a professional architect. This collection of tools for iOS and Android mobile devices gives you easy access to all sorts of functions, wherever you may go.

Paper

Architect Apps Paper

The Paper app by FiftyThree, Inc. makes it easy to capture your ideas as sketches, diagrams, illustrations or notes and share them on the internet. It’s a simple and intuitive app built specifically for the iPad’s display. The company recently announced the introduction of a ‘pencil’ stylus that connects to the iPad via Bluetooth.

Graphisoft BIMx

Architect Apps BIMx

Available for both iOS and Android devices, BIMx is the ideal app for architects using the ArchiCAD program to present or share designs with clients and contractors.

MyPantone

Architect Apps MyPantone

Need mobile access to the entire Pantone catalog of colors? Check out myPANTONE, which includes over 13,000 Pantone colors and makes it easy to create and share color palettes.

Dream Home

Architect Apps Dream Home

Get inspired for interior design and home renovation projects with Dream Home HD, an app for iPHone and iPad that offers high-resolution photos in a wide range of design styles. Save your favorite images, share them with friends and upload your own.

Photosynth

Architect Apps PhotoSynth

The Photosynth app by Microsoft makes it easy to capture and share interactive panoramic images with not only left and right but also up and down, creating an entire sphere. That could be especially helpful when you’re assessing a building site or thinking about how to renovate or decorate an interior space.

Next Page – Click Below to Read More:
14 Apps For Architects Interior Designers Homeowners

Share on Facebook


[ By Steph in Gadgets & Geekery & Technology. ]

[ WebUrbanist | Archives | Galleries | Privacy | TOS ]


WebUrbanist

 
Comments Off on 14 Apps for Architects, Interior Designers & Homeowners

Posted in Creativity