A Guest Contribution by Todd Sisson – author of our brand new Landscape Photography eBook (currently 33% off for 7 more days only).
The majority of landscape images are photographed in the horizontal aspect. I guess this because the horizontal format approximates the way in which we perceive ‘reality.’ However landscapes look stunning in the vertical format and often the unique characteristics of the upright format suit a scene better than a horizontal* composition. I am guilty of undershooting verticals these days, primarily for commercial reasons, but in any given shooting situation I try to remind myself to seek both a vertical and a horizontal composition from a scene.
Here’s why I think you should photograph vertically and some quick tips for successful upright image making.
Reason One: Verticals are Easy to Learn
Vertical composition using a wide angle or ultra-wide lens is the fast track to making interesting landscape images. My first successful landscapes were all vertical compositions where I found a moderately photogenic foreground object and used this to lead into the greater scene. To this day I find it easier to frame up an interesting sunset in the vertical format. I use rocks, grasses, flowers – just about anything with form to introduce the viewer’s eye to the scene.
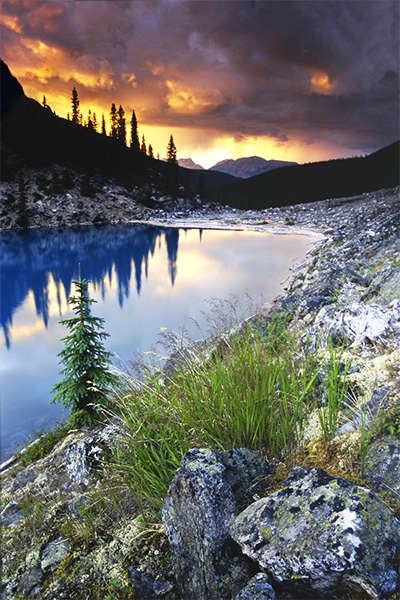
Moraine Lake, Alberta Canada (1997). Nikon F601, Nikkor 24mm, f/16, (shutter speed unknown), Fuji Velvia and most importantly, Lee 3 stop GND filter. This was the first image that I ever made that actually turned out how I thought it would! Note that foreground elements don’t have to be spectacular to work, they just have to be well arranged in the frame and complement the rest of the scene. When I was learning, I found it easier to eliminate foreground distractions and make a ‘tight’ composition in the vertical format. As a result, I shot far too many verticals in my early days and very few good horizontal images…
Reason Two: Vertical Compositions can be more Dynamic
In this dPS blog post, I explained the principles of ‘dynamic landscape compositions’. What I didn’t reveal in that article (for some inexplicable reason) was that vertical compositions can often accentuate the dynamic qualities of an image – particularly when using an ultra-wide lens.
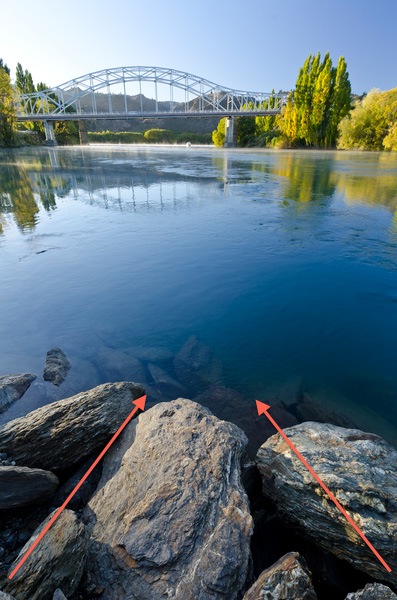
The Clutha River at Alexandra (it’s not wonky, the bridge slopes downhill…). Nikon D7000, Nikkor 12-24mm f/4 DX, Marumi Polarizer. 12 mm, f/11, 1/13th, ISO100. The vertical format accentuated the leading lines present in the foreground rocks. Getting low and tilting down on an ultra-wide lens distorts and extends the perceived length of leading lines in the foreground.
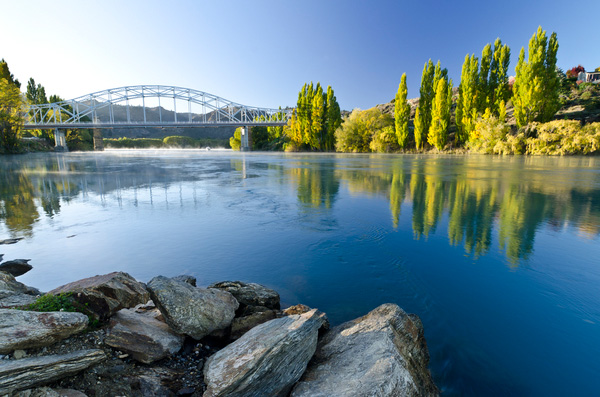
The Clutha River at Alexandra (the bridge still slopes downhill – I promise!). Nikon D7000, Nikkor 12-24mm f/4 DX, Marumi Polarizer. 12 mm, f/11, 1/13th, ISO100. When shooting horizontally, the bridge and trees would not be in frame if we used the same camera angles and proximity that were applied in the vertical format. In this case I had to step back and recompose to include everything, which reduced the dynamic impact of the rocks.
Reason Three: Verticals Sell Well
In the introduction I polluted the artistic sanctity of the article by mentioning ‘commercial reasons’. Five years ago we made most of our living from selling postcards of our images – horizontal postcards vastly outsell vertical postcards, and they fit better on a display stand, so I found myself inadvertently locked into a horizontal mindset (as I mentioned last week, deep thought and self-awareness are not my strong point). This sales trend is definitely mirrored in our website where the bulk of our print sales are horizontal.
However, In the past year we have ramped up our stock photography activity and this is one area where vertical images sell extremely well – especially for editorial usage and magazine covers where the format works beautifully with the vertical layout of printed media. Consequently, we are shooting a lot more vertical images. You may not be a full-time photographer but there are myriad ways to earn money from your photographic hobby these days, don’t leave money on the table – shoot verticals along with your horizontal compositions.
Vertical Shooting Tip 1: Get Low and Close
As I noted in the previous image, getting low and close accentuates the visual power of leading lines and dramatically increases the visual weight of foreground features. To go low you will need to use a tripod that has no centre column in order to get super close to the ground, I have detailed our tripod advice here which may be of interest if you are perplexed by the ins and outs of the tripod purchasing process.
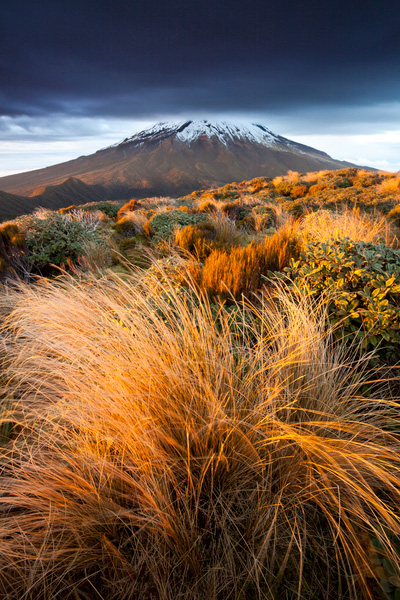
Mount Egmont New Zealand. Canon 5d mkii, Canon 17-40mm f/4 ultra-wide, Marumi polarizer. 17 mm, f/16, 1 sec, ISO100. By getting implausibly close to the foreground grass in this scene I have eliminated other distracting elements, increased the visual weight of the grasses and accentuated the leading lines in the bottom right of shot. As well as being close, I was also very low to the ground while making this image.
Vertical Shooting Tip 2: Get High and Close
When using an ultra-wide lens it is possible to include the full sweep of a scene and accentuate the visual dynamics of the image by getting above the foreground elements and composing vertically. To achieve this you will need a tripod that extends well above the height of your subject matter and then angle the camera downwards.
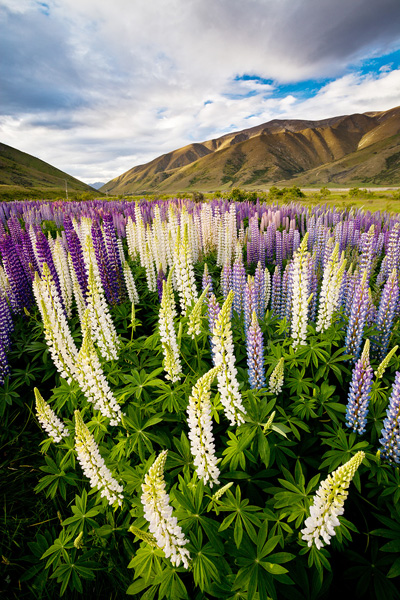
Lupine flowers, Mackenzie basin New Zealand (by Sarah Sisson). Canon 5d mkii, Canon 17-40mm f/4 ultra-wide, Marumi polarizer. 17 mm, f/16, 1/8th sec, ISO100. Sarah had to fully extend her tripod and stand on a box in order to get the camera above these chest high lupin flowers. The high perspective meant that all of the meadow is visible and accentuated the space between flowers in the foreground.
Vertical Shooting Tip 3: Break down the Composition
When composing strong verticals I tend to ‘break down’ the scene into foreground, midground and background (the same thinking helps with horizontal images of course). A good composition will contain interest in all three of these visual zones – which roughly approximates the rule of thirds compositional guidelines.
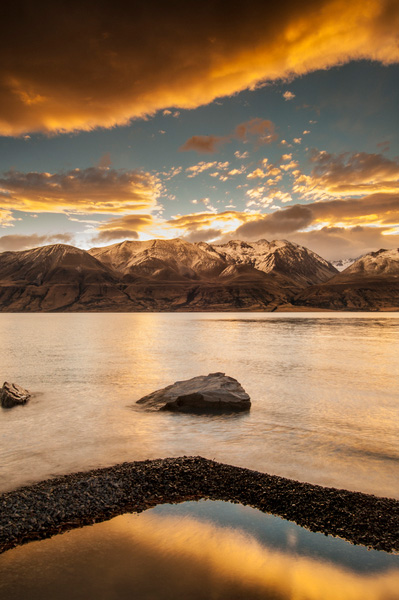
Lake Pukaki New Zealand. Nikon D800e, Nikkor 17-35mm f/2.8 ultra-wide lens, Marumi Polarizer and Singh Ray 3 stop GND filter. This image has layers of visual interest in the foreground (gravel bar and rocks) mid-ground (reflected color & mountains) and the background (the sky). Note that the terms foreground, mid-ground and background align loosely with the principles of the rule of third – I find that I shoot more in sync with the rule of thirds for verticals than horizontals.
Vertical Shooting Tip 4: – Leave some Space
Having just referred to the dreaded rule of thirds, I feel it my duty to throw a spanner into the works. Try messing with your vertical compositions by leaving ‘too much’ empty space. Dead space can look cool and graphic designers love it for dropping text into (sales tip).
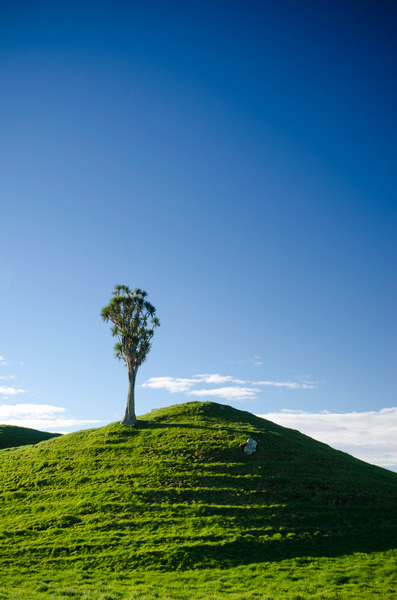
Lone cabbage tree, Taranaki New Zealand. Nikon D7000, Nikkor 16-85mm DX, Marumi Polarizer. 35 mm, f/11, 1/20h, ISO100. I think that vertical images often look great with plenty of empty real estate (I am a gleeful recidivist breaker of the rule of thirds). This image has sold several times as an interior page with text dropped over the sky portion.
Vertical Shooting Tip 5: Try Telephoto Verticals
Telephoto verticals are a particularly attractive compositional option, particularly around mountains. Because the long edge is oriented top to bottom you can exploit telephoto compression more effectively (by allowing more foreground into the frame at longer focal lengths and emphasizing the height differential across the scene).
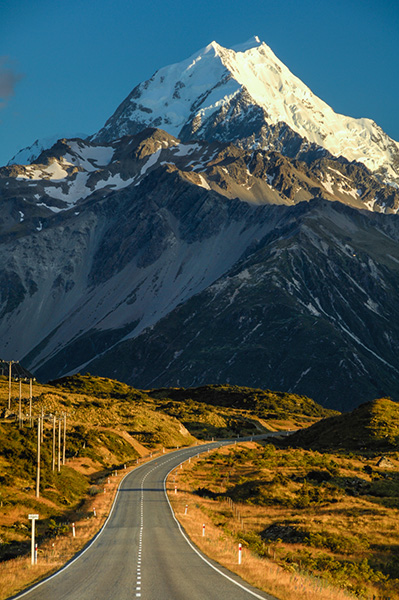
The road to Mount Cook New Zealand. Nikon D7000, Nikkor 70-200mm f/2.8 Vrii, Marumi Polarizer. 135 mm (202mm 35mm equivalent), f/11, 1/15h, ISO100. The vertical aspect exaggerates the effects of telephoto compression in scenes like this.
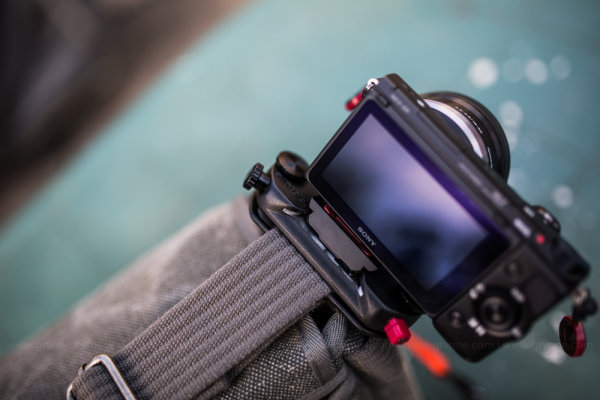
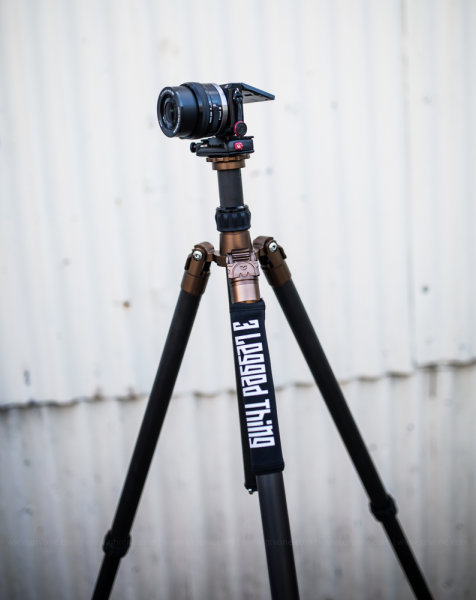
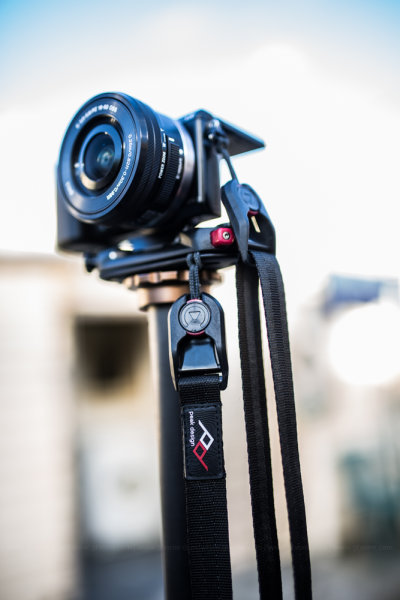
Vertical Shooting Tip 6: Invest in an L-Bracket
An L-bracket or ‘L-plate’ is an L-shaped (surprise, surprise!) tripod mounting plate that wraps around your camera body. This allows you to effortlessly mount your camera in the vertical orientation without having to flop the ballhead’s mounting point over on it’s side. Never again will you have to fight gravity and adjust tripod legs in order to get the camera leveled when shooting vertically – genius!
You will find a bit more information on the benefits of L-plates here on our website.
*I use the terms vertical or horizontal because the commonly used ‘portrait’ and ‘landscape’ terminology makes me abnormally irascible and grumpy. These terms are a nonsensical hangover derived from a Windows 95 printer options dialog box (maybe this riles my inner Mac Veteran). After all, a portrait can be photographed vertically or horizontally and likewise a landscape…..
Todd & Sarah Sisson are full-time landscape photographers based in Central Otago New Zealand. They are the authors of our new eBook Living Landscapes: A Guide to Stunning Landscape Photography.
Their work can be found as fine art prints & canvas prints at www.sisson.co.nz They can be found on Facebook, Google Plus and Twitter.
Post originally from: Digital Photography Tips.
Check out our more Photography Tips at Photography Tips for Beginners, Portrait Photography Tips and Wedding Photography Tips.
3 Reasons to Shoot Vertical Aspect Landscapes and 6 Tips on How to Shoot Them


You must be logged in to post a comment.