
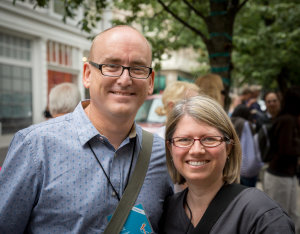
This image was made using a flash on camera, bounced into an uncoated muslin reflector. The uncoated muslin warms the light up about 400 degrees Kelvin. The reflector was positioned above and to the left of the camera, with the flash aimed into it. EOS-1D Mark IV, EF 100mm f/2.8L Macro. ISO 100, 1/250, f/4.

This diagram shows the lighting for the image above. The uncoated muslin reflector is positioned above and to the left of the camera, with the flash bounced into it. Play with the angle of the reflector to get the lighting just right.
Last week I wrote about high key portrait lighting and how it creates a very upbeat feel in images lit that way. The opposite end of the spectrum is low key lighting, which creates a more moody feeling in images. Low key lighting tends to be lit with one light on the subject, using reflectors or fill light if necessary to fill in shadows. Because only one light is required, it can be a bit easier to light a subject in the low key style, and certainly less costly indoors.
Light reveals your subject, and shadows define your subject. The shadows you create are equally as important as the light you use to expose your subject. Low key lighting will have a high lighting ration from main to fill, typically as high as 8:1. High key, by comparison, will approach 1:1.
Indoors, the simplest way to achieve low key lighting is to use a speedlite on camera, bounced off a wall, or into a reflector angled to catch your subject in the face. Adjusting the flash output will help you get the softness in light, as well as using a larger reflector. Another reflector on the opposite side of your subject can be used to throw reflected light back where it came from for fill if desired. Using a silver or gold reflector will create a harsher light, while using uncoated muslin or soft white will create a softer light.
If you’re able, and want to get the flash off camera, using a wireless trigger on your speedlite, while placing it in a softbox gives you another option to light your subject. A softbox gives you soft, directional light, without spilling the light into the background. Softboxes work by enlarging your light source. The larger the light source, the softer the light will be. I use several softboxes depending on what I need. The first is a Westcott Bruce Dorn 18×42 assymetrical strip box. This is great for
lighting a full length figure, with a natural falloff at the feet. The rest I use are Westcott Apollo softboxes. I have the 16″, 28″ and 50″ softboxes, depending on what the situation calls for. The 50″ creates light very similar to window light, with a nice soft wraparound effect. The 28″ is a bit harsher, and the 16″ harsher still.

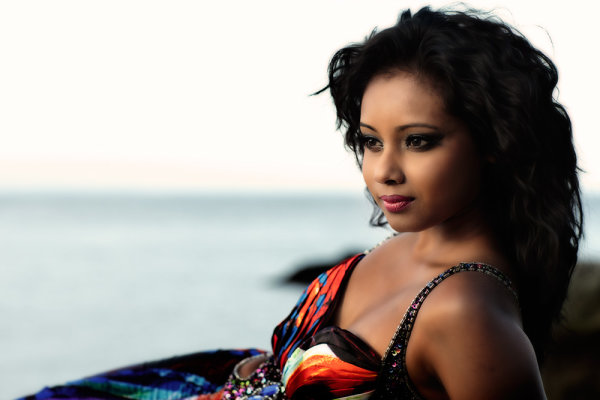
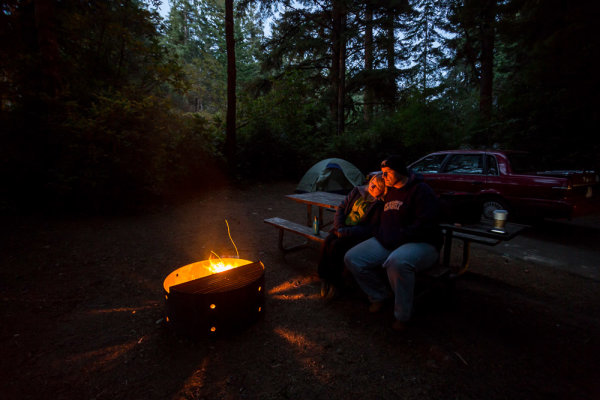
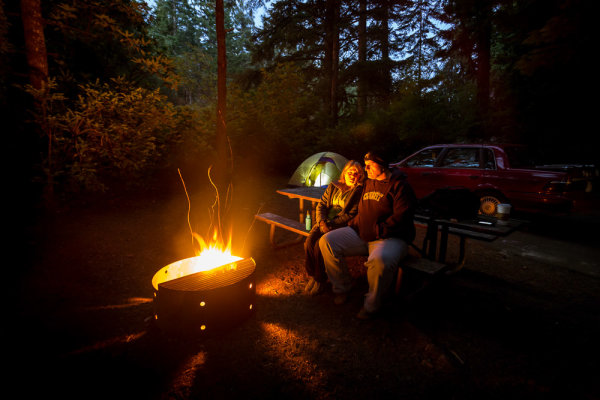
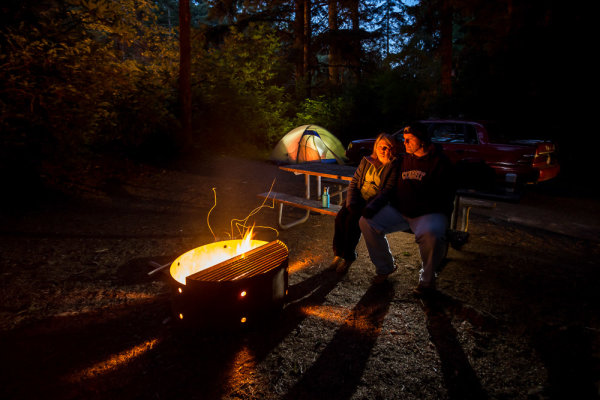
For this image, I used a Westcott 28″ Apollo softbox, with a speedlite off camera. I turned down the flash output slightly to give a more moody feel. EOS 5D Mark II, EF 24-70 f/2.8L. ISO 100, 1/200, f/8.
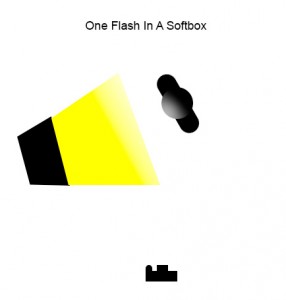
The softbox is positioned to the left of the camera and aimed at the subject as the subject is turned toward the light. The camera shoots from the shadow side of the subject, allowing the light to just kiss the contour of the subject from the side.
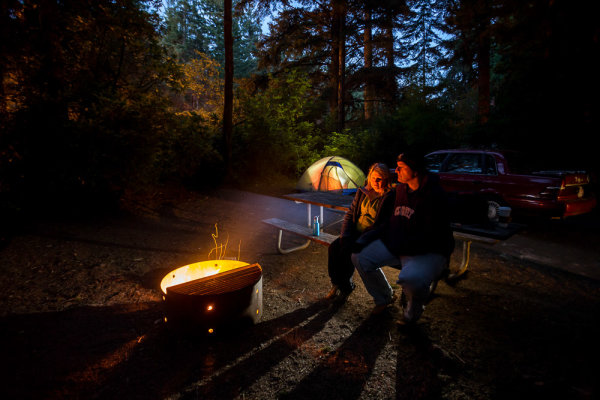
Outdoors, to get a low key lighting effect, you’ll need to catch the sun when it’s low in the sky, just as it’s setting, or in the morning as the sun rises. Alternatively, standing at the edge of deep shade can help create a low key effect as well. If needed, a scrim can help soften the light hitting your subject, but generally a sun low in the sky creates a soft warm lighting on your subject.
Low key lighting is great for setting a mood. Add it as another option in your lighting toolbox and see what happens. Share your favorite low key images in the comments too!
This shot was taken using only late afternoon sun, just before sunset. When the sun sets it becomes directional, and all I had to do was instruct my model to face the light, watching the soft shadows it created. EOS-1D X with EF 85mm f/1.2L II. 1/320, f/4, ISO 320.
Post originally from: Digital Photography Tips.
Check out our more Photography Tips at Photography Tips for Beginners, Portrait Photography Tips and Wedding Photography Tips.
Setting The Mood With Low Key Lighting


You must be logged in to post a comment.