RSS
 

Archive for May, 2013

browserFruits Mai #4

26 May

Habt Ihr Euch schon einmal überlegt, bei uns Eure Bilder zu zeigen? Wir freuen uns immer über Gastartikel und auf dieser Seite erfahrt Ihr auch genau, wie es geht. Und wenn Ihr Euch keinen ganzen Artikel zutraut, gibt es auch noch unseren Ausblick, bei dem wir täglich ein Leserbild groß auf kwerfeldein präsentieren. Aber jetzt erst einmal viel Spaß mit den browserFruits.


Fotospecial: Masken

Flickr

500px


Deutschsprachig

• Jens Pepper, seines Zeichens Kunstvermittler, Autor und Fotograf, führt Interviews mit Fotografen und anderen Akteuren rund um die Fotografie. Spannendes Projekt!

• Yahoo hat Tumblr übernommen.

• Und Flickr sieht auch nicht mehr aus, wie früher und jeder Nutzer bekommt zudem ein kostenloses Terabyte Speicherplatz. Die taz berichtet.

• Eine großartige Aufnahme des Apex-Teleskopes zeigt die Orion-Molekülwolke und sieht einfach unglaublich faszinierend aus.

• Blick über den Tellerrand: Das Erste hat einen interessanten Beitrag darüber, wie stark das Frauenbild in den Medien junge Mädchen beeinflusst. Auch Portrait- und Fashion-Fotografen sollten mal drüber nachdenken.

• Allen Berlinern und Berlinbesuchern sei bis zum 2. Juni noch ein Besuch des Photography Playgrounds in den Opernwerkstätten nahegelegt. Der Eintritt ist frei und man kann sich für den Besuch der Ausstellung eine Kamera leihen und damit nach Lust und Laune fotografieren.


International

• „Obscura“, ein dickes Buch, das sich ganz der Pinhole-Fotografie widmet, entsteht gerade und braucht etwas Starthilfe. Wer das Projekt so großartig findet wie wir, kann sich an der Crowdfunding-Kampagne beteiligen und Prints und/oder ein Exemplar des Buches sichern.

• „Dear Charlie, … this is why your pictures suck.“ Auch, wenn Du nicht Charlie heißt: Lesen und kritisch überlegen, ob Du Dich nicht trotzdem angesprochen fühlst.

• Etwas gruselig anmutende Portraits mit verdrehten Gesichtern von Alma Haser.

• Eine schöne Sammlung Levitationsbilder von Nikolay Tikhomirov.

• Das kommt dabei heraus, wenn man sein ganzes Leben automatisch loggen lassen möchte: „Memoto“ ist eine kleine Kamera zum Anstecken, die alle 30 Sekunden ein Foto macht. Wer’s braucht.

• Diese Fashionbilder von Emily Soto finden wir zeigenswert.

• Ohne vorher viel über Abu Dhabi zu wissen, reiste der Fotograf Philip Cheung 2007 für einen Auftrag dorthin … und blieb fünf Jahre. Über diesen Zeitraum dokumentierte er die sich schnell wandelnde Landschaft der Vereinigten Arabischen Emirate.

• Fstoppers hat eine feine Zusammenstellung der zehn besten Filme über Fotografie am Start. In den Kommentaren gibt’s noch mehr.

• Noch mehr Tipps für Modelle (und natürlich auch Fotografen zum Anleiten): Dear Model…, kindest regards, Other Model. XXX


Neuerscheinungen und Tipps vom Foto-Büchermarkt

Buchtipps

• Amazon verrät nicht viel über den Bildband „Live“* von Manfred Bauman, aber hier haben wir einige der darin enthaltenen Schwarzweiß-Portraits von Obdachlosen gefunden, die uns überzeugen. Und 160 Seiten für 25 € klingt nach einem gutem Deal.

• Lochkamerafans aufgepasst: Das Buch „NACH DER NATUR · CAMERA OBSCURA“* von Hanns Zischler ist im Verlag Kehrer erschienen und kostet 24,80 €. Ein Blick auf die Homepage des Fotografen lohnt sich auf jeden Fall.


Videos

I LOOK & MOVE ist ein schöner Stop-Motion-Film von Constantine Konovalov.


Chicago ganz schnell – Ihr ahnt es: Mal wieder ein Zeitraffervideo.


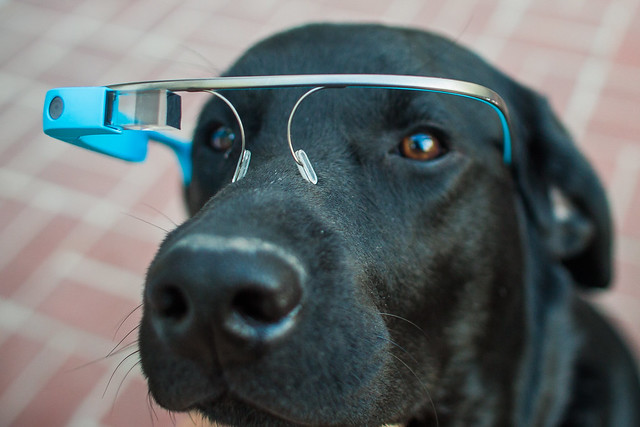
iPhone war gestern. Die Zukunft der Fotografie liegt wohl in der Google-Brille.


Ausstellungen

Hanns Zischler – Nach der Natur (camera obscura)
Zeit: 25. Mai – 30. Juni 2013
Ort: Alfred Ehrhardt Stiftung, Berlin
Link

URBAN BALLADS von Jürgen Bürgin
Zeit: 28. Juni – 2. August 2013
Ort: Fotogalerie Friedrichshain, Helsingforser Platz 1, Berlin
Link

Ein roter Löwe…
Zeit: 1. Juni – 3. August 2013
Ort: Spürsinn UG, Gifhorner Straße 148, 38112 Braunschweig
Link

Mehr aktuelle Ausstellungen


* Das ist ein Affiliate-Link zu Amazon. Wenn Ihr darüber etwas bestellt, bekommen wir eine kleine Provision, Ihr bezahlt aber keinen Cent mehr.


kwerfeldein – Fotografie Magazin

 
Comments Off on browserFruits Mai #4

Posted in Equipment


26. Mai 2013

26 May

Ein Beitrag von: Michele Di Fede

Villa Belza Biarritz


kwerfeldein – Fotografie Magazin

 
Comments Off on 26. Mai 2013

Posted in Equipment


25. Mai 2013

26 May

Ein Beitrag von: Anna Heimkreiter

infinity`s tale


kwerfeldein – Fotografie Magazin

 
Comments Off on 25. Mai 2013

Posted in Equipment


An Introduction to Photoshop Compositing for Beginners

26 May

by Sarah Hipwell

NewImage

What is compositing? Simply, it means to combine two or more images to make a single picture.

As a photographer, I’m constantly coming up with different concepts that I feel might make a good photo. But it is not always possible to get the perfect shot in one session. There have been numerous occasions while on a shoot where the light was not bright enough for the particular shot that I had in mind. On other occasions the background was too distracting. This is where the ability to create composite imagery in Photoshop is a huge advantage.

To produce a composite image in Photoshop, you need to isolate the subjects from the background of your various source photos. When I started out, I used the pen tool to help isolate my subjects. Now, I use the ‘quick selection’ and ‘refine edge’ tools which are superb and are a much faster way of doing extractions, especially for isolating hair!

But for this tutorial, I’m going to use the pen tool to create a path which I then save this as an alpha channel selection. I believe the pen tool should never be overlooked as an excellent way for beginners to increase their proficiency level with Photoshop. If you are new to using the pen tool, it does take a bit of getting used to but after time, you will pick up speed and accuracy. The big plus side to creating paths in this way is that they are re-editable and non-destructive.

I have highlighted three key features:

  1. Selection. Good selections are critical for compository work
  2. Composition.
  3. Uniform color balance and light.

Here’s the method:

  1. The Pen Tool – With the Pen Tool selected in the toolbar, choose a starting point on the photo, click and drag around the area to be selected. This will create a path outline to be saved in the Paths Palette.
  2. Place the images – When I want to bring other images into a composite, I prefer to Place them into the file. What this means is that the image is brought into your psd file on a separate layer as a Smart Object. The photo can be moved into position, made larger or smaller without affecting the quality.
  3. Match Color – When all the elements of the photo are edited and in place, I use Match Color tool as an effective way to balance the color between the two images.

NewImage

I took the photo above for a concept shot titled ‘Recycled toilet paper’. I wanted a bright blue sky with white fluffy clouds as the background. The above shot did not have the background that I wanted. So I waited a couple of days and I got the shot I wanted. See below:

NewImage

I made my selection using the pen tool to isolate the toilet rolls and clothesline. Zoom in up to 300 – 400% to get a good outline, as shown below.

NewImage

Holding down the Alt/Ctrl key enables you to move anchor points and direction lines and again make any edits to your lines and curves.

When you have finished plotting your anchor points, you can then save this outline in the Paths Palette. This selection can then be added as a layer mask. It should resemble the black and white image on the right below.

NewImage

I imported the new sky background by going to the File menu and select Place. The image then appeared as a Smart Object and on a separate layer. I had to reduce the size but the quality of the image was maintained.

When I was happy with the position of the new sky background, I merged all the layers onto one. I used a keyboard shortcut (Cmd/Ctrl+Alt+Shift+E) to achieve this. The reason for this is that the next adjustment isn’t non-destructive so that if I want to redo this edit, I would have to delete the layer and repeat the above step again.

The final adjustment was to go to Image menu and select Match Color to make sure the color is balanced between the two images. Using Image>Adjustments>Match Color I played with the two sliders to get the color of the image more uniform in appearance. See the link below where I uploaded the final composite image to iStockphoto.com

http://www.istockphoto.com/stock-photo-6231026-recycling-toilet-paper.php?st=faf18be

See more of Sarah Hipwell’s work at her website – SarahHipwell.com

Post originally from: Digital Photography Tips.

Check out our more Photography Tips at Photography Tips for Beginners, Portrait Photography Tips and Wedding Photography Tips.

An Introduction to Photoshop Compositing for Beginners


Digital Photography School

 
Comments Off on An Introduction to Photoshop Compositing for Beginners

Posted in Photography


Kite Cameras: Aerial Photography Accessible to Anyone

25 May

[ By WebUrbanist in Gadgets & Geekery & Technology. ]

aerial crop circle capture

Towers convey power, and height is both literally and metaphorically connected to broader and better views – but here come kites to undermine that top-down view.

aerial kite island photos

Kite photography is empowering and democratizing – increasingly inexpensive unmanned aircraft can be attached to likewise ever-cheaper, high-quality photographic devices. Kite Aerial Photography (KAP) enthusiasts like Pierre Lesage, a sampling of whose work appears here, are rapidly taking to these newer and better technologies.

aerial windmill landscape photo

Sending your camera into the sky is one thing – keeping it balanced so it takes a clean and crisp shot is quite another. Many of the latest advances thus appropriately address the issue of stability. Hence, stabilization rigs that help keep balance even with an ever-moving kite and ground controller.

aerial kite camera stabilization

The controller, in turn, has to determine how the photos-taking will unfold, via preset intervals, perhaps, or using infrared or radio controls. Of his setup, the photographer writes: “Originally this rig was made for a Canon Ixus 600, was then adapted with a video return and later adapted to welcome A Leica Dlux3.”

aerial from of boat

Until recently, taking photos from the sky meant owning (or at least renting) an airborne vehicle to carry you and your equipment aloft, then struggling through windows or other opening to take the best shot. Now, the game has changed, and almost anyone can get in on the action. Now the only thing that may get in your way is the thin kite string everything else hinges on.

Share on Facebook


[ By WebUrbanist in Gadgets & Geekery & Technology. ]

[ WebUrbanist | Archives | Galleries | Privacy | TOS ]


WebUrbanist

 
Comments Off on Kite Cameras: Aerial Photography Accessible to Anyone

Posted in Creativity


25 May, 2013 – What’s In Kevin’s Bag

25 May

We’re off to Sydney.  If you are in Sydney this week then visit us at the L&P IQ World Tour Event.  In the meantime enjoy What’s in Kevin’s Bag and see the gear he takes on a photographic trip.

Watch our Facebook pages as well as postings here for the latest on our Australia Adventure.


 Stephen Johnson an instructor on our previouaAntarctica workshops and well known landscape photographer has a few openings left on what looks like a great workshop into the Alaska Wilderness.  To check out this workshop and register visit his  Workshop Page


The Luminous Landscape – What’s New

 
Comments Off on 25 May, 2013 – What’s In Kevin’s Bag

Posted in News


Leseraktion: Bearbeitungsexperimente

25 May

Auf der Suche nach einer neuen, spannenden Leseraktion kam Sebastian auf die Idee, an einem einzigen Bild zu testen, was durch verschiedene Bearbeitungstechniken und -stile entstehen kann.

Immerhin kommen hier auf kwerfeldein so viele verschiedene Menschen und damit auch so viele verschiedene Stile, Interessen und Vorlieben zusammen. Wäre doch schade, das nicht mal anschaulich vergleichbar zusammenzutragen.

Es geht dabei weniger darum, wer das „schönste“ Bild aus einem Rohbild zaubert, sondern viel mehr darum, Eurer Kreativität freien Lauf zu lassen, Euren eigenen Stil zu zeigen oder einen ganz neuen auszuprobieren.

Damit Ihr Euch etwas unter den möglichen Ergebnissen dieser Leseraktion vorstellen könnt, ist die Redaktion schon einmal mit mutigem Beispiel voran gegangen. Gemeinsam haben uns jeder selbst an einem von Lauras Bildern versucht. Ausgemacht war nur, dass jeder etwas stärker bearbeitet als sonst. Aber dass die Ergebnisse dann so verschieden werden würden, hätten wir trotzdem nicht erwartet.

Nach unseren Bildbearbeitungsexperimenten findet Ihr alle wichtigen Informationen zur Leseraktion, an der Ihr teilnehmen könnt.


© Normen Gadiel

Normen: Ich habe die Person aus dem Ausgangsbild ausgeschnitten und in eines meiner Bilder eingefügt. Anschließend habe ich noch die Farblichkeit angepasst und etwas Schatten unter die Person gesetzt.


© Aileen Wessely

Aileen: Mir fiel sofort die Fast-Symmetrie zwischen dem Ausschnitt Himmel und der Straße auf, also habe ich den Hintergrund auf den Kopf gestellt und die entstehenden Leerflächen wieder aufgefüllt. Um es noch surrealer zu machen, habe ich Lauras Schal in einen imposanten Kragen verwandelt und drei Linien in der Nähe ihrer Hand betont. Die Schwarzweiß-Konvertierung habe ich gewählt, um die Aufmerksamkeit stärker auf die Formen zu lenken.


© Martin Gommel

Martin: Bei der Bearbeitung des Bildes wollte ich nur mit dem Origninalmaterial arbeiten und nichts entwenden oder hinzufügen. Nach dem Ausrichten habe mit verschiedenen Helligkeitsverläufen und Gesamtjustierungen in Lightroom die Kontraste selektiv angepasst. Auch die Farben waren mir wichtig und mittels Teiltonung und Sättigungsvariationen gelang mir dieser Look. Die Bewegungsunschärfe tut ihr Übriges und soll den Blick eines vorbeifahrenden Autofahrers auf Laura simulieren.


© Sebastian Baumer

Sebastian: Das Bild, das den Ausgangspunkt bildete, war meiner Meinung nach sehr brauchbar, allerdings stellte die Umgebung ein größeres Problem dar, vor allen Dingen die vielen bunten Autos. Ich entschied mich dazu, sie (in einer Extrem-quick-and-dirty-Session von 20 Minuten mit verschiedenen Werkzeugen) komplett zu entfernen, um dem Bild einen zeitloseren Look zu geben.

Anschließend hellte ich verschiedene Bereiche des Bildes auf und dunkelte andere nach, führte eine leichte Retusche des Gesichtes durch und legte anschließend eine Textur über das entstandene Bild, das ich am Ende mit dem Kanalmixer in eine Schwarzweißversion verwandelte.


© Laura Zalenga

Laura: Da ich die Autos sehr unschön fand, für mich aber keine Chance sah, sie schön aus dem Bild zu retuschieren, habe ich direkt beschlossen, das Objekt in eine andere Welt zu versetzen. Ich liebe Märchen, das erzählen von Geschichten und ich liebe es, eine neue Welt entstehen zu lassen, vor allem, wenn sie ein wenig surreal sind.

Erst saß das Mädchen auf einem Elefanten mitten in der Savanne, aber ihr Outfit hat einfach nicht zur Geschichte gepasst, daher habe ich mich auf die Suche nach einem Stockbild mit einem Eisbären gemacht. Und hier auch gefunden.

Der Hintergrund war mir noch zu fröhlich, da ich eher eine abenteuerliche Stimmung wollte, daher habe ich den Wald aus einem früher aufgenommenen Bild eingebaut. Noch etwas mehr Wasserdampf vom herabstürzenden Wasserfall und ein paar Schatten und fertig ist die Geschichte von einem Mädchen, das mit ihrem Eisbären durch die Wälder streift.

Sich eine Welt so zusammen zu bauen, war selbst für mich neu. Normalerweise versuche ich, das direkt in der Kamera hinzubekommen und verändere nachher eher Farben, Kontrast und einige Kleinigkeiten. Da mir zu dieser Art von Bearbeitung die Übung fehlt, bin ich mit dem Ergebnis nicht völlig zufrieden, aber es hat so viel Spaß gemacht, dass ich mich ab jetzt wohl öfter an solche Collagen wagen werde.


© Katja Kemnitz

Katja: Ich hatte mir das Bild eine Weile angesehen und mich störten die ganzen Autos und Häuser. Da wir im Vorhinein besprochen hatten, das wir gern etwas übertreiben können, damit am Ende nicht jeder nur etwas an den Farben dreht, beschloss ich kurzerhand, die Autos einfach zu entfernen. Die Straße ließ ich gerade und waagerecht im Bild verlaufen, was dem Ganzen ein sehr cleanes Aussehen gab. Um das noch zu betonen, entsättigte ich das Foto und schon war es fertig. Ich würde so kein Bild von mir bearbeiten, aber es war eine schöne Photoshop-Übung.


© Robert Herrmann

Robert: Mein erster Bearbeitungsschritt zielte auf eine etwas natürlichere Tonwiedergabe ab und so bügelte ich die Farbstiche in den Tiefen, Mitteltönen und Lichtern glatt und gab anschließend eine halbe Belichtungsstufe und etwas Gamma hinzu. Zusätzlich habe ich den Hintergrund mit einer ganz dezenten Kontrastreduktion maskiert, um den räumlichen Eindruck zu verstärken.

Anschließend habe ich den Bildausschnitt und die Perspektive minimal geändert, so dass nun zwei Fluchtlinien sauber in die rechte obere und untere Ecke laufen und die klaren Geometrien im Bild noch stärker betont werden – sehr schön hier übrigens die Wiederholung der Formen bei den beiden Giebeln im Hintergrund und der Haltung des Modells. Zuletzt habe ich den Frosch hinzugefügt. Frösche fetzen.


Regeln und Ablauf der Leseraktion

  • Ladet Euch die zwei Raws herunter, die wir für diese Aktion zur Verfügung stellen: Bild 1 und Bild 2.
  • Sucht Euch ein Bild aus, werdet kreativ und fertigt in der kommenden Woche Eure eigene Variante des Bildes an.
  • Meldet Euch bis zum Samstag, den 1. Juni 2013 zur Aktion an, indem Ihr unter diesem Aufruf einen Kommentar mit Link zu Eurem bearbeiteten Bild hinterlasst.
  • Schreibt zu Eurem Werk ein paar erläuternde Sätze. Zum Beispiel: Welche Bearbeitungsmethode habt Ihr gewählt und warum? Was war Eure Idee und wie gut hat die Umsetzung funktioniert? (Einsendungen ohne Erklärungen werden nicht berücksichtigt.)
  • Mit dem Kommentar stimmst Du einer möglichen Veröffentlichung auf kwerfeldein.de zu.
  • Am Samstag, den 8. Juni 2013 präsentieren wir unsere Auswahl Eurer Ergebnisse, hier auf kwerfeldein.


Zwei Tipps

Wer nicht mit Bildbearbeitungsprogrammen arbeiten will, möchte oder kann, darf auch gern andere Hilfsmittel verwenden, um das Bild zu verändern. Zum Beispiel: Ausdrucken und bemalen, besprayen, beschneiden, bekleben – Kreativität hört nicht am Rand von Photoshop auf.

Ihr könnt natürlich ebenso wie wir es getan haben, auch externes Bildmaterial verwenden, aber bitte nur mit ausdrücklicher Erlaubnis des Eigentümers und Link zum Originalbild.

Und jetzt genug der Worte! Auf die Plätze, fertig, los! Habt Spaß!


kwerfeldein – Fotografie Magazin

 
Comments Off on Leseraktion: Bearbeitungsexperimente

Posted in Equipment


What The Duck #1390

25 May

wtdlogo_big.jpg

We’ve been fans of Aaron Johnson’s comic strip ‘What the Duck’ for years. ‘WTD’ is one of the best satirical comic strips in the world, and it’s published here every week, as well as being included in our weekly newsletter. Barbed, topical and always amusing, we hope you enjoy WTD as much as we do. Click through for this week’s strip.

News: Digital Photography Review (dpreview.com)

 
Comments Off on What The Duck #1390

Posted in Uncategorized


Accessory Review: Phottix BG-5D III Battery Grip for Canon 5D Mark III

25 May

Phottix-BG-5DIII-Feature.jpg

The Phottix BG-5DIII battery grip is a budget-friendly alternative to Canon’s BG-E11 battery grip for the EOS 5D Mark III, allowing you to double the battery life and enhance handling when shooting vertical format images. Can it do the same job for less cash, or should you save up for the Canon-branded accessory? Find out in our review. 

News: Digital Photography Review (dpreview.com)

 
Comments Off on Accessory Review: Phottix BG-5D III Battery Grip for Canon 5D Mark III

Posted in Uncategorized


Top 10 Ways to Get the Most Out of the New Flickr

25 May

Earlier this week, Flickr rolled out the most significant changes to their service since purchased by Yahoo back in 2005.

In addition to a major web redesign and a new Android app, Flickr also changed the basic fee structure of their account types and storage limits.

Former Pro users are being allowed to retain their $ 24.99 year fee structure for unlimited, ad free service. If you are a Pro account user, nothing changes if you want to keep it.

Free account users were all given 1 terabyte of free high res photo storage. Free accounts are still ad supported, as they have been in the past, but now you are no longer limited to only viewing your 200 most recent uploads to the site.

Despite the typical torch and pitchfork mob rage emanating from the Flickr Help Forum*, (a group of super negative Flickr users representing less than .01% of all Flickr users), I’ve found over the past week that engagement on my own photos is up dramatically. More specifically, based on my Flickr stats page, engagement (as measured by comments and favorites) is up approximately 294% on my own photos since the new release.

*Dear Marissa Mayer, PLEASE, give us the ability to block users on Flickr, it would make it a much nicer place for those of us who want to enjoy it. :)

I have no way of knowing, more broadly speaking, if the stats numbers look this good for Flickr in general, but if they do, I suspect that they are very happy indeed with the success of this week’s new features.

This post is not meant to be a debate about the new changes; this post is for those of you who are ok with the site design and are now looking for ways to get the most out of it.

On with the list.

Tip #1, Make The Last Photo You Upload in a Batch Count

1. Consider a strategy for uploading your batches of photos. I upload two batches of photos to Flickr a day — one in the morning and one in the evening. Your upload strategy and the ordering of your batch uploads matters. With the new Flickr redesign, photos on the flickr.com homepage are really, really, big. Big photos get far more engagement. However, the only photo that gets shown ginormous on the flickr.com homepage is the very last one that you upload. The 5 before that are shown as small thumbnails there.

So, if you are uploading a batch of photos to Flickr, make sure the one that is uploaded last is the best of the batch. Also, landscape oriented and square photos show up much larger on the flickr homepage than portrait oriented crops. So, all other things being equal, consider making sure your last photo uploaded in a batch to Flickr is one of your strongest square or landscape oriented photographs.

Tip #2, Flickr is Your New Cloud Photo Back Up

2. Anyone who ever complains about losing photos on a crashed hard drive again is just dumb. While you, of course, should not depend on Flickr as your sole backup strategy, everyone now has a free 1TB drive in the sky for photos.

Even if you don’t want to share certain photos, or you only want to share them with your very close friends and family, upload them to Flickr anyways and mark them private or friends/family only. If nothing else, you will have a backup of last resort if you need to go get those photos later. I don’t know of anyplace else on the web where you can get 1TB of free storage. Take advantage of that not only for the photos you want to share publicly, but all your photos.

Hunt Peck

3. This is not necessarily a tip new to the new Flickr, but it’s one everyone ought to know about — keyboard commands..

On Flickr you can use the F key to fave a photo, the C key to comment on a photo, the G key to add a photo to a group, and the T key to tag a photo. This will make your Flickr experience much faster. For those complaining that, with larger photos, they now have to scroll down the page to comment, no you don’t — simply press the C key and you will jump right there, with your cursor right in place and ready to type.

Tip #4, More

4. … = MORE! This is a universal symbol on the internet for more. Anytime you see … anywhere, this means that there are things hidden underneath the … that you may want to find. It’s a good way for a site to de-clutter. I’ve seen many people ask where their favorite lesser used Flickr feature went (EXIF data, gallery functionality, all sizes, etc.). Just click on the … and you’ll find it all there.

Tip #5, Make Sure Your Sets Are in the Order You Want Them In

5. Make the most out of your sets. By default, Flickr puts your sets in the order created. Your most recent sets are shown first, and older sets are shown last. This may not be the best way to present your sets though. One of my most viewed sets is one of my oldest, my 10 faves or more set. If I didn’t manually move this to the top of my sets page, it would be buried in the over 1,800 sets I have on Flickr. Go to the Flickr organizer page here and make sure that your sets are in the order that you want them in.

If you have a lot of sets and find it cumbersome to move them around in the organizer (like I do). Shrink your browser view to super small and it will make more and more thumbnails in the organizer that are easier to move around.

Make sure your sets page shows your best sets on the first page. This will give people a great first impression of what your albums are all about.

Consider making a few “best of” sets on Flickr. If you use Jeremy Brooks’ SuprSetr app it will automatically tag all of your photos that have been favorited 10 times or more fav10. It can then build an album for you of just these popular photos of yours that you can highlight on your sets page.

Just Re-Upped for 2 More Years of Flickr PRO!!!

6. If you have a Flickr Pro account, do NOT let that expire. Your Flickr Pro account is worth more than it’s ever been worth in the past. It’s pure gold. Getting unlimited, high res, ad-free photos was the deal of a lifetime. Although Flickr is no longer offering this extraordinary deal anymore, if you have it, you get to keep it.

Go here to check on the status of your Flickr Pro and I’d recommend both renewing it now AND making sure you are set up as a recurring Pro so it automatically charges your credit card in the future. Don’t lose this awesome benefit.

Tip #7, Reupload Your Avatar

7. Make sure you reupload your Flickr avatar on the new Flickr. The old Flickr used a smaller version of your avatar, so you might notice that you have sort of this weird small avatar over a larger, dimmed out version of your old avatar on your Flickr page. You can reupload a better sized version of your avatar which will override this and make your new, larger avatar look much better.

Tip #8, Make Sure to Personalize Your Cover Photo

8. Change your cover photo. Flickr added a number of new cover photos by default with the new page design. Go to your page and change your cover photo to something new. Find a photo of yours (or a portion of a photo of yours) that uses an extreme landscape crop and will fit there and work well. I used a mosaic strip of photos for mine.

Tip #9, Review Who Calls You a Contact

9. Make sure to review your “who calls you a contact” page. This is a page that shows everyone on Flickr who has contacted you. You may be surprised that some of your friends have contacted you that you are not aware of. Review this list to see if you’ve missed any old or new friends on Flickr and add them back if you want.

Tip #10, Mobile

10. Make the most out of mobile. Although 95% of my own personal Flickr time is spent on the web version, don’t forget about mobile. Earlier this week, Flickr rolled out their Android app, which is every bit as good as their previous iPhone app and probably even better.

One of the easy things to do with this app is to favorite photos by your friends. Simply pull up your contacts photostream on the app and tap/tap to fave a photo. You can scroll down and see different friend’s photos or you can scroll sideways and see more photos from a single friend. When you have down time on the bus, or are waiting for your table at Bob’s Big Boy or wherever, use that time to favorite photos of your friends. They will see that and favorite your photos back most likely. :)

Ok Glass, Get Dogfood

Bonus tip: Get the new Flickr app for Google Glass. It’s awesome! ;) Just kidding. There’s no new Flickr app for Google Glass…

…yet.

You can find me on Flickr here.


Thomas Hawk Digital Connection

 
Comments Off on Top 10 Ways to Get the Most Out of the New Flickr

Posted in Photography