Ein Beitrag von: Thomas Lieser

kwerfeldein – Fotografie Magazin

A patent filed by Apple in 2011 and discovered this week by aoppleinsider.com seems to hint at a ‘social camera flash’ system, allowing multiple iOS devices to be connected and used as secondary strobes for impromptu flash setups. The patent is filed as an ‘illumination system’ and describes ‘initiating a master-slave relationship between the image capture device and at least one secondary device’. Click through for more details.
News: Digital Photography Review (dpreview.com)
  |
|||
Those Star Trek special effects guys are going to feel pret-ty foolish when they find out about Adam Kennedy.
Turns out you don’t need years of computer-generated image training to create breathtakingly detailed alien planets.
Adam finds his planets on the street! Fire hydrants, my friends.
He photographs, the rusted, peeling spheres that sit atop fire hydrants and edits them into wonderfully awe-inspiring habitats.
The best part about Adam’s planet project is that it started with a single imaginative thought.
It’s what inspires street art, photographers, and artists of every kind.
So the next time you think, hey that thing looks like that other thing, you know exactly what to do.
(Make art!)
Planets Made Out of Fire Hydrants
p.s. Wedding season is here! Get 40% off pro photo prints from Nations Photo Lab with code PHOTOJOJO.
p.p.s. We’re hiring A WEB DEVELOPER and AN EVANGELIST/BIZ DEV HERO. If you love photography and San Francisco, APPLY HERE.
Related posts:
[ By Steph in Gadgets & Geekery & Technology. ]
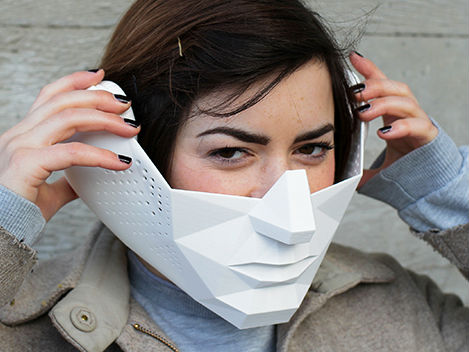
Put on a futuristic-looking, geometric white mask and you’ll suddenly have superhuman senses, hearing targeted sounds from long distances or applying effects to images in real-time. The ‘Eidos’ masks were developed by a group of students from the Royal College of Art in London, fitting over the mouth or ears to enhance sensory perception.

The mask that fits over the mouth and ears features a directional microphone to capture audio, which is processed by software to eliminate background noise. The sound is transmitted directly to the inner ear through bone vibrations to make it seem as if someone else’s speech is coming from inside your own head.


The second mask, which fits over the eyes, adds visual effects to the wearer’s range of vision, and can also analyze visual data. That data is sent to a computer, where software processes it and picks out patterns and movements that are invisible to the naked eye.

“Eidos has broad application in areas where live audio and video analysis is valuable. For example, sportspeople can visualise and improve technique in real time. Eidos also has healthcare benefits where it can be used to boost or refine sensory signals weakened by ageing or disability. In the arts, Eidos can augment live performance such as ballet, fashion or music concerts. It allows us to highlight previously invisible or inaudible details, opening up new and customisable experiences.”
![]()


[ WebUrbanist | Archives | Galleries | Privacy | TOS ]
![]()
     |

The BBC’s Technology Correspondant, Rory Cellan-Jones, has been getting to grips with the new camera module for Raspberry Pi – the low-cost DIY computer. The camera board was announced earlier this year, and opens up enormous potential for applications including robotics and high risk aerial/underwater use. Cellan-Jones got hold of one of the new camera boards and has written a short article in which he details the ‘nightmarish complexity’ of making it work. Click through for a link to the full article.
News: Digital Photography Review (dpreview.com)
Google unveiled significant new innovation in the world of online photography this morning, continuing their rapid development pace on Google+. All in, Google+ pushed out 41 new features today.
Much of the new work is focused on post production photography to make people’s photographs look better than they can straight out of the camera.
Some have suggested that part of Instagram’s success has been their ability to enhance users’ photos with very simple, one touch filters. Instagram has focused on a faux film aesthetic which actually highlights the flaws in many photos to give them more of an artistic, old school feel. By contrast, Google’s easily and automatically applied post production tools, released today, work to make photos look more vivid, life like and realistic.
By using simple techniques like skin softening, clarity adjustment, smart vignetting, HDR and other enhancements, Google, by default, now offers an enhanced photo for every photo uploaded by users to Google+. Also, with this new tech, Google will give you the ability to view the before and after results and decide which you prefer to use. For photographers who do not want their photos altered in any way, these users can turn this default functionality off.
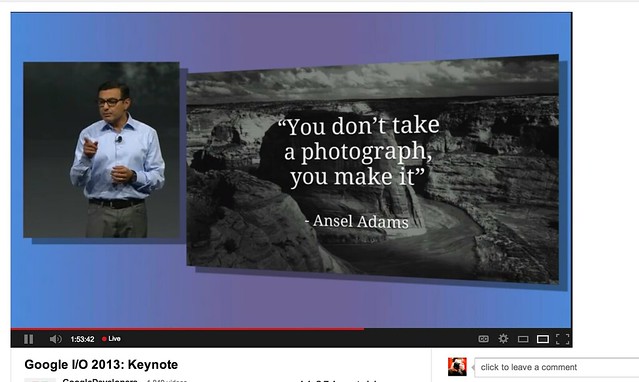
As a photographer, I have long been a believer of photo manipulation and post processing technology. Ansel Adams said “you don’t take a photograph, you make it,” as highlighted in Google Social Chief Vic Gundotra’s keynote this morning. Much of Ansel Adams’ genius has been attributed to the work that he did in the darkroom with his photos, his zone system, his post production technology of his time.
I post process all of my photos. The photo at the top of this post is the very first photo that I made with my new Google Glass that I bought yesterday. While I was able to get the composition to a point where I wanted in camera, much of the pop of that image is done with my own post production technique and style.
Many of my photographer friends also spend a great deal of time post processing their images — but the vast majority of the people out there really don’t post process at all. These people don’t own Lightroom and Photoshop or Nik Suite or Aperture or whatever else they might use to improve their photos. These are every day non-photographers who are still enamored with photography and imagery.
By applying some very basic algorithmic based enhancements, Google can make photos for the masses look much better than straight out of the camera. This is a very smart move on Google’s part. Where Instagram makes your bad photos look purposefully worse, Google now makes your bad photos look purposefully better! I stole that line from an unnamed source, btw. ![]()
Where this new tech is especially powerful is in photos of people. By using basic skin softening post production tech, photos of people will look better on Google+ than on other social networks. By appealing to our vanity, this gives Google a big advantage. If people can post photos of themselves on Google+ that make them look BETTER than on other networks, many more people will choose to post their photos on G+. Just watch as people post photos of themselves on G+ for auto beautification and even download and post them to other networks I bet.
All of this sort of fancy post production *can* be done today by skilled post production photographers who spend hours and hours behind Photoshop. Now much of it will be automated and released to the masses.
There will undoubtedly be some naysayers about this tech. The same folks who moaned about the Instagramification of mobile photography will probably also complain about this new tech too. Google was smart here by giving users a very simple way to deal with this, by simply turning off this feature.
While the photo enhancements were the sizzle of Google’s announcements today, there were many other significant enhancements added to Google Photos.
Google will now begin to analyze your images and auto tag them. This is no trick where low paid overseas workers are manually reviewing your images; Googles’ algorithms now can look at the context of your photo and the actual subjects in your photos to identify possible tags for the images. If you post a photo of the Eiffel Tower, Google can detect the Eiffel Tower in your photo and add that tag for you. If Google gets the tag wrong, for whatever reason, it’s simple for you to just remove it.
What this means is that more of your photos will be seen in search by people using Google products. Many photographers are looking for more traffic and views on their photos. Who better to provide this traffic than Google Search, yes, using Google auto applied tags. This is the future of image search. If you are a photographer, especially one who depends on photography for your living, you cannot afford to ignore the significance of Google Search. Many of my own photo sales are made by people finding my photos while searching on Google. By uploading your photos to Google+, your photos will rank better in search and now even moreso with this new auto-keywording functionality.

Google also introduced a new smart algorithm that can analyze your photos and show you which ones Google thinks are the best of the batch, offering you highlights. Oftentimes we will “spray and pray,” taking 20 images of one person or subject. Google will analyze all of the images and suggest the best one for you. Google uses not just technical information about a photo (is it blurry or underexposed?) but they are using human tested aesthetics to look for what is most appealing.
But there’s more! In addition to the tech released above, Google has also added some very easy tools which will auto generate gifs for you of your photos, auto HDR bracketed shots, and suggest other compelling ways for you to present your photography to the world. Almost miraculously, Google can even look at photos of multiple people and merge the photos into a single photo that takes the best expression of each individual from *different* photos.
All of this also comes with an awesome new look and layout of Google+ which better highlights photography on the network. Popular photos will now be featured in jumbo new oversized form across a three column layout. For non highlighted photos, Google also made portrait oriented photos, especially, look better and bigger. In the past, the portrait format was the worst looking photo format on Google+, now it’s the best — that’s worth noting. ![]() For folks who don’t like the three column layout, they can switch back to a single column if they’d like.
For folks who don’t like the three column layout, they can switch back to a single column if they’d like.
A couple of other notes: all of this work that Google does with your photos is done behind the scenes for your eyes only. You can use the tech or not use the tech. If you use the tech and like it, *you* then choose to share the image to Google+. Nothing is shared until you choose to share it.
The new technology will only work with the JPG format (hopefully Google comes out with RAW support down the road). Google increased everyone’s storage to 15GB of online storage, but note that any photo sized 2048 px or smaller does not count towards your 15GB storage limit (you can also buy more storage if you want to). Google allows unlimited uploading of photos that you either manually resize or allow Google to resize to 2048 px. There is an option on Google where you can set whether or not you want to upload full high res photos or resized 2048 sized images.
I upload some of my photos full res, and many of them I resize manually myself to 2048 px.
Google also introduced a free, stand alone hangout app that you can now use with your mobile phone or desktop device bridging text, photos and real time group video into a single app that preserves conversations (at your choice) over long periods of time. Hangouts have been one of the most popular Google+ feature and several photography related shows have been built around them.
More detail on these changes at Google here. More from Matthew Hanley here. Trey Ratcliff wrote insightful commentary here.
Thomas Hawk Digital Connection
Fuji is about to release their eagerly awaited XF 55-200mm OIS zoom lens. I have been working with a sample for the past couple of weeks and my First Impressions report is now online.

…
The Luminous Landscape – What’s New
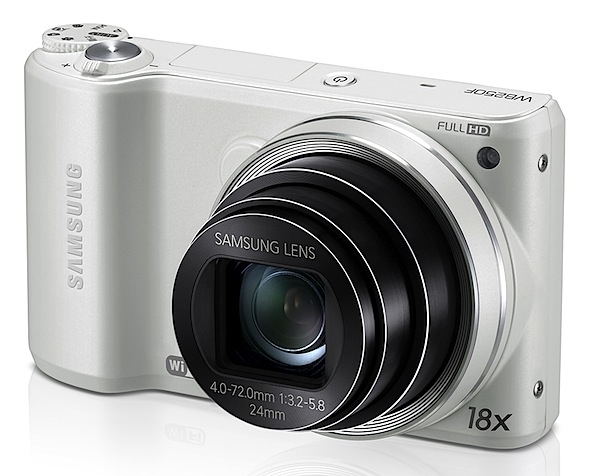
You may question why I selected the Samsung WB250F for review after my less than positive review of the Galaxy, a camera replete with all sorts of problems like dust on the sensor, poor ISO performance and an inordinately long startup time!
My reasons: Samsung is now a major player in electronics, especially smart phones and the like, so a reasonably priced device such as this is worthy of attention.
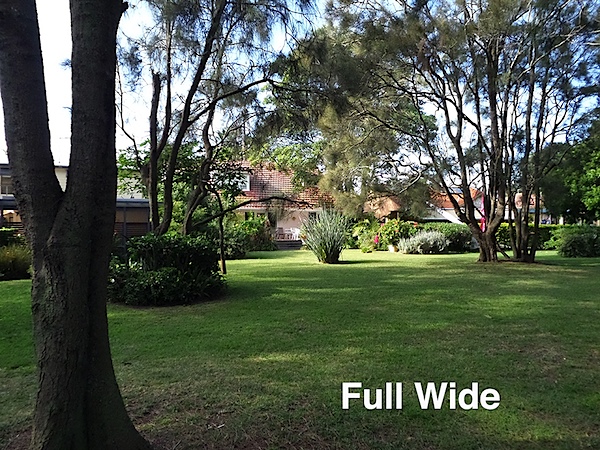
The Samsung WB250F has an 18x zoom which begins on a usefully wide 24mm 35 SLR equivalent focal length and reaches out to a 35 SLR equivalent of 432mm.
Samsung has evolved its innovative Wi-Fi technology by creating SMART CAMERA 2.0: with it images and video can be sent simultaneously to a smartphone or tablet (using the Android OS) via a Wi-Fi connection.
The maximum image size is 4320×3240 pixels, enabling the output of a 37x27cm print.
Full HD video at 1920×1080 pixel resolution can be shot in MPEG4 format. The quality is about as good as you get from a still camera, although with a little focus hunting mid zoom.
You can shoot stills mid video recording: a tiny icon of each still shot pops up on the LCD each time it is shot.

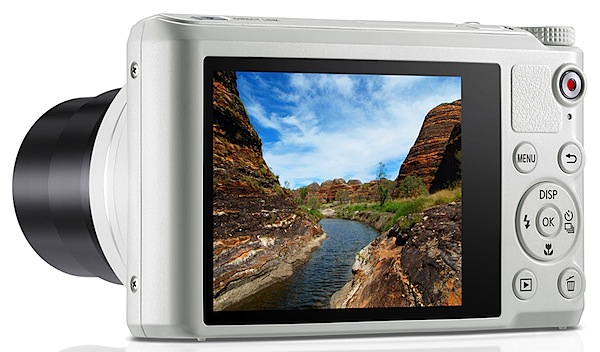
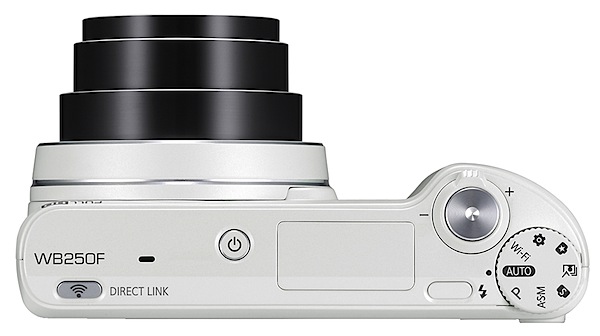
The external controls are sufficient to get the camera going:
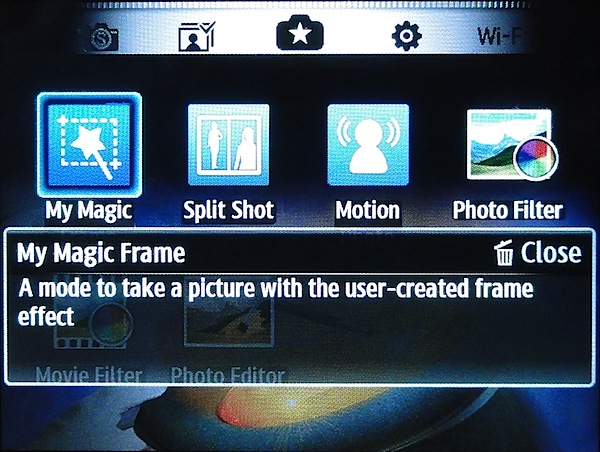
Top: on/off button; shutter button and zoom lever; Wi-Fi button; raise the flash button; mode dial with positions for auto, PASM, smart capture, best face exposures, W-Fi setup, a ‘magic’ button which allows you to do some extreme fiddling with saved shots … like arrange or edit several shots, create a GIF animation, apply a filter to video, etc.


Rear: menu; replay; trash; traverse through saved images; video record button; the control dial has positions for flash, macro, single/continuous shooting; display options.
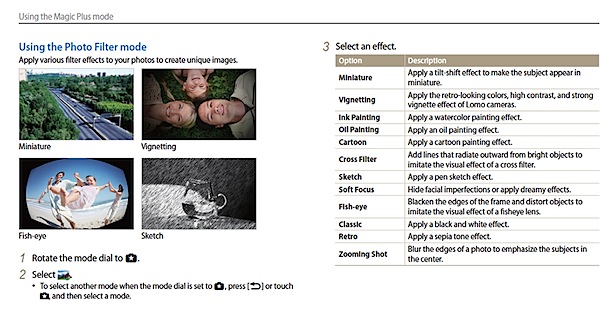
There is a collection of 12 photo filters you can apply to saved image: from ink and oil painting to cartoon effect, sketch to retro (sepia) and more.
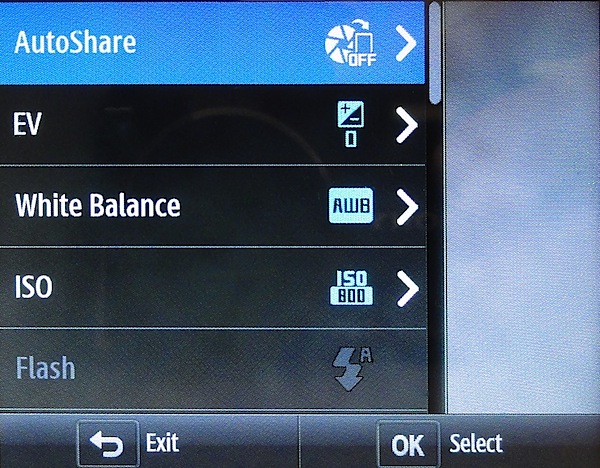
The screen menu is reasonably comprehensive but not daunting. The touch screen makes life with the WB250F extremely easy.
About two seconds from start up I could shoot the first shot; each shot came in about a second apart.
No distortion evident at the wide or tele ends of the zoom.

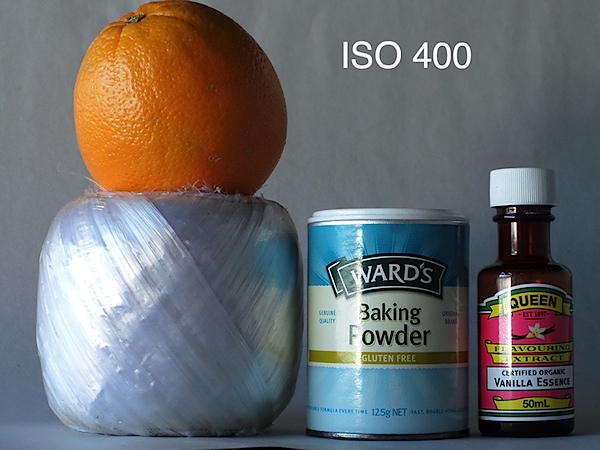


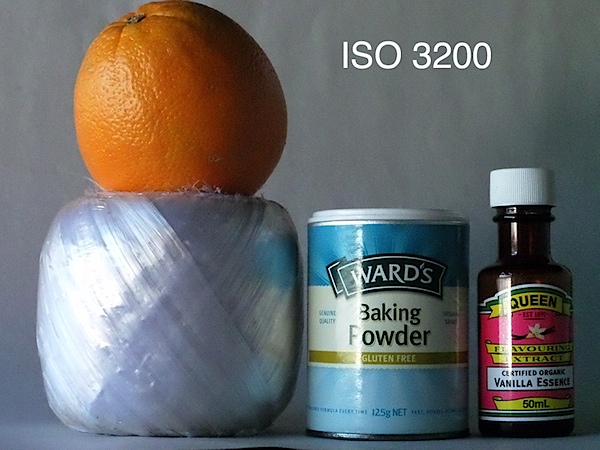
By ISO 1600 it appeared that definition had lowered. By ISO 3200 definition was even lower but surprisingly noise had not risen substantially.
Quality: average snapshot.
: looks good in white; budget-priced, compact, easy-to-use stills and video camera.
Why you wouldn’t: your ambitions run higher; no HDMI output.
Overall, this is an impressive little camera. It could easily replace my family snapper bought two years ago at twice the price!
Excellent value!
Available in two colours; white and cobalt black.
Image Sensor: 14.2 million effective pixels.
Sensor Size: 7.67mm CMOS.
Lens: f23.2-5.8/4.0-72mm (24-432mm as 35 SLR equivalent).
Stabilisation: Optical image.
Exposure Modes: Auto, Program AE, shutter and aperture priority, manual.
Metering: Multi, centre-weighted, face detection.
Shutter Speed: (Auto) 1/8 to 1/2000; (Manual) 16 to 1/2000 second.
Continuous Shooting: 6 shots at 8 fps.
Memory: micro SD, SDHC, SDXC.
Image Sizes (pixels): 4320×3240 to 1024×768.
Movies: 1920×1080 and 1280×720 (both 30fps); 640×480 (60fps) and 320×240 (30fps), 240 web.
Viewfinder: 7.6cm LCD (460,000 pixels) touch screen.
File Formats: JPEG, MPEG4.
ISO Sensitivity: Auto, 100 to 3200.
Interface: USB 2.0, AV, Wi-Fi, DC input.
Power: Rechargeable lithium ion.
Dimensions:107x62x22 WHDmm.
Weight: Approx. 226 g (ex battery).
Price: Get a price on the Samsung WB250F at Amazon.
Post originally from: Digital Photography Tips.
Check out our more Photography Tips at Photography Tips for Beginners, Portrait Photography Tips and Wedding Photography Tips.
Samsung WB250F Review

Following Nokia’s launch of the the Lumia 925 in London yesterday, we had a chance to get our hands on the new device, which features a camera with a 6-element lens, try it out and take some pictures. We also spoke to Juha Alarkuu, the head of Nokia’s imaging department in Finland, and Samuli Hanninen, vice president of Software Program Management for Nokia, about the 925’s new imaging technology and what it means for mobile photographers. Click through for the full story on connect.dpreview.com.
News: Digital Photography Review (dpreview.com)
Do you want to make your images more dynamic and aesthetically pleasing? Try looking for curves when you are photographing!
Once you start looking for them, you will find them everywhere.
Curves make an image easy to look at by leading the viewer’s eye through the frame. It is almost as if the photographer takes the viewer by the hand, draws them into the landscape, and points the way. The viewer’s eyes are compelled to follow the line.
Curves are graceful, rhythmic, dynamic and add energy to an image. They can separate or connect elements or simply offer a balance.
C curves, or semi-circles, are probably the easiest curves to find since almost any curve qualifies. It can be anything from the gentle curve of a seashore, lakeshore, a rounded rock, or grasses blowing in the wind.
While visiting a plantation I was immediately drawn to these live oak trees with branches that curve over the entire lawn forming a canopy overhead.
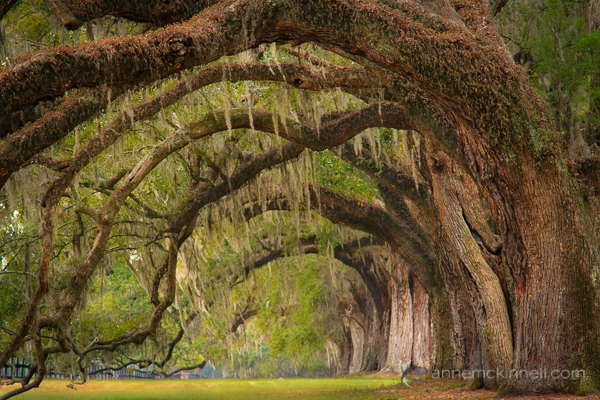
Boone Hall Planation in Charleston, South Carolina
Arches are another form of curve. They can be found naturally in rock formations if you’re in the right part of the world, or you can find them commonly in architecture. I like to make images with multiple arches if possible and take advantage of repeating curves.

Archway in Balboa Park, San Diego, California
S curves can have a mesmerizing effect on the viewer as their eyes sweep back and forth through the frame. They also create a sense of depth as the eye moves from foreground to background.
S curves can be found in the natural flow of a river, a winding road, or a pathway.
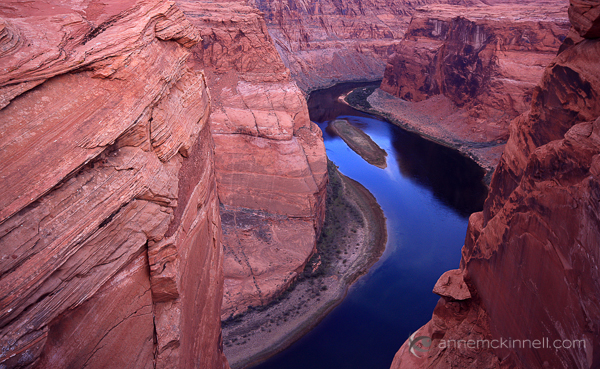
Colorado River, Arizona
Circles can be found in nature from ripples in a pond or puddles of water, or in many man-made objects.
Often in architecture you can find compositions that combine multiple curves as well as some lines that add depth and variety to the image.

Rotunda in the Legislature, Victoria, British Columbia
Perhaps the most effective use of curves are the images that are much more subtle that the examples shown above: implied curves.
They are created when objects in the frame imply the shape. Rather than the shape jumping out at you in the bend of river, the photographer has to put a little more work into composing an image to make the elements in the scene form a shape, or by recognizing and taking advantage of a shape when it happens.
I was ready to make this image at Mono Lake, California, from a lower perspective when I realized that if I stood up and made it at eye level, the tufa formations would form an S shape.


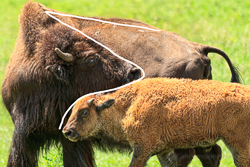
At Custer State Park, South Dakota, I was following a herd of bison when this mother looked back toward her calf and I saw the S shape right away.

Give yourself a challenge and go on a photo shoot with the goal of finding curves and use them to add interest and beauty to your compositions.
Post originally from: Digital Photography Tips.
Check out our more Photography Tips at Photography Tips for Beginners, Portrait Photography Tips and Wedding Photography Tips.
Composing with Curves
You must be logged in to post a comment.