Ein Beitrag von: Oliver Petry

kwerfeldein – Fotografie Magazin
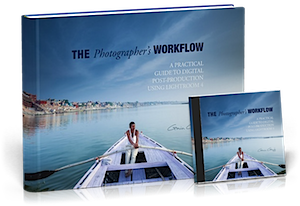 One of the most popular deals that we had in last years 12 Photography Deals of Christmas campaign was when we offered a discount on renowned travel Photographer Gavin Gough’s eBook – The Photographer’s Workflow.
Readers fed back that getting this insight into Gavins digital workflow was really valuable.
So over at SnapnDeals we asked Gavin if he’d mind bringing back the deal this week.
For the next 7 days you can again pick up this popular eBook at 33% off.
This great resource is perfect for anyone looking for a system to manage the digital photos that they take and if you’re anything like me, that’s quite the task due to the number of images that I take on a given week!
What Gavin describes is based upon use of Lightroom (an amazing tool that I use and recommend) and once you set yourself up with the principles described in this eBook you’re going to save yourself a heap of time and will also put your mind at ease your images will be safe and backed up too!
This is more than just an eBook – here’s what you’ll receive:
The thing that I particularly love about Gavin’s approach is that he not only gives you the theory but he gives you tools and also scatters through his eBook practical exercises for you to DO that will help you set up your own workflow.
Not only that you get to see what he’s talking about with the videos and many diagrams and screenshots in this eBook.
The Photographer’s Workflow is Gavin’s professional workflow. It’s the system he use every day to manage his digital photographs. In it he shares the structure, principles, presets that he’s acquired over ten years as a professional photographer and it will literally save you hours of time and give you a lot of peace of mind!
The Photographers Workflow is normally priced at $ 30 but today you can pick it up with a 33% discount and get all of the above parts of this great resource for just $ 20 when you pick it up through SnapnDeals here.
Post originally from: Digital Photography Tips.
Check out our more Photography Tips at Photography Tips for Beginners, Portrait Photography Tips and Wedding Photography Tips.
Save 33% on ‘The Photographers Workflow’ by Gavin Gough
 Extra photos for bloggers: 1, 2, 3 |
|||
Your iPad is your Sunday Times. Your game console. Your encyclopedia. The guardian of your deepest, darkest secrets. (Better put a password on that!)
And now, it’s your new studio light!
It’s true. Your tablet is powerful enough to illuminate your subject in almost any photo situation.
This guide will show you how a tablet can super charge your shots with creative backdrops, custom light shapes, and pop art colors.
Just when you thought your tablet reached peak awesomeness, it suddenly got so much awesomer.
Turn Your Tablet Into a Studio Light
p.s. Our Phoneography 101 course for both Android and iPhone students is starting April 1st! The last days to enroll are coming up quick, so make sure to enroll today!
 Studio lights and softboxes are big, cumbersome, and cost a bundle!
By comparison, your tablet is like a cheetah vs a hippo. It’s quick, versatile, and light on its feet.
Download backdrops for free and create customized shapes and reflections that will make your photos stand out from the crowd.

 With a little help from your tablet you can add shiny shapes to your reflective subjects.
For this shot you will need a something reflective like a camera lens or a wine glass.
Download a simple shape like a star or a triangle or select a shape on your lighting app.
Setup your tablet at an angle so that it bounces off your subject and into the cameras lens.
It takes some experimentation to get the angle just right so if you are using a DSLR try turning on live view on your rear LCD screen.
This should make it easier to see the reflections.
 For a playful sparkle in the eye and dramatic portrait lighting, look no farther than your tablet!
A tripod is helpful if you are doing a self portrait and you will need to shoot this pic in a dark environment.
Select a shape on your tablet and setup your camera with a short timer.
Focus the camera on your face and shuffle just slightly to the right.
Hold your tablet out in front of you and up to the left and let the magic happen.
 This technique will leave you with a softly glowing background like the embers of a camp fire.
First, pick a subject with some depth to it like a large leaf or a clump of berries.
Put a circular pattern on your tablet that complements your subjects color.
Get up close and open your aperture as wide as possible.
This shot works great with a DSLR and a macro lens but is more difficult with a phone’s camera which produces very little shallow depth of field.
 If you have two tablets you can make a light tepee for bright and shiny macro closeups.
Place your tablets with their screens turned inward so they make a roof over your subject.
Hold the tablets together at the top with your fingers or use a little tape.
Now shoot your subject down the corridor of your glowing cyber tunnel.
 Like the iPod commercials of yesteryear you can use your tablet to create cool silhouette style photos.
Put a solid color on your screen and place your subject halfway between your camera and tablet.
If you have a DSLR change your light metering to spot and aim your focus point at the tablets glowing screen.
You may want to focus manually since the room will need to be pretty dark.
 Give your food shots that extra sparkle by zapping your snack with a tablet softbox.
Place your food items against a black backdrop in a dark room.
Set a long exposure, maybe 25 seconds, f/11, ISO 200.
Start your exposure and paint your food with your tablet making sure the screen is facing away from your camera.
This trick work great with a phone too!
 A matching background will do wonders to enhance your macro shots.
Simply download a backdrop and place your subject on top of your tablets screen.
If you are shooting with a DSLR use a small aperture, maybe f/22.
Phones will work great for this shot as they already have a wide depth of field.
You can avoid glare by shooting your tablets screen at a sharp angle instead of straight on.
 Create ghostly effects in your photos by moving your tablet through the background of your shot.
To achieve this pic you will need a completely dark environment so decide on your camera settings before you turn out the lights.
First set your camera for a long exposure maybe 20-30 seconds and pick out a pattern on your tablet.
Mount your camera on a tripod, focus on your subject, and then switch your camera to manual focus so auto focus doesn’t kick in with the lights off.
Hit the lights, press the shutter button, and move your tablet through the back of your shot while the shutter is open.
You can use a phone set to a white screen to paint in your subject with light.
 A circular shape is a great way to highlight your subject with dramatic lighting.
First select a shape from your softbox app or download a picture from the internet.
Place your subject on top of your tablet so that it’s illuminated from beneath.
Setting your camera to center weighted light metering will allow you to just capture light from your spotlit subject and keep out background light.
If the object you’re shooting is clear, you get a cool glowing effect all the way up to the top.

Thanks to the members of the Softbox Pro Flickr group for their photo inspiration!
Related posts:
Nicht nur bei mir, auch bei anderen Landschaftsfotografen sind Weitwinkelobjektive sehr beliebt. Weite Landschaften und dynamische Kompositionen mit detailreichem Vordergrund sieht man oft in der Landschaftsfotografie.
Im letzten Jahr habe ich verstärkt versucht, auch mal auf das Weitwinkelobjektiv zu verzichten und mit dem Teleobjektiv auf Motivjagd zu gehen. Und das ist mir nicht leicht gefallen.
Bei der Fotografie mit dem Weitwinkelobjektiv achte ich immer darauf, dass einzelne Elemente im Foto genug Platz haben und möglichst nicht abgeschnitten werden. Durch die weite Perspektive ist das sehr gut möglich. Wenn nicht, dann reicht es oft, den Standpunkt leicht zu verändern, um doch noch eine aufgeräumte Kompsition zu erhalten.

74 mm
Wenn ich mit dem Teleobjektiv fotografiere, habe ich mit einer stark verkürzten Perspektive zu kämpfen. Sehr viele Elemente reihen sich im Sucher nebeneinander. Es ist kaum möglich, Überschneidungen, Verdeckungen oder abgeschnittene Elemente zu vermeiden.
Danach zu streben ist nicht verkehrt, aber es ist auch nötig, auf andere Weise für Ordnung zu sorgen. Beim Foto von Landsberg habe ich beispielsweise versucht, mit leichten Diagonalen zu arbeiten und den Betrachter so durchs Bild zu führen. Ebenso beim folgenden Foto, das ich im Sommer vom Auerberg aufgenommen habe.

200 mm
Mit dem Weitwinkel ist es leicht, Diagonalen ins Foto zu bekommen. Rangezoomt werden daraus jedoch schnell horizontale Linien. Aber es ist gar nicht nötig, bei Teleaufnahmen starke Diagonalen im Foto zu haben, leicht schräge Linien reichen mir schon, um die Komposition etwas aufzulockern.
Beim Foto von Prag war das nicht einfach. Das Foto wirkt sehr kompakt, die Karlsbrücke leitet fast horizontal ins Bild und das Ganze wirkt fast schon zu statisch. Die wichtigen, hellen Elemente im Foto sind jedoch leicht versetzt angeordnet. Sie liegen nicht auf einer Linie, wodurch der Blick wieder etwas wandern kann.

117 mm
Im folgenden Foto dominieren die Vertikalen, die ich sehr gern in Teleaufnahmen verwende: Das Foto wirkt aufgeräumter. Die Lampen und die Straße liegen jedoch wieder auf einer Diagonalen und die vorderste Lampe auf der linken Seite fällt komplett aus dem Muster. Dadurch erhält sogar diese starke Teleaufnahme etwas Dynamik.

172 mm
Hier gleich noch ein Beispiel mit einer einleitenden Diagonalen. Am Anfang fiel es mir schwer, Diagonalen im Telebereich zu finden, aber mit etwas Übung habe ich gelernt, wie ich die Kamera platzieren muss.

105 mm
Ein großer Unterschied zur Weitwinkelfotografie liegt darin, dass ich meinen Standpunkt weit mehr verändern muss, um einen neuen Blickwinkel auf ein Motiv zu finden. Bewege ich die Kamera weniger als einen Meter, tut sich fast nichts. Im Weitwinkelbereich erhalte ich dadurch schon signifikante Änderungen in der Komposition.
Manchmal ist es aber auch einfacher, mit dem Teleobjektiv zu fotografieren. Bei grauem, langweiligem Himmel und monotonem Licht ist ohnehin nicht die Zeit, um weite Landschaften in Szene zu setzten. Da vermeide ich am liebsten ganz, den Himmel im Foto zu haben.
Bei den Dark Hedges sieht man gar nichts mehr vom grauen Himmel, die Bäume scheinen sehr dicht zu stehen. Hätte ich hier mit dem Weitwinkel fotografiert, würde man sehen, dass zwischen den Bäumen oft mehrere Meter Platz ist. An manchen Stellen sind Lücken von fast zehn Metern. Ich hätte überall weiße Stellen im Foto und die Atmosphäre würde verloren gehen.

200 mm
Ein ähnlicher Fall war der Arbersee. Die Sonne war gerade untergegangen und der glühende Himmel blieb aus. Also suchte ich nach einer Detailansicht, die nicht auf einen spektakulären Sonnenuntergang angewiesen war. In solchen Situationen lohnt es sich immer, ein Teleobjektiv dabei zu haben.

121 mm
Zum Abschluss zeige ich Euch noch ein weiteres Foto von Prag. Blicke ich zurück, erkenne ich nämlich, dass ich mit dem Teleobjektiv in der Stadt viel lieber fotografiert habe als in der Natur. Beim Fotografieren von Landschaften ist bei mir der Weitwinkel- und Normalbereich meistens die erste Wahl. In der Stadt – besonders in Prag – hatte ich zunächst immer das Teleobjektiv auf der Kamera. Die vielen vertikalen Linien reihen sich so schön aneinander und die Straßenzüge bilden interessante Muster.

172 mm
Ich bin froh, dass ich endlich angefangen habe, den kompletten Brennweitenbereich, den ich im Rucksack umhertrage, auszunutzen. Es fällt mir immer noch leichter, Fotos mit dem Weitwinkelobjektiv zu komponieren, jedoch lohnt es sich, auch mal ranzuzoomen.
kwerfeldein – Fotografie Magazin
[ By WebUrbanist in Art & Installation & Sound. ]

Well known for grand gestures and huge installations, Christo (images by Wolfgang Volz) has outdone himself once again in this latest work – and the first since his wife and partner Jeanne-Claude passed away four years ago.

Its stats are hard to fathom: an inflatable interior you can occupy, it spans nearly 300 feet vertically with a radius of over 150 feet. Tens of thousands of square feet of fabric stretched between over ten thousand feet of rope. The total? 5 tons of material 6,000,000 square feet of space.

Its blunt title, Big Air Package, matches the simplicity of the setup: essentially, the viewer occupies a giant translucent inflatable balloon bathed in light that passes through the translucent material stretching out and up on all sides.

It occupies an old decommissioned gasometer in Germany, and its effects were unpredictable even to its creator, who was himself surprised by the effects of lighting in the resulting space. Now if only Christo would team up with James Turrell – the sky would certainly not be the limit.
![]()


[ WebUrbanist | Archives | Galleries | Privacy | TOS ]
![]()
 |
 |

SLR Magic has announced its Monster Lens II spotting scope for Micro Four Third cameras. The optic mounts directly on the camera body, allowing users to shoot distant images, commonly referred to as ‘digiscoping’. The 12-36×50 ED lens gives an equivalent optical zoom range of 840-2,520mm and aims to keep image quality high with extra-low dispersion optics and multi-coated glass elements. It will be available in June 2013 at a suggested retail price of $ 799. Click through to to read more.
News: Digital Photography Review (dpreview.com)

We’ve just added three pages of studio test data to our preview of the Fujifilm X100S, following the publication of a gallery of real-world samples, last week. The X100S is the successor to the popular X100, and offers a fixed 35mm (equiv.) F2 lens, and a version of Fujifilm’s APS-C format X-Trans sensor with hybrid phase-detection AF. A host of other, smaller improvements should make the X100S a considerably more appealing camera than its predecessor. Click through for a link to the updated preview to see for yourself how it compares to its peers in our studio.
News: Digital Photography Review (dpreview.com)
Ein Beitrag von: Daniel Barth
Als ich auf die Fotos von Daniel Barth gestoßen bin, bekam ich ein ganz wohliges Gefühl und es entstand der Wunsch, den Menschen hinter der Kamera kennenzulernen. Daraus ging ein sehr netter und inspirierender Kontakt hervor und außerdem ein interessantes Interview.

Wenn man sich Deine Fotos anschaut, begegnet man Gesichtern in schwarzweiß und tanzenden Körpern. Als was für einen Fotografen würdest Du Dich bezeichnen?
Mit derlei Bezeichnungen habe ich ein wenig meine Probleme. Es sind zwar ganz klar zwei Leidenschaften, die mich in der Fotografie antreiben: Menschen im Allgemeinen und tanzende Menschen im Besonderen.
Diese Leidenschaften prägen entsprechend stark meine Arbeiten. Zugleich gibt es aber Tanz- und Portraitfotografen – zweifellos naheliegende Kategorien – mit denen ich jenseits des Sujets de facto nichts gemeinsam habe.


Du fotografierst analog und häufig schwarzweiß, warum?
Portraits fotografiere ich fast ausschließlich analog und in der Tat viel schwarzweiß. Vor allem, weil ich die reduzierte und konzentrierte Wirkung schätze oder auch das grobe Korn bei gepushter Entwicklung.
Die Schwarzweiß-Fotografie hat aber nichts Programmatisches bei mir, ich arbeite durchaus auch gern mit Farbfilm und Polaroid.

Was im Allgemeinen und im Besonderen bewegt und fasziniert Dich an der Fotografie?
An der Portraitfotografie fasziniert mich vor allem die Intensität, mit der man sich mit einem – bis dahin häufig fremden – Menschen auseinandersetzt. Die Bereitschaft, innerhalb vergleichsweise kurzer Zeit eine besondere Form von Vertrauensverhältnis zu schaffen, sich aufeinander einzulassen, ein Stück weit jemanden zu entdecken bzw. sich entdecken zu lassen.
Es gibt im „normalen Leben“ kaum vergleichbare Situationen. Das funktioniert wahrscheinlich auch in der Fotografie nur, weil es hier einen relativ geschützten Raum mit klarer Rollenverteilung und Zielsetzung gibt. Ich glaube nicht, dass man die Essenz eines Menschen in einem Foto festhalten kann. Aber zumindest essentielle Aspekte einer Persönlichkeit lassen sich durchaus entdecken und auf Film bannen.
Das ist ein immer wieder faszinierendes Abenteuer.


Die Beschäftigung mit dem Tanz reicht bei mir ebenfalls weit zurück. Als Kind habe ich selbst Ballett getanzt – aber relativ bald eingesehen, dass weder Disziplin noch Talent für ambitioniertere Pläne ausreichend vorhanden sind. Die Begeisterung ist aber geblieben.
Aus fotografischer Sicht vereinen sich in der Tanzfotografie gleich mehrere faszinierende Aspekte. Die rein ästhetische Faszination für die Schönheit der Bewegungen und der Körper. Die Konzentration und Hingabe, mit der Tänzer häufig so in ihrer Kunst aufgehen, dass man als Fotograf kaum mehr wahrgenommen wird. Das ermöglicht ein sehr freies Arbeiten und einen unverstellten Blick, was ich sehr schätze.
Dann ist Tanzfotografie so, wie ich sie praktiziere – also: Auf der Bühne oder jenseits des Studios irgendwo im öffentlichen Raum – ein Feld, auf dem man als Fotograf vor allem reagiert und improvisiert. Man weiß nie, was gleich passiert oder wie Dinge sich entwickeln, der einzelne Moment ist nicht wiederholbar.
Man gibt so viel Kontrollmöglichkeit ab, aber gleichzeitig arbeitet man sehr fokussiert und es entsteht ein Dialog, man tanzt in gewisser Weise mit. Das gilt sogar fast wörtlich, denn ich bin ständig in Bewegung, brauche viel Platz. Je nach Choreografie nähert sich mein Kalorienverbrauch dem des Tänzers an.
Abschließend mag ich auch die rein technische Herausforderung: Man arbeitet mit einem flüchtigen Motiv in ständiger, schneller und unvorhersehbarer Bewegung, dazu extremen Lichtsituationen, häufig in raschem Wechsel. Über das Fotografieren selbst darf man da nicht nachdenken, jeder Griff muss einfach sitzen. Das ist auch ein schöner Ausgleich zur Portraitfotografie, bei der ich mir gern Zeit nehme, ja, wo Ruhe und eine gewisse Langsamkeit geradezu wichtig sind.


Wie kam es dazu, dass Du Dich der Fotografie zugewendet hast?
Über Neugier, Faszination und Experiment – und als reiner Autodidakt. Ich würde mich als visuellen Menschen beschreiben, will sagen: Ich habe eine sehr bildhafte Fantasie, verbinde Atmosphären, Emotionen oder Eindrücke schnell mit starken Bildern. Die Aussicht, Bilder festhalten und mit anderen teilen zu können, war insofern schon früh sehr reizvoll.
Die ersten Schritte in die Richtung: Mit zwölf oder dreizehn Jahren habe ich die Spiegelreflexkamera meines Vaters gekapert und damit wild drauflos geschossen. Das war ein vollmechanisches Relikt ohne funktionierenden Belichtungsmesser, entsprechend breit gestreut war die Qualität der ersten Ergebnisse. Sehr wohlwollend gesprochen.
Aber irgendwie war das auch ein Glücksfall, denn so war ich gezwungen, mich intensiver mit den Grundlagen auseinanderzusetzen. Und auch meine Vorliebe für die analoge Fotografie geht wahrscheinlich zu einem Teil darauf zurück. Nach einer Phase der Abstinenz habe ich letztlich während des Studiums angefangen, mich wieder ernsthaft und dauerhaft der Fotografie zu widmen. Und bin seither dabei geblieben.

Menschen zu porträtieren ist etwas sehr Intimes und Spezielles. Auf welche Art und Weise stellst Du den Kontakt her zu den Menschen, die Du fotografierst?
Das ist ganz unterschiedlich. In Sachen Portrait durchaus auch über einschlägige Onlineportale, obwohl das in letzter Zeit nachgelassen hat. Im tänzerischen Bereich läuft viel über persönliche Kontakte oder gemeinsame Bekannte. Interessante Tänzer für künstlerische Projekte spreche ich auch direkt an, sei es bei Proben und Aufführungen oder auch via Facebook.
Und dann kommt es mitunter vor, dass mir im Kaufhaus oder der U-Bahn derart faszinierende Menschen begegnen, dass ich sie ganz dreist ansprechen und zu einer Zusammenarbeit einladen muss. Zu guter Letzt werde ich angesprochen – über Homepage, Facebook oder Empfehlungen – woraus sich auch immer wieder interessante Begegnungen ergeben.

Gibt es ein bestimmtes Gefühl, das Du mit Deiner Fotografie transportieren möchtest?
Ein spezifisches Gefühl sicher nicht, nein. Ein breites Spektrum emotionaler Zustände reizt mich. Verbindende Elemente in meiner Fotografie gibt es eher auf abstrakterer Ebene. Ich mag sehr natürliche Fotos, unverstellt, ohne Make-up, mit natürlichem Licht.
Ausdruck und Atmosphäre sind mir wichtig. Die Person, mit der ich mich beschäftige, steht ganz klar im Zentrum. Ihr will ich mich annähern, Facetten beleuchten. Dabei geht es um Nähe und eine Form von Intensität. Vermeintliche Schönheitsideale oder persönliche Eitelkeiten spielen da kaum eine Rolle, das muss man aushalten können.
Eine Begegnung auf dieser Ebene zwischen Fotograf und Subjekt gelingt natürlich nicht immer, dennoch ist es ganz klar das Ziel. Dann gibt es auch noch verbindende Elemente auf ästhetischer Ebene, zum Beispiel eine Vorliebe für starke Kontraste, grobes Korn, Raum für Schatten, Unschärfe und Erahntes.
Auch in der Tanzfotografie bin ich gern sehr nah an den Tänzern, interessiere mich mindestens ebenso für Ausdruck und Persönlichkeit wie für Grazie und physische Präsenz. Gerade in diesem Grenzbereich zwischen Tanz und Portrait entstehen häufig die für mich stärksten Tanzaufnahmen.
Vielen Dank, Daniel!
kwerfeldein – Fotografie Magazin
Phil Steele recently released a good video on the topic of Lens Hoods that I thought readers might enjoy.
It covers everything from the why, when, and how of using Lens Hoods.
Just a reminder – Phil currently is offering 30% off his Lightroom Made Easy online course for just a few more days on SnapnDeals.
Post originally from: Digital Photography Tips.
Check out our more Photography Tips at Photography Tips for Beginners, Portrait Photography Tips and Wedding Photography Tips.
Lens Hoods: Everything You Ever Wanted to Know

You must be logged in to post a comment.