RSS
 

Archive for December, 2012

Canon Powershot G15 Review

12 Dec

Canon G15 Review

Don’t know about you, but I shudder when I read that a camera company has described a lens or a camera as being ‘bright’.

I presume they mean that the lens involved is what used to be described as ‘fast’ … you know, with a maximum aperture of f1.5 or f2 or nearby. But bright …?

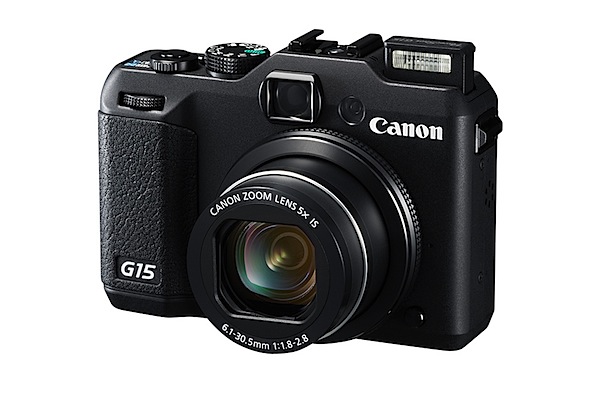
Anyway, this G series model – the Canon Powershot G15 – is the latest in what Canon used to describe as its top level, fixed lens series of cameras, with specs generally above the run of the mill models.

So, here they go: ‘Canon introduces its fastest and brightest compact camera. The Canon PowerShot G15 camera delivers enthusiast and professional photographers the fastest auto focus and brightest lens in Canon’s compact camera history.’ Whew!

Time was when the G series sat as Canon’s premier compact line of cameras. Before DSLRS became common-place, a G series camera was the one to go for. So how are things these days?

But before we head into the present it’s interesting to observe that the pioneering G1 of 2006 measured 119.7×76.8×63.8cm and weighed 420g as against the G15′s 125x87x110cm and 310g in weight. So the veteran G1 camera was almost precisely half the size of the new G15 but, weightwise, the G1 was a third heavier. Lenswise, the G1 had an f2 optic, so the new boy is (very) minimally faster.

BTW the ISO options went only to 400 — boy those were the dim days! And it used CompactFlash cards!

Enough of the past.
G15_04.jpg

Canon Powershot G15 Features

I have to say the camera got me immediately, with its classy matte black body and clearly-picked out in white control points. You can see at a glance what the mode dial settings are, along with any exposure correction you may have dialled in on the camera’s top surface. Power and shutter buttons as well as zoom controls are only millimetres away.

The speed grip is smallish but enough to securely wrap your fingers around.
Menu.jpg

Mode dial.jpg

The rear area carries little, aside from the four way rocker which gives access to ISO, macro mode, display options and flash variations with the function button set in the centre. Nearby are buttons for menu, metering options, AF selection and aperture selection. In my book, this setup makes the camera a dream to use without any need to dive into the menu ‘jungle’ which is, in typical Canon fashion, a very friendly jungle.

For me, there are very few ‘downers’ but I feel the widest end of the zoom (at a 35 SLR equivalent of 28mm) is not wide enough for most punters … 25mm makes me smile, 28mm forces me to step back a bit!

Overall, the camera could make a pro or enthusiast very happy as a backup to DSLR kit.

Maximum image size is 4000×3000 pixels, enough to output a 34x25cm print.

Movies: Full HD capture in MPEG4 at 1920×1080 resolution. Shooting movies is dead easy, simply by pushing the by now familiar red button, found at the top right corner of the camera; no stills capture, mid movie, unfortunately … do so and the move recording will stop, so there! However the AF and auto exposure functioned flawlessly during movie shooting.

All the moving shots were taken with the camera at waist level. Head high video was shot with the camera held still. All of this is a great help for the in-camera stabiliser.

The optical turret viewfinder is matched happily to the zoom’s operation, so you can enjoy flare free viewing/shooting even in bright sunlight. The bad news is that there is no indication of focus.

And then I noticed a tiny button at the front of the camera and just beneath the lens: this is to release the lens ring, enabling attachment of a tele-converter lens. Not sure if there is a wide adaptor available.

One gripe: the continuous shooting speed is a measly 2.1 fps, with so many lesser-specced cameras offering much faster rates.

MacDonald's interior 3.jpg

McDonald's interior 4.JPG

McDonald's interior 5.JPG

McDonald's interior 6.JPG

Startup Times
About a second after power up I caught my first shot; follow-ons came in at a little over a second apiece. Not rapid, I would say.

Distortion
I could discern very little barrel distortion at the zoom’s wide end, with no aberrations apparent at the tele end.

Canon Powershot G15 ISO Tests

Canon G15 ISO 80.JPG

Canon G15 ISO 400.JPG

Canon G15 ISO 800.JPG

Canon G15 ISO 1600.JPG

Canon G15 ISO 3200.JPG

Canon G15 ISO 6400.JPG

Canon G15 ISO 12800.JPG

It’s all good news, all the way up to ISO 3200, with excellent definition and relatively low noise.

By ISO 6400 we start to fall off the edge with noticeable noise and a drop in sharpness. By ISO 12800 the image is nasty: lots of noise, poor colour fidelity, poor definition. But hey! How about ISO 3200!

Canon Powershot G15 Review Verdict

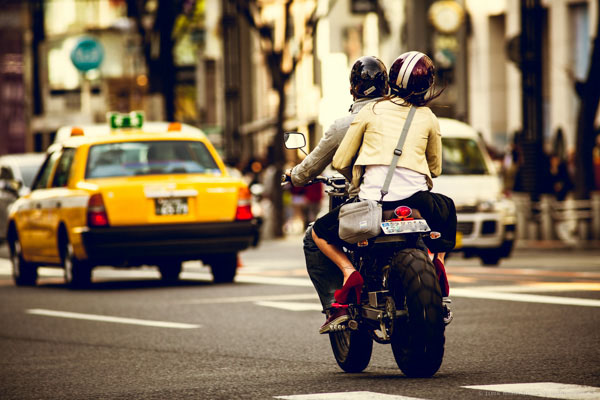
Quality: the images I took leapt off the screen. These are some of the best I have ever seen from a digital compact. Stunning video as well.

Why you’d buy the Canon Powershot G15: easy to follow control layout.

Why you wouldn’t: a tilting LCD screen would make it a much better camera for stills and movie work.

A little beauty! It could happily sit in my kit bag.

Canon Powershot G15 Specifications

Image Sensor: 12.1 million effective pixels.
Sensor: 15mm CMOS.
Metering: Evaluative, centre-weighted, spot.
Lens: f1.8-8.0/6.1-30.5mm (28-140mm as 35 SLR equivalent)
Exposure Modes: Auto, Program AE, manual.
Shutter Speed: 15-1/4000 second.
Memory: SD/SDHC/SDXC.
Image Sizes (pixels): Stills: 4000×3000 to 640×480.
Movies: 1920×1080, 1280×720, 640×480.
Viewfinder: Optical turret and 7.5cm LCD screen (922,000).
File Formats: JPEG, RAW, MPEG4.
Colour Space: sRGB.
ISO Sensitivity: Auto, 80 to 12800.
Interface: USB 2.0, HDMI mini, AV output, DC input.
Power: Rechargeable lithium ion battery.
Dimensions: 125x87x110 WHDmm.
Weight: 352 g (inc card and battery).
Price: Get a price on the Canon PowerShot G15 at Amazon.

Post originally from: Digital Photography Tips.

Check out our more Photography Tips at Photography Tips for Beginners, Portrait Photography Tips and Wedding Photography Tips.

Canon Powershot G15 Review


Digital Photography School

 
Comments Off on Canon Powershot G15 Review

Posted in Photography


Samsung H300 Zoom Test

12 Dec

unbelievable zoom
Video Rating: 4 / 5

 
Comments Off on Samsung H300 Zoom Test

Posted in Nikon Videos


On Space Time Foam: Surreal Billowing Art Installation

12 Dec

[ By Steph in Art & Installation & Sound. ]

The science of engineering and rationalism of city planning meet visionary experimentation in art installations by Tomás Saraceno. The Argentina-born artist is known for works that imagine an alternate future for humanity in unexpected, often utopian ways. His latest work, ‘On Space Time Foam‘, is an exploration of self-sufficient aerial structures that could be made on a larger scale and inhabited by humans.

‘On Space Time Foam’ is a layered installation of translucent PVC membranes suspended nearly 80 feet above the ground. Installed at the Hangar Bicocca in Milan, Italy, the work alludes to the primordial state of matter from which the universe formed.

Visitors can access the installation either from above, to navigate it themselves, or from below, to watch as people seemingly float in mid-air. The plastic has a surface area of nearly 13,000 square feet. Walking on the surface is a tricky task, sending visitors sliding and tumbling across the plastic. “As soon as you decide to climb onto the installation, you are necessarily caught up in a play of mutual dependence,” Saraceno told Klat Magazine. “This experience helps to initiate a dialogue between people, through a body language that has no need of words.”

While it’s a fun attraction in its current form, Saraceno has big plans for the concept. He aims to translate it into a Buckminster Fuller-inspired floating biosphere above the climate change-threatened Maldives Islands, which would be fully inhabitable with solar panels and desalinated water. Saraceno will embark on a residency at the Massachusetts Institute of Technology to work out the logistics of such an ambitious undertaking.

“The aim of what I do is to try to expand the range of the dialogue, to make as many people as possible aware of the extent of the impact that each of us has on others and on the environment. This is the objective of my artistic practice: awakening people to the interdependence of the different elements that make up the system in which we live—the interrelations between objects, natural phenomena and living creatures.”

See a video of the installation in action, and an interview with the artist, at Design Boom.


Want More? Click for Great Related Content on WebUrbanist:

Brad Downey Brings Wonderland to Life: 7 Surreal Urban Street Art Installation Projects

Downey is a New York street artist with a twist: his bizarre contributions to the urban art of public spaces could, if only for a moment, be confused with traditional street furniture.
14 Comments – Click Here to Read More »»


Wavy WasteLandscape Installation Made of 65,000 CDs

A surreal landscape in Paris, installed in a former funeral home, is made of 65,000 shimmering discarded CDs in an artistic statement about waste.
3 Comments – Click Here to Read More »»


Share on Facebook


[ By Steph in Art & Installation & Sound. ]

[ WebUrbanist | Archives | Galleries | Privacy | TOS ]


WebUrbanist

 
Comments Off on On Space Time Foam: Surreal Billowing Art Installation

Posted in Creativity


Red Water lily flower opening time lapse

12 Dec

Red Water lily flower opening time-lapse This sequence was filmed for my interactive on-line plant identifier and pruning guide encyclopaedia which went live March 2011 www.rightplants4me.co.uk The website is designed to help find and identify the right plants for every aspect of a garden and seasonal need and help you create a garden design with colour and interest 2-5 minute intervals The flowers need light to stimulate the flower to open. Water lilies open and close about three times Copyright and Filmed by Neil Bromhall Nikon D300 with 55mm & 105mm nikkor lens Filmed in the studio using grow light and studio flash
Video Rating: 5 / 5

 
Comments Off on Red Water lily flower opening time lapse

Posted in Nikon Videos


11. Dezember 2012

12 Dec

Ein Beitrag von: Stefan Bleihauer


kwerfeldein – Fotografie Magazin

 
Comments Off on 11. Dezember 2012

Posted in Equipment


techlife: Travel photography

12 Dec

NAIT staff photographer Jason Ness offers tips on taking travel pictures.
Video Rating: 4 / 5

Phase One IQ180 digital back Test Shoot By chance and with only a few hours to play with Hayden, Chris and myself put this shoot together. For a better look at the photos visit news.haydengolder.com Camera details behind the image. CAMERA – Phase One 645DF DIGITAL BACK – Phase One IQ180 (80 megapixels) LENS – Phase One 45mm f2.8 AF (Equivalent 35mm Focal Length – 29mm) CAMERA SETTINGS – 1/8 sec @ F6.3 100 ISO Photographer Hayden Golder – www.haydengolder.com Skater Chris Pullar -baysideblades.com.au Music The Artie Styles Quartet – www.facebook.com Videographer Bradley Harold Watson
Video Rating: 4 / 5

 
Comments Off on techlife: Travel photography

Posted in Photography Videos


Digital Photography One on One: Episode 71: Viewer Feedback Vol 2

12 Dec

In this week’s episode Mark answers questions from viewers in this viewer feedback special. Topics include: motion blur and its relation to aperture, shutter speed and exposure, good and bad bokeh, black and white photos, the inverse square law, speedlights and the Lastolite EZYBox, noise in pictures and ISO settings. Click here to see the ISO demo pictures: www.flickr.com AdoramaTV episodes mentioned: Lastolite Review: www.youtube.com Portrait Lens Review: www.youtube.com Nikon D3s and Canon 1D Mark IV Review: www.youtube.com 14 – Aperture Values www.youtube.com 16 – Exposure www.youtube.com 17 – Flash Sync Speed www.youtube.com 20 – On-Location Flash www.youtube.com 25 – Metering Part 1: TTL Metering www.youtube.com 29 – Self Portraits www.youtube.com 41 – Dynamic Range www.youtube.com 54 – Speedlights vs. Studio Strobes www.youtube.com 59 – Inverse Square Law www.youtube.com 67 – Lighting for Black and White www.youtube.com Visit www.adorama.com for more photography videos!
Video Rating: 5 / 5

 
Comments Off on Digital Photography One on One: Episode 71: Viewer Feedback Vol 2

Posted in Nikon Videos


Cool Visual Art images

12 Dec

Check out these visual art images:

Painting Vs. Photography-4
visual art
Image by zeevveez
Rain Drops on Window Network
Impressionistic Style -Cypress in Rain
Wikipedia entry Impressionism:"
Characteristics of Impressionist paintings include relatively small, thin, yet visible brush strokes; open composition; emphasis on accurate depiction of light in its changing qualities (often accentuating the effects of the passage of time); common, ordinary subject matter; the inclusion of movement as a crucial element of human perception and experience; and unusual visual angles".

coyote illumination
visual art
Image by malstad
Michael Alstad’s Coyote Illumination explores concepts of human/animal territory, evolving boundaries between the constructed and natural world and the migration, growth and adaptation of wildlife within urban ecologies. The installation is a nod to Joseph Beuys famous 1974 performance, I Like America and America Likes Me, where the artist spent three days in a NYC gallery with a felt blanket, a flashlight, a cane and a live coyote. Beuys performance was interpreted as a healing and transformative ritual that acknowledged the spiritual significance of the coyote to native North Americans, and as a symbol of environmental degradation and loss through colonial expansion.

For the FiedWork site-specific installation Alstad reworked the visual elements and context of Beuy’s performance; the NYC gallery is transposed to a camping tent in a rural Ontario field, the live coyote replaced with a durable weather resistant plastic coyote decoy ‘geese repeller’ – a realistic stalking threat that creates a ‘danger zone’ where geese won’t want to linger. The felt is substituted with gardening fibre and the coyote now embodies the flashlight – solar powered LED lights are embedded inside the decoy, illuminating it at dusk.

Go Superlambananas!
visual art
Image by Mrs Magic
www.gosuperlambananas.co.uk/

59. SuperLewis’s 152 Lamb
Artist: Lewis’s in House Visual Team
Sponsor: Lewis’s
Location: Lewis’s Department Store

 
Comments Off on Cool Visual Art images

Posted in Photographs


Arty – 2012 United States Summer Tour | Favorite Moments

12 Dec

US tour: Electric Daisy Carnival 2012 (Las Vegas, NV) Spring Awakening 2012 (Chicago, IL) Alesso 21st Birthday Bash Governors Island (New York City) Alesso 21st Birthday Bash afterparty at Pacha NYC (New York City) Eric Prydz at The Hollywood Palladium (Los Angeles, CA) IDentity Festival 2012 (Detroit, IM) IDentity Festival at Comcast Center (Boston, MA) IDentity Festival at Nikon at Jones Beach Theater (Wantagh, NY) IDentity Festival (Philadelphia, PA) IDentity Festival (Downtown Miami, FL) IDentity Festival (Houston, TX) Exchange LA (Los Angeles, CA) IDentity Festival Cricket Amphitheatre (San Diego, CA) IDentity Festival (Phoenix, AZ) Thank You for a amazing memories, summer 2012 Aftermovie COMING SOON! FOLLOW ARTY: facebook.com twitter.com soundcloud.com
Video Rating: 4 / 5

 
Comments Off on Arty – 2012 United States Summer Tour | Favorite Moments

Posted in Nikon Videos


Creative Color Processing (Part 1/3 – White Balance)

12 Dec

It is often said that photography is a visual language. Through our photographs we tell stories, share experiences, and communicate emotions. Aside from journalism, where faithful captures are important for ethics reasons, photography is often about creatively interpreting a scene, rather than simply recording what is in front of the lens.

Tokyo street scene with creative color

Tokyo street scene with creative color

Tokyo street scene with 'normal' color

Tokyo street scene with ‘normal’ color

Creative use of color can be a powerful tool for controlling the mood in your photographs. In a series of three posts I will discuss three Lightroom controls that can be used to control color and mood in your photos:

1. White Balance
2. Split Toning
3. Tone Curve

In this first article in the series I will discuss white balance, the simplest of the three tools.

Note: I shoot Raw and import my photos into Lightroom, converting to DNG on the way into Lr. Shooting Raw gives me much more flexibility to make creative color decisions in post processing. The screenshots from are from Lightroom 4, but with the exception of the Tone Curve technique that I will cover in Part 3 of the series, these techniques can be used in previous versions of Lightroom.

White Balance

White balance allows you to control the overall color temperature of your image, and adjust for different light sources like tungsten, daylight, flash, etc. If you’ve never heard of white balance take a look at this post.

White Balance Example

Example of different white balance settings

Most of the time you’ll read that white balance is there to help you get accurate color in your photos. This article is not about accurate color. For the next few minutes, forget about accurate color and let’s just look at how white balance can be used to change the mood in a photo. I like to think of white balance as just another tool for controlling color image my images. Thinking of white balance this way is liberating and encourages experimentation.

Tokyo Taxi White Balance Example

Tokyo Taxi White Balance Example

Notice how a cool white white balance creates a totally different mood than a warm white balance for the same scene? Which of the above images do you prefer? When you feel like getting creative with your images, try shifting the white balance either cooler or warmer for creative effect.

I hope this article has encouraged you to think creatively about white balance, and to experiment with shifting white balance for creative effect. I love hearing your feedback, please comment below or feel free to connect with me through Facebook or Google+.

In Part 2 of the Creative Color series I will discuss Spit Toning, and demonstrate how white balance and split toning used together for even more creative control over color.

Post originally from: Digital Photography Tips.

Check out our more Photography Tips at Photography Tips for Beginners, Portrait Photography Tips and Wedding Photography Tips.

Creative Color Processing (Part 1/3 – White Balance)


Digital Photography School

 
Comments Off on Creative Color Processing (Part 1/3 – White Balance)

Posted in Photography