RSS
 

Archive for August, 2010

Free In Depth Adobe Tutorials For Digital Photographers

26 Aug

With digital photography your images aren't complete until you've engaged in some form of post processing image manipulation.

That is unless you and your digital camera are so good that there is no need for further adjustments after you've taken a picture.

Well, for people like me, who at least take a quick look at all photo files using one graphics program or another, and then try to make the image better, we're always on the lookout for shortcuts and guidance.

If …

Digital Shot

 
Comments Off on Free In Depth Adobe Tutorials For Digital Photographers

Posted in Equipment


Free Program Will Speed Up Your Digital Photo Post Processing

26 Aug

Anything that will increase a computer's overall processing speed is always welcome, and users of digital graphics programs, such as we digital photographers, can always use more computer speed.

Anyone who has ever run the full blown Photoshop programs knows what I'm talking about so let's clean up those hard drives and at the same time recover lost files.

"Wise Disk Cleaner 5.2 Professional", by WiseCleaner.com, searches for duplicate files and other extraneous bits and pieces of code that are no longer required …

Digital Shot

 
Comments Off on Free Program Will Speed Up Your Digital Photo Post Processing

Posted in Equipment


edzstudios and adblocker

26 Aug

Just a PSA – I noticed recently that my galleries werent loading properly when I viewed them… after briefly troubleshooting I discovered that a recent update to the firefox extension “AdBlock plus” was blocking them (without really giving any indication).  So if you’re reading this with ABP turned on, you might want to disable it for the site… I don’t have any ads on it anyway :-)

Tweet This Post Stumble This Post


ed | zawadzki

 
Comments Off on edzstudios and adblocker

Posted in Uncategorized


fall fashion with Jordan P.

26 Aug

From a recent shoot with Jordan P

All done with 1 light, mixed with ambient to varying degrees :-)

jordanp-001

jordanp-002

jordanp-003

jordanp-004

jordanp-005

jordanp-006

jordanp-007

Tweet This Post Stumble This Post


ed | zawadzki

 
Comments Off on fall fashion with Jordan P.

Posted in Uncategorized


Panasonic GF1 first impressions

26 Aug

As anyone who’s been following this blog knows, I’ve been very excited about the whole inception of the new micro four thirds standard… I decided not to jump on the EP-1, waiting to see the developments from Panasonic etc…  With the release of the GF1 and the announcement of the EP-2, I finally decided to get myself a GF1 for my birthday.   Of course my B-day isn’t for another month, but given the impossibility of actually finding the stupid thing in stock, when I saw one available from amazon I jumped on it and received it last week.

Of course a week and a few shots are not nearly enough to get the real “feel” of a camera, but here are some initial thoughts:

  • I bought this camera as a replacement for my G9 (which I subsequently sold). my first thought was “this is just like my G9, only better”
  • Image quality is superb – particularly with the 20/1.7.  Plenty of detail, and the raw files hold up to processing well (using LR3 beta).  High ISO is perfectly adequate for me.  I’d use it comfortably up to 800/1250, and 1600/2500 are definitely usable with some NR/processing.  3200 is a bit noisy, but still seems perfectly usable for smaller prints etc… with some NR.
  • I don’t miss an OVF at all.  I don’t know why folks get hysterical about composing on a screen- to me it’s just another way of composing.  SLR finder, Rangefinder, Waist-level finder, ground glass… whatever.   as long as I can compose my image, it’s all good.
  • Much like the G9 it’s not truly “pocketable” it definitely needs a small bag or coat pocket.  To me this is basically a camera for “good pictures that’s lighter/easier to carry than an SLR”
  • Responsiveness is excellent.  Shutter lag is negligible, and focus is nice and snappy even in low light.  It’s not quite as good as my D700 (!) but it’s more than adequate.   I can’t see myself missing any shots due to lag (caveat: I don’t shoot kids or sports, so if you do YMMV!)
  • build quality is… decent… it’s not a leica, but it doesn’t feel like its going to fall apart either.  Probably the cheapest-feeling part of the whole thing is the zoom action on the 14-45 kit lens, but even that isn’t terrible (hey it’s a kit lens!)
  • Manual focus with the m4/3 lenses is actually not bad at all.  The “focus by wire” doesn’t bother me, and the focus rings (particularly on the 20/1.7) are surprisingly smooth and well damped, unlike many modern AF lenses.  I’m curious to try some real MF lenses on it with an adaptor.
  • I’m still getting a feel for the menus/controls, but they seem perfectly adequate.  I wasn’t sure about the whole “push-turn” control wheel but I actually really like it now.  All the necessary info is shown on screen, and all the settings I need to use regularly are easily accessible without digging through 27 menus (<cough> canon mirror lockup<cough>
  • I’m curious how the lack of a mirror will affect hand-holdability.  I know I can handhold a rangefinder at least a stop slower than an equivalent SLR, I wonder if the GF1 will have the same advantage…
  • So far the main “negative” I can find with the camera is that the grip on the front feels a little slippery (the rear has a nice rubber thumbpad, but the front “fingertip” area is too slick for me) Surprisingly this makes the grip less sure than my G9… it might be worth getting a little stick on pad for the front to alleviate this.

Overall, the “gestalt” of this camera is the same to me as the G9 – not a “pocket camera” per-se, but a “real camera” that I can carry around more easily than a full SLR.  In this regard it succeeds superbly.   For my purposes, the GF1 realizes the dream of “SLR image quality in a compact body” perfectly, particularly with the superb 20/1.7.   I’m actually toying with using it fom a couple of “real” shoots coming up, to see if the ability to go ultralight/minimalist will give added freedom in location shooting.

more to come…

P1000075

P1000053

P1000058

P1000067

Tweet This Post Stumble This Post


ed | zawadzki

 
Comments Off on Panasonic GF1 first impressions

Posted in Uncategorized


Good TIMEs!

26 Aug


The entire staff here at Strobist International Headquarters are quite pleased (and more than a little surprised) to have been included in TIME Magazine’s 25 Best Blogs of 2010.

If you are just stumbling in from that article, welcome! This is no ordinary photo blog — you can see what we are all about, here.

-30-


Strobist

 
Comments Off on Good TIMEs!

Posted in Uncategorized


Using ND Filters to Kill Depth of Field

26 Aug

UPDATE: Just answered many Q’s in the comments. -DH
__________


It’s simple math. If you are shooting outside in the sun and limited to 1/250th of a second sync (or worse) you are are going to be shooting through a tiny hole as your aperture. Even if you crank your ISO down as low as it will go, you’d better like that background. Because you are going to see it in pretty sharp focus.

Or maybe not. In addition to high-speed sync, there are a few ways to bleed some aperture from your exposure settings in full sun.

Three blurry choices, inside.
__________

Dedicated speedlights and high-speed sync is one way to get rid of your aperture problems. But because of the inefficiency of focal-plane flash (lots of energy falling on mostly closed shutter curtains) your flash power is greatly reduced.

You can add extra flashes (cue McNally’s Tree of Woe) or you can do everything at f/16 or so and then bleed some aperture with a neutral density filter.

Couple of things: First, you put the filter on the lens, and not the flash. And second, there are a few routes to take, with some being better than others.

The upside about ND filters is that you can use them with any dumb flash. Anything you flash can do balancing with the sun at f/16 it can also do at f/2.8, or even f/1.4 with ND filters. Big flashes, small flashes – doesn’t matter. You are simply taking aperture limitations out of play.

Example:

You could wrap three speedlights around an athlete for a very cool mid-day portrait. All hard lights — high front key, and two back/side rims. At a 250th of a sec, you’ll need to light your subject to ~f/16 or so (depending on the ISO) to balance the sun. More if you want to overpower it.

That takes a lot of light. But close-in, bare speedlights can absolutely do it. And any decent monobloc or pack-and-head could do it without breaking a sweat.

The problem is your backdrop — maybe you want to blow it out. Maybe it looks like crap at f/16. Maybe your sensor dust is starting to look like a scene from Jurassic Park.

The important thing to know is that the flash/ambient relationship is not going to change. You need the power to compete with the sun. But now we want to bleed some aperture out and lose the background focus.

To take your exposure from 1/250th at f/16 to 1/250th at f/2.8, you will need to place five stops worth of neutral density filter over your lens. This will maintain the flash-to-ambient balance, while knocking the light down.

(If you put it on your flash, you would be giving yourself big problems — unless maybe your flash has a thermonuclear setting or something. And you still would not be able to get your aperture down.)

So, what kind of ND filters to consider?

As always, there are choices. And some of those choices depend on your wallet. Here are three.

The Budget Option

You can get a typical-brand ND filter for about or less, which is very tempting. This is the route you will probably try first — I did. Unfortunately, it was a learning experience. Here’s why.

I bought a Tiffen 77mm ND filter that cut three stops of light. Cheap, fit my lenses and solved the problem, right?

Wrong.

The sharpness was not what I had hoped it would be. But there was also a color shift — it was a kind of weird warm that sucked the color out of the sky, which was exactly what I would typically be using as a backdrop with the NDs.

Granted, it is very difficult to make an optically pure ND filter of that strength, and maybe was a pipe dream. They got the “density” part down. The “neutral,” not so much.

But on top of that, it was like my first microwave oven. It had two settings — off, and nuclear. What I found is that I needed variability to solve different problems. Sometimes 3 stops was okay. Often I needed more — or less.

In the end, it went into a drawer. lesson learned.

The Pay-As-You-Go Plan


Being younger and wiser, my friend JoeyL skipped the dime store version and went for a set of Lee 4″ polyester ND filters. The good news — they are both sharp and cheap — on an absolute basis.

The bad news, they are basically a consumable. They will scratch, and you will have to replace them.

This is the way the Hollywood folks roll when making movies. You’ll need a 4″ gel holder (probably “pro shade” combo) and a filter for every ND value you use. If you always work in full sun and want to go to f/2.8, this might be a good option for you. But you will use up the filters and have to replace them.

If you need variability in your ND filters, it could get to be expensive pretty quickly and do so in an ongoing way. That said, Joey seems very happy with the 4″ gels and his photos of course look amazing.

He also uses it for wide-open movies with his Canon 7D. Above, he is shooting footage from inside a seaplane over Dubai earlier this year.

Pretty intimidating looking setup, if you ask me. Very Cecil B. DeMille.

If you want to use ND sparingly (and you are very careful by nature) the 4″ polyester filters can be a very reasonable option that will give you very good results. You’ll probably want to buy one that will get you from your full-sun aperture to your wide-open aperture. Then maybe a second which will do the same on a cloudy day.

This will give you the option on a sunny day (with the second, less powerful ND filter) to go to only f/5.6 if you want moderate depth of field.

The Buy-It-Once Plan

If you want optical quality, durability and continuously variable densities, there is one option. And it is expensive.

The Singh-Ray Vari-ND is the ne plus ultra of ND filters. It gives you a “dial-in” setting of anywhere from two to eight stops of neutral density — that is actually neutral. And it is sharp, too.

Singh-Ray filters have an outstanding reputation, for which one pays dearly. For example, the 77mm Vari-ND filter is 0. As far as I can tell, it is two high-quality polarizers that used together form somewhat of a “dimmer switch” for light.

But it is a thing of beauty, both in operation and performance. After paying my Newb Tax above, I at least was able to experiment enough to know that I wanted to have the ability to mix flash with any level of sunlight, work at any aperture and with any piece of flash gear. That’s what the Vari-ND let’s me do.

I’ll probably catch some crap in the comments for such a pricey filter, but I tried the cheap version and that was for nothing. To me, that’s more expensive.

And yeah, I have given the old Visa card a pretty good run over the last year. But I shot for 20 years with someone else’s gear, and I wanted the next 20 to be with that of my choosing.

And frankly, it feels very good to finally be done with major purchases for the foreseeable future.
__________

Walk-Thru

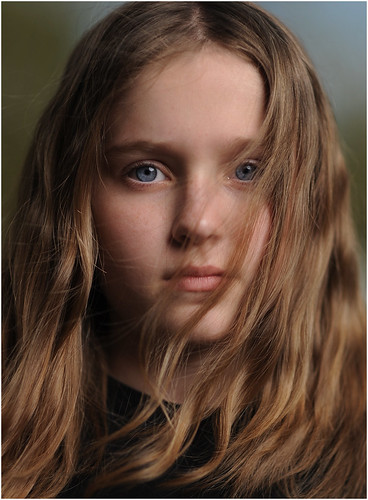
The photo up top, of my daughter Em, was when I first started using it. Just some learning time with no pressure.

It is a straightforward shot, done mid-afternoon with a single Profoto head in a 60″ Photek Softlighter II. But the neutral density adds a third variable to your normal f-stop and shutter speed duo. Here’s how I keep from getting too confused by that.

First, I choose my shutter speed. If I am pushing the limits of my lights (i.e., maybe when using speedlights) I would choose 1/250th. In this case, I had plenty of power so I started at 1/125th. This was simply to give me the ability to alter the ambient background levels with my shutter speed while shooting without hitting my sync limit. And in the end, I shot this frame with a darker background at a 1/250th. Nice to have the option.

Next, I close down my aperture until I get a background that is the exposure tone that I want. It will be very much more in focus than the final shot will be.

Now adjust the power on the flash to light the subject. In this case, Em was in the shade of a building (background in full sun) so I was adding light to a nice, dark starting point.

The flash and ambient relationship now are set. Placing the Vari-ND on your lens will allow you to remove as much light as you want from the photo, and you compensate by opening up the aperture. Rather than go wide open to f/1.4, I stopped at f/1.6 because I know my 85 is sharper there.

I went pretty wide open here, but I could have shot at any aperture. And I absolutely love that I can do that now.

The idea of crisp, multi-hard light wraps mixed with squishy backgrounds at high noon gets me a little tingly. Which is much needed, after the numbing effect of buying a filter that cost as much as a car payment.
__________

So, do you use ND filters with flash? If so, what kind? What has worked for you? What has left you wanting?

Sound off in the comments.


Strobist

 
Comments Off on Using ND Filters to Kill Depth of Field

Posted in Uncategorized


Gregory Heisler, on Stripping with Derek Jeter

26 Aug

We pre-empt our regularly scheduled programming today, as we do pretty much any time there is a good BTS video from the likes of Greg Heisler.

(Ditto you too, Dan Winters, or Peter Yang. Seriously, whip up a good BTS and the joint is all yours for the day.)

For a little sense of chronological scale, this video lasts about as long as Heisler takes to shoot Jeter. For an SI Sportsman of the Year cover, no less.

Quick takeaway: Hiding a face light on-axis of a bigger strip light (sorry for that misleading headline, ladies) for “a little more oomph” on the face. “Oomph” being one of those light qualities Heisler learned about when studying with the Great Masters.

And on the Profoto strip lights — if you have to ask, you can’t afford them. They are not strip boxes. They are strip lights. Completely different animal. They are apparently made in Sweden by elves using pixie dust or something even more expensive.

I am working on a DIY version for speedlights, made out of polished, inside-out Diet Mtn. Dew cans.
__________

(More Heisler vids on the Profoto site.)

-30-


Strobist

 
Comments Off on Gregory Heisler, on Stripping with Derek Jeter

Posted in Uncategorized


Get Your Digital SLR Firmware Updates Here

26 Aug

You do update your digital camera's firmware don't you? After all, it's like getting at least part of a new camera for free, so why not update?

The current hot firmware update is for the Canon EOS 5D Mark II and is version 2.0.4.

Of course there are firmware updates for other Canon models available, and, you'll find links to firmware updates by all the major digital camera manufacturers there as well.

"CurrentPhotographer.com" is a website where you'll not only find …


Digital Shot

 
Comments Off on Get Your Digital SLR Firmware Updates Here

Posted in Equipment


Simple But Effective Tips For Digital Photographers

26 Aug

Sometimes the simplest tip can make a huge positive difference in the results a digital photographer produces.

One simple tip I learned when I first got into photography was the "Rule Of Thirds".

This simple tip taught me to look at a given scene, or look for a particular scene, that would allow me to place the main subject in an off center place that made for a better focal point than if it was centered.

Check out the list of simple …

Digital Shot

 
Comments Off on Simple But Effective Tips For Digital Photographers

Posted in Equipment