Category: Uncategorized

  • The Art of the Pose

    Posing is hard!

    If anyone tells you otherwise then they are a bona fide genius or they don’t realize how bad they are at either directing the action or being a model.

    Some models are simply born with the ability to move freely in front of the camera, some are not.  Either way it is the job of the photographer to direct the shoot with just the right amount of attention.  Too much or too little are equally bad, and the tricky part is every shoot is different.

    Over the years I have had a lot of experience working with models, in all that time I’ve learned a lot of tricks for directing the action.  How to make someone smile naturally, how to make someone laugh, how to make someone feel comfortable and how to start ordinary people on the path to being great models!  As always this process takes two people.  A director that knows their stuff and a model with enough talent and passion to actually make the shoot better.

    Here is my single best piece of advice for working with new models.

    Adapt (and use) these three styles of of directing

    And know which one is best for the particular shoot and the particular model

    1. Meticulously guide the action

    Many photographers shy away from this technique, either they lack the confidence or on the opposite extreme they proudly wear the badge of honor that “I do not pose the model, it’s too contrived and I want PURITY in my photos.”  I’ve got news for everyone, the photos you see in magazines in advertising and editorials?  Lots of those are meticulously directed to look like they weren’t directed.  It is a rare combination for the model and photographer to be so in synch that absolutely no direction is necessary… though it does happen.

    Personally I find myself using this style most when I’m doing conceptual shoots, close-ups and beauty head shots. I also revert to this style when the model is unexperienced or unconfident in her actions and just needs the extra help.

    2. Shut up and Shoot

    Sometimes a model knows his/her craft so well that any advice you give them couldn’t possibly make things better.  Just watch and move your camera/lights accordingly.

    3. Inspire and Suggest

    My favorite style!  I work with a lot of brand new models, a majority of them have never even posed before.  This style is a great way to give the model confidence enough to experiment with posing, in doing so you can mentally assess their modeling talent and create a collaboration worth documenting.

    Here’s how you know when you’re doing it right!

    Brynlee is not a professional model.  A month or so ago Ryan Muirhead and I went in to get a quick bite to eat on a lazy saturday afternoon, as we walked into the fast food restaurant we both spotted her.  She stopped us both in our tracks, literally, and Ryan and I exchanged a look.

    She was beautiful.

    So I did something I rarely do, only the second time in as long as I can remember I wrote a note on the back of a contest entry form they had at the front register.  It said simply:

    “My name is Jake Garn, I am a photographer and I’d love to photograph you.  No charge.  Check out my work and email me if you’re interested.”

    I left my website at the bottom, I only had to wait a day or two for an email.

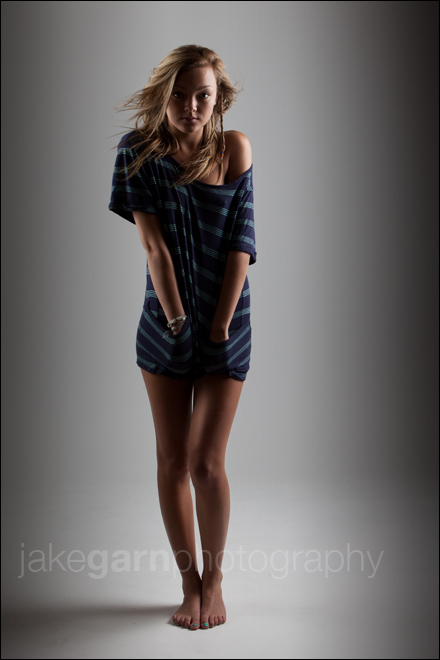
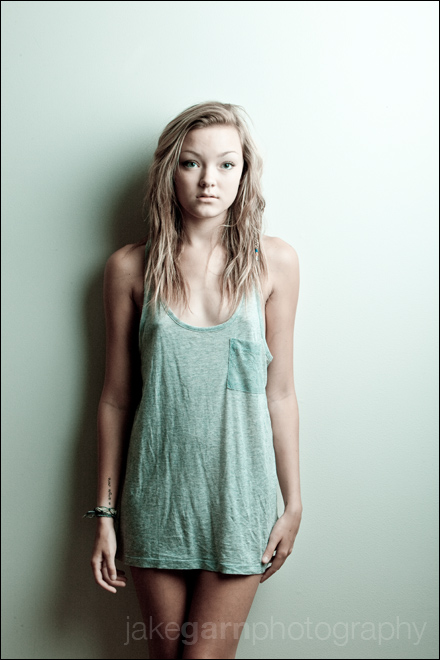
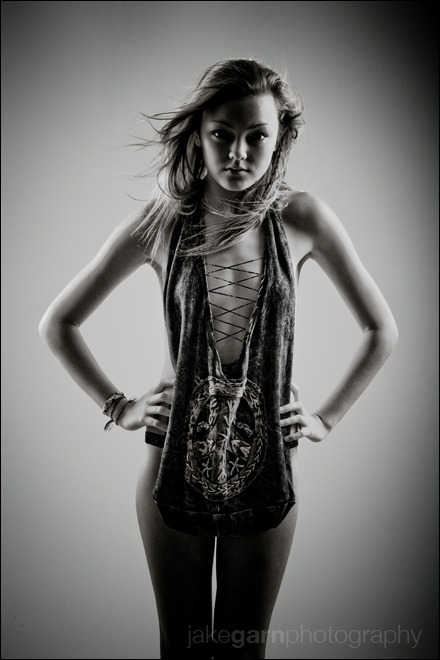
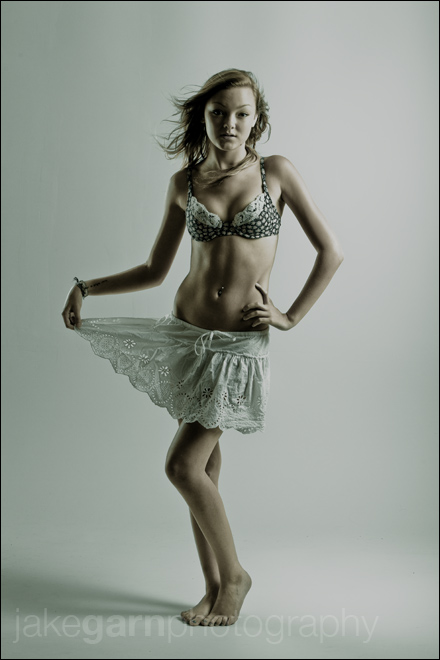
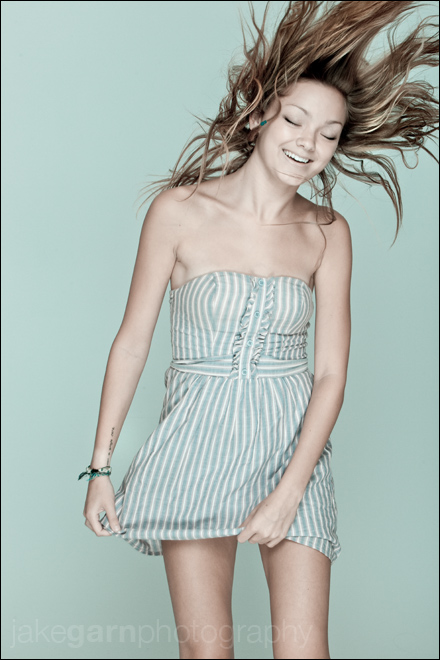
    Since then I’ve photographed Brynlee a couple of times, the images at top are from her third photoshoot.  I gently guided her to play with her dress, shake her hair, stand on tip-toes, and just play around.  Then I just shut-up and watched, click… click…. click…

    According to the time-stamps on these images we started shooting this look at 7:13 exactly.  The last frame from this look was clicked at 7:18 and 6 seconds.

    5 minutes and 6 seconds.  I think I may make a habit out of doing the five minute modeling challenge in the future… if you’d like to see future 9-image collages like this one leave a comment and let me know!

    Equipment used to achieve these images

    Classic lighting from both sides, put the softboxes as close as you can to the model and expose accordingly.  For this one I put the left-strobe slightly behind the model and the right-strobe slightly in front of her, the ratio of each strobe is about 1:1.


    Jake Garn Photography

  • 16-bit Vs. 32-bit Vs. 64-bit: What Does it All Mean?

    bits  

    A Guest post by Steve Berardi from PhotoNaturalist

    In digital photography, there’s a lot of talk about bits:

    • 12-bit vs 14-bit Analog to Digital Converters (ADC)
    • 8-bit vs 16-bit color
    • 32-bit vs 64-bit Photoshop

    But, what does it all mean? Although more bits generally means better quality processing, it’s not always that simple. Sometimes you really need to know the full story before making a conclusion.

    Before we jump into these specific examples that are common in digital photography, it’s important to understand what a bit actually is.

    What is a bit?

    The word “bit” comes from two words: binary and digit. Each bit has two possible values: 1 or 0. Sometimes it’s also helpful to think of a bit as either “on” (1) or “off” (0).

    Although one bit can store two possible values, a sequence of two bits can store four possible values: 00, 01, 10, and 11. With a sequence of bits, order matters, so “01″ is very different from “10.”

    Each time you add a bit to a sequence, you double the number of possible values, so if you go from two bits to three bits, you go from four possible values to eight possible values.

    As an example, let’s say you were interested in storing something that has 16 possible values. You would need 4 bits in this case (2 x 2 x 2 x 2 = 16).

    Analog to Digital Converters (ADC): 12-bit Vs. 14-bit

    Every digital camera has some kind of analog to digital converter (ADC) that converts the analog signal captured by the sensor into a digital signal that produces your image. Most DSLRs these days either have a 12-bit or 14-bit ADC.

    The bits in this case refer to the number of possible tonal values that your camera’s sensor can capture. For example, a 12-bit ADC can capture 4,096 possible tonal values for each pixel. On the other hand, the 14-bit ADC can capture 16,384 tonal values for each pixel.

    At first, it may seem like the 14-bit ADC is a clear winner: it can capture 12,000 more tonal values! But, these two extra bits are not increasing the dynamic range of your camera, they’re only adding more steps within that range. It’s kind of like if you took a loaf of bread and cut each slice in half to make even smaller slices. You might have more slices of bread now, but the size of the loaf is the same!

    So, you’ll experience slightly better image quality with the 14-bit ADC, but it’s really just noticeable in the deep shadows and smooth gradients (like those you find in a photo of a sunset).

    For more details on 14-bit vs 12-bit ADCs, check out these helpful articles:

    Color: 8-bit Vs. 16-bit

    In most post-processing software, you have the option between 8-bit color and 16-bit color. The bits in this case refer to the number of possible tonal values available to each color channel (red, green, and blue) of each pixel.

    With 8-bit images, you have 256 possible values for the red channel, 256 values for the green channel, and 256 values for the blue channel. And with 16-bit images, you have 65,536 possible values for each color channel.

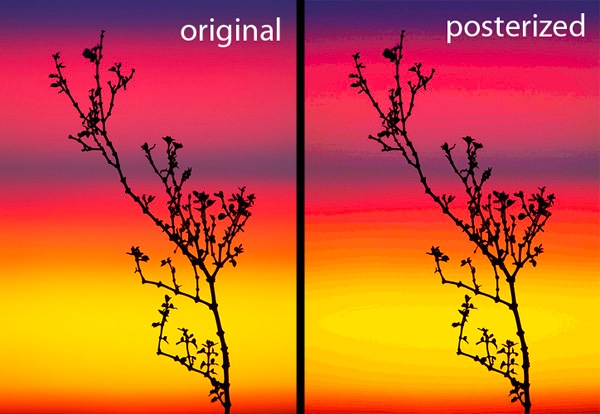
    Using 16-bit color will result in some pretty large filesizes, but it’s worth the extra size because with 16-bit processing you’ll significantly reduce your chances of posterization (as seen in the photo below). It’s a good idea to use 16-bit color even if you originally shot in JPEG (which is 8-bit), because the extra bits will help reduce rounding errors when performing common post-processing tasks like Curves or Levels.

    bits-posterized

    For more information on 8-bit vs 16-bit color, check out these helpful articles:

    Photoshop: 32-bit Vs. 64-bit

    Some post-processing applications, like Adobe Photoshop, offer 32-bit versions and 64-bit versions. The bits in this case refer to the number of possible memory addresses. With 32-bits, you can use up to 4GB of physical memory, but with 64-bits you can theoretically use up to 17.2 billion GB of memory (although this amount is usually severely limited by the operating system).

    There’s a common misconception that the 64-bit version of Photoshop is always faster, but in reality, to take advantage of the speedup (which is minimal), three things need to happen:

    1. You need more than 4GB of physical memory
    2. You need to be working with very large images (at least 800 MB)
    3. You need to be running a 64-bit operating system (e.g. Vista x64 or Mac OS 10.6)

    You might think that 800 MB is larger than you’ll ever work with, but filesizes can get big pretty quick if you’re building a panoramic image, or working with multiple layers of images to blend exposures.

    Even if you do meet all three conditions above, there’s still a chance you won’t notice any speed-up at all, depending on the operations you’re performing on the image. Also, keep in mind that many third-party plugins do not work with the 64-bit version of Photoshop.

    For more details on 32-bit Vs. 64-bit Photoshop, check out these informative articles:

    Remember: Not all bits are created equally

    The key thing to take away from this post is that not all bits are created equally. Just because something has twice as many bits that doesn’t mean it’s automatically twice as fast or two times better quality. Before making any kind of conclusion about 16-bit vs 32-bit / etc, you really have to understand the story of how those bits are being used.

    201008201339.jpgAbout the Author: Steve Berardi is a naturalist, photographer, and computer scientist.

    You can usually find him hiking in the beautiful mountains and deserts of Southern California. Read more of his articles on nature photography at the PhotoNaturalist and follow him on Twitter.

    Post from: Digital Photography School – Photography Tips.

    dpsbook.png

    16-bit Vs. 32-bit Vs. 64-bit: What Does it All Mean?


    Digital Photography School

  • How to Photograph Bands in Bars – Equipment

    A guest post by Music Photographer Rick Bennett.

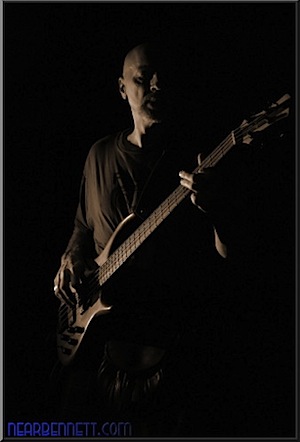
    Bass player lit with off camera flash

    Some of my favorite photography subjects are musicians while they are performing. They tend to be having fun, they like the attention, and they’re challenging to capture well because of their environments. Capturing musicians in the wild can be tough and very rewarding.

    Digital Photography School recently published 6 Tips for Budding Live Concert Photographers. One of the tips was to start out shooting friends’ bands in small clubs. I’m going to expand on that suggestion by writing a three part series on photographing bands in bars. In the first part, I’ll deal with equipment choices. In the second part, I’ll deal with set-up just prior to the performance. In the last, I’ll discuss shooting techniques.

    The most obvious part of the equipment you’ll need is a camera, and your choice of camera can really make or break your final images. It should probably go without saying that a dSLR is almost certainly required, but there are some high end compacts that could fit the bill. At a minimum, the camera should either have a hot shoe or replaceable lenses. If the lenses aren’t replaceable, look for very fast built-in glass. It also needs the ability save images in RAW format since the color balance will likely be completely crazy from any stage lights. If you’re not familiar with RAW processing, its easy enough to convert your images to black and white, and those look cool too. Finally, your camera needs to give you the ability to choose your focus point and easily manually focus. Like I said, most standard dSLRs fit all of these requirements.

    One consideration that’s more difficult to determine is low noise at high ISO. Don’t be fooled by the specs on the box: 1600 ISO on a Nikon D5000 is not the same as 1600 ISO on an Olympus E-620. For example, in one review the noise in a D5000 JPG at 3200 ISO is about the same as the noise in an E-620 JPG at 800 ISO. That’s a two stop difference that can change a 1/30s blurry shot into a usable 1/120s. Check the available reviews to make sure you’re getting a camera with the best high ISO performance in your price range. High quality at high ISO means you’ll be able to boost the ISO close to the max, meaning faster shutter speeds to help stop motion when using ambient light.

    Next, you have a choice when starting out: either use off-camera flash or use fast (f/2.8 or better) lenses. At the low end the price is about the same: a decent manual flash + triggers + mounts can be just under 0 while a “Nifty Fifty” or the Jive Thirty Five are also under 0. As with everything photography, the prices only go up. The choice of off-camera flash vs. fast glass is a tough one. Flash can work in most situations but there are some venues where placement of a remote flash can be very challenging or even prohibited. Conversely, an f/1.8 50mm or 35mm lens captures a lot of light but the short focal length means you’ll be right in the performers’ faces, and some bars (at least in my town) don’t even bother to light the performance area. I started with off-camera flash, then acquired the Jive Thirty Five, and I’ve used them both during performances to capture different moods.

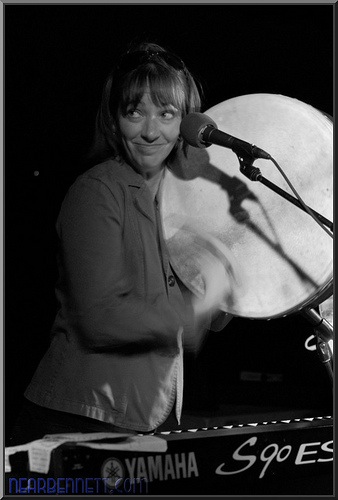
    Ambient lighting, 1/30s f/3.2

    The ideal lens is a bigger zoom: 70-200mm f/2.8. Its almost as fast as an f/1.8 but it allows you to back away from the performers a bit (or shoot a stage that you can’t access). But even that lens doesn’t solve all the lighting problems in a bar and I’ve found I still like to use off-camera flash for many bar stages. If you can’t afford an f/2.8 zoom, then any other zoom will do if you’re willing to use off camera flash. In most bars a 5.6 300mm lens won’t be able to shoot at less than 3200 ISO at 1/30s. That means a lot of motion blur and camera shake if you don’t use flash.

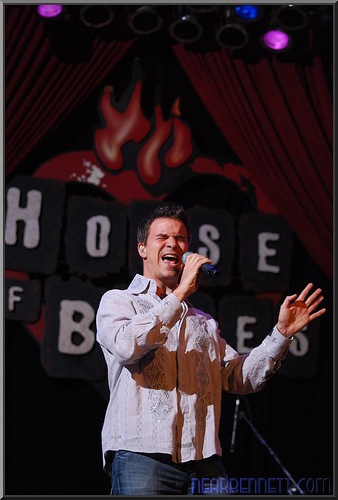
    Off-camera flash used at the Chicago House of Blues

    To go with flash, you probably will start with a lower cost full manual flash like the workhorse classic Vivitar 285HV. It gives you decent range of manual power settings, and a tilt-zoom head. My one complaint about the 285HV is that it doesn’t have a swivel head. In a bar with awkward mounting conditions, a swivel head can go a long way. So look for a flash that has manual power settings down to 1/32 and a zoom-tilt-swivel head. Some in this class have a built in optical slave, which might seem like a good way to save some money on the triggers, but it will likely just kill your batteries-the slaved flash will go off every time some other fan of the band takes a picture. Manual triggers (i.e. those that don’t support TTL metering) can be had for less than .

    If you want to take it up a notch, you can go TTL (through the lens metering) with your off-camera flash. That is beyond the scope of this article, but it will allow you a better level of creative control from the camera, and it will cost significantly more as well.

    When I’ve done off-camera flash in a bar, my preferred light stand is a VAL-voice activated light stand. They range in price, but frequently can be had for the price of a pint or two when you enlist a friend or relative to help you. With a VAL, you can have very focused light on a single performer without blasting the whole stage with light. And it is easy for a VAL to adapt to performers moving around a lot-a clamped flash can’t do that. My preferred VAL is my wife, and we quickly worked out elaborate hand signals so that I could tell her who to point the flash toward: one finger meant the first performer from the left, two fingers meant the second one, and so on. I know its complex, but you can probably figure out your own method of signaling the VAL. If you add a snoot to the flash, which keeps the beam narrowly focused, you can create dramatic lighting on a performer that looks a lot like a spot light.

    If a VAL isn’t an option for you, you’ll need a way to secure the flash to something in the bar. You’ll likely need an umbrella swivel, or some other method of converting a hot shoe to a 1/4-20 bolt. Then you can clamp the flash pretty much anywhere. I’ve clamped flashes to pictures, light bars, chair backs, shelves, posts, and drop ceilings (the drop-ceiling scissor clamp is a must here!). If you can, scouting the location will help you know what kind of clamp you’ll need for ideal placement. In some venues, if the crowds are light, I’ve even used standard light stands. A super clamp or modified A-clamp will serve you well here.

    In part two, I’ll discuss setting up your gear at the venue.

    Rick Bennett has been shooting bands in bars, at festivals, and on big stages for about a year. You can see more of his work on his blog, portfolio, or Flickr stream.

    Post from: Digital Photography School – Photography Tips.

    dpsbook.png

    How to Photograph Bands in Bars – Equipment


    Digital Photography School

  • Test Shoot: Brynlee

    Test Shoot  (n) by Jake Garn

    1.5 to 4 hour shoot just for fun.  I test out new equipment, new models, new ideas… usually with no professional styling. I tell the models to bring a bunch of their own clothes and we improvise. Rarely do I have a single idea pre-planned.   A very good exercise in creativity. I highly, highly recommend doing them as often as you can.

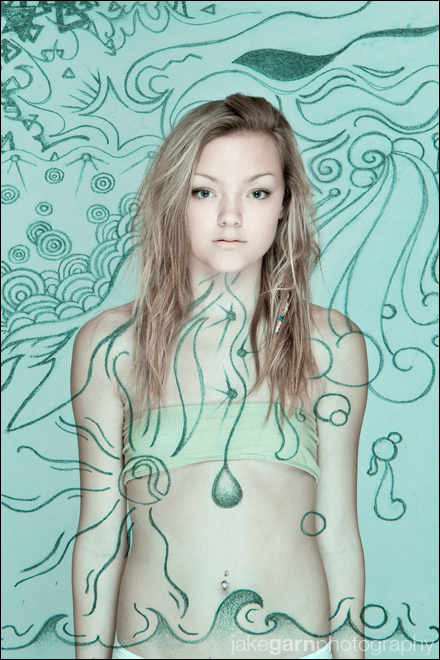
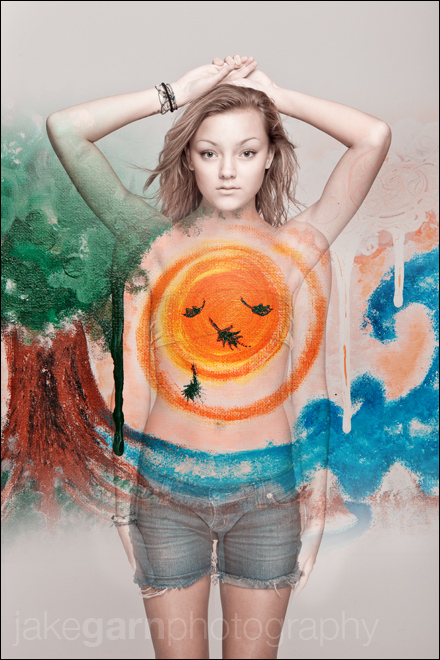
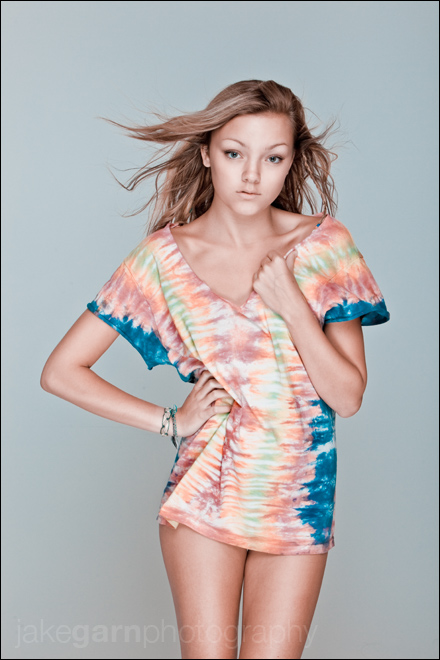
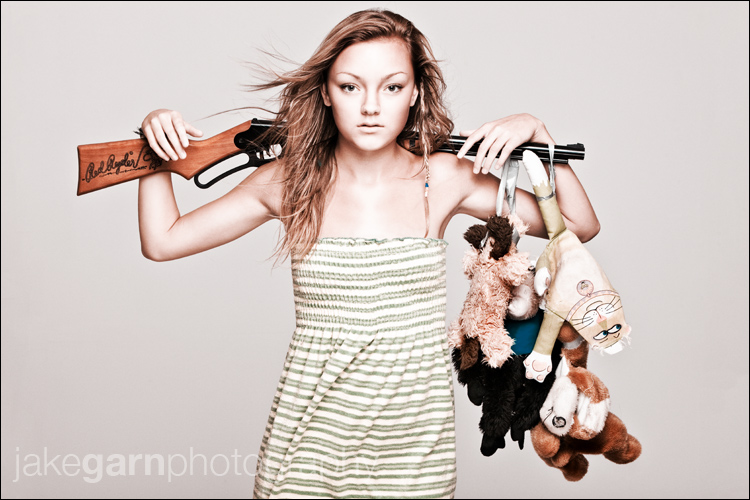
    Here is my latest.  Three days ago Brynlee and I shot for just over three hours, it turned out to be one of my favorite test shoots of all time.  (By the way, the drawings in the top two images are Brynlee’s creations)


    Equipment used to achieve these images

    Classic lighting from both sides, put the softboxes as close as you can to the model and expose accordingly.  For this one I put the left-strobe slightly behind the model and the right-strobe slightly in front of her, the ratio of each strobe is about 1:1.


    Jake Garn Photography

  • Twisted

    Twisted

    photo ©2010 click chick

    FILE Magazine

  • Going to the Source of My Paddling Water

    I have many miles of bike trails in Fort Collins and neighboring cities of Loveland, Windsor and Greeley. They allow me to follow the Poudre and Big Thompson Rivers on a bike or inline skates. On January 31, 2010 I decided for a little bit further bike exploration – the South Platte River north of Denver.

    My photography destination was the output of Denver sewer. In typical winter conditions it delivers practically all water into the South Platte (up to 200cfs, see flow data).


    I drove to the Platte River Trail parking at 104th Street and switched to my bike: a tripod on bike racks and a DSLR camera in Kata KT DR-467-BR backpack. It was a test of this setup for biking. It worked pretty well. I am going to try it with a mountain bike on some easier trails.

    I followed the South Platte south for about 8 miles. The river looked quite nice in not so nice winter conditions, quite shallow with some rocky spots, chutes, diversion dams and hundreds of ducks. Above the confluence with Sand Creek I reached my destination.


    s-platte-013010-1

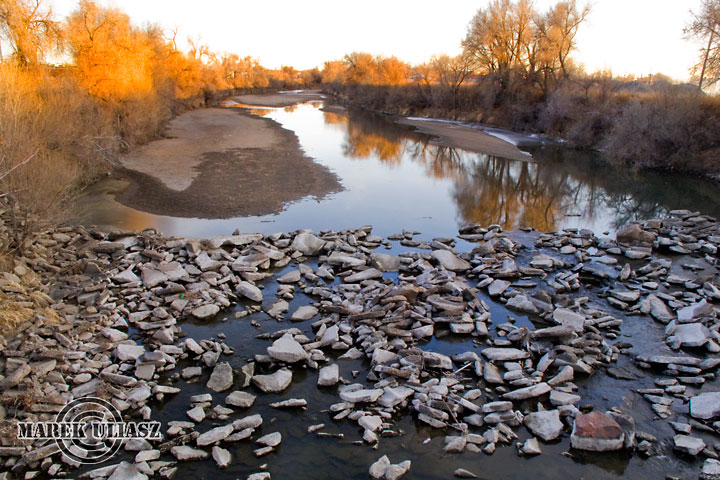
    About 200 cfs is coming out from Denver sewer. The entire river is covered by a dense foam for several hundred yards.

    It wasn't easy to photograph this scene due to heavy smell, but, hey, my background is in environmental engineering. Camera: Canon EOS 5D on a tripod. I checked this location on a map for late afternoon shooting, but didn't anticipate a bridge shadow. I was a little too late.

    s-platte-013010-2

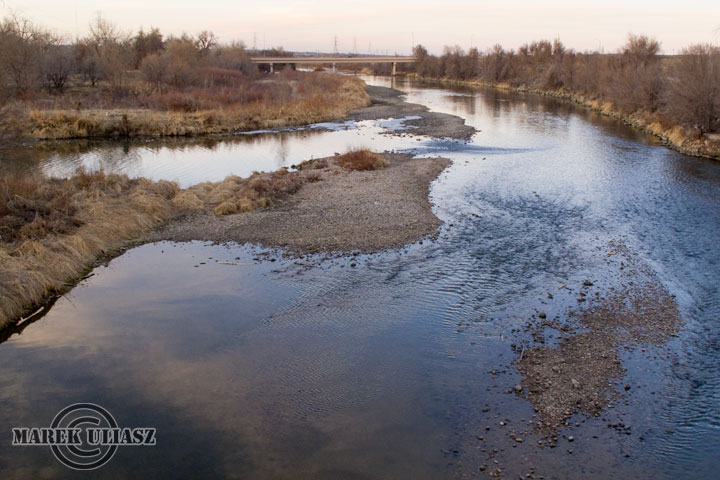
    The river above (looking upstream from a trail bridge): practically dry with a flow just of a few cfs. Camera: Canon PowerShot G11 (shooting from a bike).

    s-platte-013010-3

    The river below (the confluence with Clear Creek). Camera: Canon PowerShot G11. It was already after sunset and getting cold.

    I am going to do more photo exploration of Denver by bike, but will wait probably for a warmer weather. Green vegetation and more water in the river would be nice too. Concerning paddling I prefer to stay as far downstream from Denver as possible at least with low flow conditions during winter.

    Related posts:
    Northern Colorado Fitness Paddling
    New Year Paddling – 22 Miles to Fort Morgan on the South Platte River
    Car Photography Session on the South Platte River
    Colorado Water portfolio
    C-470 to Union Avenue and Union to Florida Avenue - paddling the South Platte River in Denver (Canoe Colorado trip reports)


    paddling with a camera

  • new site

    New look for edzstudios… cleaner and more minimalistic… also galleries changed to a jquery based setup rather than flash (hey gotta be iPad compatible right?)  If you are reading this through rss, click on through and check out the new site design.   Will be going through a few tweaks in the next few days, but pretty happy with things overall.

    Tweet This Post Stumble This Post


    ed | zawadzki

  • Congrats to Ivan Villa For an Honorable Mention Award for Scott Kelby’s Third Worldwide Photowalk

    ivan villa

    Scott Kelby is out with his selections for the winners of this year’s Third Worldwide Photowalk that took place last month. He selected 1 grand prize and 10 honorable mentions from over 1,000 images submitted. Each walk’s leader submitted a single winner from their walk to compete for the prizes.

    The image that I selected from our walk in Albany (above) was taken by Ivan Villa and it won one of the 10 Honorable Mention awards that were given. Congrats to you Ivan on winning in the contest!

    You can find Ivan’s photography and design site here.

    Thomas Hawk Digital Connection