Category: Uncategorized

  • Panasonic GF1 first impressions

    As anyone who’s been following this blog knows, I’ve been very excited about the whole inception of the new micro four thirds standard… I decided not to jump on the EP-1, waiting to see the developments from Panasonic etc…  With the release of the GF1 and the announcement of the EP-2, I finally decided to get myself a GF1 for my birthday.   Of course my B-day isn’t for another month, but given the impossibility of actually finding the stupid thing in stock, when I saw one available from amazon I jumped on it and received it last week.

    Of course a week and a few shots are not nearly enough to get the real “feel” of a camera, but here are some initial thoughts:

    • I bought this camera as a replacement for my G9 (which I subsequently sold). my first thought was “this is just like my G9, only better”
    • Image quality is superb – particularly with the 20/1.7.  Plenty of detail, and the raw files hold up to processing well (using LR3 beta).  High ISO is perfectly adequate for me.  I’d use it comfortably up to 800/1250, and 1600/2500 are definitely usable with some NR/processing.  3200 is a bit noisy, but still seems perfectly usable for smaller prints etc… with some NR.
    • I don’t miss an OVF at all.  I don’t know why folks get hysterical about composing on a screen- to me it’s just another way of composing.  SLR finder, Rangefinder, Waist-level finder, ground glass… whatever.   as long as I can compose my image, it’s all good.
    • Much like the G9 it’s not truly “pocketable” it definitely needs a small bag or coat pocket.  To me this is basically a camera for “good pictures that’s lighter/easier to carry than an SLR”
    • Responsiveness is excellent.  Shutter lag is negligible, and focus is nice and snappy even in low light.  It’s not quite as good as my D700 (!) but it’s more than adequate.   I can’t see myself missing any shots due to lag (caveat: I don’t shoot kids or sports, so if you do YMMV!)
    • build quality is… decent… it’s not a leica, but it doesn’t feel like its going to fall apart either.  Probably the cheapest-feeling part of the whole thing is the zoom action on the 14-45 kit lens, but even that isn’t terrible (hey it’s a kit lens!)
    • Manual focus with the m4/3 lenses is actually not bad at all.  The “focus by wire” doesn’t bother me, and the focus rings (particularly on the 20/1.7) are surprisingly smooth and well damped, unlike many modern AF lenses.  I’m curious to try some real MF lenses on it with an adaptor.
    • I’m still getting a feel for the menus/controls, but they seem perfectly adequate.  I wasn’t sure about the whole “push-turn” control wheel but I actually really like it now.  All the necessary info is shown on screen, and all the settings I need to use regularly are easily accessible without digging through 27 menus (<cough> canon mirror lockup<cough>
    • I’m curious how the lack of a mirror will affect hand-holdability.  I know I can handhold a rangefinder at least a stop slower than an equivalent SLR, I wonder if the GF1 will have the same advantage…
    • So far the main “negative” I can find with the camera is that the grip on the front feels a little slippery (the rear has a nice rubber thumbpad, but the front “fingertip” area is too slick for me) Surprisingly this makes the grip less sure than my G9… it might be worth getting a little stick on pad for the front to alleviate this.

    Overall, the “gestalt” of this camera is the same to me as the G9 – not a “pocket camera” per-se, but a “real camera” that I can carry around more easily than a full SLR.  In this regard it succeeds superbly.   For my purposes, the GF1 realizes the dream of “SLR image quality in a compact body” perfectly, particularly with the superb 20/1.7.   I’m actually toying with using it fom a couple of “real” shoots coming up, to see if the ability to go ultralight/minimalist will give added freedom in location shooting.

    more to come…

    P1000075

    P1000053

    P1000058

    P1000067

    Tweet This Post Stumble This Post


    ed | zawadzki

  • fall fashion with Jordan P.

    From a recent shoot with Jordan P

    All done with 1 light, mixed with ambient to varying degrees :-)

    jordanp-001

    jordanp-002

    jordanp-003

    jordanp-004

    jordanp-005

    jordanp-006

    jordanp-007

    Tweet This Post Stumble This Post


    ed | zawadzki

  • edzstudios and adblocker

    Just a PSA – I noticed recently that my galleries werent loading properly when I viewed them… after briefly troubleshooting I discovered that a recent update to the firefox extension “AdBlock plus” was blocking them (without really giving any indication).  So if you’re reading this with ABP turned on, you might want to disable it for the site… I don’t have any ads on it anyway :-)

    Tweet This Post Stumble This Post


    ed | zawadzki

  • Using ND Filters to Kill Depth of Field

    UPDATE: Just answered many Q’s in the comments. -DH
    __________

    It’s simple math. If you are shooting outside in the sun and limited to 1/250th of a second sync (or worse) you are are going to be shooting through a tiny hole as your aperture. Even if you crank your ISO down as low as it will go, you’d better like that background. Because you are going to see it in pretty sharp focus.

    Or maybe not. In addition to high-speed sync, there are a few ways to bleed some aperture from your exposure settings in full sun.

    Three blurry choices, inside.
    __________

    Dedicated speedlights and high-speed sync is one way to get rid of your aperture problems. But because of the inefficiency of focal-plane flash (lots of energy falling on mostly closed shutter curtains) your flash power is greatly reduced.

    You can add extra flashes (cue McNally’s Tree of Woe) or you can do everything at f/16 or so and then bleed some aperture with a neutral density filter.

    Couple of things: First, you put the filter on the lens, and not the flash. And second, there are a few routes to take, with some being better than others.

    The upside about ND filters is that you can use them with any dumb flash. Anything you flash can do balancing with the sun at f/16 it can also do at f/2.8, or even f/1.4 with ND filters. Big flashes, small flashes – doesn’t matter. You are simply taking aperture limitations out of play.

    Example:

    You could wrap three speedlights around an athlete for a very cool mid-day portrait. All hard lights — high front key, and two back/side rims. At a 250th of a sec, you’ll need to light your subject to ~f/16 or so (depending on the ISO) to balance the sun. More if you want to overpower it.

    That takes a lot of light. But close-in, bare speedlights can absolutely do it. And any decent monobloc or pack-and-head could do it without breaking a sweat.

    The problem is your backdrop — maybe you want to blow it out. Maybe it looks like crap at f/16. Maybe your sensor dust is starting to look like a scene from Jurassic Park.

    The important thing to know is that the flash/ambient relationship is not going to change. You need the power to compete with the sun. But now we want to bleed some aperture out and lose the background focus.

    To take your exposure from 1/250th at f/16 to 1/250th at f/2.8, you will need to place five stops worth of neutral density filter over your lens. This will maintain the flash-to-ambient balance, while knocking the light down.

    (If you put it on your flash, you would be giving yourself big problems — unless maybe your flash has a thermonuclear setting or something. And you still would not be able to get your aperture down.)

    So, what kind of ND filters to consider?

    As always, there are choices. And some of those choices depend on your wallet. Here are three.

    The Budget Option

    You can get a typical-brand ND filter for about or less, which is very tempting. This is the route you will probably try first — I did. Unfortunately, it was a learning experience. Here’s why.

    I bought a Tiffen 77mm ND filter that cut three stops of light. Cheap, fit my lenses and solved the problem, right?

    Wrong.

    The sharpness was not what I had hoped it would be. But there was also a color shift — it was a kind of weird warm that sucked the color out of the sky, which was exactly what I would typically be using as a backdrop with the NDs.

    Granted, it is very difficult to make an optically pure ND filter of that strength, and maybe was a pipe dream. They got the “density” part down. The “neutral,” not so much.

    But on top of that, it was like my first microwave oven. It had two settings — off, and nuclear. What I found is that I needed variability to solve different problems. Sometimes 3 stops was okay. Often I needed more — or less.

    In the end, it went into a drawer. lesson learned.

    The Pay-As-You-Go Plan


    Being younger and wiser, my friend JoeyL skipped the dime store version and went for a set of Lee 4″ polyester ND filters. The good news — they are both sharp and cheap — on an absolute basis.

    The bad news, they are basically a consumable. They will scratch, and you will have to replace them.

    This is the way the Hollywood folks roll when making movies. You’ll need a 4″ gel holder (probably “pro shade” combo) and a filter for every ND value you use. If you always work in full sun and want to go to f/2.8, this might be a good option for you. But you will use up the filters and have to replace them.

    If you need variability in your ND filters, it could get to be expensive pretty quickly and do so in an ongoing way. That said, Joey seems very happy with the 4″ gels and his photos of course look amazing.

    He also uses it for wide-open movies with his Canon 7D. Above, he is shooting footage from inside a seaplane over Dubai earlier this year.

    Pretty intimidating looking setup, if you ask me. Very Cecil B. DeMille.

    If you want to use ND sparingly (and you are very careful by nature) the 4″ polyester filters can be a very reasonable option that will give you very good results. You’ll probably want to buy one that will get you from your full-sun aperture to your wide-open aperture. Then maybe a second which will do the same on a cloudy day.

    This will give you the option on a sunny day (with the second, less powerful ND filter) to go to only f/5.6 if you want moderate depth of field.

    The Buy-It-Once Plan

    If you want optical quality, durability and continuously variable densities, there is one option. And it is expensive.

    The Singh-Ray Vari-ND is the ne plus ultra of ND filters. It gives you a “dial-in” setting of anywhere from two to eight stops of neutral density — that is actually neutral. And it is sharp, too.

    Singh-Ray filters have an outstanding reputation, for which one pays dearly. For example, the 77mm Vari-ND filter is 0. As far as I can tell, it is two high-quality polarizers that used together form somewhat of a “dimmer switch” for light.

    But it is a thing of beauty, both in operation and performance. After paying my Newb Tax above, I at least was able to experiment enough to know that I wanted to have the ability to mix flash with any level of sunlight, work at any aperture and with any piece of flash gear. That’s what the Vari-ND let’s me do.

    I’ll probably catch some crap in the comments for such a pricey filter, but I tried the cheap version and that was for nothing. To me, that’s more expensive.

    And yeah, I have given the old Visa card a pretty good run over the last year. But I shot for 20 years with someone else’s gear, and I wanted the next 20 to be with that of my choosing.

    And frankly, it feels very good to finally be done with major purchases for the foreseeable future.
    __________

    Walk-Thru

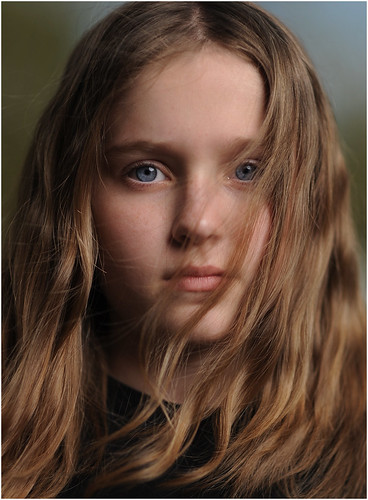
    The photo up top, of my daughter Em, was when I first started using it. Just some learning time with no pressure.

    It is a straightforward shot, done mid-afternoon with a single Profoto head in a 60″ Photek Softlighter II. But the neutral density adds a third variable to your normal f-stop and shutter speed duo. Here’s how I keep from getting too confused by that.

    First, I choose my shutter speed. If I am pushing the limits of my lights (i.e., maybe when using speedlights) I would choose 1/250th. In this case, I had plenty of power so I started at 1/125th. This was simply to give me the ability to alter the ambient background levels with my shutter speed while shooting without hitting my sync limit. And in the end, I shot this frame with a darker background at a 1/250th. Nice to have the option.

    Next, I close down my aperture until I get a background that is the exposure tone that I want. It will be very much more in focus than the final shot will be.

    Now adjust the power on the flash to light the subject. In this case, Em was in the shade of a building (background in full sun) so I was adding light to a nice, dark starting point.

    The flash and ambient relationship now are set. Placing the Vari-ND on your lens will allow you to remove as much light as you want from the photo, and you compensate by opening up the aperture. Rather than go wide open to f/1.4, I stopped at f/1.6 because I know my 85 is sharper there.

    I went pretty wide open here, but I could have shot at any aperture. And I absolutely love that I can do that now.

    The idea of crisp, multi-hard light wraps mixed with squishy backgrounds at high noon gets me a little tingly. Which is much needed, after the numbing effect of buying a filter that cost as much as a car payment.
    __________

    So, do you use ND filters with flash? If so, what kind? What has worked for you? What has left you wanting?

    Sound off in the comments.


    Strobist

  • Gregory Heisler, on Stripping with Derek Jeter

    We pre-empt our regularly scheduled programming today, as we do pretty much any time there is a good BTS video from the likes of Greg Heisler.

    (Ditto you too, Dan Winters, or Peter Yang. Seriously, whip up a good BTS and the joint is all yours for the day.)

    For a little sense of chronological scale, this video lasts about as long as Heisler takes to shoot Jeter. For an SI Sportsman of the Year cover, no less.

    Quick takeaway: Hiding a face light on-axis of a bigger strip light (sorry for that misleading headline, ladies) for “a little more oomph” on the face. “Oomph” being one of those light qualities Heisler learned about when studying with the Great Masters.

    And on the Profoto strip lights — if you have to ask, you can’t afford them. They are not strip boxes. They are strip lights. Completely different animal. They are apparently made in Sweden by elves using pixie dust or something even more expensive.

    I am working on a DIY version for speedlights, made out of polished, inside-out Diet Mtn. Dew cans.
    __________

    (More Heisler vids on the Profoto site.)

    -30-


    Strobist
  • Photowalking

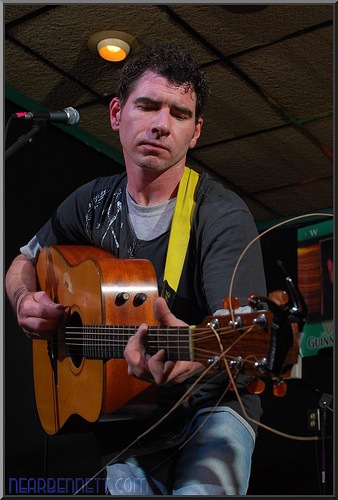
    The past few years have been really a lot of fun for me, photographically. Moments after I decided to jump into this fun hobby of taking photos, I stumbled upon a tiny group of photowalkers. The idea blew my mind. Within weeks I was trying to wrangle together my own photowalk. The first one I […]
    TrevorCarpenter.com » Photowalking

  • lighting essentials advanced workshop – a brief review

    For those not familiar, Lighting Essentials are a series of workshops put on by Don Giannatti (you may know him as “Wizwow” on flickr).   I am a big fan of Don, not only is he an excellent photographer, with years of commercial experience under his belt, but he is also a fantastic teacher – which is just as difficult a skill unto itself.  He’s also a really down to earth guy with a low tolerance for BS and fools, which I find refreshing, particularly in the online photo community which can often turn into a bit of a hive-mind circle-jerk at times (you know what I’m talking about)…

    Anyway, I got to go to his workshop in Philly in ’08 and it was awesome – definitely kicked my work up a couple of notches.   At the time I was already somewhat experienced with lighting, so I wasn’t sure what to expect, but I was blown away; it was amazing to watch Don demonstrate things that I already “knew” lighting wise, and still be able to pick up something new – a new way of thinking about it, new ways of analyzing and constructing and deconstructing light.

    A few weeks back, I had the opportunity to attend the advanced lighting essentials ‘shop down in Baltimore.  Different than the standard workshop, this one assumed a baseline familiarity with lighting to begin with – getting a baseline exposure, balatncing flash/ambient, ratios etc… This was fantastic, as we were able to jump right into working with little “catch up” required.  The format was well done. Don split us up into groups, with various assignments/challenges – in the morning we worked “in studio” talking about and working on precision lighting techniques for still life/objects.  I gained a whole new respect for product photographers – it’s a lot more difficult than you’d think.  One light, and lots of carefully placed white/black cards/diffusers etc…  I particularly appreciated this as it  really made you focus on analyzing and constructing light carefully rather than the “throw some strobes on it till it looks good” approach which many lighting novices seem to take.

    In the afternoons we worked with models,  but instead of the standard “how to light/balance” we focused more on creating a mood or complex lighting schemes – sometimes using 4, 5 or more lights – little accents and subtleties to construct a meaningful lighting scheme.   Now I tend to be more minimalist in terms of my own lighting (I tend to favor zero, one or two lights – rarely more) but even so it was valuable to concentrate on the subtleties of the lighting scheme as a whole.
    One of the things I like the best about Don’s workshops is that it’s all hands-on.  There’s no “sit around and listen to the instructor talk about how great he is” for 6 hours, as is the case with many “workshops” – Don has everyone jumping right in and shooting right off the bat.  It’s simply “talk about technique -> apply technique”.   Good stuff.   We also spent quite a bit of time talking business.  Don has been a full time photographer as well as designer and creative director for many years, so he has a fantastic amount of the experience in the industry and shares freely.  There are few things more valuable for a new photographer than the lessons of experience from someone who has “been there and done that”.   It’s like going through the school of hard knocks without having to take the knocks.
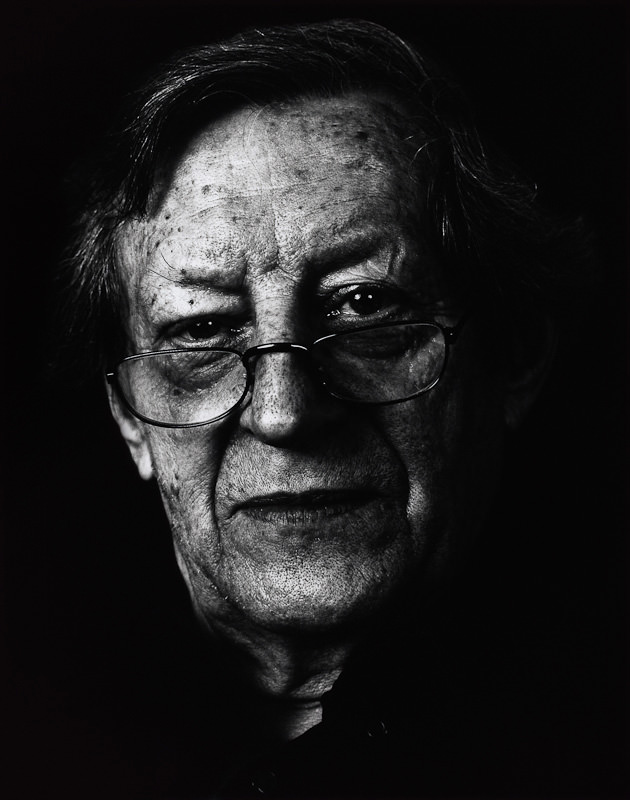
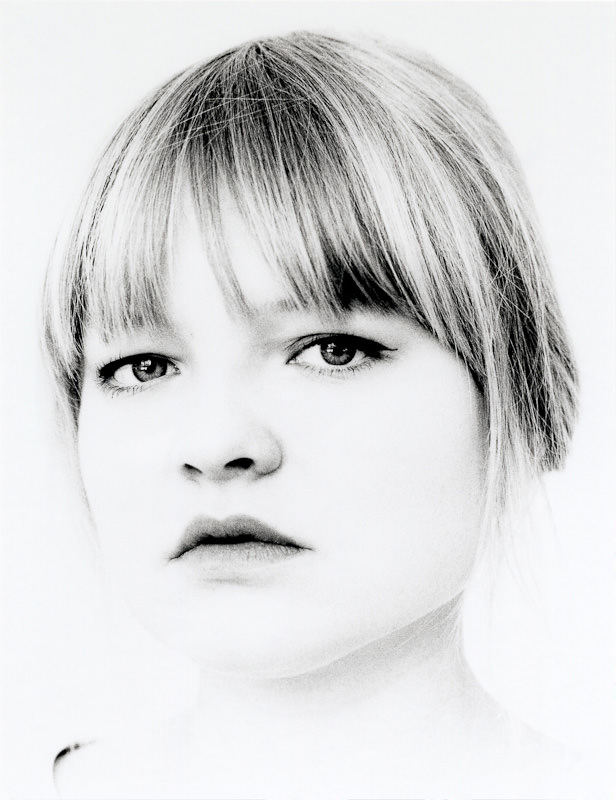
    To sum up, aka the TL;DR version:  if you get a chance to attend one of Don’s workshops, go for it – it’s worth every penny.  What boggles my mind is that folks who will drop thousands on a new camera body or lens, are so hesitant to spend money on education or workshops.  I can say without reservation that the couple of hundred bucks for the LE workshops improved my work far more than any gear purchase I have made (and yeah, I’m also guilty of chasing the latest and greatest toys when it comes to gear).

    finally some shots from the ‘shop:

    Tweet This Post Stumble This Post


    ed | zawadzki

  • Camera Exposure

    In photography, ‘exposure’ means the amount of light that falls onto the sensor of your digital camera. In modern cameras the exposure is usually set to automatic by default and, most of the time, it can be left there and will produce beautiful pictures. There are times though, when the camera lets us down or we want to produce a particular effect and it would be nice to understand what is going on ‘under the hood’.

    Getting a ‘correct’ exposure means recording as much of the relevant information in the scene as possible. In the shot on the left, the important information is the bird. The sky has gone completely white as it was much, much brighter than the bird. If I had let the meter expose for the sky, the bird would have been rendered as a black silhouette.

    Even when the exposure is ‘correct’ the problem with all cameras is that they cannot record the entire range of contrast (black to white) that the eye can see. Especially when you take into account that the eye is constantly adjusting to cope with high contrast. On a sunny day if you look into the shadows of a scene then into the bright areas, the iris in your eye will quickly adjust so you can see detail in both.

    Faced with the task of recording as much information as possible, the camera will try to average out all the light levels and expose accordingly. As burnt out highlights are normally considered uglier than black shadows, the camera, left to it’s own devices, will normally err on the dark side. Which is no good if you are shooting against a bright background. It’s the subject you want to see, and you don’t really care if the background is white.Auto Exposure Modes

    The camera manufacturers have come up with all sorts of ingenious metering systems to try to help, there are now multi mode metering systems, which give you a choice of ‘center weighting’, ‘spot metering’ or ‘multi spot metering’ on many of the better cameras, but none can guarantee to give you what you want every time.

    A common use for this technique is when you are taking a close up shot of two people and there is space between their heads, if you’re not careful the camera will focus on the wall or trees behind them. If the background is very dark or very light this can alter the exposure significantly and result in faces that are too dark or too light.

    Skin tones are what most meters are set up to consider an ‘average tone’, they are also usually the part of the picture that we most want to get right. If I am photographing a group of people in difficult circumstances, like bright sunlight for instance, I will often move close in to the group and take a light reading from someone’s face or, if we are all standing in the same type of light, I will take a reading from the back of my hand. This is no good, of course, if the subject is in bright sunlight and I am in the shade.
    Manual Exposure

    Now it’s time to turn that dial away from ‘program’ mode and have a look at the dreaded ‘manual’ mode. There are also a bewildering array of other choices such as ‘aperture priority’, ‘shutter priority’, ‘exposure compensation’ etc., but once you understand the basics you will be able to select the most suitable mode.

    The amount of light falling on the film is governed by four things.

    • The amount of light reflected from the scene which, if you are outdoors, you can do very little about.
    • The ‘shutter speed’ which is the amount of time the shutter is open, measured in fractions of a second.
    • The ‘aperture setting’ which is the size of the hole through which the light enters. If you look at the lens of your camera you will see a diaphragm in the middle of the glass which the camera adjusts according to the light. This does exactly the same job as the iris in your eye. Aperture settings are measured in ‘f stops’.
    • The ISO setting. This is the ‘sensitivity’ of the sensor. (see ISO Speed)

    The shutter speed and aperture settings have other quite separate effects on the photograph which we will discuss in another article, but for the purposes of exposure, making the picture darker or lighter, they are interchangeable. Make the hole twice as big and open the shutter for half the time and you will expose the sensor the same amount.

    Why use manual exposure?

    The advantage of manual exposure is that the settings do not keep changing as your scene changes. Let’s suppose that you are taking close up photos of cars passing by. Some of the cars will be black or dark colors and some will be light colors or white. If you are filling the frame with almost nothing but car, the meter will be trying to render each car as mid gray. Although it will probably not succeed, what you will notice is that the background is a different shade in each photo.

    I often have to take portraits of people, some are wearing very dark clothes and some are wearing white. If I am not careful with my exposure settings will be affected by the clothes.

    Although it is by no means always necessary to use manual exposure, an understanding of how it all works will save a lot of disappointment. Below are some links to other articles covering various aspects of exposure.

    Any suggestions, ideas? Feel free to comment on this article!

    Back to Top

    BlogPhoto

  • How to Photograph Bands in Bars, Part 3 – Shooting

    A guest post by Music Photographer Rick Bennett.

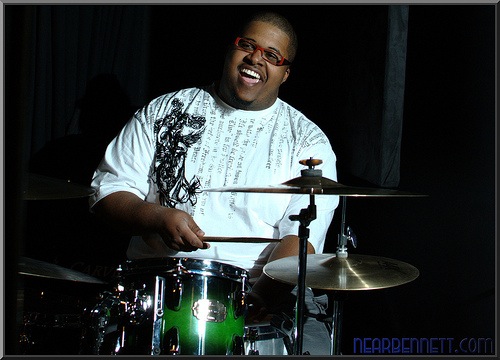
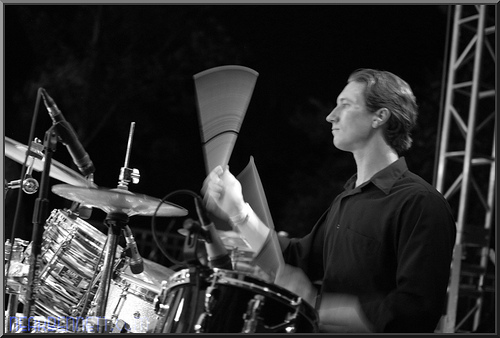
    Drummer, well lit by off-camera flash

    Bars are challenging shooting environments now matter how you slice it–crappy lighting, drunk crowds, cramped spaces. Add in musicians who like to move around a lot, speakers in photographically inconvenient locations, and microphone stands that tend to bisect heads, and you’ve got an ideal situation for a photographer who likes a challenge. In Part 1, I covered the basics of equipment needed to shoot bands in bars: low-noise-at-high-iso cameras, off-camera flash, and mongo glass. In Part 2 I talked about where I’ve found success with placing my flashes, and the camera settings that have yielded the best results. Finally, in this part, I get to the shooting.

    Before you start shooting, take care of your ears so that you can do this more than a couple of times–buy some ear plugs at your local hardware store (near the goggles and other protective gear) or pharmacy (near the sleep aids). I find I spend a significant amount of time standing right in front of the speakers, and my ears are ringing pretty badly by the end of a performance if I don’t use ear plugs. Even with the plugs in, you’ll be able to hear every part of the performance.

    While shooting, you must be polite. Most people are accommodating if you step in front of them for a moment to make a shot, but do that too frequently or for too long, and you’ll start to irritate the fans of the band. Remember that the band is there to perform for their fans. The pictures you make are secondary to that purpose. I’ve only been in one situation where I felt like my presence as a photographer was not appreciated by one fan–I finished the shot and stepped off the dance floor. The huge majority of the time, people are very forgiving of me moving in and out of the crowd in order to get the shot I want. But I’m very careful to not obstruct any one person’s view for more than a few seconds–no more than any other fan would obstruct their view.

    The easiest way to stay out of the fans’ view is to crouch down for the low angle. Most big bands perform on a stage that is raised several feet above the heads of the crowd so that everyone can see. Bands who play in bars don’t generally have this advantage, but you can create that look by taking pictures from low angles. The shots look cool, and the fans will appreciate not having to look around your f/2.8 lens to see their favorite guitar solo.

    Shot from a low angle to stay out of the way

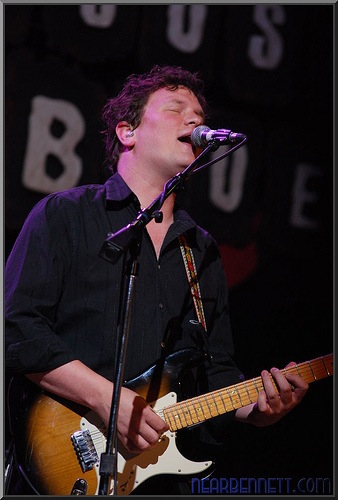
    I find the most challenging aspect of shooting musicians is composing shots without microphone shadows or severe instrument shadows. This isn’t a problem for guitars, but any instrument that is close to the face can be problematic, e.g. saxophone, trumpet, violin/fiddle. The shadows are easy to see if you’re shooting with ambient stage lighting and no flash. But with remote flash, it means you have to be on the same side of the instrument or microphone as your flash is. In this lighting diagram, if the left flash fires, the microphone will cast a nasty shadow across the singer’s face. If the right hand flash fires, no shadow problem. So you have to stay close to the flash, but not so close that it looks like on-camera flash.

    Off camera flash, no microphone shadow

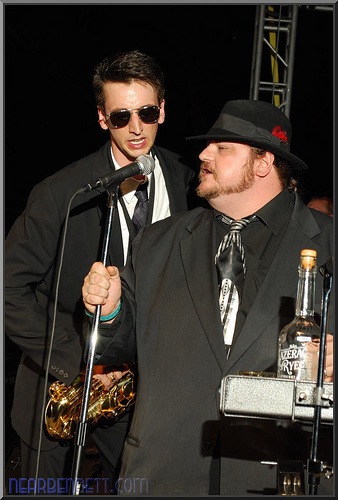
    The other major compositional challenge is getting pictures framed so that microphones and stands don’t detract from, or steal attention in, the photo. Microphones and stands are part of a performance, but I don’t like them to dominate a picture. For example, if I’m framing two musicians in the shot and the microphone from one musician is covering the face of the other, I won’t take the shot (or I’ll delete it later). I’ll change my position, or wait until the musicians change theirs if I can.

    I also don’t particularly care for shots from dead-center on a signer. It will look like they’re eating their microphone, or worse, have it shoved up their nose. That’s why I tend to take pictures from the side–I get great shots when the singer pulls back from the microphone a little bit so that you can see their whole face.

    Singers pull back from microphones to reveal their whole faces


    If I’m shooting the gig for the band, or in the hopes that the band will hire me in the future, I’ll work through the following shot list during their performance:

    • a couple of shots of every member of the band. If some play and sing, I’ll capture them doing both.
    • detail shots, generally closeups of instruments during a set break. Not all of them, just those that strike me as interesting photographically.
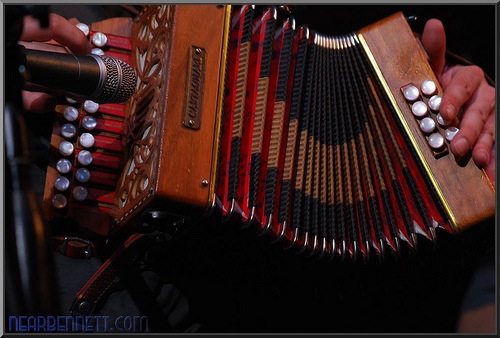
    • detail shots of instruments being played. Again, not all of them, but whatever strikes me as interesting at the time. I love shots of accordions!
    • motion blur of fingers on instruments, usually a guitar or bass. No flash here, just a 1/15 to 1/60s shutter, and up close with a f/1.8 lens. The challenge here is to capture a moment where the instrument isn’t moving very much, but the fingers are.
    • any time the band interacts with the fans or fans enjoying the show, e.g. clapping, dancing, rock hands, etc, with band and fans in the frame
    • a group shot where a) all the band members are visible in the frame, and b) everyone is playing, and c) a little bit of audience

    Accordion!

    Finally, be sure to give the drummer some lovin’. Drummers are usually in the back, with no stage lighting whatsoever, and as such, they rarely have pictures taken of them. I’ll even change the angle and power of remote flashes if I need to in order to capture a drummer. I make it my mission to capture at least one killer image of the drummer before I go home for the evening. If the drummer has any ambient lighting hitting them at all, a slow shutter will create some great motion blur.

    Drummers need great photos too!

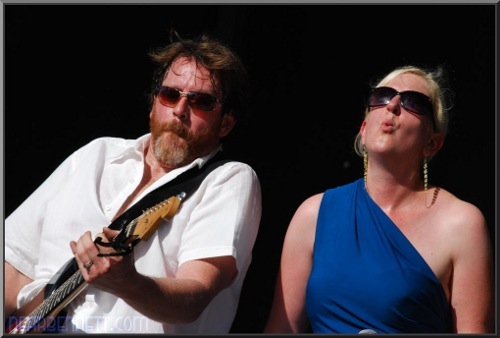
    When taking all of these pictures, I’m looking for “music faces”–points where the musicians are clearly enjoying themselves, and “music moments” where two (or more) musicians are jamming together. These are the images I really like to see. When I look at my images in post processing, I can tell who captured my attention photographically because I’ve got a lot more images of them. And I’ve walked away from shooting some gigs (not paid, or pre-arranged by the band) because the musicians weren’t performing–they just stood there playing their instruments. Meh, that’s no fun. I could have taken five shots and have faithfully captured their performance.

    Music Moment and Music Face in one shot

    Make sure the band knows how to get in touch with you by the end of the performance. They’ll definitely have noticed you (especially if you have that 70-200 f/2.8 lens) and are probably interested in seeing your work.

    What you do with the images and how you processes them will depend on your purpose in taking them. If you wanted to get the band’s attention and hopefully have them hire you, then pick a handful of the best and get them on-line in a hurry. That will help solidify in their memory that you were the one taking pictures, and, holy cow, you took some great ones! If the band had already hired you, then I assume you’ve already worked out a method of payment and delivery.

    As you’re going through the images from the night, don’t sweat the deletes. I typically keep only 1/4 to 1/3 of the images from a night of shooting. And the band doesn’t see those out-of-focus poorly framed shots.

    Don’t wait for the band to contact you–reach out to them through whatever means possible: Facebook, Twitter, their website. Let them know where to see your work and how to contact you for more.

    Good luck! And share your work in the forums.

    Rick Bennett has been shooting bands in bars, at festivals, and on big stages for about a year. You can see more of his work on his blog, portfolio, or Flickr stream.

    Post from: Digital Photography School – Photography Tips.

    dpsbook.png

    How to Photograph Bands in Bars, Part 3 – Shooting


    Digital Photography School

  • Probieren geht über studieren! Oder?

    Tobias Kappel ist 22 Jahre alt und studiert an der Muthesius Kunsthochschule in Kiel. Er beschäftigt sich erst seit 2 Jahren mit der Fotografie, wobei viele seiner Arbeiten analog entstehen.

    Der folgende Erfahrungsbericht soll euch einen Einblick in das Studium in Kommunikationsdesign mit dem Schwerpunkt Fotografie geben. Vielleicht kann das hier dargestellte aber auch für den ein oder anderen eine Anregung sein, mal wieder analog zu fotografieren.

    Wo fängt der Himmel an…

    Die Faszination war meine größte Motivation und so suchte ich nach einem Weg, der mir eine Zukunft im Bereich oder mit der Fotografie ermöglichte. Klar dachte ich zuerst an ein Studium in Fotografie selbst. Ich wollte mich jedoch nicht nur auf dieses Medium festlegen und wusste, dass ein Studium in Kommunikationsdesign mir fotografisch gesehen keine Grenzen aufzeigen würde. Ich denke, Niemand kann im Zuge der digitalen Revolution sagen, was morgen ist. Mein Studium bietet mir die Chance Crossmedial zu arbeiten, weshalb meine Entscheidung gegen die Fotografie, auch eine für sie war.

    und wo hört er auf?

    Thematisch gesehen sollten wir uns im ersten Semester mit dem klassischen Portrait beschäftigen. Hierzu musste jeder unterschiedliche Personen vollformatig portraitieren und das sowohl mit einem Tele- als auch mit einem Normalobjektiv. Insgesamt sollten am Ende mindestens 6 Aufnahmen gezeigt werden, wobei 3 handwerklich anspruchsvoll ausgearbeitet sein mussten.

    Die verbleibenden Bilder konnten mit dem klassischen Handwerk brechen und daraus ihre Kraft schöpfen (sog. Punkfotografie). Darüber hinaus sollte mit einem Weitwinkelobjektiv ein Halbakt-Portrait vor Ort und nicht im Studio erstellt werden. Realisiert wurde das Thema mit Hilfe der analogen s/w-Technik.

    02

    In den ersten Tagen des Studiums wurde ich mit Namen konfrontiert, die ich vorher noch nie gehört hatte. Richard Avedon, Nobuyoshi Araki, Robert Mapplethorpe oder Wolfgang Tillmans, um nur einige zu nennen. In unserer hochschuleigenen Bibliothek konnte ich Bildbände wälzen, die ich hätte niemals bezahlen können. Darüber hinaus widmete ich mich, schon in die Tage gekommener Pflichtlektüre, von Amsel Adams – Die Kamera / Das Negativ / Das Positiv.

    Anfangs stand das Verstehen der Technik im Vordergrund. Wir besuchten parallel zur Fototheorie einen Grundlagenkurs in Gerätetechnik. Vielen war die Auseinandersetzung mit der Technik einfach zu komplex. Als man uns dann lediglich das Entwicklungsverfahren für einen Kodak T-Max 100 erklärte wobei es draußen so langsam Winter wurde, wandten sich viele ab. Probieren ging also erstmal über studieren 😉

    03

    Schnell äußerte sich allerdings auch ein Unverständnis gegenüber dem analogen Verfahren. Welchen Mehrwert sollte diese in die Jahre gekommene Technik schon haben? Viele von uns besaßen keine analoge Kleinbildkamera, die Kosten für Chemie und Papier förderten den Missmut nur.

    Meine Erfahrung ist es, dass ich durch den Umgang mit analoger Technik gelernt habe, anders zu sehen. Darüber hinaus bin ich offener gegenüber experimenteller Fotografie, da diese sich durch das häufige Scheitern fast selbstständig ergibt. Heute versuche ich so oft wie möglich analog zu arbeiten. Ich nehme mir demzufolge die Zeit, die Fotografie mit Hilfe ihrer Vergangenheit zu verstehen.

    Klassik vs. Punk

    Die hier gezeigten Fotos sind das Ergebnis meiner Abschlusspräsentation im ersten Semester. Lediglich das Halbakt-Portrait wird hier nach Absprache mit der abgebildeten Person nicht gezeigt. Alle Arbeiten wurden auf Ilford Multigrade IV RC Deluxe Papier / 24×30,5cm vergrößert. Ich selbst erwartete von mir, mich jeder Aufgabe zu stellen.

    04

    Ich fotografierte dementsprechend mit einem alten 50mm f/2.8 Tessar von Zeiss, dem 85mm f/1.8 Nikkor und lieh mir manchmal eine Leica R4. Die ersten Bildbesprechungen mit meinem Professor verliefen anders als erwartet. Schnell wurde klar, für jedes gezeigte Bild einstehen zu müssen. Kritisiert wurde alles.

    Nebenbei fielen immer wieder Bemerkungen zur Fotografie an sich. Wir müssten uns ihr bewusst werden gleichzeitig aber unsere Rolle als Fotograf dem gegenüberstellen. Was ist überhaupt ein Foto? Eine Momentaufnahme der Realität, die Interpretation der Kamera oder doch das, zu was es der Fotograf gemacht hat?

    05

    Beeindruckt von diesen kritischen Anmerkungen zum fotografischen Prozess, begann ich die Fotografie zu hinterfragen, bevor ich sie überhaupt verstand. Während der ersten Monate versuchte ich, Aufnahmeverfahren die ich schon digital angewandt hatte analog zu übertragen.

    Konsequenz waren die klassisch angelegten High- und Low-Key Portraits. Das hier gezeigte Low-Key entstand mit Hilfe einer Studioblitzanlage und einem hochauflösenden Orthopan Ur ISO 20 Film von SPUR. Ich wollte dieses Foto unbedingt. Ich entschied mich also bewusst für die langweilig anmutende Schlüssellochperspektive, die Ausarbeitung der Hauttöne sowie dem Model. Als Kritik bekam ich lediglich “langweilig” zu hören.

    Ich wusste nicht damit umzugehen, nahm das Foto aber trotzdem in meine Präsentation auf und orientierte mich um. Das nicht betitelte, sich in Unschärfe auflösende Portrait einer Kommilitonin war ein Ergebnis dieses Prozesses. Die Anregung für das Spiel zwischen Unschärfe und Bokeh lieferte mir übrigens ein Beitrag zum Lens-Tilting hier auf kwerfeldein.de.

    06

    Das Semester näherte sich dem Ende entgegen und ich konnte mich einfach nicht mit der Punkfotografie identifizieren. Andere zerkratzten ihre Bilder, bemalten sie oder vergrößerten sie durch einen Teebeutel hindurch. Und ich? Ich wollte dem Medium entgegen treten.

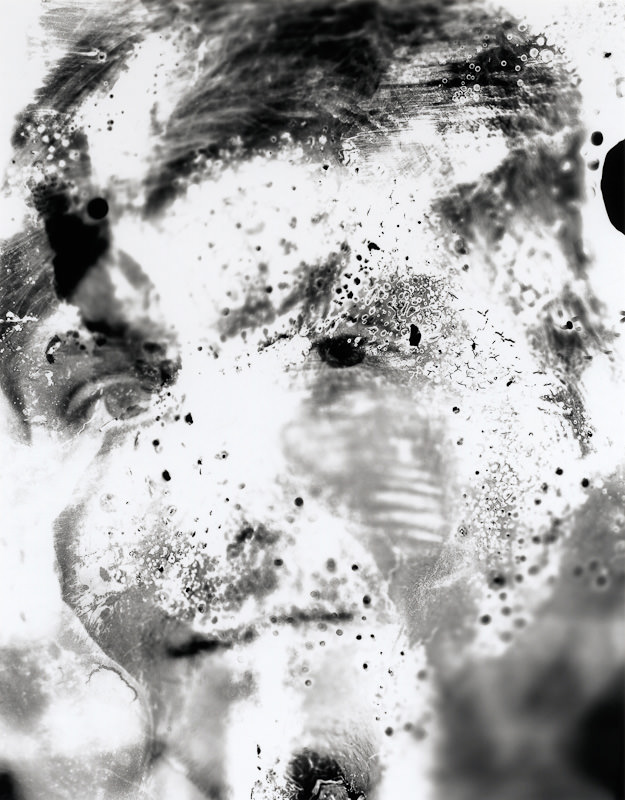
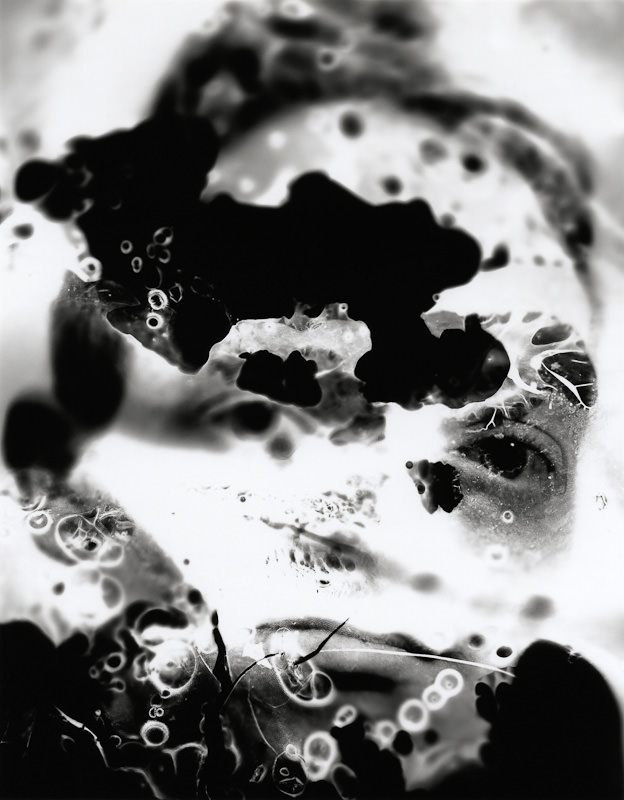
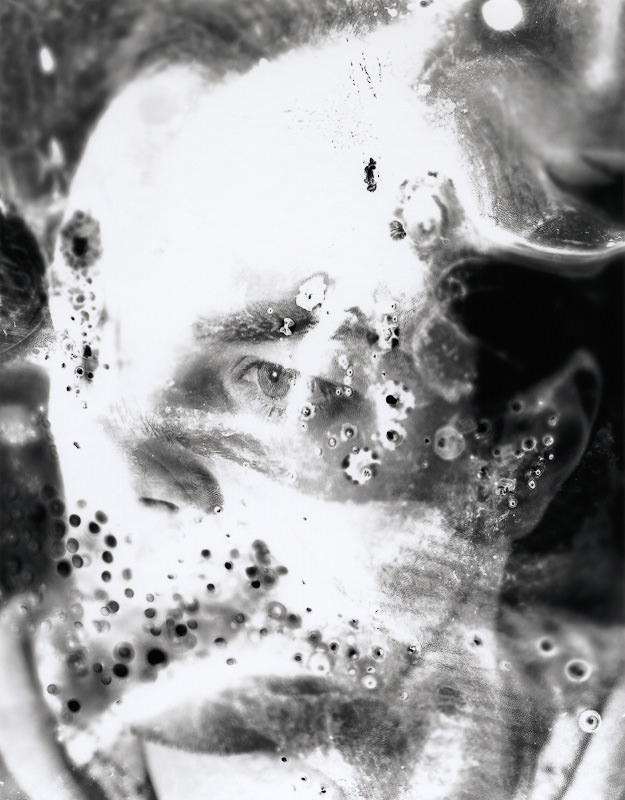
    Mich hatten schon immer Fotos gereizt, die Verwitterungsprozessen ausgeliefert waren. Hierbei empfand ich die dem Prozess geschuldete Ästhetik als eine Auseinandersetzung der Natur mit dem Medium. Ich selbst fand darin meine Inspiration. Meine Vorstellung war es, den Film so weit wie möglich aufzulösen bzw. anzugreifen ohne die abgebildeten Personen zu stark zu deformieren.

    Das Ergebnis ist eine Serie bestehend aus 3 Bildern (von ca. 50) die durch Wärme und Kälte verfremdet wurden. Bedingt durch den Zustand der Negative können diese niemals wieder so vergrößert werden.

    Ist der Himmel die Grenze?

    Auf mich warten in den folgenden Semestern Aufgabenstellungen zur narrativen Fotografie, inszenierter und manipulierter Fotografie sowie der angewandten Fotografie. In Zukunft werden wir die Technik zur Umsetzung unserer Arbeiten frei wählen können.

    Was haben das analoge Mittel- oder Großformat für Potential? Wäre es zu früh, sich schon dem Digitalen hinzugeben? Ich kann euch diese Frage heute noch nicht beantworten aber vielleicht können wir auch weiterhin hier auf Kwerfeldein darüber in einen Dialog treten.

    Bei Fragen und Co hinterlasst einfach einen Kommentar!

    ***
    Werbepause: Buchtipp – Vom Alltäglichen zum Besonderen!


    KWERFELDEIN | Digitale Fotografie