Category: Uncategorized

  • Meet the New Neighbors


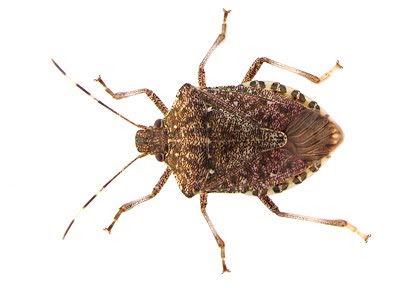
    The area where I live has been overrun by Halyomorpha halys, AKA stink bugs. They are invasive (from Asia) have no predators in this region and are … everywhere. They even became an issue in coaching Ben’s soccer game last sunday.

    “If one lands on you and you have the ball or are closely defending someone, just let it crawl around on you. It won’t hurt you. You can flick it off when the ball is in another part of the field…”

    They are a little over 1/2″ long, and mobile. I photographed one for a local photo project earlier this week, using a very simple light diffuser / bug restraint device that works well for anything very small — moving or not.
    __________


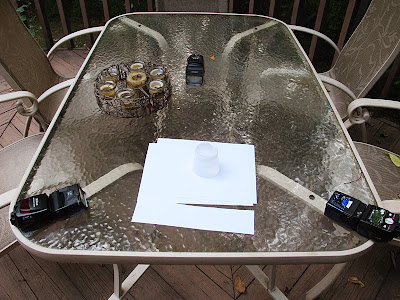
    I used two common household items to shoot the bugs — a white plastic cup and a piece of printer paper. (Or, if you are over 40, typing paper.)

    The paper makes a great seamless background for any small subject. The cup (upside down with the bottom cut out of it) is perfect as a light tent. And with your lens jammed in the hole, there is no escaping for your subject. Just spread one or more flashes around the table as shown, and you will have all the aperture you need to hold focus through any small object when shooting macro.

    It is variation of the Macro Studio, as you are essentially creating a container that is also a light modifier. And once you set it up, your thinking is pretty much over. Just tweak your settings, point and shoot.

    You can do this with just one flash, but the light will be more directional and pretty hot on one side. Remember — the surface of the cup becomes your new light source, and the distance rules still apply. So, two flashes is better and three means that whatever is crawling around will always be pointed in the direction of one of the hot spots on the cup. More than three flashes is probably overkill.

    You’ll want to work in manual mode. Set your shutter at the highest speed at which you can sync. This will help kill ambient light that might be a bad color, or coming in from the top. Close your aperture down as far as it will go — you’ll need the depth of field — and set your ISO down to its lowest setting.

    You should have your available light pretty much nuked by now. Set the flashes on the lowest power level in manual, and move them in or out until your exposure is good.

    You will have plenty of power. Probably too much, even. Mine were on 1/128 power and I still had to move them back this far to be able to shoot at f/8 @ISO 80, which was as far as I could go with my Canon G11. (I use my point-and-shoot most of the time when shooting tiny objects, as those kinds of cameras usually have great macro modes by default.)


    Here’s what the picture looked like pretty much out of the camera. The light is even, but coming from three different directions and yields a ton of detail. As bad as they smell, they look pretty cool up close. Like aliens with armor, done in a designer color scheme.

    Especially when shooting something dark, it is easy to adjust the curves to get a nice, blow-away white background. You might have to clean it up with the dodge and burn wand, too. Or, you could leave tone in the paper and include that texture (or any other background you used) in the photo.
    __________

    A Special Invitation to Laotian Readers

    I read on Wikipedia that stink bugs are considered to be a delicacy by some people in Laos — because of, not in spite of, the smell. They grind them with chilies and spices and serve the paste up with glutinous rice. (Mmm-hmm-hmm… stink bugs and glutinous rice…)

    Well, then. If anyone is hungry for some primo stink bug, Howard County, MD in the USA is where you want to be. Think of it as stink bug destination tourism. We have them by the millions — fresh and ready to eat. And you are more then welcome to come and help yourself to as many as you want.

    Because we are getting tired of them.

    UPDATE: From Walt in the comments, a real recipe for stink bug paté. Mmm-boy!


    Strobist

  • My Photography During the 2010 Missouri River 340 Race

    Photography has been a part of my racing since the 2005 Texas Water Safari when I bought the first compact waterproof camera available – Pentax Optio WP. Missouri River 340 race is easier for photography since it is open water without any portages. Nevertheless, photographing before, during and after a long endurance race is always a challenge.

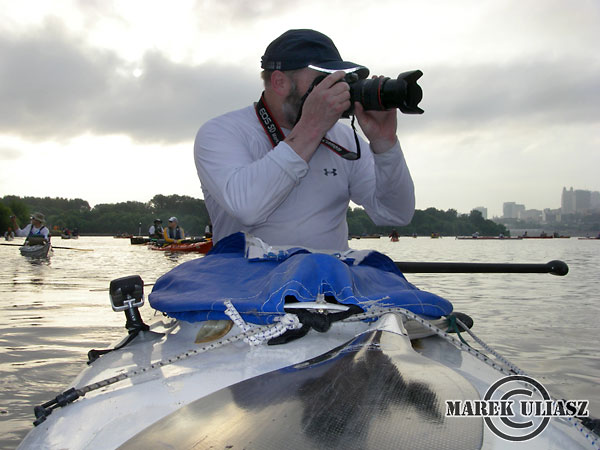
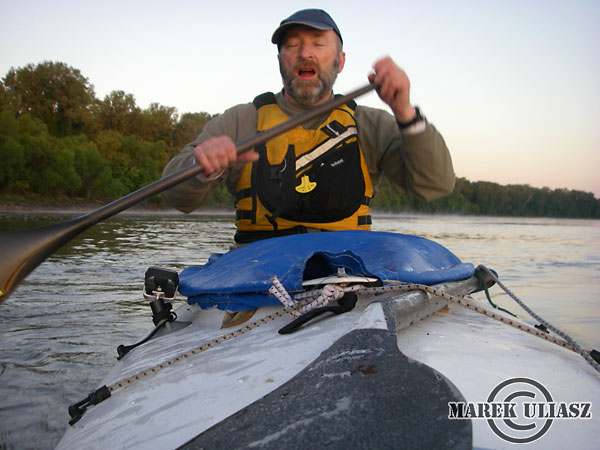
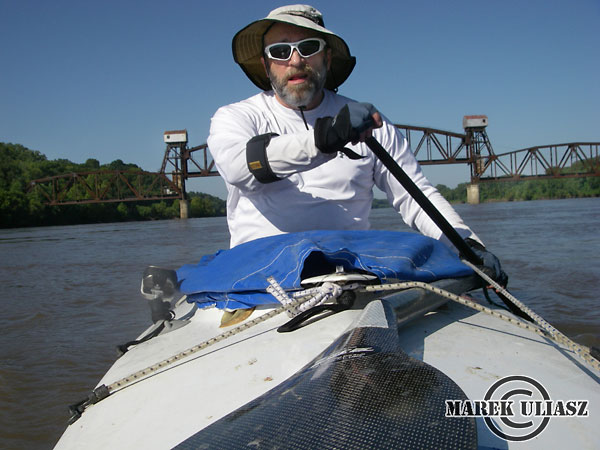
    I paddled my Sea Wind canoe during this year MR340 race and used two cameras: my main DSLR – Canon 5D with 35-70mm zoom lens, and waterproof Pentax Optio W30 mounted on a bow.

    Before the race

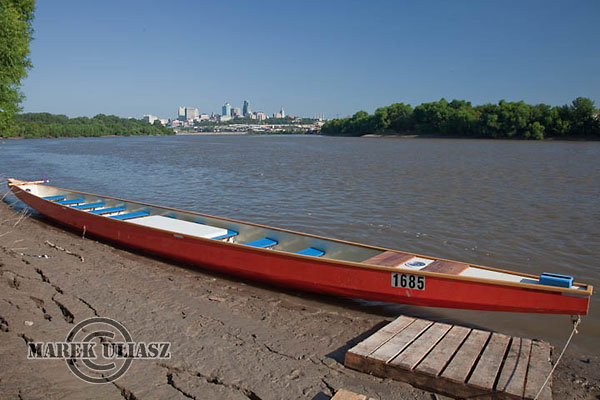
    mr340-2010-3w
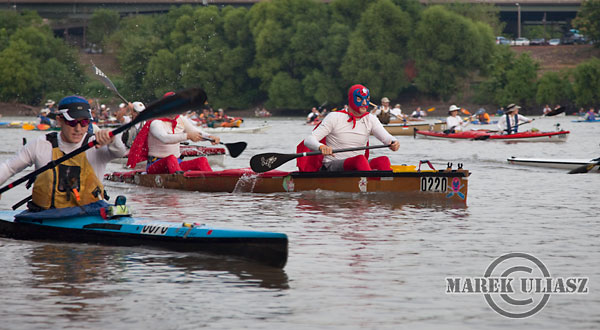
    One of my pictures shot a day before the race. A dragon boat at the Kaw Point “beach”. Camera: Canon 5D. I visited Kaw Point with a camera twice during that day.

    Kaw Point – race start

    mr340-2010-bow-camera-0
    Photographing the race start. Kaw River with Kansas City skyline far away at a background. It was pretty dark, cloudy, not so good light for photography. A view from my bow camera (flash fired).

    mr340-2010-kaw-point-1w
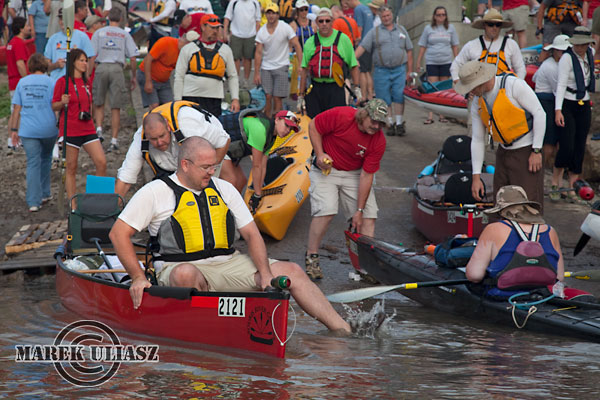
    A busy boat ramp about half hour before the start. Tighter shots turned to be much better that a general scenery pictures. Camera: Canon 5D.

    mr340-2010-kaw-point-8w
    One of my pictures from the race start. The right bank of the Kaw River was really muddy, so I was shooting from my boat. Camera: Canon 5D.

    The Canon camera stayed in a waterproof Pelican case for the rest of race. I really regret that I didn’t take it out at a beautiful foggy morning below Hermann. It was already third day of the race. I was pretty tired and a tennis elbow problem was affecting a grip in my right hand. ZRE paddle is much lighter than a DSLR camera.

    Award ceremony at St Charles

    mr340-2010-bow-camera-10
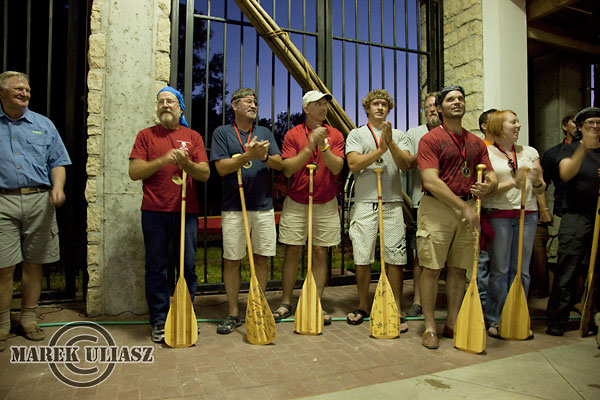
    A part of the dragon boat crew during an ward ceremony. I was shooting with Canon 5D hand held with available light at high ISO (2000). Just a few shots were successful. Perhaps, I should think about some flash setup for the next year.

    Bow camera setup

    sea-wind-pentax-2

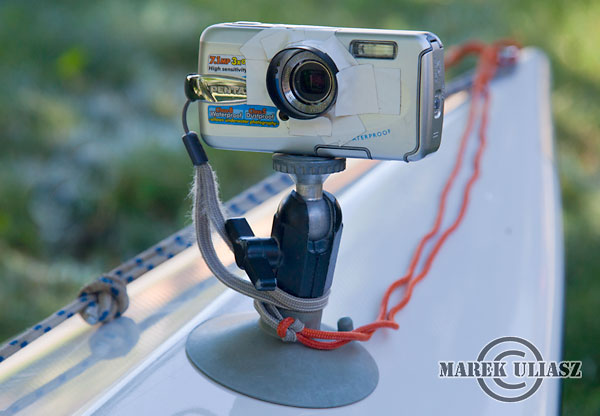
    A waterproof Pentax Optio W30 camera was mounted on a bow of my Sea Wind canoe with Sticky Pod suction cup and a mini ball head. Normally, I am using a smaller and light knuckle, but during the race it was used to mount my Garmin Etrex GPS. A tether is always mandatory with anything mounted on a deck with suction cups. Sticky Pod cups are holding pretty well on a clean deck, especially, when rinsed with water before mounting. This time I rinsed my deck with a river water which leaves a lot of silt residue when drying. As a result my camera felt off the deck once and I got one underwater shot. I didn’t have that problem in previous races when I used my drinking water to clean the deck.

    I have several blog posts on Stiky Pod suction cups including a review and different applications.

    I am using an improvised lens hood on my Pentax to protect the lens against direct sun light and splashes.

    The camera was set in a lapse time (interval) mode to shoot a picture every 4 minutes (medium quality) during ~60 hour race. Unfortunately, I forgot to turn camera flash and a battery went dead after 500+ covering about 36 hours of the race. Without a flash I would have a full coverage.

    Below the are examples of pictures shot by my bow camera under different light conditions. I am hoping to prepare an animation using all frames.

    mr340-2010-bow-camera-1
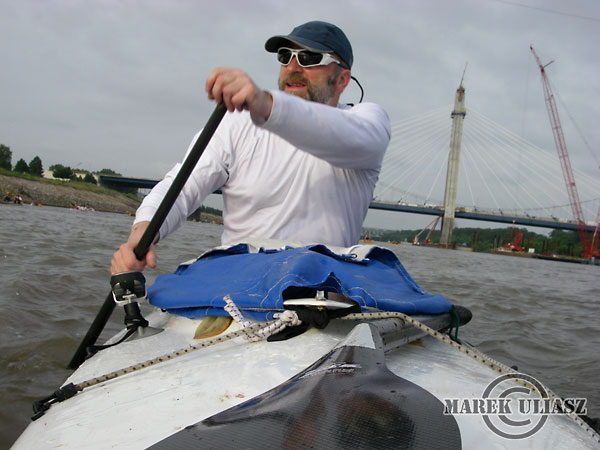
    Paddling under bridges of Kansas City. Pictures from my bow camera turned to be pretty good in these cloudy conditions with just a little bit of sun.

    mr340-2010-bow-camera-2
    A few miles further downriver.

    mr340-2010-bow-camera-4
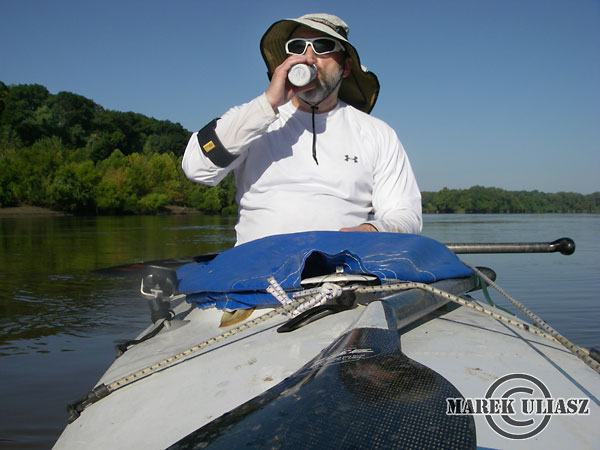
    A bottle of Ensure Plus is going in. A sunny afternoon.

    mr340-2010-bow-camera-9
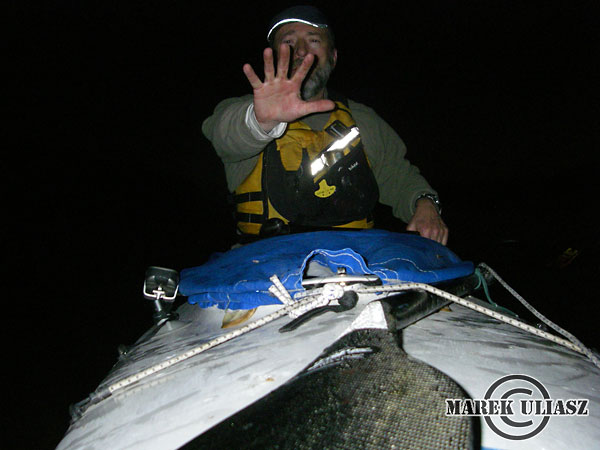
    Night time pictures with a flash from my bow camera were not very good …

    mr340-2010-bow-camera-7
    And, being blinded by flash at night every four minutes was not a fun. I couldn’t sleep!

    mr340-2010-bow-camera-8
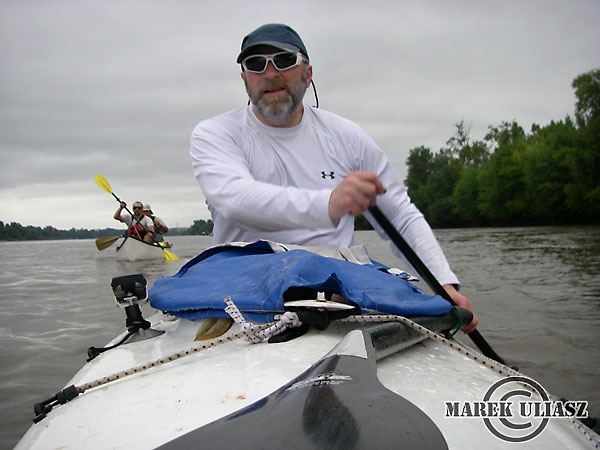
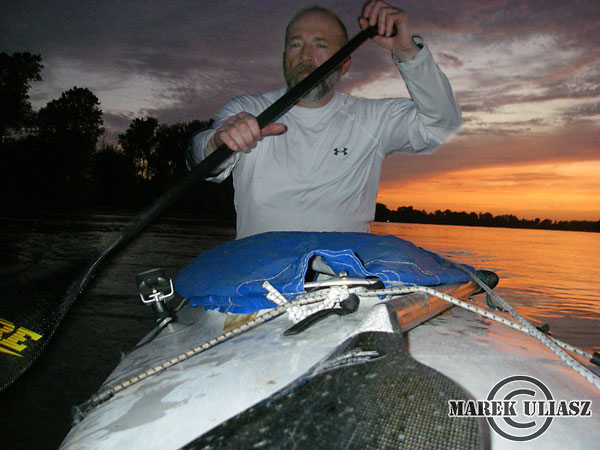
    Sleepy, tired or bored? A very early morning, second day of the race. Still in my night time clothes and a full life vest instead of an inflatable belt jacket which I used during daytime. Nights were pretty chilly.

    mr340-2010-bow-camera-6
    Passing under the old railroad bridge at Boonville.

    Other pictures

    Of course, I shot also a lot of pictures not related directly to the race, e.g., during my Amtrak shuttle back to Kansas City, or during short trip to St Louis and the old Chain of Rocks bridge over the Mississippi River.

    Next year?

    Everything depends on what boat I would paddle. I will consider a bow camera in a lapse time mode again, but without a flash. However, I would also like to have another compact camera ready to use. If I take Sea Wind canoe again I will try to photograph the race start with my DSLR camera. Probably, I will pack it in a soft waterproof bag instead of heavy Pelican case.

    Pictures for prints or downloading

    I am making some MR340 pictures available for ordering as prints or digital downloading in my stock photography website. More pictures are coming there.

    Related posts:
    120 Pictures from the Missouri River 340 Race
    3 Years of the Missouri River 340 Race series:
    Bryan Hopkins, West Hansen, Christina Glauner, Chuck and Di McHenry, Katie Pfefferkorn
    My Experience in Three Famous Ultra Marathon Paddling Races


    paddling with a camera

  • How to Photograph Natural Looking Portraits

    In this post, Hawaii wedding and portrait photographer, Natalie Norton talks about how she achieves natural, relaxed portraits from her clients.

    natural-portraits-header.png

    Here’s the scoop. This is how I do things. You don’t have to do them this way, you may have a system that works better for you, if so, please, do tell in the comment section of the post. I just want to make it perfectly clear that this is MY system, not THE system for creating natural portraits. Take it or leave it! Enjoy.

    I think people work on the presumption that in order to create a relaxed portrait, a shot that has that natural, genuine candid feel we all love in our photographs, you have to back off completely and just capture the moments as they unfold. This is completely true and completely false all at the same time. I’ve found that subjects who aren’t given good, sturdy, confident direction have a VERY hard time feeling relaxed and therefore looking natural. They end up acting awkward and looking incredibly posed when in reality the exact opposite holds true.

    Creating relaxed portraits isn’t complicated in any way shape or form, but you do need a system. Here’s mine, step by step.

    1. Get to know your subject

    Even if it’s just a little small talk, you’ve got to take a second to break the ice with some informal conversation. For me this starts all the way back when I’m emailing back and forth with clients setting things up for their shoot. I try as hard as possible always to be myself, so they get to know me and are comfortable with me from the start. My style of photography is an extension of my personality, so it’s really important that people feel comfortable with me. It helps them feel safe and open to give me their genuine selves at a portrait session, and frankly it helps me get to know them as well. Once we start shooting, I generally have a pretty solid feel for my clients. I know what they need from me to help them be at their best.

    2. Plan on a few shots to break the ice

    I always expect the first 10 or so shots to be junk. I’m nervous, my subject’s nervous and that just doesn’t equal awesome. Does that mean you wait for nerves to settle before you start shooting? Absolutely not. Get in there, get working and things will loosen up within just a few minutes. It’s like jumping into the ocean. When you wade out and take forever to get in, it’s a lot harder than just plunging in and letting your body adjust to the temperature.

    3. Make your location work for you

    When I get to a location I already have an idea of my client’s personality and they mine, so at this point it’s a matter of finding a location within the location that is going to help us both really shine. If they’re a little shy, I’m obviously not going to take them into the middle of a crowded park and expect them to cuddle up and give me something sexy to work with for their shoot. I’ll need to be familiar with the location so I know a more private place I can take them so they can be comfortable enough to be at their best and I can still feel inspired and make their shoot rock. This is hard for me sometimes, because I pay a lot more attention to (and actually find my inspiration in) the available light (which I use almost exclusively) than I do to what’s happening in the background. Sometimes I do have to sacrifice that awesome light for comfortable clients. I just have to remind myself that in the end a well lit picture that looks stiff and awkward is a lot worse than an image with light that’s maybe only so/so but has a good genuine connection from my subjects.

    4. Help it happen

    Like I mentioned above, you can’t just stand back and wait for magic. At a wedding, sure, of course, because people are experiencing an event and you’re job is to capture it as it unfolds. A portrait session is a whole different kind of animal . . . 99.9% of the time with regular subjects (ie not trained professional models) you’ve got to give some basic direction. You also can’t get in there and say, “Ok, hold hands, head turned at exactly a 80 degree angle. . . WAIT! Not that far! I said 80 degrees for crying out loud!”

    Generally what I do with a portrait session is as simple as getting my subjects seated/standing in a way that is compositionally sound within my frame. Then I step back and let them “work it.” I tell them just to be themselves. If it’s a couple, I tell them to just be into eachother. I make them laugh, I make them smile. I ask them to pretend I’m not there and just snuggle up. I let them do their thing, but I’m helping it happen.

    natural-portraits--16.png

    Sometimes I’ll give the my subjects an activity to participate in. I let them do their thing and I capture the magic moments that happen naturally. Even then though, if it’s a family portrait for example, I try to tell mom and dad to remember that I’m there. Otherwise I may end up with a lot of pictures of the back of someone’s head etc. They need to have a vague awareness that I’m around, but not focus on me. Does that make sense?

    natural-portraits-11.png

    FOR EXAMPLE: In the image above of Robin from Twigg Botanicals, I couldn’t bring myself to give someone with a job as cool as hers a basic, typical head shot, so I met her while she was setting up for an event, gave her some basic direction and let her rock out. I love this triad, and it’s perfect for what she needed for the about page of her website. You should know, Robin is pretty shy and does NOT love having her picture taken. You’d never know it from the images above!

    Just give it a go. . . truly engage your subject on your next shoot . . . and see how it goes. It can be as simple as saying, “Ooh YES! PERFECT. Give me more of that!” You may feel like a quack, but I swear to you that your clients will appreciate it.

    5. Get in there

    My subjects will be the first to tell you that I’m not a passive, standoffish photographer. No sir. I’m right up in there with you. That’s one of the reasons it’s so darn important that we’re comfortable with each other. I shoot my portraits with fixed focal length lenses, so that means that my feet are my zoom. Guess what, if I want a tight shot, that means I’m nearly right up on top of you with my lens. I know this may sound uncomfortable to some of you, but for me, I find that it helps my subjects and I feel like a team. We create a real harmony together and end up with real, genuine, connected images, and new friends to boot. Because you can’t shoot all up in there the way I do without bonding in some way shape or form.

    natural-portraits--10.png

    All that said, I’ll tell you outright, I am not afraid to PULL from my clients. I expect them to work with me. It sounds like a headache for them when you read it here, but I’ll tell you that after nearly EVERY shoot I’ve EVER shot I’ve gotten feedback from clients saying things along the lines of, “Wow, that was totally painless, fast and fun!” They appreciate my engaging them in a way that makes them feel like they’re contributing. They like to feel useful and busy. I know what you’re thinking, “Well, duh. They’re getting their picture taken, of course they’re feeling useful and busy.” But I’ll tell you what, it’s amazing how many photographers frustrate their clients by not engaging them in the process. They just say ok, let’s do this. And they leave their clients to themselves and they just stand back and shoot. Most clients HATE that, and I’ll promise you that nearly 100% of the time if you try to work it that way you’ll end up with forced smiles and awkward poses.

    natural-portraits-6.png

    Now, I can’t write a post like this and not end with a little shout out to all my clients. You are all SO VERY wonderful and I’m so thankful to each of you for letting me capture the natural, real, beautiful moments of your lives. You’re all my BFF’s and have enriched my life in so many ways!

    Happy Shooting!

    Natalie Norton is a wedding and portrait photographer who lives on the North Shore of Oahu, Hawaii. Check out more of her work and tutorials at her popular blog Pics and Kicks, www.natalienortonphoto.com.

    Post from: Digital Photography School


    Digital Photography School

  • Using Google Adwords to promote your photography business and find clients

    This article is about one of the most effective and precise ways to promote your business and find clients. Google Adwords makes advertising easier, faster, and more cost effective than ever before. If you want to, in a couple of hours, you can send a veritable flood of traffic to your site. And if you design your campaign correctly, the vast majority of those visitors will be people who are specifically looking for a photographer doing your kind of work.

    So here are some tips on how to get started with Google Adwords and how to make sure you get the biggest bang for your advertising dollars.

    Have a good website

    Before you start, let me underscore that you need to have a good website. Ideally, you’ll have a great website. With Google Adwords, you will be sending prospective clients to your site. So the overall design and functionality, as well as the images you have in your online portfolio need to be of sufficient quality that they will convince at least some of people who come that you are worth contacting.

    Set up your Google Adwords account if you don’t already have one

    Assuming you’ve good a high caliber website, the other basic thing you need is a Google Account. You can set one of these up very quickly and easily. Just go to www.google.com, click on Business Solutions underneath the search box, click on Adwords, and follow the instructions.

    Add a new Adwords campaign and set your settings

    Now it’s time to get started. Once you are inside your Adwords account, you will want to click the Campaign Summary tab, and then click “New Campaign.”  This brings us to a quick aside about the structure of campaigns and ad groups. A campaign is highest level categorization. Use different campaigns for very different projects (ie, say one campaign for you wedding photography, and one campaign for your corporate product or real estate photography). Within each campaign, you may want to have different ads that use different titles and keywords.

    GEOGRAPHIC TARGETING. When you are first setting up your campaign, there are a few settings you need to pay close attention to. One of the most important is geographic targeting.

    If you live in Atlanta Georgia, and you are trying to find wedding clients, you don’t really need your ads to show up for users in Oregon. Google gives you the ability to narrowly limit the geographic space in which your ads appear. So you might set the geographic targeting to the state of Georgia. That way, any users in Georgia searching for “wedding photographer” will see your ads. But those in other states will not. That can save you a lot of wasted advertising revenue.

    TOTAL BUDGET AND MAXIMUM COST PER CLICK. You will also need to set your daily budget and your maximum cost per click. These two amounts are obviously related: if you have a high total budget and a low cost per click, you’ll be able to generate more traffic on your site and more leads. If you have a low budget and high cost per click, then you’ll get less.

    Your cost per click is critical here. The CPC is how much you pay every time someone clicks on one of your ads. It determines how quickly you blow through your advertising dollars, but it also determines where you ads appear in the list of ads that appear alongside Google search results. The higher your ads appear in the list of ads, the more clicks you will receive.

    Unfortunately, the ideal CPC varies from keyword to keyword and is largely determined by the amount of competition over any given key word. If you specialize is Poodle Photography, and you want your ads to appear every time some types “poodle photos” in Google, then you’re probably not going to face high competition, and you can set a low CPC (maybe .15/click) and still appear very high if not first in the list.

    If, by contrast, you want to appear on the first page of search results for “denver wedding photographer”, you may need to increase your cost per click to or higher just to appear on bottom of the first page. (I know this because I’ve had to go that high several times over the past month for my own Adwords campaign for wedding photography in Colorado).

    So your cost per click is partly out of your control. You can set it at initially what ever level you want, from 1 cent to or more, but you will want to adjust your CPC strategically. In short, your goal is to find the lowest CPC that will get you onto the first page for your keywords and, ideally, will get you into the 4th position or higher.

    It’s important to note that you DON’T need to be the first result. The difference in click throughs for spots 1-3 are not all that different, and you can save a bit of money by appearing a bit lower.

    The combination of your CPC and your daily budget will determine the maximum number of visitors you get each day. If your max CPC is $.20 and you set a daily budget of 10, then you will get about fifty visitors a day on your site. If your CPC is , you’ll get ten.

    TURN OFF CONTENT NETWORK.
    There’s one last setting you should adjust. You’ll probably want to turn off the “Content Network”. You know all those Google ads you see when you are tooling around on websites? Those are the content network. For some kind of advertising these spots are very valuable.

    In this case, however, you want to put your ads in front of people are looking for your kind of services RIGHT NOW. If you are a Chicago portrait photographer, your target audience includes people actively looking for Chicago portrait photographers. And those are the people going to search engines and typing “Chicago portrait photographers.” If you leave the content network on, your ads can appear on any site where key words like chicago, portrait, photographer appear. Those might be photography blogs or news articles or something else. But in any case, someone who sees your ads while reading a photography blog is not likely to become a client. And you will still need to pay when they click on your ad. So it’s better to keep your campaign as targeted as possible.

    Tips on Designing Adwords Ads

    A google ad includes a one line title (maximum of 25 characters) and two lines of description (maximum of 35 characters each). So you have three lines of 25, 35, and 35 characters. That is not very much space in which to convey your message, so you really need to give it some some thought and make every word count.

    In choosing your title and description, try to empathize with your customers and think about what they would want to see. If you were looking for a photographer in your line of work, what kind of headline and description would compel you to click?

    It’s needs to be descriptive, clearly conveying what kind of photography you do. You may want it to include buzz words in your area of photography. In wedding photography, for example, photojournalism or photojournalistic-style wedding photography is very popular.

    You may also want to include specific reference to your geographic area. Many people are looking for photographer that work in the same city, so they will more likely to click when they see their location in your ad.

    Another important tip is that you may want to create different ads with different wording for each of your important key words. For my wedding photography business here in Colorado for example, I have separate ads for Denver Wedding Photography, Boulder Wedding Photography, Wedding Photojournalism, Engagement Photography, and other key words. The trick is to match the wording in the ads to the keywords that people are searching for. If some one is searching for “denver wedding photographer,” then they are more likely to click on an ad that includes those same key words.

    The great thing about Adwords is that you can create as many different ads as you want, even one for every keywords, at no extra charge.

    Making Adjustments

    Once you’ve created your ads, they will start to run and you will immediately generate some relevant traffic and potential leads for your site. At this point you will need to constantly go in adjust your ad settings. If your ads are not appearing on the first page for relevant terms, then you may need to increase you CPC. If you are appearing in the #1 spot for everything, you can reduce your CPC and save some money. Depending on which ads seems to be generating higher click throughs, you may adjust wording of other ads or create new, more effective ones.

    How Much to Spend?

    Finally, you may want to control you overall spending by increasing or decreasing your daily budget.

    The budget issue brings us to a final point. Be careful with Adwords. It’s easy to spend a lot of money on Adwords advertising. You can set a budget of -200 per day and generate tons of traffic. But you’re also spending -6000 per month on advertising. Set a budget of , and you are 0 per month.

    How much should you spend? Think like a business person. How much you spend depends on the returns. If you sell wedding packages for 00, you can spend 00 in advertising, get one job and cover the costs. Of course, that doesn’t leave any profit for you or any money to cover your overhead.

    In large part, how much you spend depends on your “conversion rate” – the percentage of people who come to your site and actually decide to use your services. You should assume that less than 5% of visitors will become clients. A good estimate is 2%. Using that number, if you send 100 people to your site at a CPC of , then you have spent 0 in advertising.

    If you have a good website, somewhere between 1 and 5 of those people will contact you and strongly consider buying your services. If you are charging 0 per shoot, then that’s -1500 in revenue depending on your conversion rate. As you can see, a high conversion rate dramatically increases the returns on your advertising dollars. That’s why having a good site is so important.

    Unfortunately, you probably can’t precisely guess your conversion rate. You will need to launch your campaign, watch the numbers, and adjust accordingly.


    Do you use Adwords? If so, how has your experience been? If not, why not?

    DSLRBLOG – Photography Business Blog
  • recent work

    Yup I’m still around.  Still shooting.  Dealing with some existential crises related to “direction” and “vision”, to which the solution is of course: SHOOT MORE!

    current-1
    current-2
    current-3
    current-4
    current-5
    current-6
    current-7
    current-8
    current-9
    current-10

    Tweet This Post Stumble This Post


    ed | zawadzki

  • Seminoe Reservoir – Medicine Bow River

    IMG_1132

    Since Texas Water Safari was postponed due to flooding I switched to plan B, packed my camera gear and Sea Wind canoe and drove to Wyoming instead of flying to Texas.

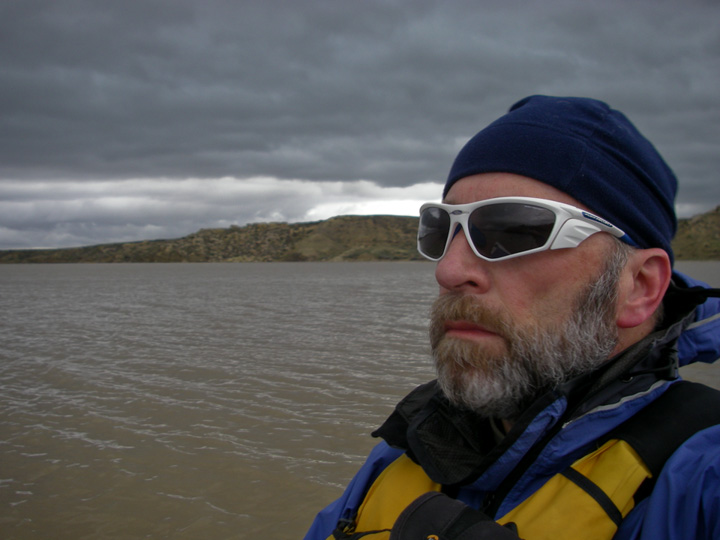
    In my desperation I ignored weather forecast. My trip turned to be shorter than planned. In Wyoming I experienced heavy rains, thunderstorms, hail, strong wind, cold, and flooding. Nevertheless, I achieved my main goal – exploring the paddling access to Medicine Bow River Arm of the Seminoe Reservoir.

    First, you need to drive to Hanna, a small mining town (hwy 72 from I-80). Then, there is about 25 miles of a dirt road – county road 291, and then a short narrow road to a boat ramp. This is a good gravel road traveled by RVs and boat trailers. Of course, after heavy rains driving conditions may be more challenging.

    So, despite of rain and some water flowing across my road I reached the boat ramp in a pretty remote location. There were some people there, but they were hiding inside their campers. I took a short paddling upstream the Medicine Bow Arm of the reservoir. The wind was quite strong, but not so bad (actually good for training). However, when I got surrounded by thunderstorms with intense lightning I gave up and returned to my car.

    I decided not to camp there – I was afraid that the road could get too muddy or washout during night, so I drove back to Hanna and I-80. Finally, I ended up for night at a motel in Rawlins. It was raining all night and till noon of the next day. When rain was stopping it was cold and windy. So, I stopped at Fort Steele to see the North Platte River, and then return home.

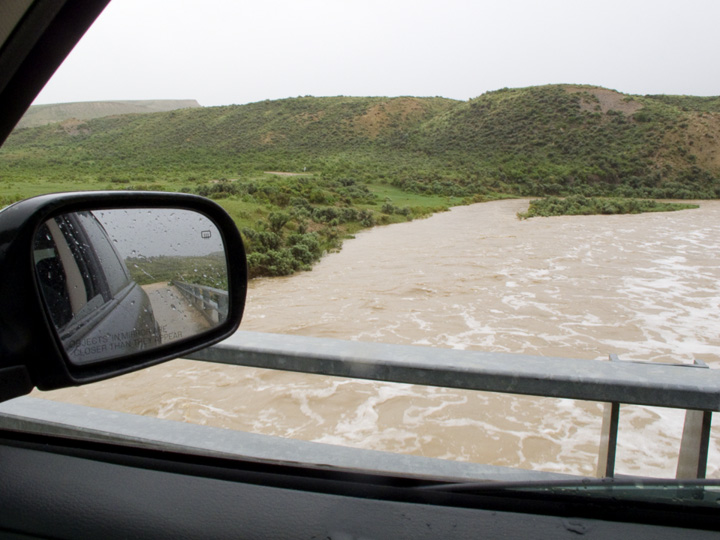
    River flow: North Platte River at Dugway – 16,000cfs, Medicine Bow River as seen from the bridge above Seminoe Reservoir – 3000cfs.


    I think that the Medicine Bow Arm can be a good alternative to the Seminoe State Park for paddling access. Driving is OK, parking and camping is free.

    It should be possible to launch a kayak or canoe on the Medicine Bow River from a bridge on the 291 road. There is a similar measuring dam structure just above this bride as in Dugway on the North Platte. I am not sure if that river can be paddled further upstream under normal, not flooding conditions. It looks like that the next potential access would be near a town of Medicine Bow. The river is not mentioned in The Floater’s Guide to Wyoming Rivers.

    Some related posts:
    Sun, Snow and Wind on the North Platte River in Wyoming
    Bennett Peak to Pick Bridge on the North Platte River, Wyoming
    North Platte River Kayak Racing – 2009 Wyoming Outback Challenge
    44 Miles of the North Platte River in 2 Minutes
    44 Miles on Big Water – 2008 Wyoming Outback Challenge Results
    7 Landmarks and Highlights of the 2008 Wyoming Outback Challenge
    2007 Wyoming Outback Challenge on North Platte River- Results and Pictures
    3 Days on the North Platte River in Wyoming: from Treasure Island to Fort Steele
    Wyoming Outback Challenge on the North Platte River – Strong Current and Head Wind
    North Platte River in Wyoming – Eagle Nest Rapid

    IMGP0005
    Other resources:
    The Floater's Guide to Wyoming Rivers: Paddle and Portage
    Wyoming Atlas & Gazettee
    map of public access areas by Wyoming Game and Fish Department
    North Platte River flow: Northgate, CO | Ft Steele/Dugway
    Wyoming Introduces Fee for Paddling and Boating


    paddling with a camera

  • 4 Years of the Missouri River 340 Race – A Slide Show

    I just posted a new slide show in Fitness Paddling blog – 120 pictures selected from the four years of Missouri River 340 Race. This annual paddling race take place in July/August at full moon and runs nonstop across the state of Missouri from Kansas City to St Charles.

    This year the race was postponed for a month due to flooding conditions on the Missouri River. So, instead of driving to Kansas City I had time to go through my old pictures. A lot of memories!


    paddling with a camera

  • the Mamiya 6 – a highly subjective review

    mam6

    My photography career started with film.  Black and white negative film, and an old Pentax spotmatic.  I “switched” to digital with a Minolta Maxxum 7d, and shot pretty much exclusively digital from then on- up until about 6 months ago, when I got the itch again…

    Now I knew I wanted to get a MF kit, as it’s hard to justify the extra work of 35mm film, given the quality of full-frame digital (ducks the angry rolls of tri-x being thrown).   Medium Format, OTOH, is a whole ‘nother beast…  I also knew I wanted a rangefinder just because, well, I love rangefinders.   That narrowed down the field a bunch – leaving basically the Fuji MF rangefinders and the Mamiya 6 or mamiya 7 in serious contention.   I took the plunge and got the Mamiya 6 (I chose the 6 over the 7 as I prefer the 6×6 negative rather than the 6×7).   Now after about 6 months of using it, I think it’s about time to write a proper review.

    be forewarned – this is not an “Controlled Environment, Pixel Peeper” type review.  I’m not going to run rolls of test film against brick walls, or post MTF charts.  This is merely my overall impression of the camera after half a year of regular use (just about enough time to really get “comfortable” with a piece of gear!)

    First off, for anyone thinking of getting one of these cameras – if you’ve never used a rangefinder before, there’s going to be a learning curve.  Rangefinder camera’s are different than SLRs in that you are *not* looking through the lens to frame/focus – you look through a separate window.   This window does not change with the focal length of the lens the way an SLR viewfinder does (in other words, your view doesn’t “zoom in” when you attach a longer lens) There are simply “framelines” – a glowing box/outline that shows what will be in the frame for a given focal length.   On the Mam6, these light up automatically depending on which lens you have mounted.  Focusing is also a totally different beast – instead of looking through the lens and subjectively evaluating if the image is in focus, the rangefinder uses a “patch” in the middle of the viewfinder, which superimposes 2 images over each other.  when they are “out of alignment” the image is out of focus – you simply adjust the focus until the overlaid images are lined up – taking a lot of the “guesswork” our of manual focusing.

    Out of focus:

    IMG_0363

    In Focus:

    IMG_0365

    Despite the differences (some might say limitations) there is a lot to like about rangefinder framing/shooting:

    • Once you get the hang of focusing it can be much faster and more accurate than a SLR.  You don’t have to subjectively evaluate whether the image in the vewfinder “looks sharp” – if it’s lined up it’s in focus!
    • No “blackout” – since there is no mirror flipping up to block your view at the moment of exposure, your view through the window is never interrupted.  May not sound like a big deal, but once  you’ve gotten used to it, it’s really nice!
    • framing outside the lines.  With an SLR, what you see in the vewfinder is what you get in the  frame – you can’t see “outside of the  frame”.  With a rangefinder, the frame does not take up the whole area of the viewfinder – the the area contained by the brightlines.  This mean that with the camera up to your eye, you can actually see the area outside the actual frame of the photograph.   To me, this is the single greatest part of rangefinder photography – you can see the scene through the camera wholistically – chosing which parts to include, and which to cut out.  You can see elements *before* they actually  move into the frame, and you can see the area around your frame to determine if you need to make a minute adjustment to composition etc…   It’s hard to describe, but it is incredible.  After shooting with a rangefinder for a while, going back to an SLR feels like putting blinders on – like shooting down a tunnel with no peripheral vision.

    Now on to the actual meat of the review:

    Handling:

    The Mam6 is a solid piece of kit.   Tight tolerance, nothing loose or sloppy.   It feels like a brick of metal in the hand.  Size-wise it is fairly comporable to a 5D, but  it actually “feels” a lot smaller.  A lot of this is due to the “collapsing lens mount”.   The mamiya 6 is essentially a “bellows” camera (albeit with a sturdy shell on the outside to protect the bellows) – pressing the button on the left side of the lens mount allows the entire assembley (lens and all) to collapse *into* the body of the camera by a few inches.  Particularly with the 75/3.5 lens mounted & collapsed, the camera’s “depth” shrinks quite a bit allowing it to slip into a narrow/small camera bag.  I find it much easier to carry around as an “all day” camera than the 5D.  Here it is side by side with the 5D+50/1.8.  The 6 has the 75/3.5 normal lens mounted, and the lens mount collapsed.  (for reference the image at the top shows the camera with 75/3.5 with the mount exteded – note the difference!)

    mam6-3

    And here it is in my everyday shoulderbag along with the 150/4.  To give a sense of scale, that is a pocket moleskine in the side pocket…

    DSC_1690

    Not exactly a “pocket camera” but when you consider that this is a *medium format* kit – it’s pretty amazingly compact.

    The camera also just “fits” well in the hand. The grip is nicely contoured and comfortable.  Despite it’s somewhat “boxy” shape, it is extremely comfortable to hold/shoot with.  The controls fall well under the fingertips – the left hand focuses and sets aperture, while the shutter speed dial is positioned in a way that it can easily be rotated with the right index finger without removing one’s eye from the VF.  When combined with the meter which shows the shutter speed in the vewfinder, it makes it possible to adjust exposure without ever taking your eye away from the camera.  The focus is smoothly damped and the rangefinder works well with a decently sized focusing patch and nice bright framelines (which light up automatically depending on which lens is mounted)

    Controls:

    as with any fully-manual camera, controls are simple – aperture is set on the lens, there is a top dial for shutter speed/ISO(ASA) with EV comp lever under it, a film advance lever (single stroke) and the shutter button.  that’s it.

    Having TTL metering, the Mam6 has a Aperture Priority mode, enabled by turning the shutter speed dial to the red “A” on the dial.  In this mode, the camera will meter to the aperture set on the lens.  As I understand it, the metering system is a center-weighted average.   There is also an AEL mode, which is also aperture priority, but has the added feature of “locking” the exposure at a 1/2 press of the shutter – very useful!   The meter shows up along the left hand side of the viewfinder – the currently selected shutter speed is shown solid, while the metered speed will blink above or below it for over/under exposed.

    It’s a very intuitive system overall, and enables quick manual metering.  I generally shoot in fully manual, but I’ve had good success shooting in AEL, pointing at the part of the scene I want to meter, 1/2 pressing to lock exposure, and then recomposing and shooting.  Frankly for “fast moving” photography such as street etc… the meter is good enough to just “set it and forget it” especially given the exposure lattitude of b/w neg. film.   In A (and AEL) mode, EV comp is controlled by a little lever under the shutter speed dial.  Honestly I’ve never used it – I’m either always in manual or AEL-meterlock-recompose mode!

    Changing lenses:

    Changing lenses is the same as an SLR, but with a catch.   The Mamiya 6 uses a Leaf shutter system, as opposed to the focal plane shutters in most SLRs.  This means that the shutter is actually *in the lens* instead of in front of the film plane.   The obvious ramification to this is that if one removes the lens, the film plane is exposed (since there is no shutter to block it!) which would prevent changing lenses while fim is in the camera.   Luckily the Mam6 solves this rather elegantly, by having a “dark slide” that covers the film while the lens is removed.   There is a little knob on the bottom of the camera that enables the dark slide, and a switch that releases it (it snaps back automatically).   The camera also has a series of interlocks which prevent you from “doing anything bad” during this process.  In other words,  when there is film in the camera, the lens-release button will not function unless the darkslide is enabled, and once a lens is mounted, the shutter will not fire until the darkslide is withdrawn.  There is a little warning light in the upper right hand corner of the viewfinder which will blink to let you know if something is set incorrectly when you press the shutter button.   This may sound complicated, but in practice it only adds a few seconds to the process of changing a lens which becomes:

    1. turn knob to enable darkslide
    2. press lens release button, remove lens
    3. mount new lens
    4. hit the switch on the bottom to remove the darkslide
    5. shoot away

    Lenses:

    The bad news is that the Mamiya 6 system, only has 3 lenses.  The good news is that it only has 3 lenses.  For me, they cover just about everything I want – moderate wide, normal and moderate tele.  The added advantage is that once you have all 3, there is no worring about “oh I need lens X and lens Y”.   It’s actually rather freeing, in a strange way.   And don’t worry about said 3 not being up to snuff – these lenses are good.  Really, Really, Really Good.   If you are coming from a 35mm system, the quality will blow you away.    The lenses are:

    75mm f/3.5:

    This is the “normal” lens, just shy of 50mm equiv. in 35mm terms.   Beautifully sharp and contrasty across the entire frame, straight from max aperture. I tend to favor normals, so this is my “default” lens.   Also helps that it is the smallest of the 3, and collapses nicely in to the body, making the camera wonderfully portable.

    150mm f/4:

    Stunning. An absolutely gorgeous portrait lens (appx 100mm in 35mm terms), razor sharp, with a beautiful falloff and incredible bokeh.   The images from this lens are truly jaw dropping. I have heard some complain that it is difficult to focus, but I haven’t had any problem, so YMMV.

    50mm f/4:

    28mm equiv.  Don’t have this lens, but from what I’ve heard it’s the best of the 3 (which is almost scary considering how good the other two are).   Saving the pennies for it now :-)

    Gestalt:

    I’ve shot with quite a few camera systems, and I can say unreservedly that the Mamiya 6 is my “”favorite” system overall.   It may sound crazy, given the limited nature of the system overall – but it’s just one of those cameras that “gets out of the way” and lets you get the shot.  From the smoothly damped action on the focus to the quiet “snick” of the shutter, to the cleverly collapsing lens mount, the camera is simply a pleasure to use – it practically “sings” in the hand.   Needless to say, the quality is superb as well (as one would expect from a medium format system).  Of course it comes with all the caveats of a rangefinder system, but it comes with all the benefits as well.   It seems to hit kind of a “sweet spot” with a combination of simplicity, usability and portability that really just *works*.

    Another wonderful aspect of the system for shooters who use strobe/flash lighting is the fact that the leaf shutter of the camera allows syncing at all shutter speeds.  Unlike focal-plane slr users who must spend outrageous sums (and endure huge power losses in high-speed-sync modes) on system-dedicated strobe units to allow flash sync beyond their native sync speed, the Mamiya 6 will happily sync with any strobe right up to it’s maximum shutter speed of 1/500 sec – simply wonderful when working with lights outdoors for dropping down the ambient!

    In a lot of ways, it’s hard to exactly pin down the appeal of this camera.   I recently read a review of the E-P1 which called it “a camera that you buy with your heart, not your head” (to paraphrase).  I think in a lot of ways the Mamiya is similar.   It’s certainly not as versatile as an SLR system, and in these days of high-volume shoots and fast turnaround times, it would be ludicrous to imagine using it as one’s primary camera.   But when I’m walking out the door in the morning, it’s almost always the one I grab.   It’s the type of camera that is simply *enjoyable* to use, the one that is just “comfortable”.

    Nitpicks:

    While I absolutely love the 6 as a whole, there are some nitpicks, nothing major but just some things to be aware of.

    • the 1/500 max shutter speed can be limiting if you want to shoot wide open in bright light.  Course you can use ND filters, but that gets cumbersome etc… (although the tradeoff to this is that you get that full 1/500 when syncing with a flash, which more than makes up for it in my mind!)
    • the meter readout can be difficult to see when wearing glasses.
    • the rather large minimum focus distance on the lenses can sometimes be limiting.

    Bottom line:

    If you shoot sports, this is not the camera for you.

    If you shoot wildlife, this is not the camera for you.

    Nor is it for weddings (well maybe) or events, or product photography (no close focus).

    That being said – this camera is a unique product that is simply magical in it’s own way, and if it suits your shooting style will quickly become one of your most-loved pieces of gear.

    UPDATE: My Mamiya 6 is currently in the shop for a broken film advance mechanism.  Apparently this is a not-uncommon issue with the 6, and something to be aware of before purchasing one.    Personally I wouldn’t let it stop me (and it doesn’t change my opinion of the camera) but just for full disclosure…

    Tweet This Post Stumble This Post


    ed | zawadzki

  • Steezy Marie for Marker Bindings

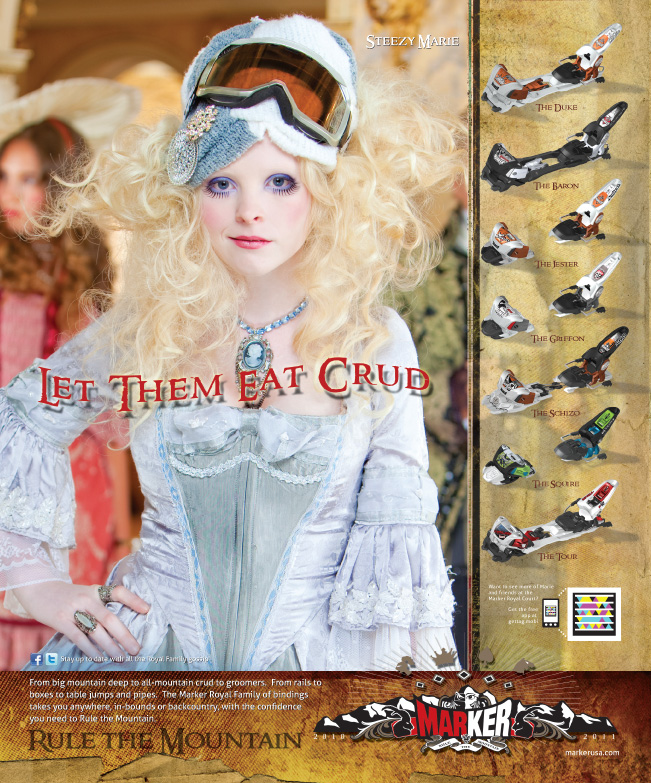
    The amazing folks at Whitney Advertising put together an idea for a national ad campaign that I fell in love with immediately!

    Marker USA has a line of ski bindings called ‘The Royal Family’ with product names like The Jester, The Duke and The Baron

    Their idea?

    What if we combined Marie Antoinette with a member of todays steezified-culture…  All the vintage styling but with a twist, ski hat and goggles.  The first character to populate this world would have to have a name… and why not call her Steezy Marie?

    There’s a bonus to this ad too!  A very high-tech bonus.  You see that colorful square icon near the bottom right?  Download the TagReader app (it’s free) on your iphone. Scan the icon (Yes, it will work on the screen – at least it does on mine) and you can watch some sweet behind the scenes video of the shoot!

    The Models!

    Credits

    Thank you so much to the entire team, especially the two photographer friends of mine that got suckered into modeling with ZERO notice from me!  I make no apologies for doing what I had to do to get a couple guy-extras. :-)

    Creative Director: Jim Whitney of Whitney Advertising
    Photographer: Jake Garn
    Hair: Steven Robertson
    Makeup: Paula Dahlberg
    Wardrobe Stylist: Michelle Boucher
    Models: Shelby Boven, Madeline Villano, Lauren Johnson, Steven Wood and Ryan Muirhead
    Location Scout: Mickelle Weber
    Photo Assistants: Ryan Muirhead, Steven Wood, and Dave Brewer
    Mr. Muirhead’s Assistant: Braxton Duncan

    Videographer: John Paul (Video viewable via the TagReader icon on the ad)

    Technical Details: 6-Lights*, lots of softboxes. Canon 5D Mark II, 50mm 1.2L

    *I should have kept better notes but we had a mini-disaster during setup when I realized that a much needed lens was not inside my photography bag.  The situation was fixed (thanks again Dave) without the clients even noticing… but the hiccup left little time for much note-taking on my part.  :-/


    Jake Garn Photography

  • Good TIMEs!


    The entire staff here at Strobist International Headquarters are quite pleased (and more than a little surprised) to have been included in TIME Magazine’s 25 Best Blogs of 2010.

    If you are just stumbling in from that article, welcome! This is no ordinary photo blog — you can see what we are all about, here.

    -30-


    Strobist