Category: Uncategorized

  • Chris Crisman Finds Inspiration at Home


    Paging through a recent issue of Fast Company, I came across a Chris Crisman photo similar to the one above. I loved the light, and got in touch with him to talk about it.

    As it turns out, the light wasn’t even the interesting part.
    __________

    The subject of the photo above is a neighbor of Chris’ from his hometown of Titusville, PA. Now working out of Philly, he periodically makes the ~350-mile drive back home to document the people and settings in his hometown.

    The work he has produced from Titusville has caught the eye of art directors, who have hired Chris to make similar photos in other settings on assignment. So rather than shooting only for pay, he is also taking the time to shoot what he knows and loves. And the resulting photos are getting him assignments that are much closer to his creative center of gravity.

    “The personal work has turned out to drive almost everything we do,” Chris says. “My hometown is just this massive inspiration point for me.”

    Looking at Chris’ portfolio, I was struck by the simplicity and authenticity of the photos. As it turns out, many of those same images were the self-produced ones — or the paid work that was commissioned as a result of the self-produced images.

    If you can concentrate your efforts on exactly what you really want to produce, good things are much more likely to happen downstream. And nothing is more powerful that shooting what you know and love.

    On his approach to photographing people, Chris says, “I feel like anyone in any position where I am going to be photographing them, they’re being photographed for a reason. They have had some point of passion in their life — or drive, or aspiration or inspiration — and I feel like I might have a takeaway from that.”

    And even on the more buttoned-down corporate shoots, he tries never to hold back and go for something too safe.

    “Honestly, I try to make a portfolio picture every time I go out to shoot,” he notes. “Part of our business plan right now is to really not accept shoots where that is not possible — unless the money is so high that it can pay for a few portfolio shoots.”
    __________

    On the technical side, Chris is working on his craft to develop a signature look. To that end, he is doing things like trying to always work with a tripod when shooting people. That may feel a little anal-retentive, but rather than restrict him it actually gives him options he otherwise would not have.

    For one, it allows him to nail down the composition to free him up to concentrate moment and expression. But it also allows him to keep an exact framing should he, say, want to remove his lights from inside of a frame. (Just move the lights a little, shoot another frame and you can layer and erase the lights in the original shot.)

    With that consistency, he can also easily extend the frame and pixel count (of his Canon 1DS Mk III) by panning over to the side and shooting more image for stitching later. Speaking of that, he has also decided to work with the same retoucher all of the time so she can help to develop a level of tonal consistency across many different subjects and lighting styles.

    As far as the light goes in this photo, he used Dynalite packs and large octas. He has stuck with Dynalite 1000 and 2000ws packs and generators because they have been very reliable for him. In fact, any failures have “involved water,” he says a little ominously. (Which I can only imagine must be quite exciting when it happens.)

    Here, the key is an octa at camera left, with the fill coming from another octa directly behind the camera. That fill is sort of like a ring light, but not exactly. Since Chris is standing in front of it, some of the light from below axis is blocked, leading to the shadowing on the underside of the fill.

    He is working very close to the ambient level — mostly reshaping the light without introducing a harsh ratio. This gives many of his photos (especially the outdoor ones) a painterly feel. Just because you have the ability to overpower the ambient does not mean that it is always a good idea.

    If you have a moment, page through his work and you’ll quickly see how his personal hometown images are not only leading to, but also informing his commissioned work. Personally, I am very much looking forward to seeing exactly where the Titusville stuff goes, and where else it takes him.
    __________

    Portfolio: Chris Crisman Photography
    On Twitter: @CrismanPhoto


    Strobist

  • Paddling the Poudre River at Nix Natural Area in Fort Collins

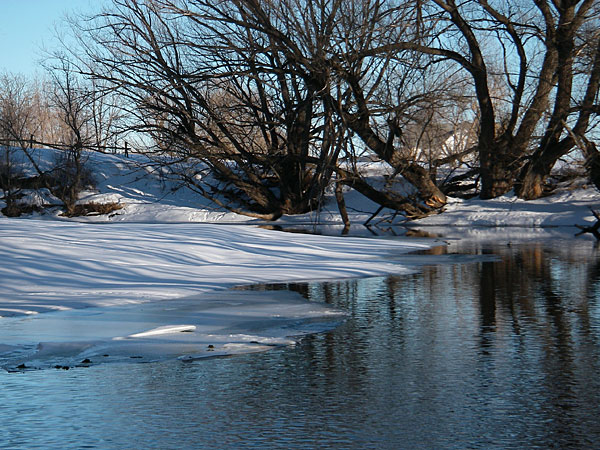
    Cache la Poudre river in winter

    Where to paddle in Fort Collins in winter time when all ponds and lake are frozen? The South Platte River is usually the only open water in northern Colorado, but it is 30-40 miles of driving. However, it is possible to find short sections of our local Poudre River suitable for some paddling even if the river flow is almost nothing. One such a spot is about a quarter mile of the river above I-25 within Arapaho Bend Natural Area. You can access that section from the Strauss Cabin parking (the very east end of Horsetooth Road) through two small ponds. When these ponds are frozen the river access requires a pretty long walk (~0.5 mile).

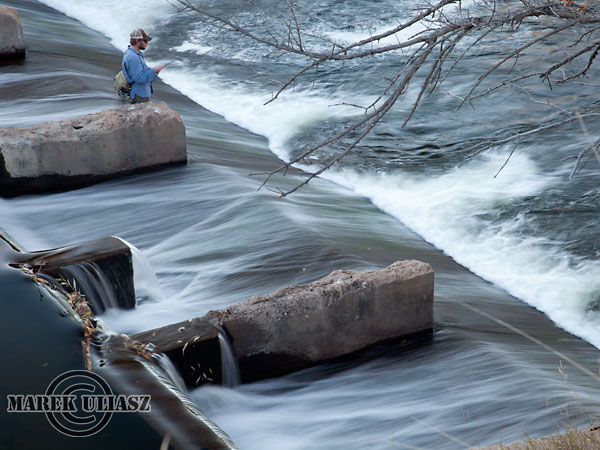
    The picture above shot in January 2007 shows another opportunity – the river above the Timnath Reservoir Inlet Dam between Lemay and Timberline Streets. Finally, I found a comfortable access to this river section from the Nix Natural Area and did some scouting with Seda kayak.

    function makeMap() {
    var latlng = new google.maps.LatLng(40.57469157203234, -105.04852831363678)

    var myOptions = {
    zoom: 15,
    center: latlng,
    mapTypeControl: true,
    mapTypeControlOptions: {style: google.maps.MapTypeControlStyle.DROPDOWN_MENU},
    navigationControl: true,
    navigationControlOptions: {style: google.maps.NavigationControlStyle.SMALL},
    mapTypeId: google.maps.MapTypeId.SATELLITE
    };
    var map = new google.maps.Map(document.getElementById(‘SGM’), myOptions);

    var contentString = ‘

    Nix Natural Area
    For directions enter your address below

    ‘;
    var infowindow = new google.maps.InfoWindow({
    content: contentString
    });

    var marker = new google.maps.Marker({
    position: latlng,
    map: map,
    title: ”
    });

    google.maps.event.addListener(marker, ‘click’, function() {
    infowindow.open(map,marker);
    });
    }
    window.onload = makeMap;

    Nix Natural Area - Fort Collins

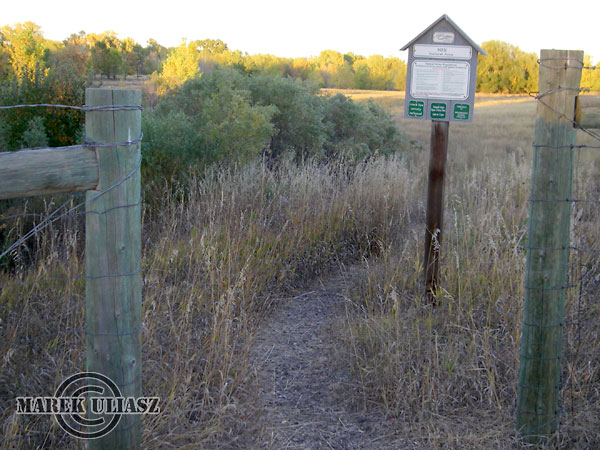
    Here is the entry (fire lane gate) to Nix Natural Area from the Hoffman Mill Road (driving north on Lemay turn right just before the bridge into Poudre River Drive, and then follow Hoffman Mill Road until you pass a gravel quarry).

    poudre-nix-3

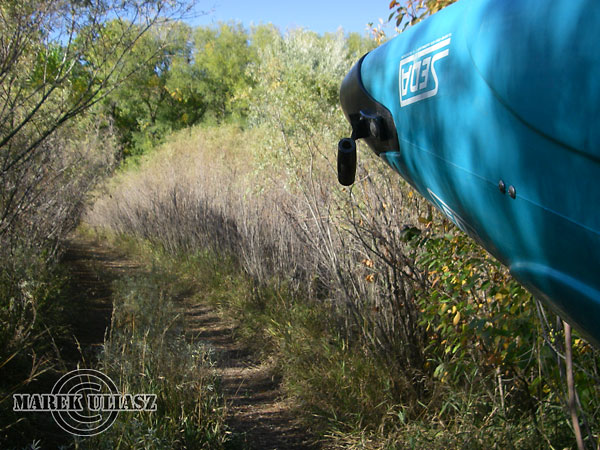
    About 200 yards of gravel overgrown fire lane leads you to a bike trail and the river.

    poudre-nix-4

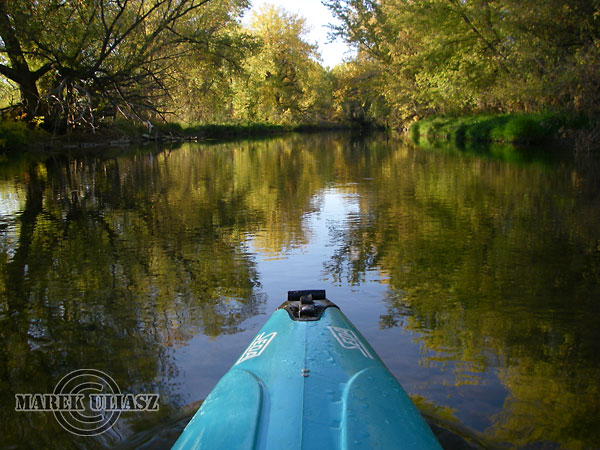
    Then, you have about half a mile of the river with standing or slow moving water. A lovely scenery in fall colors. It may be also good for some winter paddling photography. You can paddle upstream almost to Lemay Street, but before the bridge you will encounter some shallows with a fast current. I did my paddling on October 14 with ~100 cfs of the river flow in Ft Collins. It was enough water to run through those shallow downstream. However, rocks were pretty slippery and water too cold too drag my kayak up the river.

    poudre-nix-5

    A final shot of the dam from a high cliff on the right shore. I visit this place quite often riding a bike or inline skates on the Poudre Trail. Here is another image of the dam with more gold colors. And, just below the dam there is an old, rusty aqueduct


    ch_client = “mmuliasz”;
    ch_type = “mpu”;
    ch_width = 550;
    ch_height = 120;
    ch_color_title = “3c78a7”;
    ch_color_site_link = “3c78a7″;
    ch_non_contextual = 4;
    ch_vertical =”premium”;
    ch_sid = “Chitika Premium”;
    var ch_queries = new Array( );
    var ch_selected=Math.floor((Math.random()*ch_queries.length));
    if ( ch_selected < ch_queries.length ) { ch_query = ch_queries[ch_selected]; }

    Related posts:
    Paddling the Cache la Poudre River in Fort Collins – maps and mileage
    Old Aqueduct over the Cache la Poudre River
    Solo paddler, solo photographer – February 2005
    Cache la Poudre in Winter by Racing Canoe – December 2006


    paddling with a camera

  • Where Even PocketWizard Dare Not Tread


    And now, your Moment of Zen.

    Many thanks to Strobist reader Chano Reus for the heads-up on a Spanish-language blog post detailing the light-painting … of an entire city.

    No fewer than fifty photographers in the Asociación Fotográfica de Toledo participated in the making of this complex and highly choreographed image of Toledo, Spain.

    NOTE: The post now has English and Spanish versions embedded within the copy. Thanks for that!

    -30-


    Strobist

  • LumiQuest Softbox-III Gets a Big Brother


    Shown at left is one of my most used light mods, the LumiQuest SoftBox-III. It has just been supersized from 8×9″ to 10×14″ and released as the LumiQuest SoftBox LTp. (Not to worry — you can still get the SB III, too. Otherwise I would not be posting this until I had stocked up on SB-IIIs…)

    So yeah, bigger — sure. But why 10×14 inches?

    There’s actually a pretty good reason for that.
    __________

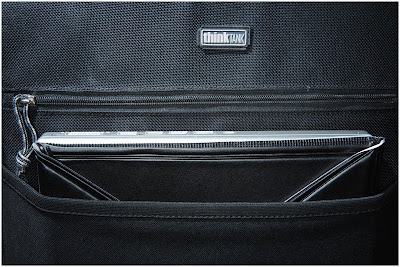
    If you are a shoulder bag type of photographer, the SB-III is about as big as you would want to wedge into, say, the hip pocket on a Domke F2 bag. But a lot of folks, myself included, now travel with a roller case to many shoots. Which means I can easily pack a laptop along, either inside or outside, for the plane trip/tethering/whatever.


    The LumiQuest SoftBox LTp is sized to ride flat next to your laptop. (LTp stands for LapTop pro.) It is sized to perfectly fit a 15″ MacBook Pro, but can also slide into most places where a 13″ MBP will ride. (Ditto the 17″ MBP, obviously.) And in that sense it not only takes up almost no room but doubles as an extra layer of protection for your laptop.

    Light-wise, the SB-LTp has the exact same profile as an SB-III, only softer. Which means it gets pretty soft in the knife-fight range, which is where I tend to use these kinds of things. But it also will give you a little more distance in that not-hard-not-soft range where it gets very interesting when combined with some fill.

    It has an edge to it, unlike bulbous-type mods in this size range. Which means you can feather it away from your subject in close and work with the edge of the beam. It is too big to use on-camera (it would reach down over your lens) so this is a off-camera hand-held or light stand thing. LumiQuest has a video on how to pre-stress it when you velcro it on, a technique which makes it mount very firmly.

    The LumiQuest SoftBox LTp is , and shipping to dealers now. More info (including the video) is on the product page.

    Two More Upgrades

    LumiQuest has also improved two long-available items — the cinch strap and the snoot. Both new products are renamed and replace the older versions.


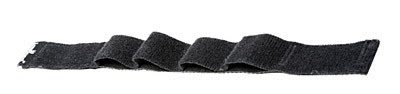
    The Ultra Strap (.95) adds neoprene to the traditional cinch strap to place constant tension on the mount, making it much more secure. It’s a cool design. You stretch it as you mount it to get the benefit, but once you do it right once it makes perfect sense. There is a how-to video on the product page linked just above.


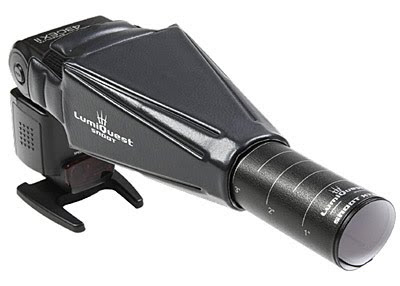
    The original snoot has been recast as the Snoot XTR and now includes an insert that will trim you down to about a 5-degree field of view. The new snoot is the same as the old model if you remove the insert. There is a video demo on the product page. And, like the Ultra Strap, this new version replaces the old version.


    Strobist

  • Low Water Paddling and Photography

    whitewater kayak with fin
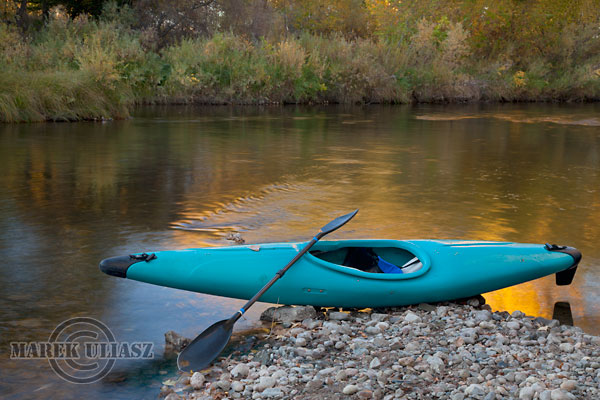
    A kayak portrait – Cache la Poudre River in Fort Collins below the Timnath Reservoir inlet dam
    (near Nix Natural Area)

    Here is my low water paddling rig I am using recently on local rivers: old Seda Cyclon whitewater kayak with a fin attached and wildwater wing paddle with aluminum tips. The fin really help tracking and moving forward, although, it is a liability when dragging a kayak over obstacles. It doesn’t cause problems in shallow spots.

    I am packing my Canon DSLR camera, a tripod, sometimes a second lens or flash and doing short exploratory paddling on rivers like Cache la Poudre in Fort Collins or St Vrain Creek. I am also going to shoot some diversion dams on the South Platte.

    I am planning these short trips around the best time for photography, so late afternoon or early morning. After evening paddling, I am trying to shoot something at “blue hour” after sunset like the Fort St Vrain Power Station or Ft Collins downtown.

    Problems with a tennis elbow prevent me from more intense paddling workouts right now.

    Related posts:
    Last Fall Colors on the Poudre River
    Poudre River from Fort Collins to Greeley – Late Fall Paddling
    Poudre River from Windsor to Greeley with High Water from Horsetooth Reservoir
    Old Aqueduct over the Cache la Poudre River
    Biking and Shooting along the Poudre River – Fort Collins Downtown
    Kayaking on Saint Vrain and South Platte Rivers near Platteville
    Shooting Paddlers – Photographic Adventures with Canoeists, Kayakers and Rafter


    Adventure Photography by Michael Clark Galen Rowell Vision - The Art of Adventure Photography


    paddling with a camera

  • On Assignment: Standing Behind Their Work


    Ever see a thriller movie where someone (usually Matt Damon) is talking to the bad CIA guys while they sit in their office even as Damon has them zeroed in from across the street?

    That’ll soon be implausible if Dianna and Wayne Wilhelm any say about it. They are building (and retrofitting) government buildings with normal-looking, 1/2″ glass that will stop a metal jacketed 9mm round at point blank range. And within two months, glass of that same thickness will be stopping rounds from high-powered rifles. Really cool stuff.

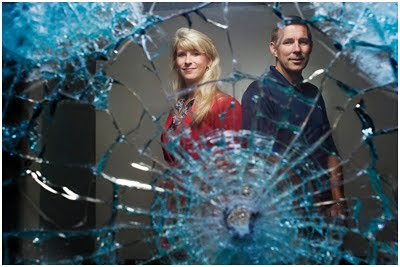
    I was assigned to shoot the Wilhelms for a BizMo cover, and thought I would take advantage of the fact that this new laminated ballistic glass is also optically decent. So I shot them through a piece of glass that already had stopped five 9mm rounds in an earlier demonstration.
    __________

    Most bullet-resistant (never say bullet proof) glass is thick and wavy. Think of the encased cashier at a high-security bank branch. But this stuff was thin enough (and clear enough) to where you could actually shoot through it with a camera and keep the subject reasonably sharp.

    Normally, I prefer SB-800s when shooting indoors and save the Profotos for when I am battling and overpowering sun. But to hold the impact marks in the glass in decent focus, I new I would need a very small aperture. So I brought my big lights to what would normally been a cut-and-dried speedlight portrait.

    f/16 and Be There

    The process was to set up my lights on a modest power setting, so I could get really fast recycle times. Then I would adjust the ratios and tweak my ISO until I was able to shoot at f/16. On a D3, anything at ISO 800 or below looks pretty much the same to me. So as long as I have DoF, I valued recycle time over marginal grain.

    This photo was shot with a Nikkor 35 f/2 AIS, a screaming sharp manual focus wide-angle lens. And even after the optical trip through the half-inch glass, the sharpness was acceptable if not perfect.

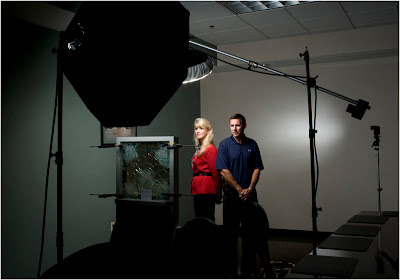
    I used three light sources. The first was a Profoto head in a large Paul Buff octa, positioned to do two things. First, I wanted it to edge-light the glass shatter marks from a hard angle. You need that lighting angle to get the crack lines to pop. Second, I wanted it to provide a small amount of (near) on-axis fill for Dianna and Wayne.


    You can see it just above the glass, in the photo above. This position gets me twice the bang for the buck. I was more concerned with the exposure level of the glass marks than the subject fill level. But by tweaking the position and angle I could get both effects pretty close.

    The key light was a boomed Profoto head in a beauty dish, slightly in front of and above the subjects. The dish is silver on the inside (efficient, but specular) so I socked it to turn it into a smallish, diffused light source.

    The separation light was a hard-angle kiss on the back wall from a slaved, gridded SB-800 seen at right. The wall was not black before the separation light hit it — it was getting some illumination from the dish and the octa. So the speedlight just created a small gradient to separate the subjects better.

    It was a pretty straightforward shot, as far as the lighting goes. Honestly, the hard part was positioning the camera at the exact spot where the subjects’ faces would each appear inside of an intact pieces of glass.

    It was harder than it looked. It is a three-dimensional solution, made more complicated by the fact that the subjects are always moving to some degree. I was bobbing and weaving like a boxer behind that glass to constantly compensate for the three variables.

    And in the end, I thought it was a little ironic that I was able to do what the bad guys aren’t — shoot both Dianna and Wayne right through a pane of their very special glass.


    Strobist

  • Are You Just Dying to Get Into a New Studio?


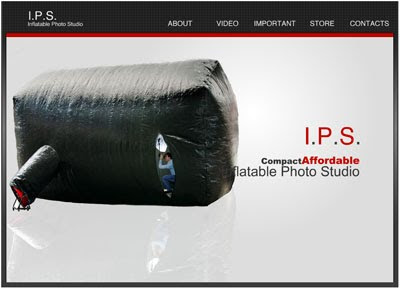
    I swear, I could not make this stuff up. The “Important” page on the new Inflatable Photo Studio (yes, I said Inflatable Photo Studio) includes the following among its several warnings:

    “It is not recommended that you smoke, cook or have any open flames in the studio. Also lights can become very hot and melt the studio. Do not rest lighting or position it against the sides. Curling irons, hair driers (sic) irons, and steamers can also melt the plastic causing rapid deflation or possible fire.”

    But wait, there’s more!

    For instance, in the event of a “rapid deflation,” not to worry! You have four minutes to get out alive — if you remember to crawl and “keep your arms up at an angle in front of you.” (Um, okay!)

    Hat tip: Andy | Tweet this

    -30-


    Strobist

  • On Assignment: Newspaper Man


    Sometimes I miss working at a newspaper.

    And when I say “I miss,” I mean that I miss it in the rose-colored glasses sense. Because some of the most fun I have had in the last 20+ years has been while shooting for small, community newspapers. So a few months ago I started stringing for a local business monthly as a way to keep touch with what I used to enjoy so much.

    It was in that capacity that I was assigned to shoot a full-page portrait of Stan “The Fan” Charles, pictured above. Stan was to be the cover for the Maryland Entrepreneur Quarterly section. Which is pretty impressive, considering his entrepreneur chops are being earned running a successful newspaper in 2010.
    __________

    During a time when most papers’ circulation charts look like black diamond ski slopes, Stan is going great guns at Press Box Magazine. (They call it a magazine, but it is really a tabloid-format newspaper.)

    Press Box succeeds by serving a strong niche better than anyone else. Their motto is “Baltimore Sports. Period.” And any guy who is succeeding in newspapers is by default a hero of mine. So many papers — and so many former colleagues — are taking it on the chin these days, it is great to see a newspaper guy killing it.

    Stan is a character with a long and rich history familiar to any true Baltimore sports fan. And I wanted to give him a kind of superhero look, with a palette normally reserved for a comic book.

    Believe it or not, the fedora — complete with a “Press Box” card in the band — was on the shelf. I could not make this stuff up. It took me about 5 seconds to convince Stan to don the hat, and we were good to go.

    But the wide-brimmed hat starts to restrict your lighting style options pretty quickly. So I decided to use what is normally a ring fill at almost a full exposure — maybe one stop down. (I used an SB-800 in an Orbis.) That gives me detail everywhere under the hat no matter what. And the ring goes darker as it wraps around the edges, for a cool look. The catchlight dead center on the eyes is a nice bonus.

    The key is a bare, gridded SB-800 with a 1/4 CTO — a very hard light source at only about two square inches of surface area. It is coming from hard camera right. You can see the super-hard nose shadow very clearly. But the ring (at only one stop down) carries lots of detail in the shadows, which somehow makes it okay. And it is aimed out in front of Stan’s face a little bit, so the grid kills the beam on the back camera right part of Stan’s head.

    I love the hard key / ring fill combo. You can light for character and still retain plenty of legibility. Umbrellas are safe light sources in part because they tend to mold peoples’ faces more towards the mean. Safe, but sacrificing personality, shape and character.

    People look different, and I want to celebrate those differences more than try to minimize them. I mean, take a good look at this guy’s face. It’s got some character. Would you get into a poker game with him? I wouldn’t.

    The way I use umbrellas has changed drastically since the Lighting 101 days in 2006, and I am planning on going back and updating that post and several others.

    Back to Stan, the separation light is a 3rd SB-800 with a grid being raked at a hard angle across that wall from back camera left. The color scheme was just pulled from his shirt and the surroundings.

    To finish off the comic book/hero look, I used high pass filtration and cranked it up way past where I normally go. Somewhere around 85% opacity, if I remember correctly. Plus, it was going full page in the paper, so I wanted it to pop even after the newspaper repro process tried to kill it.
    __________

    Rose-Colored Glasses

    It was shot to spec for the full page layout (an inside section front in a multi-section tab) with space left on the side for refer text and room for a boxed headline at bottom.

    When the paper came out, they promo’d it in the ear (upper right box) off of the front page, and I started flipping through the issue to see it big. When I found it, it was in black and white and not much bigger than a business card. The issue didn’t did’t have the space — the full-page layout was killed.

    Then I remembered why I like shooting for the web better than papers. I can run my photos any damn size I want and good repro is a piece of cake.


    Strobist

  • Best Video Setting For The Canon DSLR’s

    More and more DSLR users are utilising the ability that their cameras have to shoot high quality video – but what settings should you use to ensure you get the best quality video? Dave Dugdale from Learning DSLR Video put this video together for dPS just to answer that question – particularly with Canon DSLRs in mind.

    Video Transcription – Best Video Settings for Canon DSLRs

    I get this question about once a week, “What are the Best Video Setting For The Canon DSLR cameras”.

    So let me start off by eliminating two things you can take off the list. Those are aperture and ISO. Aperture, I really can’t tell you what to set it on because it depends on the type of look you are going after.With a shallow depth of field or not.

    And the other one is ISO. ISO is kind of there for exposure how how you are going to set the exposure. I will say you do not want go too far north of let’s say 1600 especially on like the Canon T2i then it gets really noisy. Obviosly you are going to need to use aperture along with the ISO to get the right exposure but at least it gets you in the ball park. Those two ingredients are taken off the list.

    So the first I can tell you about what is on the list is shutter speed. Basically if you are going for a filmic look you are pretty much going to double your frame rate, so if you are shooting 24 frames per second you are going to want a 1/50th of a second shutter speed and if you are shooting at 60 frames per second you are going to go with 125th frames per second shutter speed. Now I will tell you it’s just kind of a guideline and a rule but I have shot at much higher shutter speeds and it has worked wonderful, especially if you are shooting something like myself which is just basically a moving head.

    If you just getting your feet wet with your camera I think the best setting for Picture styles is Standard. I use it 90% of the time. If you are outside filming some landscapes for instance then you might want to try Landscape, and if you are using a close in portrait shot you might want to try Portrait picture style. After you have had the camera for a while and you want to take it to the next level, you might want to create a very flat picture style so you can have more control over color, sharpness and saturation in post.

    As for White Balance, the best setting by far is always going to be custom. This is where you get the perfect color temperature for your shot. This is best way to do it, but it is also unfortunately the most time consuming.

    The best setting for focus is to set it on quick focus and focus to one of the many points within the view finder. This is just my personal favor way to do this, I am sure others might disagree me but I got really accurate and fast results using this method.

    Disable your AGC to get this cleanest audio, AGC is automatic gain control. I use a hack method for this, but there are many other ways to do this as well like a buying a Juicelink box or a software hack if you are brave enough to install it on your camera.

    Set Movie Exposure to Manual, this is the best way to go by not letting the camera to decide for you.

    Grid display to Grid 1, this helps me with my composition just right.

    Disable Highlight Tone Priority, I have done many tests with this and found it best just to leave it off.

    Auto Lighting Optimizer is set to standard. Again I have done a lot of tests with this and I find that this setting not only helps my portrait photos but it even helps when I do video interviews if the lighting is not quite even on the person’s face.

    That is about it for the best settings you can use on your Canon DSLR for video. Thanks for watching and thanks to Darren for letting me do a guest post again.

    Post from: Digital Photography School


    Digital Photography School