Category: Uncategorized

  • Travel Photography Subjects: Odd/Whacky/Other

    This is it!  The last post in the Travel Photography Subjects series.  I hope you have enjoyed the other post and found some useful subjects you will be inspired to shoot on your next trip.  If you missed any of the previous 20 subjects, here are the links for you: Water, Old People, Young People, Religion, Sports, Socializing, Icons, Rich, Poor, Transportation, Economy, Food, Food Preparation, Weather, Art, Modern Vs. Traditional, Downtown, Views, History and Architecture.

    The twenty-first Travel Photography Subject is Odd/Whacky/Other.  It’s a catchall of sorts but it also a reminder to not take myself so seriously when traveling.  And when traveling, there is ultimately a lot that seems odd or whacky or just down right different.  Most travel is that way, I believe.   While looking for all the ‘serious’ subjects in this series, it is important to have a row on the checklist for the subjects that just don’t fit.

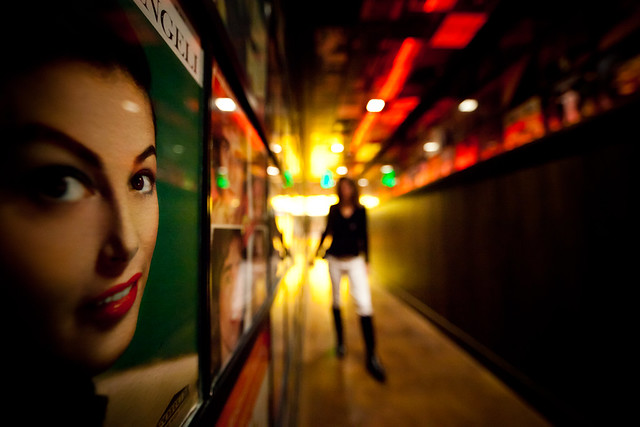
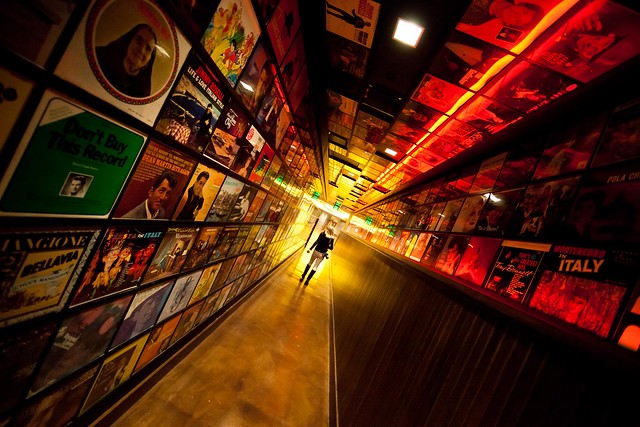
    What I and you consider odd/whacky/other is going to differ and that is the best way to have it.  This category really lets an individual’s personality shine as it shows what tickles the fancy of that particular photographer.  Whacky can be someone doing something funny, or just a juxtaposition that seems humorous (as in my example up top).  Odd is just that, odd to you.  And Other, well, Other is something of a copout, I admit.  But it is also a good reminder to break out of the mold that I have been forming with this list over the last six months.

    For me, the twenty-one items on this list comprise a solid foundation for which to build a coherent photographic travel narrative.  I want to again thank Catherine Karnow for introducing me to a version of this list on which I have expanded and adapted.  As I look forward to more travels in 2011 to Nepal, Bhutan, Italy, Hawaii, Peru, to name a few locations, this list will always be in my back pocket with another copy in my photobag.

    Here is a copy of the list in table format to help you in your travel photography endeavors.  Happy shooting!!

    Subject Shot?
    Water
    Old People
    Young People
    Religion
    Sports
    Socializing
    Icons
    Rich
    Poor
    Transportation
    Economy
    Food
    Food Preparation
    Weather
    Art
    Modern vs. Traditional
    Downtown
    Views
    History
    Architecture
    Odd/Whacky/Other

    Post from: Digital Photography School


    Digital Photography School

  • 53 Weekly Themes For Your 2011 Project 365

    Then end of one year brings the promise of something new in the one ahead. Last year DPS challenged you to start a Project 365, or Photo A Day, in 2010. We’re doing the same for 2011 and we’d love to know your plans!

    As a helpful suggestion, I have complied a spreadsheet for those needing some structure or looking for advice. The sheet is available here for download in Excel format (Project 365 Calendar). It contains a list of 52 different themes, one for each week of 2011, to aid your creativity if you get stuck. By no means is anyone required to complete this assignment exactly as written because a Project 365 should be about what interests you. It’s merely meant to help keep the motivation up when it starts to wane (around week two).

    I’ve also included a column for each day of the week for those planners out there who want to list it all out. It’s also a great way to capture future image ideas and reference them later. Need further help in staying motivated? Jim Goldstein has a post here on DPS just for you; 11 Tips to Succeed with a Photo365 Project.

    To recap the post from last year, “What is a Project365?  While they can take many forms depending on your hobbies, for photography’s sake it’s the simple act of taking a picture every day for a year. Many people will then post the photos on their blog, Flickr, Picasa Web Albums or just send them to friends. The format of presenting is not the important part of the project, although it can become a very useful way to keep committed to the project.”

    Now then, here is a link to the spreadsheet and below is the list itself for those wanting to adapt it to their own note keeping method. I tried to pick subject matter that did not require much, if any, travel far from home. It may take some creativity to caputure a few of the subjects, but you are a photographer, you are creative by nature! Have a great time shooting in 2011

    Note: You will notice the spreadsheet starts on January 1st. That ‘week’ only counts for January 1st and 2nd. After those dates, the calendar assumes the weeks start on Monday.

    Week Starts Theme
    Jan 01 Newness
    Jan 03 Cold
    Jan 10 Breakfast
    Jan 17 Macro
    Jan 24 Tired
    Jan 31 Sleep
    Feb 07 Body Parts
    Feb 14 Romance
    Feb 21 Spirit
    Feb 28 Vegetables
    Mar 07 Underneath
    Mar 14 Spring/Autumn
    Mar 21 Planning
    Mar 28 Fools
    Apr 04 Excitement
    Apr 11 Work
    Apr 18 Growth
    Apr 25 Trees
    May 02 Mother
    May 09 Up
    May 16 Anger
    May 23 Temptation
    May 30 Looking in
    Jun 06 Party
    Jun 13 Father
    Jun 20 Swing
    Jun 27 Lighting Experimentation
    Jul 04 Red, White, Blue
    Jul 11 Family
    Jul 18 Summer/Winter
    Jul 25 Time
    Aug 01 Water
    Aug 08 Shadows
    Aug 15 Peace
    Aug 22 Defeat
    Aug 29 Sunset
    Sep 05 Spice
    Sep 12 The Kitchen
    Sep 19 Autumn/Spring
    Sep 26 Tools
    Oct 03 Colors
    Oct 10 My Neighbors
    Oct 17 On The Shelf
    Oct 24 Memories
    Oct 31 Texture
    Nov 07 Wind
    Nov 14 Music
    Nov 21 Gathering
    Nov 28 Beyond Reach
    Dec 05 Smiles
    Dec 12 After
    Dec 19 Winter/Summer
    Dec 26 Oldness

    Post from: Digital Photography School


    Digital Photography School

  • How to Photograph Fireworks Displays

    FireworksPhoto by hupaishi

    Do you want to know how to photograph fireworks? With 4th July just days away I thought I’d refresh this article in which I give 10 Fireworks Photography tips to help you get started.

    Fireworks Displays are something that evoke a lot of emotion in people as they are not only beautiful and spectacular to watch but they also are often used to celebrate momentous occasions.

    I’ve had many emails from readers asking how to photograph fireworks displays, quite a few of whom have expressed concern that they might just be too hard to really photograph. My response is always the same – ‘give it a go – you might be surprised at what you end up with’.

    My reason for this advice is that back when I bought my first ever SLR (a film one) one of the first things I photographed was fireworks and I was amazed by how easy it was and how spectacular the results were. I think it’s even easier with a digital camera as you can get immediate feedback as to whether the shots you’ve taken are good or not and then make adjustments.

    Of course it’s not just a matter of going out finding a fireworks display – there are, as usual, things you can do to improve your results. With 4 July just around the corner I thought I’d share a few fireworks digital photography tips:

    Get more Digital Photography Tips like this in your email with our free newsletter

    1. Use a Tripod

    Fireworks-1Photo by Piero Sierra

    Perhaps the most important tip is to secure your digital camera to something that will ensure it doesn’t move during the taking of your shots. This is especially important in photographing fireworks simply because you’ll be using longer shutter speeds which will not only capture the movement of the fireworks but any movement of the camera itself. The best way to keep your camera still is with a tripod (read our series on tripods and how to use and buy them). Alternatively – keep in mind that there are other non Tripod options for beating camera shake.

    2. Remote Release

    One way to ensure your camera is completely still during fireworks shots is to invest in a remote release device. These will vary from camera to camera but most have some sort of accessory made for them. The other way of taking shots without touching your camera is to use the self timer. This can work but you really need to be able to anticipate shots well and its very very hit and miss (read more on remote shutter releases).

    3. Framing Your Shot

    One of the most difficult parts of photographing fireworks is working out where to aim your camera. The challenge you’ll face in doing this is that you generally need to aim your camera before the fireworks that you’ll be photographing goes off – anticipation is key. Here are a few points on getting your framing right.

    FireworksPhoto by Stuck in Customs
    • Scope out the location early – Planning is important with fireworks and getting to the location early in order to get a good, unobstructed position is important. Think about what is in the foreground and background of your shots and make sure you won’t have people’s heads bobbing up into your shots (also consider what impact you’ll have on others around you also). Take note of where fireworks are being set up and what parts of the sky they are likely to be shot into – you might also want to try to ask some of those setting up the display for a little information on what they are planning. Also consider what focal lengths you might want to use and choose appropriate lenses at this time (rather than in the middle of the show).
    • Watch your Horizons – One thing that you should always consider when lining up fireworks shots is whether your camera is even or straight in it’s framing. This is especially important if you’re going to shooting with a wide focal length and will get other background elements in your shots (ie a cityscape). Keeping horizons straight is something we covered previously on this site and is important in fireworks shots also. As you get your camera on your tripod make sure it’s level right from the time you set up.
    • Vertical or Horizontal? – There are two main ways of framing shots in all types of photography, vertically (portrait) or horizontally (landscape). Both can work in fireworks photography but I personally find a vertical perspective is better – particularly as there is a lot of vertical motion in fireworks. Horizontal shots can work if you’re going for more of a landscape shot with a wider focal length of if you’re wanting to capture multiple bursts of fireworks in the one shot – but I don’t tend to go there that often.
    • Remember your framing – I find that when I photograph fireworks that I spend less time looking in my viewfinder and more looking at the sky directly. As a result it’s important to remember what framing you have and to watch that segment of the sky. Doing this will also help you to anticipate the right time for a shot as you’ll see the light trails of unexploded rockets shooting into the sky.

    4. Focal Length?

    How-To-Photograph-FireworksPhoto by asmundur

    One of the hardest parts of photographing fireworks is having your camera trained on the right part of the sky at the right time. This is especially difficult if you’re shooting with a longer focal length and are trying to take more tightly cropped shots. I generally shoot at a wider focal length than a tight one but during a show will try a few tighter shots (I usually use a zoom lens to give me this option) to see if I can get lucky with them. Of course zoomed in shots like the one to the left can be quite effective also. They enable you to really fill the frame with great color. Keep in mind however that cropping of your wider angle fireworks shots can always be done later to get a similar impact in your photography.

    5. Aperture

    A common question around photographing fireworks displays is what aperture to use. Many people think you need a fast lens to get them but in reality it’s quite the opposite as the light that the fireworks emit is quite bright. I find that apertures in the mid to small range tend to work reasonably well and would usually shoot somewhere between f/8 to f/16.

    6. Shutter Speed

    How-To-Photograph-Fireworks-3Photo by *vlad*

    Probably more important to get right than aperture is shutter speed. Fireworks move and as a result the best photographs of them capture this movement meaning you need a nice long exposure. The technique that I developed when I first photographed fireworks was to shoot in ‘bulb’ mode. This is a mode that allows you to keep the shutter open for as long as you hold down the shutter (preferably using a remote shutter release of some type). Using this technique you hit the shutter as the firework is about to explode and hold it down until it’s finished exploding (generally a few seconds).

    You can also experiment with set shutter speeds to see what impact it will have but I find that unless you’re holding the shutter open for very long exposures that the bulb technique works pretty well.

    Don’t keep your shutter open too long. The temptation is to think that because it’s dark that you can leave it open as long as you like. The problem with this is that fireworks are bright and it doesn’t take too much to over expose them, especially if your shutter is open for multiple bursts in the one area of the sky. By all means experiment with multiple burst shots – but most people end up finding that the simpler one burst shots can be best.

    7. ISO

    Fireworks-2-1Photo by Mr Magoo ICU

    Shooting at a low ISO is preferable to ensure the cleanest shots possible. Stick to ISO 100 and you should be fine.

    8. Switch off your Flash

    Shooting with a flash will have no impact upon your shots except to trick your camera into thinking it needs a short exposure time. Keep in mind that your camera’s flash will only have a reach of a few meters and in the case of fireworks even if they were this close a flash wouldn’t really have anything to light except for some smoke which would distract from the real action (the flashing lights).Switch your flash off.

    9. Shoot in Manual Mode

    I find I get the best results when shooting in manual exposure and manual focus modes. Auto focusing in low light can be very difficult for many cameras and you’ll end up missing a lot of shots. Once your focusing is set you’ll find you don’t really need to change it during the fireworks display – especially if you’re using a small aperture which increases depth of field. Keep in mind that changing focal lengths will mean you need to need to adjust your focusing on most lenses.

    10. Experiment and Track Results

    Watching-FireworksPhoto by y entonces

    Throughout the fireworks display periodically check your results. I generally will take a few shots at the start and do a quick check to see that they are OK before shooting any more. Don’t check after every shot once you’ve got things set up OK (or you’ll miss the action) but do monitor yours shots occasionally to ensure you’re not taking a completely bad batch.

    Also experiment with taking shots that include a wider perspective, silhouettes and people around you watching the display. Having your camera pointed at the sky can get you some wonderful shots but sometimes if you look for different perspectives you can get a few shots that are a little less cliche and just as spectacular. Most of the best shots that I’ve seen in the researching of this article have included some other element than the fireworks themselves – whether it be people, buildings, landmarks or wider cityscape perspectives.

    More Tips from DPS Readers

    • “Find Out the Direction of the Wind – You want to shoot up wind, so it goes Camera, Fireworks, Smoke. Otherwise they’ll come out REALLY hazy.”
    • “Also, I find that if you shoot from a little further back and with a little more lens, you can set the lens to manual focus, focus it at infinity and not have to worry about it after that.”
    • “Remember to take advantage of a zero processing costs and take as many pictures as possible (more than you’d normally think necessary). That way, you’ll up your chances of getting that “perfect” shot.”
    • “Make sure you are ready to take pictures of the first fireworks. If there isn’t much wind, you are going to end up with a lot of smoke in your shot. The first explosions are usually the sharpest one.”
    • “Get some black foam core and set your camera to bulb. Start the exposure when the fireworks start with the piece of foam core in front of the lens. Every time a burst happens move the foam core out of the way. You will get multiple firework bursts in one exposure”
    • “Another tip I would add to this is pre-focus if possible (need to be able to manually focus or lock down focus for good) before the show starts so other elements in the frame are sharp They did mention that you only need to focus once but its a lot easier to take a few shots before the show starts and check them carefully rather than wait until the show has begun and you are fiddling with focus instead of watching fireworks!”

    Tell us your fireworks display photography tips in comments below. Don’t forget to tell us which city you’re in and what the fireworks are like there!

    We post tutorials like this every day – Get more via email with our free weekly newsletter.

    PS: Got some fireworks photos to share with us? Head over to our forum where there are a few fireworks photography discussions taking place.

    Post from: Digital Photography School


    Digital Photography School

  • 15 Must Have Photography Accessories Under $25*

    201008231308.jpgp>A Guest post by Kat Landreth from Pare and Focus. This post has been updated to help those looking for last minute stocking stuffers! *All prices and estimates in USD.

    Photography can be an expensive hobby. Cameras cost a bundle and lenses for DSLRs often cost a lot more than the camera body. Once you come to grips with the money you spent on the bare necessities it can be daunting to think about spending another fortune on accessories.

    The good news is there are plenty of photography accessories that costs less than (US). I’ve put together 15 of my favorites, and they often cost a lot less than . But I don’t think of them as “cheap” or “budget” items. These are valuable tools I would want in my kit even if money was no object. The combination of value and low cost means they make great gifts too.

    1. White Foam Core – At around this is probably the least expensive lighting equipment you’ll ever own. The white surface can be used to bounce light into shadows, softening hard contrasty light. Or, place it between your subject and the light source to cast shadows where you want them. You can even place it behind your subject for a clean distraction free background. Buy just one from a craft store for a few dollars, or get a pack of 5 boards on amazon.com for about .
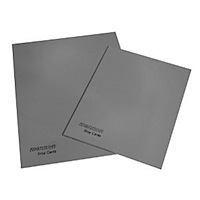
    31B1-WG8RcL._SL500_AA300_.jpg2. 18% Gray Card (AKA Medium Gray Card – Use your post processing time to get creative, not fixing basic exposure and white balance problems. A medium gray card helps you get it right “in camera” for just . An 18% gray card is designed to represent the average photographic scene by reflecting an average amount of light (18% give or take). Cameras are designed to reproduce average scenes, but not every scene in real life is average. Your camera can be fooled into under or over exposing pictures of very bright or very dark scenes. Using a gray card to set exposure will give you much more accurate results. You can also use an medium gray card to set a custom white balance for more consistent color in your photos.

    3. Spray Bottle – The trick to shooting fresh and dewy spider webs, fruit, and flowers isn’t waking at the crack of dawn. It’s having a spray bottle handy. It might feel like “cheating” at first but when you see the results you won’t care anymore. You can’t argue with the price either. Fine mist spray bottles can be found for about one dollar.
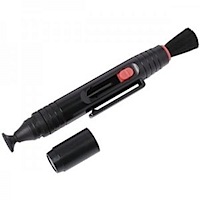
    31MnFMTtzqL._SL500_AA300_.jpg4. Lens Pen – Leave the lens fluid and papers at home. The “pen” has a microfiber disk filled with dry lens cleaner on one end. The other end has a retractable brush. Dusting with the brush removes large particles of dust. Lightly rubbing the disk on your lens will remove smudges, fingerprints and spots. A half twist of the pen with the cap on cleans the disk. I swear by this thing. I bought one for a trip to dusty Africa and used it extensively. They’re easy to use, they work perfectly, and they’re pretty cheap (around ). I can’t believe I didn’t have one before.

    5. Cloth bag of rice/beans – If you can’t or don’t want to carry a tripod around, having a bag of rice can be the next best thing. Use it to prop up your camera or rest your lens anywhere. Keep the cloth bag empty when traveling to save space and weight. When you get to your destination buy some rice or beans and fill it up. When you’re done, either eat the rice/beans, or give them to someone in need. You can buy dedicated “beanbags” filled with plastic pellets for exactly this purpose starting at about .

    6. Remote Shutter Release – Make tack sharp photos and no fuss self portraits for around . A remote shutter release lets you take the picture without touching the camera. This reduces motion blur caused by camera shake. Since the cord is a couple of feet long, it can make taking self portraits a little easier too. If you spend some time on Amazon you may even find a wireless remote shutter release that gives you even greater flexibility in the same price range. The camera’s self-timer is a less flexible but free option.
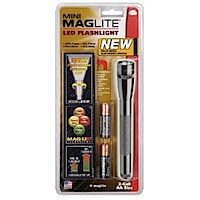
    51Yf6v+-cIL._SL500_AA300_.jpg7. LED Flash Light – These things are multi tasking marvels. Experiment with light drawing and light painting at night. And while you’re out there in the dark, you can use it to see where you’re going. They’re not just for night photography though. LED lights can look pretty close to sunlight. If you’re shooting outside they can be an inexpensive stand in for an off camera flash. You can get a small LED Maglite for around .

    8. Nikon (or similar) Lens Caps – I love my Canon, but they make the worst lens caps. Nikon caps are a lot easier to use. The pinchable area on the sides of the Nikon cap are at least twice as wide as the Canon caps. You can pinch from the center of a Nikon cap as well. This makes it easier to remove/replace the cap when a lens hood is in place. The easier it is to use the more likely I am to use it. The more I use the cap, the safer my lens is. They come in a variety of sizes (make sure you get the right size for your lens) and generally cost a few dollars.
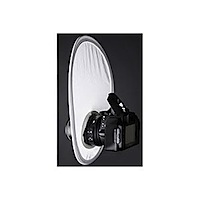
    21DcB4JfU-L._SL500_AA300_.jpg9. A Flash Diffuser (or Wax Paper) – If you have to use the on-camera flash, you can at least soften its effects with a flash diffuser. These come in many styles but they all use a white translucent material to diffuse light. Want to try before you buy? Tape a ring of waxed paper around your pop up flash next time you use it. In principal this will do the same thing as a diffuser, though it’s not durable and certainly not professional looking. When you’re at home taking family snapshots it probably doesn’t matter if you look professional. But, fair warning, it might not be a good idea to let the bride catch you with wax paper on your camera at your next wedding gig.

    10. Filter Wrench – If you have any screw on filters, one day, one of them will get stuck on your lens. It’s a sad but true fact of filter use. Filters often get stuck because the pressure from your fingers bends the filter a little when you try to unscrew them. Gripping harder to un-stick a stuck-on filter just makes it worse. A filter wrench distributes the pressure of your grip around the entire edge, gripping the filter tight without bending it. Get a filter wrench before you need one so you’re not tempted to force off a stuck-on filter and make it permanently stuck in the process. A set of two wrenches costs about .
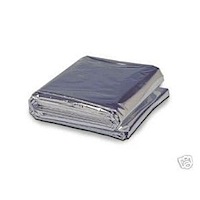
    21T+dJMsr+L._SL500_AA300_.jpg11. Reflective Emergency Blanket and/or Circular Reflector – Both of these can be used to reflect light into shadows. The nice thing about the emergency blanket, aside from it being very cheap (a pack of four blankets costs a little over ), is that the mylar it’s made of is waterproof. Throw it over your gear in a sudden downpour, or toss it on the dewey ground when you need to get low. Circular reflectors can’t pull triple duty like the emergency blanket, but they can still be had for under and unlike the emergency blanket they can be held in place with one hand. Ideally, you would have both and at these prices that’s actually practical.

    12. Bulb Blower – It’s important to blow off any large grains of sand and dirt before you wipe your camera or lens. You don’t want grains of sand to scratch your lens as you wipe it. A bulb blower delivers a powerful blast of clean air to blow away any dangerous particles. Skip the wimpy brush/blower combo they try to sell you in cleaning kits. The only thing they really do is shed bristled on your camera. Giottos makes a great bulb blower called the Rocket Blower for about .
    41wq8aCIw-L._AA300_.jpg
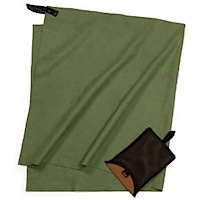
    13. Compact Backpacking Hand Towel – This is a must have if you shoot outside. An absorbent lightweight backpacking towel can whisk drops of water away before they become a problem. It’s also nice just to give your gear a quick wipe down at the end of the day to prevent dust and grime from accumulating. Keeping dust and dirt off the outside of your camera may even help keep it from getting inside your camera when you change lenses. These towels take up very little room and they’re worth every penny of the they cost. *Note: I don’t use this for the front or rear element of the lens.

    14. A Flickr Account – Use for archiving, getting feedback, showing off, and tracking your progress. A free account gets you 100MB of photo storage every calender month. For about a year you get unlimited uploads and storage space which is awesome if you want to archive your digital photos. I really like Flickr for the community (which you get access to wether you go pro or not). Photographers start “groups” to share photos and discussions with other, like minded photogs.

    Wether you want to ask questions, start a group or just have an online home for your photos Flickr’s got you covered.
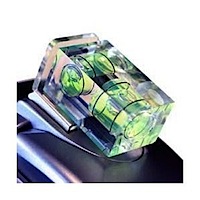
    31Uh34puYBL._SL500_AA300_.jpg15. Hot Shoe Mount Bubble Level- Keep your horizons straight even when hand-holding. It’s just a small bubble level that slips into your camera’s hot shoe. Not having to constantly straighten and crop your photos could easily be worth the this bubble level costs.

    These make great gifts! Is there a budding photographer in your life? A gift basket stuffed with a lens pen, compact hand towel, and bulb blower is perfect for a traveler. Are they shooting family events and holidays? Lighting accessories like reflectors, diffusors, and white foam core really come in handy for portraiture. Just bought their first DSLR? A basket with an 18% gray card, filter wrench, and remote shutter release is better than any cheap “get started kit” sold at the camera store.

    I’m always looking for ways to do more with less. So, what are your favorite inexpensive photography accessories?

    About the Author: Kat Landreth runs a blog called Pare and Focus – it has simple, inexpensive tips to make digital photos look better. There are “in camera” tricks along side tutorials for the free image editor GIMP.

    Post from: Digital Photography School


    Digital Photography School

  • F/1.0 moving….

    Hey folks, F/1.0 is moving… I’ve restructured my site which necessitated moving the blog address as well. I’m not going to be updating this site anymore – head on over to http://www.edzstudios.com/blog for continuing articles (there’s some new stuff up there already).

    Note: F/1.0 will remain up/accessible so any links to existing/old articles will still work.

    Tweet This Post Stumble This Post


    F/1.0

  • Rosco Plusgreen: The Magic Sunset Filter


    Druids may get all festive around Winter Solstice, but you can bet your typical cubicle worker is equally pissed off. That’s because most of them arrive at work barely after sunrise, and don’t leave until after dark.

    For that same reason, it is also when architectural photographers are most willing to go out and freeze their nu brave the cold weather to make skyline shots. At least in the northern hemisphere.

    Buildings with their lights all aglow at mix light are much prettier than they are at mix during other seasons. In June (at 39 degrees north, where Baltimore is) you’d have to wait until 9:30pm to get this shot. And the buildings are mostly empty and dark by then.

    Mix light is wonderfully unpredictable when it comes to the color of the ambient. And on top of that variable, here’s a little tip courtesy the architectural photographers: When you shoot dusk skylines, try a few with your camera set to the FL white balance as in the example above. (Click the pic for a bigger version.)

    Why?

    Because it does two things. First, it cleans up the indoor fluorescent lights in your photos, taking out a lot of the grody green cast. And second, it adds about 30CC of magenta to whatever your post-sunset ambient light is doing. Even though I shoot in raw, I always shoot it in daylight, tungsten and FL balance just to get a feel for which one I might like the best while still on the scene.

    Okay fine, Building Boy. What’s all this this got to do with lighting?

    A lot, actually …
    __________


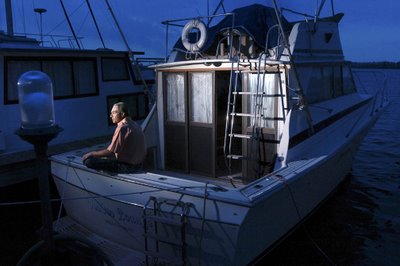
    Take this key-shifted portrait of a man on his boat. (See: On Assignment.) By taking an orange CTO filter and sticking it over your flash, you can shoot on tungsten WB and add a lot of blue into the sky. And it really gets cool if you underexpose the ambient one or two stops.

    Similarly, you can do the same thing with your green FL conversion gel. By sticking that on your flash and shooting on FL white balance, you effectively add magenta to your scene. Which takes a “meh” sunset and makes it look pretty cool. Or turns a good sunset into something almost alien.

    So not only do your skylines look amped on FL WB, but you can easily shoot a portrait in that shifted environment if you wish. Just green your flash.

    And as always, you can change the look and intensity of your new +30M CC sunset by over- or underexposing it. So work that shutter speed for a range of looks.

    These two filters (CTO and PlusGreen) are special because they are calibrated to be offset (or, very closely so) by your camera’s respective white balance settings. Which means you can zero them out, leaving only your unfiltered ambient in that completely different color space.

    Tip: Many cameras offer several different white balance settings to cover the wide range of colors of fluorescent light. You can also customize it by tweaking the white balance warmer or cooler. Photograph a neutral scene with only strobe light and figure out at which “FL” setting your camera best matches a Plusgreen filter. Then write it right on the edge of your filter.

    That way, if you need to inject some color into a sunset and balance a green-gelled flash, you’ll know right where to go with your custom WB.

    Finish it Off

    Remember, this filter-based color key swap only gets you back to neutral white light in your flash-lit areas. You are probably going to want to add a little warmth on your key light in a portrait to make them pop. Try a 1/4 CTO if you shoot Nikon (or a Rosco 08 if you shoot Canon as they tend to be a little more red sensitive.)

    Even if you just have the Rosco Strobist kit (more info | where to buy) the good news is you already have five copies each of these heavily used gels, and several more.

    But if you are only using that Plusgreen to fix your fluorescents, you are missing out on a very cool use for them.

    And if you live in the southern hemisphere, file this one away for next June 21.


    Strobist