Category: Uncategorized

  • Drew Gardner’s Brown Bag Video Series

    Long-time readers of this site are already familiar with London-based commercial and advertising photographer Drew Gardner. Many of you will be happy to know that he has just released a commercial series of walk-thru videos of over a dozen of his more notable shoots, broken into McDonald’s lunch-priced segments.

    I have always enjoyed Drew’s lighting, but even more so his creativity and imagination when approaching a shoot. And frequently, that ability to source a location or bootstrap say, an elephant or water buffalo as a prop for a shoot is more key to making the magic happen than knowing where to put your soft box.

    I have had a chance to view most of them, and the takeaway for me has been that there is generally one unexpected or unusual thing you have to figure out to make a shot come together. For me, that is a big lesson — because I am usually about the light.

    But Drew seems to have a talent for hitting the curve ball that comes at you from left field. And I would give a lot of lighting skill away to be able to do that so seemingly effortlessly. I learn something from the guy every time we talk.

    Drew kindly made one of the tutorials free, and I have embedded it above. (Blip.tv is ad-rolling it, but you can click them away.) You see the other photos selected for video tutorials here.

    -30-


    Strobist

  • 12 Amazing Photography Deals from dPS – 1 Week Only

    On the 12th Day of Christmas dPS gave to me – another chance to get all our previous deals!

    deals.jpgWelcome to the final Deal in dPS’s 12 Super Deals of Christmas! It’s been a massive couple of weeks and has been so exciting to see our readers saving literally thousands of dollars on these deals from some of our favorite partners.

    As our final Deal we’ve asked for each of the previous deals to be opened up again for one last time.

    Because it’s Christmas and many of our readers are having a few days off – we’re going to leave them open a little longer – but they will all be closed down for good as the clock ticks over to 2011 Eastern US time – so don’t delay securing them, this is your last opportunity.

    Day 1 – Save 10% on a Lens and 2 Camera Bags from Photojojo (note: one of the lenses in the original deal has sold out – so Photojojo have added a new camera bag to replace it).

    Day 2 – Save 30% on these Great eBooks from Ed Verosky (these eBooks sold like hot cakes).

    Day 3 – Save 10% on All Software from Topaz Labs – I had a lot of complaints when this deal ended. You can pick or choose here, grab one or pick them all up in a bundle.

    Day 4 – Save 30% on dPS’s Photo Nuts and Bolts eBook – we’ll be ending the bonus ‘pocket guide’ at the end of this deal. Grab yours today.

    Day 5 – Save 10% off All Photoshop Actions from MCP Actions – I’ve had a lot of positive feedback from readers on these, many of those who picked them up had never used Actions before and are excited by what they’ve learned by trying them.

    Day 6 – Save 20-25% off Kids Photography and Seamless Background Studio Training – some readers missed this one as it came on the weekend – don’t miss out again!

    Day 7 – Save 33% off Tony Page’s 2 eBooks – Tony’s eBooks are always popular and his new one sold like hot cakes.

    Day 8 – Save 30% off our Portrait Photography eBook – our first and most popular eBook ever.

    Day 9 – Get a Whole Library of eBooks for just .47 per eBook – thousands of readers picked up these amazingly cheap but valuable eBooks.

    Day 10 – Save 0 on Perfect Photo Suite 5.5 Software – award winning software at 20% off!

    Day 11 – Save 30% on dPS’s Travel Photography eBook – the perfect eBook for the many dPS readers who are traveling at this time of year.

    One Week Only – Get Yours Today

    So there you have it – all of these deals are open until midnight on 31 December (Eastern US time) or until stocks run out (on the physical products). So don’t hesitate and grab yours today.

    Thanks to all our partners for offering these deals – dPS readers have saved many thousands of dollars as a result and we thank you for that!

    Post from: Digital Photography School


    Digital Photography School

  • Home for the Holidays


    I am very thankful to not be traveling this Christmas season. And as in years past, I won’t be posting between now and the new year, either. What I do hope to be doing is spending as much time as possible with family and friends.

    In the meantime, hit the jump for our annual attempt at a Year in Review. And this year we have a little twist…
    __________

    Normally, I post my favorite ten posts of the year. And indeed, that is just below. But I thought I would turn the tables this year and also include your favorite posts, as evidenced by the number of page views they received.

    To be clear, popular section headers such as Lighting 101 and On Assignment are not included. These lists are only from posts written in 2010.

    The top three (as picked/clicked by you) will follow the regular top ten.

    But before that, some stats. This year, 2,469,886 different photographers dropped by from 218 different countries and territories. They visited for a total of 20,531,296 onsite page views, with another 12MM via RSS. For each of which I am truly grateful.

    Not surprisingly, the US was the most visited-from country, followed by Canada (which doesn’t really count, ’cause it’s, like, attached) and England (despite the obvious language barrier). Together they totaled about 13MM views.

    At the other end of the train was Eritrea, with a grand total of (wait for it…) one page view. Thus do we prefer to look at Eritrea as a growth opportunity for Strobist.com.

    Thank you all for stopping by.

    Over the week between Christmas and New Year’s a power-tool-fueled, lighting-related project is brewing in my garage. I hope to by back typing — with all ten fingers still attached — shortly after New Year’s Day.

    That said, here are the favorite posts from 2010.

    My Faves

    (In no particular order. All will open in a new window, for read-and-close ease of navigation.)

    Rocket Fuel for Your Flash
    The Stage is Set
    What Music can Teach Us About Lighting
    100% Grade-A Lighting Gear Porn
    On Assignment: Trip Jennings
    Shootout in Dubai
    Pucker Factor: f/64 — Photographing Dan Winters
    On Assignment: Caleb Jones
    Keith Richards is Still Alive
    Hops with Hopper

    Your Faves, Ranked by Clicks

    I hate to even post these, ’cause the subject of #1 is gonna get such a big head. Especially since post #2 is also very related to his post processing. All I can say is thank God post #3 had absolutely nothing at all to do with him.

    The top three 2010 posts, in reverse order: #3 | #2 | #1

    __________

    Merry Christmas (and/or whichever holidays you celebrate) and a luminous New Year to all.

    And if you are a rookie reader (yo, catch up, why dontcha) previous EOY lists are here: [ 2008 | 2009 ]
    __________

    [Ed Note: Comments will be moderated over the break, but I may be a tad slower than normal. Thanks for your understanding.]


    Strobist

  • It’s DIY Thursday

    Fancy yourself a bit of a … modder?

    Well, we gots not one but two DIY tips today, courtesy intrepid readers. Hit the jump to learn both how to add a nipple (not my term, mind you) to your SB-800 and how to make a very cool speedlight-to-AlienBees adapter.
    __________

    Can You See Me Now?

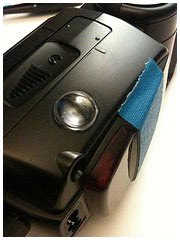
    Reader Eric Au came up with the idea to add a cheap flashlight lens to his IR window on an SB-800 to increase the angle of acceptance from other flashes’ optical signals. It appears to turn the flat window into sort of an optical collector.

    He was using it for CLS, but one would presume it would also increase the angular performance for people using the SB’s in SU-4 slave mode. More info on this cool mod in the Strobist Flickr group discussion thread.

    One note — DealExtreme seems to now be out of the multi-packs of super-cheap flashlight lenses. But they are pretty good at getting in stock to fill back orders. Shipping is free and the lenses are like, .40 for 100.

    DealExtreme takes a while, but they usually come through. Oh, and if this is your first time there, plan on a few hours of late-night browsing.

    Little Lights, Big Mods

    With the introduction of the new Einsteins, Paul Buff seems to be paying a lot more attention to the quality of his reflectors and other mods. He has moved beyond the old conical reflectors and has some very cool replacements at typically low prices.

    The grids to fit them are likewise inexpensive. And that starts to give some interesting possibilities if you can mate them to speedlights.

    Here’s the thing to remember: You need to change your speedlight output to the equivalent of a bare bulb with a Sto-Fen -type diffuser before the reflectors will properly do their thing.

    Thus will lose you some power. But this adaptation is not about power, it’s about light shaping. It is about being able to make some very cool light sources for when you are working up close (or in low, easy-to-overcome ambient.)

    You can shoot like this in your speedlight’s wireless TTL mode, too, if that’s your thing. (Not that there’s anything wrong with that…)

    I love jamming a foam-wrapped, stofened SB-800 into a Profoto Magnum reflector and working in close. Just a very cool kind of light for close-in portraiture. (Example of a Magnum-keyed portrait here.)

    So, without further ado, Tim Rogan’s neat little DIY hack to marry your AB mod and your speedlight”

    Vid not showing? Click here.

    On thing to note — this mod puts the flash a little further into the soft box than the regular AB or Einstein tube would be. No prob in a ‘box, but with a reflector you want to match the focal point of your flash head as closely to the position of an AB flash tube as possible. I would be looking to saw off some of the front of the male screw threads on the main black plastic piece to adjust that flash position.

    Very cool idea tho, and you can see a variant on it courtesy Tim Johnson.

    Or, Go High-End


    If you are the type with more money than time, frequent Strobist Flickr group contributor Elvis Pahr is now making speedlight-to-softbox adapters that look darn-near Italian as far as the design goes. More info at EP-Designs.
    __________

    So, anyone else marrying speedlights to big mods using nifty DIY hacks? Gimme a URL in the comments. I’d love to help spread the word to others.

    Oh, and for anyone who is confused by the lead pic, that’d be Tim “Tool Time” Taylor, a staple of US TV in the ’90s. Click the pic for a much better explanation.


    Strobist

  • Lightroom’s Selected and Most Selected Images

    One of confusing things when you’re getting started in Lightroom is understanding the concept of selected images and the most selected image in Lightroom.

    LR_most_selected_image_step1.jpg

    Step 1

    To see this at work, start in the Library module and press G to move to Grid view. Click on any image to select it and Shift + Click on another image. You’ll now have a sequence of images selected.

    Notice that in both Grid view and on the Filmstrip the first image that you selected has a lighter border around it than all of the other selected images and notice that the unselected images have darker borders.

    The image with the lightest border is the most selected image and it is the image that will be affected by changes that you make to various settings, in particular when you are working in Loupe view with multiple images selected.

    LR_most_selected_image_step2.jpg

    Step 2

    What you have selected in Lightroom and the view you are in impacts how changes are applied to an image.

    In Grid view if you select the Quick Develop panel and choose a different white balance setting then all the selected images that are selected will be altered.

    LR_most_selected_image_step3.jpg

    Step 3

    However, if you are in Loupe view and if you make the same change only the most selected image will be altered and not all the selected images.

    Grid and Loupe view work very differently and it’s important to understand, particularly in Loupe view, that when you have multiple images selected, there is one that is most selected.

    LR_most_selected_image_step4.jpg

    Step 4

    When you have all images in a folder or collection selected it can be difficult to see just how to deselect the images. To deselect a selection, click outside the thumbnail area of any of the selected images in an empty area of the cell it is in. This deselects the current selection so only the image that you just clicked will be selected.

    Post from: Digital Photography School


    Digital Photography School

  • 5 HOT Lightroom Features

    A Guest post by Christopher HC Brown

    lightroom_3.jpgFirst off I should come right out and say that I think Lightroom is an amazing tool for photographers. Before I got my first copy of this application I was using Photoshop to do all of my image editing.

    Don’t get me wrong, I know Photoshop is also a great application and is used by probably millions of photographers and graphic designers as the de rigueur standard. Unfortunately it is the comprehensive scope and vast number of features that is what makes it a problem for many photographers. Photoshop contains many features that are rarely or never used by photographers.

    As a result the menu structure and basic interface is quite cluttered. Furthermore, the need to use layers to perform non-destructive editing is for many of us tedious. I must admit that prior to switching to Lightroom, I so much wanted to avoid having to create and manage layers that I created a copy of each raw image I created, then performed destructive edits on the copy. If I made a change that I could not undo, or that I decided I did not like after I had applied other edits, I had to create another copy and start all over again. Certainly not an efficient approach!

    Fortunately somebody suggested that I might like to try Lightroom or Aperture as both of these applications are designed with the photographer in mind. This was in my “pre-Mac” days so Aperture was out; I got Lightroom 2.7, and recently upgraded to version 3. Since then I have become a devoted convert to this application, and now I need Photoshop only on the rare occasions that I want to perform some complex Cloneing, or if I want to do some kind of graphic editing that Lightroom, by definition, does not support.

    So now that you know how I came to be be a fervent fan of Lightroom, here is the list of my 5 favorite features that make it such a great tool for photographers.

    1. Non-Destructive Editing Without Layers

    I hate layers! I don’t like creating them. I don’t like setting their properties. I don’t like merging them, flattening them, deleting them or moving them. When I am editing a digital image there are a lot of other things I would rather do than mess around with layers. The problem for me, before I started using Lightroom, was that using layers was the only robust method for making non-destructive edits to a digital image.

    As I described above I had way of avoiding using layers, but it was not very efficient. Well fear no more. Lightroom lets us edit our RAW image files (or JPEG if you are not shooting RAW yet), preserves a history of every change we have made, and allows us to move forward and backward in the history. We can even save a snapshot of our images at any time and in this way preserve the edits performed, then make more edits. If we decide we don’t like subsequent changes, we can go back to the snapshot and start again.

    If you are like me, your aesthetic is constantly changing and as a result you are re-editing images months after your initial attempt. For us this really is a paradigm change in digital image manipulation.

    2. Library Integration

    lightroomlibraryscreen.png

    Prior to Lightroom we had to switch between separate applications to manage our ever expanding photo libraries and our editing software. Now we have a scrolling library across the left side of the window, and at the bottom a scrolling screen that allows us to quickly navigate between images.

    The navigation bar on the left of the window, by default, includes all of the folders in our library, and the collections of our images. I find this really useful when I am publishing images to my Flickr page (which is supported by version 3), putting together slide shows, and publishing Flash or HTML galleries of my collections.

    3. Graduated Filter

    lightroom-tonemapped

    The Graduated Filter tool is excellent for adjusting exposure to bring life back to an overexposed sky or for darkening a foreground to place greater emphasis on the subject, as in the picture to the left. Simply click and drag the filter down over the region in the image that you wish to adjust.

    Then, if you wish to tilt or change the size of the area covered by the filter, you can drag the area around with your mouse. You can use the graduated filter to apply heavy or light adjustments, and it always provides a smooth transition from the adjusted to the non-a dusted regions in your image. I use it mostly for exposure adjustments, but it can be used to adjust a number of properties such as contrast, brightness, clarity and sharpness.

    Also, you can use it to apply a graduated colour effect just like we used to do with glass or plastic filters when shooting film.

    4. Crop Overlay Tool

    lightroomcrop.png

    When clicked, the Crop Overlay Tool displays a grid overlaying your image. To change the region to be preserved after your crop, simply adjust the sides of the area by clicking and dragging. There are a couple of features that make cropping in Lightroom a breeze. First, you can choose from a number of standard formats (called the ‘aspect’) such as 8×10, 8.5×11, 1×1, 5×7, 4×6, etc…

    This makes changing the format of your image quick and easy. Changes to the aspect is something that photographers should experiment with when processing their images as changing the format has the power to improve final product. Now it is very easy to do.

    Furthermore, there is a little padlock symbol that when clicked toggles between locked aspect, and freeform cropping. The second cool feature is very simple, but really improves working with cropping; a preview. Provided that you have the Navigator at the top left of your Lightroom window expanded, the changes you make to the crop of the image will appear there. This makes trying different crops really easy and cuts down on a lot of the clicking through menus that some other applications make us go through.

    Finally, if you make a crop, and later think you might like the image cropped differently, or not at all, all you have to do is click the Crop Overlay Tool and you can adjust or remove the crop at your whim!

    5. Web Export

    This is a feature that I have only recently started to use. Prior to building this website the export functions I used were to local disk, Flickr and Slide shows. I actually built a website using an on-line web tool that included HTML based galleries for my images. It lasted about two days once I figured out that I could use the built in functionality in Lightroom 3 to create slick Flash galleries!

    There are something like 30 templates included with Lightroom. None of them are terribly fancy, but they provide a very simple and elegant presentation of your images. There is even a “Postcard” gallery included that spreads thumbnails of your images across the screen that enlarge for viewing when the user clicks on them. You can change the look and feel of the galleries by changing colour schemes, image and thumbnail sizes, and which metadata to display. Finally, publishing is a ‘one click’ excercise after you enter the address of the FTP server and sub-folder of your website.

    Well there you have it, my favorite 5. Get to know Lightroom and I am sure you will find many more useful features for the top of your list.

    See more from Chris at Christopher HC Brown Photography

    Post from: Digital Photography School


    Digital Photography School

  • Giving Thanks, Giving Back


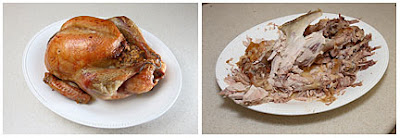
    It’s Thanksgiving Day here in the US. Which means that in addition to trotting out the traditional Strobist before-and-after turkey shot (courtesy the tryptophan-laced Paul Morton) we pause to think about giving thanks and helping others.

    This year, a quick look at how some local photographers in Howard County, MD are using their cameras to give back to their community. And not to put the idea in your head, but it was a really fun day — and something anyone reading this blog could do, too.
    __________


    A few weeks ago, I posted a cryptic note looking for photographers to help out with a community project on November 2nd. Within an hour or two there were more than fifty photogs who were willing to sign up for a day-long volunteer shoot without even knowing what they would be doing.

    As it happens, we could only use about 15 photographers for this shoot. So I chose them solely on the basis of proximity and availability for the day. Which is to say, (a) I did not cherry pick the group for pros or other hotshots, and (b) any group of enthusiasts in any city in the world could do the same type of project for any of a number of subjects.

    Here’s what we did.

    Instant Archive


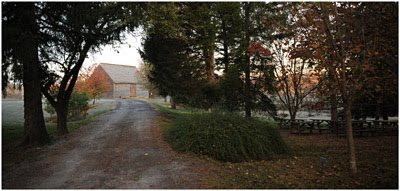
    The Howard County Conservancy is a 230+ acre plot of preserved land around a 300+ year-old farm house in Woodstock, MD. They educate over 6,000 school kids a year (via field trips) and provide events for the general public in addition to making accessible a wonder series of hiking paths through agricultural and wooded areas.

    It is an amazing place with lots of nature and history, but without a ton of money. In fact, the nonprofit organization is trying to raise enough of the latter to create an endowment that will keep them going. And if you are going to be doing that sort of thing, it helps to have a photo library.

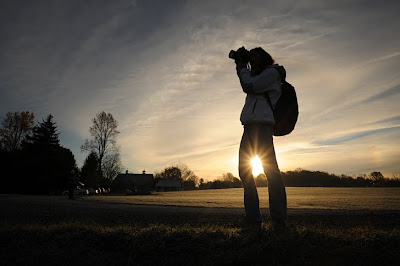
    So that’s what the 15 volunteer photographers gave them. We arrived well before sunrise (gorgeous, with frost on the ground) and stayed throughout the day.

    We were working off a subject list provided by Allison, our on-site contact, so the photos would be very useful to them. We approached team-coverage style, like back in the day at The Sun. List in hand, the photographers were also instructed to just go out waking with their cameras and seeing. And that brought back some of the best photos.

    By the end of the day we had shot over 10,000 photos, which were then edited and toned down to a tight 250. Total cost, other than our time: About 0 for pizza, drinks and some chocolate. And we had a lot of fun. You can see some of the results of the shoot on HoCo360, my local photo blog.

    Instant Results

    As it happens, Howard County was also getting another gift this month. R.E.I., a kickass outdoor equipment and clothing store, was opening in nearby Columbia. Even if not in the US, you may know of them because of Chase Jarvis’ BTS vids — he shoots their lifestyle photos for catalogs, etc.

    Among R.E.I.’s many admirable qualities is that a local store tends to push about 0,000.00 per year back into the immediate community. And the HoCo Conservancy is right up R.E.I.’s alley as a benefactor. R.E.I. not only wrote a check for ,000.00 to kick things off, but has pledged a buck for the conservancy each time someone checks into the store on Facebook.

    And because the conservancy had a brand new picture archive, they were able to create a cool poster on very little notice to showcase themselves in the new store:


    The photos in the poster are courtesy Jeff Snyder, Dave Kile and Erik Couse, all from the day’s shoot. You can see it bigger, here. The goal was to introduce any shopper in R.E.I. to the conservancy should they not already know about it.
    __________

    Anyone — ANYONE — reading this site right now has the ability to do the same thing for a deserving organization in their own community. And I think I speak for everyone involved on this project when I tell you that we had a lot of fun. It was work, but it was both creative and gratifying.

    As the picture editor for the project (highly recommend a dedicated PicEd) I was very impressed with the stuff that came back from the shooters. Most were amateurs, but they worked hard and pressed themselves all day long.

    If you are already meeting up socially with local photographers, I would like to invite you to consider moving past the typical Model Mayhem Meetup and into something with a little more of a purpose.

    It is a chance to have fun, be creative, make a difference and give thanks with your camera. You won’t regret it.

    If you find yourself in the R.E.I. store in Columbia, MD, check out the community involvement display in the back and our photos therein. And there are lots more where those came from.

    __________

    Related:

    :: HoCo360: Barnstorm ::
    :: The Howard County Conservancy ::
    :: R.E.I., Columbia, MD ::


    Strobist