The post 5 Reasons to Get Photoshop Express on Your Phone appeared first on Digital Photography School. It was authored by Ana Mireles.
Adobe has developed many Photoshop apps, but none are as popular as the desktop version (Photoshop CC). That said, maybe it’s time for this to change, at least for one of Adobe’s apps: Photoshop Express.
In this article, I’ll tell you five reasons why I recommend you give Photoshop Express a try.
Adobe decided to introduce three different apps to cover the full range of editing that Photoshop can offer: Photoshop Fix, Photoshop Mix, and Photoshop Express. In this article, I’m going to talk about Photoshop Express, and why I believe it’s worth downloading.
1. It’s free
Unlike the desktop version of Photoshop, you don’t need a Creative Cloud subscription in order to use Photoshop Express.
You can download the app for free, and you’ll get access to all the features and updates.
You do have to create an Adobe account, though (one that also allows you to use a limited version of Lightroom Mobile).
2. It’s social
A very important thing for a photo editing app is the social aspect. You want to snap and share photos with ease.
Adobe took this into account when designing the cropping tool. With Photoshop Express, you can crop your images using the array of predetermined sizes for Facebook, Instagram, Pinterest, LinkedIn, Etsy, and most other major social networks.
For example: When cropping for Facebook, you can choose from the Page Cover, the Event Cover, the Profile Cover, the Profile, or the Ad.
Of course, you can then share your photo directly from the app. From there, you can also add a watermark, send the image to Creative Cloud if you are a subscriber, send the image to a printer, and more.
3. You control size and compression
Unlike many other editing apps, Photoshop Express lets you choose the size and quality of your file before saving or sharing it.
You can set a default JPEG Quality and a default Image Size in the Preferences of the app. To set this up, tap on the menu (in the top-left corner). Then go to Preferences and then Save Options.
You can also change size and quality in the final stage of your saving or sharing process. Before you choose the destination of your image, click on the settings below the thumbnail (so you can modify them).
4. You can work with RAW files
A RAW file is like a digital negative. It saves the information from the shot prior to processing; that way, you have much more to work with when you’re editing, and the quality will be superior.
Of course, this means that the file size will be bigger, so keep an eye on your storage space. If you have a camera, you probably know that each brand has its own RAW files. For example, Canon uses CRW/CR2/CR3, while Nikon uses NEF/NRW. A standard and open-source RAW format is a DNG file, which is what you get if you shoot using Lightroom Mobile.
On the left, you can see how a RAW file is clearly marked in the gallery. That one was shot using the camera from Lightroom Mobile. On the right, you see the post-processed version of that file (edited using Photoshop Express).
5. You can do all your post-processing
Last but not least, the editing capabilities of Photoshop Express are top-notch. After all, the app was created by a company that has been leading the post-processing market for decades.
That said, Photoshop Express won’t reach the level of editing that you can do with the desktop version of Photoshop. That’s why there are three apps.
However, if you consider that Photoshop Express is free and won’t take up all your phone storage space, it’s actually very good.
Snapshot made with a Redmi Note 8, later post-processed in Photoshop Express.
Also, Photoshop Express includes many presets for looks, effects, stickers, frames, etc. That way, you can do some serious post-processing, or you can just create fun posts for your social media feed.
Conclusion
With so many editing apps on the market, it’s difficult to make a choice; sometimes you end up downloading a different app for each purpose.
However, Photoshop Express has proven to be an all-purpose and well-rounded app.
And if you have an iPhone, you’ll get some additional features.
Share in the comments if you decide to try Photoshop Express, and let me know what you think.
The post 5 Reasons to Get Photoshop Express on Your Phone appeared first on Digital Photography School. It was authored by Ana Mireles.
The post 5 List-Making Exercises to Improve Creativity in Photography appeared first on Digital Photography School. It was authored by Megan Kennedy.
We’ve all made lists before: shopping lists, to-do lists, Christmas lists, and more. List-making can be a valuable asset to photography, too. In this article, we’ll look at the benefits of list-making, how it can improve creativity, and some effective list-making exercises.
The benefits of list-making
List-making can improve creativity in a number of ways. For example, many of us tend to remember tasks that need to be done better than we remember the tasks we’ve completed. This can generate a feeling of being overwhelmed, which can lead to something called task paralysis. Making lists provides a visual reminder of our progress over a period of time, inspiring creative momentum and a sense of accomplishment.
In addition, a recent study has shown that the simple act of jotting down a list of to-dos is enough to ease the anxiousness brought on by incomplete tasks. List-making also encourages brainstorming, a pillar of the creative process. By creating an accessible layout of tasks and ideas, lists give goals a certain tangibility, facilitating active steps towards a positive creative outcome.
List-making isn’t restricted to pen and paper. There are plenty of useful apps for making and reviewing lists, too. Android apps pictured: Notepad (left); Habits (right).
List #1: Things I don’t know (and how to learn them)
I’ll admit that a things I don’t know list sounds a little pessimistic at first. But identifying areas you know little about is the best way to target gaps in your own practice.
Take a bit of paper, use a list-making app, open a Word document, or select a page from a notebook (whatever works), and start listing the facets of photography you want/need to know more about. You can list anything, from art theory to photography tricks to post-processing techniques. Next, pair your points with a few words about how you might actively bridge these knowledge gaps.
Here’s an example:
You’ll see that I’ve added timelines to each point on the list, too. Adding a timeline helps bolster your commitment to incorporate the listed tasks into a creative routine.
Naturally, the time you assign to each goal will depend on your daily habits and the goal itself. Just remember that any dedicated length of time invested in your practice is far better than investing no time at all. If you aren’t sure about your timeline, start small and make adjustments incrementally.
Put your list somewhere visible as a reminder of your goals. As you progress, make additions or amendments to your list; your plan should always be open to change. You could even create a checklist to help improve creativity and to map the trajectory of your creative growth.
List #2: Subjects I want to photograph (but haven’t yet)
We all have subjects we would love to photograph, but haven’t yet. Making a list of subjects you aspire to photograph is a productive way to set goals that will broaden and improve creativity.
To start a subjects I want to photograph list, first type/write out some realistic subjects that you would like to photograph in the short and/or long term. Next, add some necessities that will facilitate these goals. Will you need particular equipment? Additional experience in the field? A passport? Savings? Research? List anything that comes to mind. Here’s a quick example:
Note that I have added research to each individual goal. Solid research is fundamental to most photographic undertakings. To tease out what particulars you might need to research, you can use the things I don’t know list!
Once you have your outline, you’re free to break down your list into more detailed segments. For example, you could plan a budget for acquiring suitable equipment. Some goals will be more long-term than others, but having a list will enable you to take decisive steps toward successfully photographing your dream subject.
List #3: Creatives that inspire
There are many artists that inspire my creative practice. So many, in fact, that it can be hard to keep track. That’s where list number number three comes in.
Inspiration drawn from other creatives can reveal new approaches to your own photography. Canon 5D Mark II | Canon EF 50mm f/1.8 II with extension tubes | 1/125s | f/3.5 | ISO 500.
Making a thoughtfully curated list of creatives that inspire and motivate your practice is a great way to maintain momentum and stimulate ideas. From recording your favorite photographers in an alphabetical Excel spreadsheet to noting the names of impactful artists in a visual diary, creating a list of inspirational creatives provides an accessible point-of-reference that can improve creativity in a lull.
List #4: Photography goals
Making a photography goals list is a lot like making a subjects I want to photograph list. The idea is to lay out goals paired with actionable steps to achieve a desired creative outcome. Here is a quick example:
Again, you can break down your actionable steps even further by creating checklists, budgets, or timelines. List-making rewards persistence while focusing and improving creativity; it also emphasizes the value of each step toward an overall creative objective. Keep your list somewhere you’ll see it regularly and use it as a compass and a source of inspiration when goals seem far away.
List #5: Why I love photography
Like most things, photography has its ups and downs. When things go right and inspiration flows, it can be smooth sailing. But when things go wrong, you can start to feel the pressure of creative fatigue. Fortunately, lists are a great way to help ease the burden of a creative dry spell.
Photography will take you to amazing places, and it can all start with a simple list! Canon 5D Mark II | Canon EF 24-105 mm f/4L IS USM | 1/200s | f/6.3 | ISO 100.
The why I love photography list is an opportunity to reflect on what it is that makes you do what you do as a photographer. What made you fall in love with photography in the first place? How does photography inspire you? What do you love about your favorite subject matter? How has photography positively impacted your life? What drives you to make your next shot?
There are so many reasons people fall in love with photographic image-making, and listing them creates something concrete to draw upon when needed, helping you to improve creativity and clear the fog of artistic fatigue.
Conclusion
Lists aren’t just great for remembering things; they’re an opportunity to improve creativity and expand creative practice. Lists give order to chaos, they provide a plan to work through, and they supply proof of what has been achieved.
By making lists, we can reinforce ideas, formulate goals, and track sources of inspiration and success. Happy listing!
The post 5 List-Making Exercises to Improve Creativity in Photography appeared first on Digital Photography School. It was authored by Megan Kennedy.
The post Canon EOS M7 Rumored to Arrive in 2020 With Dual Card Slots, 2.36M-Dot EVF appeared first on Digital Photography School. It was authored by Jaymes Dempsey.
With most photographers focused on Canon’s new EOS R models, rumors of another couple of Canon EOS M cameras have mostly flown under the radar. This includes talk of a potential EOS M7, as well as a rumored EOS M50 Mark II.
And information continues to leak, including recent Canon EOS M7 specifications; if the rumors are accurate, it’s shaping up to be one impressive camera.
Canon Rumors suggests we may get:
A 32-megapixel sensor.
In-body image stabilization.
A 2.36M-dot electronic viewfinder.
12 frames-per-second shooting.
Dual card slots.
4K/60p.
Nice, right?
Unfortunately, the same set of rumors also puts the EOS M7 price at $ 1599 USD, which is significantly more expensive than either the EOS M50 and the EOS M6 Mark II. But if the EOS M7 is, as many have speculated, a higher-end, durable APS-C mirrorless model from Canon, this pricing could make sense.
Now, the features listed above are unconfirmed (Canon Rumors marks them as CR1), so take them with a pinch of salt. But the EOS M7 has long been a topic of discussion, including speculation of the camera as a mirrorless replacement to the Canon EOS 7D series, which was a favorite set of DSLRs among bird and wildlife photographers.
If the latter is true, the EOS M7 should, first and foremost, be an action photography camera. This is hinted at by the (relatively) fast continuous shooting specification, as well as the dual card slots, but we’ll have to wait and see regarding its durability (the 7D series was known for its large, tough bodies).
Interestingly, Canon Rumors also mentions the possibility of the EOS M line drawing to a close in 2021, with Canon focusing entirely on the EOS R lineup, including (perhaps) an APS-C EOS R model. If such a rumor were true, then the EOS M7 and the EOS M50 Mark II may be some of the last EOS M bodies we ever get.
Of course, this is also completely unsubstantiated, so just keep an eye out for related news in the future!
Now over to you:
What do you think about the rumored specifications for the Canon EOS M7? Is it a camera you’d be interested in? Also, do you think that Canon will truly discard its EOS M lineup? Share your thoughts in the comments!
The post Canon EOS M7 Rumored to Arrive in 2020 With Dual Card Slots, 2.36M-Dot EVF appeared first on Digital Photography School. It was authored by Jaymes Dempsey.
The post 5 Quick Reasons to Use the Nifty Fifty for Landscape Photography appeared first on Digital Photography School. It was authored by Tim Gilbreath.
The 50mm prime lens, commonly known as the Nifty Fifty, is a lens that even inexperienced photographers have likely heard of. Most of us know it for its outstanding qualities; it’s an inexpensive, high-quality, prime lens that is in plenty of photographers’ bags around the world and is one of the most popular lenses of all time.
What we might not think of a Nifty Fifty as, however, is a lens normally used for landscape photography. The field of view is tight, and the lens doesn’t possess a focal length wide enough to usually be considered proper for this sort of work.
But I have. For four years, the 50mm f/1.8 has been my workhorse for portfolio building (which is primarily nature and landscape), and even though I’m branching off with other lenses, I can’t stress the usefulness of the Nifty Fifty. And I’m not alone.
My primary reasoning for using the 50mm instead of going out and buying a proper wide-angle lens such as a 35mm or even wider?
Cost.
I was diving back into photography, and I was on an extremely tight budget. After buying my camera, spending $ 500 on a lens simply wasn’t an option. It didn’t take long for me to hear my fellow photographers sing the praises of this wonderful lens: cheap, fast, and sharp. Right up my alley.
There are no tricks or immaculate revelations here, and you won’t likely become famous for taking only landscape shots with 50mm lenses. But there are a few reasons why shooting landscapes with a 50mm lens can produce great results.
Giving it a try can only improve your photography and make you a better observer of the world around you.
Focus on what’s important
We think of landscapes as sprawling, wide shots that include many elements in one frame, but do they have to be that way? Can we not capture the beauty of the area around us in a tighter package? The rolling hills and an interesting tree in an outdoor scene are more than enough to create a photo that provokes thought.
The Nifty Fifty makes it easier to focus on whatever is most important in your photo, while still capturing enough around the subject to lend the shot scope.
Shooting at this focal length forces us to focus on the most important parts of what we’re seeing around us. Trimming the fat, as they say. In doing this, we’re also training ourselves psychologically to do the same in all of our shots.
Quality
Landscapes usually require very good sharpness, and 50mm prime lenses excel at that. No extra moving parts normally required for zooms makes for a crisper, sharper result. As with most lenses, the Nifty Fifty sweet spot isn’t wide open, but more in the f/4 to f/5.6 range. And narrower apertures will still yield excellent results.
The 50mm prime allows you to capture very sharp images.
Take your time
Since the 50mm is a prime lens, you’ll get an added benefit (or detriment, depending on how much you care for walking): The single focal length means you can’t just shoot from anywhere. Instead, you’ll need to move around to find the best angle and distance. This automatically forces you to think about your shot a bit more, which is always a good thing.
A 50mm lens allows you to think differently about the landscape or subject you’re framing and to make more creative choices.
With a zoom, you’d adjust focal length without even thinking until the scene is framed in a way that looks good. But what if that isn’t the best angle or distance? The Nifty Fifty will give you the incentive to take a chance and try something different, whether it be an angle, a distance, or a perspective.
No wide angle…or can there be?
Of course, there can! The 50mm gives you a gentle push into playing around with some panoramic shots. Three, four, five, or more shots can be stitched into a flattering wide-angle composite, sometimes with even more dramatic results than a single wide-angle shot.
By stitching together shots, we can create a panorama that gives us the wide field of view we’re looking for.
Lightweight is king
If you’re serious about landscape photography, you’re probably already lugging around a considerable amount of gear. Camera bodies, other lenses (you don’t go out with just one lens, do you?), tripods; the list goes on.
The last thing you need is more heavy lenses when you’re out and about, right? Do you know what the Canon 50mm f/1.8 weighs? 4.6 ounces (130 g). It’s short, sweet, and light to boot.
At the end of the day, all lenses and focal lengths have advantages and disadvantages, and the case can certainly be made for using wider glass. But, as a teaching tool, the 50mm prime lens is a great option for your landscape photography; it will make you think a bit differently about your photos and easily provide you with clear, sharp images.
The post 5 Quick Reasons to Use the Nifty Fifty for Landscape Photography appeared first on Digital Photography School. It was authored by Tim Gilbreath.
The post Create Beautiful Indoor Portraits Without Flash (NSFW) appeared first on Digital Photography School. It was authored by Ed Verosky.
Ed Verosky is a professional photographer and author based in New York. In this article, Verosky explains how to create portraits using natural and ambient light only. To learn more about achieving great lighting in any situation, check out Verosky’s popular eBook, “100% Reliable Flash Photography.“
Note: This post contains one image with very mild nudity (in fact, so mild you might not even see it).
For me, using flash can be the most efficient way to create a high-quality portrait. There’s nothing like it for an editorial shoot when you need that combination of full lighting control, minimal shooting time, and predictable results. Sure, you have to know what you’re doing to make it come together like that. But that ability comes with knowledge and experience.
Mastering flash means mastering your light in any situation. Sometimes, however, there is beautiful light to be found, just waiting there for you to use it. Natural and constant ambient light can be your best friends if you have a little time and flexibility with the environment and your subject.
Constant light, as opposed to flash/strobe lighting, will allow you to see and adjust its effect on your subject and the environment in real-time. This is a great way to learn about lighting placement and this knowledge and experience will certainly carry over into your flash portraiture. As I like to say, “light is light,” meaning that the principles of lighting a subject and the environment are essentially the same whether the light source is a quick “flash” or a constant illumination.
The main difference is that the flash is capable of producing a more intense light but with too short of a duration for the photographer to see the effects of its position on the subject in real-time. With constant lighting, you can casually move the lights and your subject around and know instantly how the changes will affect the portrait you’re making. With a few test shots to check exposure, you’re good to go.
Lighting setups
Natural light. Window light is just about the most beautiful light you can find when the conditions are right. It can serve as a huge softbox and be manipulated with any combination of window dressings such as blinds and curtains. Simply place your subject nearby the window and let the light create much of the portrait’s drama. I like to position the subject so that there is plenty of shadow to one side, providing many options for classic portraiture looks.
Window light narrowed with curtains. ISO 800, 50mm, f/2.8, 1/80 sec.
Household lights. You can also make great use of simple household lamps. I like to remove the shades off the room lights and utilize them as bare bulb light sources. To start off, just position the main light in front and to one side of your subject, preferably several inches higher than their head. This will give you a classic lighting pattern to work with. A second light may be placed farther back from the subject and serve as a backlight or kicker, which will add dimension.
A setup consisting of two household lamps, minus the lampshades. The kicker is behind Kelly ,and the main lamp is almost directly in front of her, just to camera right. ISO 800, 50mm, f/2.8, 1/60 sec.
Camera settings
My general advice for any indoor shooting is to think “fast and wide.” Your initial camera settings should be a balance of the highest ISO possible that will still provide acceptable noise levels for your purposes, the widest aperture your lens will allow, and the fastest workable shutter speed.
Of course, each of these controls is interrelated and integral to overall exposure, so you’ll have to make some adjustments and concessions for the environment you’re working in, and for the effect you’re trying to achieve in your shots.
Fortunately, most DSLRs are now capable of low noise even when using high ISO speeds, so most room lighting and even low natural light won’t be a problem for you. But even if your camera happens to produce lots of noise at higher ISOs, that isn’t necessarily a big concern. Either leave the noise as is, or bring some of it down in post-processing using your choice of available noise reduction techniques.
Many photographers actually artificially add noise back into their images in order to reproduce the look of film, or otherwise reduce the super-clean, slick, digital look coming out of the camera. Simple advice: Don’t worry about the noise unless it gets in the way of the image you’re trying to create.
Another thing that will really help with achieving beautiful portraits in lower lighting situations is a fast lens. By “fast,” we’re referring to a lens with a wide aperture of at least f/2.8. The wider the aperture, the more light the lens allows to pass through in a given unit of time. This will give you more freedom with your ISO settings (as they won’t have to be so high to compensate for less light coming in through the lens), and faster shutter speeds (as they won’t have to be so low to compensate for less light coming in through the lens). Lenses with wider apertures also have the capability of shallow depth-of-field, which can greatly add to the interest and mystique of your portraiture.
Shutter speed is an important consideration not just because of its effect on overall exposure, but also because of potential blur with lower shutter speeds. As with ISO, however, the effect of supposedly less-than-optimal shutter speeds is what you make it. You might find an occasional blurry image makes a rather artistic statement. Every portrait doesn’t have to be as sharp as a tack.
Another household lightbulb setup, featuring Chris. I used a bare household lightbulb off to camera-left to illuminate her on one side and the background at the same time. The main light is coming in from camera right. ISO 800, 85mm, f/1.8, 1/60 sec.
So, with those factors in mind, you might want to try the following exposure combination as a starting point and adjust according to your needs:
Camera Mode: Aperture Priority
Aperture:f/2.8 (or the widest possible for your lens)
ISO: 800
Shutter Speed (target): 1/100 sec. or higher.
In Aperture Priority mode, your camera will automatically set the shutter speed for you while you control everything else. You’ll have to pay attention to your shutter speed to make sure it isn’t falling so low as to create unwanted blurring. Again, these are just starting points. With a stationary pose and a steady hand, I’ve managed handheld shutter speeds as low as 1/15 sec. and produced good results. You might also want to try your camera’s Manual mode to maintain full control of your settings. If your lighting conditions are going to be fairly static, I’d recommend it.
Also, you will most likely benefit from shooting in your camera’s RAW (NEF) format so that critical adjustments, like white balance, exposure, and contrast, can be made easily and with minimal loss of information in post-processing. Although white balance settings aren’t actually imposed on the RAW file, you can set white balance as you wish during shooting in order to get an idea of what the final image might look like. Plus, a chosen WB setting will tell your processing software what color temperature and tint settings to best start off with for each image.
Window light illuminates Satu. ISO 800, 50mm, f/4, 1/200 sec.
Post-Processing
Aside from the creative post-processing possible with your ambient light images, there are some things you might want to address in the initial post-processing effort:
White Balance: Not all light sources produce the same color temperatures. Despite what they look like to our eyes, the camera will record various types of household lighting (fluorescent, tungsten, daylight balanced) and natural light (sunset, cloudy, shade) as producing different color casts.
So if you are shooting a portrait using a bright tungsten light as your subject’s main light, but you have a strong window light coming through in the background, you might have an undesirable color mix to deal with.
Fortunately, you can correct these types of color mismatches in post-processing by making a general white balance setting choice in your software and selectively altering the offending colors in specific parts of the image. If this isn’t something you’d like to worry about, then don’t. The colors might be acceptable just the way they are. If not, you always have artistic color-altering effects and even black and white conversion options. So, it’s all good.
Noise Issues: I personally like a little noise in my images most of the time. But if you had to use very high ISO settings to get your shots, and have the need to bring some of the noise down, there are a number of good built-in, stand-alone, and plug-in software options to handle this. I will occasionally use the noise reduction tools in Lightroom or my Photoshop Noise Ninja plug-in, for example.
Natural and ambient light photography indoors can be a great way to learn the finer points of lighting your portraits. The actual experience for you and your subject is also worlds apart from the strobe and studio effect of working with flash. Unlike outdoor shooting, indoor work without flash can introduce problems having to do with lower lighting situations. Using some of the advice above, you should be able to handle the challenges of low-light portraiture and come away with great-looking images.
If you would like to learn how to get amazing light in any situation, check out Ed Verosky’s eBook, “100% Reliable Flash Photography.” It’s a great resource that has helped thousands of photographers improve their use of flash and ambient light for portraiture.
The post Create Beautiful Indoor Portraits Without Flash (NSFW) appeared first on Digital Photography School. It was authored by Ed Verosky.
The post Weekly Photography Challenge – Shallow Depth of Field appeared first on Digital Photography School. It was authored by Sime.
Our dPS Weekly Challenge this week is ‘Shallow Depth of Field’ #dPSShallowDOF
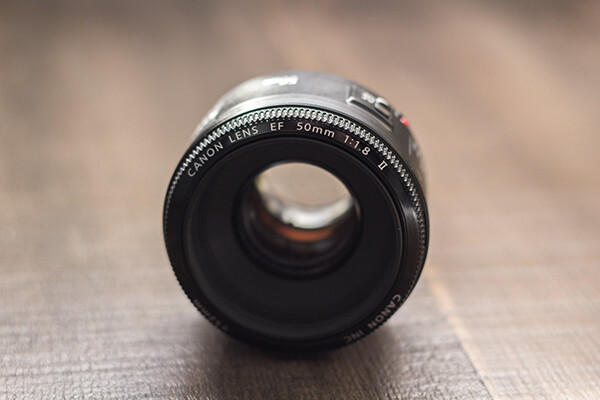
After our challenge last week, ‘Mistakes‘ it reminded me of when I first purchased my EF 50mm f/1.4 lens and pretty much had it at f/1.4 or ‘wide open’ the whole time! The shallow depth of field (Where you have your subject nice and sharp, and everything else out of focus, the quality of the ‘out of focus’ area sometimes referred to as ‘Bokeh‘) look was something I loved at the start, and as I learned to use it more effectively, became another ‘tool’ in my photography toolbox.
Shallow depth of field lets you isolate a subject or highlight an area in your frame, my first example below, highlighting the lens details on my new Sony 12-24mm, you see everything else nice and blurry – This was shot with another Sony lens, the FE 35mm f/1.4 (Maybe my favourite ever) it’s great for shallow depth of field!
You might not have a lens with a wide aperture (f/1.4 / 1.8 / 2 / 2.8, etc) but you can use whatever you have to go for the most shallow depth of field that you can.
Check out Kevin’s article here for some good tips on ‘depth of field’
A Sony photographs a Sony ‘Wide open’
We look forward to seeing what you come up with this week!
Congratulations to all of you that Tweeted, Instagrammed, Facebooked or posted a photo in the comments below our blog post! There were some great ‘mistakes’ in there! Well done to Elena, on this photo! Doesn’t look like a mistake to us! Congratulations on your recent awards, too! It’s great to see members of our dPS community progress in their photography!
Congrats to our dPS Group Member, Elena
Great! Where do I upload my photos?
Simply upload your shot into the comments field (look for the little camera icon in the Disqus comments section) and they’ll get embedded for us all to see. Or, if you’d prefer, upload them to your favourite photo-sharing site and leave the link to them.
Share in the dPS Facebook Group
You can also share your images in the dPS Facebook group as the challenge is posted there each week as well.
If you tag your photos on Flickr, Instagram, Twitter or other sites – tag them as #DPSShallowDOF to help others find them. Linking back to this page might also help others know what you’re doing so that they can share in the fun.
Follow us on Instagram?
The post Weekly Photography Challenge – Shallow Depth of Field appeared first on Digital Photography School. It was authored by Sime.
The post 10 Cheap Photo Tricks for Creative Images appeared first on Digital Photography School. It was authored by Rick Ohnsman.
As the coronavirus crisis drags on, you may find that you’re getting out less to make photos. You could probably use some fresh and fun photo ideas as a pleasant diversion from the gloomy news. Whether you call these photo tricks, techniques, projects, or whatever, I suggest you give them a try and see what new and interesting photos you can make.
I think you’ll eat up these photo tricks with a fork and spoon! This is the last one in the collection, but be patient. Read the rest first, as there are some good ones; we’ll save this technique for dessert.
For a deeper dive
My intent here is not to get into great detail or give much “how-to” for these tricks. For some, I’ve already written complete articles and, where that is the case, I have linked to those articles so you can do a deeper dive into the subject.
For a few other tricks, I may not have written about them in-depth, but others have. The idea is that while these tricks may not be unheard of, this is a collection of photo tricks all in one place; it’s a jumping-off point for your photo exploration.
1. Bag a vignette
You may have heard of accessories called Lensbabies, a collection of adjustable and specialized lenses designed to give artistic, soft, blurred, and other looks to your image.
Now, I won’t pretend this trick will do for a few cents what specialized gear costing a few hundred dollars can do. But here’s a way to bag some interesting, Lensbaby-style images for dirt cheap.
This photo accessory costs a few pennies and easily fits in your pocket: the “Baggie Vignette.”
Here’s what you do:
Get a plastic sandwich bag and tear a ragged hole in the bottom of it. Pull the bag over your lens so that portions of the bag intrude into the edges of the image. Focus on your subject.
Viola, you have “Baggie FX.”
Play with the positioning, the size of the hole, various apertures, and lighting. Photo accessories don’t get any cheaper than this.
2. Bokeh with flair
Pronounce it how you like; bokeh refers to the look and quality of out-of-focus elements in a photo. Bokeh becomes especially noticeable when the out-of-focus elements are specular highlights.
Different lenses with different optics, different aperture blade shapes, and different numbers of blades will produce different kinds of bokeh, as will the photographer’s choice of aperture.
A wide aperture combined with out-of-focus highlights will give some nice bokeh effects. The pattern of the bokeh shape will depend on the lens. The Canon 50mm f/1.8 gives this kind of look.
Here’s a way to go a step further and make patterned bokeh. Lay a filter the size of lens you intend to use on a piece of cardboard, trace around it, and cut out the cardboard. Now cut a shape, such as a small star, into the center of the cardboard disc you made. Place the disc over the lens and tape it there, or sandwich it between the lens and a filter.
Here, a star pattern was cut in a “bokeh filter,” and the specular highlights in a piece of aluminum foil produced the star effect. Then the image was layered with another shot to create the final result.
With a wide aperture (a 50mm f/1.8 prime, the “nifty fifty,” works great), shoot something with some specular highlights and ensure those highlights are out-of-focus. The highlights will now be the shape of your “bokeh filter.”
Rather than make your own bokeh filter, you can also buy patterned bokeh filter kits with more elaborate shapes than you could probably cut yourself. For folks into 3D printing, this could also be a good project.
3. Reflect on this
You can take a still-life or product photo up another notch by shooting it on a reflective surface. You might think a mirror would be a natural choice for this, but because both the glass surface of a mirror, as well as its silvered backing, are each reflective, you will get two sets of slightly separated reflections if you shoot objects on a mirror.
A polished dark table proved just right for getting a reflection of the wedding rings. The jar of marbles was shot on a piece of black acrylic sheet and the bokeh effects were added with a string of Christmas lights in the background.
A better choice is a piece of acrylic plastic sheet, also known as plexiglass. You can get this in many colors, but I find a very dark black plastic sheet creates a look I like. (A piece of black tile would work well too, but I’ve not been able to find larger tiles.) Shoot with a black backdrop and you can isolate your subject nicely.
4. Big results with little lights
When we used film or less-sensitive digital cameras, big and often hot lights were needed for indoor photography. With the advent of LED lighting coupled with cameras offering low noise capabilities, we can now make images with very little light.
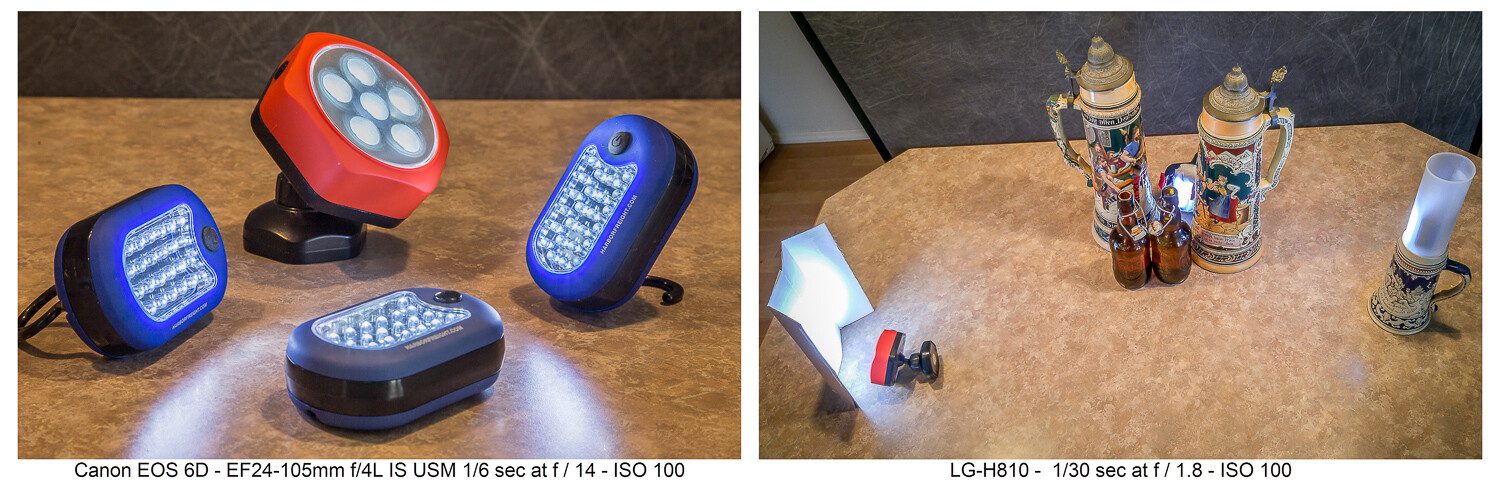
Also, when doing still-life photos, shutter speed can be anything you like: full seconds, or even minutes, if necessary. Now almost any lighting instrument can be used with some ingenuity. Small LED flashlights can also be used for light painting.
LED flashlights like these can be found cheap at the hardware store. The second image shows how they were used……to produce this image. Having limited light isn’t a problem when shooting still life where long exposures are fine. Canon 6D | Canon EF 24-105 f/4 | 3.2 sec | f/3.2 | ISO 100.
I have a collection of various flashlights (aka “torches”) and other LED lighting gear, which I’ve typically bought for just a few dollars online or at the local hardware store. Finding new ways to creatively use these little lights has allowed me to make some creative images. Take a look at this article which explores this topic further.
5. CD rainbow macros
Before you toss that scratched CD, add it to your bag of photo tricks. Mount a macro lens on your camera, or use whatever means you have to get close to your subject. Put the CD down with the reflective, non-printed side up. Then, with an eyedropper or other tool, place small water droplets all over the surface of the disc.
Waterdrops on a CD shot with a macro lens and lit in various ways can produce some colorful abstract images.
Focus your shot and get creative. The lighting is purely up to you. Perhaps try some shots in direct sunlight where the intense light will really pop the rainbow spectrum. Maybe try a small flashlight. Try a long exposure and light-paint the droplets. Anything goes when you’re making abstract images.
6. Oil and water abstracts
I wrote a complete article on this technique, which is another way to get some interesting and colorful abstract images. With minimal equipment and whatever lighting you like (even shooting outdoors with natural light), you can have a whole afternoon of fun.
Oil and water don’t mix, and that’s a good thing for this technique. A glass dish shot from above and through the mixture with some colorful objects in the background is the technique here.
7. Up in smoke
Add this to your collection of photo tricks to make some smokin’ hot images. An incense stick and some care with your lighting will get you going. Then take your shots to the computer where you can add additional effects. Have a look at my article here on DPS, “How to Make Interesting Abstract Smoke Photos,” for a full write-up on this technique.
This is a straight, side-lit shot of the smoke pattern rising from an incense stick.Take the straight shot on the left, mirror it in editing, and colorize it. Then you have a firebird! (At least that’s what I see. What do you see in this abstract?)The original smoke photo mirrored both horizontally and vertically and colorized in editing. Is this what they mean by “smoke and mirrors?”
8. Interaction with reflection and refraction
Find historic images of early photographers, and you might see them standing behind their cameras with black capes thrown over their heads. They did not have DSLRs, where the image entering the lens is reflected onto a mirror, through a prism, and then into the viewfinder right-side up. Instead, early photographers used the first “mirrorless” cameras, and the image came through the lens and displayed upside down on a ground glass at the back of the camera. The image was quite dim, which explains the need for the cape to better see the projected image.
The water-filled glasses refract the light while the black acrylic plastic sheet below reflects it. There’s a lot of light physics going on in these shots.
We won’t require you to take a course in optical physics so you can understand the behavior of lenses, light, reflection, refraction, or the differences in light transmission through various mediums. Just break out some glassware, pour in a little water, maybe use that piece of black plexiglass we mentioned earlier, find an interesting background, and go for it.
You are getting sleeeepy… The water in the glass refracts the light and flips the image, much like a lens.
If you do want to dive deeper into understanding light behavior, take a look at my article “How to Understand Light and Color to Improve Your Photography.” Maybe take a look at this one as well: “Just Dew It – Fun with Macro Dewdrop Photography.”
These tiny glycerin drops act as little lenses, focusing, refracting, and reversing the image behind them.
9. Zooming around
In our collection of photo tricks, this one is hardly a secret. You probably have done it before. No? Well, if not, and you have a zoom lens, it’s high time you tried the zoom blur effect.
The technique is simple enough. Set your exposure so you can get at least a one-second shutter speed, if not longer. This ought to be easy enough at night if you set the ISO to its lowest setting (such as ISO 100) and stop down the aperture to a small size (such as f/16 or f/22). If you’re shooting in the daytime and these settings alone don’t get you down to a second or more of exposure time, try adding a polarizing filter or a neutral density (ND) filter to reduce the light still further.
Lights at night make great subjects for the zoom blur technique. You’ll definitely need to work on a tripod.
You can do this technique handheld, but a tripod helps. Set your camera so you get the 2-second shutter delay, then with one hand on the zoom ring, trip the shutter. When you hear it click, zoom in (or out) during the exposure. Play with starting zoomed tight and then pulling out during the exposure, or starting wide and then zooming in. Lights at night can make for great looks. Try only zooming during the first or second half of the exposure. There’s no single way to do this, so play and discover what you can create.
Both these shots were zoomed during the exposure. See my fireworks article for the “Boom, Zoom, Bloom” technique.
10. Create a computer screen background
An interesting background can add to the story of your photo. If you have a good-sized computer monitor and are shooting a smaller object, being able to create a background on your computer screen opens all kinds of possibilities.
Create a unique background to go along with the theme of your photo by putting up something appropriate on a computer screen in the background of your shot.
Photographing screens would seem a simple process, but can be more tricky than you think. If you plan to do much of this, reading up on the best camera techniques for shooting screens would be time well spent.
Cheaper by the dozen
The title said 10 photo tricks, but I’m going to throw in two more for free and make it an even dozen. I really like the looks I can get with these last two.
11. Action sequences with Microsoft ICE
I wrote the article “Make Easy Panoramic Images with Microsoft ICE,” which focused primarily on how to use this free and very powerful tool from Microsoft to make panoramic images. That is good fun in itself and a very useful technique.
Toward the end of that article, I touched on something else you could do with ICE: sequential action images. These are great for showing the progressive steps of action, and ICE makes the technique quite easy. Follow the link, read through the article, and see how you can make images like this:
Pan with the action while shooting multiple images in continuous mode, then use the free Microsoft ICE software to assemble them. Quite easy, actually!
Here’s an alternative way to make sequential action photos with a completely different technique, one that’s more well-suited to capturing very fast action: “How to Use Multi-flash to Capture Compelling Action Photos.”
12. Phun photos with photoelasticity
Combine physics with fun and you get Phun, right? With this technique, you will be exploring what is called photoelasticity or, more specifically, birefringence.
Clear plastic tableware goes cosmic with this technique. Learn about birefringence.
You don’t have to understand what’s going on, and this isn’t hard to do. It just works and looks cool. Here’s what you’ll need to do:
Your light source will need to be an LCD computer monitor, TV or, for smaller subjects, a tablet, or even a cellphone. LCD screens emit polarized light, and using polarized light to backlight your subject is part of what’s needed to make this work.
Try to limit any other ambient light. The effect will be stronger if the LCD light is dominant in your shot.
Use subjects made of hard, clear plastic. Polystyrene is what is used for most clear plastic cutlery and drinkware, so these make good subjects. Often the plastic in cheap picture frames is made from similar materials. Glass objects will not work for this.
You will need a polarizing filter on your lens. Standard circular polarizing (CPL) filters work well.
Polarized light plus a polarized lens reveals the “mechanical stress patterns” within certain types of plastics. Clear styrene plastic usually works well.
Now, get ready to say “Wow!” Place your subject in front of the LCD light source. Bring up an image that will create a totally blank, white, bright screen so that light backlights your subject. You won’t see anything until you look through the camera viewfinder and through the attached polarized filter. Cool, huh?
Now rotate the filter. The computer screen will be white, black, or intermediate shades, while the plastic subject will show the rainbow birefringence effect. The patterns will be showing the mechanical stress within the plastic, with tighter patterns where the curves of the object are tighter.
Is it okay to still say “Groovy, man?” A second sheet of plastic was held in front of the lens, producing the colored background. Aside from some exposure and saturation adjustments, this effect is what you see through the lens while making the shot, not added later on the computer.
Just a tip when you are seeking potential subjects for this kind of photography:
Your LCD cellphone screen is a polarized light source. If you have a pair of polarized sunglasses, objects held in front of a blank white screen on the phone and viewed while wearing the glasses will show the effect if they are the right kind of material. You may have to tilt your head to get the same effect as rotating a circular polarizing filter.
Now go play
So there’s a dozen new things to try with your camera. You will also find that these kinds of photography will force you to use different exposure, focusing, camera control, lens selection, and editing skills than perhaps you normally might use.
Remember, even failed experiments can be lessons when you seek to determine what went wrong and then try again to get it right. Now go try some of these photo tricks, have fun, and post some of your images in the comments section. If you have any questions, feel free to post those, too.
The post 10 Cheap Photo Tricks for Creative Images appeared first on Digital Photography School. It was authored by Rick Ohnsman.
The post Is There a Right and a Wrong Way To Expose Your Photos? appeared first on Digital Photography School. It was authored by Kevin Landwer-Johan.
I have never liked the term ‘correct exposure.’ I don’t believe there’s often a single right way to expose your photos. There’s always room for artistic interpretation depending on:
Light
Subject
Camera
Lens
Exposure setting choices
Composition choices
Intent
All these will have some influence on the way a photograph will appear. One of the most important aspects of achieving a pleasing exposure is your intent. This cannot be measured by an exposure meter.
How you expose your photos is a key choice when working with your camera. Most photos you take will display variation in tone from the brightest point to the darkest. You won’t often photograph subjects that are the same tone throughout.
The quality of light and how it reflects off the surfaces in your composition will help determine the exposure value for each tone. Sometimes the range of tones in a composition means your camera will not be able to render them all with visible detail.
When the level of contrast is beyond what your camera’s sensor can capture in a single exposure, you have to choose how to expose your photos. What is the most important part of the composition you want to expose correctly? Often this will be the middle tones. Other times it will be either the highlights or the darkest parts of your composition.
Particularly with high contrast lighting, you must choose how you want to expose your photograph. This is where the intent you have for how the photo will look comes into play. Do you want a bright, energetic image, or a more somber and moody one? What look will best suit your subject?
With a more monotone subject, the tonal range will not be large, especially when what you are photographing is not highly reflective. It was very easy to make a nice, even exposure of this dusty little dog lying in the dirt. This was because of the limited tonal range, low-contrast light, and overall beige color.
The dynamic range of film is far narrower than that of modern camera sensors. Our digital cameras are far more capable of recording a broader tonal range in a single image than any film. When you take photos with film, you need to be more precise about how you expose your photos. This is more vital in high contrast situations.
Because the tonal range of film is much narrower, you’re more likely to lose detail in the shadows and/or highlights than when you work with a digital camera. Imagining that you are using film can help you be more aware of what part of your composition you want to expose well.
For example, when I photographed this novice monk (above), he was in a dark space with light coming through a window. The contrast was significant. I knew that if I let my camera decide the exposure, it would mean the light area of the boy’s face would be overexposed. This is because most of the composition was in shadow.
I used my spot meter to take an exposure reading from the light reflecting off the monk’s face and set my exposure accordingly. In my original file, there is some detail visible in the shadows. I have boosted the contrast during post-processing to eliminate it.
The bell-shaped histogram myth
The notion that a correctly exposed image will produce a bell-shaped histogram is nonsense. You can’t rely on a histogram to provide useful information about exposure.
Histograms are a graphical representation of the tones present in a photo. When the photo is mostly middle tones, you’ll see the histogram as a bell shape: high in the middle section and low toward the left and the right.
The tonal range of the scene you are photographing has an influence on what the histogram will look like. This is why you cannot gauge exposure by looking at the histogram. Some people may find it helpful, but it’s not good practice to rely on it to help you choose your exposure settings. Don’t aim to make your histogram a bell shape.
For example, portraits made against a black background will never display a bell-shaped histogram. The graph will always spike on the left because there are more dark tones in the image than midtones or light tones. Depending on what a person is wearing, such a histogram may be very flat.
For the image above, the grandma’s face is where I wanted the correct exposure. It would not be possible, even if I wanted it, to set my exposure so that detail in both the background and the headscarf was visible.
Expose your photos with intent
Know what you want before you press the shutter release.
Often, you have chosen your subject. You’ve composed carefully. Then you take a photo with no real regard for the lighting or your exposure setting.
Letting the camera take care of the exposure using averaged metering and an automatic setting is the way many people take pictures. The results of such exposures are relatively predictable. This is because of how cameras are designed and calibrated. To obtain the best exposure each time you take a photograph, you must match it to your intent.
How do you want the light on your subject to look? What is the mood you want your photo to convey? Are you capable of achieving this with the current lighting? These things must be considered before you press the shutter release.
Be in control of your exposure settings. Read your meter as a guide. Rather than ensuring that your meter is reading zero for every photo, adjust your settings to where you can capture the photo that matches your intent.
I do not believe there is a right or wrong exposure choice for any photo. You can take into account all the technical aspects, but while this approach may produce technically correct images, they will often lack expression and feeling of any kind.
Not being intentional when you expose your photos often produces bland results.
The post Is There a Right and a Wrong Way To Expose Your Photos? appeared first on Digital Photography School. It was authored by Kevin Landwer-Johan.
The post Tips for Managing Digital Noise in Lightroom and Photoshop appeared first on Digital Photography School. It was authored by Kevin Landwer-Johan.
If you’ve ever set your ISO toward the higher end of your camera’s range, you will find that your photos don’t always turn out so great. Digital noise is generally noticeable in photos that have been taken with a high ISO setting. Managing digital noise is important when you move toward the limits of your camera’s ISO range.
In this article, we’ll take a look at various techniques, both in-camera and during post-processing, for managing digital noise.
Digital noise appears like colored sand scattered through your photos. It’s particularly noticeable in darker and lighter areas of your compositions when you’ve used a high ISO setting.
Noise varies from camera to camera depending on the quality of the sensor. You’ll have noticed it in photos made with your smartphone at night. When the light is low and the ISO is high, a phone or camera with a very small sensor is prone to producing a lot of digital noise. On higher-end full-frame cameras there’s not so much of an issue with digital noise until your ISO reaches the highest settings it’s capable of.
At first glance, digital noise may not be so noticeable. But when you enlarge an image made using a high ISO, it is easy to see noise speckles. These speckles are discolored pixels and pixels with an incorrect luminance value. They contrast with the surroundings in an unnatural way.
Digital noise in photos is not the same as grain. Grain is associated with film and has a different appearance than digital noise. Different types of film have different grain structures. Grain can be used to creatively enhance photos, whereas digital noise degrades an image.
Detail showing digital noise. Nikon D700 | 70mm | 1/100 sec | f/2.8 | ISO 6400.
Two types of digital noise
There are two types of digital noise that affect your photos when you use a high ISO setting. These are color noise and luminance noise.
Color noise, or chromatic noise, appears as discolored pixels that contrast with how the colors in a photo should look. It’s most apparent in the very light or very dark areas of photos taken at high ISO settings. Sometimes this type of noise is difficult to eradicate. The best approach can be to simply convert your photo to black and white.
Luminance noise shows up as pixels that are brighter than they should be. When you raise the ISO setting on your camera, the pixels on the sensor become amplified and distort. Think of it as like turning the volume on your stereo up too high to the point that the sound distorts.
How can you avoid digital noise in photos?
The most surefire way to avoid digital noise is to keep your ISO setting low. This is not always possible, especially when photographing in low light conditions.
Raising your ISO increases the risk of adding unsightly noise, but it also allows you to choose a narrower aperture and faster shutter speed.
Getting sharp photos of action at night requires a fast shutter speed. And an easy way to achieve this is by raising your ISO setting. So it’s not always possible to avoid noise. Managing digital noise when you post-process your photos then becomes necessary. There are various tricks and tools you can use to do this.
Try this exercise to discover the highest ISO setting you are comfortable using on your camera:
Find a reasonably dark place to take photos of a static subject, such as a room with the drapes drawn or outside at night. Set your camera on a tripod, or on a firm surface where it won’t move.
You can set your camera to any exposure mode you’re comfortable with, but you must set your ISO to manual. And if you use your camera’s manual exposure setting, balance your aperture or shutter speed before each shot (so your meter is always reading zero).
Start with the lowest ISO setting. This is usually ISO 100. Take a photo of your subject. Then change your ISO setting to 200. Take another photo.
Repeat this process, doubling the ISO, until you have taken a series of images throughout the ISO range.
Study the photos on your computer. Zoom in to 100% and look at the digital noise. At what ISO setting does the digital noise appear to degrade image quality? The ISO setting below that point should be the maximum you use.
Post-processing programs and apps have functions that can reduce digital noise in photos.
The less noise apparent in a photo, the more successfully you can remove it. If you’re too aggressive with managing digital noise, your photos will appear soft and blurry.
Detail showing digital noise.
Reducing digital noise using Lightroom
In the Develop module in Lightroom, click on the Details Panel on the right side of the screen. Here you’ll see a number of sliders. The ones you want to use are the Luminance and Color sliders.
Start with Luminance slider and drag it to the right. Then slide the Color slider if you still see some noise. Watch what’s happening to your image as you do this. You don’t want to slide it further than you need to. The further to the right you move these controls, the softer your image becomes.
The amount you need to adjust the sliders will vary from image to image.
Detail with noise reduced. Note the position of the Color and Luminance sliders.
Reducing digital noise using Photoshop
If you prefer using Photoshop, you’ll still find good controls for managing digital noise.
In the top menu select Filter>Camera Raw Filter. In the new window that opens, select the Details icon (it’s the two triangles). Here you have the same two sliders as in Lightroom: Luminance and Color. Slide them to the right only enough to get a satisfactory result.
Detail of unprocessed image showing noise reduction tools in Photoshop.
You can further reduce noise by selecting Filter>Noise>Reduce Noise from the top menu.
Applying the noise reduction filter in Photoshop.
Photoshop allows you more flexibility in reducing noise. You can isolate the problem areas with masks or multiple layers. This can help retain detail in important areas of your compositions.
Try this noise reduction technique
When you are photographing a static subject and have your camera on a tripod, take two or more photos.
Open two of the photos in separate layers of the same file in Photoshop. Once you’ve done this, the easiest way to reduce the noise and retain clarity is by changing the blend mode of the top layer. The Multiply blend mode usually works well. You can also experiment with Overlay and Soft Light blend modes.
Conclusion
Whenever I’m taking photos, I try to maintain the lowest ISO setting possible to avoid digital noise. In many low light situations, using a higher ISO setting is necessary to take photos without extra lights.
Each camera model manages digital noise differently. Use the experiment I outlined in this article to ascertain the highest ISO setting at which you are comfortable shooting.
Managing digital noise is now easier than ever. Cameras have more advanced sensors than early digital cameras had. And imaging software has also evolved to be better at managing digital noise.
The post Tips for Managing Digital Noise in Lightroom and Photoshop appeared first on Digital Photography School. It was authored by Kevin Landwer-Johan.
The breathtaking landscape before you is just begging to be photographed. The only problem is that you don’t know how to do it. You try taking a few images, but upon reviewing them your disappointment sinks in. They don’t hold a candle to the real thing — and they certainly don’t look like those gorgeous landscape images that show up Continue Reading
The post Landscape Photography: Complete Guide for Beginners; Equipment, Settings, and Tricks appeared first on Photodoto.


 Congratulations on your recent awards, too! It’s great to see members of our dPS community progress in their photography!


You must be logged in to post a comment.