The current climate is not ideal for many businesses, particularly photographers. Without an outlet for work, it’s easy to ruminate on how you’re going to weather the storm. Going without work is not an option for many photographers, so what are the alternatives? Fortunately, there’s plenty you can do to pivot your business and retain your income. For example, increasing Continue Reading
The post Working From Home as a Photographer in the Current Climate: A No-Bull Guide appeared first on Photodoto.
The post How to Achieve Dark and Dramatic Food Portraits appeared first on Digital Photography School. It was authored by Charlie Moss.
Unless you’ve been under a rock for the last few years, you can’t have missed the growth of food portraits. They are everywhere, from the high-budget advertising of supermarkets and artisan food brands to amateur photographers on Instagram.
If you’re even slightly interested in food photography, wherever you look you’ll be presented with sensuous images of beautifully-styled food portraits. From burgers with perfectly placed drippy cheese to vintage-styled cakes laden with fruit, it sometimes seems that the photography world has gone food-mad.
What is a food portrait?
One competition with a food portraiture category says that they want to see images of food that are “good enough to eat.” But a look through their gallery of previous competitions suggests something more.
In food portraits, the food is the hero. It’s not about the farmer, the shop, or the packaging; the photograph is unapologetically about the food. And it should make you want to reach right into the picture and take a bite.
There are many styles of food portraits. Sometimes it’s about the hero ingredient and other times it’s about the finished dish. But it’s never about the person who made it or the place the food is being served.
Some photographers love a bright and airy feel to their images. Their shots wouldn’t look out of place in a designer loft apartment. Others prefer a darker-styled shot. And it’s this style that I’m going to focus on in this article.
(If you’d like some inspiration, just search “dark food photography” on Pinterest or Instagram and start scrolling.)
Choosing a subject
Not every piece of food makes for a great subject. If you’re shooting an ingredient before it’s prepared, then don’t be afraid to look for the most perfect or characterful examples you can find in the shop. Every flaw or imperfection will feel like it has been magnified by ten when you photograph it.
Of course, sometimes you might like to deviate from images of perfect ingredients! The potatoes I photographed in the pictures for this tutorial were delightfully gnarled. They come from a period in UK food production called “the hungry gap;” during this time, the last of the winter vegetables are on the table while we wait for the fresh spring produce. Always look for a story in your images.
If you’re planning on shooting a finished dish, then it needs to be plated both beautifully and creatively. This takes practice, and many professional photographers hire food stylists to help them with the job. Don’t be disheartened if it takes a while to get the hang of cooking and plating food that looks good in photographs (besides, you get to eat your attempts while you practice).
Take your time composing your scene. As you can see from the screenshot of my Lightroom catalog above, I knew roughly what I wanted from the start, but ended up making many minor adjustments to the potatoes I was photographing.
Don’t forget to think about your props and background. They are as much a part of the shot as the food itself. You can make your images even more unique by painting your own backdrops.
Keep it simple
To shoot dark food portraits, you don’t need an elaborate, complicated, or expensive setup. These potatoes were simply shot on a tabletop with a painted background and a fake wooden surface. There is natural morning light coming from the left-hand side of the image. On the right, I positioned a piece of cardboard with some tinfoil wrapped around it to act as a reflector.
Once I’ve shot a photograph that I’m happy with, I like to apply a general Lightroom preset to add contrast and color grade the image. This kind of subtle color grading can really help to set your photo apart.
Changing the color tones in this way is something that people who aren’t photographers often don’t do with their images, and so it adds a more polished look in the eyes of many viewers.
Take it to Photoshop
Once I’ve set the basic color that I want in Adobe Lightroom, I open the image in Photoshop. Photoshop lets you use layers, which ultimately allows you to have greater control over the image you are creating.
Apply sharpening
The first thing I always do when I’m opening an image in Photoshop is apply some gentle sharpening. It just crisps up all the details so that you can get to work.
My method for this initial sharpening is to first duplicate the background layer. You’ll need to get a copy of your image onto a new layer in order for this method to work. You can right-click on the existing layer in the layers panel and choose “Duplicate Layer.”
Apply a high pass filter with a radius of about 1.5 on the new layer that you just created. The high pass filter is found in the “Filter” menu (look in “Other” at the bottom of the list). The radius you need will vary, but if you look closely at the image above, you’ll see that the “ghost” of the image is barely visible when you preview the effect that the high pass filter is having.
Once you’ve done this, set the layer’s blend mode to “Overlay,” and you should see the effect of the high pass filter that you just applied.
Dodge and burn
You can make dark food photographs really come alive by using dodge and burn creatively, and that’s the technique at the heart of the example image above.
Rather than using the dodge and burn tools built into Photoshop, try this method instead. First, create two new layers. Name one “Dodge” and one “Burn.” In the “New Layer” dialogue box, make sure that you check the option to fill the layer with an overlay-neutral colour and set the blending mode to “Overlay.”
Then, using a soft brush set to 100% opacity but with a low (2-3%) flow, you can start to bring the image to life. Use a black brush on the burn layer to deepen the shadows and a white brush on the dodge layer to brighten the highlights.
Go gently and try not to lose too much detail! The trick with dodging and burning is to build up the effect slowly. Use brushes and layers like a painter uses light and shadow to shape the food portraits that you have photographed.
Before and after dodging and burning.
You can always turn down the opacity of a layer if you go too far, or you can even delete it and start again altogether. If there’s just a small bit that you’re not happy with, you can apply a layer mask and just mask out that small section.
Finishing the food portrait
To finish off the image, I added a digital texture to the background and faded it until it was almost invisible. It had the effect of softening the painted backdrop slightly, which is a look I preferred.
This basic approach of editing colors in Lightroom (perhaps using a preset), sharpening the image in Photoshop, and then dodging and burning the photograph is one that can be applied to many different kinds of photographs.
I’ve used the same approach in architectural photography as well as portraits, but I feel that it really shines as a technique when it comes to dark and dramatic food portraits.
The post How to Achieve Dark and Dramatic Food Portraits appeared first on Digital Photography School. It was authored by Charlie Moss.
The post S’cuse Me While I Tweak the Sky: Tips for Dramatic Skies in Your Photos appeared first on Digital Photography School. It was authored by Rick Ohnsman.
Singing “Home on the Range,“ a cowboy might picture the perfect place where “the skies are not cloudy all day.”
A cloudless day might appeal to many people, but not to landscape photographers.
The so-called “bluebird day” generally makes for poor landscape photographs with a boring, featureless sky. Maybe you’ve also heard this: “When the weather gets bad, the photos get good.”
So what do you do when Mother Nature gives you few or no clouds to work with? Let’s look at some tips for dramatic skies.
There’s a good sky here, but it’s going to take some coaxing to bring it out. Canon 6D | Canon EF 24-105 f/4 | 1/4 sec | f/18 | ISO 200
In camera
If there are no clouds at all to work with, your options while shooting are pretty limited. You may want to compose your shot so that there is little, if any, sky. However, if you have even a few clouds to work with, here are some ways to make the most of them:
Use a polarizing filter
Polarizing filter effectiveness depends on the angle of your shot in relation to the angle of the sun. The strongest effect is with the sun 90 degrees to the direction your camera is pointing; you get varying degrees of effectiveness at other angles.
Look through the viewfinder, rotate the polarizer, and watch as the contrast between the sky and clouds changes. Sometimes this will be very dramatic, especially with white puffy clouds on a blue sky.
Adjust to your taste, backing off a bit if needed. There is such a thing as too much, however, so remember:
What you do with a polarizer when making the shot can’t easily be undone later in post-processing. Be careful when using a polarizing filter in combination with a wide-angle lens. Parts of the sky may darken more than others across the shot, giving an unusual look you probably won’t like, one that is tough to fix later.
A wide-angle lens (this shot was made at 17mm) plus a polarizer can be a bad combination. Note how the sky is darker in some places than others. This would have been better without the polarizer.
Use a graduated neutral density (GND) filter
Landscape photographers often deal with a wide dynamic range between a bright sky and a much darker foreground. Should you expose for the sky or the land, the highlights or the shadows?
A graduated ND filter that goes from a darker density at the top to clear at the bottom can help even out the exposure. The advent of digital editing tools that emulate this in editing has caused many photographers to dispense with using these filters.
One advantage to working without a GND is that you can change your mind later if you don’t want a GND effect. You can also better deal with scenes where the horizon isn’t perfectly straight across. Still, some photographers favor the traditional graduated ND filter in certain circumstances.
Bracket
Rather than use a graduated ND filter in the field to even-out a composition with a bright sky and dark foreground, take multiple bracketed shots while varying the shutter speed (but not the aperture).
Many cameras have this feature built-in, so you can make a series of bracketed shots with one press of the shutter button. Having a series of the same shot taken at varied exposures will give you the raw materials for some of the editing techniques we’re about to explore.
In edit
Sometimes you are able to capture an image that has clouds in the scene, but they are underwhelming and need some editing help to give them extra pizzazz. Let’s look at some tips for dramatic skies using standard editing techniques.
Basic sky editing
Lightroom is usually my editor of choice, and so the techniques I’ll mention next will use it as a reference. The concepts should translate fine to other editors, however, so if you grasp the ideas you’ll be able to implement the same changes, whether you use Capture One, ON1 Photo RAW, ACDSee, or something else.
Whatever you’re photographing, work to keep your exposure “in-bounds.” That is to say: Don’t blow out the highlights on the right side of the histogram or block up the shadows pushing them past the left side of the histogram. Whether working with a dark or light shot, or maybe an image with both light and dark extremes, if the entire histogram is “between the goalposts,” then you have an image that is workable.
That said, whenever possible, use the ETTR (expose-to-the-right) method. If you are not familiar with this, I suggest you read up on it. The greatest amount of data in a photo file is in the brighter tones. If you have a bright sky (and are trying to get some detail in the clouds) combined with a darker foreground, it is better to have to darken the image while editing. You can purposely expose for the highlights and get the sky correct in-camera, but then you may be later faced with trying to brighten up the shadows. A cleaner, less noisy image will result if you have to later bring down the highlights rather than if you drag up dark shadows “out of the mud.”
Also, we are talking about editing a RAW file, not a JPEG. If you are still shooting JPEGs then you have already limited what you can recover. If you don’t shoot RAW images, I suggest you stop here, learn why and how to shoot and work with RAW files, and then come back.
It’s maybe harsh, but if you want to be a more skilled editor and do things like recover cloudy skies, then learning how to work with RAW files is a prerequisite. ‘Nuff said.
Here is my standard workflow in Lightroom for just about any image. If there are clouds in the shot, it’s Step One that brings them alive.
Adjust the exposure slider. Don’t worry too much about making it just right. you’ll fine-tune again later.
Bring down the highlights. How much? Look at your image and watch the histogram as you work.
Open up the shadows. Move the slider to the right. Watch the image and the istogram.
Set your white point. There are several ways to do this. I like this method: Hold down the Alt key (Option on Mac). Click and hold the Whites slider. The image will turn black. Now while holding the key and the mouse button down, slowly move the slider to the right until you see a few specks of white on the image. Slide back left a bit if necessary. What you’re doing is making the points that you should into the brightest (whitest) points in the image. They will set the extreme right point on the histogram.
Set your black point. This technique is the same: Holding down the Alt/Option key, click the Blacks slider, hold, and drag left. The screen will go white until you reach a point where some black specks appear. I sometimes find I will allow a few more black specks (totally black) points to affect an image than white points, but that depends on the image.
Re-adjust your exposure and contrast. You may need to go back now and re-adjust your Exposure slider a bit and/or adjust the Contrast slider.
With just some basic Lightroom editing, the clouds look better already. Canon 6D | Canon EF 24-105 f/4 | 1/4 sec | f/18 | ISO 200
How much to adjust any of the sliders will depend on the image. In general, this simple workflow will get your image “in the ballpark” and likely help start bringing out detail in the sky.
You may want to move onto other global adjustments like Texture, Clarity, Dehaze, Vibrance, and Saturation, because you can adjust those to your taste. If, however, your sky needs special help, it’s time for some local adjustments.
Going local
It’s quite possible your sky will need some local adjustments to give it the look you seek. If you’re not familiar with Lightroom’s local adjustment tools and techniques, DPS writer Andrew S. Gibson has written a good article on that subject.
I will add a couple of things to try when using Lightroom’s local adjustment tools to help accentuate your sky and clouds:
Try the Range Masking tools to better select your sky. Used in combination with the Graduated Filter, the Radial Filter, and the Adjustment Brush, you’ll be able to apply your effects where you want them and not where you don’t.
Try using the Clarity and Dehaze sliders when seeking to tune the sky to achieve the look you want. Go easy, though. It’s easy to go way overboard, especially with the Dehaze slider.
Combine a Graduated Filter with the Luminance Range Mask in Lightroom to select the sky. Then use the sliders to get the look you seek.Now we’re talking! Compare this to the original image at the top of the article. Canon 6D | Canon EF 24-105 f/4 | 1/4 sec | f/18 | ISO 200
Multiple shots: HDR in Lightroom
I mentioned bracketing your shots while shooting high dynamic range subjects, such as with the bright-sky/dark-land combination you may often encounter.
When editing, having multiple bracketed images to work with will offer all kinds of possibilities. One of them is the ability to do HDR (high dynamic range) work within Lightroom. This is a whole lesson unto itself, and I suggest you learn it.
5 bracketed images are merged into a single HDR photo in Lightroom.
After producing an HDR image from multiple images merged in Lightroom, you’ll have a 32-bit file to work with, rather than the standard 24-bit single image files you are accustomed to dealing with.
The image will now have 10 stops of exposure adjustment (the Lightroom Exposure slider will go from a +/- 5 range to a +/- 10 range).
Make your bracketed shots so the darkest image captures all the bright sky detail and the brightest image picks up all the shadow detail. Combined into a single 32-bit HDR DNG image in Lightroom, you’ll have lots of adjustment possibilities to get a just-right exposure with good sky detail.
The 32-bit DNG file created after a merge-to-HDR routine in Lightroom gives a much larger exposure range to work with.
Moving to Photoshop
You can do a lot in Lightroom, but sometimes you need more control and more power. One of the things Photoshop offers that Lightroom doesn’t is layers. Here are some tips for dramatic skies using Photoshop for editing.
Blending
You will need at least two shots with different exposures for this technique. Let’s outline a very simple approach.
(You will need to use layers and masks in Photoshop, so if you’re not familiar with those, here’s your chance to learn.)
This will work best if you shoot from a tripod so your images are identical except for exposure. Shoot at least two shots, one exposed to capture all the bright details in the sky, the other exposed for the darker areas of the land.
If you’re coming from Lightroom, highlight both images, then click Photo>Edit In>Open as Layers in Photoshop. Have the lighter image on top.
To be sure the images are sized and aligned perfectly, select both layers in Photoshop (F7 turns on the layers palette), click the first layer, hold down Shift and click the second layer, and then from the top menu click Edit>Auto-Align Layers>OK.
Create a mask on the top layer. (With the top layer selected, click the Add Layer Mask icon, which looks like a rectangle with a circle in it).
Use the Brush Tool with the color set to Black. Click on the mask you just created. Now paint over the sky. As you do, you will reveal the darker sky layer underneath. Adjusting brush size, opacity, and brush softness will help you better control things.
One shot exposed for the sky, the other for the land. I then layered, aligned, and blended using a mask in Photoshop. Canon 6D | Canon EF 24-105 f/4
The multi-layer masking approach can also work well if you use Photoshop selections to choose what you will keep from one layer and use from the other layer. Selection techniques can be simple or very complex in Photoshop, depending on how complex a selection you need to make. I will point you to a good entry point for further study: this article by DPS writer Yacine Bessekhouad.
Here’s a different technique to try when you have a blue sky and not much additional blue in your shot. Use the Lightroom targeted adjustment tool in the HSL/Color panel to bring down the luminance level of the blue. You can go even further with a monochrome conversion. The look is similar to having used a polarizing filter.
Do some multiplying
Perhaps you only made one shot, didn’t bracket and, despite some of your editing techniques, the sky and clouds still seem a little wimpy. Never fear.
Here’s something else to in Photoshop:
Make a duplicate of the layer. (Ctrl/Cmd + J.) You will have two duplicate layers on top of each other.
Duplicate that copy again so you now have three duplicate copies. Temporarily turn off the bottommost layer (probably labeled “Background”) by clicking the eyeball icon.
Now, change the blend mode to Multiply. The detail and contrast in the clouds should be amplified.
Duplicate again for further amplification.
Repeat with additional duplicates; hit Ctrl/Cmd + J as desired to keep duplicating. until the sky turns the way you’d like. Don’t worry about the foreground just yet.
To reduce the duplicates into one layer, merge the visible layers: Layer>Merge Visible (or Ctrl/Cmd + Shift + E).
You will now have just two layers, the merged layers and the background layer. Turn the Background layer back on by clicking the eyeball again.
You will now need to use one of the selection and masking techniques to mask out (“erase”) the probably over-darkened land/foreground portion of the top layer.
Here I brought the shot into Photoshop, made a duplicate, and then applied the Multiply blend mode to the top layer. Bringing back the darker portion was easy here with a straight horizon line. This look is similar to what you might get with a traditional glass graduated ND filter.
S’cuse me while I switch the sky
In the rock classic “Purple Haze,” Jimi Hendrix sang, “S’cuse me while I kiss the sky.” Some people later thought the lyrics to be “kiss this guy;” that’s called a misheard song lyric or mondegreen. A website is devoted to them. As a photographer, I prefer to sing my own version: “S’cuse me while I switch the sky.”
Could this sky be any more boring? Let’s help it. Canon 6D | Canon EF 24-105 f/4 | 1/60 sec | f/8 | ISO 100
Sometimes when there’s no clouds at all, or a plain blue sky, a plain gray overcast sky, or maybe you blew out the sky and there’s nothing to recover, you’re left with no alternative. A sky replacement is needed.
Other times, you just want a different sky for a more dramatic effect.
Whatever the case, substituting skies is a great way to get some nice images and a really great way to polish your editing skills.
Now here’s a nice sunset. Let’s work a piece of this in. Canon 6D | Canon EF 24-105 f/4 | f/11 | ISO 200
With Photoshop
Put the clouds layer on top, then use a black brush on a white mask and paint to reveal the lower beach area again.Back in Lightroom for some more fine-tuning. Isn’t this a much nicer image than the original?
Sometimes sky replacement is an easy task, such as when you have a flat horizon or perhaps a hard-edged building against the sky.
Of course, if you have trees with leaves or intricate details to select, it can be much more challenging.
Some might have called this a perfect day when this historic train rolled into the Boise (Idaho) Union Pacific Depot. Not a cloud in the sky. Boring! At least with the hard, straight lines and continuous blue color, making a selection is easy.
My goal here is not to teach you the various techniques of sky replacement. There are many instructional articles and online tutorials for that. Here’s an example from DPS writer Simon Ringsmuth for basic level sky replacement. Here’s an online Youtube tutorial where a more detailed foreground tree is dealt with. Here’s yet another tutorial with different techniques.
As I said, sky replacement can be a deep dive into Photoshop tools and techniques. But what if there was a simpler way? We’re now beginning to see one-click tools that do a pretty good job of sky replacement.
Here’s a dramatic sky. But will it work?Impressive, but does it work? Might you question if this really was the sky that was present when the photo was taken?
With Luminar 4
Sky replacement software has been around for a few years, but it’s only been recently that it’s produced good results with relatively complex subjects. The use of artificial intelligence in applications has made a huge difference in the quality of the finished image.
The “king of the hill” at this writing may be Skylum’s Luminar 4.
This was an easy job for Luminar 4 and this stock sky looks pretty convincing.
Luminar 4 comes with a few dozen skies you can use as replacement, and you can add your own skies.
(If you’re serious about getting into sky replacement, I would strongly encourage you to start collecting sky images, snapping shots whenever you see an interesting sky and adding them to a folder for possible later use.)
Nice shot, but it would be better with a dramatic sky. Canon 6D | Canon EF 70-200 f/2.8 | 200mm | 1/30 sec | f/16 | ISO 100
Something to bear in mind when deciding whether to use the included skies or your own is resolution. The replacement sky should have a resolution at least as great or greater than the image to which you’ll be adding it. Using a low-res sky image with a higher-res original image will just look bad and degrade your shot.
This sunset sky in the Luminar 4 collection was just right for this shot. The program also let me tune the color balance of the original image to match more effectively.
A confession here:
I have only dabbled with sky replacements in Luminar 4 using the free demo version, so I don’t claim to be an expert. I am reasonably impressed with what I’ve seen so far. Even with a fairly complex subject, such as the harbor shot below with lots of sailboat masts and rigging extending into the sky, it did a very nice job.
Might you do better with Photoshop? I guess that would depend on your skill level. Artificial intelligence has not yet reached the level of human skills and intelligence. Then again, much will depend on your level of proficiency with Photoshop. Speaking for myself, I’m not sure I could currently do better than Luminar at this time.
And doing it with a few simple clicks? Good stuff, if you ask me!
With the masts and rigging extending into the sky, replacing the sky with Photoshop selection tools, layers, and masks would be challenging. With Luminar 4, it was done with a few clicks. Perfect? Maybe not, but impressive. It added the birds, too!
Other tools
Luminar isn’t the only program for doing sky replacements. I work on a PC and my tablet and phone are Android devices, so I’m not as familiar with what’s on the Apple side of this kind of software. I do know other forms of software are moving toward the use of AI and doing sky replacement.
I was pleased to stumble across an Android app that may not be as refined as Luminar. And for images you might shoot with your phone and want to do a sky replacement for the web, Enlighten’s Quickshot does an admirable job and is very easy to use, right on your phone. I see it is also available for iOS.
I replaced the sky in this shot right on my Android phone. I used Quickshot, a pretty good little app. For online work that will be posted on the web, it seems plenty capable.
Ethics of sky switching
So if you can, does that mean you should? If you can replace the sky in a photo, should you? When does the result stop being a photograph and become an art piece, a reflection of the skills of a photo editor and not those of a photographer? Would you enter an image in a photo contest where you had replaced the sky?
I don’t claim to have the answers, but I have raised the ethical questions surrounding sky replacement before. Take a look at this article I wrote several years ago which dives deeper into that subject.
If you’re going to do magic…
Have you ever had the misfortune of watching a really bad magician? A show where it is clearly evident the performer really did have something up his sleeve or where there was no doubt about how the trick was done? I’d use that example as a lesson in what not to do if you decide to do sky replacement with your photos.
A shot where the light in the sky comes from one side while the subjects in the foreground are lit from the other side would be an example of “bad magic.” So would different light temperatures between land and sky or evident fringing where poor selection and masking was done. Rather than embarass yourself with a poorly executed sky replacement where even non-photographers can spot the fakery, practice your skills for yourself only. I believe only when you’re ready for “primetime” should you begin showing your sky replacement images.
Then, of course, you will face a new dilemma. Once people are aware you can produce shots with amazing skies, even when you do capture a photo in-camera with a gorgeous sky they will wonder, “Is that real or did you add it?”
If you’re going to “do magic” and replace skies, it had better be convincing. You tell me: Is this the original sky or not?
Conclusion
I hope you picked up some good tips for dramatic skies in this article. I also hope you’ll give consideration into not just when and how to implement these techniques, but if you should or shouldn’t.
Some people really don’t enjoy photo editing and would prefer to do everything in-camera as much as possible. For others, editing is part of the craft and no photo is complete until it has undergone an extensive edit session.
As I write this, the Covid-19 crisis lingers, and so maybe you have more time at home to work on your editing skills. Meanwhile, let me leave you with this sign-off used by Garrison Keillor, host of the radio show, “A Prairie Home Companion.”
“Be well, do good work, and keep in touch.”
The post S’cuse Me While I Tweak the Sky: Tips for Dramatic Skies in Your Photos appeared first on Digital Photography School. It was authored by Rick Ohnsman.
The post 10 Incredible Bird Photography Tips for Beginners appeared first on Digital Photography School. It was authored by Prathap DK.
What is the most important factor in getting your bird photographs noticed by a large audience? Is it the camera or the lens or the bird?
Imagine you have a Canon 1D X Mark III or a Nikon D5 and an 800mm lens. You have been to a place to photograph the magnificent bald eagles. Everything seems perfect! Isn’t it?
But what if you do not know what makes a good bird photograph? Do you think, just by shooting a burst of photographs, you’ll get the best results?
Definitely not. You may get snapshots, but not photos.
“There is nothing worse than a sharp image of a fuzzy concept.”– Ansel Adams
Today you will learn some of the core principles of bird photography. These will give you an understanding of what makes a good bird photo.
1. You don’t need expensive lenses for great bird photography
A great bird photograph does involve several factors, such as:
Quality and direction of the light
Composition
Knowledge about the bird and its activities
Background
Knowledge about the gear you are using
Proper settings
Proper exposure
Your position
3 + 1 Ps (Patience, Perseverance, Practice + Passion)
You see, it takes a lot to become a good bird photographer. A decent APS-C or DX-format camera body with a telephoto lens of up to 300mm is more than sufficient to really get great bird photographs.
It is important to realize that bird photography is much more than just the camera or the lens. There is no denying the fact that the longer the lens, the easier it is to photograph birds that are skittish. But the lens itself cannot make a great bird photograph.
Also, if you do not have a longer telephoto lens, nothing stops you from taking a great photograph of birds like mallard ducks, geese, gulls, and herons that are easily approachable. If you cannot take a close-up of a bald eagle, nothing stops you from taking a unique photograph of a bald eagle in its habitat.
Everything boils down to how you view the situation. “Is the glass half empty or half full?”
2. Light and composition
Photography is all about light. Light has a few characteristics that will make a photograph wonderful.
Early morning and late afternoon light is usually the best time for bird photography. The light during these times is soft. As a bonus, the birds are very active.
Soft light has some wonderful characteristics, such as:
It does not cast harsh shadows on the bird
It brings out a glow in the bird’s plumage
It creates a catchlight in the bird’s eye
Composing a bird photograph helps you convey your message in the best possible way. Bird photography composition is generally very simple. Following a few basic composition principles will help you make a difference:
Use the rule of thirds compositional technique to place the bird off-center
Use color contrast by aiming for a complementary background
Fill the frame with the bird
Use a clean background
3. Transport the viewer into the bird’s world
We see our world at five to six feet high, but birds see the world in few inches to few feet. To get a feeling of the bird’s world, get down on their level!
Go low and go slow.
Always try to photograph the birds on their eye level, except for birds in flight, of course. Getting down low has greater benefits that will overshadow any of your complaints, such as not wanting to bend down, lie down, etc. Some of the obvious benefits are:
You get more intimate photographs of birds since you will get eye contact
You will get pleasing blur both in the foreground and background
You make the bird less scared since you can hardly move
You will transport the viewer into the bird’s world
4. It’s all in the eye
Take a look at any photograph of a bird. What is the first thing you want to see?
It’s the eye, right?
We tend to make an eye connection with any living being. It is no different than with birds. The eyes are the windows to the soul. If there is no light in the eyes, then they look dull or lifeless. Birds look lively when there is light in their eye.
This light in the eye is called a catchlight.
By following a few guidelines you can easily get better bird photographs:
Always keep the bird’s eye in sharp focus
Check for a catchlight in the bird’s eye (this is easy to get if the bird is front-lit)
Make sure to photograph from the bird’s eye level
5. Fill the frame
In bird photography, we generally photograph an individual bird. When photographing individual birds, it is always a good idea to fill the frame.
Advantages of filling the frame with the bird are:
It is easy for the viewer to focus on the bird
It is easy to achieve a pleasing blur or bokeh effect in the background
It is easy to properly expose for the bird
It is easy to compose in the field
6. Tell a story
Storytelling in bird photography should not be confused with stories in books and newspapers. Storytelling is a way to express the time of the day, mood, place, or activity of the bird in a single photograph. Viewers should be able to picture themselves in the scene.
Simply put, a photograph of a bird plus its surroundings will give a better sense of story than just the bird filling the frame. Though the story may not always be true.
Here are few tips you can follow while you photograph a bird in its habitat:
Make the bird an integral part of the photograph by including its natural habitat
Show the interaction of birds if there is more than one bird in the photograph
Indicate the weather conditions by including snow, rain, or mist
Take photographs during sunrise and sunset
Show season by including flowers in bloom, autumn colors, or snow
7. Capture their action and behavior
Birds are always in action. They hardly sit still. Capturing birds in action involves more effort and patience compared to photographing perched birds.
Here are a few tips for capturing birds in action:
Photograph early in the morning or late in the afternoon when birds are very active
Use burst mode to take several photographs during the action
Track the bird until focus is locked before pressing the shutter
Learn to anticipate the action either by observing or reading about birds
Birds tend to ignore you when they are very hungry. It is very easy to photograph them in action during these times. But care should be taken not to disturb them and to maintain considerable distance.
Capturing a bird’s behavior is much tougher than any other aspect of bird photography. This is generally because birds become alert the moment they see you.
The alert bird is always trying to fly away, so you’ll rarely see its behavior. You can observe the actual behaviors of a bird when it is truly comfortable.
There are few ways to make a bird comfortable:
Use a natural place to hide, like a bush or tree or something that obscures you
Wait patiently until the bird ignores you
Visit the location several days in a row until the bird becomes comfortable with your presence or you get the right opportunity
Remember to research and learn everything about the bird you are photographing. This will definitely make you a better bird photographer; also, you will enjoy knowing about the bird.
8. Capture their magnificent flight
The most interesting part of bird photography is capturing their magnificent flight. This is very tricky for beginners and pros alike. It is not easy to take flight photographs that will wow viewers.
Your success photographing birds in flight largely depends on the bird, as well as the technique that you employ. Smaller birds are generally very erratic in their flight and also a bit difficult to track, since they are generally small in the frame. But larger birds are slightly less swift and are not as difficult to track.
If you want to be successful with flight photography, start with larger, slower-moving birds. Learn all the field techniques to capture the perfect photographs of these birds.
Here are some simple tips that will help you capture those magnificent flight photographs:
Learn about the bird’s flight patterns
Know the bird’s landing and take-off patterns
If there is more than one bird, it is almost always the case that, if one flies, the rest will follow suit
Track the bird for a while and let the camera achieve focus before pressing the shutter
Use Aperture Priority so you do not have to worry much about the changing light conditions
9. The background makes the picture
This is one of my favorite questions: Is it the background or the bird that makes the picture?
Go through all your favorite bird photographs and see it for yourself.
Except for extreme close-up portraits of birds, every other type of bird photograph will look great when the background is clean and complements the bird.
It is very important to keep an eye on the background while taking bird photographs. Just follow these simple tips:
Avoid taking bird photographs when the background is too distracting
Avoid taking bird photographs when the background is plain and boring
Wait for the bird to assume a good position or change your position to get an interesting background
Choose maximum aperture values to throw the background slightly, or completely, out of focus
10. Practice with common birds
I urge you to practice photographing common birds. You might have understood by now that these techniques are not dependent on your camera, your lens, or the bird. I was using an 18-200mm lens for the first four years of my bird photography. I learned and practiced most of my birding techniques with common birds like seagulls, mallards, geese, and herons.
I spend most of my time photographing these common birds, and I challenged myself to make some unique photographs of them; this challenge has fueled my passion for a long time.
I put more importance on learning and practicing photography than on whatever gear I possess. I am very happy to say that I learned most of the photography basics here at Digital Photography School.
I hope my story so far is an inspiration to you to embrace the beauty of these common birds.
Wrap up
Focus your time and energy on learning all the core principles outlined above. Prove to yourself that you have the passion to go out and photograph birds every day, or as often as you can.
Remember that proper techniques will always outsmart equipment. Make every attempt to create amazing photographs of the common birds. Enjoy photographing birds. That is the secret to success.
The post 10 Incredible Bird Photography Tips for Beginners appeared first on Digital Photography School. It was authored by Prathap DK.
The post Nikon’s 2019 Mirrorless Shipments Lag Behind Sony, Fujifilm, and Olympus appeared first on Digital Photography School. It was authored by Jaymes Dempsey.
Last month, we reported on Nikon’s decreased 2019 market share (Nikon now sits behind both Canon and Sony, but ahead of Fujifilm, Panasonic, and Olympus).
And we can now follow that up with additional data that highlights Nikon’s struggles, recently published in Nikkei article.
In 2019, over eight million interchangeable lens cameras (ILCs) were shipped, and here’s the breakdown by camera manufacturer:
Canon: 4.16 million ILCs
Nikon: 1.73 million ILCs
Sony: 1.66 million ILCs
Fujifilm: 500,000 ILCs
Olympus: 330,000 ILCs
Other Manufacturers: 280,000 ILCs
These numbers are pretty much what you’d expect, with Canon leading the digital camera manufacturers by a large margin and Nikon in second place, closely followed by Sony. Fujifilm sits at the back half of the pack, then Olympus, while Panasonic and Ricoh/Pentax fail to make the top five.
Here, we can see that Nikon still remains competitive, even as Sony threatens its position. But bear in mind that these numbers include all interchangeable lens cameras, not just mirrorless models.
And when you look at mirrorless cameras (MILCs) alone, Nikon’s position becomes much more tenuous:
Sony: 1.65 million MILCs
Canon: 940,000 MILCs
Fujifilm: 500,000 MILCs
Olympus: 330,000 MILCs
Nikon: 280,000 MILCs
Others: 240,000 MILCs
As the data indicate, Sony is firmly on top, though I expect its lead will narrow over the next year or so. Canon’s dedication to its full-frame mirrorless system, as displayed in the EOS R5/EOS R6 release, will boost Canon’s numbers to at least become competitive with Sony.
But for Nikon, the future isn’t looking so rosy. It’s now been two years since the release of Nikon’s initial mirrorless offerings, the Z6 and the Z7. And while we’ve gotten two additional mirrorless cameras to show for it (the full-frame Z5 and the APS-C Z50), Nikon hasn’t even outperformed Olympus, a company in the process of selling its unprofitable camera division.
It’s clear that Nikon has big plans for the future (rumors of a Nikon Z8 abound), and Nikon recently announced several impressive Z-mount lenses. But right now, the company seems to be held up primarily by DSLR sales, which just doesn’t seem sustainable.
Let’s just hope that Nikon manages to turn things around in the coming years. For me (and, I imagine, for most photographers), more camera choice is pretty much always better.
Now over to you:
What do you think about Nikon’s recent camera sales? Do you think the company will make a comeback? What do you think Nikon needs to do to be successful? Share your thoughts in the comments!
The post Nikon’s 2019 Mirrorless Shipments Lag Behind Sony, Fujifilm, and Olympus appeared first on Digital Photography School. It was authored by Jaymes Dempsey.
The post Why It’s Important to Pay Attention to Your Backgrounds in Photography appeared first on Digital Photography School. It was authored by Simon Bond.
In today’s article, you’re going to learn about the importance of backgrounds in photography. Knowing how to best use the background will have a big impact on the success of your photo.
You’re going to discover the different approaches to dealing with the background, and how that background will then work as a counterweight to your main subject.
So turn your eye away from the main subject, and see what a good background will do for your final image.
The strong pattern in the background leads the eye to the model, who is the main subject in this portrait photo.
Background or main subject?
The answer to this question is, of course, both.
As a photographer, you need to pay equal attention to the main subject and the background. It’s easy to lose track of the background while you focus on your main subject. Take a little longer composing your photo and look to the background. You’re looking to avoid clutter in the background while lining up leading lines with your main subject.
In this photo, the street hawker is the main subject, but equally important is the background and the mood the background provides.
Composing with the background
The background is an important aspect of portrait and still life photography. And the background often takes up the entire photograph when shooting landscapes, so you pay particular attention to it by default.
So what are you looking for in the background, when the main focus of the image is your main subject? The answer is design elements, such as:
Lines: Are there leading lines in the background? Then make sure they lead the eye to the main subject. Equally, make sure the background is compositionally sound. This will often mean positioning the subject in the left or right third of the frame.
Patterns: Is there a textured background such as a brick wall behind your subject? Make sure that this fills the background.
Minimalism: Avoid background clutter for a more minimalist photo. Step to the side if this removes an unwanted element from your photo such as a lamp post or a person.
Frames: Like leading lines, if there is a natural frame you can use in the background then line this up with your main subject.
The frame gives the photo a more minimal feel, yet there is still a story captured with the moving person.
Work with the background or remove it?
You have a choice as a photographer whether you want to use the background in your frame, or whether you want to eliminate it.
The choice is an artistic one, and for certain types of photography (such as street photography), you’ll certainly want to include the background.
So let’s look at these two approaches.
This photo has a minimalist feel, produced by a strobe with a snoot attached.
The story is in the background
The background is vital in that it gives your photo context. How your main subject interacts with the background gives your photo more narrative, and hence it becomes a stronger photo. That’s not an excuse to include clutter, though; you should still look to see what elements can be removed from the background.
The ideal photo then shows your main subject, and just enough of the background to provide that story. So how will you achieve this?
Focal length: A change in focal length can have a big impact, especially on the background. Longer focal lengths will allow you to compress the background behind your main subject, but at the (likely) cost of losing narrative content that would have enhanced the photo.
Bokeh: Bokeh refers to the out-of-focus portion of your photo. This effect can be controlled, and you don’t need to completely blur out the background. A soft-focus background can give your photo a story without forcing the eye away from your main subject.
Framing: If you happen to find a natural frame in front of your subject, you can use this. Use it to frame the main subject and the area of the background that’s important. Then the frame can naturally remove unwanted elements in your photo by blocking them from view.
This photo shows how background can add context to the main subject. Soft bokeh is used here.
Minimal backgrounds in photography
The other way to deal with the background is to remove it, blur it out, or ensure it’s one particular texture.
Taking this approach will give your photo a much more minimal feel, and this can be just as effective when producing an interesting image. This option is well worth considering when you have a very interesting main subject or, even better, a main subject that provides its own story by doing something interesting.
So how will you go about producing minimal backgrounds in photography?
Low-Key: A low-key effect involves perfectly exposing the main subject while underexposing the background. The resultant photo will then have a black background. To achieve this, light your subject with a narrow beam of sunlight or use a strobe with a snoot attached.
Bokeh: Now the aim is to completely blur out the background. The best lenses to do this are prime lenses, and you’ll want to use the largest available aperture. The greatest effect will be achieved when there is a large distance between the main subject and the background.
Texture: Backgrounds like brick walls, metal shop shutters, or concrete blocks can work well here. The aim is to fill the background with a particular pattern and nothing else.
Color block: Again, a wall can work here, but it should be a single color. Alternatively, how about aiming at the sky on a clear day, so you have just blue for your background?
This photo includes stronger bokeh with the background blurred out. However, the colors in the background still serve to frame the leaf.
Maximize backgrounds in photography!
Now that you know how important it is to pay attention to the background, how will that change your photography? Are there techniques you use that haven’t been mentioned in this article?
As always, we’d love to see your photos and for you to share your opinions. If you have photos where the background is key to the success of the photo, then please share those in the comments section. And explain why you think the background is so important!
The post Why It’s Important to Pay Attention to Your Backgrounds in Photography appeared first on Digital Photography School. It was authored by Simon Bond.
The post 4 Ways to Shoot Portraits in the Middle of the Day appeared first on Digital Photography School. It was authored by John McIntire.
One of the first things you learn when starting out in portrait photography is that the midday sun does not provide great lighting conditions.
As with all things in photography, there are plenty of exceptions. But, for the most part, this is sound advice. Because of the harsh, contrasty light, and the deep shadows that such light produces, shooting portraits in the middle of the day can be a real challenge.
Creating portraits on location in the middle of the day can prove a real challenge, thanks to unflattering light from the high sun. Fortunately, there are loads of ways to get around this and take back all those wasted shooting hours.
Canon 5D Mark III | Canon EF 50mm f/2.5 Macro | 50mm | 1/800 sec | f/5.6 | ISO 200
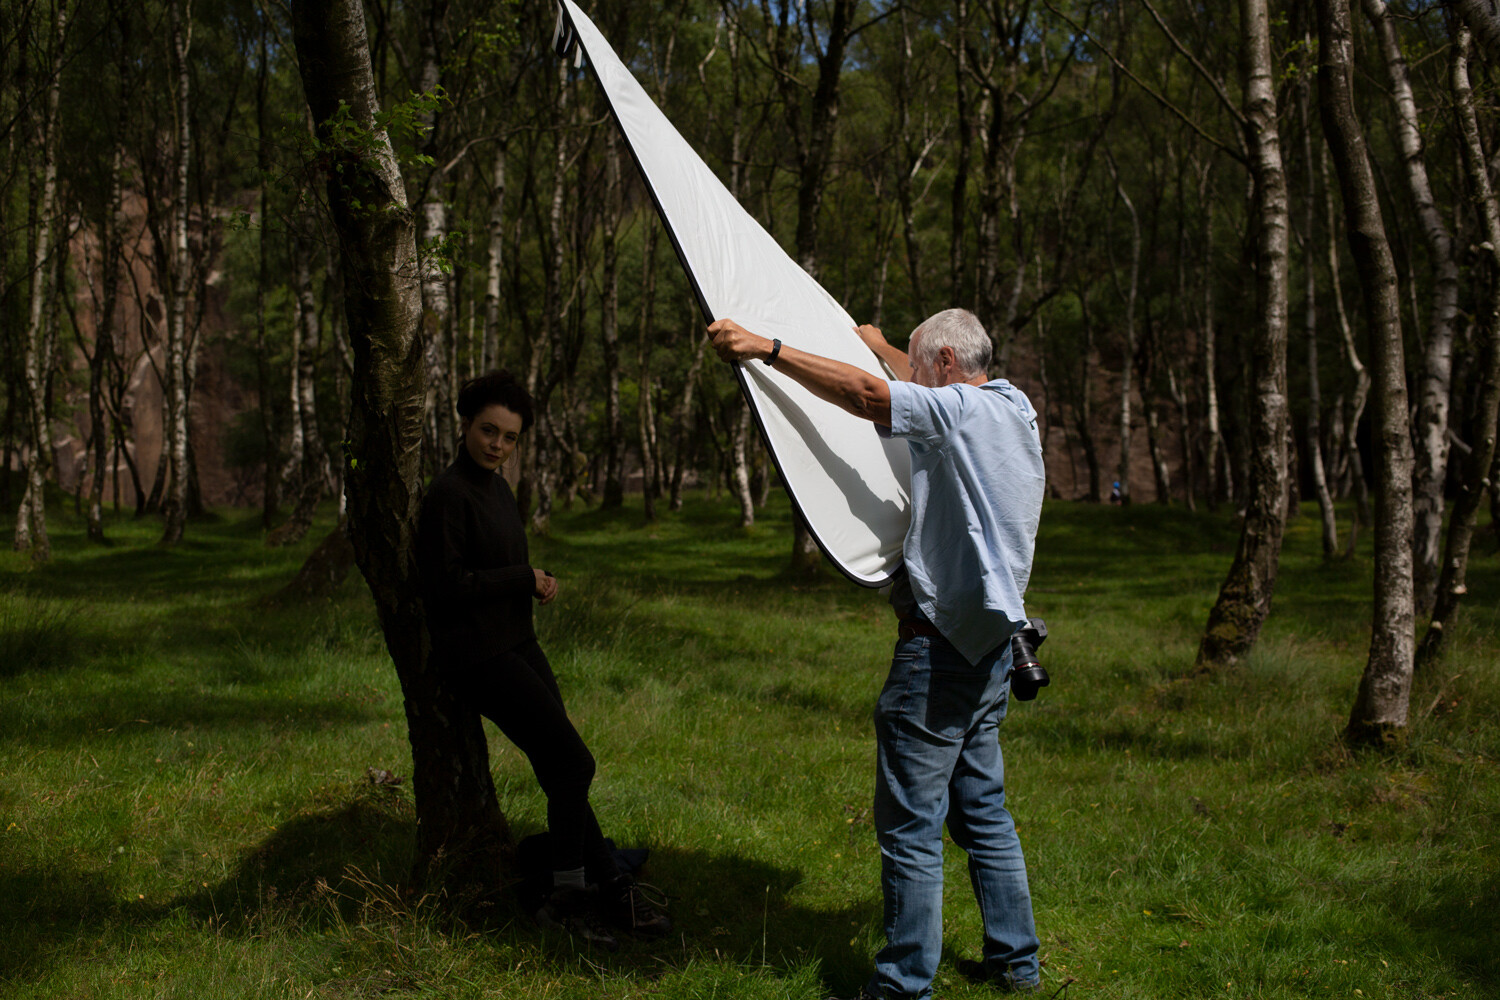
Of course, you can always go and find a bit of open shade for more flattering light, but what do you do when isn’t an option? And what do you do when you have a location that you love, but the light isn’t perfect at the moment?
You could always wait. But with portraits, you can’t necessarily count on another person’s enthusiasm for waiting around for the right light. Fortunately, there are a lot of tools that will help you modify the midday sun so that the light is more flattering for portraiture.
By far, the easiest way to shoot in the middle of the day is to do so on an overcast day with heavy cloud cover. Of course, just like waiting around for the golden hour, you can’t always wait around for clouds.
Canon 5D Mark III | Canon EF 85mm f/1.8 | 85mm | 1/2000 sec | f/2.8 | ISO 200
This article will give you an overview, along with the basics, of four techniques for manipulating, or completely altering, the light from the midday sun to help you get better portraits.
1) Reflector as key
The first of these techniques only requires a reflector. Either white or silver will do, but if you opt for a 5-in-1 reflector, you will have both at your beck and call.
In strong sunlight, the white reflector should work most of the time. If the light is a bit dimmer, you may need to opt for the silver reflector.
In direct sunlight, the shadows are heavy and unflattering. An easy and cheap method of countering this is through the use of a silver reflector.
Canon 5D Mark III | Canon EF 85mm f/1.8 | 85mm | 1/1600 sec | f/4.5 | ISO 400
To get started with using a reflector as your key light, place your subject so that the sun is behind (or at least to the side of) them.
Now, raise the reflector up and point it back towards your subject. It should be placed opposite the sun. You should be able to see and watch what the light bouncing off the reflector is doing. Adjust the reflector’s position until you are getting the effect that you are after.
When using a reflector like this, make sure it’s above and pointed at your subject. You will be able to watch what the light is doing.
While using a reflector in this way, there are a few things to keep in mind. Because the reflector is your main light source (or key light), it is usually best to make sure that it is above your subject. Lighting from above in this way will help to ensure more natural and flattering results. Lighting from below will result in unnatural-looking shadows that won’t be flattering to your subject.
The silver reflector has killed most of the shadows from the sun and brought up the exposure of the subject’s eyes for a much more flattering light.
Canon 5D Mark III | Canon EF 85mm f/1.8 | 85mm | 1/800 sec | f/4.5 | ISO 400
Another thing to keep an eye on is your exposure. Because you are working with natural light, you will be able to rely on your camera’s meter. Where you might find a problem is when the light reflecting off of the reflector isn’t as strong as any sunlight in the scene.
Do watch what the light is doing very carefully. Here, the reflector has come down too low and the light is hitting the subject’s arm and the lower side of her face first. This is not flattering.
To ensure a good exposure on your subject, meter from their skin. An easy way to do this is to use your camera’s spot metering mode and meter a place on your subject’s skin that is being lit by the reflector.
Just remember that your camera’s meter is measuring for 18% grey and a lot of skin tones do not fall anywhere near that range. Subjects with lighter skin may require a bit of overexposure, while subjects with darker skin will need you to compensate with underexposure. In most cases, 1/3 to 2/3 of a stop will be good enough.
2) Diffusion
You might not be surprised to see that direct overhead sunlight doesn’t make for a very good portrait.
Canon 5D Mark III | Canon EF 50mm f/2.5 Macro | 50mm | 1/3200 sec | f/5.6 | ISO 400
A diffusion panel is a great option for manipulating the harsh midday sun and achieving better portraits in the middle of the day.
Diffusion panels are sheets of material that you place between the light source and the subject. The material spreads out the light, making it softer and more suitable to portraiture. If you have a 5-in-1 reflector, you probably already have one of these.
Alternatively, there are a lot of options on the market, including massive diffusion panels that cover a large area.
Using a diffuser (or a diffusion panel) is a great and affordable way to soften the light from the sun.
Canon 5D Mark III | Canon EF 50mm f/2.5 Macro | 50mm | 1/500 sec | f/5.6 | ISO 400
To use a diffusion panel for these purposes, simply place it between the sun and your subject. Because we are talking about the middle of the day, depending on where you are in the world, the sun should be pretty close to straight above your subject. In this case, the diffusion panel would go above your subject. This will have the effect of softening the light; once you’ve done this, you should be able to meter and start taking images.
All that you have to do is place the diffusion panel between your subject and the sun. Because this diffuser cuts out two stops of light, you can clearly see how much darker the area in shade is compared to the rest of the scene.
There are a few things to watch out for while using a diffuser. A lot of diffusion panels are made to reduce the exposure of the light in your scene by a certain number of stops. This is important to take into account because the diffuser will only be altering the exposure of the light falling within its area of effect. If your subject is a fair distance from the background, the background will appear two stops brighter than it did in any shots you may have taken without the diffuser.
Here, you can clearly see the effect the diffuser has on the subject and the ground that it covers. You can also see how much brighter the background becomes when you expose for the subject.
This may result in overexposed backgrounds. To minimise this, you can make sure that the diffuser is covering everything in your frame by choosing a background closer to your subject, or by using a background that’s very dark in the first place.
This diffusion panel catches even the slightest breeze very easily. Without a dedicated stand, it required two people to hold it in place and, even then, it had its moments.
Also, large diffusion panels like the one I have used in this example are very light. If there’s even a slight breeze, they pretty much act like a sail. You may need a dedicated stand or extra bodies to hold them in place.
3) Flash as fill
More direct sunlight, more unflattering light. Using flash to fill in the shadows is another useful technique for portraits in the middle of the day.
Canon 5D Mark III | Canon EF 50mm f/2.5 Macro | 50mm | 1/1600 sec | f/5.6 | ISO 400
If you have the equipment, using off-camera flash as fill light to the sun’s key light is a great way to help you take portraits in the middle of the day. The job of the fill light is to bring up the exposure of the shadows created by your key light (the sun, in this case). This will reduce the contrast in your scene and even out the exposure.
Here, you can see that the shadows from the sun still exist, but they are much brighter. This reduction in contrast makes for a much more suitable portrait.
Canon 5D Mark III | Canon EF 85mm f/1.8 | 85mm | 1/640 sec | f/4 | ISO 100
There are a lot of ways to do this, but I’ll go over a basic method that requires the least amount of extra equipment.
It doesn’t matter if you are using a speedlight or a full-powered strobe; the principles remain the same.
The first thing you need to do is obtain an exposure for the ambient light. Do this by using your camera’s meter and taking a test shot as if you weren’t going to be using flash at all. The one exception here is that you need to ensure that your final shutter speed is slower than the max sync speed on your camera. This is often around 1/250 seconds, but do check your manual just in case. Once you’ve ensured that all of the highlight tones are present in your frame and not overexposed, you should have your working settings.
Note: If the sunlight is very bright and you cannot get the shutter speed to go slower than your max sync speed, you may want to consider using High-Speed Sync.
Now, turn on (and connect) your flash. While you are getting started with fill, I suggest placing your flash in an on-axis position. This means the flash is on the same line as the lens of the camera from the subject’s position. Although if you are using a speedlight on top of the camera, I recommend getting it off for more flattering results.
Getting the flash off-camera will always provide a more flattering light. (Please forgive my visitor. He just wanted to see what was going on.)
You can use Manual mode of E-TTL mode on your flash. Either will work fine, but E-TTL might help to get you closer to the desired exposure in less time.
Once your flash is set up, take a test shot. Look at the shadows in your image. Are they too bright? Turn down the power on your flash and take another test shot. Repeat this until the shadows appear how you want them. Do your shadows seem unchanged, or are they still too dark? In the latter case, turn up the power.
One thing that I suggest you take into account immediately is modifiers. For fill lighting, you will generally want as soft a light source as possible. The light from a bare speedlight will never be soft. A modifier like a translucent umbrella is dirt cheap and as portable as an actual umbrella, and they work well with both small and large flashes.
Use as big of a modifier as you can for softer light. Portable softboxes like this one work well. So do translucent umbrellas if you want a cheaper, even more portable option.
Another thing to look out for with fill lighting is how much you are filling in the shadows. Remember, the goal in using a fill light is to bring up the shadows so that they aren’t as dark in high contrast situations. You want to avoid having the exposure of your fill light as bright as the exposure from your key light. Try to aim for at least one stop between the exposure for your key and fill, but don’t be afraid to extend it more. Oftentimes two, three or even four stops of difference is the right choice.
4) Flash as key
Yet more unflattering light, this time with a more extreme solution. Here you will learn how to overpower the sun and use your own light.
Canon 5D Mark III | Canon EF 50mm f/2.5 Macro | 50mm | 1/800 sec | f/5.6 | ISO 200
Another way to use flash for portraits in the middle of the day is to use your flash as the key light. This will require a fairly powerful flash, as you will need it to appear brighter than the sun in your exposure, as you will now effectively be using the sun as a fill light. There are two main ways to go about this. These are using your flash in Manual mode and using your flash in E-TTL mode with High-Speed Sync (HSS).
Because it is fairly easy to get started with your flash in E-TTL mode with HSS (provided that you have the right equipment), that is what this article will discuss.
Using High-Speed Sync on a high-powered strobe allows you to overpower the sun and light the scene with your flash. The sunlight will still be present, but it will be a few stops darker than your key light.
Canon 5D Mark III | Canon EF 50mm f/2.5 Macro | 50mm | 1/800 sec | f/5.6 | ISO 200
High-Speed Sync allows you to use flash at shutter speeds far faster than your maximum sync speed. Since shutter speed is what governs the exposure of ambient light while using flash, this means that you can use a shutter speed that underexposes the light from the sun.
Adding the flash as key at this point will shape the main light on your subject with whatever modifier you are using, while the shadow areas will be filled in by the ambient light. This is a great technique that works in a huge variety of situations, but it does require a bit of specialist equipment.
Most speedlights have HSS functionality and more and more full-sized strobes are coming to market that have it, as well.
To get started using this technique for portraits in the middle of the day, select the aperture that you want to work with. Using the meter in your camera, meter the scene and underexpose it by the desired amount. You can evaluate the histogram to decide whether it is dark enough, or too dark.
Underexposing the ambient light by three stops was too much in this case. Evaluate based on taste and your desired output, then adjust as required.
Canon 5D Mark III | Canon EF 50mm f/2.5 Macro | 50mm | 1/2500 sec | f/5.6 | ISO 200
Now, set up your flash with your chosen modifier for the lighting pattern of your choice. Rembrandt and Butterfly are two basic patterns that work great most of the time. Now, connect your flash to the camera and turn it on, making sure that it is set to both E-TTL mode and HSS mode.
Take a test shot.
Adjust the exposure compensation of your flash as required to get a good exposure of your subject. Referring to the histogram will help you figure out how much exposure compensation you need to use at a glance. If your image is too bright, dial in -1/3 to -2/3 of a stop at a time until you have the desired effect. The same applies for too dark images. Just dial in +1/3 to +2/3 of a stop instead.
The test shot in this instance was way too overexposed. Simply dial in exposure compensation on your flash unit or trigger and keep evaluating until it is right.
Canon 5D Mark III | Canon EF 50mm f/2.5 Macro | 50mm | 1/800 sec | f/5.6 | ISO 200
Once you have a decent exposure, you should find that you have a nicely-lit portrait with all of the shadow and highlight details present in your image.
This is a very basic overview of High-Speed Sync and doesn’t even come close to covering what’s possible with the technique, but it should get you started with the basics.
Outro
Learning how to use just one of these techniques can open up hours worth of time that you would normally avoid shooting portraits in.
Canon 5D Mark III | Canon EF 50mm f/2.5 Macro | 50mm | 1/640 sec | f/4 | ISO 100
While there are plenty more methods for shooting portraits in the middle of the day, the ones listed here should go a long way to get you started.
There is no reason that you should feel limited by the time of day (and the lighting it brings) when you are photographing people.
Even with a few basic tools and techniques, you can stop being at the mercy of the light and, instead, take control of it and manipulate it to your needs. If nothing else, doing so will open up countless hours in the day that you can use for your portrait photography that you would normally be advised to avoid.
The post 4 Ways to Shoot Portraits in the Middle of the Day appeared first on Digital Photography School. It was authored by John McIntire.
Low light photography is one of those types of photography that when done well can produce amazing photos but when not done well can leave you feeling a bit disappointed. It’s a type of photography that at first can seem quite complicated as if you need a PhD to master. Yet all you actually need is a few simple pieces Continue Reading
The post The Ultimate Guide To Low Light Photography: Tips, Settings, Cameras, Lenses appeared first on Photodoto.
The post Weekly Photography Challenge – Details appeared first on Digital Photography School. It was authored by Sime.
This week we want you to focus on ‘details’
Last week we went with self-portraits and there were many of you that submitted really great images, thanks! This week, we want to see ‘detail’ and that could be a detail of yourself if you wanted to continue the theme “here’s my eyeball” seems to be a thing
I’ve decided to photograph the end of a fallen tree at the local park, the cracks, the rings and the ants! #dPSDetail
There’s detail in everything, while not necessarily being a macro photograph, though you can if you want, the detail is a selection of the larger image. An example might be that the photograph above is a detail shot of the scene below. Detail photographs are used in a story to help tell that story. Tag your photos #dPSDetail and we look forward to seeing what you come up with!
From last week’s photographs, this was a stand-out from Belgium based photographer, Katrien Stuyck, thanks and congratulations, Katrien!
Great! Where do I upload my photos?
Simply upload your shot into the comments field (look for the little camera icon in the Disqus comments section) and they’ll get embedded for us all to see. Or, if you’d prefer, upload them to your favourite photo-sharing site and leave the link to them.
Share in the dPS Facebook Group
You can also share your images in the dPS Facebook group as the challenge is posted there each week as well.
If you tag your photos on Flickr, Instagram, Twitter or other sites – tag them as #DPSDetail to help others find them. Linking back to this page might also help others know what you’re doing so that they can share in the fun.
Follow us on Instagram?
The post Weekly Photography Challenge – Details appeared first on Digital Photography School. It was authored by Sime.
The post KUVRD Launches Lens Hood That Fits 99% of Lenses appeared first on Digital Photography School. It was authored by Jaymes Dempsey.
Lens hoods cause photographers a lot of frustration.
On the one hand, they’re necessary. They reduce unwanted flare while protecting the front element from damage.
On the other hand, they’re big, unwieldy pieces of plastic that take up space in your camera bag. And you generally need a different lens hood for every one of your lenses.
Which is why KUVRD, the company behind a universal lens cap, has just launched a new Kickstarter campaign:
For the Universal Lens Hood.
As KUVRD explains on its Kickstarter page, the Universal Lens Hood is carefully designed to fit 99% of lenses, by way of a clever stretch-and-fold system that allows you to expand the hood around your lens, then resize the hood depending on the lens you’re using.
The Universal Lens Hood also offers other innovative features, such as compactness (it can be folded up into a small ring that fits in your pocket) and filter compatibility (you can nestle any circular filter inside the lens hood, regardless of size).
Plus, the Universal Lens Hood promises to eliminate reflections from surfaces. If you’re shooting the skyline through a hotel window, for example, simply press the front of the hood up against the glass and watch as the reflections disappear.
And did I mention that it only costs $ 30 USD?
Now, there are a few drawbacks to the Universal Lens Hood worth highlighting:
First, it actually comes in two sizes, one designed for lenses with a 54mm to 76mm filter size, and the other designed for lenses with a 72mm to 112mm filter size. This isn’t a huge deal, but it does seem to undermine the idea of a single universal lens hood; if you have lenses of different sizes, you’ll need two of the hoods, not one.
Second, I do wonder about adjusting focus rings and zoom rings under the Universal Lens Hood. While KUVRD claims that it’s easy to fold the lens hood back and gain access to these controls, this seems inconvenient at best, especially if you’re trying to zoom and focus manually in a single shoot (and could potentially cost you images while you’re fiddling around).
While the Universal Lens Hood is technically still in the funding stage, it has already shot far beyond its $ 5000 USD Kickstarter goal, which means that orders will be shipped (likely in December). So if you’re looking for a lens hood that is ultra-compact, fits all your lenses, and includes some additional useful features, then the Universal Lens Hood is worth a look.
You can become a Kickstarter backer here, where you can grab a single copy of the Universal Lens Hood for $ 30 USD or two copies of the Universal Lens Hood for $ 50 USD.
Now over to you:
What do you think of the Universal Lens Hood? Is it something you’d be interested in? Do you get frustrated with your current lens hoods? Share your thoughts in the comments!
The post KUVRD Launches Lens Hood That Fits 99% of Lenses appeared first on Digital Photography School. It was authored by Jaymes Dempsey.


 Photography is all about light. Light has a few characteristics that will make a photograph wonderful.


 Focus your time and energy on learning all the core principles outlined above. Prove to yourself that you have the passion to go out and photograph birds every day, or as often as you can.


You must be logged in to post a comment.