New Year Day afternoon. I started the 2021 paddling on Horsetooth Reservoir with Sea Wind, my expedition canoe. No drysuit or wetsuit needed, but loading this boat on Toyota 4Runner and carrying to water was a good crossfit training in […]
paddling with a camera
Archive for the ‘Photography’ Category
Starting 2021 Paddling Season with Kruger Canoe in Colorado
04
Jan
3 Rookie Mistakes to Avoid When Shooting on a White Background
04
Jan
The post 3 Rookie Mistakes to Avoid When Shooting on a White Background appeared first on Digital Photography School. It was authored by Lily Sawyer.

Because white background portraits are so common, many people think it’s an easy effect to achieve. Simply put your subject in front of the camera against a white background (preferably with a flash or strobe), and take the picture.

Unfortunately, it’s not so simple. Using the method described above would result in a photo with either a gray, dull, or muddy-toned background. The best possible result would be an off-white background after you have done some edits. That’s not the only issue, though; you’d see unwanted shadows everywhere, too.
I have replicated the setup with my little model, Sven (Kristoff’s beloved reindeer in the movie Frozen). It is easier doing this with a small-scale subject, as the lights are huge in comparison. With people, to do this to scale, you need to have massive octaboxes and flags. But this tutorial will show you the process clearly.
So here are three rookie mistakes to avoid when trying to achieve 100% pure-white background photography:
Mistake #1: The background is not lit properly
The background must be lit with approximately two stops more light than the subject. For example, if you want to photograph your subject at f/8, set your background lights to two stops brighter, so your meter reads f/16 on the background.
Note: You need to meter foreground and background lights separately, so that when metering for the main light (on the subject) you would turn the background lights off and vice versa. When both the background and main lights are on, your meter should still give you f/8 on the subject, because you are metering the light that falls on your subject and not on the background.
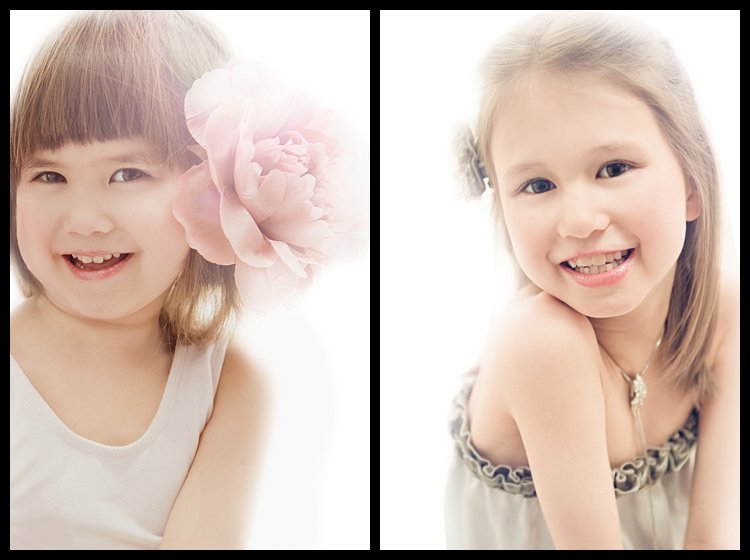
The photo below (right) shows what it looks like when you don’t light the background at all. You get a tone and color other than the intended white. In the photo on the left, the background was lit, but there was no main light illuminating the subject. Therefore, the resulting image is almost a silhouette of the subject.

My camera settings for all the shots in this setup were ISO 250, 1/160s, and f/8 (though the background gave a meter reading of f/16). The speedlights were set to 1/16th power (I rarely use my speedlights at full power, because the batteries run out very quickly).
The camera was a Nikon D750, which handles noise superbly, so ISO was not an issue. Two SB-910s and one SB-900 speedlight were used for this setup.
The photo below shows the setup with only the left background light firing.

You will notice in the two images below that only the right background light fired in the left photo, and only the left background light fired in the right photo. Such lighting is acceptable, of course, if that was your intention. The main light was positioned at a 45-degree angle on camera right. I wanted to bounce my flash onto the white rogue bender to modify the light.

You may also notice that in the left photo (above), there is a very slight shadow of Sven on the background behind him – because the left background light didn’t fire. When the background light did fire on the left, this shadow was eliminated (right photo, above).
Below is the setup with all three lights firing correctly.

Now that you have your background and main lights set up, you need to make sure these lights only hit the intended subject. This leads us to the next rookie mistake: separation.
Mistake #2: Not enough subject-background separation
Because the background lights are so much brighter than the foreground light, you need to separate them from the main subject. There are two key ways of doing this:
- Flagging
- Distance
Flagging
You can use anything black to flag your lights: the black side of a reflector, black cardboard sheets, or black foam core.
Black does not bounce light; instead, it absorbs light. It also blocks light from seeping through to places where you do not want it. If you don’t flag (block) your background lights, your subject will end up with a halo effect and look very backlit.
Distance
Once you have flagged your lights, you need to position your subject far enough away from the background (and from the background lights) that any light spillage won’t touch your subject. This depends on your personal preference and intention, of course – you may want some spill on your subject for a certain look or effect, or you may not.
If you do want some spill, make sure to run a few tests with various lenses, as chromatic aberration may occur around the edges of your subject due to the abundance of light. Some lenses are prone to chromatic aberration regardless of aperture, while others perform very well even at wide apertures, where chromatic aberration is most commonly observed. Also, be careful with the amount of spill you allow – you don’t want to chop off parts of your subject from the spill overexposure.

The photos above show a properly-lit Sven. The two background lights fired at f/16 and the main light fired at f/8. There are no unwanted shadows on the background, as was my intention.
However, I wanted to have a reflection and shadow in the foreground. This leads nicely to the third rookie mistake to avoid: a floating subject.
Mistake #3: The subject is floating
If you do not include some floor shadows, your subject will look like it is floating on white air, or like it’s cut out and pasted on a white sheet of paper.
The best tip for avoiding floating subjects is to use a reflective surface such as translucent white plexiglass, or white tile sheet, as a base for your subject to stand on. You can adjust the opacity of the reflection in Photoshop during post-processing, but having the reflection shows that your subject is planted firmly on solid ground.

Bonus mistake #4: Overexposed background
Be careful not to add too much light to the background. If you go past pure white and really overexpose a shot, the white will start almost glowing around the subject, just like if you had sun flare outdoors.
This lowers contrast and makes your subject look like they have a bit of a halo. You can see this overexposed effect in the images below:
White background photography mistakes: Conclusion
I hope this little tutorial has shed some light on basic techniques for creating a white background, and that it has solved any and all mysteries regarding how to achieve such a look.
If you have other, more advanced techniques, do share them in the comments below!
The post 3 Rookie Mistakes to Avoid When Shooting on a White Background appeared first on Digital Photography School. It was authored by Lily Sawyer.
How to Use Graduated Neutral Density Filters for Landscape Photography
03
Jan
The post How to Use Graduated Neutral Density Filters for Landscape Photography appeared first on Digital Photography School. It was authored by Francesco Gola.

If you want to create stunning landscape photos without significant post-processing, then you need a graduated neutral density filter.
But why are GND filters so important? What do they do? And how do you use them?
That’s what this article is all about.
So if you’re ready to discover how you can capture beautiful landscape images with GND filters, let’s get started!
Dynamic range
Since the camera was invented, we have tried to copy one of the greatest wonders of our body: the human eye. Unfortunately, while it’s been nearly 200 years since we first captured light with the camera, we are still far from overcoming Mother Nature.
Why?
Because the eye sees much better than the camera.

The parameter that describes this behavior is called dynamic range. It basically defines the difference between the minimum and maximum value of brightness that a device (like your eye or the sensor of your camera) is able to record. From a practical perspective, dynamic range defines the ability of your camera to see details in very dark areas and very bright areas of a scene.
If you’re wondering how much more your eye sees compared to your camera, the answer is staggering. Your eye can see about twice as much dynamic range as older cameras (though camera technology has come a long way in recent years!).

The problem
Thanks to the eye’s massive dynamic range, when you look at a marvelous sunset, you’re able to see all the details in the scene (in both the sky and the land).
But as soon as you try to capture the scene with your camera, you’ll get an overexposed sky or an underexposed foreground. The dynamic range of your camera is limited, and can therefore capture detail in only one of these areas, so you have to choose.
Given that limitation, how can we hope to shoot a beautiful sunset or a wonderful sunrise and capture all the marvelous details, both in the sky and on the land?
There are different methods to overcome this problem, but my favorite is the use of graduated neutral density filters (also known as GNDs).

What is a graduated neutral density filter?
A graduated neutral density filter is a piece of glass made up of two distinct parts:
A completely transparent area, and a darker section.
Now, by positioning the darkest part of the filter to correspond with the brightest portion of the scene you’re photographing, you can reduce the exposure difference (dynamic range) in the frame.
In other words, by positioning the dark part of a graduated neutral density filter over a bright sky, you can reduce the difference in brightness between the sky and the land for a much more even exposure.
To reduce the exposure difference is to reduce the dynamic range of the scene – so your camera can simultaneously capture detail in both bright and dark areas of the scene. GND filters are like sunglasses for your camera – except that the sunglasses are only applied to a portion of the image, rather than the entire shot.
Types of graduated neutral density filters
Graduated neutral density filters are typically distinguished by the type of transition between the transparent and dark areas of the filter. There are three main families of GNDs:
- Hard-edge filters are characterized by a clear boundary between the transparent and dark areas. You use a hard-edge GND when the separation between the bright and dark areas of your scene is very defined, such as when photographing a seascape with a flat horizon.
- Soft-edge filters are characterized by a soft transition (they change from light to dark more gradually), and are therefore used when the transition between light and dark areas is less distinct. A classic example is a mountainous scene, where the mountains intersect with the sky.
- Reverse filters are nothing more than hard-edge GNDs with a dark area that fades away as you move from the line of separation to the upper border of the filter (so the filter is darker in the middle than on the edge). Reverse GNDs were invented to better manage sunrises and sunsets, where the light is more intense on the horizon line (in the middle of the scene). If you love seascapes (like me!), this filter will be your best friend forever.

Another difference between filters is the material. Higher-quality filters are made of optical glass. Putting an inexpensive resin filter in front of a lens worth hundreds (or thousands) of dollars is not a great idea.
Finally, GND filters are distinguished by their ability to block light. In other words, how dark are they at their most extreme?
In landscape photography, you generally need one to four stops of darkness during sunrise and sunset, depending on the weather conditions. This is the reason why most filters on the market offer these gradations.
You can shop for graduated neutral density filters on Amazon or at B&H Photo Video (they ship worldwide).
How to use a GND filter in the field
Using graduated neutral density filters in the field is very simple.
First, try to take exposure readings off the darkest and brightest areas of the scene (usually the foreground and the sky, respectively). The difference in exposure will indicate the intensity of the filter you’ll need.
For instance, if the meter reading for the sky is 1/250s and the meter reading for the foreground is 1/30s, then the difference between those readings is three stops (1/250s > 1/125s > 1/60s > 1/30s), so to balance the exposure you should use a 0.9 (3-stop) GND.
At this point, just mount the filter with its dark side over the brightest part of the scene. This is why a GND screw-in filter doesn’t make sense. You would not be able to align the transition area with the scene, whereas a drop-in filter lets you position the transition area perfectly.

To avoid holding the filter with your hands, you can buy a filter holder. Once the holder is mounted in front of your lens, it will hold your filters in place. (Note that you can stack multiple filters this way.)
There are many nice holders on the market, but the best one (in my opinion) is the V6 Holder by NiSi filters. It’s the only filter holder that lets you simultaneously install three different filters and a polarizer without any vignetting issues (plus, it works as wide as 16mm on full-frame cameras).
Graduated neutral density filters in landscape photography: Conclusion
Without graduated neutral density filters, capturing sunrise and sunset scenes will be hard – and sometimes impossible.
That’s why I recommend you always have at least one GND in your bag.
And the limited dynamic range of your camera will just be a bad memory!

The post How to Use Graduated Neutral Density Filters for Landscape Photography appeared first on Digital Photography School. It was authored by Francesco Gola.
Weekly Photo Challenge – 2021 Goals
02
Jan
The post Weekly Photo Challenge – 2021 Goals appeared first on Digital Photography School. It was authored by Sime.
Last week we all shared our ‘Best of 2020’ and this week, for something completely different, we want you to reflect on 2020 and your photography (try to forget everything else for a minute!) and think about what you’d like to do with your photography in 2021, and, rather than share an image, just let us know what you’d like 2021 to look like for your photography?
- Maybe you want a new camera?
- Maybe it’s time for that new lens you’ve been thinking about?
- Perhaps you’re thinking it’s time to ‘go pro‘
- Maybe you’re going to put the camera away for a while?
- Could it be time to try a different genre?
I’ll start! I’ve been photographing food for a little while now, and this year I’m going to focus on portraiture and learning all I can about portrait lighting and photography!

If you’ve already started heading towards your goal, feel free to include a photograph of the journey! We’ll be back to our regular weekly challenge next week.
As ever, comment in the comment’s section below, include a photo as per above, but mostly just tell us what you hope to achieve with your 2021 photography.
Happy New Year everyone, from all of us here at dPS.
–Simon
The post Weekly Photo Challenge – 2021 Goals appeared first on Digital Photography School. It was authored by Sime.
Tamron 70-300mm for Sony Review: A Compact, Well-Priced Telephoto Lens
02
Jan
The post Tamron 70-300mm for Sony Review: A Compact, Well-Priced Telephoto Lens appeared first on Digital Photography School. It was authored by Suzi Pratt.
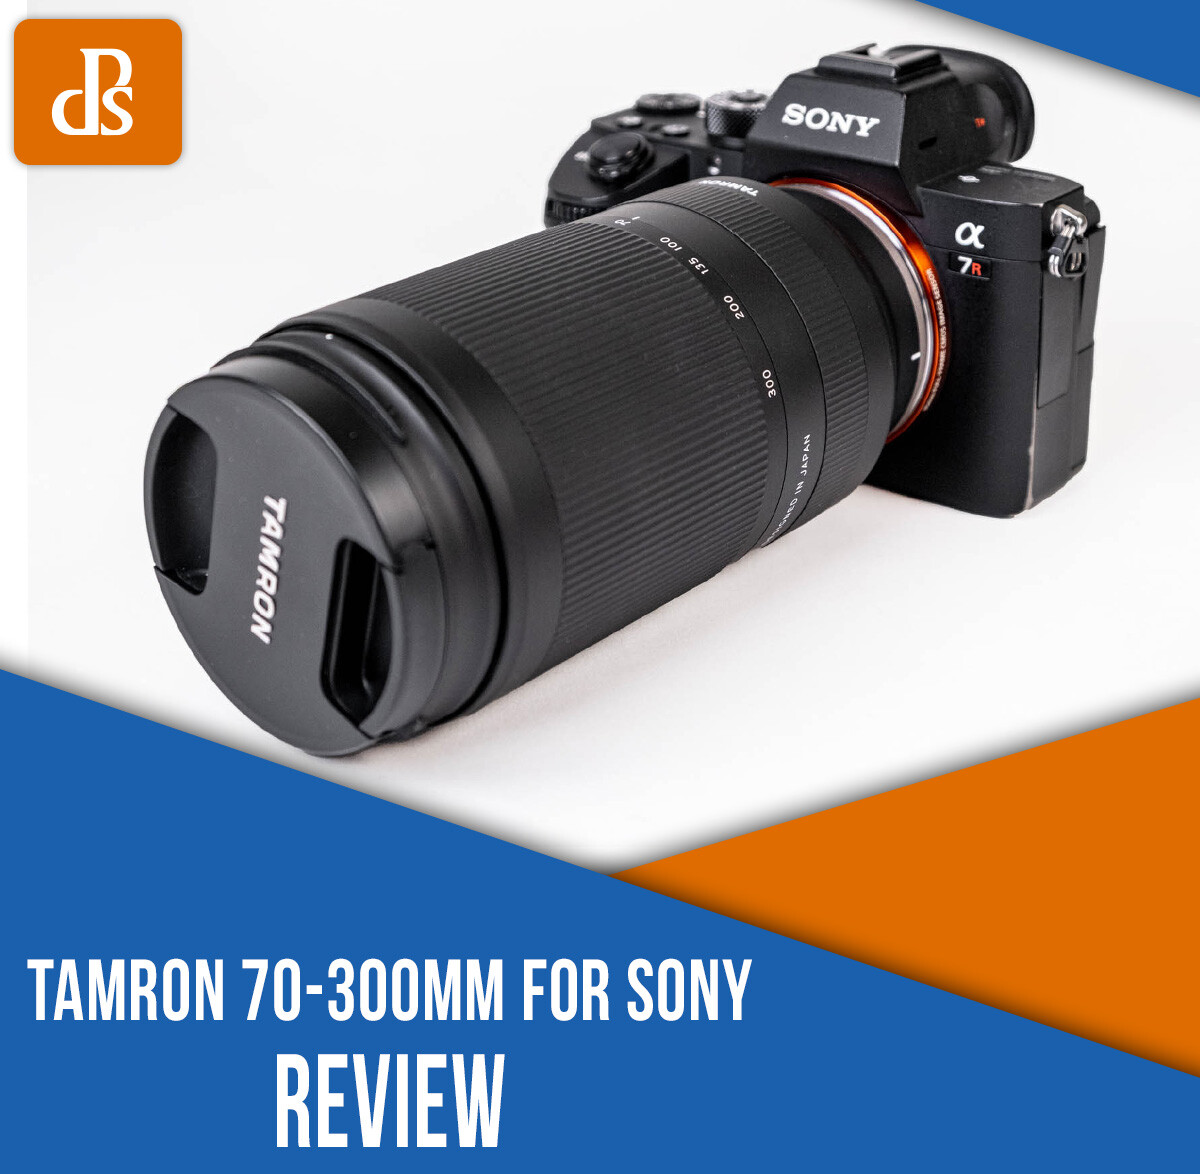
The new Tamron 70-300mm f/4.5-6.3 lens is the “world’s smallest telephoto zoom lens for Sony E-mount full-frame mirrorless cameras.”
But does this lens live up to the hype?
Let’s find out in this Tamron 70-300mm for Sony review!

Tamron 70-300mm for Sony: Overview
The Tamron 70-300mm is made to be used on a full-frame camera, but you can also mount it on an APS-C camera; the equivalent focal length just gets cropped to 105-450mm. This can be an advantage if you prefer getting more zoom out of your lens.
Besides its compact and lightweight build (more on that below!), the biggest appeal of this lens is the price. At just $ 550 USD, the Tamron 70-300mm is more than half the price of the Sony alternative.
For comparison’s sake, the Sony FE 70-300mm f/4.5-5.6 has a slightly faster f-stop and also comes with image stabilization. But it is larger, heavier, and more expensive than the Tamron model. So if budget, size, and weight are a concern, the Tamron 70-300mm is the way to go!
- Released: September 2020
- Focal Length: 70 to 300mm
- Maximum Aperture: f/4.5 to f/6.3
- Minimum Aperture: f/22 to f/32
- Lens Mount: Sony E (full-frame)
- Minimum Focus Distance – 31.5″/0.8 m
- Focusing: Autofocus
- Image Stabilization: No
- Filter Size: 67 mm
- Dimensions: 5.8” x 3″/148 mm x 77 mm
- Weight: 19.2 oz/545 g

Lens design
The Tamron lens follows on the coattails of some impressive Tamron releases, such as the 28-200mm f/2.8-5.6. And if you’ve used any recent Tamron lenses, the 70-300mm will feel very familiar in your hands. It has a similar look and feel to other Tamron lenses, and it takes a 67 mm front filter, just like many other Tamron lenses.
While the build is mostly plastic, the lens is weather-sealed with a dust- and moisture-resistant construction. This makes the 70-300mm ideal for shooting in a variety of outdoor conditions. I wouldn’t take the lens out in pouring rain, but a light drizzle is totally fine.
Aside from its low price point, the biggest advantage of the Tamron 70-300mm is its compact size. With a weight of just 545 g (1.2 lb) and a length of 5.8 in, it’s easy to forget that you’re hauling a rather long-range telephoto lens. The small size also makes it easier to hold the lens for long periods of time, especially compared to bigger lenses like the Sony 100-400mm.

Ease of use and performance
The Tamron 70-300mm is a very straightforward lens. There’s a zoom ring and a manual focus ring with no additional buttons or switches on the lens.
It would be nice to have a lock switch to prevent the zoom barrel from sliding out when you use the lens – and while it’s not a dealbreaker, the lack of a lock is something to be aware of.
All Sony autofocus modes (including Eye AF) are as snappy as they’d be if using a native Sony lens. If you have any concerns about using a third-party lens, rest assured that all modern Tamron lenses work flawlessly with Sony E-mount cameras.
Image quality

Photos on the 70-300mm Tamron are razor sharp. Color rendition is also accurate, with absolutely no chromatic aberration or distortion.
While this lens doesn’t have a fast f/2.8 or f/1.8 aperture, beautiful bokeh can still be achieved with sufficient distance between the subject and the background. The bokeh is pleasing and smooth. The lens’s sweet spot seemed to be between f/4.5 and f/11.
The lens also has a nice minimum focusing distance of 31.5 in (0.8 meters) when shooting at 70mm. This allows you to get pretty close to your subject and still get crisp shots.

Best uses
Given its focal range and features, the 70-300mm is best used as a complementary lens to a wide-angle or mid-range zoom, such as the 24-70mm.
Shooting purely at 70-300mm may suit some photography styles, but most photographers will want to occasionally get a shot wider than 70mm, which is when a wider second lens will come in handy.

However, you can use the Tamron 70-300mm as your sole lens and get some great wildlife, landscape, and portrait shots. Just make sure you have enough light or a camera that can shoot at high ISOs because of the narrower maximum lens aperture. If you plan to shoot indoors or in low light, the Tamron 70-180mm f/2.8 will better suit your needs.
The Tamron 70-300mm can also work as a great video lens. Just note that it lacks image stabilization (IS), so it is best used on a tripod or a gimbal stabilizer if shooting video.
Tamron 70-300mm for Sony review: Conclusion
For the budget-conscious photographer, or for those wishing to have the smallest and lightest camera kit, the Tamron 70-300mm is a bargain of a lens.
One of the only reasons why you may not opt for this lens is if you prefer the all-in-one Tamron 28-200mm lens. The 28-200mm is smaller and slightly more expensive, and it gives you a much wider focal range at the expense of not being able to zoom as far as 300mm.
If you are interested in purchasing the Tamron 70-300mm for Sony, you can grab it here.
So what do you think? Would you buy the Tamron 70-300mm, or would you opt for a different lens? Let me know in the comments below!
-

300mm | 1/100s | f/6.3 | ISO 800 -

300mm | 1/8000s | f/6.3 | ISO 1250 -

300mm | 1/6400s | f/6.3 | ISO 400 -

300mm | 1/500s | f/6.3 | ISO 400 -

184mm | 1/320s | f/5.6 | ISO 400 -

300mm | 1/250s | f/6.3 | ISO 400 -

70mm | 1/8000s | f/5 | ISO 400 -

70mm | 1/100s | f/4.5 | ISO 1250 -

97mm | 1/60s | f/8 | ISO 1000 -

70mm | 1/640s | f/6.3 | ISO 800 -

70mm | 1/200s | f/6.3 | ISO 800 -

156mm | 1/80s | f/5.6 | ISO 3200 -

186mm | 1/800s | f/5.6 | ISO 1600 -

239mm | 1/2500s | f/11 | ISO 500
The post Tamron 70-300mm for Sony Review: A Compact, Well-Priced Telephoto Lens appeared first on Digital Photography School. It was authored by Suzi Pratt.
Happy New Year from the dPS Team (Plus Our Ultimate Guides)
01
Jan
The post Happy New Year from the dPS Team (Plus Our Ultimate Guides) appeared first on Digital Photography School. It was authored by Jaymes Dempsey.

On behalf of the entire dPS team, I’d like to extend the warmest of New Year’s greetings!
2020 hasn’t been easy, but it’s over – which means it’s time to think about 2021.
Here at dPS, we’ll continue to bring you photography tips, tutorials, and techniques of all kinds, so make sure you check back regularly for our best new content.
And for those of you looking to get a head start on your photography education, I’ve shared our dPS Ultimate Guides below – which offer a quick way to master new photography topics. You can even download the guides as PDFs; that way, you can take them with you wherever you go.
Simply click on the links below to view the Ultimate Guides:
- The dPS Ultimate Guide to Photography for Beginners
- The dPS Ultimate Guide to Landscape Photography
- The Ultimate Guide to Learning How to Use Your First DSLR
- The Ultimate Guide to Street Photography
- The dPS Ultimate Guide to Getting Started in Lightroom for Beginners
- The dPS Ultimate Guide to Taking Portraits and Photographing People
- The dPS Ultimate Guide to Photography Terms
- The Ultimate Guide to Nature and Outdoor Photography
- The Ultimate Guide to Night Photography
- The dPS Ultimate Guide to Food Photography
- The dPS Ultimate Guide to Fine Art Photography
And if you feel these ultimate guides are valuable, make sure you share them with your friends!
The post Happy New Year from the dPS Team (Plus Our Ultimate Guides) appeared first on Digital Photography School. It was authored by Jaymes Dempsey.
SLC-OE-08: Turning the Corner
01
Jan
Whew. What a year.
But if you're reading this, you made it through!
As we all move into a hopefully much better 2021, here are three things you can do to improve your experience as a photographer for the coming year.
Read more »
Strobist
When to Shoot in RAW vs JPEG (and Why)
31
Dec
The post When to Shoot in RAW vs JPEG (and Why) appeared first on Digital Photography School. It was authored by Simon Ringsmuth.

There has been a longstanding debate in the photography community about RAW vs JPEG file formats. Both have their benefits and drawbacks, so determining which one to use isn’t as simple as you might think.
In fact, rather than thinking about RAW vs JPEG as a single choice to make, it’s best to reframe the question entirely. So don’t think about which format to always use.
Instead, think about when to use RAW and when to use JPEG.

Understanding RAW and JPEG formats
If you’re new to digital photography, terms like “RAW” and “JPEG” might seem a little strange. So what actually is a RAW photo? And what is a JPEG photo?
When you press the shutter button on your camera, it takes in color and light data, then converts the data into a photograph. RAW is one type of file format that your camera can use, and it’s found on dedicated cameras like DSLRs and MILCs.
A RAW file is the unprocessed image data straight from the sensor. It must be converted to a usable image format via a program such as Lightroom or Luminar. RAW files are much larger than JPEG files, and they often don’t look good until they are edited. Therefore, a longer post-processing time is required, and memory cards fill up quicker. But you do get a flexible file that can be endlessly edited to look exactly how you want.

A RAW file gave me far more freedom to edit this photo compared to if it had been shot as a JPEG.
JPEG images are RAW files that are instantaneously converted by the camera into a format that is easy to share. In the process, however, JPEGs lose some of the data captured by the image sensor.
JPEG files have widely used since 1992, and the original intent was to create an image format that was a nice compromise between quality and file size. If you’re old enough to remember the early days of the internet, you know that bandwidth was a precious commodity, and a single image file could take several minutes to download on a dial-up modem. JPEG helped solve that problem and quickly became the dominant format for digital photos. This legacy lives on today, and nearly every digital camera and mobile device can shoot JPEG photos.
So which format is better? That’s a question only you can answer, and it all depends on your photographic goals. But it’s a bit like deciding between a truck and a sedan, a microwave and an oven, or whether to wear shoes or sandals.
In other words, it’s not a question of whether JPEG is better than RAW or RAW is better than JPEG. Instead, it’s about deciding when to shoot in RAW or JPEG and why.

I didn’t want to edit this photo, so I shot a JPEG and was perfectly happy with the result.
When to shoot in RAW
There’s no question that RAW files offer much more flexibility during the editing process. When it comes to recovering highlights, bringing out detail in the shadows, adjusting exposure, and all other types of edits, RAW reigns supreme.
While RAW does have some downsides, the advantages can easily outweigh the disadvantages.
In general, I recommend shooting RAW in the following situations:
You’re shooting paid photos for clients
When working with clients, you want all the flexibility you can get. The best-laid plans can often go awry, and despite all your preparedness, you can still end up with images that are too dark, too bright, or need severe color-correcting.
This is where RAW excels, as it lets you recover as much information as possible to fix errors or tweak the image to your liking.

Here, the backlighting resulted in a severely underexposed image. I was able to save it because I shot in RAW.
You know you’ll be doing extensive editing
If you are shooting in extreme conditions, you’re pushing your camera and your skills to the limit, or you’re even just taking normal pictures that you know you will be editing, then RAW is a good choice.
If I’m taking more than just casual snapshots, I like to err on the side of caution; I’ll shoot in RAW, even if I’m not sure how much editing I’ll be doing.

You might want to edit your images years later
This one is a little tricky, since it’s difficult to predict whether you will or won’t want to edit your pictures years or decades down the line.
Some photographers like to shoot everything in RAW just to be on the safe side. While it’s impossible to predict the future, it’s difficult to imagine any scenario in which RAW files would offer less flexibility than JPEGs or other file formats.
We might reach a point years down the road where machine learning and artificial intelligence are able to give RAW-style flexibility for lossy formats like JPEG, but we’re not there yet. RAW formats are used by world-class institutions like the National Archives in the United States. Such facilities certainly know a thing or two about storing images for the long term, and if RAW is good enough for them, then it’s likely good enough for you.

When my kids were little, I didn’t know as much about photography as I do now. I shot everything in RAW, just in case I needed to edit my photos years later.
When to shoot in JPEG
Some people are of the opinion that all pictures should be shot in RAW, but I tend to disagree.
While RAWs do have advantages over JPEGs, there’s nothing wrong with capturing JPEG files if they work for you. Just because some people shoot in RAW doesn’t mean you have to!
In general, I recommend using JPEG in the following situations:
You like the look of your camera’s JPEG files
The biggest advantage of RAW is also one of its key disadvantages; having the freedom to adjust your photos ad infinitum isn’t much of an advantage if you don’t really want to edit them.
All camera manufacturers configure their cameras to process JPEGs with a certain look or style. As such, the straight-out-of-camera JPEG files can look much better than RAW files. And if you don’t plan on editing your pictures, then these JPEGs are probably the better option.

I like the Fujifilm JPEG files just fine, and as such, I almost never shoot in RAW with my Fujifilm camera.
I shot in RAW frequently – until I got my Fujifilm X100F camera. I quickly realized that I quite liked the look of its JPEG film simulations such as Classic Chrome and Provia. Soon, I had stopped shooting in RAW entirely on my Fujifilm, because I just liked the JPEGs better. I could certainly edit the RAW files, but I realized over time that I didn’t want to. I liked the JPEGs just the way they were (and I still do!).
If you like how your JPEG files look, then don’t worry about RAW and keep using JPEG. It doesn’t make you any less of a person, or photographer, just because you want to let your camera do some of the editing for you.
And even though JPEG files can’t be edited as much as RAWs, you can still make some basic changes, such as adjusting exposure and correcting the color. You shouldn’t expect the same flexibility that you’d get when editing RAW files – but if that’s not your goal, then JPEGs will be fine.

I shot this as a JPEG and was still able to tweak the white balance just a bit in Lightroom. Would RAW have worked better? Perhaps. But I like this shot anyway.
You’re capturing casual snapshots of friends and family
RAW files have more flexibility than JPEG files – but if you’re shooting lots of casual pictures or snapshots of friends, family, and everyday life, then RAW just might be overkill.
RAW files take up more space on your memory card, they can be a chore to edit, and they are also difficult to share. The latter is especially important for these slice-of-life photos, and most casual shots don’t really require much in-depth editing, anyway.

When you shoot JPEG files, you lose some of the flexibility of the RAW format – but you gain the ability to easily share photos, and you don’t have to deal with conversions and editing software.
On family vacations, it’s not uncommon to share memory cards before everyone leaves, just to make sure everyone has everyone else’s photos. This is just easier with JPEGs, since every device and operating system works great with the JPEG file format.
You’re photographing sports and fast action
This might seem a little counterintuitive because sports and action shots sometimes need to be edited afterward. It’s difficult to nail the exposure and white balance when shooting some types of sports, which is why photographing in RAW can be useful.
However, it’s not uncommon to end up with hundreds or even thousands of photos after a sporting event, especially if you use your camera’s continuous shooting mode. The sheer quantity of images can turn the task of editing into an arduous process that ends up taking far too much of your time.

I shot JPEGs with the Overcast white balance setting, so all I had to do was crop a few shots, instead of meticulously editing the hundreds of photos I got from this game.
As a result, it can actually be a good thing to shoot in JPEG when you know you will end up with a massive amount of photos. You can learn to tweak JPEG settings in-camera, such as lifting the shadows and manually setting the white balance to maintain uniformity across your pictures. This isn’t the same as editing each image by hand, but it’s a lot easier!
The internal buffer on your camera won’t fill up as quickly when shooting in JPEG mode due to the smaller file size. This means you can take more images without waiting around while your camera transfers them to your memory card. Those precious seconds can make all the difference at sporting events or other situations where the action comes frequently and you don’t want to miss a shot.

A Compromise: RAW+JPEG
If you’re still not sure when to use RAW vs JPEG files, just know that there is no correct answer. Whichever file type you choose is fine as long as it works for you.
If you feel comfortable using RAW, then great. If you’d rather shoot in JPEG, go for it. And if you want the best of both worlds, you really can have your cake and eat it, too.
You see, most cameras let you choose a mode called RAW+JPEG. As you might expect, this mode saves both RAW and JPEG files for every shot. It can eat through your memory cards in a hurry, but as long as you don’t mind the increased storage requirements, you can avoid making the RAW vs JPEG decision altogether and just use both formats.

RAW vs JPEG: Conclusion
When I first started getting into photography, I suffered from a severe case of RAW guilt.
I thought that if I didn’t use RAW, then I wasn’t a real photographer, because real photographers shot in RAW. I thought JPEGs were for the unwashed masses and should be shunned by any picture-taker who took themselves seriously. It took me far too long to realize that this type of gatekeeping has no place in photography.
As long as you have a process that works and you’re happy with the result, then don’t let anyone tell you that you’re doing it wrong. And if you haven’t yet figured out when to use RAW vs JPEG and you’re looking for some advice, then hopefully this article gave you some ideas.
I’d love to hear your thoughts about when you shoot in RAW versus JPEG and why. So share your opinion in the comments section below!
The post When to Shoot in RAW vs JPEG (and Why) appeared first on Digital Photography School. It was authored by Simon Ringsmuth.
dPS Top Nature and Wildlife Photography Tips of 2020
31
Dec
The post dPS Top Nature and Wildlife Photography Tips of 2020 appeared first on Digital Photography School. It was authored by Jaymes Dempsey.

Do you want to improve your nature and wildlife photography, fast?
Then take a look at our best nature and wildlife photography tips from 2020. They’re packed full of helpful advice, all designed to help you capture stunning photos!
Starting with our most popular nature photography article of the year:
1. 5 Camera Settings Every Bird Photographer Should Know
2. 10 Must-Use Bird Photography Camera Settings for Beginners
3. How to Take Vibrant, Razor-Sharp Macro Photos of Flowers
4. Tips for Doing a Backyard Photo Safari
5. Macro Photography for Beginners
6. 10 Incredible Bird Photography Tips for Beginners
7. Photographing on Your Home Patch and Why You Need One
8. How to Choose the Best Lens for Wildlife Photography
9. How to Photograph Beautiful Winter Snowdrops (or Other Flowers)
10. Nature and Wildlife Photography Tips for Beginners
11. 10 Ideas for Photographing Nature in Your Backyard
12. How to Photograph Sun Flares: 14 Tips for Beginners
13. 10 Tips for Improving Your Wildlife Photography
14. 6 Tips for Near-Macro Photography With a Telephoto Lens
15. Tips for Photographing Birds in Flight
Conclusion
I hope you’ve enjoyed these nature and wildlife photography tips!
And if you want to keep improving your photos, make sure you subscribe to the dPS newsletter. We’ll send you weekly tips, tricks, and techniques – so that you can take your photos to the next level as quickly as possible!
The post dPS Top Nature and Wildlife Photography Tips of 2020 appeared first on Digital Photography School. It was authored by Jaymes Dempsey.
dPS Top Post-Processing Tips of 2020
30
Dec
The post dPS Top Post-Processing Tips of 2020 appeared first on Digital Photography School. It was authored by Jaymes Dempsey.

If you’re looking for a quick way to improve your photos…
…then I highly recommend you take your post-processing knowledge to the next level.
Unfortunately, learning to post-process isn’t easy – which is where these tips will come in handy!
So without further ado, here are the most popular post-processing tips of 2020:
1. 5 Things to Do to Every Photo In Lightroom to Improve Your Photos
2. Luminar vs Lightroom: Three Reasons Luminar is Better (and Two Reasons It’s Not)
3. How to Use the Photoshop Camera Raw Filter for Better Photo Editing
4. RAW vs DNG: What’s the Difference and Why Does It Matter?
5. A Beginner’s Guide to Layer Masks in Photoshop
6. Lightroom Moon Editing Tips for Awesome Moon Photos
7. 10 Tips for Using a Graphics Tablet for Easier Photo Editing
8. Good Crop Bad Crop – How to Crop Portraits
9. 8 Vital Tips To Crop Your Photos For Stronger Compositions
10. Capture One 20 Review: Time to Make the Switch From Lightroom?
11. How to Create a Photogram Effect With a Digital Process
12. 8 Core Lightroom Retouching Techniques to Enhance Your Photos
13. How to Convert a Photo to a Drawing in Photoshop
14. Mastering Noise Reduction in Lightroom: The Essential Guide
15. RAW Photo Editing in Lightroom: How to Make Your Photos Look Real to Life
Conclusion
If you enjoyed these post-processing tips, then I highly recommend you check back on Thursday – which is when we reveal our final set of top tips from 2020!
Specifically, you’ll get to discover the most popular nature and wildlife photography tips of this year.
So make sure you don’t miss out!
The post dPS Top Post-Processing Tips of 2020 appeared first on Digital Photography School. It was authored by Jaymes Dempsey.
You must be logged in to post a comment.