I would love for you to look back at the article that I did a couple of months back. It is very simple to say that Photographer’s Metadata (PM) includes all the things that you know about your photograph which no one else is aware of. It is simple to say, but it is not so easy to grasp all the consequences.

So many consequences.
The aim of the previous article was to advance the idea of Photographer’s Metadata (PM). I think even the least concerned photographer has some vague thoughts in the back their minds about Photographer’s Metadata. However, if you are more aware of it, then it might become an important part of your photographic journey.
What steps can be taken to close the gap between your perception of your photograph, and the perception of others?

Narrow that gap.
This might be thought of as a rather esoteric topic. I may be repeating myself, but I really do think that it is important to the understanding and development of your photography. Let’s start with an example, a photograph, and some of the Photographer’s Metadata.
An example
Charles Masters is my friend, quite an adventurer, and a fine photographer. In his own words:

“This photograph is of Sherpa Tshiring climbing the serac wall, that is a glacial ice wall on Choy Oyu. It is one of the Himalayan peaks, and the ‘Turquoise Goddess’ is the sixth highest mountain in the world, one of 14 peaks in the world over 8,000 metres. This was taken approaching 7,000 metres and although it is considered one of the easier climbs, it is not a weekend hike.

The black & white version seemed to portray the atmosphere far better than the color version as the ice from the climber above Tshiring rained down on him.
To get to this stage on the serac wall, we had been climbing for more than three weeks. It was nearly a month since I had left home in the UK. The climb was made more difficult by the lack of snow that season, making the standard, easier route impossible.
In order to acclimatize, we had spent the previous week rotating between the Advanced Base Camp and Camp One. Multiple trips included a 600m steep scree slope. We called this slope the less polite version of illegitimate, as the loose surface meant it was two steps up, one step down!
The further ascent from Camp One to the glacial, serac wall was relatively easy but still included a number of crevasses which needed to be negotiated.
The serac wall is about 45 metres of solid blue glacial ice, ranging from 45 to 80 degrees angle of climb. When the photograph was taken, I was hanging from a fixed rope, on a section where the ice wall was at its steepest, and the temperature was below freezing and had, at times, been in the minus twenties.

The team triumph!
It was one great moment from many, and it will live with me forever.

Note: The two images above have been used with permission from the photographer, Charles Masters.
This story is a part of Charles’ Photographer’s Metadata. No one else knows the full events surrounding the ice wall photograph. However, can there be any doubt whatsoever that these circumstances have an effect on Charles’ perception of his own photograph? Can there be any doubt that there is a gap between the way he sees this photograph and the way you, or any viewer, see it? Let us look at what you might do to close that gap.
Suggestion One – The Gift of Time
A photographic subject which most of us have mixed feelings about is ourselves. A couple of years ago I decided that I wanted a more interesting portrait to use in the various places we use such things. It seems justified to spray and pray when you are, in effect, on both sides of the lens. So, I ended up with hundreds of shots.

Too many.
It was not a matter which taxed me on a daily, or even weekly basis. But I will admit that it was at least six months later, when I thought, “That one is okay”.

Okay.
A self-portrait may have one of the highest levels of emotional engagement that exists, along with a large chunk of Photographer’s Metadata. If you read the first article on this topic, you may recall that Ian Weldon said that he would like to wait six months before editing wedding photographs. In terms of reducing the effects of Photographer’s Metadata, I do not think there is any real substitute for the passing of time.
Certainly, I have been in too much of a rush to share a photograph sometimes. Why did I choose this one?

Surfboarder 1
I think I must have liked some detail in the shot above. Maybe it was the separation between legs, arms, and face, or the look of a soul singer doing dance moves, some relative detail like that. But, the real story here is surely about action, and the second shot (below) depicts that better, with higher flung arms and a bigger splash.
There is not very much emotional involvement here, the weight of Photographer’s Metadata, beyond being pleased with what my camera could do. However, even then, it was a few days later before it was clear to me which was the better photograph.

Surfboarder 2
The gift of time is not always available to us. Be cautious about reaching irrevocable decisions.
Suggestion Two – Give Them a Clue
Have you ever wondered where musicians get their titles? Me too! I have used song titles as inspiration for naming my photographs, and even my dogs! I think that when I venture much beyond naming a photograph “Tree One” or “Market”, my first refuge is to give the viewer even less help with titles inspired by songs, which can be quite cryptic.
A pop tune which was in my mind when I shared this photo.

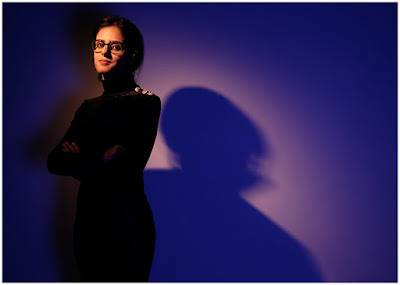
“Isn’t she …”
In a nod to Stevie Wonder, I titled it “Isn’t she …”. In fairness, that is not such a bad title, because it invites the viewer to engage. Of course, Stevie finished the phrase with “… lovely”. However, the idea is that if you are trying to narrow the gap between the viewer’s perception and your own, there are a whole range of possibilities that would be more helpful than that. Perhaps, “Black and white study of the beauty and shapes of an Asian girl”?

35 up
When I shared the photograph above, I called it “35 Up”. If viewers gave it some thought, they may realize that it means that the photograph was taken from the 35th floor. I think it is possible to be more helpful, to reduce the gap between photographer and viewer. I might have simply extended it to read, “35 floors up in Manila”.
Viewers would have made various degrees of movement towards my knowledge of the photograph. I could have become even more descriptive and titled it, “Tropical storm clouds gather with the sunset over the Philippine capital city”. I could have said all sorts of things which would have narrowed the gap between the viewer’s perception of the image and my own.
Suggestion Three – Give Them Even More of a Clue
Have you been to photographic exhibitions or looked at fine art books? Have you ever read an artist’s statement?

An artist’s statement
And so on, and on and on. This was taken from a site which is a random artist’s statement generator. Incredibly, there appear to be a lot of these sites. And, the above statement is not the whole thing, it’s just a selection from what was generated.
Personally, I would be inclined to the more prosaic. Remember when you first looked at the photograph of the climber near the top of the article? Now that you have read the story and his artist’s statement, doesn’t the story change the way you view the photograph? I think it is a great shot to start, but I believe that anyone reading the story will have an even more positive view of the photograph afterward.

Story = popular
As some affirmation of what I am saying, on a recent visit to Instagram, I noticed many of the photographs that had a huge number of likes, also had a story attached to them, some quite substantial. It seemed that often, the successful shots had a paragraph of explanation which, frankly, in this age of emoticons, grunts, and butchered vocabulary, seemed remarkable.
We all bend reality to fit our own perceptions, and I am going to take this informal survey of Instagram to mean that people like photographs more if they know more about the story behind them. The viewers have moved closer to the photographer’s perception.
Suggestion Four – DO NOT PANIC!

Our man in Jakarta.
This photograph has been used as an example in public talks on several occasions. That means that I have gained a lot of evidence about how others react to it. In response to the direct question, about 80% prefer the shot above. I prefer the version below.
My Photographer’s Metadata is that this photograph was taken at three in the morning, near the docks in Jakarta, Indonesia. How can I put it to you? That location, at that time, is not going to appear in any Lonely Planet suggestion of an itinerary. It is probably because of my Photographer’s Metadata that I prefer the shot with the light bulb.

Our man in interrogation.
Even though literally hundreds of people have indicated that they prefer the version without the lightbulb, I am happy to do nothing about that, as I prefer the photograph as it is. I think that the light bulb tells more of the story of the risk which was present, and it makes me think of an interrogation.
I am aware of my Photographer’s Metadata, and how it affects the way I see this photograph. What do I need to do about it? The answer is simple. NOTHING! It is completely okay to decide that you are happy with the photograph as it is, you do not need to explain anything, nor do you need to attempt to close the gap in perceptions.
The above suggestions are about helping the viewer move closer to the photographer’s version of the reality of the photograph. What about moving yourself, the photographer, in the direction of the viewer?
Suggestion Five – The Way I Dance

It’s not for me to judge.
Consistent with what I have suggested, if you are able to accept that you know things about a photograph, and those things have degrees of effect on your judgment, it is a good start. I know that I have a huge prejudice when looking at a photograph of one of my daughters. Knowing that helps me to accept that others will not see the photograph in the same way. With this situation, it is my prejudice which is getting in the way. My Photographer’s Metadata is on overload. Objectivity is a very distant country.
Time for a song:

By taking some time, adding a descriptive image title, some kind of statement will help to narrow the gap, will bring the viewer closer to your perception of the photograph. But you can also move your own position, so try to be aware of some of your prejudices. I think it is possible that being aware of yourPhotographer’s Metadata might help you to accelerate through the period of time before you become sufficiently dispassionate, and more objective, about the photograph.
Suggestion Six – We All Dance in Our Own Way
We each have our prejudices, others have theirs.

Cheeky.
I knitted my brow when another photographer commented on this photograph, “good texture to the hair … nice even light on the contours of the face”. It seemed like a very strange thing to say about the photograph of a 1-year-old child. Then I realized that the person making the comments was almost exclusively a landscape photographer and that they were still applying landscape criteria. So I was able to move myself a little in their direction.
Advice about writing, or public speaking, tends to include an early emphasis on the consideration of your audience. I am not sure that it’s something which we give much thought to photographers.

The thinker.
I am conscious that so many of the points I am making here, could be expanded to chapter length. To keep it to a manageable length, let me give you just one example.
When I shared this photograph below, I knew that the audience tended to be conservative in their tastes. By being aware of my audience I had taken a step towards reducing my Photographer’s Metadata and understanding their reaction, before I even showed it to them. I knew that this was pushing the limits of what they would find to be acceptable framing.

Who are you?
I was right that the framing was not loved, and that was confirmed by showing a different, more conventional photograph.

Ah! That girl!
By understanding the audience and making a little movement myself, I had reduced the gap between our perceptions. My Photographer’s Metadata included ideas about how the framing emphasized the haughty, aloof look. Others were not so inclined to see it that way.
Suggestion Seven – No New Prejudices, Please
Obviously, if you took the photograph, you’ll have at least some idea of the technical aspects. To take specific items, how much do you think the camera and lens combination should influence your judgment of the photograph? You are, of course, very entitled to your opinion. Me? I think it should matter approximately zero percent. Bambi Cantrell’s statement that “Expression beats perfection” should not be so difficult to fully embrace. It is though, isn’t it? We cannot help it, and there is something to be admired about a technically good photograph.
Bambi Cantrell’s statement that “Expression beats perfection” should not be so difficult to fully embrace. It is though, isn’t it? We cannot help it, and there is something to be admired about a technically good photograph.
I’ve used this photograph on dPS before, but I do not apologize because it is technically a little short. However, most viewers seem to be captivated by the expression of joy.

Slightly blurred laughing girl.
When publishing your own photographs, or looking at those of others, try not to introduce another layer of prejudice. Try not to be overly concerned with the technical aspects, it is likely to get in the way, in effect, add to the Photographer’s Metadata. Removing the EXIF is a step you can make towards moving you nearer to the viewer’s position.
Balance

It is probably another one of those questions to which the answer is arriving at a balance. Some sort of balance between your Photographer’s Metadata, and what you feel the viewer needs to know to appreciate the image in the way that you wish. You can move towards that balance in various ways.
The post Practical Advice for How to Use Your Photographer’s Metadata by Richard Messsenger appeared first on Digital Photography School.


You must be logged in to post a comment.