RSS
 

Archive for the ‘Photography’ Category

Camera Comparison of 3 Popular Nikon Models: D750 – D7100 – D5100

03 Jan

No matter which stage you are into the world of DSLR photography, often the big question comes. Which camera do you buy to start or progress your photography journey and get those creative juices flowing?

In this article, I will compare three widely popular Nikon cameras (the Nikon D750 24 MP FX body – $ 1499, Nikon D7100 24 MP DX body – $ 724, and the Nikon D5100 16 MP DX body – $ 189) of different capability levels and price points. It will give you practical insight into their image quality by using them in real-world shooting scenarios (landscape/social events/sports) that you may want to cover in your photography.

According to statistics from explorecams.com, these three cameras (as of 11 September 2017) rank in Nikon photo-count: D7100 first, D750 second, D5100 sixth. So indeed these are cameras trusted and used by Nikon shooters the world over.

This article is not a photography theory, camera specs, best settings, lenses, or camera technical reviews. There are excellent web resources for that and I do fully encourage you to check these out, both here on dPS and other sites. This comparison will give you real-life examples to see which camera may suit your needs, expectations, and wallet better.

All scenarios will have the following structure:

  • A description of the scene
  • Gear and settings used to ensure comparability
  • The output photographs
  • Summary

Landscape Scenario

The Scene

Most probably you will find yourself at some point outside, camera at hand, wanting to capture the beauty that you see around you. In southern Greece, the picturesque village of Planiteros, with its flowing streams and huge sycamore trees, is the perfect setting for our first scenario.

Gear and Settings

Reasonable companions to this type of photography are a wide angle lens, a tripod, and a remote. The Tokina 12-28 f/4 lens, the Sirui T-025X carbon fiber tripod and the Nikon ML-L3 remote were used. Using the Tokina, which is compatible with both full frame or FX (D750) and crop sensor or DX cameras (D7100 / D5100) allowed photographs of very similar focal lengths to be taken for comparison.

Nikon D5100, capable of handling this situation?

Aiming to give a slightly softer flow rendition of the stream, while maintaining ample depth of field, a longer exposure time and a narrower aperture were desirable. For all three cameras, sensible vibration reducing technique was applied for this type of shooting vision. Mounting the camera on a tripod, using a remote to trigger the shutter, and activating mirror lockup (available on D750 and D7100) or exposure delay (on the D5100, as mirror lockup is not available) are solid steps to getting a good quality landscape photo.

Aperture Priority mode (set at f/8), Matrix Metering, Auto WB, single autofocus mode (AF-S), single point focus, autofocusing on the same point using live view and using the base ISO for each camera (100 for the D750 and D7100, and ISO 200 for the D5100), were the settings applied to extract the best possible quality files from each sensor. Raw files were processed in Lightroom (LR) to produce similar JPGs.

The Landscape Photographs

Look at the photographs below and try to guess which camera produced which picture. The answer comes right after the photographs.

LAND Nikon D750 Nikon Camera Comparison of Three Popular Models: D750 - D7100 - D5100

LAND Nikon D5100 Nikon Camera Comparison of Three Popular Models: D750 - D7100 - D5100

LAND Nikon D7100 Nikon Camera Comparison of Three Popular Models: D750 - D7100 - D5100

Answer: 1) D750 (top), 2) D5100 (middle), 3) D7100 (bottom).

Summary Landscape

If you could not find an edge between one photo over another that makes two of us. I would be glad to hang 12×16″ print from any of them on my wall. Proper technique in this scenario is more important than the camera used and it creates a level playing field for all sensors.

Social Events Scenario

The Scene

Gatherings with friends and family are occasions where you want to grab a candid moment or the ambiance shot that will serve as a memento for many years. Good friends Nikos and Athina were kind enough to invite me and my wife over to their place for a glass of wine. This was the perfect occasion to compare the three cameras in a usual social setting.

Gear and Settings

Contrary to the landscape scenario’s contemplative and slower pace of shooting, social gatherings usually lend themselves more to a handheld, run and gun shooting style. So no particular gear other than the Tokina 12-28 f/4 lens was used here. While this is not a usual focal length for shooting indoors with people, when used from a sensible distance and towards the wider end it can serve the comparison between the three cameras.

Nikon D7100

Aperture Priority mode (at f/4), Matrix Metering, Auto WB, single autofocus mode (AF-S), single point focus, focusing through the viewfinder and using Auto ISO with no High ISO Noise Reduction applied, were the settings used to extract the best possible quality files from each camera.

Using Auto ISO has to do with my individual shooting style. In this scenario, it is actually the same as using ISO 1600 for D5100 and D7100 and ISO 3200 for D750. These are, in my experience, the highest ISO levels that each camera can handle (especially for straight out of camera JPGs) before noise becomes too obtrusive.

Both the out of camera JPGs and those made following similar processing of raw files in Lightroom are provided in the next section.

The Social Event Photographs

Let’s start with the camera JPGs. Which camera produced which photo will come right after both sets of pictures (camera JPGs and LR processed JPGs).

SOCIAL Nikon D7100 CAM Nikon Camera Comparison of Three Popular Models: D750 - D7100 - D5100

SOCIAL Nikon D750 CAM Nikon Camera Comparison of Three Popular Models: D750 - D7100 - D5100

SOCIAL Nikon D5100 CAM Nikon Camera Comparison of Three Popular Models: D750 - D7100 - D5100

And here are the LR processed counterparts in the same order.

SOCIAL Nikon D7100 LR Nikon Camera Comparison of Three Popular Models: D750 - D7100 - D5100

SOCIAL Nikon D750 LR Nikon Camera Comparison of Three Popular Models: D750 - D7100 - D5100

SOCIAL Nikon D5100 LR Nikon Camera Comparison of Three Popular Models: D750 - D7100 - D5100

Answer: 1) D7100 (top), 2) D750 (middle), 3) D5100 (bottom).

Summary Social Events

Again, as in the landscape scenario, you would be hard-pressed to find a winner here. Less than perfect focusing (front or back focus) or camera shake (due to a slow shutter speed) have a lot more impact than the camera model in such shooting environments (e.g. the domestic indoor lighting here).

Sports Scenario

The Scene

Photographing movements, be it your loved ones playing in the backyard or shooting any sport, can generate highly dynamic, catchy, and memorable photographs. Usually, I play football with my friends once a week. For the sake of this article, I put my football gear aside and grabbed my photo kit to shoot the sports scenario.

Gear and Settings

Depending on the sport and the venue, different lenses can be employed in your gear arsenal. The consensus seems to be that a telephoto zoom is an invaluable piece of kit for sports in general. A Tamron 70-300 f/4-5.6 lens was used for this test, as it is compatible with both FX and DX cameras. A Sirui P-224SR Carbon Fiber Monopod and a Manfrotto 410 Junior Geared Tripod Head were used to create the support platform.

Hand holding a DSLR camera with a lens attached is achievable for periods of time. However, when shooting sports, perhaps for hours, and consistently following the action as it unfolds requires more support. This monopod and head combination is working very well for me.

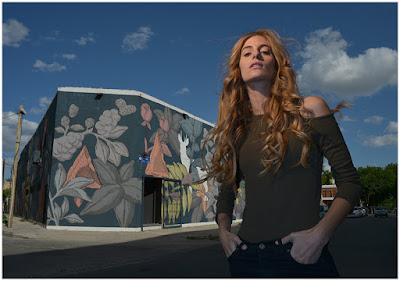
Nikon D750 really excels in this situation.

Usually, sports photography lends its self to shutter priority mode. Select at least a 1/500th of a second. Then take it up from there to freeze action as needed (unless panning is used, where perhaps even 1/60th or slower may be sufficient).

Unfortunately, in the available light conditions of this scenario, not even 1/20th was attainable with any of the three camera-lens combinations, while using reasonable ISOs as discussed before. To somewhat combat this, a minimum of ISO 3200 was used for all cameras. This pushed the limits of acceptable noise, but bought a few more precious tenths of seconds of speed.

With this important point in mind, Aperture Priority mode (varying between f/4 and f/5.6 across the zoom range), Matrix Metering, Auto WB, continuous autofocus mode (AF-C), Dynamic-area AF mode (d9 for comparability), autofocusing through the viewfinder and no High ISO Noise Reduction, were the settings used to extract the best possible quality files from each camera.

Both out of camera JPGs and JPGs following similar processing of raw files in Lightroom are shared in the next section.

Finally, to showcase how high ISO performance has evolved over the years, I will include a bonus JPG with Hi-2 (ISO 51,200) straight out of camera from the D750 (only cropped and lens profiled in Lightroom).

The photographs

First up the camera JPGs, then the LR processed ones. Which is which is shown at the end after both sets:

SPORTS Nikon D7100 CAM Nikon Camera Comparison of Three Popular Models: D750 - D7100 - D5100

SPORTS Nikon D5100 CAM Nikon Camera Comparison of Three Popular Models: D750 - D7100 - D5100

SPORTS Nikon D750 CAM Nikon Camera Comparison of Three Popular Models: D750 - D7100 - D5100

And here are the LR processed counterparts in the same order.

SPORTS Nikon D7100 LR Nikon Camera Comparison of Three Popular Models: D750 - D7100 - D5100

SPORTS Nikon D5100 LR Nikon Camera Comparison of Three Popular Models: D750 - D7100 - D5100

SPORTS Nikon D750 LR Nikon Camera Comparison of Three Popular Models: D750 - D7100 - D5100

Answer: 1) D7100 (top), 2) D5100 (middle), 3) D750 (bottom).

The bonus ISO 51,200 file from the D750.

SPORTS Nikon D750 CAM HI 2 Nikon Camera Comparison of Three Popular Models: D750 - D7100 - D5100

Summary sports

Shooting sports is indeed a completely different animal. Gear that will get perfectly adequate photos in normal situations (e.g. nature and social situations as above) simply will not be enough for sports. It is not an accident that you see big glass and pro bodies used in sporting venues the world over.

Having said that, it is possible with any of the three cameras discussed here to get some usable shots by capturing the peak of the athletes’ movement. My learning is also that increasing ISO even well above 3200 may be sensible for all these cameras. The higher shutter speed benefit offsets the increased noise.

The key differentiator between the three Nikon cameras is not the quality of the keeper photos. It is the vast superiority of the D750’s autofocus system, frame rate and ISO performance that will allow you to create a lot more keepers, long after the other two bodies have given up trying.

Conclusion and proposals

You went through a lot of info here. Now it is time to make some sense of it. I will hopefully help by offering my insights following this Nikon camera comparison and my few years of trying to decipher photography principles and gear choices.

Newest and biggest isn’t always necessary

The latest most expensive camera, with more Megapixels, is neither necessary nor is it a guarantor of getting good photographs. The 4/2011 launched DX D5100 coupled with a suitable (i.e. with built-in focus motor) lens, can create the same quality photographs in many situations as its more capable 2/2013 launched DX D7100 or the 9/2014 launched (and much more expensive) FX D750 siblings.

Solid shooting technique and basic gear (e.g. a tripod) is essential no matter which camera body is used.

In some cases, bigger is better

Higher spec bodies do offer tangible shooting benefits other than image quality. This was apparent in the sports scenario. Be it superior focus performance, internal focus motor, larger viewfinder, commander flash capability, AF fine tune, physical buttons for more functions at hand, prosumer (D7100) or semipro (D750) bodies can help you get your photography to that next level of refinement.

Consider carefully your lens purchases. Ensure the best possible compatibility in case you ever decide to move from DX to FX. A few clever purchases can give you great value-for-money FX and DX compatible lenses (hint: Tokina).

However, do rent or try out gear from friends before you commit. I cannot overstate the real-life ease-of-use factor versus any specs’ sheet excellence.

So here are my proposals to you depending on your stage in the photo journey

Just starting out. Don’t feel pressured to get an expensive high-spec body. A sensible approach may very well be to grab a dirt cheap used D5100 and an 18-200mm inexpensive used lens. See if DSLR photography suits you and your lifestyle and take it from there. Give it time and do not splash out immediately on many different lenses. Plus the D5100 can also act as a great video camera thanks to its rotating screen.

The bug has bitten you. It takes an honest discussion with yourself to see if you really need all the bells and whistles of that new body versus an early D5xxx or a D7000 model. If the answer is yes, then my proposal is to hang in there. Skip the D7100 and save the cash to spring for the D750 (new or used), unless the more recent D7xxx series have similar autofocus and ISO performance for a lower price.

You are ready to make money from your photography and turn semi-pro or even full-time pro. Congratulations! By now you have probably outgrown even the D750 for the sake of other pro FX and DX bodies. There’s not much I can offer in terms of advice here, other than a D750 can always be a light backup body, great for both stills and video.

Conclusion

Thank you for the time reading this article and see where your photography passion takes you next!

Do you have and use any of these Nikon cameras? What types of photograph do you shoot? Please share your experience in the comments below.

The post Camera Comparison of 3 Popular Nikon Models: D750 – D7100 – D5100 by Konstantinos Skourtis appeared first on Digital Photography School.


Digital Photography School

 
Comments Off on Camera Comparison of 3 Popular Nikon Models: D750 – D7100 – D5100

Posted in Photography


Mastering and Sharing One-Click Presets in Luminar

02 Jan

One of the main strengths of Luminar by Macphun, soon to be Skylum, is how it makes a suite of professional-style editing tools available to even the most casual of photographers. It does it all with a user interface that is clean, simple, and easy to understand. In contrast to some other editing programs on the market, Luminar’s full suite of powerful tools is available through a simple approach based on applying Filters and Presets, along with more advanced options such as layers and masking.

Instead of hiding these under myriad menus and obscure tiny buttons, Luminar presents you with easy-to-understand options when choosing your edits and includes real-time previews of what your edits will look like. And much of this starts with the simple act of selecting a Preset.

Mastering and Sharing One-Click Presets in Luminar

Presets versus Filters

Before getting too deep into how to use and share one-click Presets, it’s important to understand some basic terminology related to Luminar’s use of Presets and Filters.

When you load an image into Luminar’s editing interface you are presented with two main options to edit your images: Add Filter or Apply Preset.

Filters

Filters are individual editing tools that let you perform basic adjustments such as color temperature, exposure, and white/black levels. Luminar also contains more advanced filters like color balance, texture overlay, HSL, and the Accent AI filter that uses artificial intelligence to adjust a range of parameters all with a single slider. Filters can be applied across an entire image, brushed in selectively, and used in combination with layers in a manner similar to Adobe Photoshop’s editing workflow.

Mastering and Sharing One-Click Presets in Luminar

Click Add Filters, then select a filter such as Saturation / Vibrance, and you will be shown a description of the Filter as well as a preview of how it would look applied to a sample image.

Presets

Due to the sheer number of filters available the options can seem overwhelming even to seasoned editors. This is where Presets come in handy, and where the brilliant simplicity of Luminar really starts to shine.

A Preset is a collection of filters specifically chosen by the developers of Luminar to produce a certain type of effect on the whole image when combined. At the bottom of the Luminar interface, you will see a row of Presets with names like Soft & Airy, Sky Enhancer, and Vivid which are good starting points when editing a variety of image types. Click the Categories button to see the filters organized as specific collections that can be useful depending on the specific types of images you are editing.

Mastering and Sharing One-Click Presets in Luminar

Presets are organized into specific categories, and you can also access your favorites and any custom Presets with the click of a button.

If all this talk of Presets has you feeling overwhelmed before you even start, just take a breath and know that it’s a lot simpler than it might seem especially when you actually open Luminar and start to use it. You don’t even have to use Presets at all but I have found them to be a great starting point when editing my images. It’s a nice compromise between me performing all manner of meticulous edits by hand and having Luminar do all the work for me.

Presets occupy a comfortable middle ground that allows you to have one-click access to a set of edits that will enhance your images in a heartbeat. At the same time, they still allow you to retain as much control over the individual editing parameters as you would like.

Preset walkthrough

To show how Presets work I’m going to walk you through an example step by step beginning with this image of some autumn leaves. This is the RAW file straight out of my camera with no edits applied.

Mastering and Sharing One-Click Presets in Luminar

Original boring unedited image. Cue sad trombone sound effect…wop wop woooop.

When you load an image into Luminar you will see it take up most of the screen except for a portion at the bottom and the right. The former is where you can select a Preset and the latter is used for applying and editing Filters.

Mastering and Sharing One-Click Presets in Luminar

Add Filters on the right, Presets are at the bottom.

Forget about Filters for now and just focus on the Preset options at the bottom of the screen. Each one has a name that describes the type of effect it will have on your photo. Best of all, each Preset has a mini preview of what it will actually do if you apply it to your image.

Preset previews rock!

This is one of my favorite features of Luminar, and it’s almost worth the price of the program all by itself because you can quickly scan through the many options available and choose one to instantly transform your photo with the click of a button.

Mastering and Sharing One-Click Presets in Luminar

The Preset panel gives you real-time previews of what each one will look like when applied to your image.

As an added bonus you can even adjust the degree to which Luminar applies a Preset by clicking on one and then dragging the slider to the left. That way if you like the effect that a Preset has on your image but find it to be a bit overdone, just lower the value a bit with the slider. You also have the option of clicking the star icon in the corner of any Preset which saves it to a list of favorites.

Mastering and Sharing One-Click Presets in Luminar

Use the slider to adjust the degree to which a Preset is applied.

The following image is an example of what one click on the “Warm Sunset” Preset did to transform the original picture of some dull green and yellow leaves.

Mastering and Sharing One-Click Presets in Luminar

The finished version, all done with a couple of clicks thanks to the Presets in Luminar.

Not too shabby, right? As a comparison, I loaded the same RAW file into Lightroom and was able to get similar results but it took a lot more time and required changing values on a dozen different sliders.

Such is the beauty of Luminar’s approach. The developers have done much of the heavy lifting so that you don’t have to, while still giving you full access to all the editing options within each of the Presets. So if you really want to do a dive deep and adjust your images on a granular level, you can.

Note: You can also add a texture overlay and save that in a custom preset as well.

Editing the Presets

If all the screenshots and arrows in this article have your head spinning, here’s a refresher of the basic Luminar workflow:

  • Step 1: Import an image into Luminar
  • Step 2: Click on a Preset
  • Step 3: You’re done. There is no Step Three.

However, if you would like to dive into some of the finer details of using Presets, Luminar lets you see exactly what each one does and also tweak the parameters to your liking. You can save your edits as new Presets, and even create your own Presets from scratch.

For example, the Warm Sunset Preset that I applied to the image of the leaves is really just a collection of Filters with specific adjustment values already applied. The following screenshot shows the specific filters that Warm Sunset uses, as well as the numerical values that have been dialed in by the Luminar developers.

Mastering and Sharing One-Click Presets in Luminar

The Warm Sunset Preset consists of three Filters, each with pre-determined values dialed in that you can change at any time if you like.

When you click on a Preset you will see all of its Filters show up on the right side of your screen, and you are free to change any of the values you want or even add new Filters to the mix. It’s an endlessly customizable editing solution that can go a long way towards giving you the professional results you have always wanted without the hassle and steep learning curve inherent in some other photo editing programs.

Creating and Sharing Presets

Even though there are dozens of Presets already built-in to Luminar, you can create your own by choosing any combination of filters, editing them to the values you want, and choosing “Save Filter Preset…” from the Filters menu.

I often find myself adding a little clarity along with some post-crop vignetting to my images (and for nature shots a bit of vividness too) so I pulled those Filters, dialed in the values for each one, and then saved it as a Preset called “Clarignette” (my attempt at making a new word).

Mastering and Sharing One-Click Presets in Luminar

A custom Preset I created called Clarignette, which uses the Clarity, Brilliance/Warmth, and Vignette Filters.

Custom Presets can be accessed by clicking the Categories button just above the row of Presets and choosing “User Presets.” Any Presets that you create or customize can also be shared with other users which makes this a great way to use custom Presets on multiple computers or in any type of collaborative editing environment. Choose “File > Show Presets Folder…” to see the folder on your computer where your custom Presets reside. Each one is saved as an “.lmp” file that you can copy to the Custom Preset folder on another computer or send to a friend.

Stacking Presets with Layers

One final ace up Luminar’s sleeve is its ability to let you combine filters using layers, in precisely the same way Photoshop and other image editing programs handle a layer-based non-destructive workflow.

Instead of applying a Preset directly to the image you are working with, you can click the “+ Overlay Preset” button in the lower-right corner of the Luminar workspace which adds a layer onto which your Preset edits are applied. This is exactly the same as an Adjustment Layer in Photoshop. Your Preset edits can now be applied, controlled, and adjusted independently of the image itself. Masking tools can then be used on each layer to control which parts of the image are affected by the Preset.

Note: You can also apply a mask to any of the Filters applied directly to your image as well.

Mastering and Sharing One-Click Presets in Luminar

I started with an image of some leaves, and created an Overlay with the Vivid Preset. Then I added a second Overlay with the B&W Preset and applied that with a radial mask so it is only affecting the outer edges of the image leaving all the color in the center.

This layer-based Preset implementation is another illustration of how Luminar takes a powerful-but-simple approach to editing. It’s not that Luminar is quantifiably better or worse than other editing programs because such an evaluation depends greatly on the individual needs, workflow, and style of the photographer. However, for users who are relatively new to photo editing and want a program that offers a simple, clean, intuitive approach with a feature-set deep enough to grow with them over time, it’s hard to beat Luminar.

Anyone who has used Instagram or other social media apps to apply image edits with the click of a Filter or Preset button will feel right at home with Luminar. As those individuals demand greater control and flexibility as they improve their skills, Luminar is right there beside them ready to meet the challenge. I really do like Luminar’s approach to editing with Presets and Filters and I think it’s a nice way to bridge the gap between amateur and professional photo editing. It’s simple enough for casual users but has a deep feature-set to cater to more demanding photographers too.

Disclaimer: Macphun, soon to be Skylum, is a dPS advertising partner.

The post Mastering and Sharing One-Click Presets in Luminar by Simon Ringsmuth appeared first on Digital Photography School.


Digital Photography School

 
Comments Off on Mastering and Sharing One-Click Presets in Luminar

Posted in Photography


A Fresh Look at Learning Photographic Composition

02 Jan

Popular teaching about photographic composition says to learn the rules and then break them. I prefer to encourage the people who join our photography workshops to learn the rules, understand them well and put them into practice so frequently they become second nature.

If you can apply the rules without even consciously thinking about them you will create more dynamic, interesting photographs which convey more feeling.

A Fresh Look at Learning Photographic Composition

Why do we have rules?

Rules are important as they are the underlying structure of composition. Much like scales are to musicians. Much like grammar is to language.

Successful musicians have typically spent long hours going over and over the same scales until they know them so well they do not need to think about them. When we learned our first language, our “mother tongue”, we never consulted the textbooks to study the grammatical structure of the language, we just absorbed it, (most frequently from our mothers.)

A Fresh Look at Learning Photographic Composition

Some people will have more difficulty learning the rules of composition and applying them effectively than others. Very much like some people can learn to play musical instruments or learn new languages easier.

I think it is because we are all creatively gifted in different ways. If you are gifted with a visual creativity you may find it easier to compose photographs than say someone who is gifted with a musical creativity and finds it easy to play the guitar or trumpet for example.

A Fresh Look at Learning Photographic Composition

I do like what the famous American photographer Edward Weston had to say about learning and implementing the rules of composition:

“Now to consult the rules of composition before making a picture is a little like consulting the law of gravity before going for a walk.”

I doubt any of us can recall studying the law of gravity before we learned to walk. But we certainly knew about it.

A Fresh Look at Learning Photographic Composition

Know them at a subconscious level

Knowing the rules is important as they will help guide our creative thinking, but applying these rules rigidly will generally lead towards making rather static and lifeless photographs. As you learn the rules and know them so well you can incorporate them into your photographs intuitively you will find your images may take on a whole new dynamic. Very much like walking and talking, it’s good to be subconsciously aware of the rules and laws as they are there for good reason.

A Fresh Look at Learning Photographic Composition

Practice constantly

Reading about and studying the rules of composition will help you gain a good understanding of them. Practicing them frequently is the most effective means of consistently integrating them into your photographs. Practice them even when you don’t have your camera with you.

Begin to see in the rule of thirds, discover leading lines and strong diagonals, look for frames and how you can use symmetry. One side effect of seeing like this will likely be that you start taking your camera everywhere with you.

Fill the frame

When I first started working in the photography department of a newspaper it was impressed upon me to “fill the frame”. This encouragement has stuck with me and I am aware, consciously or subconsciously, of wanting to effectively achieve this with every photograph I make. This was important in the newspaper in order to convey the story effectively, (and so sub-editors had less flexibility to horribly crop your photos).

A Fresh Look at Learning Photographic Composition

Filling your frame does not mean that in every photo your subject must be pressed out to the edges of your viewfinder. It means however you are choosing to compose your photograph, make sure whatever is within the four corners and edges is relevant to the picture you are making.

A Fresh Look at Learning Photographic Composition

If empty space is relevant and adds to your composition, use it well. If cropping in so tight that part of your subject is cut off makes a stronger image, then crop tight.

However you decide to compose your image, be happy with it. Don’t get hung up on the rules. But do have a solid understanding of them and explore how you like to incorporate them into the creative photographs you are making. And, if you so come up with any new rules, please do let me know!

Here’s a little video talking about this concept of composition.

The post A Fresh Look at Learning Photographic Composition by Kevin Landwer-Johan appeared first on Digital Photography School.


Digital Photography School

 
Comments Off on A Fresh Look at Learning Photographic Composition

Posted in Photography


5 Ways to Invest in Your Photography Over the Next 365 Days

02 Jan

Happy 2018! Can you believe it is already 2018? Seems like just a little while ago we were all celebrating ushering in the Y2K era and now to think that 2020 is just two years away seems unreal. I love the new year. It brings forth hope, aspirations, and positivity.

Metaphorically, it is like the slate has been wiped clean and you have a chance to chase some of your most amazing and lofty goals. So why not use this new year to invest in something that you really love as well – your photography. Here are some simple easy ways to invest in bettering your creativity and your craft over the next 365 days.

Sunset golden hour photo - How to Invest in Your Photography Over the Next 365 Days

#1 – Create smart goals for your photography

Let’s drop the myth that only professional photographers who are in business are allowed to have photography goals. I don’t care if you are just beginning to learn photography or have been doing this for years, one of the best ways to improve at anything is to have realistic goals for what you aspire to and want to achieve.

Goals can be things like learning to photograph in manual mode, selling stock images or booking your first wedding client. No matter what your goals are, I encourage you to take it a step further and create SMART goals. A SMART goal is defined as one that is;

  • Specific
  • Measurable
  • Achievable
  • Results-focused
  • Time-sensitive

So for each of your goals, add additional parameters to convert them to SMART goals by figuring out how to measure them, how to achieve and execute them, and what specific timeframe you want them to be completed by.

Jaipur Lake Palace Photo - 5 Ways to Invest in Your Photography Over the Next 365 Days

A SMART goal to travel and explore my home country has lead to some amazing opportunities. All because I really thought through what I wanted to do, how I wanted to execute it, and what outcomes I wanted from those opportunities and really working towards those goals!

#2 – Plan to do at least 4 personal photography projects

I really believe that personal projects are the cornerstone to helping you improve your photography. Once you take the pressures of working with clients out of the equation, you are free to explore, get creative, and challenge yourself. This creative freedom is bound to reflect positively on your work.

Personal projects can be short exercises directed to help you improve in some area of your photography or extended self-assigned projects that really take you completely out of your comfort zone to try something different. You can choose to space out your personal projects throughout the year – perhaps even commit to doing one per quarter.

No matter what you choose, have SMART goals on what, when, and how you are going to execute your personal projects. You can see more details on the importance of personal projects in this previous article.

Ocean views from the caribbean - 5 Ways to Invest in Your Photography Over the Next 365 Days

One of my ongoing personal projects to learn and master film photography because it provides so much more room for learning and improving my photography in general. I even went so far as only taking a 35mm film camera on vacation to the Caribbean.

#3 – Practice photography every day

One of the easiest ways to practice photography every day is by signing up for a 365 series. Quite simply put, a 365 series is a commitment to creating one photo every day for 365 days. You can use a DSLR, a point and shoot camera, or even a smartphone to work on this series.

You can even take this a step further by joining one of the many online groups available. They are created solely for the purpose of encouraging you to photograph and post a single photo every day for 365 days straight. They even provide photo prompts to help you stay on track so you are constantly thinking of what to photograph every day.

Small waterfall photo - 5 Ways to Invest in Your Photography Over the Next 365 Days

A picture a day is literally just that – a photo a day. Get as creative as you want with this exercise. Use it as a way to get out of the house, meet fellow photographers, or just as some quiet time to reflect on who you are as a photographer and what motivates you.

#4 – Share your work online and offline

Join online groups or even local camera clubs to meet and socialize with other photographers. Many clubs have critique nights where members submit photos and comment on each other’s work. This is a great way to not only have your work be seen by others but also to get unbiased feedback on your work, which can be used for improvement and growth.

Many times we are our own worst critic and downplay our talents and skills because we are afraid or maybe lack the confidence in our photography. And you know what’s the best part? Having a group of like-minded people that you can talk photography about with all day long without them tuning you out within the first five minutes of any conversation (Can you tell this is how my family is when I start to talk photography!?).

Photo of the Taj Hotel in Mumbai at sunrise - 5 Ways to Invest in Your Photography Over the Next 365 Days

I have made some amazing friends via online communities – we have collaborated together, referred work to each other and bounced life and business challenges off one another. But most importantly, I have made some incredible friends who I know have my best interests at heart.

#5 – Attend a photography workshop, conference or take an online course

Like most other professions, the photography industry is continually evolving and changing. New products, techniques, and styles are constantly being introduced. So attending a photography workshop or conference is a great idea.

Plus you never know who you might meet there in terms of future friends, potential clients, or even referral opportunities. There are numerous workshops, seminars, and even free online events and tutorials to keep you busy learning new things.

Keeping abreast of the latest in any business is a good thing. It shows your clients, both present, and future, that you value your business and skill, enough to invest in it.

 Mirror reflection of an alpine lake in Oregon - 5 Ways to Invest in Your Photography Over the Next 365 Days

Workshops, and conferences are another great way to expand your professional circle, make industry friends and learn new skills/techniques. Make sure you do your research prior to committing funds to attend an event/workshop or conference.

What will you do with the next 365 days?

I hope these tips were helpful to you as you plan out 2018. Remember, getting your photography to a level that you are proud of takes time and a lot of hard work. Make this your year to shine with your photography.

The post 5 Ways to Invest in Your Photography Over the Next 365 Days by Karthika Gupta appeared first on Digital Photography School.


Digital Photography School

 
Comments Off on 5 Ways to Invest in Your Photography Over the Next 365 Days

Posted in Photography


SLC-2L-01: Owning the Sun with Two Speedlights

02 Jan

When working with one speedlight outdoors in daylight, logic dictates that you need to find the shade if you want to create a nice quality of light.

This is because you only have one light, which a) needs to do all of the heavy lifting, and b) is not very powerful. Which means that you tend to go soft—and close—with your one light.

So one light can be limiting. But as you'll see, a second light can open up some pretty neat options. Read more »
Strobist

 
Comments Off on SLC-2L-01: Owning the Sun with Two Speedlights

Posted in Photography


Top Street and Travel Photography Tips 2017

01 Jan

If you’ve been reading over the last few of days you may have seen these already:

  • The Best Landscape Articles on dPS in 2017
  • Top Portrait Photography Tips of the Year on dPS in 2017
  • Most Popular Post-Processing Articles of 2017
  • Best Beginner Photography Articles 2017
  • Reviews and Articles on Photography Gear – 2017

Top Street Photography Tips 2017

  1. The Ultimate Guide to Street Photography
  2. What are the Best Street Photography Camera Settings and Why
  3. How to Conquer the Biggest Fear in Street Photography
  4. Tutorial – Easy Camera Settings for Street Photography
  5. 7 Vital Tips to Improve Your Candid Street Photography
  6. 6 Reasons Why You Should Use a Standard Lens for Street Photography
  7. The Pros and Cons of Black and White Versus Color for Street and Travel Photography
  8. 7 Tips for Capturing the Decisive Moment in Street Photography
  9. How to Tell a Story With Your Street Photography
  10. 5 Tips for Photographing Street Portraits

Top Travel Photography Tips 2017

  1. 6 Reasons Why Your Travel Photos Don’t Look Like the Ones in Magazines
  2. 7 Non-Photography Items Which No Travel Photographer Should Leave Home Without
  3. 6 Practical Tips to Instantly Make Travel Photography Easier
  4. 7 Travel Photography Tips I’ve Learned from People in the Industry
  5. 8 Travel Photography Tips for Your Next Journey
  6. 10 Quick Tips for Travel Photography
  7. How to Backup and Manage Your Photos When Traveling Without a Computer
  8. How to Shoot Engaging Travel Portraits from Start to Finish
  9. How to Plan a Street Photography Shoot When Traveling
  10. Tips for Taking Documentary Style Travel Photos
  11. 7 Realities That Hit Once You Become a Professional Travel Photographer

The post Top Street and Travel Photography Tips 2017 by Darlene Hildebrandt appeared first on Digital Photography School.


Digital Photography School

 
Comments Off on Top Street and Travel Photography Tips 2017

Posted in Photography


Happy New Year 2018 – Recap of our Ultimate Guides to Photography

31 Dec

Wishing you the happiest new year from the dPS family.

As a bonus, here is a summary of some amazing ultimate guides we published in 2017. Each is available as a free PDF – just click on the ones you want to download below.

  • The Ultimate Guide to Street Photography
  • The dPS Ultimate Guide to Landscape Photography
  • The dPS Ultimate Guide to Getting Started in Lightroom for Beginners
  • The dPS Ultimate Guide to Photography for Beginners
  • The dPS Ultimate Guide to Photography Terms – a Glossary of Common Words and Phrases
  • The Ultimate Guide to Nature and Outdoor Photography
  • The dPS Ultimate Guide to Fine Art Photography

Enjoy and please share this page with your friends if you find these valuable!

The post Happy New Year 2018 – Recap of our Ultimate Guides to Photography by Darlene Hildebrandt appeared first on Digital Photography School.


Digital Photography School

 
Comments Off on Happy New Year 2018 – Recap of our Ultimate Guides to Photography

Posted in Photography


Reviews and Articles on Photography Gear – 2017

30 Dec

If you’ve been reading over the last few of days you may have seen these already:

  • The Best Landscape Articles on dPS in 2017
  • Top Portrait Photography Tips of the Year on dPS in 2017
  • Most Popular Post-Processing Articles of 2017
  • Best Beginner Photography Articles 2017

Now it’s time to geek out a bit and talk about photography equipment. Here are some of the reviews and tips from 2017 to help you make the best of your gear.

Reviews and Articles on Photography Gear – 2017

  1. Review of the New Sigma 500mm F4 DG HSM OS Sport Lens
  2. Review of the New Flagship DX Camera – The Nikon D500
  3. Review of the New Formatt Hitech Firecrest Filter Holder and Neutral Density Filters
  4. Review of the Wine Country Camera Filter Holder System
  5. Review of the Sigma 85mm f/1.4 Art Lens
  6. Review of the New Nikon D5600 Camera Body
  7. Review of the Sigma 24mm F1.4 DG HSM Art Lens
  8. Camera Bag Review – The Udee Backpack
  9. Review: Sigma 100-400mm F5-6.3 DG OS HSM Contemporary Lens
  10. Think Tank Signature 13 Camera Shoulder Bag Review
  11. The New Canon 6D Mark II – Hands-On Previews and Thoughts
  12. Review of the K&F Concept TC2534 Lightweight Carbon Fiber Tripod
  13. Review of the new Spekular Modular LED Light System
  14. VSGO Camera Sensor Cleaning Kit Review
  15. Eight Ways to Get Rid of GAS – Gear Acquisition Syndrome
  16. When is the Right Time to Upgrade Camera Gear?
  17. Tips for Buying Used Camera Gear
  18. Recommended Gear for Doing Long Exposure Photography at Twilight and Dusk
  19. DIY Hack 2-for-1 Luggage and Camera Roller Bag

The post Reviews and Articles on Photography Gear – 2017 by Darlene Hildebrandt appeared first on Digital Photography School.


Digital Photography School

 
Comments Off on Reviews and Articles on Photography Gear – 2017

Posted in Photography


Best Beginner Photography Articles 2017

29 Dec

If you’ve been reading over the last couple of days you may have seen these already:

  • The Best Landscape Articles on dPS in 2017
  • Top Portrait Photography Tips of the Year on dPS in 2017
  • Most Popular Post-Processing Articles of 2017

Now, let’s get some help for those new to photography. If you just got a new camera as a gift and don’t know where to start – these are for you!

Best Beginner Photography Articles 2017

  1. 10 Must-Use Bird Photography Camera Settings for Beginners
  2. Avoid These 5 Common Camera Setting Mistakes Made By Beginners
  3. How to Shoot in Manual Mode Cheat Sheet for Beginners
  4. The dPS Ultimate Guide to Photography for Beginners
  5. 4 Beginner Tips for Creating Dramatic Portraits with One Flash
  6. Beginner’s Guide to Metering Modes on Your Camera
  7. 5 Easy Ways to Drastically Improve Your Photographs for Beginners
  8. Photoshop Versus Lightroom: Which is Best for Beginners?
  9. 25 Things I Learned as a Photography Newbie
  10. 3 Things I Wish I Knew When I Started Photography
  11. 5 Camera Settings Every New Photographer Needs to Know
  12. 5 Things Every Newbie Photographer Must Learn and Practice
  13. Bought Your First DSLR? 6 Tips for Learning How to Use Your New Camera

The post Best Beginner Photography Articles 2017 by Darlene Hildebrandt appeared first on Digital Photography School.


Digital Photography School

 
Comments Off on Best Beginner Photography Articles 2017

Posted in Photography


Most Popular Post-Processing Articles of 2017

28 Dec

If you’ve been reading over the last couple of days you may have seen these already:

  • The Best Landscape Articles on dPS in 2017
  • Top Portrait Photography Tips of the Year on dPS in 2017

Next up in this summary is post-processing.

Most Popular Post-Processing Articles of 2017

    1. 5 Common Post-Processing Mistakes to Avoid
    2. A Step by Step Guide to Processing Portraits in Lightroom
    3. Basic Portrait Post-Processing Workflow Tips to Help You Save Time and Stay Organized
    4. Don’t Fear Photo Post-Processing – Shooting is Only the First Part of the Image Creation Process
    5. How to Match Your Image Processing Using Reference View in Lightroom
    6. 4 Tips for Post-Processing Images on the Road
    7. Overview of the Intuos Pro Wacom Tablet and the MobileStudio Pro for Post-Processing
    8. How to Choose the Right Monitor for Photo Editing
    9. Overview of Photo Studio Ultimate 2018 for Windows by ACDSee
    10. Image Editing Software Review: PortraitPro 15
    11. How to Speed Up Your Photo Editing with the Right Lightroom Workflow
    12. How to do Non-Destructive Editing in Photoshop
    13. How to Merge and Combine Images in Photoshop
    14. How to Remove People from Your Photos Using Photoshop
    15. How to Create a Rim Light Effect Using Photoshop
    16. The dPS Ultimate Guide to Getting Started in Lightroom for Beginners
    17. Tips for How to Think and Use Lightroom More Artistically
    18. How to Understand the Lightroom Tone Curve
    19. 3 Handy Lightroom Features I Discovered by Accident
    20. Review of Macphun’s Aurora HDR 2018
    21. How to use Macphun’s Luminar for Beginners
    22. Luminar The Ultimate Lightroom Plugin

Whew, that is a lot, but it’s a big category with lots of options now available to you for processing your images.

Can you help us with a quick poll? Since there are so many new photo editing software options – please fill in any that you are using below. It will give us a better idea of what to cover in the upcoming year! Thanks for your assistance and for reading.

Note: There is a poll embedded within this post, please visit the site to participate in this post’s poll.

The post Most Popular Post-Processing Articles of 2017 by Darlene Hildebrandt appeared first on Digital Photography School.


Digital Photography School

 
Comments Off on Most Popular Post-Processing Articles of 2017

Posted in Photography