RSS
 

Archive for the ‘Photography’ Category

The Importance of Learning From Failure to Help You Grow as a Photographer

07 May

There’s a scene in the 1995 movie Apollo 13 when Gene Kranz, flight commander of the ill-fated moon mission, tells his team that, “Failure is not an option” as they struggle to find a way to bring three astronauts home from the depths of space. While that moment certainly makes for dramatic storytelling, it’s often far from the case when photography is concerned.

I would even go so far as to say failure is not only an option but necessary for you to grow as a photographer. There will be times in your photographic journey that things just don’t go as you had hoped despite how much you plan ahead. While some of these instances might slow you down the important part is learning from failure, growing from your mistakes, and becoming a better photographer as a result.

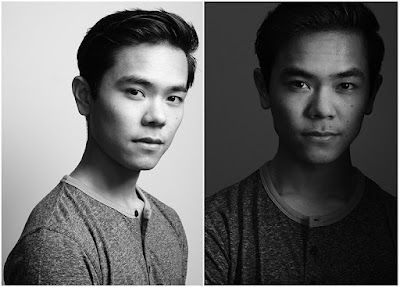
This picture turned out great, but there have been plenty over the years that didn’t.

I would like to share some things I’ve learned over the years from times that I have failed. Hopefully, this will help you benefit from my experiences.

Know your gear well

On some of my first sessions with clients, I had a very difficult time getting my camera to do what I wanted it to do, and many of my images were ruined because of it. A few were too bright, others were too dark, and some weren’t even in focus.

Luckily I shot in RAW so I could fix some of the issues in Lightroom. But things would have gone a lot smoother if I had just taken the time to understand my camera, learned how to use it, and knew what to do when shooting instead of spending hours adjusting images afterward.

The Importance of Learning From Failure and Your Growth as a Photographer - DLSR camera

Your camera is loaded with buttons, dials, menus, and options. Do you know what they all do?

Example

To illustrate what I mean by this, take a look at the following image I shot almost five years ago. Thankfully I did this session as a favor for some friends of our family because looking back on it I would feel terrible if I charged them money for these pictures!

dark family photo (underexposed) - The Importance of Learning From Failure and Your Growth as a Photographer

I remember being frustrated at seeing the LCD screen of my Nikon D7100 as I took these pictures because they were all coming out so dark! I didn’t know what was wrong, and I didn’t know what to change on my camera to fix the problem.

Looking back there was any number of remedies for this overly-dark photograph that I could have used. Had I only known how to actually work the knobs and dials on my camera, simple things like the follow could have solved it:

  • Adjust the exposure compensation (duh!).
  • Change to spot metering instead of matrix metering (of course!).
  • Locked exposure on a bright part of the scene and recomposed the shot (why not?).

Thankfully I used RAW and not JPG so the image wasn’t a total loss, but the skin tones are washed out and the picture is not nearly as vibrant and dynamic as if I had just gotten it right at the time of the shoot.

family portrait in the park - The Importance of Learning From Failure and Your Growth as a Photographer

Clearly, I had a lot to learn about lighting, composition, and why having clients sit on a canvas drop-cloth with their feet out is not a good idea.

This advice is not just for newbies

This advice isn’t just for professional sessions with clients either. Something happens when you get new gear and want to put it through its paces. I attended a wedding recently as a guest, not as the official photographer, but I had my shiny new Fuji X100F with me and even though I thought I knew how to operate it, I made a crucial mistake that cost me a lot of good shots throughout the evening.

For a good 20 minutes I couldn’t figure out why my camera wasn’t focusing right and all my shots were coming out poorly exposed. Finally, I realized that I had accidentally activated the built-in ND filter. There was even an icon on the LCD screen indicating the ND filter was turned on, but I didn’t see it because I just wasn’t as familiar with the camera as I should have been.

people dancing at a party - The Importance of Learning From Failure and Your Growth as a Photographer

Suffice it to say I felt like a complete amateur when I realized that a mistake I made had ruined so many good photo opportunities, but I quickly learned from it and hopefully now you can too!

Familiarize yourself with the location beforehand

Years ago, not too long after I got my Nikon D200 and 50mm lens, I thought I was a pretty big deal and knew everything there was to know about pictures. After all, I had a prime lens! What else was there to understand? (Spoiler alert: A lot. A whole lot!)

One of the biggest mistakes I made during this early period was to show up for photo sessions without ever having been to the location beforehand. This made it impossible, as any seasoned photographer would know, to plan out some of the basic essentials of a photo shoot and look for things like lighting, foreground and background elements, and even where to have my clients sit, stand, or walk.

Hard lesson to learn

The worst offender of the bunch was a session I did for a high school senior where most of the pictures turned out –  well, let’s just say less than ideal because I failed to plan ahead in terms of the physical location. We agreed to meet at a cross-country track, with almost no natural shade, at 5 pm. This is what happened:

portrait in the shade - The Importance of Learning From Failure and Your Growth as a Photographer

From one of my first high school senior sessions, and one I wish I could erase from existence altogether.

After searching for something, anything, to block the sun so he wasn’t squinting – I finally found this set of metal bleachers behind a tree. But because I didn’t understand how to operate my camera to get the exposure right (see failure tip #1) I got shots that were lit like some kind of circus act and were far too over or underexposed.

If I had taken some time to visit the location first I could have at least mentioned some alternative places at the track, or even suggested a different location entirely. Instead, I got out of my car and met the client and his mom with the kind of overconfident swagger that only a new wet-behind-the-ears photographer has, and ended up biffing most of the shots.

I did scrape by with enough competent shots to make it worth their while, but nonetheless, I walked away having learned something I will never forget.

senior portrait - The Importance of Learning From Failure and Your Growth as a Photographer

This was from one of my more recent high school senior sessions. I think it’s just a bit better, don’t you?

A few more for good measure

There are a host of other times I have failed as a photographer but each time I have tried to engage in some self-reflection and understand where I went wrong, As well, I tried to talk with other photographer friends, so I don’t make the same mistakes in the future.

My work has grown, and so have I, as a result of these failures. I would almost go so far as to say that failure is downright essential if you want to refine your craft as a photographer.

dogwood flower - The Importance of Learning From Failure and Your Growth as a Photographer

It took years of poor decisions and overlooking the obvious for me to learn enough about photography to take this simple picture of a dogwood flower.

Without going into too much detail, here are just a couple of other times I have swung and missed, photographically speaking, over the years along with a bit of caution for others thrown in for good measure.

When in doubt, take more photos

I was born in 1980 and grew up in the era of physical film, so when I got my first digital camera I carried that mentality with me. As a result, I missed out on a lot of good shots, especially with clients, because I thought I already had enough and didn’t want to fill up my memory card.

With the price of memory cards being so astronomically low, there is no excuse for not taking enough pictures, and you can just delete them later if you need to.

Control your depth of field

After I got my 85mm f/1.8 lens I took it out to a photo session with clients before thoroughly using and understanding it, which is always a big mistake. I also thought that I could shoot everything at f/1.8 because it gave me such a cool background blur!

What I didn’t realize at the time was the extra-large aperture was also causing half the people to be out of focus due to the insanely shallow depth of field. Just because your lens has a super wide aperture doesn’t mean you should always use it. When in doubt, stop it down a bit.

family portrait outdoors - The Importance of Learning From Failure and Your Growth as a Photographer

I focused on the mother, front and center, and shot this with my 85mm lens at f/1.8 to get a blurry background. What I didn’t realize was that also meant the husband was out of focus as a result.

Know when enough is enough

This one is going to vary depending on the type of photography you do. But as someone who takes a lot of family and child photos, it’s important to know when to hold ’em and know when to fold ’em.

Kids, and even parents, can be fickle and there were times early on when I would drag out photo sessions long after I should have called it quits. “Hey let’s get some more shots over there!” I would say. My clients would begrudgingly oblige while I scampered off ahead of them in a vain effort to capture authentic smiles and emotions.

Dragging out a photo session won’t help you get better pictures. But it will make your clients roll their eyes and think about booking someone else next time. Someone who will take a hint and pay attention to their needs!

family photo - The Importance of Learning From Failure and Your Growth as a Photographer

I learned over the years that kids just don’t last long at family photo sessions, so I took a ton of pictures and tried to keep things interesting by switching up the poses. 20 minutes later these kids were ready to be done, and I could have tried to stretch things out further but it would have only led to frustration.

Conclusion

These are just a few of the many lessons I have learned over the years that, while painful at the time, have served me well in the long run.

What are some of the ways in which you have failed, fell down, or otherwise came up short and what did you learn from it? I’d love to hear your thoughts and experiences in the comments section below. Hopefully, we can all learn from each other’s mistakes.

The post The Importance of Learning From Failure to Help You Grow as a Photographer appeared first on Digital Photography School.


Digital Photography School

 
Comments Off on The Importance of Learning From Failure to Help You Grow as a Photographer

Posted in Photography


4 Tips to Help You Love Using Manual Mode

07 May

In this article, I’d like to share with you a few tips on how to utilize some of your camera’s functions to help you come to grips with shooting in Manual Mode.

Sometimes stripping back to the basics and only using minimal, older equipment with none of the modern features new cameras possess, can help you grow as a photographer. Sometimes making good use of selective technology on your digital camera can also help you learn and create more accurate exposures more easily than is ever possible with older cameras.

Asian woman holding an old 35mm film camera - 4 Tips to Help You Love Using Manual Mode

I started learning on a camera which had no auto anything. There were no options other than to learn Manual Mode. I still use shoot manual 99% of the time.

During the photography workshops we run, I love to encourage people to switch to manual and commit to it for a period of time. If you try Manual Mode once or twice for a short time it’s likely you will not “get” it. You need to commit and using only Manual for most of what you photograph for long enough until you feel you are making progress.

man taking a photo - 4 Tips to Help You Love Using Manual Mode

1. Live View/Electronic View Finder

Many cameras now have LCD screens/electronic viewfinders which display how the exposure will look when you take a photo in Manual Mode. If your camera has this function it pretty much eliminates the need to look at the exposure meter or change your metering mode to obtain well-exposed photographs.

By focusing your attention on the exposure of the image on your LCD screen or in your electronic viewfinder while you are adjusting your aperture, shutter speed, and ISO settings you can easily see when your photo will look good.

Asian woman photographer 4 Tips to Help You Love Using Manual Mode

You need have your screen or viewfinder set so it’s neutral, not too bright and not too dark. To check this you can take a few test photos and then review them (on the computer). If they are over or underexposed adjust the brightness value of your camera’s LCD screen and/or viewfinder until your photos have the same exposure value you are seeing in the viewfinder or on your monitor in Live View mode.

2. Use Your Spot Meter

If you prefer not to use Live View or do not have an electronic viewfinder which displays the changes to the exposure value as you adjust your controls, using the spot meter can help you achieve more accurate reading and set your exposures more precisely.

Woman selling mangoes - 4 Tips to Help You Love Using Manual Mode

Modern cameras have a selection of metering modes which include a spot meter. Most often using the averaging mode, which takes a reading from multiple segments of the image area and gives an exposure value the camera calculates, is sufficient.

However, in some situations, particularly if your subject is back-lit or contrast in the scene you are photographing is high, using the spot meter setting will allow you to make a reading off the area of the image which is most vital to you.

For example, making a portrait where your background is significantly lighter or darker than your subject it is best to take a spot meter reading from their face as this is usually the most important part of your image. Using the averaged setting your camera’s meter will also read from the background and calculate that into the result it returns, potentially giving you a less than satisfactory exposure.

Karen woman smoking a pipe - 4 Tips to Help You Love Using Manual Mode

Learning to use your spot meter will assist you in creating more accurate exposures. I have one of the function buttons on my cameras set to switch to spot metering, allowing me to quickly and easily take a reading from any particular part of my composition.

3. Review Your Photos

It’s not a healthy practice to always be checking your camera’s monitor after every photo you take, as this can interrupt your attention from your subject. But it can be helpful to review your first few images after making adjustments to your exposure settings.

Taking a look at the results after changing your aperture, shutter speed, or ISO will give you a clear idea as to whether your settings are suitable for the photos you want to create. If you see a photo that’s too bright or too dark overall or in a part of the composition you prefer to see well exposed, then you will need to make some adjustment to your settings.

Asian woman reviewing a photo on a DSLR camera monitor - 4 Tips to Help You Love Using Manual Mode

As you practice this technique you may start to find you can estimate how much you need to alter your exposure settings rather than consulting your exposure meter again. This does take some practice, but if you form a habit of doing this, you will find this is a quick and easy way to achieve a better exposure.

4. Check Your Metadata

Our digital cameras record an incredible amount of metadata, associated information about each photograph you take. Learning to read and understand even a small amount of this information can assist you in producing more consistently pleasing exposures.

Back of a DSLR camera at dusk - 4 Tips to Help You Love Using Manual Mode

Being able to freely review the exposure value for any photo you have taken can help you understand why it’s good or maybe why it needs improving. I find this information most handy when I am sitting at my computer reviewing my images from a photography session.

Comparing photos made with different exposure values and looking at the metadata can help you have a better understanding of what settings you can use next time.

In Conclusion

Evening photo with bold colors taken during a Chaing Mai Photo Workshop

Autofocus, Facial Recognition, Auto White Balance, and ISO flexibility are all modern advancements in camera technology which make using Manual Mode easier. Because you don’t have to pay so much attention to these things and can better concentrate on setting your exposure well.

Exposure is one of the key elements of every photograph. Learning to understand how you can use the various features of your camera to assist you in making better exposures will help you become a more creative photographer.

?

The post 4 Tips to Help You Love Using Manual Mode appeared first on Digital Photography School.


Digital Photography School

 
Comments Off on 4 Tips to Help You Love Using Manual Mode

Posted in Photography


Which Size Lensball is Best for Crystal Ball Photography?

06 May

The world is in your hands, well it can certainly seem that way when you do crystal ball photography. The crystal ball allows you to take refraction photos, which reveal the background scene within the ball. It’s a great technique, with which many people are having a lot of fun.

The photographic technique has now become so popular that photographers have re-branded the crystal ball as a lensball! So the question that’s often asked is which lensball size is the correct one to buy? Let’s take a look at the various options available when buying a crystal ball, and decide which is the best for you.

Which Size Lensball is Best for Crystal Ball Photography? - 3 sizes

Which size of the lensball is the best? There are three here, an 80, a 120 and a 60mm ball.

Small Lensball

The small size lensball is anything less than 60mm, so all the way down to a marble. These balls are the easiest to pack and are considerably lighter than the other balls. So what are the strengths and weaknesses of this particular size?

Strengths

  • Weight – These add almost no weight to your bag at all, and this also makes them easier to use for handheld photos.
  • Size – Again owing to their small size they’ll be easier to pack, giving you more space for other items. The smaller size also allows you to place the ball in gaps where the larger balls won’t fit.
  • Handheld – This size makes it easier to hold the ball between your finger and thumb, which becomes more difficult at larger sizes.
Which Size Lensball is Best for Crystal Ball Photography?

This position to rest the ball is only possible with a small lensball.

Weaknesses

  • Weight – This is also a weakness. Once a heavy ball is in place it usually stays there. The problem comes on a windy day, where the wind can move a lighter ball much more easily.
  • Focus and distortion – This lensball size will have a smaller sweet spot for focus, and a greater proportion of the ball will be distorted. Using a smaller aperture can help, as more of the ball will be focused.
  • Lens required – You will need a macro lens when using a small lensball if you wish to fill the frame with the ball.
Which Size Lensball is Best for Crystal Ball Photography?

The small size is perfect to hold between your index finger and thumb.

Medium Lensball size

This refers to balls at 80mm in diameter. Many photographers see this as the ideal size for their refraction photography. There are a lot of good reasons why you should also use this size of lensball. Let’s break it down, as this is the crystal ball you’ll likely be using.

Strengths

  • Weight – This is a little heavier, but still not noticeable. So it’s a nice thing to carry in your camera bag to add a bit more creativity to your work.
  • Size – This is a decent size, though you might not fit this ball into a small space. The ball will fill a nice portion of your frame with a standard lens, using a macro is optional at this size.
  • Focus and distortion – By this size, the sweet spot area of focus within the ball dominates the scene inside the ball, and distortions at the edge are much less noticeable.

Weaknesses

  • Size – There are very few weaknesses in this size of a lensball. However, if you wish to take a photo where you frame just the edge of the ball this is more difficult. Likewise using the ball to eclipse a background object is also more difficult, as the ball is that much smaller.
Which Size Lensball is Best for Crystal Ball Photography?

The lensball is ideal for many kinds of creative takes on typical scenes. Here it’s used to capture a road lined with cherry blossom trees.

Large Lensball

The large size refers to those balls that are 100mm or over in diameter. This size is not common amongst most photographers, though this is the size I cut my teeth on for crystal ball photography.

Even with the extra weight, this is often the preferred size for me personally, it just gives better quality images in my opinion. Whether this is the size for you will come down to if you want to carry the extra weight or not.

Strengths

  • Optics – This size offers the best in optics, a larger proportion of the ball will be in sharp focus.
  • Handheld – This is a much more natural size to fit in the palm of your hand or someone else’s palm. One classic crystal ball composition is that of a hand cupping the ball.
  • Size – This makes it far easier to fill the frame with your ball, and even hide some background elements behind the ball.
Which Size Lensball is Best for Crystal Ball Photography?

A larger size ball will both fill the frame more easily and cover up the background when it’s close to the camera.

Weaknesses

  • Weight – The obvious weakness here is weight. Those not used to carrying a heavy camera bag should avoid this crystal ball size. The weight is equivalent to an extra lens in your camera bag. It comes down to whether you want an extra lens or the larger crystal ball in your bag.
  • Size – While optics are better when photographing this size, the larger size is not so good for storage. This will take up a large space in your bag.
Which Size Lensball is Best for Crystal Ball Photography?

This particular way of holding the crystal ball is one of the classics. It’s not so natural looking with a smaller sized ball.

Safety

The crystal ball is a really great photographic tool to play with, though there are some safety issues you need to be aware of. You will also find that staff in the airport may consider the crystal ball a lethal weapon! This means you will have to put it in your checked luggage, hand luggage is not an option.

So what are these safety concerns then?

  • Fire hazard – Keep the crystal ball stored somewhere out of the sun. The glass will act in the same way a magnifying glass does, and while this will usually only result in smoke it can lead to a fire as well. Oh not to mention, it can burn your hand when you are holding it as well!
  • Gravity – Due to its spherical nature the ball is liable to roll. If it rolls off the edge of a tall building it can cause damage to whatever it hits. Take care with the ball in such situations.
Which Size Lensball is Best for Crystal Ball Photography?

Having a small crystal ball with me enabled me to fit it in the gap of this fence.

Conclusion

Asking which size if crystal ball you should buy is a little like asking which is the best tripod. Everyone knows the sturdiest tripod is best, but that it’s impractical to carry around for the whole day.

The same is true of the crystal ball, the 80mm medium sized ball then is probably the best choice. There is certainly a case for the smaller or larger size of balls though, so if you decide to get a second ball how about a different size?

Using more than one ball at a time can also be fun!

As mentioned in this article, the 80mm is both not too heavy, yet doesn’t sacrifice the image within the ball making this a good size.

Have you bought a crystal ball, or are you thinking of doing so? We’d love to see your comments, and images – please share below.

The post Which Size Lensball is Best for Crystal Ball Photography? appeared first on Digital Photography School.


Digital Photography School

 
Comments Off on Which Size Lensball is Best for Crystal Ball Photography?

Posted in Photography


Tips for Editing Hockey Photos in Lightroom

06 May

In this article, I’ll give you some tips for editing hockey photos using Lightroom. If you’re a hockey mom or dad, read on to make the photos of your kid on the ice stand out.

Shooting hockey is hard

Have you ever tried to photograph lightning?

Sometimes that’s what it feels like when taking pictures at a hockey game. Every play is a blur. You can feel the game’s speed and intensity right until the final whistle. Emotion and sweat mix together on the faces of players who battle and fight for every inch, as the arena shakes with a thunderous ovation from the spectators.

Two hockey players battle for the puck

In short, it’s a whole lot of fun to capture through a camera. But after the crowds are gone and your ears have stopped ringing, it’s time to head home, load your images up on the computer and apply your special brand of editing.

Editing hockey photos can be tricky too

Regardless of what camera you use, all hockey images will benefit from some attention in Adobe Lightroom before you share them on social media or in a local publication. And despite the thrills of the sport, the arena is a tough place for a photographer. You have to deal with low or inconsistent light, high ISO settings and low shutter speeds, scuffed up glass and more.

Learning the technique to get decent shots in the first place is half the battle — but that’s a story for another time. Today, it’s time to head into the editing room.

Note that even though this guide specifically addresses features in Adobe Lightroom, the same concepts can be used in any photo editing program with similar controls.

Shoot in RAW

First off, if you’re serious about getting the best hockey pictures possible then it’s a good idea to shoot in RAW. Sure, file sizes are a lot larger, but this is because more data is preserved for each shot. When you’re editing, you’ll be thankful for all the extra leeway you can get with a RAW file over a JPG.

A hockey player sitting on the bench during a game

That’s not to say that you’re doomed if you shoot JPG. It just means you’ll need to be extra careful getting the settings right in the camera since there won’t be nearly as much flexibility when editing later. The choice is yours.

Cull Aggressively

Culling is the process of removing and maybe also deleting photos that simply don’t make the cut.

Not every image is a keeper. Especially in sports photography, you’re going to get images that are out of focus, poorly composed or simply not very interesting. If your goal is to edit every single image you take, you’re going to go crazy.

Choose the best of the best to focus your time and energy on, and then start editing those.

Cropping and Straightening

It’s rare to nail the best possible composition right in your camera. Sure, it happens from time to time, but it’s more likely that your pictures will benefit from a bit of cropping and straightening.

Consider what’s important in the frame. You want to have a nice balanced composition that fills the image. Think in terms of simplicity: if you crop out a stick or skate that appears in the corner of the image it will help your final picture feel more clean and professional.

The unedited image of a hockey player on a breakaway - Tips for Editing Hockey Photos in Lightroom

This is the image out of the camera. It’s already a fairly tight shot, but it would be even better with a crop.

A hockey player on a breakaway against a goaltender - Tips for Editing Hockey Photos in Lightroom

That’s more like it! Now the action feels close and intense.

It might not be possible to do a tight crop of a shot and maintain quality, depending on how your camera handles high ISO settings. If you find that your images are always just a little too zoomed out, remember that for next time you photograph a game.

Straightening out your images is a big help as well. As you track the play through your camera, it’s easy to start tilting the camera.

There are times when a crazy tilt gives a sense of action and energy to a picture — but often it just looks like the players are about to tumble out of one side of the image.

An unbalanced image of a hockey goaltender - Tips for Editing Hockey Photos in Lightroom

The players by the bench look like they’re ready to slide down to the bottom left side of the shot.

A hockey goaltender taking a break while the crowd cheers - Tips for Editing Hockey Photos in Lightroom

This straightened version feels a little more stable.

Take the time to straighten your pictures and they’ll look much more professional and balanced.

Understanding White Balance

Cameras interpret color differently than our eyes do. Under tricky lighting conditions, cameras don’t always capture an accurate representation of color.

Correcting the White Balance is an important part of your final edit since it’s hard to appreciate an image that looks too blue or too yellow. If you shoot in RAW, you can adjust the White Balance without losing any image quality. With JPG, you can still make minor adjustments but don’t count on being able to save many images.

An example of the white balance settings in Lightroom

The White Balance slider in Lightroom.

If you have a shot that needs to be fixed, the eyedropper tool can be useful for getting you fairly close to the mark. Click on something in the shot that is a neutral color, such as the boards, and then adjust from there. Pay close attention to skin tones and always remember that the ice should be white.

A hockey image with a poor white balance setting - Tips for Editing Hockey Photos in Lightroom

The Auto White Balance setting missed badly on the original shot, choosing to use 4450K

Hockey players fighting for the puck - Tips for Editing Hockey Photos in Lightroom

After some correction, I settled on 3800K as a White Balance that displays the colors more accurately.

Finding the right White Balance can be tricky, especially since different display screens can have subtle variances. But with a bit of practice, correcting the White Balance in your shots will become a piece of cake.

Contrast, Shadows, Blacks and Dehaze

Your approach with editing is going to be very different depending on whether or not you have to shoot through the glass. In the NHL, photographers either shot through a small hole in the corners or from higher angles where they can see above the glass. But you may not have that luxury.

Shooting through thick glass usually robs a picture of a lot of its contrast. Contrast plays an important role in giving an image depth and making it “pop”. So you’ll need to add that back in the final edit.

Lightroom offers a couple of sliders that can manage this.

  • Contrast: This slider will make dark mid-tones darker and light mid-tones lighter. When used in moderation it can make a picture appear richer, but be careful not to overdo it and create surreal tones.
  • Blacks: This slider influences the darkest tones of the image. This can be useful for fixing hockey pants, sticks and skates so that they are black again, rather than a faded dark grey.
  • Shadows: This slider affects the mid to dark tones of the image. Typically this slider plays a big role in determining the brightness of the crowd and the players’ faces.
  • Dehaze: Introduced only a few years back, the Dehaze slider tries to interpret how light has been lost and scattered in the image. It works well with foggy images and is actually a good fit when shooting through hockey glass as well.
A low contrast image of two hockey players, taken through the glass - Tips for Editing Hockey Photos in Lightroom

This shot was taken through the glass. The colors are weak and the contrast is very poor. Overall, the image looks dull.

Two hockey players fighting for the puck in the corner of a rink - Tips for Editing Hockey Photos in Lightroom

After applying Contrast and Vibrance, the picture comes back to life! This image uses the following settings; Contrast +45, Shadows +42, Blacks -19, Dehaze +25.

If you’re lucky enough to get the chance to shoot without a pane of glass between you and the players, these contrast sliders will still be an important part of your final edit.

There is no “right” amount of contrast to use; just adjust the slider to taste and to make sure the final image is full and rich.

A hockey player on the bench during a game - Tips for Editing Hockey Photos in Lightroom

With no glass between the player and the camera, this shot is clear. It still benefits from some contrast to bring out color and drama.

Lightroom settings for a hockey image - Tips for Editing Hockey Photos in Lightroom

Adjustments used for the image above.

Keep your Whites White

The ice at a hockey rink is white. That means that it should be white in your final image as well. This can be a tricky process, especially since cameras don’t “see” the same way that your eyes do.

If you overexpose an image, the ice might turn into a uniform blob of white. If you underexposure, the ice becomes a murky gray. It’s a delicate balancing act.

An underexposed hockey image where the ice has turned a shade of gray - Tips for Editing Hockey Photos in Lightroom

A perfectly timed snap – but the underexposed ice looks terrible!

Once again, shooting in RAW gives you a bit of leeway. With RAW you can get good results correcting the exposure by plus or minus two stops. With JPG, a missed exposure could mean that the picture needs to go into the trash.

When editing, you’ll want to pay attention to your histogram and clipping warnings. If the ice is overexposed, it will show as a line right up against the right side of your histogram. Your final image should have bright ice but without clipping.

The histogram of a hockey picture - Tips for Editing Hockey Photos in Lightroom

The histogram of a typical hockey image (above). The mountain far to the right is the white of the ice. If it was all the way to the right, we’d start losing detail in the highlights.

A hockey player jumping into the air in celebration after scoring the winning goal - Tips for Editing Hockey Photos in Lightroom

After some tweaks to the exposure, the celebration can begin!

In Lightroom, you can adjust the overall image with the exposure slider, or you can target the ice surface more precisely by adjusting the Highlights or Whites sliders.

Start by adjusting the “Whites” slider, as this controls the maximum brightest point of the image. Once this is set, you can also adjust the “Highlights” slider, which affects a range of the brightest tones.

The goal should be to bring out a bit of the texture in the ice made of snow and grooves carved into the surface.

Brushes, Graduated Filters & Other Adjustments

Now let’s dig into some of the incredible tools in Adobe Lightroom. This is the point where your friends will wonder what kind of wizardry you are conjuring up to make your pictures look so good.

Adjustment brushes give you pinpoint control over selected areas of a picture. This is perfect for when you’ve got your whole image to a good point, but there are just a few more details that you can’t let slide.

Brushes can be used to apply any of Lightroom’s editing features. In the example below, I can use a brush to brighten up one of the players, who was a bit too dark in the finished image.

A hockey image with a adjustment brush applied to it - Tips for Editing Hockey Photos in Lightroom

The player in black was just a little too dark, even after all our adjustments. Never fear – now’s the time to use an Adjustment Brush.

Setting for an adjustment brush used on a hockey picture

Above are the settings applied to the brush. We’re raising the shadows to make the player brighter, but also adding contrast so that the adjustment doesn’t look unnatural.

The final hockey image, after an adjustment brush was applied - Tips for Editing Hockey Photos in Lightroom

The final image looks much more balanced!

Graduated Filters are fantastic for tackling uneven light or color shifts. If you’re a photographer in the big leagues, chances are you’ll be shooting at arenas with top-of-the-line lighting. But most of us aren’t there yet.

You’re probably more familiar with an old rink that has flickering lights, sections of the ice that are darker, or even the dreaded mixture of color temperatures. Find yourself in this situation and it’s going to take some fancy footwork to save your image.

The image below stood out for its strong composition and a good view of the players’ faces, but it doesn’t get much worse than the uneven light. No fear, Lightroom to the rescue!

An ice hockey image that is nearly ruined by poor lighting and color casts - Tips for Editing Hockey Photos in Lightroom

Ugh! This picture is the perfect example of terrible hockey rink lighting. Is it even possible to save it?

Using a graduated filter to fix the color cast on a hockey picture - Tips for Editing Hockey Photos in Lightroom

Fortunately, this shot was taken in RAW. So after applying some exposure and contrast adjustments, we can now use a Graduated Filter to try to fix this mess.

Settings on the graduated filter of a hockey image

The settings on the filter (above). We’re giving it a bump in exposure, and some heavy White Balance corrections.

The edited image of hockey players celebrating after a goal - Tips for Editing Hockey Photos in Lightroom

Voila – the picture is saved!

Lastly, Lightroom also offers a Radial Filter, which can be used to create effects similar to a vignette. This is a useful tool for subtly drawing attention to a certain player.

Saturation, Vibrance & HSL

Hockey sweaters are typically bright and vibrant with color. However, high ISOs, poor lighting, and dirty glass can often cause those colors to appear faded and drab in your image.

The Vibrance and Saturation sliders play an important role in bringing your image back to life with color.

Hockey players wearing bright red hockey jerseys - Tips for Editing Hockey Photos in Lightroom

For more precise control over colors, you can also turn to the HSL sliders. HSL stands for Hue, Saturation, Luminance, and these sliders allow you to modify an individual color in the image.

Is the home team wearing yellow? You can make their shirt colors “pop” by adding a saturation boost in the yellow channel but be careful not to ruin the balance in the rest of the image.

A hockey player deeking around a defender - Tips for Editing Hockey Photos in Lightroom

The settings of an HSL slider in Lightroom for a hockey image

Example of how to give just the yellow channel a bump in saturation.

If you’re looking for a more advanced application of the HSL sliders, try using them to eliminate unwanted colors from your image.

The image below is suffering from being a bit too colorful. All the spectators in the back, plus the yellow on the goaltender’s glove don’t really suit the color palette.

Fortunately, we can go in and start reducing the saturation of those colors that don’t fit in the image, giving a more professional and cohesive final shot.

A hockey goalie waiting for the face-off - Tips for Editing Hockey Photos in Lightroom

An intense shot, but the mishmash of color in this image is a bit distracting.

The adjustments made to the HSL sliders for a hockey image

These settings reduce the saturation on several channels. Note that we aren’t affecting either team’s colors.

The final edited image of a hockey goalie waiting for the puck to drop - Tips for Editing Hockey Photos in Lightroom

It’s a subtle effect, but now the colors are a bit more controlled, which improves the overall quality of the image.

The HSL sliders are also an invaluable tool for controlling unwanted color casts in your final image. If you can’t quite seem to find the right White Balance and there’s an overly blue or yellow tone lingering in your image, you can reduce the saturation for that specific color.

This might be necessary when shooting in arenas that have uneven lighting or that use a variety of types of light.

Adding Grit

Hockey isn’t a soft game. Play can get rough and gritty in a hurry — and you may want to try to capture a flavor of that in your edit. For this, you can turn to the Clarity slider.

The Clarity slider controls edge contrast. Using a pinch of Clarity can really help with bringing out textures and lend a gritty feel to the image.

A hockey player on the bench, with a pinch of clarity applied - Tips for Editing Hockey Photos in Lightroom

A +10 Clarity boost keeps this picture grounded in reality.

A hockey player on the bench, with clarity heavily applied

Sliding Clarity up to +85 creates a distinct and gritty style.

Be aware of how stylized you want your image. If you’re trying to edit the image to reflect reality, the Clarity slider should be used in moderation. But if you’re looking to let loose and create a bold, loud image, the Clarity slider can quickly become your best friend.

Sharpening & Noise Reduction

We’re getting close to the finished product! The combination of fast-paced action and high ISO speeds means that you’ll need to pay a bit of attention to sharpening and noise reduction.

Examples of sharpening and noise reduction in a hockey image

This is a tight crop of the finished image. Sharpening is set to +40 and Noise Reduction is +15. There’s still some grain, but it isn’t overly distracting.

Examples of sharpening and noise reduction in a hockey image

Now we move both Sharpening and Noise Reduction to +100. The grain is gone, but all details and texture have been smoothed out of existence as well.

A hockey goalie exits the bench and goes out onto the ice at the start of the game

The finished image, with +40 Sharpening and +15 Noise Reduction.

While modern cameras have vastly improved how much grain is produced in high ISOs, you’ll want to add some Noise Reduction. Don’t panic about the amount of grain while viewing the image at 400% zoom. Some grain is okay — in fact, it will be barely noticeable at all when viewing the picture under normal circumstances.

Noise reduction should be beneficial to the image; if you notice that details start to lose definition, then you’ve overdone it.

Sharpening can be added according to taste as well. Oversharpening can make the image look metallic and fake, so try to find the right balance.

Export and Share!

Last but not least, click “Export” and share your shots with the world! Maybe you’ve grabbed some awesome shots for a friend or family member, or maybe you’ve set a goal to become a professional photographer for the NHL.

A hockey team celebrates winning the trophy

Either way, you’re sure to have learned a few more tricks and will be able to apply that newfound knowledge to the next game you photograph.

Good luck chasing those elusive action shots!

The post Tips for Editing Hockey Photos in Lightroom appeared first on Digital Photography School.


Digital Photography School

 
Comments Off on Tips for Editing Hockey Photos in Lightroom

Posted in Photography


Event Photography Etiquette: Avoid Embarrassment With These 10 Dos and Don’ts

06 May

Maybe you’re already a seasoned event photographer interested in improving your business, or perhaps you’re reading this because you’re about to photograph your first event and want some pointers. As a photographer, you want to be keenly aware of your image as well as behavior when working on-site with clients. A superior professional image shows the world that you’re both competent and worth the cost of your services for event photography.

This article provides my recommendations on how to appropriately conduct yourself before and during an event photography shoot. Positioning yourself to land assignments and inspire confidence in your clients starts with your demeanor and presence.

1. DO Wear Appropriate Clothing

Your apparel says a lot about you. On one event photoshoot, I was approached by a guest who appeared interested in hiring me for a freelance job. But he hesitated, saying “Honestly, you look expensive. I’m not sure I can afford you.” While that assumption may have been right, his reaction was far better than “You look cheap, maybe I can lowball you.”

man in tuxedo toasting - Event Photography Etiquette: Avoid Embarrassment With These 10 Dos and Don'ts

Always ask your client about the dress code ahead of the event. Did you forget to ask? Play it safe and dress your best. It’s better to be the sharpest dressed person in the crowd than the jeans-and-t-shirt person in a sea of tuxedos.

group in tuxedos -Event Photography Etiquette: Avoid Embarrassment With These 10 Dos and Don'ts

2. DO Respect Privacy

As a photographer, you’re probably familiar with the fact that not everyone likes being photographed, much less by a stranger. In order to make guests feel at ease, introduce yourself, “Hi, my name is John/Jane Doe and I’m here Photographing for XYZ Media.”

Guests might ask for further info, such as where the photos will be displayed. It’s wise to gather this info with your client ahead of time. Sometimes an introduction isn’t necessary. Once guests see you making the rounds with your camera, they might just grab you for a quick shot, no questions asked.

beef sliders - Event Photography Etiquette: Avoid Embarrassment With These 10 Dos and Don'ts

To avoid liability/privacy concerns, you can specify in your contract that it’s the client’s duty to inform guests of a photographer’s presence for the event. In my experience, clients have no issue with this.

3. DO Show up Early

Most of my event clients want to know that I’m willing and able to arrive early, which I do as a courtesy at no extra charge.

menu on a plate - Event Photography Etiquette: Avoid Embarrassment With These 10 Dos and Don'ts

Showing up early not only allows you to familiarize yourself with the venue and points of contact, but also shows your professionalism. Take precautions: Leave extra time in case of traffic, car troubles, or those dreaded wardrobe or equipment malfunctions. Plus, when you arrive early you can grab some preliminary test images of the venue/rooms as well as important detail shots.

4. DO Learn People’s Names

If you sometimes have trouble remembering names, as most of us do, take care to write down all client names (especially new clients) in BIG letters on your notes sheet for the event.

Everyone likes hearing their name, and a prospective client will subconsciously be more impressed if you can end the conversation with a friendly, “Well Kathy, I’m glad we talked and I’m looking forward to working with you.” Re-read that sentence in your head but without the name this time. It sounds a bit cold and dry, right?

5. DO Interrupt as Politely as Possible

As you make your rounds during a networking or cocktail hour, many people will be engaged in conversation. When it’s unavoidable interrupting a conversation, I recommend approaching while making eye contact.

Mexico Consulate Award - Event Photography Etiquette: Avoid Embarrassment With These 10 Dos and Don'ts

Typically someone in the group will notice you and your camera and know what you want. If nobody notices you, don’t be too shy or just stand there awkwardly. A gentle tap on the shoulder might be in order. Of the hundreds of times I’ve approached people for photos, I seldom get a “no”. People understand that photography is my job, and most are happy to pose for a photo.

6. DON’T Photograph People Eating

For most events over two hours in length, there will be a portion where guests are treated to a meal or hors-d’oeuvres. Photos of people eating should be avoided, so this is your chance for a work break.

Pay attention, however, because you can get some great candid photos of tables at the tail end of a meal when the satisfied diners are typically in a good mood. I’ve captured many great photos of guests post-meal laughing and chatting this way. I recommend standing back and using your zoom lens to capture these images.

people talking - Event Photography Etiquette: Avoid Embarrassment With These 10 Dos and Don'ts

7. DON’T Be Pushy With Public Figures or Celebrities

You might be excited to learn that someone notable, a political figure or even your favorite musician will be attending an event. Thanks to the bad behavior of so many paparazzi over the years, many public figures dislike or distrust photographers. Can you blame them?

Radio Show awards photo - Event Photography Etiquette: Avoid Embarrassment With These 10 Dos and Don'ts

Keep this in mind as well: most celebrities dislike being told what to do. If you’re photographing a meet-and-greet situation and it’s not an intimate portrait session, be careful about asking a celebrity to strike a pose or shift position, regardless of whether or not it would help the photo. Try to gauge the individual’s temperament and mood. If he or she ignores your question or reacts badly, don’t persist! Shooting around such non-cooperation will be necessary.

8. DON’T Show Alcohol or People Drinking

Not everyone cares if they’re photographed holding a beverage; in fact, some people like that image. Regardless, as a courtesy to guests, it’s best not to show them drinking alcohol. When photographing a group of guests standing around a table, it’s a good precaution to ask whether any of them would prefer to set their drinks down first.

Wiley Awards Ceremony lady with wine - Event Photography Etiquette: Avoid Embarrassment With These 10 Dos and Don'ts

Wiley Awards Ceremony image cropped - Event Photography Etiquette: Avoid Embarrassment With These 10 Dos and Don'ts

Cropped to remove the drink.

9. DON’T Drink Alcohol While Working

Quite often you’ll find alcohol flowing freely at events and parties, including even the high-level corporate get-togethers. You may be tempted to join in on the fun. If you are, I recommend waiting until your job is done and your camera gear is safely stashed away before indulging.

You wouldn’t want your client to give you the okay, only to have the CEO of the company or the bride’s father spotting you with a tall glass of whiskey in one hand and a camera in the other. You’re a professional, and that’s not a good look for you.

Editor’s note: I personally would recommend NEVER drinking at an event you are hired to attend, even if you are done shooting for the night. Other people can’t know that you’re off the clock. They just know that you’re the official photographer and that they saw you drinking. So use your own judgment.

wine bottles - Event Photography Etiquette: Avoid Embarrassment With These 10 Dos and Don'ts

10. DON’T Make Sales Pitches to Attendees

I recall reading a one-star review of a wedding photographer who acted completely inappropriately on a job and it stuck with me. Not only did that photographer allegedly flirt with the bridesmaids but he tried handing a business card to the groom during the cake-cutting ceremony instead of photographing his client’s special moment.

Take note: Bad timing and poor social awareness could land you poor reviews and do harm to your business and reputation.

That’s not to say that your conversations with attendees couldn’t turn out to be productive, just remember that your paid job at the event is to photograph. Assuming that you’re maxing out your assignment, it’s fine to chat with guests here and there. But let the subject of your services arise from their questions, not from your self-promotion.

Summary

In summary, there are many precautions to consider in order to come off as a professional at an event. Whether it’s a wedding, party or corporate engagement, self-awareness is key, and a little preparation can go a long way in demonstrating your competency and professionalism.

If you follow these tips and do your best work, your clients will undoubtedly be impressed and more importantly – happy.

The post Event Photography Etiquette: Avoid Embarrassment With These 10 Dos and Don’ts appeared first on Digital Photography School.


Digital Photography School

 
Comments Off on Event Photography Etiquette: Avoid Embarrassment With These 10 Dos and Don’ts

Posted in Photography


Weekly Photography Challenge: Flowers – with Prizes from ViewBug

05 May

If you didn’t already cover this topic from last week’s photography challenge (spring) now’s the time to get some flowers.

Photo by dPS writer Jaymes Dempsey

There are many ways to photograph flowers. Here are some ideas:

  • How to do Photography of Frozen Flowers
  • 3 Tips for Taking Photos of Flowers
  • How to Create Gorgeous Flower Images using a Flashlight and a Reflector
  • Five Ways to Take Your Macro Photography to the Next Level

Weekly Photography Challenge – Flowers

Simply upload your shot into the comment field (look for the little camera icon in the Disqus comments section) and they’ll get embedded for us all to see or if you’d prefer, upload them to your favorite photo-sharing site and leave the link to them. Show me your best images in this week’s challenge. Sometimes it takes a while for an image to appear so be patient and try not to post the same image twice.

Share in the dPS Facebook Group

You can also share your images in the dPS Facebook group as the challenge is posted there each week as well.

Win Prizes from ViewBug

We’re excited to introduce a sponsor and prizes for this week’s challenge. ViewBug is the World’s biggest photo contest community with over 70 contests always open for submissions. Win prizes, exposure, and the bragging rights. It’s FREE to join! This week, ViewBug will be awarding three winners prizes!

One Challenge winner will receive 1 year of ViewBug PRO ($ 139 value) plus a free photography logo bundle ($ 59 value). Two Runners Up will receive a 1 year of ViewBug Premium ($ 59 value) plus a free photography logo bundle ($ 59 value).

To Enter

Participate in the challenge as you normally would (as described above) by posting your photo. To be considered for a prize you just need to complete the entry form below (or via this link) and submit the link to your photo.

The Contest is open continuously from 05:00am Australian Eastern Standard Time (“AEST”) on May 5, 2018 (03:00pm United States Eastern Daylight Time (“EDT”) on May 4, 2018), through May 12, 2018, 04:59am AEST (May 11, 2018, 02:59pm EDT) (the “Contest Promotion Period”).

Full Terms and Conditions Digital Photography School Weekly Challenge – ViewBug T&C.

Winners are announced on the Weekly Challenge Winners page on 19th of May.

?Loading…

The post Weekly Photography Challenge: Flowers – with Prizes from ViewBug appeared first on Digital Photography School.


Digital Photography School

 
Comments Off on Weekly Photography Challenge: Flowers – with Prizes from ViewBug

Posted in Photography


Three 2-Minute Tips to Get You Thinking

04 May

The folks over at Adorama TV have a series of 2-minute tips by David Bergman which I think is brilliant! You can watch one while you’re standing in line at the grocery store, waiting for your food at a restaurant, or when you only have a limited time.

So I selected three that I think are particularly helpful. Check these out and the rest of the series on the Adorama TV channel.

Autofocus modes

In this video, David explains the difference between the two main types of autofocus modes of your camera and when to choose and use each of them.

Lens Hoods

See why David almost always uses a lens hood when he’s shooting and when he might remove it in this next video.

?

Steady as She Goes

Get some quick tips on keeping your camera steady so you can get the sharpest images possible, even at slower shutter speeds.

?

The post Three 2-Minute Tips to Get You Thinking appeared first on Digital Photography School.


Digital Photography School

 
Comments Off on Three 2-Minute Tips to Get You Thinking

Posted in Photography


SLC-1L-03: Need Light With More Edge? Aim It Away From Your Subject.

04 May

The two photos above have the same light source, same light location and same white background. The only difference in the second photo is that the light has been aimed differently. Pointing your light away from your subject—and using the edge of the beam—is a quick way to sculpt much more interesting light on a head shot or portrait.

But how far away do you need to aim it? Further than you'd think. And finding the nice edge to your light is definitely a game of inches.

Here's how to do it.Read more »
Strobist

 
Comments Off on SLC-1L-03: Need Light With More Edge? Aim It Away From Your Subject.

Posted in Photography


How to Control Your Background Tones by Manipulating Light Fall-Off

04 May

In this article, I’ll show you how to control your background by manipulating light fall-off.

When using studio lighting, one of the most frustrating things to deal with can be backgrounds. Sure, if you have space, time and the money, you can just stock up on seamless backgrounds covering white, black and everything in between. But if you are on a budget, or are already taxing the limits of your storage space, that’s often not a viable option.

The good news is that it’s entirely possible to take a white or grey background, whether it’s a wall or a seamless backdrop, and manipulate your light so that the background appears black or any shade of grey you can imagine.

The method discussed in this article is quite easy.

How to Control Your Background by Manipulating Light Fall-Off - portrait with black background

Understanding how the rate of fall-off effects your lighting will grant you great control over how your background appears in your photos.

Move the light

To control your background, all that you have to do is move your light. It’s counterintuitive though. To get a darker background, you will move the light closer to your subject. For a lighter background, you would move the light further away.

This approach has the effect of changing the background; however, it also completely alters the quality of light falling on your subject.

For this demonstration, I used a small softbox (around 3×4′) placed directly in front of and above the subject. In the sequence of images below, you can clearly see that the light source is simply moved backward in increments of two feet. Also, you’ll see that the softbox was angled upwards slightly as it moves back so that it points toward the subject and not the floor.

How to Control Your Background by Manipulating Light Fall-Off

The light source is two feet away from the subject and angled down at forty-five degrees.

How to Control Your Background by Manipulating Light Fall-Off

At four feet, the light had to be angled upwards slightly so that it remained pointed at the subject.

How to Control Your Background by Manipulating Light Fall-Off

At six feet, the light on the subject gets noticeably harder, but the background appears as it is in life (its actual shade).

How to Control Your Background by Manipulating Light Fall-Off

The light source as seen 10 feet from the subject.

In terms of the background, the way this works is through light fall-off. As the light source gets closer to your subject, the rate of light fall-off increases.

In the simplest terms possible, this means that as you move your light closer to your correctly exposed subject (remember to recalculate your exposure everytime you move your light), the light reaching your background loses intensity at a higher rate, making the background appear darker.

In this progression (starting left to right) the light begins two feet away from the subject and is moved back in two-foot increments until it is 10 feet away in the right-hand frame.

For these examples, I used a middle grey background to better illustrate the dramatic changes in tonality as the light is moved.

In the first image on the left, the light is two feet away from the subject, rendering the grey backdrop nearly black. At four feet away, in the second image, the background gets noticeably lighter. By the fifth image, at 10 feet away, the grey tone of the background almost matches the subject’s light grey shirt.

Because the light was moving away from the subject in each frame, the exposure had to be metered for each change. The image on the left was shot at f/11, while the one on the right was shot at f/2.8, which is a total of four stops of difference in exposure.

Left: soft light with the light source two feet away. Right: hard light then it’s 10 feet away. Here you can clearly see the difference in the quality of light. Pay close attention to the tonal transition between the shadow and highlight areas of both images.

It’s important to note that moving the light closer, or further away, will also have a dramatic effect on how the light appears on your subject. As the quality of light is altered on the background, it also changes on your subject. Bringing it in close will change both the softness and intensity of the light on your subject, making it both brighter in terms of exposure and softer (quality of light is directly related to the size of the light source and distance from the subject).

Moving the light away from your subject will result in a lighter backdrop. Aside from that, this will also result in harder light on your subject. Just be aware that a lot of subjects won’t suit being lit with hard light and be careful with how far you go, and you should be fine.

Move the light too far back, however, and you may as well be using a small flash from a closer distance. For example, the softbox used here from 10 feet away is only barely distinguishable from a bare speedlight at a closer distance.

The end

That’s it. This technique is easy to put into practice even if you don’t yet understand the technicalities of the Inverse Square Law that makes it work. It isn’t foolproof, however, and you may want to have other tricks up your sleeve if you’re in a position where you don’t have enough space to work with.

Background lights and flags can both go a long way to helping you solve exposing your background the way you want as well. This method is just one other option to add to your skillset, hopefully bringing you one step closer to getting things right in camera.

The post How to Control Your Background Tones by Manipulating Light Fall-Off appeared first on Digital Photography School.


Digital Photography School

 
Comments Off on How to Control Your Background Tones by Manipulating Light Fall-Off

Posted in Photography


Are You Making These Five Food Photography Mistakes?

03 May

There are some common mistakes photographers make when starting to shoot food. Are you guilty of these five food photography mistakes?

There is a saying that if you can shoot food, you can shoot anything. Some would disagree with this, as every genre of photography has its own challenges. However, food can be very difficult to shoot purely for the reason that it dies in front of the camera so quickly.

One minute your towering stack of pancakes causes your salivary glands to go into overdrive, the next minute you wouldn’t feed the pancakes to the dog. Despite what many an Instagram account would have us believe, a lot of food is not really that good-looking. It’s up to the photographer and usually a food stylist and a whole team of people to create the drool-worthy images you see in cookbooks and magazines.

peach tarts - Are You Making These Five Food Photography Mistakes?

Great food photography is about planning and considering all the details up front. It is also a process of constant problem-solving. Thinking through the key aspects that make up a great food photograph before picking up your camera will go a long way towards helping you get the best results.

#1 – Bad Light

As with any form of photography, the most important principle is light. Without light, you’d have nothing. This is why photography is often referred to as “painting with light”. Whether you are using natural or artificial light, the approach you take with your lighting will make or break your photographs.

Often what separates the professional food photographers from hobbyists is their keen understanding of the physics of light and how to manipulate it to get the effect they want. If a client wants you to shoot their orange juice product to look like it was taken early in the morning on a sunny day and you live in rainy London, you will have to know how to recreate that light.

Are You Making These Five Food Photography Mistakes? - breakfast sandwich

Lighting is not just about getting enough light onto your subject. As long as you have some light, you can get a decent shot with a longer exposure. Good lighting is also a matter of correct light.

For example, a common issue is restaurant photography where the indoor lighting contaminates the scene, creating unwanted color casts, particularly in the highlights. This can be difficult to fix in post-processing but can be avoided by overpowering the ambient light with a flash system, such as a speedlite, or flagging (blocking) the top to keep the unwanted light from hitting your set.

Are You Making These Five Food Photography Mistakes? - types of lighting

#2 – Poor Composition

Image composition is an art form in itself. Apart from light, it’s one of the most difficult aspects of food photography to master. It can take years for composition to become second nature to you. Going in-depth on this is beyond the scope of this article, but there are some things to be aware of that can help you improve your compositions right away.

To start with, keep it minimal. Your main subject with a couple of supporting elements, like a prop and a square of linen is all you need. Use three to five elements in your composition. Using odd numbers while composing your scene will add more symmetry and balance than even numbers, which can create competition between the elements and divide the viewer’s attention.

Are You Making These Five Food Photography Mistakes? - cinnamon buns

Think about the textures in your scene. Adding texture in terms of your props or surfaces and backgrounds, or even supporting ingredients such as seasonings or garnishes can really elevate the simplest food image.

Another tip is to keep your surfaces and background neutral. Bright colors will detract from the food and even cast unwanted tones onto the food.

#3 – Incorrect Angle of View

Before beginning to shoot, it’s crucial to decide on the best angle to shoot your food scene. The right choice will depend on your subject.

Foods with several layers, like burgers or stacks of pancakes, look best when shot at eye level, so every element can be seen. On the other hand, flat foods like pizza and cookies look best shot from overhead or at 90 degrees, as this angle puts everything on an even plane and brings a graphic element to the subject.

This is a great angle for tablescapes or other scenes where there are numerous elements that might not otherwise fit into the frame.

Are You Making These Five Food Photography Mistakes? - pizza shot

Another popular angle is forty-five degrees or three-quarters view. This angle works in many situations with many types of food. It works with most focal lengths and the main subject’s shape, height and texture are displayed.

fettuccine with peas - Are You Making These Five Food Photography Mistakes?

One angle I would rarely recommend is a low camera viewpoint, where the camera is aimed slightly upwards. You sometimes see this in burger advertisements, but it rarely works for most types of food subjects.

#4 – Incorrect Focus

When approaching a shoot, you also need to be aware of where the sharpest focus should land. Typically this will be more toward the front of the food. In addition, think about how much of that area should be in focus. This will influence the f-stop (aperture) you choose.

I rarely shoot any lower (wider) than f/5.6 for my food compositions, as I find not enough of my subject will be in focus otherwise. When shooting food, the objective is to show off the food and make it look its best, which won’t happen if most of it is blurry.

Once you have taken your shot (preferably with your camera tethered to your laptop) check your focus at 100% magnification. Make sure focus is where you want it and the depth-of-field is not too shallow.

chia pudding_darina kopcok_DPS

Also, calibrating your lens to your camera will ensure that you are not missing focus due to technical issues.

#5 – Cropping Incorrectly

The beauty of digital photography is that you can sometimes address issues that you have encountered during your shoot in post-processing. One example of this is using the crop overlay tools in Lightroom or Photoshop to finesse your compositions. However, image crop is a point that needs to be addressed when shooting.

Common mistakes new food photographers make is shooting the main subject too close, to the point the viewer doesn’t understand what is being portrayed. Or the cropping is too tight to show the food in its best way.

In the image below, the Indian-spiced prawns look much better when the scene is shot wider and includes a couple of elements that they’d be eaten with, like naan bread and chutney. The closer shot lacks movement and flow and is overall less appealing.

indian prawns - Are You Making These Five Food Photography Mistakes?

When shooting, try a couple of different crops and see which looks best. Also, a good tip is to shoot your scene wider than you want it to look in the final image so you can use the crop guides in your post-processing program of choice to improve your composition.

croissants - Are You Making These Five Food Photography Mistakes?

Hopefully, these tips will help you plan for your next food shoot. Let me know in the comments some of the challenges you’ve faced with your own food photography and how you’ve overcome them. What food photography mistakes have you made?

The post Are You Making These Five Food Photography Mistakes? appeared first on Digital Photography School.


Digital Photography School

 
Comments Off on Are You Making These Five Food Photography Mistakes?

Posted in Photography