RSS
 

Archive for the ‘Photography’ Category

How Conquer Your Fear of People as a Photographer

25 May

You know the feeling; shyness around strangers, dreading new situations, sleepless nights worrying, completely self-conscious in a crowd, thinking that everyone is judging you. In short, a fear of people.

Your fear and inhibition are like having “stage fright” in everyday life. All of this leads to you suppressing your personality, your creativity, and any chance to share your gift of photography with your culture and the world. All of this fear is dangerous because it blocks your creativity, making you become miserable and anxious.

But there is hope for you because many folks have overcome their fear of people and gone on to thrive as photographers. Below are five exercises that will help you to conquer your fear of people too.

Climbing child on playground equipment - How Conquer Your Fear of People as a Photographer

My son used to be afraid of heights at the playground. But I knew he could overcome it. So every time we were at the playground I would encourage him to try something with heights. He’d go just a little bit higher each time until he had completely overcome his fear.

How to Overcome Self-Consciousness and Fear

“If you want to conquer fear, don’t sit home and think about it. Go out and get busy.” – Dale Carnegie

The way to overcome self-consciousness, fear, and shyness is to practice the healthy opposite.

What is the healthy opposite of fear and inhibition? Having a healthy confidence, the ability to enjoy other people, and the courage to try your best and accept constructive criticism. Here’s how you can work toward that.

Window light portrait. - How Conquer Your Fear of People as a Photographer

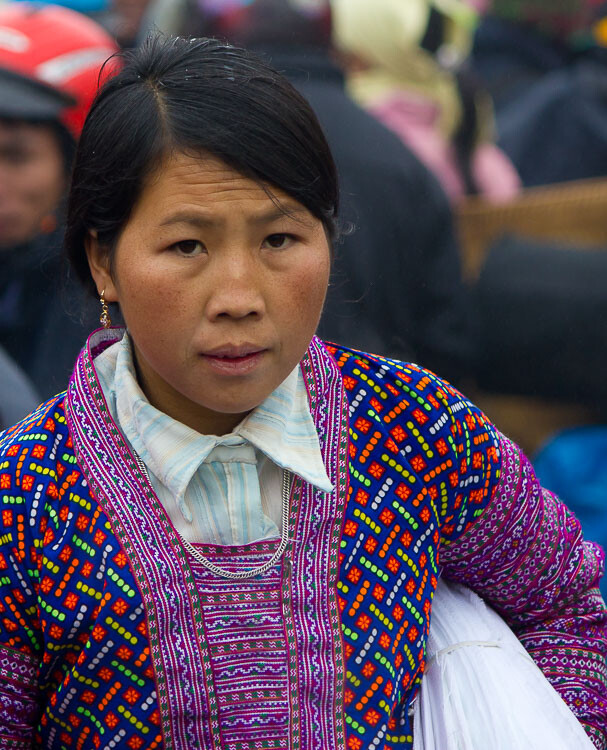
It used to be extremely intimidating to ask friends if I could take a portrait of them. At a favorite coffee shop of ours, I asked my friend if I could snap a few photos while we were talking. I was really intimidated by this, but it becomes much easier once you do it a few times, trust me.

1. Begin with a Healthy Goal

Without healthy goals to aspire to, your life will be stagnant. You need a goal or you have nothing to move toward. Here’s a good goal for you if you’re a fearful photographer. Aim to become a creative photographer who is comfortable and confident with people.

Setting a goal doesn’t help you much unless you’ve got some steps to achieve it. Let’s see how to practice the healthy opposite of fear so that you can become “a creative photographer who is comfortable and confident with people.”

Begin with the smallest steps possible, and gradually improve from there.

Walking the dog. How Conquer Your Fear of People as a Photographer

When I was a kid I was afraid of dogs. I didn’t want my kids to be afraid of dogs so I made sure that they were around dogs from the time they were infants. Whenever they showed fear I helped them to be brave and get comfortable with the dog.

2. Use Your Voice

If you’re afraid of people, you probably don’t speak much. You’re likely afraid of having your ideas rejected, giving damaging advice, or being locked in a heated debate. But as long as you’re a kind and thoughtful person, these things aren’t likely to happen often.

The worst part about speaking up is the nervousness you feel just before saying something. Ignore that “stage fright.” Overcome it by saying something small. Don’t go big, just practice by making small talk.

Portrait in a coffee shop - How Conquer Your Fear of People as a Photographer

I’ve challenged myself to try street photography or photographing people while out and about. I was sitting in a coffee shop reading about photography when I saw this gentleman quietly having coffee on his own. I couldn’t resist taking a picture, waiting for the moment that he brought the coffee cup up to drink.

Baby Steps

Perhaps you’re interested in street photography, but you’re so afraid of people that you could never ask for a portrait of them. You could practice getting comfortable by making small talk with strangers. Don’t even bring your camera along, that’s too much pressure. Just practice small talk.

Once you get over that initial discomfort of striking up a little conversation, asking strangers to take their picture won’t be as scary.

Mayfly - How Conquer Your Fear of People as a Photographer

Add bugs to the list of things I’ve been afraid of! One summer I took a macro lens around and photographed bugs. The time I spend photographing them and editing the photos seemed to make me much more comfortable with bugs! Slowly exposing yourself to the things that cause fear will help you to overcome them.

lady bug macro shot - How Conquer Your Fear of People as a Photographer

On the Job Training

Another way to become comfortable working with people is to get a job working at a department store portrait studio. If you work during the Christmas rush you’ll have the opportunity to photograph hundreds of families.

Because it’s your job, you’ll be forced to talk with them. This repetition will help you get over your fear of talking with people. Remember, you’re not there for the photography itself. You’re there to practice talking with people so that you can get over your fear and move toward your goal of being a creative photographer who is comfortable and confident with people.

First hair cut. How Conquer Your Fear of People as a Photographer

My little girl tends to be shy of new people and new situations. It takes a little while but she will become comfortable with friendly people. She was very shy for her first haircut but now loves a day out to get her hair done.

3. Offer Compliments

If you’re not sure how to start a conversation, start by noticing something that you can sincerely compliment a person about. Self-consciousness and fear paralyze you by keeping you focused on yourself in negative ways. If you’re always self-conscious, then you need to just take the spotlight off yourself by focusing on other people instead.

When you focus on offering people compliments two things will likely happen. First your attention is turned away from yourself and on to them. Second, your mind is turned away from negative thoughts (about yourself) and toward positive thoughts (about them) instead.

When I was a senior portrait photographer I would always find some little thing to compliment students about. If it was obvious that they spent a lot of time on their hair, that’s the compliment I gave. Maybe they had a great smile, or were funny, or we had something in common.

Focusing on the other person and having something nice to say will build bridges and help you to overcome your fear and discomfort around people.

Riding the escalator. How Conquer Your Fear of People as a Photographer

Escalators can be intimidating the first time you step on one. Kids are afraid they’ll get swallowed up in the moving steps. Once my kids figured out how to ride one, they treated the escalator like a ride at an amusement park! Overcoming your fear can lead to exciting things in life.

4. Visualize Criticism

You may quickly get over the fear of talking to people or the anxiety you feel over negative thoughts about yourself. But how about receiving criticism of your photographs? This is one of the worst things imaginable for some photographers.

If you panic or become consumed with anxiety and want to “just give up” over the slightest criticism of your photos, then you need to learn to take criticism better. It’s not comfortable at first, but it can be done.

Here are some steps

First, admit that you are not perfect and that you should always focus on improvement. Be humble and admit that some healthy criticism could actually help you.

Second, seek it out. That’s right, go looking for critiques! Look for people who are better than you who can show you how to improve. You want to grow as a person and a photographer don’t you? Ask successful people how you can be better.

Journal writing - How Conquer Your Fear of People as a Photographer

You can document your journey of overcoming the fear of people by journalism. Get it all out on paper. What you’re thinking, what you’re feeling, and all the successes you have.

Third, visualize criticism. You can practice receiving the image critique comfortably before actually receiving it. Close your eyes and imagine someone saying, “These photos are terrible” or “That’s not your best work.” Just imagine hearing those words. Get over the shock and uncomfortable feelings. How could you respond to their harshness in a positive way?

Do you think it seems weird to use your imagination this way? Yes, it may seem strange at first. But it’s exactly how you’re already using your imagination.

Your self-conscious fear is leading you to imagine what people are thinking and saying about you. Your imagination is causing you to fear criticism and be paralyzed instead of receiving it graciously, improving, and moving forward toward your goal of being a creative photographer who is confident and comfortable with people.

Chopping wood. How Conquer Your Fear of People as a Photographer

I’ve embarrassed myself a few times trying to chop wood with people watching me. I needed to learn to do it well. So one summer I decided to chop a massive pile of wood. It wasn’t easy to learn and some pieces ended up a mess before I could get them to split. But by the end, I was now showing other people how to chop wood. Constantly try things that intimidate you. The little successes will keep you moving forward and ignoring fear.

Consider who you are receiving the criticism or critique from. If you post photos online, you’re eventually going to receive harsh criticism from someone, solicited or not. The internet is an easy place for people to be mean and remain anonymous.

Please feel free to ignore people who are harsh and cruel. But always listen to the constructive criticism by other photographers who actually care about you and want to help. Their insights can be very valuable, making you a better photographer.

5. Open up, be vulnerable, and make friends

Your fear and shyness of people may come from your honest desire not to bother anyone. You avoid saying or doing the wrong thing. But are you also avoiding friendship and positive interaction too?

Begin with small talk and offer compliments. Become comfortable with conversation and criticism. Once you’ve done this then opening up and going deeper with people won’t be so hard.

Do you know what you might discover? You’re not alone in your fears. Other people (and especially photographers) are afraid too. And they’ll be thankful that you spoke up, and shared your ideas and your creativity. Courage is contagious.

Paddle boarding - How Conquer Your Fear of People as a Photographer

This is our friend who is terrified of water. It used to be almost unthinkable for her to get out into the water.

two girls paddle boarding - How Conquer Your Fear of People as a Photographer

However, she was determined to overcome her fear – or at least ignore it. Fear can be paralyzing, but finding the strength to overcome it can open new doors in life.

Go Forward Toward Your Goals

I used to be terrible with people, especially with kids. But I used all of the ideas above to break out of my shyness and conquer my fear of people. I still feel uncomfortable at times. But now I run my own photography business specializing in people! Whether it’s families or individual portraits, I’m able to connect with people and help them to feel comfortable in front of the camera.

If your goal is to become a creative photographer who is comfortable and confident with people, follow the steps above. It’ll take time, but start small and soon you’ll be thriving among people.

The post How Conquer Your Fear of People as a Photographer appeared first on Digital Photography School.


Digital Photography School

 
Comments Off on How Conquer Your Fear of People as a Photographer

Posted in Photography


Fotophire Photo Editing Toolkit

25 May

If you’re looking for a good and reliable photo editing tool, Fotophire  has you covered. It provides you with a host of interesting features that help you turn your photos into beautiful works of art. Fotophire is simple and easy to use. It has an intuitive user interface packed with functionalities both beginner and pro users can draw on to Continue Reading

The post Fotophire Photo Editing Toolkit appeared first on Photodoto.


Photodoto

 
Comments Off on Fotophire Photo Editing Toolkit

Posted in Photography


7 Quick Tips To Help You Capture Better Portraits

24 May

Taking great portraits is a great genre of photography to master. Some of the most famous photographs in the world and even paintings are simple head and shoulder portraits. They can tell us so much about the person being photographed. Think of arguably the most famous painting of all time and most people would probably say the Mona Lisa. But taking portraits also seems to be a difficult thing for newbie photographers to do. Fear not, here are 7 quick tips to help you capture better portraits.

7 Quick Tips To Help You Capture better Portraits - portrait of a chef

1. Start with a conversation

It might seem daunting taking someone’s portrait, even in a studio. But it will get so much easier if you build a rapport with the person first. Whether it’s in the studio or in the street, start the shoot with a conversation and get to know who they are. Find out what they do, what they like, and even what their personality is like.

If you can, make them laugh with a joke. Not only will all of this help build a picture of who they are which can influence the photo, but it will also mean that they are much more comfortable working with you.

This, in turn, will mean that they will be more relaxed and also more be accommodating to you taking their photo. Clearly, sometimes that will be difficult in travel photography, for example, when you might not speak the same language. But even then it’s amazing what a few hand gestures, a few local phrases, and a smile can achieve.

portrait of a lady smiling - 7 Quick Tips To Help You Capture better Portraits

2. Frame carefully

While it might seem obvious, it’s amazing how often I’ve seen a portrait taken where it hasn’t been framed properly. When you are taking an environmental portrait, you need to capture some of the person’s surroundings to be able to tell a story. But when you’re doing a normal head and shoulders portrait, the sole focus should be the person standing in front of you. Their face is where the focus should be, so if there are distracting elements near them or in the background try to crop those out.

Often the reason that photographers end up with too many distractions in the photo is that they are too far away from their subject. So, if you find that you are not able to focus primarily on the subject’s face when taking a portrait, get closer.

portrait of an Asia lady - 7 Quick Tips To Help You Capture better Portraits

3. Think about the background

Another key element of framing your portrait properly is to ensure that the background isn’t too overpowering. Ideally, a muted or plain surface such as a wall works best as the viewer isn’t distracted by anything else. They can focus solely on the person’s face. If you find that your subject is standing somewhere that doesn’t work best for the portrait, ask them if you can move them and position them somewhere better. Even if you don’t speak their language, usually pointing to where you want them to go does the trick.

If you find that you have to take the photo with too much stuff happening in the background, set a wide aperture so that you will get the background blurred. This will help make your subject stand out from the busy background and not get lost in the photo.

portrait of a person in costume in Italy - 7 Quick Tips To Help You Capture better Portraits

4. Experiment

Most of the time the advice that you are given is to try and light your portrait using natural light, photograph your model from the front, and get close enough to eliminate any distractions. Sound familiar? For example, being outside on an overcast day is ideal for taking portraits as the soft even light means you don’t get harsh shadows on the person’s face.

But while these are great bits of advice that you should follow, it is also worth sometimes pushing the boundaries. So experiment with harsh lighting or even a more creative shots such as in the example below. I took a step back to let people pass and was immediately struck with the dynamism that having someone walk across the image brought to it. It’s still a portrait, but it’s a little more interesting than if there was no one else in the shot.

The key is to not be afraid to go against convention and try something different, you might be surprised by the results.

7 Quick Tips To Help You Capture better Portraits - portrait of person in costume in Venice

The passer-by added a sense of mystery to this portrait.

5. Keep the eyes sharp

If there is just one rule that you need to follow when it comes to taking better portraits, it is to ensure that the subject’s eyes are sharp and in focus. If the eyes are not in sharp focus, the whole image looks soft and unappealing. So, take extra care that you are focusing correctly and that you are keeping the eyes sharp.

When taking portraits outside, the majority of the time you can get away with using a fairly wide aperture. So as long as there is decent light your shutter speed should remain fast enough to avoid camera shake. If you are unable to keep a fast enough shutter speed, raise your ISO accordingly.

portrait of a young Asian child crying - 7 Quick Tips To Help You Capture better Portraits

6. Take multiple shots

You often have a relatively short window when taking portraits as your subject will usually want to get on with their day. But that should still give you plenty of time to take multiple photos. Try taking photos in burst mode so that you can capture the exact moment when your model has their eyes open or has an expression on their face that works for the photo.

You can also try a few different compositions and even angles to give your photos variety. The great thing about digital photography is that it won’t cost you anything to take multiple photos as long as you have enough memory space.

man taking a photo in Venice -7 Quick Tips To Help You Capture better portraits

7. Just relax

Sometimes the real key to taking any great photo is just relaxing and letting it happen naturally. So rather than rushing around and clicking away frantically, just slow down and take your time.

Start talking to people without the burden of knowing that you want to photograph them and if the situation lends itself to a photo just enjoy the process and have fun. Show the person the photos you’ve taken, keep everything casual and you will find that your photos become much better and more intimate.

young girl's portrait - 7 Quick Tips To Help You Capture Fantastic Portraits

Taking a great portrait takes great skill, but when done well it can have incredible results. You will find that not only will you have amazing photos that will look great anywhere, but also memories that you will cherish. Just follow these 7 quick tips to help you capture better portraits and you’ll be on your way to capturing great photos of people.

Please show us your portraits and share your tips advice below.

The post 7 Quick Tips To Help You Capture Better Portraits appeared first on Digital Photography School.


Digital Photography School

 
Comments Off on 7 Quick Tips To Help You Capture Better Portraits

Posted in Photography


10 Lightroom Plugins You Should Use

24 May

Lightroom is one of Adobes most useful tools in its photography bag. It’s the companion to Photoshop, and it’s built more for image processing and visual editing, rather than the manipulation abilities that makes Photoshop so popular. Lightroom is one of the key tools any photographer should have in their tool belt. What’s a Plugin? Plugins are often referred to Continue Reading

The post 10 Lightroom Plugins You Should Use appeared first on Photodoto.


Photodoto

 
Comments Off on 10 Lightroom Plugins You Should Use

Posted in Photography


9 Tips On How To Photograph Winter Sports

24 May

If you’re planning a winter holiday in a picturesque location, you’re probably wondering how to capture the perfect shot in the snow. Here are 9 tips to help you photograph the dynamic winter sports with beautiful snowy landscapes in the background. Pick the right lens and use protection   Even if you prefer a sharp, high performance prime lens to Continue Reading

The post 9 Tips On How To Photograph Winter Sports appeared first on Photodoto.


Photodoto

 
Comments Off on 9 Tips On How To Photograph Winter Sports

Posted in Photography


Ways to Get Amazing Smiles from Your Subjects

24 May

Photographing people is a deceptively simple process these days. It seems with the wide availability of high-quality photo equipment and digital editing software that every Tom, Dick, and Harry is now a professional photographer. The reality is that true pros know technical knowledge is not the only thing that sets them apart from the amateurs. Connecting with your subject when Continue Reading

The post Ways to Get Amazing Smiles from Your Subjects appeared first on Photodoto.


Photodoto

 
Comments Off on Ways to Get Amazing Smiles from Your Subjects

Posted in Photography


My Top 5 Photography Documentaries on YouTube

24 May

Surrounding yourself with inspiration is one of the best ways to jump-start your creativity. By viewing the works of others, we connect with our own photographic practice. One of my favorite things to do in a creative lull is to trawl YouTube. I could spend hours looking for interesting photography documentaries to watch and study.

I always feel myself rearing to get photographing by the time the credits roll. So here are a few of the favorites that I like to revisit from time to time. I hope you enjoy them as much as I do!

#1 – The Many Lives of William Klein

William Klein is known for his gritty street photography as well as his fashion work with Vogue. As a creator of some of the most iconic imagery of the 20th century, the American-born French photographer originally trained as a painter. Despite having no formal training as a photographer, Klein won the Prix Nadar in 1957 for New York, a book of photographs he compiled in 1954. Since then, Klein’s work has been praised as uncompromising and revolutionary in both his approach and execution.

The Many Lives of William Klein takes a peek into Klein’s world as he prepares his retrospective exhibition. Smart and sarcastic, Klein recounts memoirs of his photographic past and shares insights into his process and passion for photography.

Note: there is a warning of strong language in this video so if you find that offensive you might want to go to the next one.

#2 – The Colourful Mr. Eggleston

Produced by BBC for its “Imagine” TV series, The Colourful Mr. Eggleston provides a rare look into the life and work of one of photography’s most influential proponents. William Eggleston was born in 1939 in Memphis, Tennessee to a family of plantation owners. He grew up in Sumner, Mississippi and spent six years studying at various art schools, never receiving a degree. When he received his first camera in 1957, a Canon rangefinder, he was hooked. As one of the first art photographers to use color film, he began visually recording the world around him, capturing everyday moments in life in compressed color and light.

Eggleston’s idols, Robert Frank, Henri Cartier-Bresson and Walker Evans roamed the world for photographic subject matter. But Eggleston remained rooted in Memphis. His wife, Rosa, tells the story that one day Eggleston told a friend that there was nothing to photograph because everything in the city was ugly. The friend told him to “photograph the ugly stuff” which set him on a path photographing a contemporary landscape made up of vending machines, light bulbs, power poles, wires, signs, urban decay and occasionally human subjects.

The Colorful Mr. Eggleston follows his photographic process in and around Memphis as he isolates the facets of everyday life that make up the dense, atmospheric imagery of his work.

#3 – The Genius of Photography

The Genius of Photography is a series originally featured on BBC Four that investigates the rich history of photography. Over the six-part series, the documentary explores an aspect of the photographic medium. It covers the earliest incarnations of photography through to modern digital practice.

From art to commercial photography, the series includes interviews and encounters with some of the world’s best including William Klein, Sally Mann, Jeff Wall and many more.

Click here to go to the video.

#4 – Lomography: Shoot from the Hip

The Lomo Camera: Shoot from the Hip is a colorful insight into the history and momentum of the Lomography movement. The philosophy behind Lomography is “Don’t Think, Just Shoot”, encouraging spur-of-the-moment photography not dissimilar to Cartier-Bresson’s decisive moment. The movement is also accompanied by 10 golden rules encouraging spontaneous, active photography with less concern for formal photographic technique.

While Lomography itself can be a bit hit-and-miss, the documentary conveys a world of unfocused color and spontaneity. But the Lomo ethos isn’t reserved only for photographers with plastic cameras; much of the Lomographic practice can still appeal to those with more hi-tech photographic equipment. With rules like “Take your camera everywhere you go” and “Lomography is not an interference in your life, but part of it.”

The Lomo Camera: Shoot from the Hip inspires a fun and creative approach that can be applied across the board photographically.

#5 – The Photographers

Click to go to the video page.

Working for National Geographic is a job that many photographers dream of, but few attain. With some assignments lasting for months, National Geographic’s camera staff aren’t just journalists, they’re artists, braving a myriad of hardships. As one Nat Geo photographer featured on the Photographers, Michael (Nick) Nichols explains, “The toughest part of [the] job often times is not taking photographs but surviving an environment”.

Seeking out “memorable images, unusual subjects, and unexpected moments” in some of the most unique and sometimes inhospitable of locations. The Photographers follows several Nat Geo photographers as they capture iconic shots the magazine has become known for, delivering beautiful and unique imagery and delving into what it is that makes up our world.

Conclusion

Photography documentaries are great because they give us a behind-the-scenes look at someone else’s photographic world. Every photographer works differently. So when we view another photographer’s practice, it’s as if they are passing their own inspiration on to us.

These are only a few of the wide selection of photographic documentaries to find on YouTube. So go ahead, start your own list of favorites and get inspired! Share your list in the comments below as well.

Editor’s list: here are a few others I recommend if you can find them:

  • War Photographer – James Nachtwey. I can’t find the whole documentary on YouTube but you can watch his TED talk here.
  • The Big Bang Club is about news photographers in South Africa during the fall of the Apartheid. This one you might have to pay to watch but it’s really worth it.
  • Double Exposure is about the life of photographer Margaret Bourke-White, one of the earliest women photojournalists. I can’t find it on YouTube but look around maybe you can find a copy somewhere.

The post My Top 5 Photography Documentaries on YouTube appeared first on Digital Photography School.


Digital Photography School

 
Comments Off on My Top 5 Photography Documentaries on YouTube

Posted in Photography


Why You Should Find Your Own Photography Style and Not Conform to Social Media Trends

23 May

Everyone is a photographer. We all love to use our phones, tablets, or cameras to take photos. What’s more, we all share them and publish them for the world to see. This phenomenon has changed photography and photographers.

Not so long ago you needed to have a camera to be able to take a photo, there was no other way. Before the explosion of social media sites hit the internet is was decidedly more difficult to get your pictures published.

Street portrait of an Asian woman in red - Why You Should Find Your Own Photography Style and Not Conform to Social Media Trends

Go Beyond Social Media Norms

With the rise of Instagram, Facebook, Twitter and the proliferation of other media sharing websites, we are seeing and sharing more and more photographs every day. Standing out in such an enormous global crowd is not easy.

So how do you create a unique photography style which does not look the same as most of what’s already out there? Because, let’s face it, so much of it is so similar (and dull.) There are tons of pictures of pets, sunsets, selfies, kids and food, food, food.

Most successful photographers concentrate on one style. This can take years to develop. Dedication and experimentation are keys to attaining a photographic look and feel that is uniquely yours and will be recognized as such. Mastering any form of creative expression does not happen easily or without a lot of practice.

Step Outside Your Comfort Zone, Get Into a New Zone

You need to be willing to step outside your comfort zone. Don’t just keep photographing the same things, in the same way, that you are comfortable with already. Push yourself to do things with your camera that you’ve not experimented with before. Step out and photograph subjects you’ve wanted to but not have been bold enough to do so. You never know what you will discover by trying something different.

Man selling kebabs in Istanbul - Why You Should Find Your Own Photography Style and Not Conform to Social Media Trends

Don’t give up easily either. Giving up will not get you anywhere if you haven’t first shown some commitment to producing some photographs you are content with.

My Story

As a young man, I was painfully shy. I loved photography, but could never bring myself to photograph people. My sister encouraged me. She told me my photos were excellent, but really lacked the inclusion of people.

She was not so happy when she became my subject. I also started photographing friends as we hung out together and became somewhat comfortable photographing people that I knew.

Karen woman hand sewing - Why You Should Find Your Own Photography Style and Not Conform to Social Media Trends

Shortly after I landed a job in the photography department of a daily newspaper, I quickly realized that if I wanted to keep my job I would have to overcome my fear (yes, it was a real fear) of photographing strangers. Everything in me wanted to keep the job at the paper and to succeed as a photographer, so I pressed on and challenged myself to break through.

Now my main love in photography is taking pictures of people. Often they are people I do not know.

Hmong man with one leg sitting against a wall -Why You Should Find Your Own Photography Style and Not Conform to Social Media Trends

Most people will not face the same test to develop their photography abilities as I was confronted with. But I hope my story can inspire you to press on trying new things with your photography and to persevere in going beyond your comfort zone.

Experience and Experiment

As you experiment, keep in mind that your worldview is unique. No one else sees or experiences the world quite the same way you do.

Think about how you can express this through your photography. What do you see that someone else might not? Why do you feel a certain way about the subjects you are photographing? No one else will feel just the same.

Connect with your subject, whether it’s a person, a pet, a landscape or your lunch, and photograph it with feeling. More often than not you will create a strong, more unique image than if you just take a quick snapshot.

Go Beyond Your Gear

As you seek to develop your own unique personal photography style try not to concentrate too much on your equipment. Pouring all your attention into what you’re doing with your camera will not help you connect with your subject and you will produce less dynamic photographs. No matter how technically correct your images are, they will often be rather dull if you are not connecting with your subject.

Ballet dancer practicing - Why You Should Find Your Own Photography Style and Not Conform to Social Media Trends

However, the more comfortable you are with your camera, and the more proficient in knowing what it’s capable of and the best settings to use will help you immensely.

Loving your camera and knowing it well, so you can use it as an integral part of your creative process, will assist you in developing your photography style. The more focused you are on trying to figure out which lens to attach and what shutter speed will be needed, the more likely you are to disconnect with your subject. The more familiar and comfortable you are with your camera the better.

Close up portrait of a young man - Why You Should Find Your Own Photography Style and Not Conform to Social Media Trends

Have Precise Control

Anyone who’s read my articles watched my videos or taken my workshops or online courses will know I always encourage the use of a camera in Manual Mode. Being in precise control of the equipment you are using will definitely facilitate your unique creative growth.

Using settings which give your camera control of the exposure (auto modes) will give you results like everyone else who relies on these settings. In Manual Mode you have the choice to expose your photos as you like, not always as your camera dictates.

You are Unique – Create Unique Photographs

Experiment! Take time and work with a purpose and a goal in mind. Be inspired to step beyond creating just another snapshot for your social media posts and make a point of producing strong photographs expressing your unique perspective of the world you live in.

It’s not easy to do. But press on and don’t give up. Make a start with your first ideas and keep at it. Be flexible and adapt as you develop.

At first, you might love the topic or photography style you’re working on and later find you are drawn to a something a bit different. Go with the flow, so long as you are continuing to produce photographs you are happy with and you can see a progression in what you are doing.

Kayan girl portrait - Why You Should Find Your Own Photography Style and Not Conform to Social Media Trends

To learn the story behind some of these photographs please check out this video:

I’d love to know how you are developing your photography style, whether you are inspired by this article and just starting out, or if you’ve been working on your own particular style for some time. Please share your thoughts and photos in the comments section below.

The post Why You Should Find Your Own Photography Style and Not Conform to Social Media Trends appeared first on Digital Photography School.


Digital Photography School

 
Comments Off on Why You Should Find Your Own Photography Style and Not Conform to Social Media Trends

Posted in Photography


Fixing Your Photos with the Lightroom Spot Removal Tool

23 May

Lightroom’s suite of editing tools is not as comprehensive as its big brother Photoshop But the program does offer a host of options for fixing photos that cover most of the corrections you are likely to need on a daily basis. You can, of course, use Lightroom for basic operations like adjusting white balance, changing exposure, and converting images to black and white. But there are much more advanced features as well, such as the Spot Removal Tool.

This tool is a quick and easy way to remove blemishes and imperfections. It doesn’t have the same level of depth and customization as similar options in Photoshop, but with a little practice, it should suffice for most situations in which you are likely to need it.

Fixing Your Photos with the Lightroom Spot Removal Tool - sunset photo

Fixing Imperfections

To access the Spot Removal tool, first, click on the Develop module and then press the Q button (the keyboard shortcut). Or you can click on the circle icon with a small arrow pointing to the right just below the histogram at the top of the panel on the right-hand side.

how to open the Lightroom Spot Removal Tool

Once you are in the Spot Removal panel it might be tempting to start clicking away at every spot and blemish on your images. But understanding some of the options available to you will help you use the tool more effectively and result in better edits.

The Spot Removal tool has two main options, Clone and Heal. Each of these has three sliders that you can change: Size, Feather, and Opacity. Before getting into the differences between cloning and healing, let’s take a look at the three options they have in common.

Fixing Your Photos with the Lightroom Spot Removal Tool - sliders

Size

This changes, as you might have guessed, how big the edit is going to be. Larger sizes are suited for bigger edits, while pinpoint accuracy can be obtained by making the tool as small as you need it to be.

You might be tempted to slide left and right to change these values, and that certainly works just fine. But you can also type precise numbers between 0-100 or just scroll up and down using the mouse wheel to see the brush automatically grow and shrink until you get it to where you want. You can also use the square brackets [ and ] on the keyboard to adjust the brush size.

Feather

This slider lets you control how gradually the Clone or Heal edits are implemented. Sliding all the way to 100 means your edits will gradually fade out near the edge of the tool. A value of zero indicates that there will be no feathering whatsoever.

This will result in a harsh edge around your edits that will be easy to spot so I don’t usually recommend it. Instead, try for a value of around 50 and adjust it to your taste. Similar to the Size parameter you can adjust this with the mouse by holding [shift] and scrolling up and down, which I find much easier to use than the slider.

Opacity

The opacity is a way for you to specify how transparent your edits will be. A setting of 100 is totally opaque and nothing will show through, whereas lower values will lessen the overall impact of the tool.

There might be instances in which you don’t want to completely remove a spot or blemish but mask over or fade it just a little, and in that case, set an opacity of 25 or 50 (this works well for portrait retouching, lightening circles under eyes and wrinkles without completely removing them).

Fixing Your Photos with the Lightroom Spot Removal Tool

Cloning

Hearkening back to the earlier days of Photoshop, the Clone tool is one of the most often-utilized features for beginning or even more advanced photographers who want to tidy up their pictures. The basic function is pretty straightforward since all it does at a fundamental level is copy, or clone, one part of a picture and put it on top of another part. This is great for situations with textures, patterns, or colors that are highly similar or where duplicating one portion would not be easy to detect.

Using the Clone Tool

This picture of a squirrel (below) has a stick on the right-hand side that I would like to remove. The Clone tool is a good way to do it. To fix something like this you can either shrink the tool so it’s small and brush it over the imperfection or increase the size to be much larger and click just once.

Each situation is going to call for a different type of edit but in general, I like to use a larger brush and click once because it usually results in edits that aren’t as visible in the final result.

Fixing Your Photos with the Lightroom Spot Removal Tool - image needing some cloning to remove a stick

This image is fine, but it would be great if that stick protruding up on the right side could be removed.

Lightroom tries its best to get your initial clone edit just right by taking what it thinks is a sample of a similar portion of your image. But as you can see below it doesn’t always work.

bad cloning job - Fixing Your Photos with the Lightroom Spot Removal Tool

Lightroom’s initial attempt with the Clone tool was less than ideal. You can clearly see a circle of in-focus grass where the stick used to be.

Adjusting cloning results

You don’t have to be content with the initial results though, as Lightroom lets you refine and tweak the cloning options until you’re satisfied.

There is an Overlay setting for the Clone tool. It is a white circle indicating the location from which the Clone Tool is selecting to copy. As well there is another circle showing you where it is being pasted. In the lower-left portion of the Develop module is a tiny little option picker that says “Tool Overlay” with four choices: Auto, Always, Selected, and Never. My personal preference is to go with “Never” and use the “H” key to show and hide the Tool Overlay as I need it.

As you use the Spot Healing tool you will see little gray circles pop up all over your image, which shows you the places where you have edited your image. If you don’t see these tiny pins press “H” to show them, and then click on one to show the white circles showing you where the edits are being taken from and applied. You can see an example of this in the image below.

Fixing Your Photos with the Lightroom Spot Removal Tool - cloning overlay

Press the H key to show and hide the Tool Overlay. Then grab the source that is being copied and drag it to another part of your image that blends in better with the surroundings of the blemish to be cloned out.

Once you see where Lightroom is grabbing the part of your image that it’s using to fix a blemish, it’s easy to fine-tune it to get the results you are looking for. Use your cursor to drag the bright circle around the image until you find a spot that would be better-suited for filling in the blemish. You can also adjust the sliders while you have your editing point selected to see in real-time what happens when you change things like size, feather, and opacity.

better cloning job - Fixing Your Photos with the Lightroom Spot Removal Tool

I wouldn’t say it’s impossible to tell that this photo has been edited, but most casual viewers would likely never know.

Visualize spots

One issue that you might encounter when using the Spot Removal Tool is that it’s not always easy to see where the spots in your picture are actually located. Fortunately, Lightroom has an option that can help you in this regard.

If you click the “Visualize Spots” button in the lower-left corner of the Develop module (make sure the Spot Removal tool is selected), you will see a black-and-white version of your image with areas of high contrast highlighted. If you do not see this option, activate your toolbar by pressing T on the keyboard.

You can also simply press the A key to activate the Visualize Spots view. Use the slider to fine-tune the amount of contrast visible, and doing so will show you where some of the imperfections are located that you might have missed.

Fixing Your Photos with the Lightroom Spot Removal Tool - silhouette with spots to remove

Some of the spots on the above image are easy to see, but others are visible only upon closer inspection. Snuffing out all the blemishes, which are really dust on the front of my camera lens, would be a time-consuming process without the Visualize Spots option enabled. Doing so makes it easy to see every mote and speck that I need to fix with the Spot Healing tool.

Fixing Your Photos with the Lightroom Spot Removal Tool - visualize spots active

Visualize spots activated

The finished image, after some clicking and editing, is much improved. I even decided to leave in the streak of lens flare on the left side because I liked the effect, you could remove it if you wanted to by using the same tools.

image after cloning - Fixing Your Photos with the Lightroom Spot Removal Tool

Healing

While similar to the Clone tool, the Healing brush operates in a slightly different way. It takes textures and tones from a source portion of your image and blends it with the area you want to fix. It’s not a direct 1:1 copy of the source, like the Clone tool, and as such it creates results that are often a little more refined and effective in terms of removing problems and blemishes.

The Heal tool has the same options as the Clone tool (Size, Feather, and Opacity) but because the nature of the tool is somewhat different. The Opacity doesn’t function in exactly the way you might expect. It still adjusts how much of the source spot is stamped onto the blemish you want to remove but because it’s blending textures, colors, and patterns even a 100 value of Opacity means that you won’t see quite the same results as the Clone tool.

Fixing Your Photos with the Lightroom Spot Removal Tool

To fix a picture using the Heal tool, click on any spot you want to remove (or click and drag if it’s more than just a single spot) and Lightroom takes care of the rest. If the spot is not fixed to your liking, press H to show the Tool Overlays and edit as you see fit by dragging the source that is being copied and adjusting the Size, Feather, and Opacity.

Note: One other thing you can do with the Lightroom Spot Removal tool is to draw a line or shape. Your cloning area is not just limited to a circle anymore as it once was in LR.

The picture below shows the result of using the Heal tool to remove about a dozen blemishes and imperfections on a photo of some mushrooms. All this was done in under five minutes using only the Heal tool, and it illustrates how simple and effective this type of editing can be.

Fixing Your Photos with the Lightroom Spot Removal Tool

The Photoshop Solution

I often use the Lightroom Spot Removal Tool to fix little things in my images, but for real in-depth editing, you might want to turn to Photoshop. There you can really dig in with layers and the advanced editing tools that program offers.

For most photographers, whether professional or casual, the options in Lightroom will usually suffice. That’s what I find myself using almost every time I need to tweak a picture. Give it a try and you might be surprised at what it can do for you too.

The post Fixing Your Photos with the Lightroom Spot Removal Tool appeared first on Digital Photography School.


Digital Photography School

 
Comments Off on Fixing Your Photos with the Lightroom Spot Removal Tool

Posted in Photography


Camera Comparison – The Fujifilm X-H1 Versus the Sony a7R III

23 May

Two of the hottest mirrorless cameras you can get your hands on right now are the Sony a7R III and the Fujifilm X-H1. My husband owns one and I have the other. In the past few months, we’ve been experimenting with our new cameras and have noticed quite a few similarities and differences. This is by no means a comprehensive camera comparison, but some of the main differences will be highlighted below.

Camera Comparison - The Fujifilm X-H1 Versus the Sony a7R III

The Fuji X-H1 left, and the Sony a7R III on the right.

Our Background

My husband and I are both photographers who have always been in opposite brand camps. We were Nikon versus Canon during the height of the DSLR. Now in the mirrorless world, we are Fujifilm versus Sony. I’m a full-time photographer specializing mainly in food and architecture photography, while my husband is a part-time assistant photographer.

Our differing photo needs and styles have partially dictated our camera brand loyalty. I prefer Sony for its higher megapixel count for architecture photos and also its more flexible lens selection. Meanwhile, my husband loves Fujifilm for their rangefinder design and film simulations.

One thing we can agree on is that we both have an interest in making more videos. That is why we specifically choose the Sony a7R III and Fujifilm X-H1 as our new cameras. Note that at the time, the Sony a7R III was the newest camera on the market–there wasn’t yet a Sony A7III or a Sony a7S III, both of which are arguably better cameras for video.

Camera Comparison - The Fujifilm X-H1 Versus the Sony a7R III

Fuji versus Sony

Common Features

Before we talk about differences, the Sony a7R III and Fujifilm X-H1 do have many features in common. First, both cameras have enhanced, on-par video recording capabilities. They shoot in 4K and 120 fps slow motion video, and both cameras offer in-camera image stabilization (IBIS). Built-in Wi-Fi and Bluetooth are available on both cameras to facilitate quick transfers to cell phones or tablets.

Physically, both cameras have dual SD card slots for more storage flexibility. There’s also focus peaking to help highlight areas that are in focus, which is especially helpful when using manual-focus lenses. Finally, there are tiltable touchscreens on both cameras. However, touchscreen capabilities are quite limited and you can’t perform full camera operation with them.

Here is the same scene, shot with both cameras for comparison.

Sony a7riii versus fujifilm x-h1 cameras

Fujifilm X-H1

Sony a7riii versus fujifilm x-h1 cameras

Sony A7rIII

Common Weaknesses

In terms of things that neither camera offer, the list isn’t terribly long. But ideally, both cameras would offer a more flexible tilt and swivel screen. Built-in GPS for geotagging photos is also missing.

Finally, both cameras come with hot-shoe mounts for attaching an external flash. However, neither camera comes with a built-in flash.

Camera Comparison - The Fujifilm X-H1 Versus the Sony a7R III

Sony a7R III

Sony a7R III Benefits

Larger Sensor, More Megapixels

The biggest difference exists in the cameras’ sensors. There’s a full-frame, 42.4-megapixel sensor on the Sony, while the Fujifilm has an APS-C 24.3-megapixel sensor. Currently, Fujifilm does not make any full-frame mirrorless cameras, although that will change when the X-T3 comes out in late 2018.

Depending on your photography style, more megapixels is a generally a good thing. Although, it does require using SD cards and hard drives with significantly more storage space for those large file sizes.

Super High-Resolution Composite (Pixel Shift)

Speaking of resolution, there’s a new feature on the Sony a7R III called Pixel Shift. In short, this increases image resolution by 4 times. You still have to shoot individual images and stitch them together in post-production using the included software. The result is a super high-res image that’s great for shooting landscapes or buildings.

forest scene with a river and bridge - Camera Comparison - The Fujifilm X-H1 Versus the Sony a7R III

A photo that was taken with Pixel Shift.

Longer Battery Life

Mirrorless cameras have long been criticized for having poor battery life. Luckily, Sony responded positively by putting a new Z-battery in the a7R III. This battery isn’t cheap, but it offers a much longer battery life than the X-H1 at 650 shots versus 310 shots.

Hyperlapse Filming Mode

One thing many Sony shooters miss from the a7R II is the PlayMemories App that added built-in features such as time-lapse shooting. However, time-lapse can still be taken on the a7R III if you use the S&Q setting.

This allows for shooting slow motion or fast (hyper-lapse). If you do the latter, this is essentially a hyper-lapse that is taken in camera. Just be sure to adjust the settings in the camera, as S&Q can be set to shoot slow motion or hyper-lapse videos.

Headphone Jack

Since recording accurate sound is a big part of video-making, it’s essential to have a headphone jack. This is present on the Sony a7R III but is oddly missing from the Fuji X-H1.

Sony a7riii versus fujifilm x-h1 cameras - Camera Comparison - The Fujifilm X-H1 Versus the Sony a7R III

Fuji left, Sony right.

Bigger Buffer for JPGs

The X-H1 is a faster camera when it comes to shutter speed and frames per second (more on that below). But the Sony has a leg up when it comes to JPG buffering, or how many more JPGs you can shoot before waiting in burst mode. It’s 82 shots on the Sony a7R III compared to 40 shots on the Fuji X-H1.

Higher ISO

Sony – The Sony a7R III has a native ISO sensitivity range of 100 to 51,200. When extended, the Sony can reach ISO 50 to 204,800 for stills, or 102,400 for video.

Fuji – Meanwhile, the X-H1 has a slightly smaller range of ISO 200 to 12,800 or an extended ISO range of 100 to 51,200 for stills or 25,600 for video.

Bigger Lens Selection

When it comes to lenses, Sony has a wider array of choices compared to Fujifilm. If you need traditional focal lengths such as the 16-35mm, 24-70mm, or 70-200mm, you’ll want to go with Sony.

Camera Comparison - The Fujifilm X-H1 Versus the Sony a7R III

Fujifilm X-H1 Benefits

Top LCD Display

The X-H1 takes on the look of a DSLR camera, departing a bit from Fujifilm’s more classic rangefinder design. Part of the DSLR look includes a top LCD display where you can easily see your camera settings. In practice, that may or may not be helpful since the pop-out LCD can also show your camera settings.

Faster JPG and RAW Shooting

Interestingly, the Fujifilm X-H1 is quite a bit faster than the Sony a7R III. The X-H1’s shutter is faster at 1/32,000th versus 1/8000th when shooting wide open in bright light. Also, the X-H1 has faster RAW and JPG shooting in burst mode (14 FPS for the Fuji as compared to 9 FPS on the Sony).

Longer Exposure

Despite being a crop sensor camera, the X-H1 is set up better for taking night photos. It has a long exposure of up to 900 seconds (15 minutes), compared to 30 seconds on the Sony a7R III.

Camera Comparison - The Fujifilm X-H1 Versus the Sony a7R III

Built-In Film Simulations

Fujifilm has been mastering color profiles long before digital cameras even existed. Many color profiles from film days have been added into digital cameras in the form of built-in film simulations. Six have existed until the X-H1 which saw the addition of the brand new Eterna film simulation. If you’re a fan of Fujifilm colors, this could be a big selling point.

Lower Price

Finally, the Fuji X-H1 is significantly less expensive coming in at $ 1,899 compared to $ 3,198 for the Sony a7R III.

In Conclusion

Here is a video comparison going over some of these things as well:

?

Both the Fujifilm X-H1 and Sony a7R III are fantastic digital photography tools that offer lots of features for those looking to up their photo or video game. Which is best for you depends largely on your photography style. What do you like to shoot, and what are the basic tools of the trade that you need to make that happen?

As a commercial architecture, food, and event photographer, I need the extra megapixels, ISO range, and lens choices offered by Sony. However, these features aren’t as critical to my husband, an editorial photographer who values the physical aesthetic and experience of shooting with a Fujifilm camera as much as the image quality.

Here are some more images of the same scene for comparison:

Sony a7riii versus fujifilm x-h1 cameras

Fujifilm X-H1

Sony a7riii versus fujifilm x-h1 cameras

Sony A7rIII

The post Camera Comparison – The Fujifilm X-H1 Versus the Sony a7R III appeared first on Digital Photography School.


Digital Photography School

 
Comments Off on Camera Comparison – The Fujifilm X-H1 Versus the Sony a7R III

Posted in Photography