RSS
 

Archive for the ‘Photography’ Category

5 Framing Tricks to Help You Capture Better Landscape Photos

05 Jun

Landscape photography is one of the most popular genres of photography and for good reason. A great landscape photo has the power to wow the viewer and captures the beauty of the incredible planet that we live on. But landscape photography is also difficult to master as not only are you often at the mercy of the elements, but you are also fighting against the limitations of digital cameras versus the human eye.

As advanced as digital cameras are, they are still no match for your eyes and that sometimes means you feel let down when you look at photos you’ve taken. A big part of this could be as simple as framing your shot correctly. So here are 5 framing tricks to help you capture better landscape photos.

sunset over a valley - 5 Framing Tricks to Help You Capture Better Landscape Photos

1. Add a Sense of Scale

Think about that feeling you get when you first see an amazing landscape in front of you. It’s often the sense of feeling really small compared to those towering mountains or that deep valley. But capturing that feeling in a photo isn’t as straightforward as just taking a shot of the scene. To be able to convey that sense of scale you need to help the viewer by showing them a comparison with something they can relate to.

For example, photograph a large boulder and it will be difficult for someone looking at the photo to know how big it is in reality. But put a person next to the boulder and suddenly there is an instant sense of scale. This is a great way to really make your landscape photos jump off the page and captivate the viewer.

mountain scene - 5 Framing Tricks to Help You Capture Better Landscape Photos

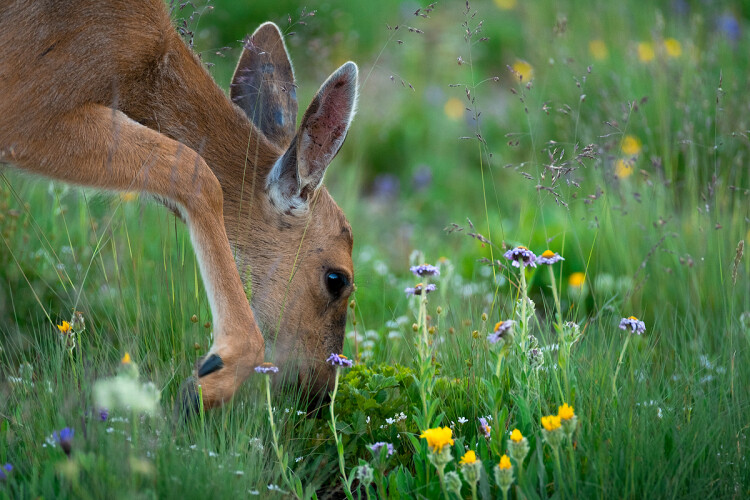
2. Point of Interest

A good landscape photo should lead the viewer’s eyes around the image. Sometimes to achieve this you need to add a point of interest to your image. This is especially true if you are photographing a scene where there is a vast empty area where nothing is happening.

Without a clear point of interest, the viewer’s eyes will get lost in the photo and it won’t work. For example, the photograph below would be pretty uninteresting without the people in it. But by including people not only does it add that point of interest but it also tells a much more intriguing story.

A point of interest could be anything. It can be a rock, person, animal, a tree, or a building. So next time you are evaluating a scene, think if it will benefit from having a point of interest. If so, try to frame your photo using the rule of thirds to capture this in the composition.

2 small people on large sand dunes - 5 Framing Tricks to Help You Capture Better Landscape Photos

3. Zoom In

In landscape photography, it’s really easy to try and capture everything in front of you. After all, that amazing vista is what usually wows people. But sometimes a wide-angle shot of a scene just doesn’t work because there is too much for the viewer to process. On those occasions, you need to zoom into your scene and try to capture a small section rather than the whole thing.

Think about the small section in the same way as if it was a wide-angle shot and frame up your image with the same thought process. The key is to not be afraid to forego the “big wide-angle shot” for the smaller zoomed in section. Remember that you can always try a few different crops and then decide on the best one later in post-production.

But don’t make the mistake of just capturing wide-angle shots and relying on cropping in post-production as the more you crop an image, the more pixelated it will become if you want to print it at really large sizes. Try to actually capture some photos zoomed it with your camera instead.

green landscape scene - 5 Framing Tricks to Help You Capture Better Landscape Photos

4. Sky or Land?

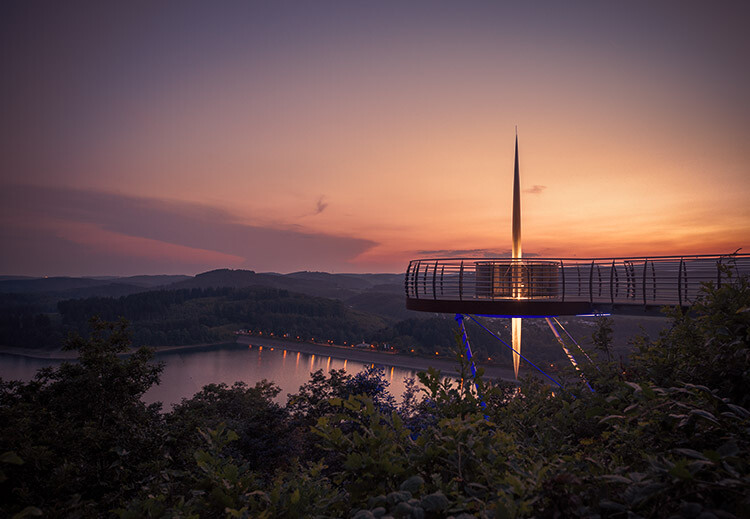
One of the best ways to ensure that your landscape photos look dramatic and stunning is by focusing as much of the photo on the part that is going to give you impact. That means really considering where to put the horizon line. If you have a dramatic sky with lots of clouds, beautiful dramatic sunsets or even moody stormy weather, then place your horizon line in the lower third of the image, so you are showing more of the sky.

If on the other hand, your foreground is interesting with a good point of interest, then place your horizon in the top third of the image. Thus maximizing the area showing the foreground in the image. Just try to avoid placing your horizon line in the middle of the image where possible as it can make your photo seem uninteresting.

So always remember, sky or land? Whichever it most important to your image, show more of that part of the scene.

beach sunset - 5 Framing Tricks to Help You Capture Better Landscape Photos

5. Extreme Angles

Most people see landscapes from one particular view only – eye level view. The great thing about photography is that it allows you to capture a photo at a completely different point of view to what most people see. You don’t need to dangle yourself off a cliff to capture unique views, sometimes just being slightly lower or more elevated can have incredibly dramatic results.

For example, set your camera really low (almost on the ground) and you will capture a unique angle from a worm’s eye viewpoint. Put your camera on a tall tripod and lift it up so that it’s higher than normal eye level and again you’ll capture a unique shot.

There’s also the option of using drones these days which can give you even more stunning photos of landscapes. But make sure you always check local laws regarding drone usage. As with any type of photography, the key is to experiment.

seascape and castle on a hill - 5 Framing Tricks to Help You Capture Better Landscape Photos

Conclusion

Capturing the perfect landscape takes time, effort and usually some luck a well.

You need so many factors to be working together to capture stunning photos and even then you still need to think about how to frame all of those elements into a photograph that will do the scene justice. But once you have a great location, an interesting subject, and the perfect light, follow these framing tricks and you may well capture some stunning landscape photos.

The post 5 Framing Tricks to Help You Capture Better Landscape Photos appeared first on Digital Photography School.


Digital Photography School

 
Comments Off on 5 Framing Tricks to Help You Capture Better Landscape Photos

Posted in Photography


Tips for Shooting Landscapes With a Telephoto Lens

05 Jun

Landscape photography is the realm of the wide-angle lens. Right? Isn’t it? I’m sure I read that somewhere. “When photographing the landscape, use a wide0angle lens.” I know I’ve heard that. We probably all have. But it’s just not true. So in this article, I’ll give you some tips for shooting landscapes with a telephoto or long lens.

Tips for Shooting Landscapes With a Telephoto Lens - sunset over the mountains

At 100mm, I was able to bring in the details of Denali, and the nearby Alaska Range as seen from Talkeetna, Alaska.

Think beyond the wide view

Sure, wide-angle lenses are great for the landscape, I use them frequently. But they shouldn’t be the only tool in your box when you are photographing the landscape. In fact, as I was browsing through my image catalog looking for images for this article, I found that many of my favorite landscape shots were made with a lens other than a wide-angle. Many were in the 70-200mm range, and a few were even made with super telephotos at 500mm or 600mm.

If you spend much time photographing landscapes, then you’ll know that there are situations where a wide-angle falls short. Here are some thoughts, and examples of when to apply telephoto lenses of different lengths to your landscape photography.

black and white landscape scene - Tips for Shooting Landscapes With a Telephoto Lens

An otherwise non-descript mountain becomes an interesting subject when the dappled sunlight plays over the tundra.

50-100mm Short Telephoto

Just a step above the “normal” lens lies the short telephoto. Many frequently used zooms, such as the popular 24-70mm and 24-105mm lengths fall into this category. Since images made in this range are not much above a standard lens, they share many of the same characteristics.

A substantial depth of field remains, even at fairly wide apertures, and the field of view is wide enough to include large features of the landscape, such as entire mountains, or broad bends of a river.

mountains in warm light - Tips for Shooting Landscapes With a Telephoto Lens

While holding on to some of the advantages of a wide-angle or standard lens, short telephotos also retain some of the challenges. This range is not for landscape details alone, rather, substantial elements of sky or foreground are often included, reminiscent of classic landscape composition.

As in a wide-angle landscape, you must consider the many different layers of an image (foreground, mid-ground, background, subject, etc.). Unlike a wide shot, however, depth of field is compressed, so when possible, use a high f-stop (like f/11 or f/16).

man on a hilltop - Tips for Shooting Landscapes With a Telephoto Lens

Think of this range (50-100mm) as a tool to simplify your composition, but that doesn’t mean it’s easy to make an image work.

100-200mm Range

storm on the horizon and mountains - Tips for Shooting Landscapes With a Telephoto Lens

The storm described below rolls over the Kelly River in the Noatak National Preserve of Northwest Alaska.

As I was paging through my Lightroom catalog looking for images, I was surprised to find that this range of focal lengths (100-200mm) is actually one of my most-used. I expected to find a lot of portraits and action shots but was surprised to see how many landscapes appeared.

A couple of years ago, I was hiking with a group of clients on a remote mountainside in far northwestern Alaska. It was late autumn, my last trip of the season. The tundra below was a mosaic of red, yellow, and orange. We’d summited a small peak and were on our way down when ominous clouds appeared on the far side of the valley. From the way the precipitation blew, I could tell that those clouds held not rain, but snow, and a lot of it.

My mind went two directions at once. The guide in me, safety oriented and risk-averse, told me I needed to get down the mountain with my clients, and fast. We still had a couple thousand feet of descending, plus three or four miles to walk to reach the safety of camp.

The photographer in me, however, wanted to drop my pack, pull out the camera and go to work. I compromised, pausing regularly to shoot as we made our way down carefully. I relied heavily on a mid-range telephoto, reaching out with my lens to find the patterns in the tundra, the rolling storm, and the sweep of the river.

hillside in red and orange - Tips for Shooting Landscapes With a Telephoto Lens

Telephoto lenses allow you to play with patterns. Here I worked with a creek flowing through the autumn tundra in Denali National Park, Alaska.

As that focal length was too long to show a broad field of view, I isolated the components that told the story. I ignored the foreground, cropping it (in the camera) completely out of the composition. From my perch high above the river, everything in the frame was far away, maximizing depth of field and relieving any necessity to choose a focal point. A

That is where this range of telephotos thrive: distant landscape elements can be shown in context, sharp from front to back.

200-400mm Long Telephoto

sunrise reflection - Tips for Shooting Landscapes With a Telephoto Lens

At 300mm, a detail can become a subject, or something entirely abstract, like these distant mountains reflected at dawn in the Salar de Uyuni, Bolivia.

High in the Himalayas of Bhutan, I rose before daybreak and walked a quarter mile to a mid-valley hillock. At 15,000 feet even that small exertion winded me. I recovered, gasping, and watched a dense bank of fog roll past in the gray light.

As morning dawned, the fog began to break, alternately revealing and hiding narrow views of the surrounding peaks. The rocks and glaciers of the mountains high above the fog layer were lit by the bright morning sun, while I shivered in damp mist.

Through the 24mm lens on my camera, I saw little but gray. Frustrated, I pulled the lens off and replaced it with a long telephoto zoom. When a window opened in the fog, I followed it with my camera waiting for something to appear. Letting the clouds do my composition for me, I snapped images: a glacier, a jagged ridge, a spear-headed peak.

sunlight on part of a rocky mountain cliff - Tips for Shooting Landscapes With a Telephoto Lens

A flank of Jhomolhari, a Himalayan peak, appears through a hole in the clouds. With a wide-angle, this would have been a small sliver of a gray image.

When the circumstances are right, a long telephoto can be a trip-salvaging tool for a landscape photographer. The morning described above was the one chance I had to make images from that camp high in the mountains. Without a long lens, that sweet light touching the mountains above would have appeared as a tiny speck in a sea of gray.

Rarely is there much depth in images made in this focal range. The depth of field is shallow at most apertures, and it can be difficult or impossible to retain focus in all of the image’s layers. So select your focal point carefully, and then compose your image to suit the story you want to tell. The focal length may cut the landscape down to smaller parts, but that doesn’t make your composition any less important.

400mm and Above Super-Telephotos

There aren’t many photographers who spend thousands of dollars on a 500mm or 600mm f/4 lens to shoot the scenery. And yet super-telephotos are capable of capturing surprising and unique landscapes.

I’ll be honest. My big glass stays at home unless I expect to see wildlife. In the backcountry, where I shoot a lot, my 500mm f/4 is just too big to lug around. However, on a number of occasions, it’s proved useful for making some atypical images of the landscape.

A 600mm equivalent allowed me to bring in a ridge of Denali in Denali National Park, Alaska, and show close detail.

Several years ago I was leading some bird photographers on a trip to the coastal plain of the Arctic National Wildlife Refuge. We were camped near the coast, on a river delta just spitting distance from the Arctic Ocean. We had been happily exploring the tundra, photographing the abundant birds and rarely paying attention to the landscape.

But one evening (late-night really), the never-setting sun was at its lowest and shed golden light across the expanse of tundra between us and the mountains. It was crystal clear, every detail visible in the distant peaks. The tripod-mounted 500mm leaning atop my bruised shoulder was the perfect tool.

The great distance to the mountains allowed large swaths of the coastal plain and foothills to maintain focus. Everything was compressed, making elements that were miles apart appear close to one another. I played with the light on the mountains, exploring the Brooks Range with my camera from 50 miles away.

caribou on the tundra - Tips for Shooting Landscapes With a Telephoto Lens

The distant Brooks Range loom over the Coastal Plain of the Arctic National Wildlife Refuge, a place, where for now at least, caribou still roam wild.

The next morning, it was still clear when a herd of caribou (above) some ten thousand strong, passed by a few hundred yards from our camp. The long glass combined with the animals were the perfect combination for showing what a dramatic and wild place is the Arctic Refuge. The compressed field made the distant mountains loom close providing more context for the caribou in the foreground.

Super telephotos are all about compression and isolation. The landscape through long glass looks nothing like it does to the human eye. Distant elements grow close, and unless your focal point is in the distance, depth of field is compressed to a few feet. These lenses are a tool for isolating patterns, compressing distances, and exaggerating sizes.

Conclusion

At 500mm lens with a 1.4x teleconverter allowed me to provide a close-up image of the full moon rising over the Andes of Bolivia, just as the last alpenglow touched the volcano.

Long lenses allow you to play with details. Here, sun falling through the clouds in Southeast Alaska makes a simple composition.

When it comes to landscape photography, telephoto lenses are often forgotten. They slip to the bottom of packs or are simply left at home.

Your bag or closet are bad places for telephoto lenses. They should be accessible, ready to help you see your landscape in a new, and creativity-inspiring way. So pull your long lens out, click it onto your camera, and explore the way the lens changes your perspective of the landscape.

The post Tips for Shooting Landscapes With a Telephoto Lens appeared first on Digital Photography School.


Digital Photography School

 
Comments Off on Tips for Shooting Landscapes With a Telephoto Lens

Posted in Photography


How to Simplify Your Life as a Photographer

04 Jun

Whether you’re an amateur or a professional photographer, complexity, confusion, and chaos are your enemies. When your life is chaotic and you’re feeling out of sorts, you’ll be unfocused and your photography will suffer. As a creative person, the last thing you want is to neglect your creative pursuits like photography.

“The more simple we are, the more complete we become.” – August Rodin

Here are 5 ways for you to simplify your life so that you can focus clearly on your life and love of photography.

Lighthouse - How to Simplify Your Life as a Photographer

Embrace simplicity in your photos by including as little as possible in the frame. In this photo, I eliminated the foreground as well as boats and other objects that could have been in the frame. All our attention is drawn to the clouds and the lighthouse in the distance.

1. Tidy up a mess

“Have nothing in your homes that you do not know to be useful or believe to be beautiful.” – William Morris

One of the simplest ways to bring some order to life around you is to tidy up a mess. Find space that you’ve got control over and clean it up. Start with your desk, or clean up your bedroom. Maybe you’ve got piles of stuff laying around the house. Choose one pile, sort it out, and put it away.

Once your space is clean, make it beautiful. Make a print of your favorite photo and frame it. Place it on your desk or hang it on the wall. Creating a tidy and beautiful space around you will help you simplify the chaos and encourage your creativity.

Jellyfish - How to Simplify Your Life as a Photographer

With nothing else present in this photo our full attention is drawn to the little jellyfish. Sometimes simplicity in photos is hard to achieve because there are so many other distracting elements.

2. Organize your photography gear

“There are two ways to be rich: One is by acquiring much, and the other is by desiring little.” – Jackie French Koller

Gather up all your photography gear into one place. This is especially helpful if you’ve got equipment stashed all over your house or apartment.

Clean it thoroughly, sort it out, and sell what you don’t need. By simplifying your gear, you’ll have fewer decisions to make and you’ll be freer to take photos when you’re in the moment.

For example, instead of wasting time wondering which of your eight lenses you should use, you’ll have three favorite ones from which to choose.

Frosty window silhouette - How to Simplify Your Life as a Photographer

Silhouettes are an excellent way to simplify and draw attention to your photos. The frosty glass adds an interesting background.

Organizing and simplifying the gear you own is one way to simplify your life. But another way is to simplify your desire for more gear.

Photographers are notorious for suffering from GAS – gear acquisition syndrome. Buying new gear is necessary from time to time, but sometimes buying stuff is an easy way to feel like a photographer rather than actually being one.

Make the most of the gear you’ve alredy got and only purchase what will truly allow you to take more creative photos.

Robin's egg - How to Simplify Your Life as a Photographer

I love taking photos with my Fuji x100s because it has just one prime lens. I don’t have to think about lens choices or focal lengths. Instead, I forget about my camera and just observe what’s around me.

3. Learn one new thing

“Knowledge is a process of piling up facts; wisdom lies in their simplification.” – Martin H. Fischer

You’ve embraced simplicity by cleaning up some small space, you’ve made that space more beautiful by printing and framing one of your photos, and you’ve begun relieving your GAS.

Now, take your favorite camera and lens and go learn something new. But learn just one new thing at a time. As a creative photographer, you’re likely eager to learn many new things and become a better photographer. That is a worthy ambition. But don’t pile on too much learning at once. That will only hold you back.

Choose just one article, book, or course, and master that before moving on. DPS has a lot of tips and articles for you to learn from, but they have also organized and simplified topics with their books and courses.

Coffee mugs - How to Simplify Your Life as a Photographer

I decided to spend some time trying to learn food photography. It’s a fun skill to study about. I needed to create some sort of background for this coffee mug and decided to stack up a few other mugs behind it. I like the repetitive pattern, another form of simplicity in photos.

4. Create a photography project

“Simplicity is about subtracting the obvious and adding the meaningful.” – John Maeda

With your new learning, why not tackle a photography project?

Many photographers have thousands of disorganized and disconnected photographs. And they have dozens of ideas in mind for what they will photograph next. Make of list of everything you’re interested in trying as a project and then choose one thing from the list to accomplish.

Silhouette and symmetry with a living room window - How to Simplify Your Life as a Photographer

I have a growing collection of silhouette photos with my living room window. Soon, I’ll gather them all together and choose my favorites for a photo book. The symmetry in this photo is an element of simplicity.

Instead of the chaos of too many options and ideas, choose one thing and bring it to life. Maybe you could take a day trip to a favorite location. Or gather together friends for a portrait project. Maybe you should sort through photos from the past and create a photo book.

In just a few days or weeks you could have a finished project and something new to hang in your tidied up space. Tackling a project will help simplify your life and bring order and accomplishment to your day.

Close up portrait of a toddler - How to Simplify Your Life as a Photographer

Close-ups simplify portraits by eliminating distracting backgrounds. Toddlers and kids have lots of fun peering into the camera or playing peekaboo.

5. Photography business

“Simplicity is the ultimate sophistication.” – Leonardo da Vinci

It is natural for photographers to consider starting a photography business. It’s a natural move since entrepreneurs and creative people are cut from the same cloth. Starting a photography business may seem like the ultimate way to live as a photographer. But even with a business, you must keep it as simple as possible.

Fishing boat silhouette - How to Simplify Your Life as a Photographer

I love to show up early before family photo sessions. Arriving at the harbor at 5 am in the morning, I captured this beautiful silhouette of a father and son heading out on one of the Great Lakes to fish.

If you’re already in business consider ways that you can simplify your photography business:

  • Keep your business aligned with what you actually love to photograph.
  • Offer one type of photography rather than doing everything.
  • Choose a simple pricing strategy.
  • Create a simple mobile-friendly website.
  • Put limits on how long your workday will be.
  • Create simple systems to make your workday flow.
  • Carve out lots of time for family and friendships.
Baseball - How to Simplify Your Life as a Photographer

I played baseball as a kid and feel nostalgic about it in the autumn months. Photographing a single object, such as a baseball, is a way to practice simplicity in your photography.

Start simple and make steady progress

Take the next 90 days (3 months) to simplify your life and your photography. Clean up your spaces, appreciate the gear you’ve got, learn just one new thing, and bring it all together with a photography project. If you have a photography business or are thinking of starting one – keep it simple by keeping all the parts simple.

Let me know in the comments what you plan to simplify first.

The post How to Simplify Your Life as a Photographer appeared first on Digital Photography School.


Digital Photography School

 
Comments Off on How to Simplify Your Life as a Photographer

Posted in Photography


DIY Camera Bag Modifications for DSLR Storage and an Active Lifestyle

03 Jun

In today’s world, digital camera technology continues to improve and get lighter. A plethora of systems offer lighter camera bodies with more technology bundled into them. There are many photographers transitioning to these systems to lighten their gear and are selling off their old equipment. However, I cannot help but be attached to the reliability and familiarity of my full frame DSLR bodies.

I do not like to compromise on image quality and feel most confident making quality images in spur-of-the-moment wildlife activity or in difficult lighting with my full-frame camera. Are you the same as me? If so, does that make us a little crazy?

Pelican case - DIY Camera Bag Modifications for DSLR Storage and an Active Lifestyle

The Pelican case gives me space for a couple of bodies, a 200-500 mm telephoto lens, and two shorter ones. Lots of space to pack a full kit!

Well, in truth, it is a bit crazier than that, I am most comfortable when I have two camera bodies with me at all times. I also carry a telephoto lens, 50mm, and wide-angle lens with me along with cleaning equipment and filters, and I like to do so at all times. In other words, I carry a full kit. I do my best to carry a full kit when hiking 10 miles into the backcountry, floating a 5-mile river trip, or walking to a local beach to watch a sunset.

If you are like me you are constantly looking for ways to safely haul your gear from Point A to Point B while also protecting your investment during your adventures. Through experimenting and modifying a Pelican 1510 case I have found a solution that works for me. In this article, I will demonstrate that system for you. I hope my DIY camera bag for DSLR storage and transportation works for you and inspires you to get more creative in hauling your gear!

DIY Camera Bag Modifications for DSLR Storage and an Active Lifestyle

I customized this Pelican 1510 case to provide waterproof and shockproof protection for my DSLR bodies and kit. Thanks to the modifications I have made, I now transport this kit everywhere.

What you’ll need

  1. A hard case – I use a Pelican 1510. The case is TSA approved as a carry-on size, meaning you’ll never have to check your camera gear to baggage claim. I pack non-critical, lower-cost items in the modular pack (see below in #4) and check those in my bag. Then I carry on the rest of my kit.
  2. A drill, 3/32 drill bit, and 3/8 drill bit – You’ll need a high-speed drill and a sharp bit to do some customization of the Pelican case. Make sure the 3/32 bit is wide enough diameter to put the eyebolt through.
  3. Eyebolts (2x) with nylon locking nuts (2x) – These will be used to secure the luggage straps to the Pelican case in the front.
  4. A secondary “modular” case for the outside – You can choose any case that is the same size or smaller than the Pelican case. Think about the gear you are using and tailor it to fit your needs. I make sure my modular case can hold my filter set, cleaning equipment, batteries, and other photography knick-knacks.
  5. Velcro – This will be used to secure the secondary modular case to the outside of the Pelican case. Get Velcro strapping that has sticky sides.
  6. Adjustable luggage straps (2x) – make sure the straps have good clips. I prefer a 1” wide webbing for the strap.
  7. Carabiner clips (2x) – These will be used to secure the luggage straps to the Pelican case in the back.
  8. Backpack straps – I use the Pelican 1510 backpack conversion straps offered by RUCPAC. I have been using their system for about two years now and find it durable and comfortable. If you are a true DIY-er you could modify the straps of an old backpack.

Modifying the Pelican 1510 Case

Pelican 1510, DSLR Storage, Camera, Modification

Step #1 – Drill holes near the latches

Close the lid and use the 3/32 bit to drill through the plastic to the inside of each latch. You’ll need to go through both layers so the extra length of eyebolt has a hole to pass into. Once you have drilled the hole, open the case and use the 3/8 bit to bore into the plastic so that the nylon nut recesses into the case and allows it to close. Repeat on both sides of the case.

drill holes - DIY Camera Bag Modifications for DSLR Storage and an Active Lifestyle

You can see here that I bored through both sides of the Pelican case with the 3/32 bit to allow the eyebolt to pass through. I bored with the 3/8 bit into the top layer to allow the nut to recess so that the top can close

Step #2 – Drill holes through the fins (back hinge)

Use the 3/32 bit to drill through the “fin” on the backside and pass a carabiner through the hole. The fins are the rigid plastic ribs that stick out to hinge the lid and bottom of the Pelican case together.

Repeat on the other side.

DIY Camera Bag Modifications for DSLR Storage and an Active Lifestyle

I drilled through the “fin” of the back with the 3/32 bit and threaded the carabiner through. I did the same thing to the other side of the pack.

Pelican 1510, DSLR Storage, Camera, Modification

Step #3 – Apply the Velcro

Apply the Velcro to the back of the modular case and then line it up accordingly on the front of the Pelican case.

Tip: Stick the hook side and the fuzzy side of the Velcro together on your modular case, peel the paper off to expose the sticky surface and then press the modular case onto the Pelican case to get a perfect alignment of your Velcro.

Pelican 1510, DSLR Storage, Camera, Modification

DIY Camera Bag Modifications for DSLR Storage and an Active Lifestyle

Attach Velcro to the top of the Pelican case and make sure that it aligns with the modular case. It is easies to make sure that the Velcro is aligned by sticking it together, applying it to the Pelican case, and then pressing the secondary modular case onto it.

DIY Camera Bag Modifications for DSLR Storage and an Active Lifestyle

Attach the Velcro.

Pelican 1510, DSLR Storage, Camera, Modification

With the Velcro attached to the Pelican case and the modular case, you’ll be able to open and access the case without it falling off the larger Pelican case. That’s a huge perk!

Step #4 – Thread the luggage straps onto the system

Thread the luggage straps through the eyebolt and the carabiner. Adjust it to a length that fits around the modular case, and then tie a good knot – I prefer two half-hitches.

DIY Camera Bag Modifications for DSLR Storage and an Active Lifestyle

Make sure the luggage straps are long enough to wrap around the modular case. Tie the ends securely to the carabiner and eyebolts.

Step #5 – Install the backpack straps to the Pelican case

Next, install the RUCPAC straps to the Pelican case. This is very simple – you’ll attach it to the top handle and thread the straps through the bottom wheels. Instructions to install the RUCPAC come with the product.

DIY Camera Bag Modifications for DSLR Storage and an Active Lifestyle

RUCPAC straps attached to the Pelican 1510 case.

There you have it!

This DIY camera bag solution has grown with me and my kit and worked for me the last two years. I find this pack very comfortable to use and wear. I am 6’3” and would be interested to hear if it fits shorter torsos as well.

The luggage straps give you the flexibility to attach a tripod or any other gear on to the outside. You can choose the size of modular case you that use to accommodate the gear you have.

This pack also provides a portable chair for those long days or nights shooting photography and can act as a tripod in a pinch. In fact, having the pack available has saved my shoot on several occasions when I needed stabilization but did not have a tripod.

DIY Camera Bag Modifications for DSLR Storage and an Active Lifestyle

The DIY camera bag case can function as a spur-of-the-moment tripod. I’ve used it for shooting the Northern Lights and time-lapses.

DIY Camera Bag Modifications for DSLR Storage and an Active Lifestyle - northern lights

I took this image of the Aurora Borealis with my camera stabilized on my Pelican case. It saved the night since I did not have a tripod along with me!

Conclusion

What I’ve shown you here could be just a jumping off point for you. Use this concept to expand and create your own DIY storage solution that works for the gear and kit you have, and your needs.

Once you are done get out there and shoot lots of images. As I like to say, “pixels are cheap”, so go make a lot of them!

The post DIY Camera Bag Modifications for DSLR Storage and an Active Lifestyle appeared first on Digital Photography School.


Digital Photography School

 
Comments Off on DIY Camera Bag Modifications for DSLR Storage and an Active Lifestyle

Posted in Photography


How to Create Your Own Style by Using LUTs in Photoshop

03 Jun

It is important to have your own style. Everybody says that. It is one of the most important factors to avoid drowning in millions of other photos from other photographers. A style is many things. It is your compositions, what you shoot photos of, what light you shoot in, but one of the most important factors is, how you post-process your photos. In this article, we will look at a post-process technique that can give you your own unique look to all of your photos using LUTs in Photoshop.

There are many ways to apply a certain look to your photos, some are better and some are simpler than others. You can pick up a filter or a preset in some tool and it might look pretty good. But it will not really be your style no matter how cool it looks. Anybody with that tool can click that exactly same preset and have the same look.

mountains at dusk and reflections - How to Create Your Own Style by Using LUTs in Photoshop

Create your own look

If you want to have your own style or look, you will have to create it. A great way to do that is by creating your own “Color Look -Up Table” or simply called LUTs. This is a fairly easy way to make a quite drastic look which will be unique to your photos. This is also called color grading.

A LUT is a Color Look-Up Table, it maps one color into another. It is a technique used in the movie industry, to create certain styles to movies. The same technique can be applied in photography to create a distinctive and professional look to your photos.

In this article, you will first learn how to use LUTs, and then how to create your own LUT files. The LUT is your post-processing style. This technique requires Photoshop or GIMP (or any program that uses layers – Luminar is also capable of using LUTs). The examples in this article were done with Photoshop.

Before we start, remember that when you are post-processing not to overdo it only “do it” enough, or subtly.

The Vista Point - How to Create Your Own Style by Using LUTs in Photoshop

How to use a LUT

Photoshop comes with a number of LUTs out-of-the-box, you apply them as an adjustment layer. They will change the colors of the image and some of them will also change the contrast. Let’s see how to add LUTs to a photo.

Path into the unknown - How to Create Your Own Style by Using LUTs in Photoshop

Step 1 – Open a photo in Photoshop

Start by opening a photo, maybe one that you have post-processed a bit to balance the contrast, highlights, and shadows.

Open a file in Photoshop - How to Create Your Own Style by Using LUTs in Photoshop

Step 2 – Add an Adjustment Layer

Then add an Adjustment Layer – choose “Color Lookup Adjustment layer”.

Add LUT adjustment layer - How to Create Your Own Style by Using LUTs in Photoshop

This layer will use a LUT file to make magic changes to your photo.

Step 3 – Pick a LUT

Make sure that you have the Properties tab of the adjustment layer opened. Click on the 3DLUT file drop-down menu and a list will appear. The list you see include the default LUTs shipped with Photoshop.

Open properties - How to Create Your Own Style by Using LUTs in Photoshop

Pick one and see what happens. Play around and try different default LUTs and see what happens.

Pick a LUT - How to Create Your Own Style by Using LUTs in Photoshop

Some are very dramatic, like for instance EdgyAmber, while others are a bit more subtle.

See the result of EdgyAmber - How to Create Your Own Style by Using LUTs in Photoshop

Resulting image using the EdgyAmber LUT.

At first, you may think that the dramatic ones are not useful at all, but try changing the layer opacity to 30% while you have the EdgyAmber LUT selected.

Change the opacity of the layer - How to Create Your Own Style by Using LUTs in Photoshop

As you can see the dramatic LUTs can also become subtle.

Change opacity Result - How to Create Your Own Style by Using LUTs in Photoshop

EdgyAmber LUT applied at 30% opacity.

Step 4 – Combining several LUT files

You can also create your own unique look. One that you can use for a particular series or even apply it on all of your photos as your style. You can do that by combining several Color Lookup (LUT) adjustment layers.

On each one, change the opacity level to something rather low, probably in the 5%-40% range. Once you have 4-6 layers, you can be pretty sure that the exact combination of layers, their order and opacity is unique.

Combined LUTs - How to Create Your Own Style by Using LUTs in Photoshop

Combining four LUTs for a unique look.

This is a pretty effective, yet simple, way to process your images to make them look like professional photographs.

Advanced tip!

You can also use some of the other kinds of adjustment layers to change the colors, to make more exact fine-tuning tweaks. Good adjustment layers for doing this are Selective Colors, Channel Mixer, and Color Balance. There are others, but they are even more advanced.

Once you have a selection of Color Lookup Adjustment (LUT) layers that you like, you can save this combination as your own LUT. This way you can achieve the same look on another photo, simply by applying just one LUT. It is almost as simple as clicking a preset button.

House in Hamburg - How to Create Your Own Style by Using LUTs in Photoshop

Requirement 1 – Your photo must be the Background Layer

To make this work, it is a requirement that the original image is the Background Layer. This will always be the case if you have opened the image normally.

Background layer - How to Create Your Own Style by Using LUTs in Photoshop

Requirement 2 – Do not use masks

Whatever color grading adjustment layers you use to change the colors, do not use any masks. Using masks will confuse the Color Look Table export tool and your LUT will probably not be usable.

The Lock House - How to Create Your Own Style by Using LUTs in Photoshop

Step 5 – How to use your own LUT

Once you have made a set of adjustment layers to your photo, you can save it to a LUT file by going to: File > Export > Color Lookup Tables…

How to save the LUT - How to Create Your Own Style by Using LUTs in Photoshop

In the export dialog box, you can name your LUT. You can also change the Grid Points. 64 is a good compromise between size/performance and quality. Finally, make sure that you have 3DL checked.

How to save LUT - Settings - How to Create Your Own Style by Using LUTs in Photoshop

If you save all your own LUTs to the same folder, they will be easy to access and find later. You can make a shortcut to the folder and very quickly apply one of your own LUTs to another image.

Step 6 – Using your own LUTs

It is very simple to use your newly created LUT file. Open a new image in Photoshop, add a Color Lookup Adjustment Layer and click Load 3D Lut.

How to load LUT - How to Create Your Own Style by Using LUTs in Photoshop

As you can see, it instantly transforms your photo.

Custom LUT loaded - How to Create Your Own Style by Using LUTs in Photoshop

If you apply this LUT to any photo they will share a common look and feel.

All the photos in this article are processed using the same LUT and the familiarity is easy to spot. The results are dark moody images with a yellow/orange tint in the highlights and a blue/purple ting in the shadow areas.

They were all created with just some basic contrast, highlight and shadows adjustments applied in Lightroom, before importing them into Photoshop. The post-processing need not stop here, but for the purpose of the example, these images were kept simple.

The outer Pier - How to Create Your Own Style by Using LUTs in Photoshop

Conclusion

By creating and using LUT files you can create a look for all your photos or even just to a series of images, that is unique. The LUT could be just a part of a more complex post-processing method or it could be the one spice that makes it your signature look.

As you grow more familiar with them you can create LUTs that you use for particular types of photos. One for sunny daytime photos, one for pre-sunrise, one for nighttime, etc. Have fun and be creative with using LUTs.

More LUTs

You can find tons of LUTs available on the internet. Some are free, some are not. However, I still recommend that you try to create your own, make it your style.

If you have any questions about creating or using LUTs, please ask in the comments area below.

The post How to Create Your Own Style by Using LUTs in Photoshop appeared first on Digital Photography School.


Digital Photography School

 
Comments Off on How to Create Your Own Style by Using LUTs in Photoshop

Posted in Photography


5 Camera Settings That All Macro Photographers Should Know

03 Jun

This article will detail five camera settings that are essential and which all macro photographers should know. It was inspired by Will Nichols’ excellent tips Five Camera Settings Every New Photographer Needs to Know. You will notice two main themes in this article – ensuring a perfect point of focus and ensuring maximum sharpness. Both of which are critical in macro photography.

Included in the list of settings are Manual Focus, Manual Mode, Live View, the self-timer, and burst mode. By familiarizing yourself with these settings, your macro photography will grow by leaps and bounds.

dahlia macro photography flower - 5 Camera Settings That All Macro Photographers Should Know

1. Manual Focus

Manual focus is one of the most important tools in a macro photographer’s toolkit. When working at high magnifications, you cannot rely on a lens’s autofocus capabilities for a couple of reasons.

First, Manual Focus is necessary for creative macro photography. In macro photography, particularly in more abstract macro photography, you have to make your point of focus count. Only by using Manual Focus, can you do so with the required pinpoint accuracy.

Secondly, macro lenses tend to have relatively bad autofocus capabilities, especially at high magnifications. It becomes frustrating to sit and wait while the lens pans back and forth (this is an even bigger problem in low light).

Macro photography grape hyacinth abstract - 5 Camera Settings That All Macro Photographers Should Know

By using Manual Focus, I was able to render the tip of the flower sharp.

The solution? Learn to use Manual Focus. With a bit of practice, you’ll find that you can focus quickly and efficiently, and your keeper rate will immediately increase.

Flower Abstract Macro Photography pink flower - 5 Camera Settings That All Macro Photographers Should Know

2. Aperture Priority or Manual Mode

There’s no way around this. A macro photographer must have maximum control over their depth of field.

At the high magnifications that are characteristic of macro photography, depth of field is often mere millimeters. And, as touched on above, it is essential that you use that in-focus area to your advantage.

One way to do this is by carefully selecting your depth of field. This may involve using a shallow depth of field for a more abstract look, or a large depth of field so as to ensure a completely sharp subject. Regardless, being able to modify your depth of field from subject to subject, from image to image, is crucial.

Tulip abstract macro photography - 5 Camera Settings That All Macro Photographers Should Know

I knew that I needed a very shallow depth of field if I wanted to pull off this tulip photograph. I used Manual Mode to select an aperture of f/4.2.

There are two settings that offer this level of control: Aperture Priority and Manual Mode. Aperture Priority Mode (labeled A or Av on your camera mode dial) allows you to set the aperture (and hence adjust the depth of field). Then the camera sets the shutter speed based on its internal light meter. Manual Mode (labeled M on your camera mode dial) allows you to control the aperture but also gives you control over the shutter speed.

I generally use Manual Mode, because I like to make split-second decisions regarding the shutter speed. But there are good reasons to use aperture priority mode as well. Whichever mode you choose, make sure that you are consciously adjusting the depth of field to fit your creative vision.

macro photography abstract trout lily - 5 Camera Settings That All Macro Photographers Should Know

3. Live View

Live View is useful in macro photography for a few reasons.

First, Live View allows for you to check your point of focus. As mentioned above, nailing your desired point of focus is essential in macro photography. With Live View, you can zoom in on the LCD screen to ensure that you are not front-focusing or back-focusing.

macro photography abstract flower - 5 Camera Settings That All Macro Photographers Should Know

Live View allows for you to make an image such as this where you can carefully focus on the base of the flower.

Furthermore, on some camera bodies, Live View enables you to reduce camera shake and keep your images sharp.

How? For the relevant camera bodies (I recommend that you check to see if this is true for your camera because it is an excellent trick), when Live View is activated, the mirror in your camera immediately flips up. Normally, this mirror flip occurs when you press the shutter release, causing camera vibration, and thus reducing sharpness.

But with Live View, this pre-flip means that, when you ultimately press the shutter release, no extra vibration occurs.

Macro photography black eyed susan abstract - 5 Camera Settings That All Macro Photographers Should Know

I took this handheld image at dusk, and just barely managed a sharp image.

4. Burst Mode

If you always use a tripod when shooting macro, feel free to ignore this tip. But for those who don’t like the weight or reduced flexibility that a tripod brings, Burst Mode can be a great tool.

What is Burst Mode? This is the camera setting that allows rapid-fire photography when you hold down the shutter release button. It ranges from a few frames per second to upwards of 10 (depending on your camera model).

While primarily used by wildlife, sports, and bird photographers in order to capture split-second action in the field, Burst Mode can also be used by macro photographers in order to ensure maximum focusing accuracy.

macro photography seedhead abstract - 5 Camera Settings That All Macro Photographers Should Know

I took this photograph while hand-holding at an extreme magnification. Without burst mode, I probably would have failed to get a usable image.

Macro photographers are often working at such high magnifications that it’s difficult to ensure perfect focusing even when using the above settings. This is where Burst Mode comes in. By taking a series of images, any slight camera motion is controlled. Even if a few photographs are out of focus, you are likely to be satisfied with some of the others.

5. Two-Second Self-Timer

A final setting that is useful for macro photographers is the two-second self-timer. When shooting (with or without a tripod) in low light with a large depth of field, you might struggle to get sharp images. Part of the problem may be camera shake, caused when you press the shutter release button. Your finger pushes the button but also rocks the camera at the same time.

The solution is to use the two-second self-timer. This is a setting offered by most DSLRs which allows you to obtain maximum sharpness and may be the difference between a usable image and a blurry one.

macro photography abstract lights - 5 Camera Settings That All Macro Photographers Should Know

When shooting in the evening, the two-second timer can be extremely useful.

Conclusion

By familiarizing yourself with these five settings; Manual Focus, Manual Mode, Live View, Burst Mode and the two-second self timer – you will have the technical grounding that all macro photographers need.

Can you think of any others settings that all macro photographers should know? Please share them in the comments below.

macro photography abstract - 5 Camera Settings That All Macro Photographers Should Know

The post 5 Camera Settings That All Macro Photographers Should Know appeared first on Digital Photography School.


Digital Photography School

 
Comments Off on 5 Camera Settings That All Macro Photographers Should Know

Posted in Photography


Weekly Photography Challenge – Open Wide

02 Jun

It’s time to open wide – your aperture that is – for this week’s photography challenge.

It’s that simple. Grab a lens with a big aperture like a 50mm f/1.8 or a zoom that has f/2.8, and choose the widest setting you’ve got available. Choose your subject and focus carefully to put emphasis and attention precisely where you want it.

If you need some tips for composing your narrow depth of field image, here are some ideas:

  • Benefits of Using a Large Aperture and Tips for Shooting Wide Open
  • Fast Glass: Tips for Working With Wide Aperture Lenses
  • How to Make Fake Shallow Depth of Field Using Photoshop
  • How to Use a Neutral Density Filter to Control Depth of Field
  • Seeing in Depth of Field: A Simple Understanding of Aperture
  • Why a 50mm Lens is your new Best Friend
  • 3 Elements of Getting Shallow Depth of Field Images

Bokeh from a 50mm f/1.8 lens.

Shallow depth of field brings focus to the glasses here. Make your subject stand out.

Weekly Photography Challenge – Open Wide

Simply upload your shot into the comment field (look for the little camera icon in the Disqus comments section) and they’ll get embedded for us all to see or if you’d prefer, upload them to your favorite photo-sharing site and leave the link to them. Show me your best images in this week’s challenge. Sometimes it takes a while for an image to appear so be patient and try not to post the same image twice.

Share in the dPS Facebook Group

You can also share your images in the dPS Facebook group as the challenge is posted there each week as well.

The post Weekly Photography Challenge – Open Wide appeared first on Digital Photography School.


Digital Photography School

 
Comments Off on Weekly Photography Challenge – Open Wide

Posted in Photography


3 Elements of Getting Shallow Depth of Field Images

01 Jun

Depth of field is one of the things that beginners often struggle with understanding. So I found a couple of videos on YouTube to help you out.

Depth of Field Basics

In this first video from B&H Photo, Kelly Mena explains the three elements that affect depth of field and how they work. The three elements are:

  1. The aperture
  2. Focal length of your lens
  3. The subject to camera distance

Okay, that explains things really well. Let’s look at another video example showing the same three elements.

Depth of Field the Easy Way

Next up, is this video by photographer Ray Scott. He gives some great image examples showing both ends of the spectrum from shallow to wide depth of field and how to combine the three elements to best control your background and foreground focus.

If you have had trouble understanding how to get a shallow depth of field, I hope this has helped you get a better handle on it.

The post 3 Elements of Getting Shallow Depth of Field Images appeared first on Digital Photography School.


Digital Photography School

 
Comments Off on 3 Elements of Getting Shallow Depth of Field Images

Posted in Photography


Working with Different Shutter Speeds for Landscape Photography

01 Jun

There are three fundamental settings in landscape photography: the ISO, Aperture and Shutter Speed (known as the Exposure Triangle). While all of these are equally important to understand in order to create technically correct images, there’s one that’s extra important when it comes to an image’s visual impact. Adjusting the shutter speed makes a big difference and is often what can make your image stand out from the crowd.

Choosing the ideal shutter speed is not an easy process though. There rarely is a single correct shutter speed but there certainly are scenarios that benefit from a specific one. In this article, we’ll look at a few different scenes and how the shutter speed affects each of them.

Working with Fast Shutter Speeds

The easiest shutter speed to work with is a fast one. Working with fast shutter speeds doesn’t require a tripod and you can easily photograph subjects that quickly pass by. This is also the most common choice for most beginning photographers as it doesn’t require much effort (and most auto functions choose a relatively fast shutter speed).

Below you have a typical example of when you need to use a fast shutter speed. In order to freeze the motion of the deer, I had to increase the shutter speed to 1/320th of a second. Had the deer been moving at a higher tempo I would have to increase the shutter speed even more to avoid any motion blur.

deer in a field - Working with Different Shutter Speeds for Landscape Photography

Photographing animals is not the only time where you should use a fast shutter speed though. In the image below, I used a shutter speed of 1/1600th.

Why did I use such a quick shutter speed for that scene? By the looks of it, the water is quite still, there are no moving subjects and there’s still enough light to use a slightly slower shutter speed, right? Yes, however, this shot was taken from a boat and even though the waters were relatively still, I needed a very quick shutter speed in order to freeze the scene without any blur from camera movement.

iceberg and water - Working with Different Shutter Speeds for Landscape Photography

Use the ideal settings not perfect ones

Had I been standing on land, I could have easily used a slower shutter speed and achieved a similar look. In fact, the overall quality could have been even better as I could have used a lower ISO and an ideal aperture. However, the purpose of photography isn’t to always have the perfect settings; it’s having the ideal settings that allows you to get the shot within the given conditions. The most important is to actually capture the image.

For too long I was too focused on always having the perfect settings. The truth is that this often leads to missing the shot as you focus too much on the technical aspect rather than working with the conditions you’re given.

For example, using a slower shutter speed when standing on a boat (such as in the image above) would have led to the icebergs being blurry due to the motion. What would you prefer? A blurry picture which is “technically” perfect, or a sharp picture that doesn’t have the technically perfect settings?

Before we move on to slower shutter speeds, let’s look at a few more scenarios where a fast shutter speed is recommended:

  • When photographing handheld.
  • Photographing quickly moving subjects.
  • When aiming to freeze motion.
  • When photographing from a vehicle.

Working with Slow Shutter Speeds

In landscape photography, the difference between slow shutter speeds is much bigger than between fast shutter speeds. While you won’t see a huge difference between 1/320th of a second and 1/640th of a second (in most cases) you may see a big difference between 10 seconds and 60 seconds. Because of this, I’ll split this section in two parts: less than 30 seconds, and more than 30 seconds (Bulb Mode).

dark image with moving water - Working with Different Shutter Speeds for Landscape Photography

The definition of a long exposure is somewhat vague but in my Ultimate Guide to Long Exposure Photography eBook, I describe is at the shutter speed where you no longer can capture a sharp handheld image. Typically, this is in the range of 1/50th of a second, depending on your camera and focal length (a longer focal length requires a quicker shutter speed to capture a sharp handheld image than a wide-angle).

Shutter speeds up to 30 seconds

While the difference between a 1 second and 30-second shutter speed is big, it’s more natural to put these together in one section to keep this easier to follow. Still, I’ll try to break it up a little to give you an idea of which shutter speeds you should experiment with in different situations. Again, there’s no correct choice and it often comes down to your preference and the tools you’ve got to work with.

When photographing beaches and seascapes where waves are crashing onto the shore or forming around rocks, I often work with a shutter speed of 0.5-1 second. I find that this creates a nice blur in the water while still keeping enough texture. A slower shutter speed such as 8 seconds blurs the water but not enough to give it the “silky” effect you often see with long exposure photography (we’ll come back to that in a bit).

waves crashing on a rocky shore - Working with Different Shutter Speeds for Landscape Photography

This also applies when photographing waterfalls and rivers. I tend to use a semi-slow shutter speed rather than an ultra-slow shutter speed when working with these scenes, as I prefer to keep some textures in the water.

As you lengthen the shutter speed you’ll see that moving elements become more and more blurry. In the image below, I used a shutter speed of 20 seconds to blur the water and give some motion to the sky. If you look at the clouds, you can see that they have been moving and it’s starting to have the “dragged sky” effect.

seascape scene - Working with Different Shutter Speeds for Landscape Photography

Keep in mind that the speed of the clouds determine how slow the shutter speed needs to be in order to pick up this motion. When clouds are moving quickly you can pick up their motion even with a shutter speed of 5-10 seconds, but to really get the “dragged sky” effect you often need to use a shutter speed (or exposure time) longer than 30 seconds.

Shutter speeds longer than 30 seconds (Bulb Mode)

In order to achieve a shutter speed longer than 30 seconds you most likely need to activate Bulb Mode.

When I first got into long exposure photography and purchased my first 10-Stop ND filters, I immediately got hooked on these ultra-slow shutter speeds. I’ll admit that I don’t do as much of it anymore (as it rarely fits with the vision I have for most locations) but it’s certainly a lot of fun to play with.

The main reason to use a shutter speed longer than 30 seconds for landscape photography is to achieve the “dragged sky” effect and to completely blur out moving elements such as water. It can also be a good way to remove people from your images (if they walk around during your 2-3 minute exposure they most likely “disappear”).

sunset on a coastal scene - Working with Different Shutter Speeds for Landscape Photography

For the image above I used a shutter speed of 180 seconds. As you can see, this has completely blurred the water and the sky is dragged across the frame.

Conclusion

Working with longer exposures can be a lot of fun but it’s not something that’s always beneficial. For example, when photographing a scene that doesn’t have any moving elements (and no clouds), there’s no need to use an ultra slow shutter speed, as it will most likely look exactly the same with a slower one.

So knowing how to select the best or most appropriate shutter speed takes practice, and comes down to what you want to achieve in your image.


For more information about this and other aspects of this type of photography, check out my Ultimate Guide to Long Exposure Photography eBook,

The post Working with Different Shutter Speeds for Landscape Photography appeared first on Digital Photography School.


Digital Photography School

 
Comments Off on Working with Different Shutter Speeds for Landscape Photography

Posted in Photography


5 Common Camera Setting Mistakes Made by Newbie Photographers

01 Jun

Photography is a process of constant learning, so it’s only natural to make mistakes along the way. But with a little bit of advice from those who have been there already, fledgling photographers can avoid a few common camera setting mistakes and focus on bigger and better things. Here are a few tips and tricks I learned early on that will help you get stuck into quality image making.

1 – Leaving image stabilization on when using a tripod

Image stabilization is a handy device that can reduce camera shake and improve image quality when it’s used properly. When activated, image stabilization counteracts slight movements of the camera to help reduce blur in your photos. It can be so effective that cameras and lenses equipped with the system allow you to use a shutter speed of between three and five stops slower than cameras without the feature.

This makes for sharper images in lower light conditions. Sounds great right? Well yes, but not all the time. In fact, when image stabilization is used with a tripod, it can sometimes be more of a hindrance than a help.

If your camera is already set up on a tripod, it should be steady enough by itself. In this case, with the image stabilization left on, the system may try to compensate for minuscule vibrations that wouldn’t otherwise have an effect on the image, increasing blur rather than reducing it.

Check your camera or lens user manual to learn how to switch the system off while shooting with a tripod and you’ll get much sharper images. Just don’t forget to turn it on again when you are going to hand-hold the camera.

5 Common Camera Setting Mistakes Made by Newbie Photographers

In this example, you can see the difference in sharpness between the photograph taken with Image Stabilization on and the photograph taken with IS off. Notice that the photograph with IS off is sharper, with greater contrast.

2 – Using the wrong autofocus mode

When I started out in photography, I remember struggling to properly focus on a subject in my frame, often leaving the camera to select a point at random and hoping for the best. At the time, I didn’t realize the importance of different autofocus modes.

Autofocus offers several different modes which you can select. These are One-Shot AF (Canon)/AF-S (Nikon), AI Servo AF (Canon)/AF-C (Nikon), and final AI Focus (Canon) and AF-A (Nikon).

Probably the most commonly used focus mode is the One-Shot/Single-Servo option. It is the best choice for stationary subjects and serves as the standard setting on your camera. For this setting, the autofocus system achieves focus and then locks that setting in until the shutter is actuated. Once locked, you are assured that your subject will be sharply focused.

AI Servo/AF-C, on the other hand, focuses the lens continuously, which makes it ideal for tracking a moving subject. In this focus mode, the camera will let you take a picture at any time, even if the subject isn’t in focus. This mode is the best choice when you have a moving subject like children, animals, shooting sports, birds, etc.

5 Common Camera Setting Mistakes Made by Newbie Photographers

You can change your focus mode in the quick control panel (this shows the Canon options).

Many cameras also offer a third autofocus mode: AI Focus (Canon) or AF-A (Nikon). This mode attempts to automatically detect whether the subject is stationary or moving and sets the focus mode depending on the situation. However, AI Focus isn’t as reliable as the other two dedicated settings, so it’s best to deliberately select between One-Shot/AF-S or AI Servo/AF-C where possible.


5 Common Camera Setting Mistakes Made by Newbie Photographers

AI Servo/AF-C focus mode is ideal for photographing moving subjects.

3 – Not shooting in RAW format

For much of my early photography, I shot in jpeg. It was a familiar file format, so I just went with it. Only later did I discovered what I was missing out on. JPEG files are processed by the camera. That means that while settings like color temperature and exposure are set based on your camera settings, the camera will process the image to adjust blacks, contrast, brightness, noise reduction and sharpening. The file will then be compressed into a JPEG.

But because the image has been edited, compressed and then saved as a JPEG, information in the original photograph gets discarded and cannot be recovered. This limits how much editing you can do with the image in post-production.

Advantages of RAW format

RAW files, on the other hand, are uncompressed and unprocessed. Although they come out looking flatter and darker than JPEG images, they retain all the information recorded in the original image. This allows for a lot more flexibility in post-production, allowing you to take full control over adjustments that you want to apply to a photograph.

Shooting in JPEG can be useful for happy-snaps or circumstances where output doesn’t need to be as higher quality. Otherwise, for professional-grade imagery, you want to shoot in camera RAW. And if you aren’t sure, it is possible to shoot both at the same time – just make sure you have an extra CF card or two on hand.

5 Common Camera Setting Mistakes Made by Newbie Photographers

You can see that the unedited, uncompressed RAW image is a lot flatter than the JPEG because it retains all the information of the original shot. Only after processing will the RAW image match or surpass the look of the JPG.

4 – Always shooting in automatic mode

Automatic exposure mode means that the shutter speed, aperture and ISO are set automatically by the camera for a given situation, leaving you to depress the shutter button and move onto the next shot. But what if you want to take more control over your images?

The biggest advantage of shooting in manual mode (or shutter/aperture priority mode) over automatic is creative control. Plus, the camera doesn’t always get the algorithm for exposure right, so you can end up with underexposed or overexposed images.

Choose a semi-automatic mode instead

You don’t have to shoot fully manual to take better control of your images either. Aperture and Shutter Priority modes allow you to select and adjust either your aperture or shutter speed while the camera compensates to give you the right exposure.

5 Common Camera Setting Mistakes Made by Newbie Photographers

Auto shooting mode.

By using Aperture Priority, you have much more control over the depth of field in your image, dictating how much of the image is in sharp focus. This is helpful for many genres from portraiture to landscape photography, changing the dynamic of your images depending on the situation and how deep you want your photographs to look.

As for using Shutter Priority, being able to take control of the motion in an image allows for a lot more creative leeway. Motion blur has long been used to make images more dynamic. Think waterfalls with smooth flowing water and time-lapse cityscapes, as well as intentional camera movement.

While Automatic exposure mode is useful and often effective, relying only on Auto is allowing your creative photographic potential go to waste. Experimenting with shooting in full Manual or Shutter or Aperture Priority Mode means that you can truly get to know your camera and exploit its artistic possibilities.

5 – Not backing up files

We have a saying in Australia; “She’ll be right”. The term asserts that whatever is wrong will right itself with time. It’s both an optimistic and an apathetic outlook, and when it comes to photography, it can be the start of a spiral into digital file oblivion. I’m talking about backing up files.

Okay, so it isn’t technically an in-camera setting mistake, but photography has an enormous output of content that needs to be maintained so that it is as fresh as the day it was created.

From day one, “she’ll be right” just doesn’t cut it. If you only have one copy of your images stored on a hard drive, and that hard drive fails, (as they often do) then you’ll completely lose all your work. Forever! The easy solution is to have a second or even third copy of your images stored somewhere else, either on an external hard drive or cloud storage service.

Make the investment now and you’ll thank yourself later.

5 Common Camera Setting Mistakes Made by Newbie Photographers

An old favorite, this image is backed up on two separate hard drives!

Conclusion

Starting out in photography can sometimes seem like a daunting task – there’s so much to learn! But photographers, for the most part, are a friendly bunch. We’re happy to pass on the tips and tricks we’ve learned along the way.

By doing your research, there are plenty of ways to dig into photography, avoiding common mistakes, and delve into the world of photography with confidence!

The post 5 Common Camera Setting Mistakes Made by Newbie Photographers appeared first on Digital Photography School.


Digital Photography School

 
Comments Off on 5 Common Camera Setting Mistakes Made by Newbie Photographers

Posted in Photography