RSS
 

Archive for the ‘Photography’ Category

Recovery Toolbox for Photoshop: Rescue Your Damaged Adobe Photoshop Files

02 Oct

The post Recovery Toolbox for Photoshop: Rescue Your Damaged Adobe Photoshop Files appeared first on Digital Photography School. It was authored by Kevin Landwer-Johan.

Have you ever endured the stress of dealing with a corrupted Photoshop PSD file? It’s not such a common problem, but when it happens it can invoke serious mental and emotional hardship. Let me introduce you to a little software tool that can be of great help to photographers, designers, and anyone else who uses Adobe Photoshop – the Recovery Toolbox for Photoshop.
Recovery-Toolbox-for-Photoshop

Fully recovered corrupted PSD file

How PSD files become corrupt

Imagine spending hours post-processing a photo you’ve captured or graphic you have created. It’s one of your best. You’ve worked through some tutorials, and been inspired to create a masterpiece of digital art.
 
You’ve put the final touches to it and hit Save, and then the power goes out. Your file has not saved correctly. Or you’ve saved it to a hard drive with bad sectors. Even when you revive the drive, the PSD file will not open. These are events that create nightmares.
 
There are other ways PSD files become corrupted and Photoshop won’t open them. At times, all you’ll see is an error message.
 
Recovery-Toolbox-for-Photoshop
 
Other times the file will open but will be incomplete. Layers may be missing, or the file may have been flattened. Maybe all you’ll see is digital noise.
 
Recovery Toolbox for Photoshop: Rescue Your Damaged Adobe Photoshop Files
 
You may have encountered similar file retrieval problems with bad memory cards or hard drives. These situations require specialized software that can recover files and rebuild them.

Adobe Photoshop Repair Tool

Adobe Photoshop Repair Tool from Recovery Toolbox is specifically designed to reclaim and repair damaged Photoshop PSD files. It’s not a tool you will use every day (hopefully), but when you do need to, it can save you considerable stress and maybe hours of work.

This small piece of dedicated software opens and restores PSD files. Often it will manage to completely restore a file which Photoshop refuses to open. Other times it will work partially. You might get most of your layers back, but not all of them. At this stage, however, it is only available for users of Windows 98 and above.

How it works

Step 1:

Open Recovery Toolbox for Photoshop and select the file you are having issues with. Click ‘Next’.
 
Recovery-Toolbox-for-Photoshop

Step 2:

The ‘View Data’ window will open. Here you have a breakdown of what the Recovery Toolbox for Photoshop can see in the corrupted file. If the file has multiple layers, click on the ‘Layers’ drop-down in the left-hand panel to view them.
 
In the right-hand panel, there are two tabs. Click on the ‘Picture’ tab for a preview of each layer.
 
Recovery-Toolbox-for-Photoshop

Step 3:

Choose your target file and the layers you want to recover. In this step, you can also select or deselect certain layers you want to recover.
 
Recovery Toolbox for Photoshop: Rescue Your Damaged Adobe Photoshop Files

Step 4:

Click ‘Recover’ and the software will work its magic. Once the recovery process is completed, click the ‘Show Result’ button to open the recovered file in Photoshop. It’s as easy as that.
 
Recovery Toolbox for Photoshop: Rescue Your Damaged Adobe Photoshop Files

Salvaged

Whether you’re a keen amateur or a professional photographer, this software will help you out when Photoshop fails to open a file. This might mean the difference in saving time rebuilding an image, or it might save your skin and keep a valuable client.
 
This Recovery Toolbox for Photoshop works on any PSD file saved from Photoshop version three or later, and recovers files with .psd and .8bps extensions.

Working through the easy steps is fast and allows for some control in the layers you choose to repair. I found that when testing this software, it was not necessary to do this, but the feature allows for flexibility with more problematic files.

This software is specifically designed to read, analyze, and recover your PSD files.

When testing this software, I purposefully produced a series of damaged PSD files, corrupting them in different ways. While saving a multi-layered PSD file, I rebooted my computer while the file was in the process of writing to a hard drive. I also saved the file to a thumb drive which I removed before fully saving the image. I did this at various stages in the process of saving. In these instances, the Recovery Toolbox for Photoshop was not able to restore my files even when they’d been nearly through the saving process.

 
Recovery Toolbox for Photoshop: Rescue Your Damaged Adobe Photoshop Files
 
The software was sent to me with a number of test files. Each of these appeared to be corrupted in different ways. Some of them opened with Photoshop, but incompletely. Others failed to open and Photoshop displayed an error message.

Pros

  • Dedicated to repairing PSD files.
  • Easy to use.
  • Well laid out user interface.
  • Detailed information and controls.
  • Price.

Cons

  • Doesn’t repair all damaged PSD files.
  • Only available for Windows Users
recovery-tool-box-for-photoshop-online
If you don’t like the idea of installing software onto your computer, Recovery Toolbox for Photoshop also has an online repair service where you simply upload your damaged file. The benefits of using the online version include:

  • Helps to repair Photoshop files on all Operation Systems: macOS, iOS, Android, Windows and so on
  • Work on any devices: PC, tablet, phones
  • Affordable price: $ 10
  • No need to install any software

In this review, the online version was not tested.

Conclusion

Recovery Toolbox for Photoshop is a great tool and will help you out where Photoshop fails to. However, there is never any substitute for having a disciplined backup routine. Saving your work often and backing it up on a separate drive, device or in the cloud is the most sure-fire way to ensure your precious files are safe and usable.
Disclaimer: Recovery Toolbox for Photoshop is a paid dPS partner.

recovery-toolbox-for-photoshop

The post Recovery Toolbox for Photoshop: Rescue Your Damaged Adobe Photoshop Files appeared first on Digital Photography School. It was authored by Kevin Landwer-Johan.


Digital Photography School

 
Comments Off on Recovery Toolbox for Photoshop: Rescue Your Damaged Adobe Photoshop Files

Posted in Photography


Has Wescott Out-Godoxed Godox with the Westcott FJ400 Strobe?

02 Oct

The post Has Wescott Out-Godoxed Godox with the Westcott FJ400 Strobe? appeared first on Digital Photography School. It was authored by Carl Spring.

The FJ400 flash and trigger

Wait? How Much? Did Westcott just outdo Godox?

Westcott has just announced the FJ400 Strobe, which on first glance is not that exciting. Then you see the price, only $ 569! That is $ 80 cheaper than the ultra-popular Godox AD400. That’s before you get to the universal trigger system. Has Wescott done the impossible? Has Westcott out Godoxed Godox?

Specs

Let’s get this stuff out of the way. If you want the headline numbers, here they are:

FJ400 Strobe

  • 400 watt-second AC/DC strobe
  • 9 F-stop range in 0.1 and 1.0 increments
  • Mains power adapter included
  • 0.9 recycle time at full power
  • 480+ full-power flashes per strobe
  • 0.05 second recycle time at the lowest power setting
  • 20 watt LED modeling lamp (Daylight balanced)
  • High-Speed Sync up to 1/8000th second, TTL and rear curtain sync
  • Bowens Mount
  • Series of gels (full CTO, has CTO, window green and diffusion) included. These attach by magnets
  • Color Screen

X2-M trigger

  • Universal wireless radio trigger for FJ400 strobe
  • Compatible with many Canon, Nikon, Sony (with adapter), Fuji, Panasonic Lumix and Olympus cameras (more are being tested by Westcott)
  • Integrated long-lasting lithium-ion battery
  • Up to 200,000 flashes per charge cycle
  • Wireless communication range of up to 985 feet (300m)
  • Bluetooth compatible with free mobile app
  • USB Type-C to USB-A cord for quick charging and firmware updates
  • 6 groups and 16 wireless channels
  • Color LCD screen

This is a serious specification list that clearly shows that Westcott is after potential Godox users. 

The Flash

westcott-fj400-strobe-Wescott FJ400 flash with bag and filters

The headline specs on this are huge. Not only is the flash cheaper than the Godox AD400, but it has a larger battery allowing for more flashes (480 for the Westcott vs. 390 for the Godox). This is at the expense of size, with the Westcott being slightly larger than the Godox. I would personally happily trade the size (and accompanying weight) difference for the extra flashes. 

The other really impressive feature is that the Westcott includes a mains cable, allowing you to plug in the Westcott FJ400 Strobe and use it as a standard studio strobe. For the Godox this is an additional extra. 

Lastly, the mount is Bowens (as is Godox), which allows you to use several different modifiers at all different price points. It also has an adapter for the Rapid Box system, meaning you can easily use the excellent Westcott modifiers

The Trigger

westcott-fj400-strobe-Westcott X2-M Trigger

The universal trigger is something that is going to be incredibly useful to many people. I shoot both Canon and Fuji and currently have two triggers that I have to remember each time I shoot. The fact that this system has a universal system is really exciting for those of us who shoot different brands. 

I also like the movement in the trigger. The fact that I can flick it up when setting my lights, then flick it back down to keep a more compact footprint is exciting. The LCD screen size is nice and big meaning it will be easy to change settings. The included Li-Ion battery is good for 200,000 flashes. This is great, but I do like using AA batteries on my triggers. It’s the peace of mind that I can get batteries no matter where I am. 

For those of you who use Sony cameras, you will need to buy an adapter. However, this is only $ 20. 

Isn’t this just a rebadged Jinbei?

It certainly looks like these strobes are based on the Jinbei. It is not totally surprising that the FJ400 Strobe has been based around an existing system. The price point Westcott has brought this unit out at would be incredibly difficult if they had to create the whole system from scratch. 

I am not an expert on electronic engineering, so cannot comment on the exact differences, but I have a hunch that the Westcott FJ400 will be built to a slightly higher specification. How much, however, is to be determined. The filter system included with the Westcott is more practical than those I have seen included with the Jinbei system. 

Also, Westcott has excellent customer service. You get to talk to a real person on the phone and things are US-based.  For many photographers, and especially professionals, great customer service is worth its weight in gold.

When can I get it?

Westcott expects to be shipping the FJ400 Strobe for the end of October. 

If you want to get yourself more excited, you can check out the announcement video below.

So, are you excited by the FJ400? Is it enough to persuade you to look at the switch from Godox? As always, let me know in the comments! 

The post Has Wescott Out-Godoxed Godox with the Westcott FJ400 Strobe? appeared first on Digital Photography School. It was authored by Carl Spring.


Digital Photography School

 
Comments Off on Has Wescott Out-Godoxed Godox with the Westcott FJ400 Strobe?

Posted in Photography


Announcing (2) Small-Class Lighting Workshops Baltimore / Washington, DC Area, Dec. 6 and 7

01 Oct

I’ll be teaching two, full-day lighting workshops in the suburban Baltimore/DC area on December 6 and 7.

They are two separate one-day events. These are small-group workshops, with a maximum class size of 12 people each day. These are shooting workshops, and you’ll be behind (and/or in front of!) a camera for most of the day.

Assuming you arrive at this class with a basic understanding of f/stops and shutter speeds, you will leave with a strong foundation in the fundamentals of off-camera lighting. You will be comfortable using single and multiple lights both alone and/or balanced with a mix of ambient lighting.

All lighting gear will be provided. We will also provide lunch.

You will need to bring a camera that is adjustable in manual mode and has a hot shoe connection for a flash, a lens that covers normal and/or portrait range, one or two fully charged batteries and an empty storage card. Maybe a notebook and pen if you like.

That’s it. Just show up ready to learn and to have fun. Leave the rest to me.

Details

Dates:
December 6 and 7, 2019

Time:
9:30am – 5:30pm

Price:
$ 259

Location:
Sandy Spring Friends Lyceum
17715 Meeting House Road
Sandy Spring, MD 20860

Note; These are the only small-class lighting workshops I’ll be teaching in the US this year. In the past, these have tended to fill very quickly. So if this is something you’d like to do, I’d suggest signing up sooner rather than later.

Sign-Up Links

Friday, December 6

Saturday, December 7

Strobist

 
Comments Off on Announcing (2) Small-Class Lighting Workshops Baltimore / Washington, DC Area, Dec. 6 and 7

Posted in Photography


How to Use Natural Light in Travel Photography

01 Oct

The post How to Use Natural Light in Travel Photography appeared first on Digital Photography School. It was authored by Karthika Gupta.

We all enjoy traveling and taking countless travel photos on our trips, don’t we? Why else are you reading this article! Travel photography is one of the most popular genres of photography today – especially with the advent of social media and the ‘share everything’ culture. People want to capture and post stunning photos of their travels to influence others, motivate others and in some cases also sell travel-related things.

Natural-Light-in-Travel-Photography

But travel photography is so much more than that. Travel photos have the potential to connect us to our beautiful world. Images of places, cultures, art, and even food take us away from our mundane everyday existence. They can transport us to magical places we can only dream of visiting someday. Perhaps they remind us of a time when we too took that trip and had similar experiences? It can become a walk down memory lane.

So how can we improve our travel photos?

Many elements go into creating an amazing travel photo, but for the purposes of this article, we will focus on light – specifically natural light in travel photography. This is my preferred way of using light in photos. In fact, I very rarely travel with an external flash because of the extra weight and because I don’t like the look of flash in my photos. I know many people who use flash with amazing results – and more power to them!

There are several reasons why I use natural light in travel photography:

  1. It is readily available and free
  2. It provides a range of light variations so I can get creative with my travel images
  3. It is a super-large light source, a.k.a the sun
  4. It constantly changes from day to day and season to season

In order to use effectively use natural light in travel photography, you have to become an expert at reading and understanding the light that is around you as you travel. Light is affected by many things and light affects many things too.

1. Location and light

For the most part, travel photography involves a lot of outdoor photography in natural light and primarily in the harsh mid-day sun. Of course, there are exceptions where you are indoors in places like museums and restaurants.

In such cases, you will likely be dealing with indoor lighting and may even use a flash. So before you take a single photo, look around and analyze your location. This will help you understand how you can harness the natural light around.

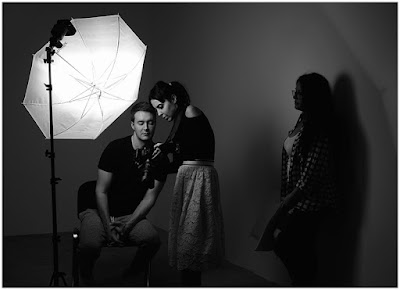
Consider whether you are out in the elements with only the sun as your light source. Are you in a city where the light is reflecting off highrise buildings? Perhaps you are in a museum where there is a lot of tungsten lighting, and flash photography is not allowed?

Image: Use creative framing and make the best of harsh midday sun during your travels.

Use creative framing and make the best of harsh midday sun during your travels.

How you handle you camera settings will depend on the location and light at that location. Harsh mid-day sun outdoors means lower ISO and high shutter speeds.

Cityscapes may mean mixed lighting with shade and harsh shadows, so you need to adjust your ISO and shutter speed accordingly.

Museum lighting may mean higher than normal ISOs along with really slow shutter speeds. You will have to pay attention to camera shake while hand-holding at slow shutter speeds.

2. Time of day and light

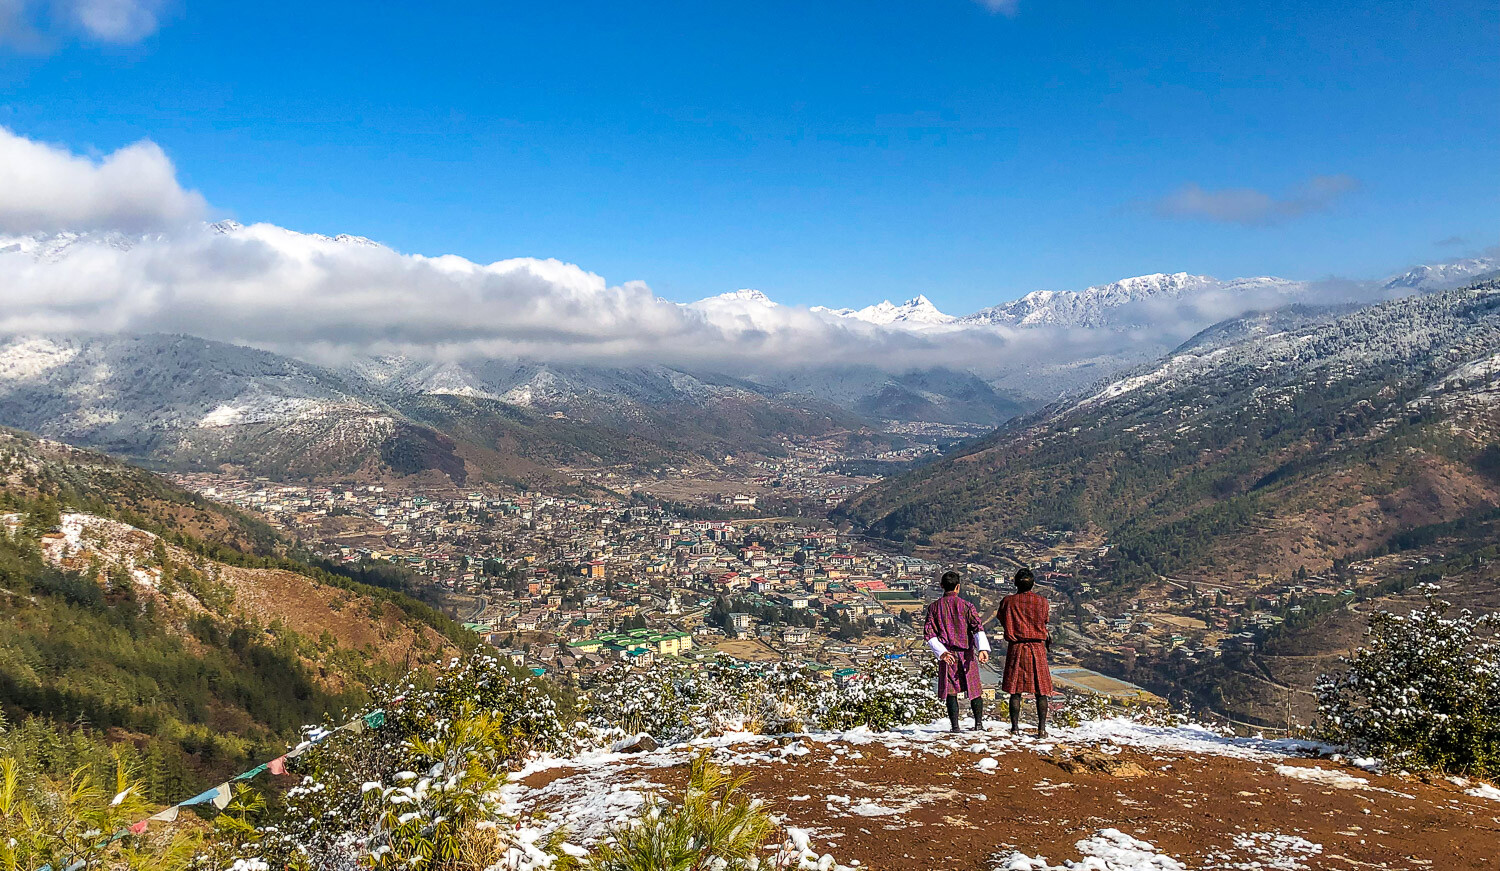
The fascinating thing about natural light is that it changes constantly. Depending on the time of day, season, or even the direction your window faces – light fluctuates minute to minute. Light first thing in the morning on a mountain top will be very different compared to the light mid-morning. Come sundown; the light changes again.

Knowing what time of day you are photographing will help you plan your gear as well as the kind of shots you will take.

Natural-Light-in-Travel-Photography

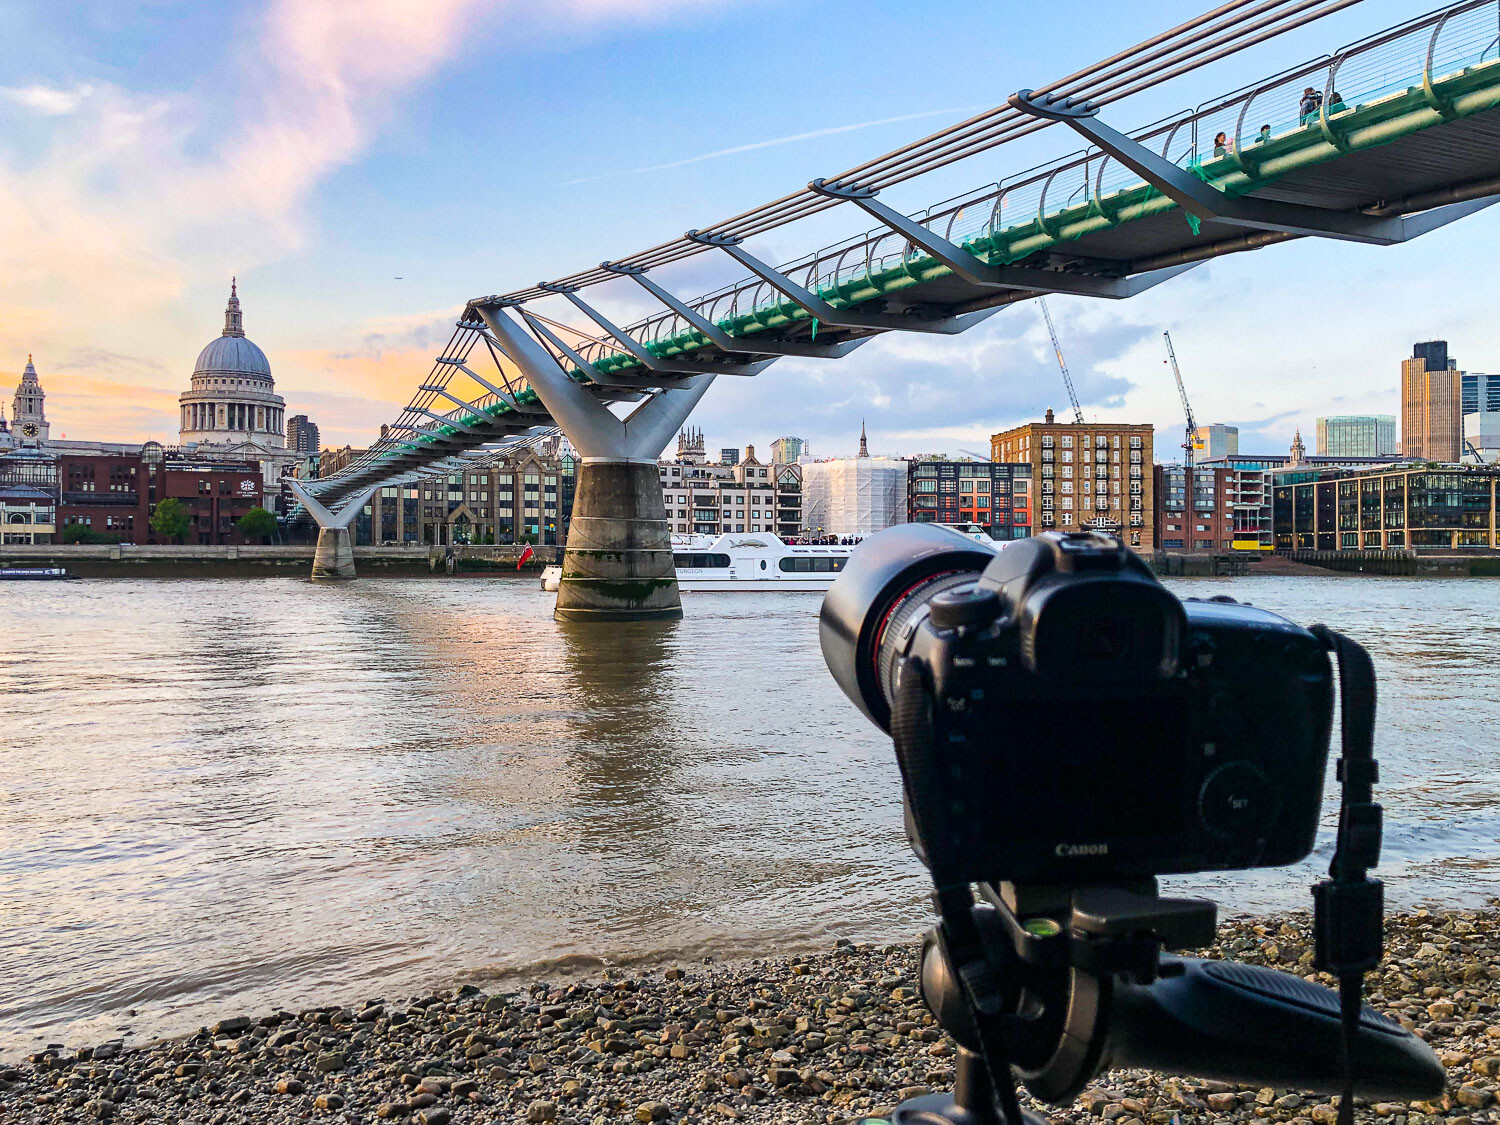
I have seen the apostles photographed many different ways, but this lighting just takes the cake! I did nothing except show up just after sunset!

Most travel photographers photograph at multiple times in the day and night. So take gear that is flexible and that you can use for all these different situations.

I travel with my Canon 5D MKIII, a 24-70mm f2.8 lens, and a small travel tripod at all times. Also, I have a few standard filters like a neutral density filter and a polarizer filter that fits in my camera bag. I have to admit, I don’t use it that often, but once in a while that waterfall during a hike calls my name.

Traveling light can help you be prepared for any situation – day or night – for amazing scenes that capture your eye.

3. Subjects and light

Believe it or not, light does impact the subject. Depending on where you are, placement of your subject, and where your light source is, the results can differ wildly. So, the first thing to do after working out the light is to understand it in relation to your subject.

In travel, I find that in most cases, my subjects are not mobile. They are buildings, monuments, and people going about their day.

So what is adjustable in these scenarios is me and my relative position to the subject and light. Don’t be afraid to move around to get the best angle and framing that will work for your situation.

Image: This minx gave me no time to adjust myself, so I just waited for the hop and took the shot...

This minx gave me no time to adjust myself, so I just waited for the hop and took the shot…I love the fact that I got him and the shadow in the same frame.

If you are indoors, try to use natural light from a window to light up the subject as far as possible. If you are outdoors, perhaps using the lens hood to block out the sun can help in reducing the harshness of light, especially if it is directly behind the subject.

Image: This is one of my favorite photos of my son during our travels. I saw the light and him almos...

This is one of my favorite photos of my son during our travels. I saw the light and him almost at the same time, and had a few seconds to take this shot….a perfect way to capture the majestic castles in Portugal!

4. Weather and light

A common misconception that photographers have, especially those starting out, is that they cannot go out and photograph in bad weather. Bad weather can include rain or overcast skies.

But in reality, overcast skies are great for taking travel photos. The clouds act as a natural diffuser, blocking out the harshness of the sun and making the light more even without harsh shadows.

Natural-Light-in-Travel-Photography

Sometimes all you need to do is show up and mother nature does the rest for you – fog, rain, clouds – they all add to the effect.

Always check the weather forecast before you go out shooting. Periods of rain, followed by clear skies, might be the best time to photograph landscapes where everything is uniformly lit.

Conclusion

I hope these tips help you in understanding the power of natural light in travel photography. Travel photography is often tiring because you are out and about all day; looking, feeling, and experiencing new things and trying to capture as much of it as you can.

By understanding how to use natural light in your photos, you can focus more on the creative side of photography to create stunning drool-worthy travel photos – much to the envy of your family and friends.

Do you have any other tips for using natural light in travel photography? Share with us in the comments below!


natural-light-in-travel-photography

The post How to Use Natural Light in Travel Photography appeared first on Digital Photography School. It was authored by Karthika Gupta.


Digital Photography School

 
Comments Off on How to Use Natural Light in Travel Photography

Posted in Photography


PhotoWorks: Photo Retouching Will Never Be Tedious Again

01 Oct

Retouching photos could be a nightmare. Wrinkles, acne, oily skin – sometimes the camera is cruelly precise. It is unpleasant to say the least if those are just your own private pictures. But what if photography is your business? No client wants to see their faces imperfect, especially on pictures taken during a special event (wedding, anniversary, etc.). If you Continue Reading

The post PhotoWorks: Photo Retouching Will Never Be Tedious Again appeared first on Photodoto.


Photodoto

 
Comments Off on PhotoWorks: Photo Retouching Will Never Be Tedious Again

Posted in Photography


Photoshop Basics: Working with Layers

01 Oct

Photoshop.  For photographers, web developers and graphic designers alike, its the go-to program for creating and editing professional grade graphics.  And like every beloved piece of software, it has to have a strong foundation to build upon; a base system that supports all other operations.  For Photoshop, it’s layers. Operations we describe here are applicable to all Creative Suite versions Continue Reading

The post Photoshop Basics: Working with Layers appeared first on Photodoto.


Photodoto

 
Comments Off on Photoshop Basics: Working with Layers

Posted in Photography


New Smartphone Includes a 108-Megapixel Camera and Wraparound Display

30 Sep

The post New Smartphone Includes a 108-Megapixel Camera and Wraparound Display appeared first on Digital Photography School. It was authored by Jaymes Dempsey.

xiaomi mi mix alpha

These days, smartphone manufacturers seem to be in a race of their own: to include the most cameras with the most megapixels.

Apple has just released the iPhone 11 Pro, with its 3-camera setup. The Huawei P30 Pro packs a 40-megapixel sensor.

And now we have a new smartphone to evaluate:

The Xiaomi Mi Mix Alpha 5G, which includes some features that can only be described as “intriguing.”

First, the camera: The Mi Mix Alpha 5G boasts a single 108-megapixel camera.

Yes, you read that right:

108 megapixels, which is not only more megapixels than the leading Google, Apple, Samsung, and Huawei cameras combined, but is also more megapixels than you can find in any Canon or Nikon DSLR.

Now, so many megapixels can cause problems:

More megapixels in a small sensor results in lots of noise, especially when shooting at higher ISOs.

But Xiaomi has attempted to account for this problem, including a “tetracell” design that can combine four pixels into a single pixel element, in order to produce 27-megapixel photos when shooting in low light.

Will this truly keep noise levels down? I’ll admit that I’m skeptical. On the Mi Mix Alpha 5G’s 1/1.33 inch sensor, even 27 megapixels is a lot, and 12-megapixel smartphones (i.e., Apple’s latest iPhones) still struggle with noise.

There’s also a question of whether a 108-megapixel camera even makes sense. Do any smartphone photographers actually need this many megapixels? Sure, more megapixels are good for printing large or doing big crops, but 108-megapixels seems like overkill for such consumer-oriented tech.

Note that the same sensor will be included in Samsung’s upcoming Galaxy S11, though the Mi Mix Alpha 5G will be the first of the two to debut the camera.

The Mi Mix Alpha 5G also features a wacky “surround display,” which wraps completely around the smartphone.

While the concept is cool, it seems like the reality might be problematic. For one, a wraparound screen can’t use a case, which means the smartphone is much more likely to be broken when dropped or banged up.

And having a display on the back of the phone seems like it could cause privacy issues; if you’re using one side of the phone, will people be able to read your messages on the other?

That said, the Mi Mix Alpha 5G is definitely a unique smartphone with a powerful camera. So if you’re the type that likes more experimental technology, go for it! The Xiaomi Mi Mix will be available for around $ 2800 USD this December.

Now I’d like to ask you:

What do you think about the Xiaomi Mi Mix Alpha 5G? Would you be interested in a 108MP smartphone camera? And what do you think about the wraparound display? Would you worry about dropping it? How about privacy?

Share your thoughts in the comments!

The post New Smartphone Includes a 108-Megapixel Camera and Wraparound Display appeared first on Digital Photography School. It was authored by Jaymes Dempsey.


Digital Photography School

 
Comments Off on New Smartphone Includes a 108-Megapixel Camera and Wraparound Display

Posted in Photography


3 Basic Steps for Photographing Motion, Moving Objects and the Art of Panning

30 Sep

Photography is one of the most powerful arts of all time. It gives time a meaningful value, some might say even more valuable than memories. Photos can express deep emotional features of places, things, people, and objects. They are part of our legacy to the future generation. But it’s not all about the future, or the past. It’s about capturing Continue Reading

The post 3 Basic Steps for Photographing Motion, Moving Objects and the Art of Panning appeared first on Photodoto.


Photodoto

 
Comments Off on 3 Basic Steps for Photographing Motion, Moving Objects and the Art of Panning

Posted in Photography


5 Awesome Ways to Improve Your Clothing Photography

30 Sep

Clothing photography… it’s chic, it’s in demand, and it can score you a pretty penny if you prove yourself. What’s even better is that clothing photography has weaved itself into numerous popular industries and niches, ranging from fashion and runways (duh), to Ecommerce stores, all the way to social media and its influencers – there is no shortage of gig Continue Reading

The post 5 Awesome Ways to Improve Your Clothing Photography appeared first on Photodoto.


Photodoto

 
Comments Off on 5 Awesome Ways to Improve Your Clothing Photography

Posted in Photography


11 Tips for Shooting Travel Stock Photography to Make Money

30 Sep

The post 11 Tips for Shooting Travel Stock Photography to Make Money appeared first on Digital Photography School. It was authored by Kav Dadfar.

Stock photography is a tough industry to master. The competition is fierce and prices have been falling over the last decade. But if you are willing to put the effort in and have a long term plan, you can certainly reap the rewards. As a photographer who has been involved in stock photography for over a decade, I have certainly seen the highs and lows. So here are my top tips for shooting travel stock images and how to make money from it.

shooting-travel-stock-photography

1. Include people

Picture buyers are always looking for something new and fresh. Including a person can often be what makes your images unique to the thousands of others that already exist. Including a person in the shot also gives the image some context and shows more of an experience rather than just documenting a place.

Some scenes are busy enough that you don’t need someone to pose. But if you do need someone, don’t be afraid to ask a stranger. Rarely have I found that anyone says no. I always offer to send them a copy of the image to sweeten the deal. This doesn’t mean you shouldn’t take the more generic-type shots. It more about maximizing your sales potential by shooting a variety of different images.

shooting-travel-stock-photography

2. Get a model release

So once you have included a person when shooting travel stock photography, it is a good idea to get a model release. If the person or people are mainly unrecognizable, or if you intend to sell your shot for editorial purposes only, you won’t require one. But be aware that some stock agencies will require a model release even if it is someone’s hand showing in a photo. Of course, there are times where it simply isn’t feasible, for example, if you are photographing a crowd of people. Getty Images have a great model release form that you download here.

shooting-travel-stock-photography

3. Shoot portrait and landscape

When shooting travel stock photography, you should always shoot a landscape and portrait version. Not all scenes work in both landscape and portrait, so sometimes it might not be possible. But if you can, it will come in really useful.

But not only portrait and landscape, try to capture some different compositions. For example, place your point of interest on the left or right. Leave room above and below. You are already at the location so you might as well cover as many possibilities as you can. You never know when a buyer will ask if you have that image in a different crop. Doing this will mean that for example, your image may get used as a double-page spread or a front cover.

11 Tips for Shooting Travel Stock Photography to Make Money

4. Leave space for copy

It is important to shoot images with dead space to allow for copy or headlines to be put in. Sometimes this can mean breaking those all-important rules of composition you have spent years perfecting. But it’s worth it to make those sales.

As mentioned above, you can always shoot multiple versions of the same shot. Try to imagine where and how your image will be used in a publication (or even a website), and compose your shot with that in mind.

Image: There was plenty of free space at the top of this image for the copy to be placed.

There was plenty of free space at the top of this image for the copy to be placed.

5. Choose the right agency

This might be pretty obvious, but it’s important to submit your images to the correct stock photography library. If you shoot travel stock photography, then a specialist travel site is best. If you shoot still life, then an agency that specializes in this would be more successful.

Beyond that, spend some time researching the agency that you are thinking of submitting to. For example, are you happy to see your images sold for a few cents? Consider what your commission rate will be as well as they vary greatly from one agency to another.

shooting-travel-stock-photography

6. Think carefully before submitting to Microstock

Every single person I have ever spoken to who submitted to microstock sites regrets doing so down the road. Of course, there are probably some photographers out there who are very happy with their returns. The problem is that you will need such a huge collection of images with a wide coverage to see any returns that will be worth your time. This is because microstock sites sell images for cents. Ask yourself, would you prefer to sell one image at $ 25 or 250 at 10 cents?

11 Tips for Shooting Travel Stock Photography to Make Money

7. Find fresh angles

If you really want to make your images stand out and catch the buyer’s eye, photograph it differently! Every picture buyer has seen the classic shot of the Eiffel Tower, and it has been on the cover of hundreds, if not thousands, of publications. So the same is not likely to catch many prospective client’s attention. It’s not always easy, but if you can capture something different or unique, you might end up with a few sales from it. This could be as simple as photographing something from lower down or higher up.

11 Tips for Shooting Travel Stock Photography to Make Money

8. Unique location

As well as finding fresh angles, find new locations. Iconic locations such as London or New York, are constantly changing, so there are always potential new places from which to capture photos. This could be from a new rooftop bar with a unique view of Manhattan or new art installation on the streets of London. Even if your location isn’t ever-changing, finding somewhere with a view that not everyone photographs can be very useful.

shooting-travel-stock-photography

9. Quality over quantity

This is often a bit of a contradiction when it comes to stock photography because stock photography is a numbers game. The more images you have, the better your chances of making a sale. However, the key is that they have to be quality shots that people would be willing to pay for. This is the reason that it will take most stock photographers a few years to get a wide enough coverage of images to see a decent return.

Try to always shoot the best locations at the best possible time of day. More often than not, this will be sunrise or sunset, but you will need to assess each scene individually. Your aim should be to capture each shot in a way that you can sell it.

11 Tips for Shooting Travel Stock Photography to Make Money

10. Stay local

Shooting good travel stock photography doesn’t always mean jetting off to far-flung locations. You can often produce great travel stock images a lot closer to home. If, like me, you are lucky enough to live near an iconic place (for me it is London), then you already have endless photo opportunities.

Shooting locally has other benefits as well.

You can revisit locations easily if the weather wasn’t great. You don’t have to worry about the additional travel expenses that eat into your profits. In fact, you will probably find that your local shoots end up having a far better ROI (return on investment) than traveling to other places.

11 Tips for Shooting Travel Stock Photography to Make Money

11. Do something different

Another way that you can try to capture different types of images is to use different technology. For example, drones have now been around a while and can offer a completely new and unique view of something that may have been photographed a lot. But there’s no denying it’s getting harder and harder to fly drones in many places. So if it’s something you are interested in, it’s probably a good idea to get a license. But drone images do sell pretty well, so it is worth considering.

shooting-travel-stock-photography

Conclusion

For most people stock photography will never be the main source of income. However, with some preparation and planning, you can certainly make some extra money from your hobby or profession. The key to being a successful travel stock photographer is to treat it like a business as much as possible. Keep your costs as low as you can, and shoot as often as you can.

Do you have any other tips you’d like to share? Do you make money from shooting travel stock photography? Share with us in the comments!


shooting-travel-stock-photography

The post 11 Tips for Shooting Travel Stock Photography to Make Money appeared first on Digital Photography School. It was authored by Kav Dadfar.


Digital Photography School

 
Comments Off on 11 Tips for Shooting Travel Stock Photography to Make Money

Posted in Photography