RSS
 

Archive for the ‘Photography’ Category

10 of the Most Useful Photoshop CC Shortcuts

20 Oct

The post 10 of the Most Useful Photoshop CC Shortcuts appeared first on Digital Photography School. It was authored by Kevin Landwer-Johan.

photoshop-cc-shortcuts-list

Learning photography well requires a lot of study and practice. Figuring out what the dials and buttons on your camera do takes time and focus. Choosing what to photograph and how you want it to look is challenging for many photographers.

Once you’ve taken some photos, another challenge to face is how to get them looking their best. This is where you need to learn a whole new set of computer skills. The more particular you are about the way your photos end up, the better post processor you need to become.

photoshop-cc-shortcuts-list

Adobe makes two of the most popular photography post-processing programs. Lightroom and Photoshop have been industry standards for many years. As the software develops, it becomes more and more complex. There are many built-in tools to make the user experience more fun. But to make use of them you will need to study and practice.

Photoshop CC Shortcuts

Making the most of your keyboard is about the best way to ensure not only greater speed, but more enjoyment when using Photoshop. The software has many cool shortcut keys that speed up your workflow. They also help you maintain unbroken concentration when you are working on a photograph.

With so many shortcuts, it’s not practical to sit down and learn them all at once. Looking at them in the software does little to inspire. This is why I’ve come up with a list of ten Photoshop CC shortcuts that I think you will find helpful.

From time to time, I make a point of learning a few more. I’ll search for five to ten shortcuts and make a list. I place this next to my computer monitor and refer to it when Photoshopping.

If you’re not used to using keyboard shortcuts with Photoshop, they might seem a bit fiddly at first. Like learning to touch type, the more you practice, the easier it becomes, and the less you have to think about where you are putting your fingers. Learning to use shortcut keys in Photoshop is a similar experience, but you can easily break it down and learn a few at a time.

1. Clone Stamp Tweaks

The clone stamp is one of the most used tools in Photoshop. It’s powerful and flexible to do everything from removing small blemishes to recreating whole portions of a composition. Here’s a couple of keyboard shortcuts that make it even more useful.

Use Alt+Shift+arrows (Opt+Shift+arrows on Mac) to offset the selection area.

Alt+Shift+<> (Opt+Shift+<> on Mac) rotates the selection

Using [] scales the source.

These shortcuts only work when you have a North American keyboard selected in your operating system.

photoshop-cc-shortcuts-list

2. Last-Used Filter

When you’re processing batches of images, you’ll often want to repeatedly use the same filter. To apply the previously used filter, use Ctrl+F (Cmd+F on Mac). Reapply the last filter used, but display dialog box to alter settings use Ctrl–Alt–F (Cmd+Opt+F on Mac)

photoshop-cc-shortcuts-list

3. Lock Transparent Pixels

In Photoshop, using the / key locks transparent pixels. This is helpful when painting or compositing. Working on a layer with transparent pixels, you will avoid affecting them using the keyboard shortcut.

10 of the Most Useful Photoshop CC Shortcuts

4. Color Fills

Use Shift+Alt+Backspace (Shift+Opt+Backspace on Mac). This fills opaque pixels on a layer with the foreground color. Shift+Ctrl+Backspace (Shift+Cmd+Backspace on Mac) fills with the background color.

photoshop-cc-shortcuts-list

5. Marquee Tool Tweak

Drawing a marquee by default happens from the edge. To draw a marquee selection from center Alt+drag (Opt+drag on Mac)selection.

10 of the Most Useful Photoshop CC Shortcuts

6. Selection Help

To bring back a selection you deselected, use Ctrl+Shift+D (Cmd+Shift+D on Mac). This will restore the last active selection. It is super helpful if you deselect and then notice something else you need to alter.

photoshop-cc-shortcuts-list

7. Layer Mask Speed

Ctrl+\ (Cmd+\ on Mac) switches between Layer and Layer Mask Ctrl+2 (Cmd+2 on Mac) to switch back. This is a pure workflow time saver. It allows you to keep your mouse active on the image rather than dragging it back and forth to the layers panel.

10 of the Most Useful Photoshop CC Shortcuts

8. Brush Tool Cursor

With the Brush Tool selected hitting the Caps Lock shows only the cross-hair cursor. This allows you to position your cursor more precisely. It’s also a good shortcut to know how to undo. If you’ve inadvertently turned caps lock on while using the Brush Tool, you may wonder why you can only see a crosshair. Hit the caps lock again, and your normal cursor will reappear.

photoshop-cc-shortcuts-list

9. Revert to Last Saved

F12 reverts the file to the last saved instance of it. This is a quick and easy way to review changes you are making to an image.

10 of the Most Useful Photoshop CC Shortcuts

10. Screen Space Savers

F keys to show/Hide panels. Memorizing these keyboard shortcuts will give you so much more screen space to use. If you are confined to a single monitor, making use of these shortcuts can change the way you use Photoshop.

F5 – Show/Hide Brushes panel

F6 – Show/Hide Color panel

F7 – Show/Hide Layers panel

F8 – Show/Hide Info panel

Alt–F9 – Show/Hide Actions panel

10 of the Most Useful Photoshop CC Shortcuts

Conclusion

I suggest you use this list as a starting point. Not all these shortcuts will be helpful for everyone. Think about the actions you use repetitively when using Photoshop and search to discover if there are keyboard shortcuts to make your life simpler.

Making a note and keeping it near your computer will help you commit these shortcuts to memory. Once you have them, do some more research and make another list of shortcuts you’d like to learn. Making a concerted effort and being consistent with using these shortcuts, you will learn them quickly.

There are over 500 keyboard shortcuts for Photoshop. Master these, and then you can also customize your own.

If you’ve got a few favorite shortcuts you think others may not be aware of, please share them in the comments below.


The post 10 of the Most Useful Photoshop CC Shortcuts appeared first on Digital Photography School. It was authored by Kevin Landwer-Johan.


Digital Photography School

 
Comments Off on 10 of the Most Useful Photoshop CC Shortcuts

Posted in Photography


The Google Pixel 4 Will Feature Two Cameras Plus Enhanced Night Sight

19 Oct

The post The Google Pixel 4 Will Feature Two Cameras Plus Enhanced Night Sight appeared first on Digital Photography School. It was authored by Jaymes Dempsey.


The Google Pixel 4 Will Feature Two Cameras Plus Enhanced Night Sight

Earlier this week Google announced the long-awaited Pixel 4, which promises to take smartphone photography to a whole new level.

This comes in the wake of Apple’s iPhone 11 Pro announcement last month, which saw the debut of a triple-camera setup and features such as Night Mode.

In other words, the Pixel 4 is a competitor in an intense fight to create the best cameras, the best lenses, and the best camera software.

So what does the Google Pixel 4 offer?

Let’s take a closer look:

First, the Google Pixel 4 features a dual-camera setup, offering the usual wide-angle lens alongside a new 2X telephoto option. This isn’t unique (Apple has regularly included “telephoto” lenses going all the way back to the iPhone 7 Plus), but it is a nice addition for those who need a bit more reach. You can use the 2X lens for tighter portraits, and it’s also useful for street photography, where you often need to photograph subjects from a distance.

Interestingly, Google has decided to keep the wide-angle camera at 12 megapixels, but has packed in a 16-megapixel sensor for the telephoto camera. While plenty of photographers will be excited by this jump in resolution, it remains to be seen whether such tiny pixels will result in significant noise.

The dual-camera setup should also improve Google’s Portrait Mode, and Google has promised more natural background blur and very precise edges (e.g., when dealing with hair). Truthfully, I’m skeptical. I’ve yet to see a Portrait mode photo that looks perfect on any smartphone camera. But I’ll wait until I see the results from the Pixel 4 before judging.

One cool new feature that will debut in the Pixel 4 is Live HDR. When you go to capture an HDR photo, you’ll be able to see a live HDR preview on your smartphone screen; this should give you a sense of what you can expect from the HDR+ effect.

Finally, if you enjoy doing astrophotography, you’re in luck: The Pixel 4 offers an improved Night Sight mode, in which you can take stunning photos of the night sky. It works by taking a series of long exposures, before blending them together to create a beautiful final photo. Note that you’ll need a tripod or other method of stabilization to get sharp astrophotography shots.

Overall, the Google Pixel 4 offers some impressive new features, even if none of them feel totally groundbreaking. Up until now, the Pixel lineup has dominated regarding low-light shooting, and the enhanced Night Sight suggests that Google plans to keep running with this success.

The Google Pixel 4 is currently available for preorder starting at $ 799 USD and will hit the shelves on October 24.

You can check out this first look video from cnet to get more of an idea of the Google Pixel 4.

?

Are you interested in the Google Pixel 4? Let us know in the comments!

The post The Google Pixel 4 Will Feature Two Cameras Plus Enhanced Night Sight appeared first on Digital Photography School. It was authored by Jaymes Dempsey.


Digital Photography School

 
Comments Off on The Google Pixel 4 Will Feature Two Cameras Plus Enhanced Night Sight

Posted in Photography


Weekly Photography Challenge – Mountains

19 Oct

The post Weekly Photography Challenge – Mountains appeared first on Digital Photography School. It was authored by Caz Nowaczyk.

This week’s photography challenge topic is MOUNTAINS!

Image: Cathedral Rock and the Hump Mt Buffalo in Winter  by Caz Nowaczyk

Cathedral Rock and the Hump Mt Buffalo in Winter  by Caz Nowaczyk

I have a big fascination with mountains and have recently been visiting Mount Buffalo in Victoria, Australia again (I visit here a lot because it is such an incredible landscape!). This has inspired this week’s challenge!

So go out and capture mountains. They can be color, black and white, moody or bright. Just so long as they have mountains! You can also manipulate them in your favorite post-processing software. You get the picture! Have fun, and I look forward to seeing what you come up with!

Image: The Cathedral and the Hump at Mt Buffalo National Park, Victoria in Winter by Caz Nowaczyk

The Cathedral and the Hump at Mt Buffalo National Park, Victoria in Winter by Caz Nowaczyk

Image: View from The Horn to The Cathedral and the Hump in Mount Buffalo National Park by Caz Nowacz...

View from The Horn to The Cathedral and the Hump in Mount Buffalo National Park by Caz Nowaczyk


Check out some of the articles below that give you tips on this week’s challenge.

Tips for Shooting MOUNTAINS


5 Tips for Avoiding Boring Photos of Mountains

Simple Tips to Improve Your Travel Photography – Photographing Mountains, Hills and Valleys

9 Tips for Photographing Mountain Lake Reflections

A Set of Awe Inspiring Majestic Mountain Images

How to Photograph a Minimalist Landscape

These Inspiring Landscape Photographers will Make You Want to Take Better Photos

The dPS Top Landscape Photography Tips of 2018

Weekly Photography Challenge – MOUNTAINS

Simply upload your shot into the comment field (look for the little camera icon in the Disqus comments section) and they’ll get embedded for us all to see or if you’d prefer, upload them to your favorite photo-sharing site and leave the link to them. Show me your best images in this week’s challenge.

Share in the dPS Facebook Group

You can also share your images in the dPS Facebook group as the challenge is posted there each week as well.

If you tag your photos on Flickr, Instagram, Twitter or other sites – tag them as #DPSmountains to help others find them. Linking back to this page might also help others know what you’re doing so that they can share in the fun.

The post Weekly Photography Challenge – Mountains appeared first on Digital Photography School. It was authored by Caz Nowaczyk.


Digital Photography School

 
Comments Off on Weekly Photography Challenge – Mountains

Posted in Photography


How to Copyright Your Photography and Why You Really Should

18 Oct

The post How to Copyright Your Photography and Why You Really Should appeared first on Digital Photography School. It was authored by Darina Kopcok.

How-to-Copyright-Your-Photography


In today’s digital world, it has become crucial to register copyright for your images. Theft online is rampant, so you need to protect yourself and your work. Read on to find out why you should and how to copyright your photography.

How-to-Copyright-Your-Photography

What is Copyright?

Copyright protects the legal rights of the owner of intellectual property or work of art. In simple terms, copyright is the right to copy. As photographers, this means that only we as the original creators of our images, and anyone we give authorization to, are the only ones with the exclusive right to publish or otherwise reproduce our images.

The moment you click the shutter on your camera, you own the copyright to your images. No matter your level of skill, or whether you’re an amateur or a pro, your images are protected by law.

Keep in mind that copyright laws do vary from country to country, therefore the information in this article is general. It’s also meant for educational purposes since I’m not a lawyer and not qualified to give legal advice.

The lack of knowledge or education about copyright has caused a lot of problems in the photographic industry. Many new or emerging photographers are not educating their clients on copyright and usage, so clients assume they own their images and can do with them whatever they wish. To compound this problem, lawyers often advise their clients to always obtain copyright from the photographer, but in most cases, this is completely unnecessary, unless the client wants to sell the images and make a profit from them.

All of the big companies like Coca-Cola and McDonald’s never ask for copyright. They don’t need it. They license images for a specific use and time frame.

Any discussion about buying out copyright should include very large numbers.

How-to-Copyright-Your-Photography

What is published versus unpublished work?

There are two types of work that fall under Copyright: published and unpublished.

Digital media falls under copyright protection, but it has not been updated to be clear. Published works, in this case, are different from a patent, which covers inventions or discoveries, or trademarks, which covers designs, symbols, logos, and words.

To qualify as published, the work must be distributed to the public in some form, whether digital or print. There has to be some form of copies or multiples. A website or blog doesn’t qualify as published because your photos are not getting distributed. Social media is also considered unpublished. It is not distributed to the public in copies the way stock photos are, for example.

How to Copyright Your Photography and Why You Really Should

Why you should register your copyright

It’s an unfortunate by-product of living in today’s world that your images will get stolen. If you post any of your photography online, chances are that some will get stolen at one time or another. Some of this theft is due to the ignorance of the public, while others knowingly take your images without your permission, without paying for usage licensing.

Unfortunately, a lot of large companies do this, and there have been numerous high profile lawsuits where photographers have won hundreds of thousands of dollars for copyright infringement.

Filing copyright on your photos will protect you in the case you need to go to court to sue for statutory damages and lawyers fees. In a copyright infringement suit, a judge or jury can award you statutory damages as defined by the Copyright Act – thousands, if not tens of thousands of dollars, if you can prove that your image was stolen with willful intent.

Photography is becoming more commoditized, but there is still immense value in it because it allows companies to make a profit by advertising their products. If someone is trying to gain financially by selling a product with stolen images, that is a big problem. Think of it this way: it’s not just the images that are stolen; it’s also the profit of the photographer.

When you don’t charge for usage, or go after those who are using your images unlawfully, that’s money out of your pocket. And what’s worse, you may actually be struggling to pay your overhead and make a profit in the first place.

How-to-Copyright-Your-Photography

How to file for Copyright

Filing for copyright can be a bit tedious, but it can be done online fairly simply. For example, as I’m based in Canada, I Googled “Canadian Copyright Office” and easily found the website for the intellectual property office. I have registered photographs and even a photography eBook I sell on my blog online very easily.

Some countries have agreements with the U.S. to enforce U.S. copyright laws. It’s often useful to register your copyright in the U.S. even if you’re not a U.S. citizen, to obtain the statutory benefits of registration in the United States.

Ideally, you should copyright any images before they are published, but you can copyright them at any time. You can even copyright them after you’ve discovered an unlawful use of one of your images. It will just be a bit more complicated from a documentation standpoint.

The cost of registering copyright varies from country to country. In Canada, it’s $ 50, and in the U.S., it’s currently $ 55 for a group of images. You can copyright your images as a group, to a maximum of 750.

For more information about registering photographs with the U.S. Copyright Office, go here.

The portal is fairly simple to use, but this resource will give you more information. You have to upload a .jpeg for each image you’re copyrighting, and submit a title list in an Excel spreadsheet. The preference is that these items be submitted in a .zip file.

Research the copyright laws in your country. Although in many countries like Canada and the U.S. copyright is immediate upon creation of a work, you still have to register copyright before you can sue.

Conversely, in Australia, there is no formal copyright registration system. The law ensures that certain forms of expression are automatically covered under the Copyright Act.

How-to-Copyright-Your-Photography

To sum up

Copyright is something that a lot of people don’t understand – even clients. It’s important to educate yourself and those you work with on the ins-and-outs of copyright. As I mentioned, laws vary from country to country, but you can find a lot of this information online. It’s crucial to protect yourself and your work.

Do you have any other tips on how to copyright your photography? Have you had your images stolen? If so, share with us in the comments below.

The post How to Copyright Your Photography and Why You Really Should appeared first on Digital Photography School. It was authored by Darina Kopcok.


Digital Photography School

 
Comments Off on How to Copyright Your Photography and Why You Really Should

Posted in Photography


5 Questions to Ask Before Buying Used Camera Gear

18 Oct

The post 5 Questions to Ask Before Buying Used Camera Gear appeared first on Digital Photography School. It was authored by Jaymes Dempsey.

Questions to Ask Before Buying Used Camera Gear

I’ve bought a lot of used gear over the last decade.

Cameras.

Lenses.

Batteries.

And more.

Questions-to-Ask-Before-Buying-Used-Camera-Gear

A lot of those purchases turned out great. Some of them I still use to this day.

But a large chunk of the used purchases I made?

Trash.

In fact, in my more naive years, I was forced to return over 50% of the gear that I purchased. There were just so many problems: sand in focusing rings, stains on the front element, shutter buttons that couldn’t communicate with the shutter. (Oh, and my least favorite: Fungus inside the lens. Doesn’t that just make you shiver?)

And here’s the kicker:

I bought all of this gear through respectable buyers, who described the equipment as in “excellent condition,” “flawless,” “perfect,” “like new,” – you name it.

It got so bad that I considered leaving the used market entirely and just buying new. But I resisted.

Why?

Used camera gear is a real bargain – if you buy carefully. This is why I took all of my negative gear-buying experiences and turned them into a process for making sure I purchased good used gear.

At the core of that process is a series of questions. Questions that I’m going to share with you today. Some of the questions are for you, the buyer. Others should be posed to the seller before you put any cash down.

Are you ready to discover how to buy used gear effectively?

Let’s get started!

Questions-to-Ask-Before-Buying-Used-Camera-Gear

Question 1: Are you buying from a reputable seller with a money-back guarantee?

This is the number one most important thing that you should do when buying used gear.

Purchase from a seller that you trust – and that gives you an enforceable money-back guarantee. You don’t want to purchase a camera online, only to find that it’s full of water damage and sports a cracked LCD.

This means that buying used through Amazon is fine. All of their products are backed by Amazon month-long guarantees.

Buying used through eBay is also fine. Ebay’s buyer protection ensures that you’re not going to get ripped off in such an obvious fashion.

5 Questions to Ask Before Buying Used Camera Gear

But this makes most forums (if not all forums) off-limits. If the forum doesn’t have a serious money-back guarantee that’s honored by the site itself, then stay away.

This also makes in-person sales off-limits, such as those done through Craigslist. Sure, you can inspect the item upon receipt, but what are you going to do when you get home, put that lens under a light, and realize it’s filled with an army of fungus?

It’ll be too late, and your seller may not be so receptive to a return.

So just don’t do it. Instead, use sites like Amazon, eBay, B&H, or KEH, which all have clear money-back guarantees.

Question 2: Does the seller include actual pictures of the gear?

Sellers not including pictures is a big warning sign, especially on a website like eBay, where pictures are the norm. It should make you ask: Why doesn’t the seller want to show off their “excellent condition” item? Is there something they’re trying to hide?

Another red flag is only showing a stock photo. These are easy to spot; they look way better than anything that a casual, eBay-selling photographer would have taken, and there tends to be only one or two of them.

5 Questions to Ask Before Buying Used Camera Gear

If you like the price and everything else checks out, then go ahead and shoot the seller an email, asking for in-depth pictures of the item. If the seller refuses, then it’s time to look elsewhere.

You might come across some sellers who are offering many units of the same item (e.g., five Canon 7D Mark II’s). In this case, they likely have shown a stock photo, or a photo of one item, because they don’t want to go through the effort of photographing each piece of kit.

In such cases, you should message the seller and ask for pictures of the exact item that you’ll be purchasing. It’s too easy, especially with these big sellers, to end up with an item that you’ll have to send back.

Question 3: How many shutter actuations has the camera fired?

(Note: This section is for buying cameras.)

First things first: A shutter actuation refers to a single shot taken with a camera.

Every camera has a number of actuations its shutter is rated for. Once the shutter has reached around that point, it just…fails. While you can get the shutter replaced, it generally costs enough that you’re probably better off buying a new camera body.

5 Questions to Ask Before Buying Used Camera Gear

If you want to know the shutter actuation rating of any particular camera, you can look it up through a quick Google search.

Of course, the shutter rating isn’t a hard and fast rule. There are some cameras that go far beyond their predicted shutter count, and there are some cameras that fail far sooner. The shutter count is just an average.

Now, when you look at camera listings online, you’ll see that shutter actuations are reported about fifty percent of the time.

But the other fifty percent of the time, there will be no mention of them.

This is for three possible reasons:

  1. The seller doesn’t know about the importance of shutter actuations.
  2. The seller can’t figure out how to determine the shutter actuations for their camera.
  3. The seller doesn’t wish to share the shutter count because it won’t help the sale.

I would never buy a camera without knowing its shutter count. Therefore, I recommend reaching out to the seller and asking.

If the seller refuses to share the count, then let the camera go. If the seller claims they don’t know how to view the shutter count, explain that they should be able to find it easily, either within the camera itself or through a website such as https://www.camerashuttercount.com/.

If they still won’t give you the count, then don’t buy. It’s not worth risking it.

Question Four: Does the lens have any blemishes on the glass, fungus, scratches, haze, or problems with the focusing ring?

(Note that this is for purchasing lenses.)

This is a question to ask the seller, and I suggest you do it every single time you make a purchase.

5 Questions to Ask Before Buying Used Camera Gear

Yes, the seller may be annoyed by your specific question. But this is a transaction; it’s not about being nice to the seller! And I’ve never had someone refuse to sell to me because I annoyed them with questions.

In fact, what makes this question so valuable is that it often forces sellers to actually consider the equipment they’re selling. Up until this point, the seller may not have really thought about some of these things. So it can act as a bit of a wake-up call and make the seller describe the item beyond “excellent condition.”

When you ask this question, make it clear that you want a detailed description. You genuinely want the seller to check for scratches on the glass, fungus in the lens, problems with the focusing ring, and more. You don’t want a perfunctory examination.

Unfortunately, there will still be some people who don’t do a serious examination, or who lie in the hopes that you won’t notice the issues (or be bothered enough to make a return). But asking the question is the best you can do.

Question Five: Has the seller noticed any issues with the item in the past?

This is another question to ask the seller before you hit the Buy button. It’s meant as a final attempt to determine whether the item has any issues.

In this case, by asking about the item’s past.

5 Questions to Ask Before Buying Used Camera Gear

Unfortunately, there will be sellers who have had an item break repeatedly – but, as long as it’s working at the moment they take the photos, they’ll give it the “perfect condition” label. Fortunately, many sellers will still be honest with you. If they’ve had a problem with the item, they’ll say.

So it’s definitely worth asking – just to be safe.

5 Questions to ask before buying used camera gear: Conclusion

Now that you know the five most important questions to ask before buying used camera gear, you’re well equipped to start buying gear online.

Questions-to-Ask-Before-Buying-Used-Camera-Gear

Yes, you’re still going to run into the occasional issue, but if you’re careful, and you think about these crucial questions to ask before buying used camera gear…

…the number of issues will be far, far lower.

And you’ll be able to effectively take advantage of used camera equipment!

Questions-to-Ask-Before-Buying-Used-Camera-Gear

The post 5 Questions to Ask Before Buying Used Camera Gear appeared first on Digital Photography School. It was authored by Jaymes Dempsey.


Digital Photography School

 
Comments Off on 5 Questions to Ask Before Buying Used Camera Gear

Posted in Photography


How to Make Your Images Have Fall Vibes

18 Oct

The post How to Make Your Images Have Fall Vibes appeared first on Digital Photography School. It was authored by Anabel DFlux.

how-to-make-your-images-have-fall-vibes

With Fall fast approaching, we will soon be surrounded by beautifully warm-colored leaves and vegetation, filling the air with the sweet scent of Autumn. This is a photographer’s paradise, especially the ones who are also social media mavens following artistic trends. But what if you, like me, are not so lucky to live in a place that actually has seasons?! I live in Southern California, and finding trees that actually change color is…pretty uncommon, to say the least. So what are lonesome Californians to do?! Turn to post-processing, to make your images have fall vibes!

What defines a Fall or Autumn vibe in images?

how-to-make-your-images-have-fall-vibes

All there is to portraying specific ideas or ‘vibes’ are color. We associate colors with seasons, inspired by the colors that nature gives us during those times (in locations that actually have seasons. Is my bitterness over Southern California’s lack of seasons showing yet?!). Winter tends to be cold and blue, Spring is rainbow and vibrancy, Summer is warm greens, and Autumn is oranges, reds, and yellows.

Although you can sit there for several hours and recolor every leaf into a different Autumn color, for the most part, Fall vibes can be achieved by playing with and removing colors that are associated with the seasons we are not trying to mimic. Fall is warm and full of reds, oranges, yellows, and more rustic tones.

How to make your images have fall vibes in post-processing

Taken this summer, this is the base image we will be working with to show you how to make your images have fall vibes. I find that images with very shallow depth of field (like the one below) are a bit easier to work with when altering their colors.

How to Make Your Images Have Fall Vibes

For the sake of explanation, the edits shown below are quite extreme. Use your judgment and personal taste to determine how far you take them.

Also, the tutorials I am listing below use Adobe Lightroom and Adobe Photoshop. However, they can easily apply to other editing software too as many feature similar options and sliders. Even the free mobile version of Photoshop and Lightroom have these sliders.

Adobe Lightroom

I turn to Lightroom for these kinds of color adjustments because it’s quite quick and simple to do. You can also copy the settings and apply them to an entire batch of images rather than having to do each one by one. Our final image will look like this:

how-to-make-your-images-have-fall-vibes

The HSL Panel

The HSL panel is the first panel I go to when I want to create a summer vibe in my photographs. Conveniently, this is one of the first open panels in Lightroom.

HSL stands for “Hue, Saturation, and Luminance,” and is a panel box in Adobe Lightroom (with similar panels in other programs). I like to say that this is the panel that adjusts each of the colors individually. Each slider is divided by colors: red, orange, yellow, green, aqua, blue, purple, and magenta.

Hue is the color. On a technical term, the hue is the wavelength of the light reflected. This describes why an object that is a solid color appears different depending on the amount of light that hits it. On the HSL panel, the Hue slider can change how specific colors look. For example, the reds can be made to be more orange in color or more red.

Saturation determines how intense a color is. Pulling the slider to the left makes the color more gray, pulling the slider to the right makes it more true to pure tone.

Luminance lightens or darkens a specific color. Luminance refers to the reflective brightness of colors. I use this slider to make colors that are a bit too light, much darker in photographs so that they don’t stand out to the eye too much.

With the image above, our primary objective is to change the green to more fall colors. In this case, I will make the green more orange. I can achieve this by adjusting the Green color slider under ‘Hue’ and subsequently adjusting the colors surrounding the green. The awesome thing about sliders is that you have full control.

Next, I drop down to saturation and adjust how true to tone each color is and decreasing the color we want to remove altogether (for example, the green).

Finally, with the Luminance slider, I brighten up all of the warmth we have put into the photograph.

How to Make Your Images Have Fall Vibes

Split toning

If you find solely using the HSL sliders isn’t enough, you can add more of the color you want using the Split Toning menu. Split Toning is located right below HSL.

Split Toning is just toning applied to different areas of luminance. You can color your shadows with one color, and your highlights with another. In this case, I toned both the highlights and the shadows to bring even more warmth into the image.

When I do Split Toning, to make it easy to see what I am doing, I bring the Saturation up to its maximum 100 value point and then click on the little color rectangle next to Highlights and then next to Shadows. Clicking this rectangle brings up a color selection box. I then select the color I am interested in and proceed to significantly lower the sliders until I achieve the shadow or highlight coloration I desire.

The settings I used for the image above are these:

How to Make Your Images Have Fall Vibes

Masks

If you’re following along in your own editing program, you may find that making all of these color adjustments have now impaired parts of our image that you may not want to be colored like that. In my photo, the whites of the dog became far too yellow for my liking. You can use Masks to remedy this by selecting the parts of the image you do not want the effect applied to.

Locate Masks at the very top of the right-hand tabs when clicking “Develop.” I like to use the Adjustment Brush which is the long selectable line directly under “Histogram” in the screenshots below.  Then, you paint on the image and can make adjustments on the painted section independent from the overall image. In this case, I removed the warm effect from the dog and brightened the dog a bit. The red haze shows you where you applied the mask.

How to Make Your Images Have Fall Vibes how-to-make-your-images-have-fall-vibes

Adobe Photoshop

There are many, many, many different methods of achieving the same end result in Adobe Photoshop.

Photoshop is a large, and at times, complex program. To keep it simple, I’ll explain my favorite color adjustment methods similar to the adjustments in Adobe Lightroom. For another example of a Fall-vibe in a more muted tone than the edit above, we will replicate the image featured below:

how-to-make-your-images-have-fall-vibes

Before we even get started, in the Layers panel, duplicate the Background (main) layer and work on that. As a rule of thumb, never work on the original layer and make all adjustments on a new layer. This helps you remedy mistakes, give you the flexibility to change your mind, and use masks to remove the effect from the parts of the image it shouldn’t apply to!

Hue/Saturation

The term ‘saturation’ in general describes the level at which something is absorbed. For example, a sponge heavily saturated with water. In photography, saturation refers to how pure a color is. How red is red? How blue is blue? You can imagine a color  “absorbed” in the photograph like a sponge, with a higher saturation resulting in a more significant color.

Hue is a color attribute that explains how discernible a color is to its true color (for example, how green is the green?). Hue is based on color wavelength and is completely independent of a color’s lightness or darkness and intensity.

You can use the Hue/Saturation slider in the Image > Adjustments window!

How to Make Your Images Have Fall Vibes

Where it says “Master” (which will adjust everything simultaneously) you can select individual colors to adjust. This is great to use on images that don’t involve a lot of color variation.

How to Make Your Images Have Fall Vibes

Selective Color

The Selective Color in Photoshop (also located in Image -> Adjustments) is similar to the HSL sliders in Lightroom. Selective Color allows you to modify each color (located in the drop-down menu under “Color”) by either adding or decreasing CMYK colors (Cyan, Magenta, Yellow, and Black). CMYK is the color mode that a printer operates in.

I like using Selective Color with images that feature a lot of white because I don’t necessarily want my whites toned the same as the rest of my image. You can adjust the white itself in Selective Color, which is pretty cool. This allows me to keep the white dog more authentic to the original rather than making the Great Dane orange.

How to Make Your Images Have Fall Vibes how-to-make-your-images-have-fall-vibes

Color Balance

Another way to adjust the colors in the image is by utilizing the Color Balance sliders. This can also be located under Image -> Adjustments. Color balance is the global adjustment of the intensity of the colors. This what I use the most when trying to create some fall vibes in my photographs.

I prefer this method because it’s the fastest slider set to use – but the end result does tend to look a lot like a filter. If that’s the look you’re going for; awesome! But if not, Selective Color may be of better use to you.

how-to-make-your-images-have-fall-vibes

Conclusion

Whatever method you implore to make your images more Autumn oriented, enjoy those warm fall vibes and glow up that Instagram feed!

Do you have other tips on giving your images fall vibes? Try these methods and share your images with us in the comments below!

The post How to Make Your Images Have Fall Vibes appeared first on Digital Photography School. It was authored by Anabel DFlux.


Digital Photography School

 
Comments Off on How to Make Your Images Have Fall Vibes

Posted in Photography


How to Use a 16-Stop ND Filter for Extreme Long Exposure Photography

18 Oct

The post How to Use a 16-Stop ND Filter for Extreme Long Exposure Photography appeared first on Digital Photography School. It was authored by John McIntire.

extreme-long-exposure-photography

Long exposure techniques are a fantastic way to inject interest into your photography. By nature, these techniques present your images in a way that is different to how the world is perceived by the human eye. Blurring moving elements within your frame (whether that be water, people or clouds) can also be a tool to help you isolate and focus on the elements of a scene that you want your viewers to focus on. This makes long exposures a valuable asset for composition and design. While most long exposures last for a matter of a few seconds, there are tools available that will allow you to do extreme long exposure photography – even in the middle of the day.

How to Use a 16-Stop ND Filter for Extreme Long Exposure Photography

This tutorial will show you how to use a 16-stop neutral density filter to do extreme long exposure photography. It will take you step-by-step through the equipment you need, the steps you need to take to get started, and the considerations you need to make to overcome some technical issues. There is also a list of tips at the end to help you get the most out of your 16-stop ND filter.

Why 16 stops?

Extreme-Long-Exposure-Photography

Using the long exposures provided by a 16-stop ND filter, you are able to blur moving elements (such as clouds and water) to simplify your frame and reduce visual clutter.

Long exposures, even with strong 10-stop neutral density filters, are usually limited to low light situations. For the most part, this is fine as that means you will be out at golden hour or blue hour when the light is at its very best for most types of photography.

What a 16-stop ND filter allows you to do is to extreme long exposure photography in the middle of the day when the light levels are at their highest. For example, a shutter speed of 1/125th of a second (sunny 16 rule) turns into an 8-minute and 44-second exposure when you put 16-stops of neutral density filter on the lens. This kind of exposure time turns the water and clouds into an almost ethereal, milky texture that works well visually. By blurring these elements, you are also potentially reducing visual clutter and contrast in your scenes, making them more visually appealing.

What you need

Extreme-Long-Exposure-Photography

Apart from the filter, this technique is going to require a few other pieces of equipment as well.

  • A camera with a Bulb setting.
  • A sturdy tripod that will hold still for several minutes or more.
  • A release that will allow you to trigger the camera without touching it.
  • An exposure calculator.
  • A 16-stop ND filter. (This tutorial will work the same with any strength of ND filter.)

How to do it

Once you’re out on location, setting up for a long exposure is pretty easy. In fact, these steps remain the same whether you are using a three-stop filter or a 16-stop filter.

Step 1: Set up your camera and line up your composition.

Make sure to attach all of your releases or filter holders at this point as well. Anything you can use to reduce the chance of camera movement between now and the time your exposure finishes will help to ensure there is no camera movement affecting your images. Take your time with this step and if you need to, take as many test shots as possible. Once you put the filter on, you will be stuck in place for several minutes.

Be sure of your composition before you get to that point.

Step 2: Meter and calculate exposure

Extreme-Long-Exposure-Photography

Here, a metered shutter speed (without the filter) of 1/160th of a second becomes 6 minutes and 49 seconds once the 16-stop ND filter is applied.

If you’ve taken test shots, you already know what your exposure is (without the filter). If not, read the camera’s meter. Take the exposure it has given you and input it into the exposure calculator of your choice to calculate the exposure required for 16-stops of ND filter. This will give you your required exposure for your final image.

There are a lot of exposure calculators available on iOS and Android. They all provide the same end result, so pick whichever one you would like.

Step 3: Set focus

Set the focus where you want in the frame and then place the camera in Manual Focus mode. Autofocus will not work at all with a 16-stop filter. It is way too dense. Putting your camera into manual focus will make sure that the camera does not attempt to focus when it can’t, thereby rendering your photos out of focus.

Step 4: Switch to Bulb

Put your camera into Bulb mode to allow it to keep the shutter open for as long as your exposure requires.

Step 5: Attach the filter

Extreme-Long-Exposure-Photography

With everything in place, you can now attach your filter. If you’re using a rectangular slot-in variety, attach the holder to the ring you’ve already placed on your lens. If you’re using a screw-in variety (shown), be very careful not to jostle your set-up because, if you do, you will have to start the process again.

Step 6 – Input shutter speed

Extreme-Long-Exposure-Photography

My trigger is controlled by my phone, so the shutter speed is inputted into the app as shown.

With the filter set up, you just need to input your shutter speed into whatever trigger you are using. In these examples, I am using a Pulse trigger which allows me to control it from my phone. There are a lot of available options at a variety of price points. Be sure to choose one that doesn’t require you to hold down a button for ten minutes though.

Step 7 – Release the shutter

With that done, the only thing left for you to do is to start your exposure and wait.

Easy as that

How to Use a 16-Stop ND Filter for Extreme Long Exposure Photography

This process may seem like a lot of steps, but it is quite easy. As long as you take care not to move the camera throughout the process, you will be fine. You will be able to set it up in a minute or so once you have practiced a bit. The key here is to know your equipment and to practice the movements so you can perform them as second nature.

Considerations

Now that you know how to create long exposures with your 16-stop ND filter, there are a few technical considerations you should bear in mind.

Noise

Image: Noise is a problem when taking long exposures and is especially prone to showing up in the sh...

Noise is a problem when taking long exposures and is especially prone to showing up in the shadow areas of your images. Be prepared to take care of it.

Unfortunately, long exposures with digital cameras mean noise. The longer the exposure, the more noise appears in your images. If you use a higher ISO to achieve shorter exposures, that will also increase the noise levels in your images.

To alleviate this as much as possible, try to avoid really, really long exposures if they are not necessary. If your camera has a Long Exposure Noise Reduction (or similar) feature, turn it on (remember that this will double your exposure time). It will also help if you to familiarize yourself with noise reduction software, either inside Photoshop or Lightroom, or other third-party program.
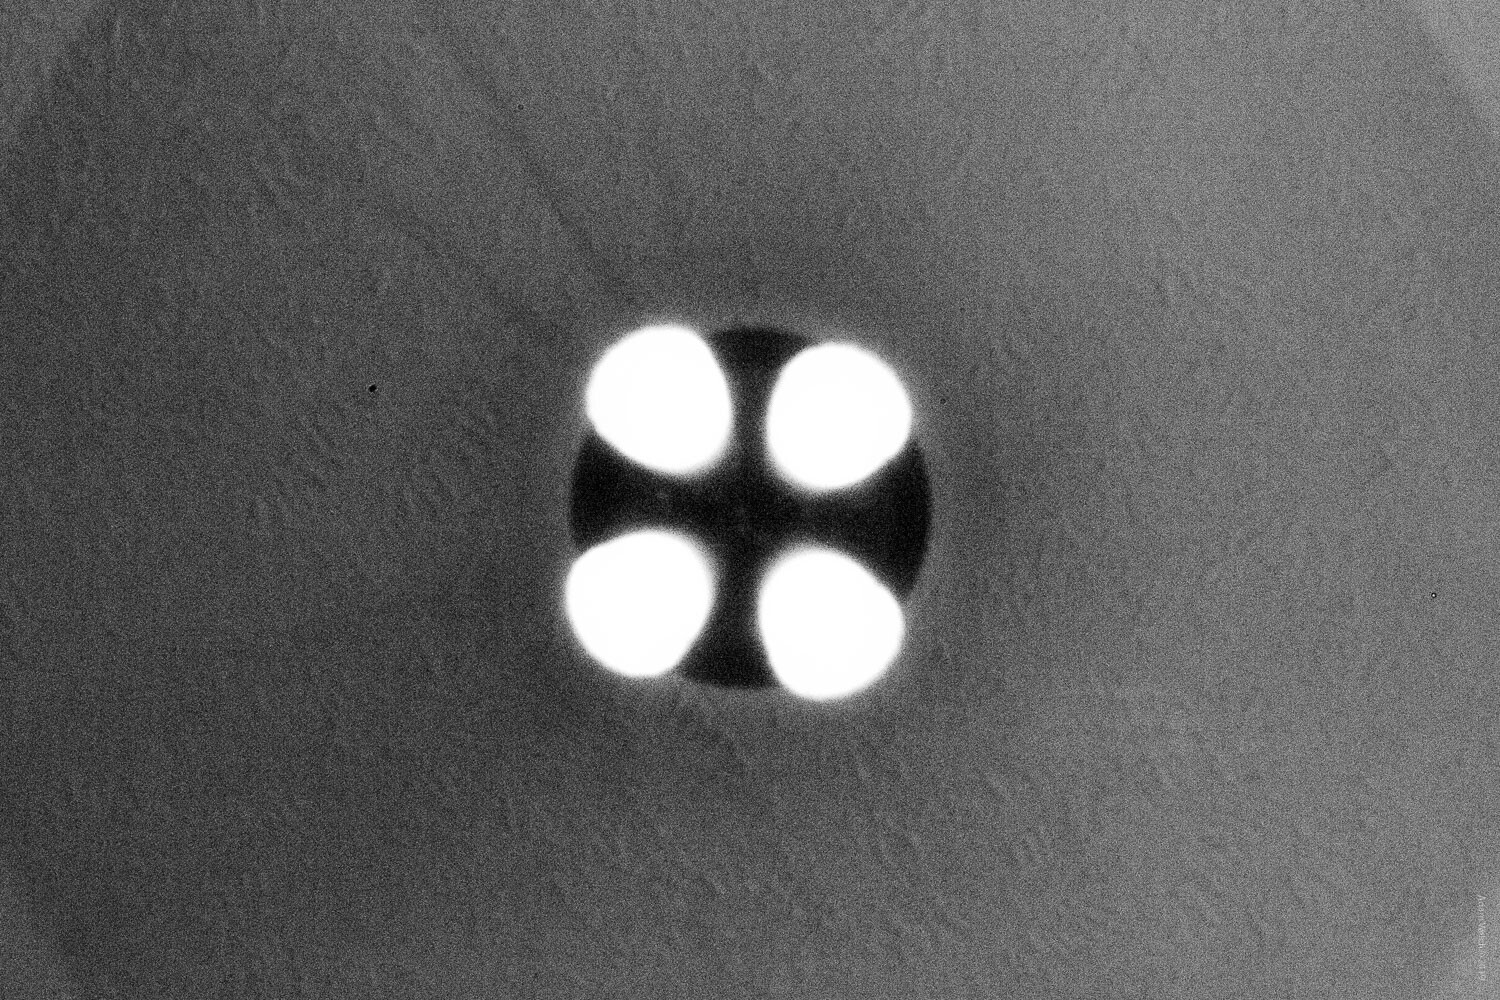
Hot pixels

Image: The two circled white dots are hot pixels. They’re easy enough to clone out just as lon...

The two circled white dots are hot pixels. They’re easy enough to clone out just as long as you are aware of them in the first place.

Hot Pixels are an unfortunate side effect of long exposures using digital cameras. While there is no way to truly avoid them, you need to be aware of their existence as they have the potential to ruin your efforts. These defects happen when your sensor gets hot during a long exposure (a simplified explanation, but it will serve).

To deal with them, you can heal, patch, or clone them out in Photoshop. Alternatively, you could use the Long Exposure Noise Reduction (or similar feature as appears in your camera system), but be aware this doubles your exposure time. If your exposure is close to nine minutes, that now means that all of your exposures will take about 18 minutes.

Light leaks

Extreme-Long-Exposure-Photography

While light leaks of this nature can be easy to take care of, there are a few steps you can take to make sure that they don’t appear in the first place.

With such long exposures, light leaks can be a common problem. These happen where excess light falls onto your sensor. This can happen where the filter attaches to the lens, or it can happen where the lens attaches to the camera. It can also happen through the viewfinder.

If you’re worried about light leaks, you can buy dedicated accessories that help to prevent them. If the leak is coming from the lens mount, you can also wrap material around it for a cheaper option. Some camera brands have a little rubber rectangle attached to the camera strap. This handy little feature is used to cover your viewfinder during long exposures. Simply slide off the exterior case over your viewfinder, and slide the rubber rectangle from your camera strap in its place. This will stop the light leaking in through the viewfinder.

Another option is to shoot a wider composition than you need and crop the light leaks out. This wouldn’t be my preferred method, but it will work in a pinch when you have no other choice.

Changing light

Image: This image is underexposed by several stops. Although it was taken at the exposure the meter...

This image is underexposed by several stops. Although it was taken at the exposure the meter dictated, the light dimmed significantly during the exposure, meaning the original exposure time was inadequate.

In the middle of the day, your exposure will be close to a near-constant. Later in the day, however, light levels can start to change rapidly.

If you meter for a long exposure of a hypothetical half hour in the late afternoon, it is entirely possible the light will lower in intensity during that time. Therefore, the actual time required for correct exposure will be much much longer. This will result in underexposed images.

You can compensate by preparing for that possibility beforehand. Choose a longer shutter speed than your meter dictates if you suspect that the light will change on you. This will be mostly guesswork based on plenty of experience though, so be sure to be out practicing as much as possible.

Filter size

Image: For the most versatility, consider opting for a filter system that will fit the complete rang...

For the most versatility, consider opting for a filter system that will fit the complete range of your lenses so you have the choice to use it at all of your available focal lengths.

Image: Alternatively, feel free to shoot wide and crop in. Not ideal, but this works just fine. Crop...

Alternatively, feel free to shoot wide and crop in. Not ideal, but this works just fine. Cropping is also a useful way to get rid of light leaks that appear at the edges of your images like in the example shown.

If you opt for the screw-in variety of filters, you may find yourself limited with the lenses you can use. In my case, I bought a filter that would fit my 16-35mm wide-angle zoom, and almost immediately found that I wanted to put it on my 70-200mm to crop in close on a particular building.

I was convinced that I wouldn’t want to use it on anything but the wide-angle lens. You can always buy stop-down rings, but if you think that you’ll use your filter on a  variety of lenses, a filter that fits a slot-in system may be the better choice for you.

Releases, triggers, and remotes

Extreme-Long-Exposure-Photography

As mentioned, there are a lot of options to fire your shutter without touching your camera. It doesn’t matter which you pick. However, it would be best to altogether avoid any releases that require you to hold down a button for the entire duration of the exposure. For thirty seconds, this may not be a problem, but in terms of ten-minute exposures, you are just increasing the chance that you might slip and ruin your frame.

Tips

Here are a handful of tips to help you get the most out of the technique.

ISO

Extreme-Long-Exposure-Photography

If you want shorter exposure times without using a different filter, you can increase your ISO. Here, changing the ISO from 100 to 400 (2 stops) has cut the exposure time by over 75%.

If you don’t want to wait around for, say, ten minutes for an exposure, you can halve it by upping your ISO one stop. This may introduce some more noise to your images, but as long as you don’t try to go past ISO 800, and your exposures are under or around 10 minutes, you should be fine as long as you are aware of the possibility.

Lighting

Image: In overcast conditions, the effect of the 16-stop filter can emphasize the flatness of the li...

In overcast conditions, the effect of the 16-stop filter can emphasize the flatness of the lighting. This may or not work with what you are trying to achieve.

Image: Conversely, the technique also helps to emphasize hard lighting and the contrast in such scen...

Conversely, the technique also helps to emphasize hard lighting and the contrast in such scenes. Use this to your advantage.

This is no rule, but I’ve found that this technique works well with subjects in direct light as the heavy contrast suits the technique. In overcast conditions, the flatness of the light is emphasized, and the results can feel a little less than inspiring. Again, this is not a rule and if you have no choice but to shoot in overcast conditions, do so anyway.

Moving things

Extreme-Long-Exposure-Photography

On a rare and anomalous sunny day in Manchester, this river was full of numerous boats that constantly went through my frames. The near ten-minute exposures have caused all evidence of them to disappear.

The longer your final exposure, the less any moving thing will show up in your frame. Is there a lot of river traffic in your scene? A bunch of tourists? Chances are those things will have left your frame by the time your exposure is finished. If you’re at a particularly crowded spot, see if you can make your exposure as long as possible to increase the chances that every unwanted element is removed from your frame.

Be sure of your composition

This technique is a very slow and deliberate form of photography. If you get something slightly wrong, it will cost you a fair amount of time to try again. To prevent having to do that, take your time with every single step in the set-up process and make sure that it is right. Composition, in particular, is vital for you to get right before you press the shutter release.

Embrace the time

Whilst your camera is recording your exposure, you will have a lot of time standing around. Take advantage of it. Take the opportunity to appreciate the scene around you without the viewfinder to your eye. Mindfully think about any other compositions in the area. It’s easy to start worrying about the remaining time on the exposure clock, but I encourage you not to. Instead, take a quiet few minutes for granted when you have nothing to do but stand next to your camera.

Be aware of your surroundings

Extreme-Long-Exposure-Photography

I was aware of the tide coming in here (I was counting on it) but did not expect it come this far in less than ten minutes.

Because you are going to be standing around for at least a good few minutes, it’s important that you pay extra care to your surroundings during your exposure. During normal-length exposures, you won’t usually have a problem with things like the tide coming in and submerging your tripod during the exposure. With exposures that last into the minutes or hours, that’s more than a possibility.

Simply put, pay attention to your environment and keep yourself and your equipment safe.

End results

Finally, here are a few examples of some of the results you can expect to achieve with a 16-stop ND filter.

Extreme-Long-Exposure-Photography

How to Use a 16-Stop ND Filter for Extreme Long Exposure Photography

How to Use a 16-Stop ND Filter for Extreme Long Exposure Photography

How to Use a 16-Stop ND Filter for Extreme Long Exposure Photography

How to Use a 16-Stop ND Filter for Extreme Long Exposure Photography

That’s it

If you already have experience with long exposures, the only thing new to you with this technique is the amount of time the shutter will be open. The skills may be basic, but the extra few stops of ND filter can lead to wonderful results.

I encourage anyone interested in long exposures to give the technique a try. If nothing else, experiencing the mindful, deliberate, and slow approach to photography that this technique commands are well worth the effort. Also, it is a nice departure from the faster-paced styles of photography.

Share your extreme long exposure photography with us in the comments below!

The post How to Use a 16-Stop ND Filter for Extreme Long Exposure Photography appeared first on Digital Photography School. It was authored by John McIntire.


Digital Photography School

 
Comments Off on How to Use a 16-Stop ND Filter for Extreme Long Exposure Photography

Posted in Photography


Travel Like A Pro, Take Travel Photos Like A Pro

17 Oct

Travel is the best excuse to pull out your camera and take photos until your memory is full. The sights, people, culture, food — everything about going to a new place calls for a photo opportunity, one that you wouldn’t want to miss. Taking the perfect travel photo, however, isn’t just a simple click. Sometimes, it can be challenging to Continue Reading

The post Travel Like A Pro, Take Travel Photos Like A Pro appeared first on Photodoto.


Photodoto

 
Comments Off on Travel Like A Pro, Take Travel Photos Like A Pro

Posted in Photography


How to turn your DSLR into a Digital Pinhole Camera

17 Oct

The post How to turn your DSLR into a Digital Pinhole Camera appeared first on Digital Photography School. It was authored by Adam Welch.

how-to-turn-your-dslr-into-a-digital-pinhole-camera

For all the advances made over the last 190-some-odd years of photographic history, at its primordial core, a camera is a highly simplistic apparatus. Our cameras are just light-proof boxes except for an opening that allows a small amount of light to enter. Any photograph ever made owes its creation to the technology of the camera obscura, from the Latin words meaning “a dark box” or “a dark room.” These magical devices project images consisting of light rays which pass through a singular, relatively small opening (aperture), thus casting the inverted scene inside the darkened space. If you were to add an optical element (lens) and an image receptor (digital sensor, film, other material) then, my friends, you have yourself an essentially modern camera system.

how-to-turn-your-dslr-into-a-digital-pinhole-camera

Even today, some cameras operate without lenses, relying only on the raw essentials of image-making to produce a photograph. These are “pinhole cameras” and consist of the bare-bones of photo-making – a light-proof box with an aperture and an image receptor.

A pinhole camera is, in fact, so easy, so simple, that you can morph your current DSLR or mirrorless digital camera into a surprisingly efficient pinhole camera. You can do so, using only a few basic materials that you likely already have on hand.

Not only is making your own digital pinhole camera a great project for all ages, but it is also an excellent way to “reset” yourself if you’ve become a little burnt out with your current photography gear.

For lack of a better phrasing, using a pinhole camera is arguably the most “pure” form of photography you can practice, in terms of tools involved. Let me show you how to turn your DSLR into a pinhole camera.

What you’ll need

As with most things, you can make your digital pinhole camera as simple or as complicated as you would like. For this example, I’m going to show you the most basic construction method I have used thus far. Now, let’s get down to business.

Materials:

  • An interchangeable lens digital camera. Although there is little chance of damaging your camera, I still recommend using a camera that you don’t rely upon daily. The reason being that you will have a small opening in which dirt or moisture could enter your camera. For our example, I’m using the back-up for my back-up; a Canon 7D MK1.
  • Aluminum foil
  • A pin or thumbtack
  • Tape. Preferably opaque such as electrical or gaffers tape
  • Scissors

how-to-turn-your-dslr-into-a-digital-pinhole-camera

That’s it! Yes, really. This is the basic materials that you need to turn your camera into a digital pinhole camera.

A brief introduction to pinhole photography

Before we continue, let’s take a quick time-out to talk about a few of the basic principles of pinhole photography. First of all, this is not going to be a tutorial for making a perfect digital pinhole camera.

Believe it or not, although incredible lacking complication, pinhole photography is an extremely nuanced craft. There are formulas for figuring out the optimum aperture size (the pinhole), and how to determine the actual F-stop you will be shooting to calculate exposure.

Even though we’ll be forgoing the complexities, it’s still good to have grounded knowledge in the principles of pinhole photography before you start.

Focal length

For our purposes, the focal length of your pinhole camera will be practically equal to the focal flange distance (FFD) or your camera. The FFD is just a fancy way of saying how far it is from the lens mount of your camera to the image sensor plane. Most cameras will have a symbol that demonstrates the image plane location.

How to turn your DSLR into a Digital Pinhole Camera

Check out this handy database over on Wikipedia for finding the FFD for your particular camera. In our case, the FFD is 44mm, which is also our effective focal length. This will come into play when we learn about optimal aperture size for the pinhole camera; which we’re about to talk about right now.

Optimal aperture (pinhole) size

Believe it or not, there is a beautifully elegant equation derived by none other than Joseph Petzval which helps us to determine the best size for the opening of our pinhole camera based on the focal length. In our case the FFD, and the wavelength of light. The equation is as follows:

How to turn your DSLR into a Digital Pinhole Camera

In the formula “d” is the diameter of the pinhole, “f” is the focal length, and lambda (the “l” with a kickstand) is the wavelength of light. Unless your goal is to make an extremely precise pinhole camera, you can essentially forgo all of the information in this section. Still, if you’re a camera nerd like me, it’s cool to know.

So, based on our formula, my “optimum” pinhole diameter is about .011mm, which is TINY. In fact, if we were to manage it, our effective aperture at 44mm focal length would be about F/157. Again, this is all just food for thought, and it won’t actually play into our final pinhole. You won’t need to crunch any numbers to turn your DSLR into a digital pinhole camera. So let’s move on to the good stuff!

Putting it all together

Now, let’s get to making our pinhole camera. As we’ve said before, this will be an extremely simple construct. We’ll begin by cutting out our aluminum foil diaphragm. This is the operable component of the entire system, as it will be what we eventually use to form our pinhole aperture.

Keep in mind that aluminum foil has a shiny side and a matte side. This will come into play later. A piece of foil 3×4 inches (7.6×10.2cm) should be plenty for almost all cameras.

Image: Shiny side…

Shiny side…

Image: …matte side.

…matte side.

Creating the Aperture

I like to use the front cap for the camera to trace a rough outline for the diaphragm. Just flip the cap over and this will give a good approximation of the front surface of the camera flange. Feel free to trace the outline on either side of the foil. Don’t worry if you don’t have a front cap to use as a guide, cut the foil as best as you can, making sure to leave some overlap.

how-to-turn-your-dslr-into-a-digital-pinhole-camera

Remember to trace the cap (if you have one) face down.

How to turn your DSLR into a Digital Pinhole Camera

Throughout the cutting process, try to keep the foil as unwrinkled and flat as possible.

how-to-turn-your-dslr-into-a-digital-pinhole-camera

Next, it’s time for our bravery test. We need to make our pinhole now. If you remember from earlier, our “optimum” pinhole size is .011mm. Of course, we won’t be able to achieve this exactly, so the best we can hope for is to make the smallest hole with the tools we have on hand. The pin I’m using has an approximate diameter of .77mm, which is still much larger than our optimum calculated hole size. So we’ll try to make the opening as small as possible using just the tip of the pin.

Lay the foil shiny side up on a semi-firm surface like a cutting board, or in our example, a piece of poster board. Aim for the approximate center of the foil disk and lightly press down with the pin. Don’t attempt to press the pin completely through the disk. Just a small amount of pressure will likely be sufficient to puncture the foil.

How to turn your DSLR into a Digital Pinhole Camera

And there you have it; our freshly minted pinhole.

how-to-turn-your-dslr-into-a-digital-pinhole-camera

From here, it’s just a matter of fixing our new pinhole diaphragm to the front of the camera.

Mounting the pinhole

Center the pinhole diaphragm as close as possible to the lens mount of your camera. Then, carefully tape the foil to the lens flange. I’m using a few pieces of electrical tape. It’s a good idea to use tape that is as opaque as possible and one which won’t leave excessive residue on your camera once it’s removed. Again, keep the foil as flat as you can.

How to turn your DSLR into a Digital Pinhole Camera

how-to-turn-your-dslr-into-a-digital-pinhole-camera

Begin at the outsides of the foil and be sure that the tape seals the diaphragm as tightly as possible. After this, I like to add a few more pieces of tape to the front of the foil for added strength. A delicate touch is required here. Be mindful not to cover your pinhole!

how-to-turn-your-dslr-into-a-digital-pinhole-camera

I know it’s difficult to believe, but you’ve just made a pinhole camera!

Tips for shooting with your pinhole camera

As you have likely already assumed, pinhole cameras make use of relatively small apertures. As such, shooting with them will require longer exposure times. So, a tripod will always be a good idea to have on hand for your pinhole work. Furthermore, it will be complicated to compose your images visually. However, this doesn’t mean that you can’t shoot your pinhole camera handheld!

Here are some suggestions for getting the most out of your pinhole camera when shooting with and without a tripod:

  • Bump up that ISO. Use the highest ISO you are comfortable with in order to bring the required shutter speed into a manageable range for handheld shooting.
  • Forget the viewfinder. While it’s perfectly acceptable to keep the camera held to your eye, it won’t benefit you all that much. Try shooting with the camera in a “waist level” configuration, holding it close to your body for added stability.
  • Pinholes love long exposures! Try mounting your pinhole camera on a tripod and lowering your ISO for some great long exposure images. That small aperture is your friend when it comes to super long exposure photography.
  • Protect your camera. Remember, you are now shooting without the protection of a lens. Even though the pinhole is extremely small, dirt and moisture can still make their way into the internal components of your camera.
  • Be ready to observe any and all dirt present on your sensor. Seeing as you will be shooting at extremely narrow apertures, any specs of dust or dirt on your camera’s sensor will be readily apparent.
  • Try a few extra pinholes. There is no rule saying you have to limit yourself to a single aperture. A few additional pinholes can produce some amazing effects. Experiment with different numbers and configurations of pinholes.
  • Embrace the blur. By its very nature, pinhole photography is imperfect. Remember that the beauty of working with a pinhole camera stems from the simplistic nature of the method itself.
  • Pinhole photography works great in black and white. Converting your pinhole images to black and white can change the entire dynamic of the photo.

Here are a few examples of images I made with my converted pinhole DSLR:

How to turn your DSLR into a Digital Pinhole Camera


How to turn your DSLR into a Digital Pinhole Camera

How to turn your DSLR into a Digital Pinhole Camera

How to turn your DSLR into a Digital Pinhole Camera

How to turn your DSLR into a Digital Pinhole Camera

How to turn your DSLR into a Digital Pinhole Camera

How to turn your DSLR into a Digital Pinhole Camera

These last two images were made after I introduced three additional pinholes…

how-to-turn-your-dslr-into-a-digital-pinhole-camera

how-to-turn-your-dslr-into-a-digital-pinhole-camera

Ways to improve your pinhole camera

You can make more heavy-duty pinhole apertures using more sturdy materials and by more precisely measuring and cutting your pinholes. Of course, this means additional work and will likely require much more advanced tools. Still, we can make our pinhole camera perform much better through some simple ingenuity.

The best way to up-the-ante of your digital pinhole camera is by adding a bit of flocking to the inside surface of the diaphragm. Flocking is just a way of reducing reflections and glare inside of the camera by darkening the components that might produce these sorts of problems.

Even though we faced the matte side of the foil inward (told you this would come into play), we can still help further reduce the reflections by darkening the inside of the foil. The easiest way to do this is to use a black permanent marker to darken the inside surface of the diaphragm.

Image: Careful not to color over the pinhole. The aperture is extraordinarily delicate.

Careful not to color over the pinhole. The aperture is extraordinarily delicate.

This will help to reduce stray light rays that can degrade image quality. An even better solution is to add dark tape to the inside of the diaphragm. This will make for a much more efficient flocking material. If you plan to add tape flocking, it’s a good idea to apply it prior to making your pinhole. Again, leave a small amount of room around the aperture so that the diaphragm remains as thin as possible.

How to turn your DSLR into a Digital Pinhole Camera

Final thoughts on pinhole cameras

While I was making the images for this article, I realized what might be the greatest benefit of turning your DSLR or mirrorless camera into a pinhole camera; it makes you forget. What I mean by this is that when you use such a simple camera, most of your worries over composition and tack-sharp focus seem to fall away. It’s an odd feeling, really.

What’s more, given the fact that you’re shooting at such small apertures, it produces an enormous depth of field. This means that the entire scene will technically be “in focus.”

At the same time, you know that without the benefit of a lens, the entire photo will simultaneously be less sharp, even dreamlike. When operating under these conditions, it forces us to strip away our pretenses and focus (photo humor) on the core values of our images.

If you’ve never used a pinhole camera before, I hope that this tutorial has shown you that it is incredibly easy to turn your DSLR into a digital pinhole camera. Follow the steps shown here, and you can have a digital pinhole camera in your hands in less time required to read this article.

Have you ever used a pinhole camera? If so, be sure to share your thoughts and images in the comment section below!

Author’s note: While the method shown here poses little risk to your camera, I strongly urge you to only attempt projects such as these using equipment that you wouldn’t mind being damaged. As always, use good judgment and proceed at your own risk.

The post How to turn your DSLR into a Digital Pinhole Camera appeared first on Digital Photography School. It was authored by Adam Welch.


Digital Photography School

 
Comments Off on How to turn your DSLR into a Digital Pinhole Camera

Posted in Photography


Sensor Without Blown Highlights May Be the Future of Photography

17 Oct

The post Sensor Without Blown Highlights May Be the Future of Photography appeared first on Digital Photography School. It was authored by Jaymes Dempsey.


Sensor Without Blown Highlights May Be the Future of PhotographyHow would you like to never blow a highlight again?

Most photographers would jump at the chance, which is why a recent paper published by German researchers has generated such excitement.

The paper discusses a new image sensor that researchers successfully built, one that offers the potential for avoiding all blown highlights.

Currently, CMOS sensors work by way of pixel cell photodiodes. You hit the shutter button, exposing the sensor to light. Each pixel cell has a photodiode, which receives light waves and converts them into a current. This current is then measured by the camera and ultimately turned into an image file.

But here’s the thing:

The pixels in our cameras can reach a point of saturation. Once a certain amount of light hits a photodiode, that individual pixel cell stops processing light waves. And it creates a blown-out, completely white spot. When this happens many times during the same exposure, you end up with blown highlights.

Yet the researchers on this new project have found a way to get around this.

Imagine a pixel. Once it’s fully saturated, it can’t measure any more light.

Unless it can reset itself, going back to zero, so it’s ready to process light once more.

That’s what these researchers developed. They created “self-reset” pixels, which go back to zero upon becoming saturated. But the initial data isn’t lost; instead, it’s recorded by the pixel, so that the camera gets an accurate reading of the amount of light in the scene.

The final image, theoretically, would retain detail in every highlight, even when light levels are extremely high.

Now, while researchers have already created an experimental sensor with self-reset pixels, it will be some time before this invention is incorporated into electronics (if it’s incorporated at all). However, if this line of research does pan out, photography will be utterly transformed. It will suddenly be possible to stop thinking about exposure when shooting in good light. All you have to do is overexpose, and your images will turn out just fine. You’ll instead be able to focus entirely on other aspects of photography: color, composition, lighting, and more.

What do you think about this new invention? Would you like to see cameras that don’t blow out highlights? Or do you think it would make photography too easy? Share your thoughts in the comments!

The post Sensor Without Blown Highlights May Be the Future of Photography appeared first on Digital Photography School. It was authored by Jaymes Dempsey.


Digital Photography School

 
Comments Off on Sensor Without Blown Highlights May Be the Future of Photography

Posted in Photography