RSS
 

Archive for the ‘Equipment’ Category

Everyone’s Going Ga Ga Over The New Digital Polaroid Instant Camera

11 May

I've been a fan of instant photography ever since I was a little kid when an instant camera was simply called "the Polaroid."

That's because no one else manufactured similar cameras and Polaroid had the field all to themselves. But things soon changed.

Polaroid continued changing and improving their products, Kodak took a shot at the instant camera business, and Fuji came out with some cameras and film of their own, but the technology was still clumsy and limited.

But people still …

Digital Shot

 
Comments Off on Everyone’s Going Ga Ga Over The New Digital Polaroid Instant Camera

Posted in Equipment


Create Photoshop Patterns

05 May

This tutorial will teach you how to save an image or picture and use it as a new pattern in Photoshop. And next time, whenever you’re working with larger canvas, you can just use the Fill Layer feature in Photoshop to set the pattern as your background.

1. Open the image you want to use as pattern.

pattern


2. Then, go to Edit > Define Pattern. Type in the name you want for the new pattern and click OK.

3. Now, we want to use the new pattern as a background in our new project. Open a new document, whatever the size is up to you.

4. Go to Layer > New Fill Layer > Pattern. You’ll see this small window.


screen

Click OK and you’ll see another window for you to select the pattern you want to use. Choose the pattern you created just now and click OK.

Untitled-2


And you’ll have a nice background for your new project.

pattern

Any suggestions, ideas? Feel free to comment on this article!

Back to Top

BlogPhoto

 
Comments Off on Create Photoshop Patterns

Posted in Equipment


A is for Apple (64/365)

04 May

A is for Apple (64/365), originally uploaded by alibubba.

Catchy Colors Photoblog

 
Comments Off on A is for Apple (64/365)

Posted in Equipment


Snakehead Yardang, White Sands National Monument

30 Apr

In 2004 I stumbled upon an incredibly interesting area of White Sands National Monument while hiking out into the 360 square miles park, an area I can only describe as an ancient dune field. When I first discovered this area I photographed one of the many yardangs I found in this isolated area (see photo #2 in My Top 5 Favorite Photographs and Accompanying Stories), but upon my return in April of 2010 the formation I originally photographed had been eroded into oblivion and was gone forever. I have to admit I was really bummed the formation was no longer present, but that disappointment soon transformed into an adrenaline fueled high as I discovered yardang after yardang the farther I hiked out.

Snakehead Yardang, White Sands National Monument

Snakehead Yardang, White Sands National Monument

One of the more fascinating yardangs I found and photographed was one that resembled a snakehead emerging from a 60 foot dune. I took care to photograph various compositions of this fragile sand formation and cherished the fact that no one would ever see this formation in the exact same way. As I discovered while visiting the area of my last yardang photo these formations  are here one day and gone another. The winds of the Tularosa Basin simultaneously shapes and destroys the landscape providing a unique experience with every visit. It is for this reason that every visit to White Sands National Monument is as exciting as the first.

Photo Details:
Canon 1Ds Mark III, Canon 16-35mm f/2.8 II, 16mm, 1/200 sec, f/16, ISO 200

Technorati Tags: Photography, Fine Art, New Mexico, White Sands National Monument, Landscape, Nature

Copyright Jim M. Goldstein, All Rights Reserved

Snakehead Yardang, White Sands National Monument


JMG-Galleries – Jim M. Goldstein Photography

 
Comments Off on Snakehead Yardang, White Sands National Monument

Posted in Equipment


Mesquite Dunes, Death Valley National Park

28 Apr

Experiencing the purity of nature is always exhilarating. Nothing to me exemplifies the purity of nature more than the untouched patterns found in the desert. While often explored by Death Valley National Park visitors the desert winds always reclaim Mother Nature’s domain. These still moments are fleeting and oh so prized.

Mesquite Dunes, Death Valley National Park (Black & White)

Mesquite Dunes, Death Valley National Park

Technorati Tags: , , , ,

Copyright Jim M. Goldstein, All Rights Reserved

Mesquite Dunes, Death Valley National Park


JMG-Galleries – Jim M. Goldstein Photography

 
Comments Off on Mesquite Dunes, Death Valley National Park

Posted in Equipment


Zazzle Link Referral Program

26 Apr

Store links that you build will link to the store of any seller that you choose. When a customer clicks on your link, you will earn a referral fee on anything that visitor buys in that shopping session.

This is an example of a store link. Click the link to see how it works.

ONimages Vintage Designs

When visitors to your website use this new home page link, you will earn a referral fee on anything they purchase in that visit! I have chosen many different Zazzle stores to visit with amazing products that you can purchase. Or if you wish you can join Zazzle and leave a comment with the name of your Zazzle store on my blog and I will create a referral link to your site.

Here are some Zazzle stores to visit:

Christianphotogirl Boutique
Prawny
The Candy Store!
Noteworthy
OddBob
Perfect Postage & Cards for your special occasions
clean_world
Cards | Postage | Gifts | More
Katie Tormala Photography
Brooklyn Born Productions
The Jason Mraz Store

Any suggestions, ideas? Feel free to comment on this article!

Back to Top

BlogPhoto

 
Comments Off on Zazzle Link Referral Program

Posted in Equipment


Tuba, No Socks

26 Apr

 Tuba, No Socks

photo ©2010 daniel e. rice

FILE Magazine

 
Comments Off on Tuba, No Socks

Posted in Equipment


Creating Professionally Looking Cheap Flyers

23 Apr

© morbutoBeing a photographer and Adobe Photoshop expert, a lot of friends ask me to help them create professionally looking cheap flyers for their businesses. Whenever I have some extra time to spend I gladly aid them in implementing their ideas to create professionally designed flyers. The work hours I put into these projects may seem to go unpaid, but I hardly see it that way. That's what friends are for, right? Of course various printing companies will also have a nice flyer template which …

Digital Shot

 
Comments Off on Creating Professionally Looking Cheap Flyers

Posted in Equipment


Food, Food, Food

22 Apr
Das ist ein Gastbeitrag von Tilo Gockel. Tilo lebt in Aschaffenburg, arbeitet dort an der Hochschule und lehrt industrielle Bildverarbeitung. Nebenbei schreibt er immer einmal wieder Artikel über Themen aus der Fotografie oder Bildbearbeitung in psd.photoshop, Docma oder DigitalPhoto oder tüftelt an neuen Fotoprojekten oder Workshops.

Weil er auch sehr gerne kocht und isst, ist eines seiner Lieblinsmotive
„Food, Food, Food“ …! 🙂

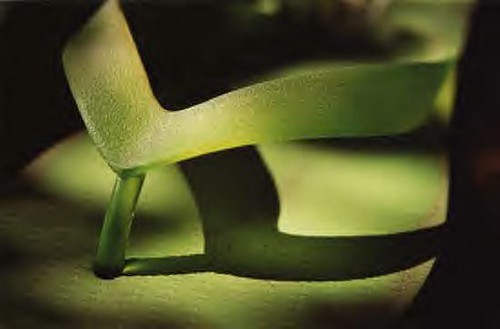
Also für mich gibt es kaum etwas entspannenderes, als am Wochenende loszuziehen, in unserer Haus-und-Hofkonditorei „Der Süsse Löwer“ ein paar Edeltörtchen einzukaufen, in der Gärtnerei nebenan noch ein paar Requisiten zu besorgen und mir einen schönen Tag mit einer Food-Session zu machen. So sind auch die Fotos unten entstanden, und im weiteren Text möchte ich hierzu den Hintergrund zu Licht und Beleuchtung, Optik und Photoshop erklären.

Food ist oft nicht einfach zu beleuchten, weil es je nach Art transparent, reflektierend oder lichtschluckend sein kann. Manche Früchte brauchen Gegenlicht, andere eher frontales Licht oder Licht von der Seite. Diffuses Licht wie Tageslicht von einem Nordfenster ist besonders schön, aber nicht immer verfügbar. Mit Blitzlicht wird das Essen entweder totgeblitzt, oder der Aufbau wird schnell relativ komplex und teuer (Schirmchen, Softboxen).

Nicht so im Beispiel: Auch wenn man es den Fotos nicht ansieht, so kam ein ganz normaler E-TTL-Aufsteckblitz zum Einsatz, nicht entfesselt, sondern einfach auf der Kamera. Der Blitz war rund 45 Grad zur Seite geneigt, fürs erste Foto nach links, für das zweite nach rechts, und hat dort eine Styroporplatte als Reflektor angeblitzt. Dadurch wird dieser Reflektor zu einer großen und wunderbar weichen Lichtquelle, die in der Wirkung einer Softbox recht nahekommt.

Als weitere Lichtquellen finden sich im Setup das Tageslicht durch einer Balkontür gegenüber der Kamera (zartes Gegenlicht) und ein Schminkspiegel, der hier als Aufhellreflektor auf der Seite gegenüber des Reflektors etwas aufhellt und ein paar Akzente setzt. Im Hintergrund stehen ein paar Gläser, um die begehrten Bokeh-Unschärfekreis’chen zu erzeugen.

Zur Optik und zu den Kameraeinstellungen: Hier habe ich die klassische Festbrennweite 50 mm f/1.4 verwendet und habe das Objektiv abgeblendet auf 2.8. Dies erzeugt eine schöne geringe Schärfentiefe, lässt aber den scharfen Bereich auch wirklich knackig werden. Ansonsten: Canon APS-C-Kamera, Raw-Format, Av-Modus, ISO 100 für geringes Rauschen. Das Verhältnis Blitzlichtanteil versus Tageslichtanteil kann man entweder im Av-Modus über die Belichtungskorrektur und Blitzbelichtungskorrektur oder auch, wenn die Werte nach ein paar Probeschüssen festliegen, im M-Modus vorgeben.
Das Licht ist grundsätzlich ausreichend für Fotos aus der Hand und ohne Stativ, bei einigen habe ich dann aber doch die ISO-Zahl auf 200 erhöht, um auf eine wackelfreie Belichtungszeit von 1/80tel Sekunde zu kommen.

Am Ende der Foto-Session steht der Raw-Import und ein dezentes Photoshop-Touch-up. Schick ist es, die Sättigung oder Dynamik leicht zu erhöhen, das Bild mit einem warmen Fotofilter etwas sonniger zu gestalten und nach dem goldenen Schnitt ins gewünschte Format (2:3, 3:4 …) zu croppen (hier hilft Atrise GoldenSection). Ein sehr vorsichtiger Einsatz des Abwedlers (Lichter, 2%) kann im Beispiel die Johannisbeeren noch leuchtender machen, aber weniger ist hier oft mehr.

Bis hier findet sich kaum etwas neues im Touch-up, jetzt folgen aber noch zwei kleine Tricks:
Einmal verstärkt eine ausgeprägte negative Vignette, ausmaskiert, nur für die Lichtseite wirkend, den Eindruck, dass dort ein helles Nordfenster leuchtet: Filter, Objektivkorrektur …, Wert ca. +35.

Abschließend wird noch geschärft. Entweder selektiv über Hochpass (Ebenenkopie, entsättigen, Hochpassfilter mit Wert um die 4, Verrechnungsmodus „Ineinanderkopieren“, Deckkraft ca 50 % , Ebenenmaske anlegen, nur relevante Teile einmaskieren) oder, schicker, über die frei verfügbare Photoshop-Penum-Scharfzeichnungsaktion.

Wer noch mehr zu Tricks und Links und Quellen zur Food-Fotografie lesen möchte, der findet unter fotopraxis.net in der Workshop-Rubrik einige weitere Workshops zu Sushi, Limonade, Sahne-Splashes, Toast und Keksen.

***
Werbepause: Buchtipp – Vom Alltäglichen zum Besonderen!


KWERFELDEIN | Digitale Fotografie

 
Comments Off on Food, Food, Food

Posted in Equipment


Flipflop

22 Apr

flipflop, originally uploaded by J.Segrest Photography.

Catchy Colors Photoblog

 
Comments Off on Flipflop

Posted in Equipment