Blog

  • Karsh, Beaton and Swannell featured as Camera Press celebrates 70 years with exhibition of famous faces

    $ (document).ready(function() { SampleGalleryV2({“containerId”:”embeddedSampleGallery_9619767340″,”galleryId”:”9619767340″,”isEmbeddedWidget”:true,”standalone”:false,”selectedImageIndex”:0,”startInCommentsView”:false,”isMobile”:false}) });

    An exhibition of portraits that chart the last seven decades of celebrity photography will mark the 70th birthday of British photo agency Camera Press. Emma Blau, granddaughter of founder Tom Blau, has searched the 12 million images of the agency’s archive to find the photographs that demonstrate how portrait photography has changed since the agency started in 1947. The first photographer to join the business was Yousuf Karsh and the first event covered was the wedding of the Queen of England by society photographer Baron.

    The exhibition ‘Camera Press at 70 – a lifetime in pictures’ will feature archival work by Karsh, Cecil Beaton, Baron and Jane Bowen, as well as by more recent photographers such as John Swannell, Clive Arrowsmith, Jason Bell and Chris Floyd.

    Celebrities caught by the lenses of the exhibited photographers will include Kate Bush, The Queen, the Gallagher brothers from Oasis, Amy Winehouse, Marilyn Monroe, Winston Churchill and JFK.

    The free exhibition will be held the Olympus-sponsored Art Bermondsey Project Space in London from 17th May to 10th June 2017. For more information see the Camera Press website, and for more of the images see the Daily Mail website. 

    Information from Camera Press

    Founded in 1947, Camera Press celebrates its Platinum anniversary this year with Camera Press at 70 – a lifetime in pictures. Drawing on an unparalleled collection of images, and featuring work by some of the most iconic names in the industry this exhibition offers a fascinating insight into photography from the 1940s to the present day.

    On display will be the work of photographic legends such as Yousuf Karsh, Cecil Beaton and Jane Bown through to contemporary names that include Andy Gotts, John Swannell, Jason Bell, Jillian Edelstein, Chris Floyd and Laura Pannack.

    The exhibition will feature two further 70th anniversaries: 1947 was the year the young Princess Elizabeth wed Prince Philip and the British Academy of Film and Television Arts (BAFTA) was founded. The first photographs distributed by Camera Press were of the wedding of the future Queen, and this famous image by Baron will sit alongside more recent unique portraits of Princess Diana, The Queen’s Jubilee and the christening of Prince George. The exclusive BAFTA portrait collection will shine a light on many of our best loved actors from the worlds of TV and film.

    Also included in the show are photographs by three generations of the Blau family: founder Tom Blau, his son Jon and granddaughter Emma.

    Articles: Digital Photography Review (dpreview.com)

  • Polaroid sold to new owner

    Photo by Martin Martinsson licensed under Creative Commons

    PLR IP Holdings, LLC, the company that owns the Polaroid brand, is under new ownership. Wiaczeslaw (Slava) Smolokowski is a Polish investor and businessman who owns a majority share in the Impossible Project, the company that continues to produce Polaroid’s legacy instant film. A press release issued today mentions that Polaroid headquarters will remain in Minnesota and maintain its Hong Kong and New York City offices, with ‘plans for expansion into other international offices.’

    Polaroid first filed for Chapter 11 bankruptcy in 2001. It was acquired in 2005 by Petters Group Worldwide, but more trouble followed and the brand filed for Chapter 11 again in 2008. It was acquired as a joint venture by Hilco Global and Gordon Brothers in 2009. Since then, the company has overseen licensing of its name on a range of digital cameras and accessories, from colorful action cams to an ill-advised Nikon 1 imitator. 

    Polaroid Acquired by New Ownership Group

    Minneapolis, MN—May 12, 2017— PLR IP Holdings, LLC, the owner of the Polaroid brand and related intellectual property, has been acquired by a group of investors led by the Smolokowski family. The new owners acquired 100% of the shares, effective May 5, 2017, from the Pohlad family, Gordon Brothers, Hilco Global and others.

    The lead investor in the new ownership group, Wiaczeslaw (Slava) Smolokowski, is a Polish businessman and investor with holdings in the energy, biotech and real estate sectors. He is the cofounder of Mercuria Energy Group Limited, one of the world’s largest commodity trading houses.

    Mr. Smolokowski is also the majority shareholder of The Impossible Project, the company that purchased the last remaining Polaroid factory in 2008 and continues to manufacture instant film for legacy Polaroid cameras.

    Polaroid is an iconic brand known the world over for pioneering and perfecting instant photography – both in the analog and digital eras. 2017 marks the 80th anniversary of the venerable company’s founding. Today, Polaroid products are sold in over 100,000 retail stores in more than 100 countries throughout the world.

    “I’d like to thank the outgoing board members and shareholders for their outstanding leadership and support over the last several years,” said Scott Hardy, President and CEO of Polaroid. “Under their stewardship, we achieved the tremendous growth and success that has led us to where we are today. We are also very pleased to welcome the new ownership group to the Polaroid family, and excited to begin writing the next chapter in the story of the Polaroid brand.”

    “We are very pleased that this strategic transaction unites the Polaroid brand with its heritage – a move that’s exciting for both the buyer and the Twin Cities-based Polaroid team,” said Jann Ozzello Wilcox, chief investment officer for the Pohlad organization. “It was important to us that the headquarters remain here, and that management and the employees not only retain, but expand their roles with the new owner’s exciting plans for the brand’s future.”

    “The transformation Polaroid has achieved is a credit to the brand’s strength. We’re proud to have been a part of it and know it will be in good hands under its new ownership,”said Ken Frieze, CEO of Gordon Brothers.

    Polaroid’s headquarters and management team will remain in Minnetonka, Minnesota. The company also maintains offices in New York City and Hong Kong, with plans for expansion into other international offices.

    Articles: Digital Photography Review (dpreview.com)

  • Why There are 6 Types of Lightroom Previews and How to Use Them

    Previews are an essential part of the Lightroom workflow. But with so many different types of Lightroom previews, it’s easy to get confused. For example, do you know the difference between minimal, standard and 1:1 previews? Or what a Smart Preview does? Or why 1:1 previews are useless in the Develop module?

    The differences are more than academic. The way you use previews makes a big difference to Lightroom’s speed and efficiency. If you want Lightroom to run at optimal speed, you need to build the right previews. Let’s take a look at how to do that.

    Lightroom Previews

    Why does Lightroom build previews?

    If you open a photo in Photoshop, there is no preview. You are looking at the photo itself. So why does Lightroom need previews? The answer lies in the fact that Photoshop and Lightroom edit photos in different ways.

    Photoshop is a pixel editor. It changes the pixels of your photo and saves those changes in the file. Lightroom is a parametric editor. It doesn’t change the original photo file in any way. Instead, it keeps a record of any changes made to the photo in the Catalog. As the original photo is unchanged, Lightroom needs to use previews to show you how your photos look after you have edited them.

    Let’s take a look at each of the different types of Lightroom previews.

    Library module previews

    There are several types of preview you can build in the Library module. Previews are used by Lightroom to display your photos in the Library module. They help you view, zoom, rate, and flag photos – all the organizational stuff you want to do in this section.

    Whenever you import photos into Lightroom it gives you the option of selecting the type of preview to build. There are four choices. The first two (Minimal and Embedded & Sidecar) are relevant if you want to import photos quickly and are happy with a low-resolution preview.

    Lightroom previews

    Minimal previews:

    These are the smallest previews possible. Minimal previews save space and time but don’t give you a high-quality Library module preview.

    Embedded & Sidecar previews:

    This option uses the preview built into the Raw file if there is one.

    Minimal and Embedded & Sidecar previews are temporary. If you choose either of these options Lightroom builds its own better quality previews as soon as it can. This slows down the browsing process in the Library module. For this reason, I only recommend selecting Minimal or Embedded & Sidecar previews when you need to import photos rapidly.

    The next two options are ones you are most likely to use. They give you good quality previews that you can use to view photos.

    Standard previews

    Builds a preview for viewing images in Loupe View, but without zooming in. You can set the size of standard previews in the Catalog Settings. The best option to pick is Auto. With Auto, Lightroom builds previews that match your monitor resolution.

    Lightroom takes longer to build Standard previews than it does to create Minimal or Embedded & Sidecar previews. But the benefit is that the Library module runs much faster.

    Lightroom previews

    The only problem with Standard previews is that they are not designed for zooming into your photos. When you zoom in, Lightroom has to build a 1:1 preview. So there’s a delay that slows the Library module down in displaying your image full size.

    1:1 previews

    The best quality previews of all are 1:1, but it’s the one that takes longest to build. This is a full-size preview that lets you zoom into your photos at 100% when looking at them in Loupe view. With 1:1 previews there is no delay when you zoom into a photo.

    The only drawback of 1:1 previews is that they take up a lot of hard drive space. Lightroom handles that by discarding 1:1 previews after a set amount of time. The default is 30 days, but you can change that in the Catalog settings if you need to.

    Lightroom previews

    Smart Previews

    Adobe introduced Smart Previews in Lightroom 5. A Smart Preview is a high-quality, highly compressed preview that measures 2540 pixels along the longest edge. Smart Previews are used by Lightroom CC to synchronize with Lightroom mobile and Lightroom web.

    The option to create Smart Previews is available in the Import window.

    Lightroom previews

    Smart Previews are different from the other Library module previews because they can also be used in the Develop module. The advantage of this is that you can develop photos using Smart Previews when the hard drive containing your original photo files isn’t connected to your hard drive.

    This feature lets you use Smart Previews to develop photos while you are traveling. All you need is a laptop, a copy of your Lightroom Catalog and the preview files containing Library module previews (1:1, standard, etc.) and Smart Previews. So you don’t have to take the hard drive containing the original photos and worry about losing it while on the road.

    If you’re a Lightroom CC subscriber Smart Previews also let you use Lightroom mobile and Lightroom web.

    Lightroom previews

    The Lightroom folder contains the Lightroom Catalog and the preview folders you need to run Lightroom on any computer.

    Smart previews save space and can be built later as well

    Earlier I said that Smart Previews are both highly compressed and high-quality. This sounds like a contradiction but it’s true. I don’t know how Adobe have done it but the result is that you can’t tell a Smart Preview apart from a full-size preview in terms of image quality. The only difference is that a Smart Preview is smaller.

    You can build Standard, 1:1, or Smart Previews at any time in the Library module by selecting the images and going to Library > Previews and selecting the preview type required. The option to build Minimal or Embedded & Sidecar previews only appears in the Import window.

    Lightroom previews

    Develop module previews

    When you switch from the Library module to the Develop module the preview Lightroom uses to display your photos changes. Lightroom renders high-quality previews that let you see the result of actions like adding sharpening, applying noise reduction, and retouching images.

    These previews are cached rather than saved in a preview file, otherwise, they would rapidly eat up most of your hard drive space.

    Creating 1:1 previews in the Library module makes no difference to the speed at which Lightroom renders previews in the Develop module. But if a Smart Preview exists for the photo Lightroom uses the Smart Preview instead of rendering a Develop module preview under one of two conditions.

    a. The hard drive containing the original photo file is disconnected from the computer.

    b. You have Lightroom CC 2015.7 or Lightroom 6.7 or later, the hard drive containing the original photo file is connected to the computer, and you have the Use Smart Previews instead of Original for image editing preference enabled in Preferences (see below). Note that if you zoom into 1:1 Lightroom stops using the Smart Preview and renders a full-size preview instead.

    Lightroom previews

    Smart Previews are smaller than full-size previews. That enables Lightroom to run faster when Smart Previews are used in the Develop module. The speed increase can be quite significant. If you don’t need to zoom into your photos at 100% magnification then the benefits are considerable.

    Conclusion

    Lightroom previews are somewhat confusing, especially for newcomers to the software. This is hardly surprising considering there are six types of them! So let’s keep things simple. These are my recommended previews to use.

    When you import images into Lightroom, choose either Standard or 1:1 previews. If you intend to zoom into your images while viewing them in Loupe view, you definitely want to pick 1:1 previews. Otherwise, pick Standard.

    If you’re a Lightroom CC subscriber and you want to view the images in Lightroom mobile or Lightroom web then tick the Build Smart Previews box. Do the same if you intend to use Smart Previews in the Develop module.

    Any questions? Let me know in the comments section below.


    If you’d like to learn more about Lightroom, then please check out my popular Mastering Lightroom ebooks.

    The post Why There are 6 Types of Lightroom Previews and How to Use Them by Andrew S. Gibson appeared first on Digital Photography School.


    Digital Photography School

  • SID is a 3D camera that promises shake-free VR videos

    Chinese company Weeview, maker of the Eye-Plug camera dongle for Android phones, has launched a Kickstarter campaign for a 3D camera. The new SID model features a pair of stereoscopic cameras that, when used together, produce 3D videos suitable for VR applications and headsets. Weeview says its new camera produces ‘shake-free’ footage, and that the stereoscopic effects can be adjusted with a mobile device during post-processing.

    The SID camera works in conjunction with a mobile app that supports live 3D video streaming, as well as functions like ‘Auto Follow’ for tracking a subject in the video and ‘Highlight’ for zooming in specific parts of the shot. The model offers a total maximum video resolution of 2880 x 1440 (3K) at 30 fps, as well as 32MP 8064 x 4032 still photos. Both sensors sport an F2.4 lens with a 160-degree field-of-view. The camera itself contains 802.11n WiFi for wireless connectivity, micro USB for charging, and a microSD card slot for content storage.

    Joining SID is the SID Camera Kit, a bundle that includes a motorized handheld gimbal and a smartphone mount. The gimbal can pan 320-degrees, roll 120-degrees, and tilt 320-degrees. Weeview says its new camera is also compatible with GoPro gimbals. 

    The SID camera is currently being offered to Kickstarter backers who pledge at least $ 179, while the gimbal is included in the bundle for backers who pledge at least $ 269. Shipping to these backers is estimated to start this upcoming August.

    Via: Kickstarter

    Articles: Digital Photography Review (dpreview.com)

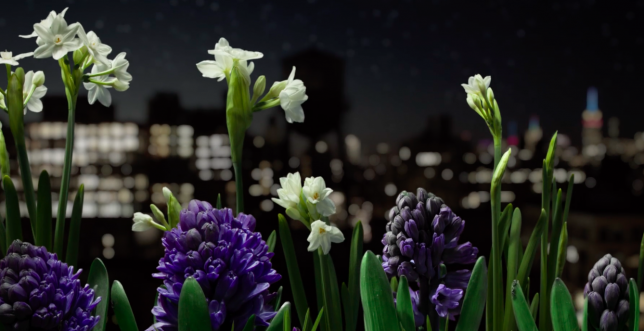
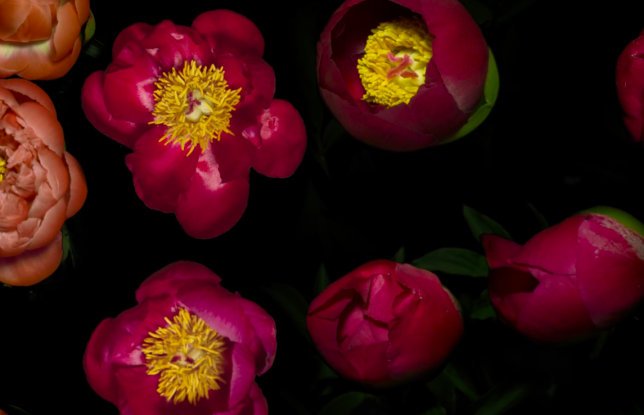
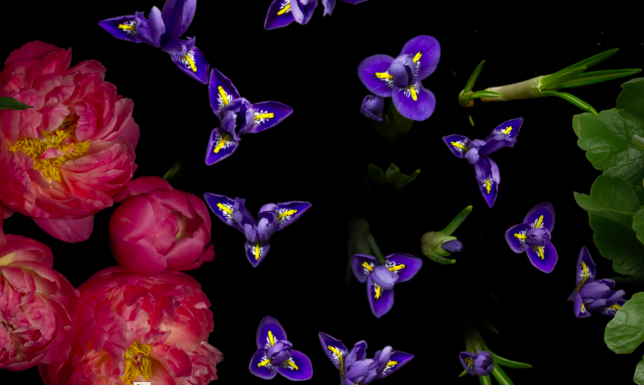
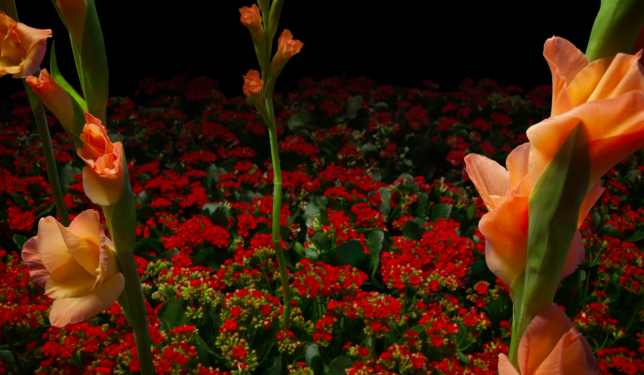
  • Spring on Speed: Time-Lapse Video Captures 3 Years of Blooming Flowers

    [ By SA Rogers in Art & Photography & Video. ]

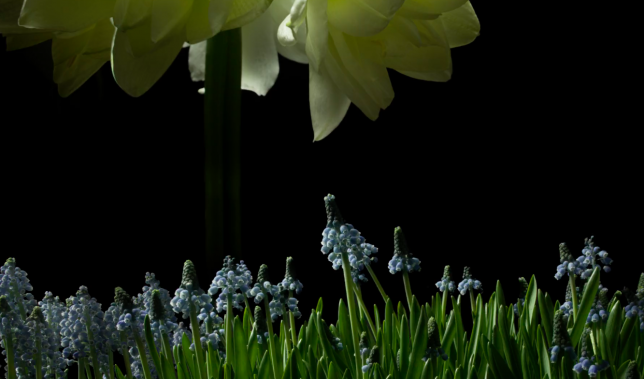
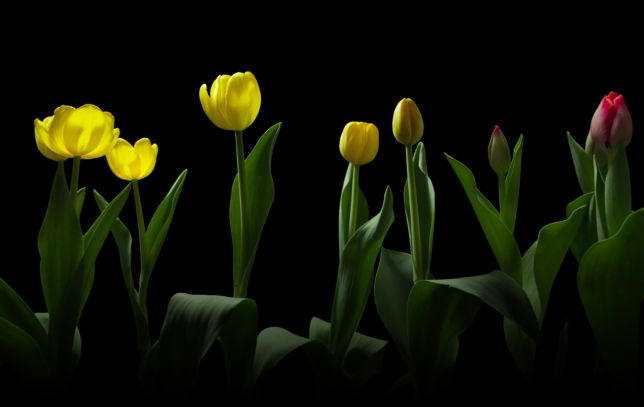
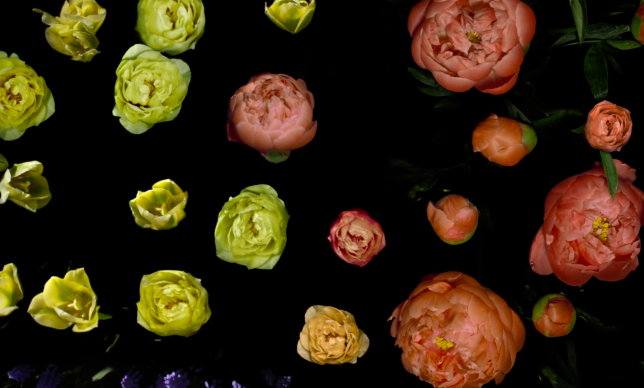
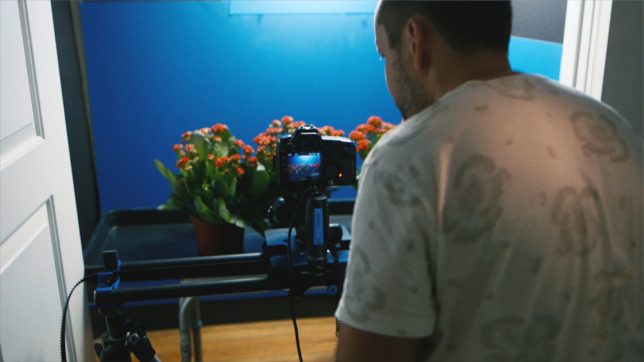
    A single sweeping shot seems to capture an entire spring season of blooming flowers in this artfully directed time-lapse video, which took three years to record and complete. Filmmaker Jamie Scott captured almost all of the footage on a soundstage in the closet of his New York home, often against a black backdrop, placing the flowers in stark relief as they unfurl.

    The sped-up result almost makes them look like sea creatures waving around under the sea, tentatively opening and then closing again as the camera passes over them. Scott started out filming the flowers from the front, but realized the effect was more dramatic if he shot them from above instead, shifting focus as he went.

    In a behind-the-scenes interview with F-stoppers, Scott explains that he made the film in contrast to his previous time-lapse work entitled Fall. The difference between the two films isn’t just the season, but also the close-up shots, shallow depth of field, classical score and placing the camera on a slider.

    Share on Facebook


    [ By SA Rogers in Art & Photography & Video. ]

    [ WebUrbanist | Archives | Galleries | Privacy | TOS ]


    WebUrbanist

  • Upper Yosemite Falls Moonbow – Getting The Shot

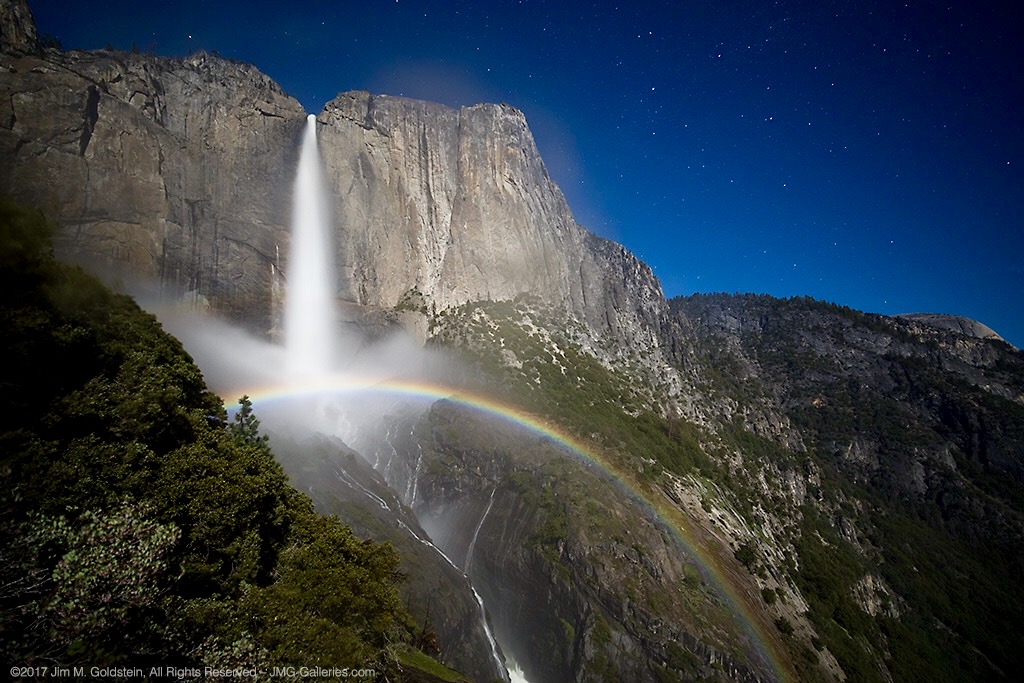
    Upper Yosemite Falls Moonbow - May 9 2017
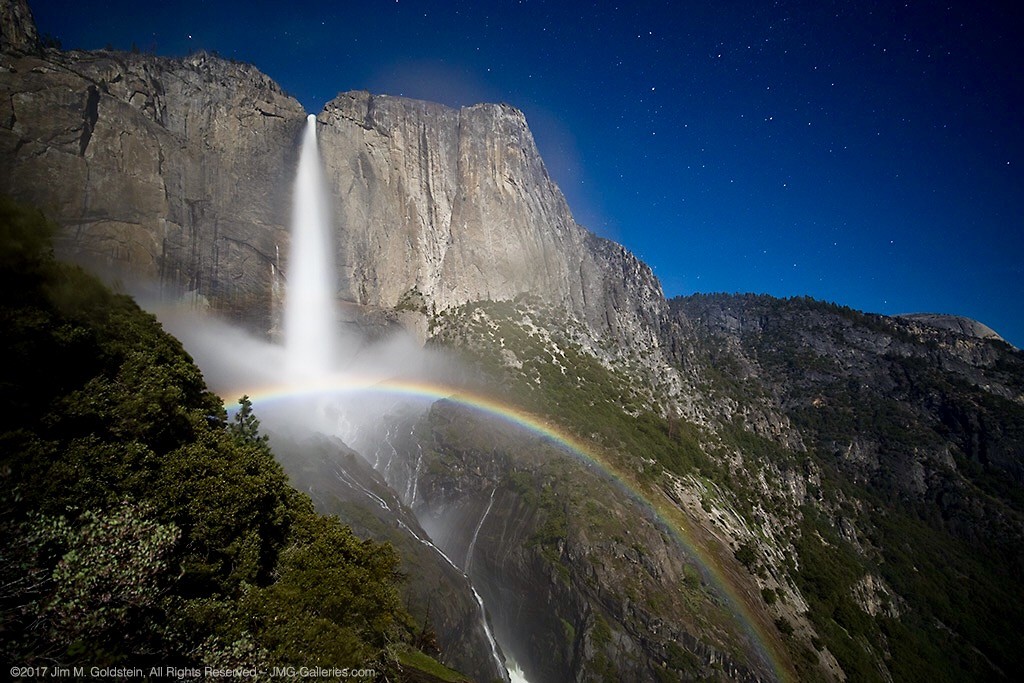
    Upper Yosemite Falls Moonbow - May 9 2017

    A large moonbow arcs across the mist from Upper Yosemite Falls, Yosemite National Park

    There are quite a few photos in my portfolio that I look back upon and question my sanity due to the absurd conditions I’ve endured to capture them. This particular photo is up there on the insanity scale.  This past winter has seen extraordinary snowfall levels in the Sierras and now that Spring has rolled around the water levels are quite high in Yosemite Valley due to the snow melt.  That translates to huge waterfalls and under the right conditions moonbows (rainbows at night via moonlight).

    I’ve taken moonbow photos from the Upper Yosemite Falls trail several times, but this year was like none other. I took up position in a new spot this year with a good friend Brian Hawkins. Our hike started off innocently enough with a hike that started at 4:30PM and later ended at 5:30AM. The reason for the long duration of the shoot was a combination of bringing a lot of gear (3 Canon DSLRS, 2 tripods and 4 lenses plus extra layers of clothes) and the interest in shooting multiple time lapses + stills. Time lapse sequences run a couple hours and the moonbow wasn’t going to appear until 11:30PM.

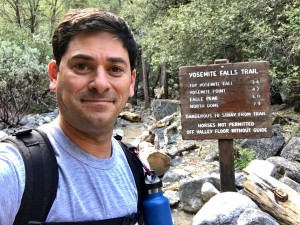
    Start of the Upper Yosemite Falls moonbow hike (4:30PM)
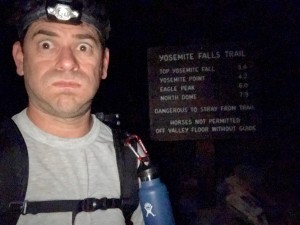
    End of the Upper Yosemite Falls moonbow hike (5:30AM)

    Now that I type it all out It really is rather nuts. I of course don’t think this before the hike because I have selective memory issues or quite simply my elevator doesn’t go to the top floor when it should.

    Hiking with a full photo backpack means slow going on a hike that is 1.5 miles with a 1250 foot elevation gain. Leaving “early” affords me the time to properly stake out the right location, set up all 3 camera, eat and start shooting. On the way up the focus is squarely on the task at hand and making it to the setup spot early.

    Waiting in heavy mist and gusty winds.

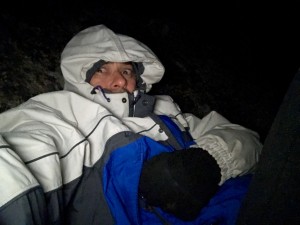
    Are we having fun yet? Waiting in heavy mist and gusty winds. Only 4 hours to go.

    The most painful part of the excursion is the wait. This year this was particularly true given the setup spot quickly became inundated with heavy mist from the falls when the wind kicked up (10mph gusts). Without exaggeration we were waiting in a windy rainstorm. A sane person might consider moving to avoid the heavy mist, but once you’ve invested the time to setup multiple cameras and climb down steep side trails it quickly becomes a less attractive option. This of course was constantly second guessed through out the night as conditions remained miserable. Eventually we called uncle and left the cameras running but took shelter an 1/8th of a mile away on the main trial to stay dry.

    So what does one think during the hours of waiting for the moonbow to appear and during the moonbow sequence run? Let me tell you in order of thought.

    1. I am so freaking wet and cold.
    2. I should have brought more layers to stay warm and dry.
    3. It’s so wet I’m not sure any of this footage will come out.
    4. I don’t think I could have carried anything more.
    5. What the f*ck are you thinking that this would be a good idea!
    6. I’ve never seen conditions so good for moonbows, but it’s too good. There’s too much water.
    7. What was that noise!? F*ck it better not be a mountain lion. Crap it was just my jacket hood rubbing against my head.
    8. I can’t feel my fingers. I should use those hand warmer things. Cr*p they’re in my camera bag back in the heavy mist. Forget it I’d rather have cold hands than get wet again.
    9. I wonder if my batteries died. I better go check.
    10. Upon returning repeat all the above thoughts
    11. I am so freaking cold. I am never going to do this again. I don’t know what I was thinking.
    12. Now that it’s so wet and windy how am I going to retrieve all my gear
    13. Holy sh*t! I can’t believe I’m here at 3AM

    Then after all of this I get to my camera to see the most amazing sight, Yosemite Falls roaring full of water with the biggest moonbow I’ve ever seen. All those earlier thoughts are lost as I get more stills taken. The results, like the photo above, are like a narcotic that wipes my mind clear. With the photo high in place packing up is less cringeworthy albeit still miserable. Trying to remember, pack and not leave behind gear and accessories for 3 cameras is tough enough, but particularly mentally challenging when cold and tired. Fortunately years of experience and more importantly being a little too anal for my own good make this a little easier.

    Unlike years past the extra effort of trying to dry off gear took some extra time. It also required another round of gear packing. By the time this was all complete the hike down could begin at 3:50AM.

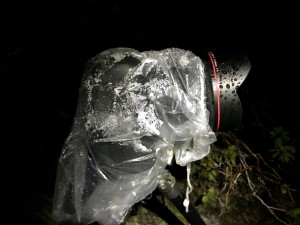
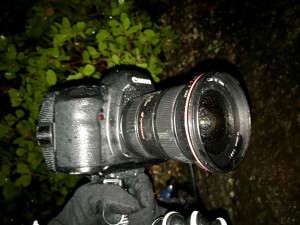
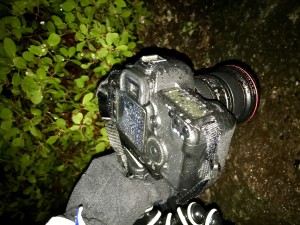
    Canon 5D Mark IV + Canon 11-24 drenched from the heavy mist off the falls.
    Canon 5D Mark II + Canon 16-35mm Mark II drenched from the heavy mist off the falls.
    Canon 5D Mark II + Canon 16-35mm Mark II drenched from the heavy mist off the falls.

    The hike down was cold, but dry and thus in my mind warm. On the way down thoughts of mountain lions hiding in the shadows quickly subside, instead focusing on not twisting an ankle due to fatigue or carelessness. Also important is to not step on the many millipede that crawl across the trail. In between dodging millipedes I’m left wondering how well my footage and still came out. Cold and tired I’m thinking it’s doubtful anything could have come out and back to questioning why I thought this was a good idea.

    Fast forward 7 hours as I write this and it’s become apparent several shots came out, but I won’t know how much until I’m back home. Between three cameras it’s likely it worked out. I really shouldn’t do this again, but come next year I’m sure all this will be mentally blocked and I’ll be making a similar hike / moonbow shoot just like I did in 2011, 2012, 2013, 2014, 2016 and this year. Apparently I’m a slow learner.

    Authors Note: Excuse the typos if any as I typed this on my phone and I’m still very sleep deprived.

    The post Upper Yosemite Falls Moonbow – Getting The Shot appeared first on JMG-Galleries – Landscape, Nature & Travel Photography.


    JMG-Galleries – Landscape, Nature & Travel Photography

  • National Geographic highlights early ‘People’ entries to Travel Photographer of the Year 2017 competition

    Travel Photographer of the Year 2017: People entries

    National Geographic’s Travel Photographer of the Year competition is open once again for entries, and its editors have shared a few of their favorite early contenders in the ‘People’ category. Submissions are being accepted until June 30th, and a Grand Prize win will get you a ten-day trip for two to the Galápagos Archipelago with National Geographic Expeditions.

    Photo and caption by Brandon Kusher / National Geographic Travel Photographer of the Year Contest

    Slam Dunk. A basketball player flies high through the air attempting a slam dunk in which he puts the ball between his legs first!

    Travel Photographer of the Year 2017: People entries

    Photo and caption by Akiomi Kuroda / National Geographic Travel Photographer of the Year Contest

    M. Portrait of Miho

    Travel Photographer of the Year 2017: People entries

    Photo and caption by Jobit George / National Geographic Travel Photographer of the Year Contest

    Bridging Generation. A beautiful photo of a father and son sitting in white traditional attire with beautiful blue sky on the day of Eid al-Fitr in a mosque in New Delhi, India. The photo shows the beautiful bond which these two generation have been building up in a very simple and lovable manner.

    Travel Photographer of the Year 2017: People entries

    Photo and caption by Lorraine Yip / National Geographic Travel Photographer of the Year Contest

    Retro Ride. Traveling through Cuba in a vintage 1950 Chevrolet with a speedometer which no longer works. We were passing by the city of Camagey known for its winding streets. The modern American Hawaiian hula figure and yellow taxi cab sign on the dashboard adds to the time travel-esque element of the classic Chevrolet, set against the backdrop of an old and perhaps dilapidated , but not forgotten, Cuba.

    Travel Photographer of the Year 2017: People entries

    Photo and caption by Hua Zhu / National Geographic Travel Photographer of the Year Contest

    Old and Young. This photo was taken in a small village in Wuyuan, China. It estimates that there are about 250 million countryside people living in the big cities. Many young people are making money in the cities, leaving their parents and kids at their hometown.

    Travel Photographer of the Year 2017: People entries

    Photo and caption by Pradeep Raja / National Geographic Travel Photographer of the Year Contest

    Ramadan Prayers. This is a shot of women praying inside Istiqlal Mosque, Jakarta which is the biggest mosque in Southeast Asia during the month of Ramadan.

    Travel Photographer of the Year 2017: People entries

    Photo and caption by Lauren Breedlove / National Geographic Travel Photographer of the Year Contest

    Lady Havana. During a recent visit to Cuba, I encountered this bold woman on the street while strolling around Old Havana. Something about her just struck me, like her eyes held a million stories. Not having any cash on me, I borrowed some change from a friend and approached the woman with it, asking to take her photograph. She nodded and posed like a boss, stogie and all.

    Travel Photographer of the Year 2017: People entries

    Photo and caption by Mattia Passarini / National Geographic Travel Photographer of the Year Contest

    Tibetan’s soul smile. This monk was running back to his room after the afternoon prayer. I was chasing him trying to get a nice shot, but he kept covering his face. In Chinese i called after him: (pai yi zhang ba) “just one shot!” He looked back and started to laugh..
    Tashi Lhunpo Monastery, Tibet

    Articles: Digital Photography Review (dpreview.com)

  • Comparing a 50mm Versus 85mm Lens for Photographing People

    As a writer for Digital Photography School, one of the most frequently asked questions I receive from beginner and intermediate photographers is, “If I have to choose just ONE lens to buy right now, which one should I choose?” We’ve previously discussed the differences between a 24mm lens and a 50mm lens for photographing people, and in that same vein, it’s time for another lens showdown!

    lens photographing people

    In this article, we’ll be discussing the differences between an 85mm and a 50mm lens for photographing people. Once again, I’ll walk you through several sets of similar images taken with each lens so that you can easily see the differences between the two. Hopefully, you can walk away with a better understanding of which lens might be the best upgrade for you.

    To keep things consistent, all images in this article were taken with a Canon 60D, and either the Canon 50mm f/1.8 lens or the Canon 85mm f/1.8 lens. The Canon 60D is an APS-C sensor (cropped sensor) camera, so in order to determine the functioning focal length of these lenses on this camera, multiply the lens focal length by 1.6 (multiply by 1.5 if you use Nikon). So on a cropped sensor camera, the 50mm lens functions roughly as an 80mm lens, and the 50mm lens functions as a 136mm lens.

    1. Differences in Depth of Field

    lens photographing people

    This image was taken with Canon 85mm lens at f/1.8.

    One of the biggest differences between the 85mm lens and the 50mm lens is the distance that you’ll need to stand from your subject. With the 85mm lens, the minimum focusing distance is 2.8 ft, and with the 50mm lens, the minimum focusing distance is 1.15 ft.

    This means that in general, you will be standing further away from your subject with the 85mm lens, than you will with the 50mm. In turn, this decreases the depth of field, which means that images shot with the 85mm lens tend to have much blurrier bokeh than images shot with the 50mm lens, even when using the same aperture.

    lens photographing people

    This image was taken with a Canon 50mm at f/1.8.

    You can see the difference clearly in the cherry blossoms in the background of the two images above, both of which were shot at f/1.8. The cherry blossoms are fairly well blurred in both images, but the shape of the blossoms is more defined in the image taken with the 50mm lens, and the blossoms are significantly more blurred and creamy in the image that with the 85mm lens.

    Of course, everyone has a different preference when it comes to bokeh. Some prefer the more uniform creaminess that the 85mm lens offers, while other photographers prefer to have a little more definition in the background.

    lens photographing people

    Left: 85mm lens | Right: 50mm lens.

    You may even find that you prefer different approaches in different applications! For example, I usually favor the more uniform bokeh of the 85mm lens. However, when I’m photographing in the grass, I prefer the bit of texture which the 50mm lens provides (see the examples above).

    This is purely a matter of preference, so start making mental notes about which type of images you tend to prefer when you look at other photographers’ work. If you find that you are always drawn to the creamier texture, then the 85mm lens may be a better fit for you. If you prefer a bit more texture in the background, you may want to consider the 50mm lens instead.

    2. Differences in Framing

    lens photographing people

    This image was taken with 50mm lens.

    In addition, spend some time thinking about the content of your backdrops. Using an 85mm lens will result in an image that is more closely framed on your subject. On the other hand, shooting with the 50mm lens will result in an image that includes more of the background (though not nearly as much as shooting with the Canon 24mm lens).

    Do you happily hike up to the top of a mountain for a photo session? You might want to consider the 50mm lens in order to more fully capture the trees and vistas in the background behind your portrait subject(s).

    lens photographing people

    This image was taken in exactly the same place as the previous one, only using the 85mm lens instead of the 50mm.

    On the other hand, do you often find yourself trying to disguise the background in your images? Do you shoot on location with backgrounds that are sometimes out of your control and/or unpredictable?  In that case, you may want to consider the 85mm lens.

    When you combine the decreased depth of field of the 85mm lens with the closer framing of your subject, the 85mm lens is stellar at creating beautiful portrait images at almost any location.

    3. Differences in Shooting Distance

    lens photographing people

    This image was taken with 50mm lens.

    Remember when I said that when you’re using an 85mm lens you’ll be standing further away from your subject than you would be using a 50mm lens? Here’s another reason why that’s important to know, I almost never use my 85mm lens inside our home.

    Our house is just over 1,000 square feet, and depending on the room, sometimes I physically cannot back up far enough to use my 85mm lens. Aside from official photography business, it’s important to me to be able to capture little day to day moments of our family, and so having a fast lens that I can use indoors is a must-have for me.

    As much as I love my 85mm lens, it just isn’t a great fit for that purpose given the size of our home. Your mileage may vary.

    Lens photographing people

    This image was taken with 85mm lens.

    On the other hand, when we’re outdoors I often prefer my 85mm lens. In that situation, standing further away from my subjects is a good thing. I can let my kids play and have fun without being all up in their business. Having a bit more space between them and the camera means that they’re able to relax more easily, which in turn leads to more genuine expressions and candid smiles.

    Conclusion

    As you can see, both of these lenses are great for capturing portrait-style images of people – I personally keep both in my camera bag and use them with near equal frequency.

    That said, if you’re only able to purchase one lens right now, both lenses have situations in which they outshine the other, so it’s important for you to think realistically about your preferences and the way you’ll use a portrait lens most often in order to get the most bang for your buck!

    If you have one of these lenses – which do you use the most for people photography?

    The post Comparing a 50mm Versus 85mm Lens for Photographing People by Meredith Clark appeared first on Digital Photography School.


    Digital Photography School

  • Fantastic footage of fjords with the DJI Mavic Pro

    This footage, filmed by CreateOne film production on a DJI Mavic Pro high above Norway has us all checking our vacation days and airline ticket prices. The processing is a little heavy in some places and there’s a couple of odd jello-tastic shots, but it’s well worth the two minutes of your time if you’re looking for a quick break from your day.

    Articles: Digital Photography Review (dpreview.com)

  • How to Organically Grow Your Instagram Following

    Instagram is unquestionably one of the biggest social networks today, and it’s undeniable that every photographer should have a presence here. But if you’re like me, you’ve probably struggled to amass a following beyond your existing friends and colleagues. So how do you truly (and organically) grow your Instagram following? Here are some tips.

    Instagram followers

    1. Keep your Instagram posts consistent

    When I first started my personal Instagram account, my posts were all across the board. From pictures of my breakfast to photos of a recent vacation or cute dogs I met in my neighborhood, there was no consistency to my Instagram feed. My followers didn’t know what to expect when they looked at my feed, and thus there was no incentive to follow me. As a result, I decided to revamp my approach to Instagram.

    My personal Instagram shifted to focus purely on food, restaurant, and event photos as an extension of my professional photography portfolio. Since making this shift, my personal account has seen a drastic jump in followers, as well as interaction with my individual posts. I’ve also built a community of food, restaurant, and event Instagrammers, many of whom I’ve even met in real life at InstaMeets (more on this below). As for my travel photos, those now live on a brand new Instagram account that I’m still growing from scratch. While overall followers for this account are still minimal, interaction with posts has steadily gone up using the rest of the tactics below.

    How to Organically Grow Your Instagram Following

    The lesson here is that keeping your posts consistent in either style or subject matter will give people a clear incentive to follow you. People will follow you when they’re interested in the photos that you post, so you must give them an idea of what to expect, and when to expect it. Make sure you post at least several times a week, or maybe even more often if you can come up with enough content or have a larger following. Also pick one or two themes to focus your photos on, for example, food photography or travel photography. This will help you pick out relevant hashtags to post.

    Use Add Accounts if you have multiple accounts

    Many Instagram users are electing to have at least two separate accounts; one for their personal posts, and one for their more professional, targeted posts. If you go this route, Instagram has made it easy to switch from viewing and posting from multiple accounts via Options > Add Accounts. You’ll have to sign in to your second account; afterward, a dropdown menu will appear under your profile name and you can flip between your accounts.

    Instagram Add Account

    2. Hashtags are key

    In order to have your posts be seen on any social network, you have to understand how new content gets discovered. For Instagram, it’s all about hashtags. But don’t just invent hashtags out of thin air. Instead, you leverage existing hashtags that are both relevant to the photo you are posting, and hashtags that have been used by other people. Note that Instagram allows a maximum of 30 hashtags per post, so add as many as you can!

    So where do you find relevant hashtags to use? Here are some ideas.

    Websta – Top 100 popular hashtags

    Check out the Top 100 Popular Hashtags section on Websta. This will give you a sense of how popular certain hashtags are. The more photos or posts that are tagged with these popular hashtags, the more eyeballs are scanning them, meaning there’s a higher chance of gaining more likes for your content. However, you’re also more likely to get spam comments on your posts, which is why you should not only use super popular hashtags but also drill down into more niche hashtags, per the steps below.

    Find hashtags on leading Instagram profiles

    As mentioned above, it’s important to focus your Instagram posts around specific topics, such as food or travel. Not only does it help you figure out what types of photos to post, but it also gives you ideas of other Instagram profiles to emulate. For example, an account focusing on food photography might look up Instagram handles for leading food publications such as Bon Appetit and Food and Wine. Follow these handles and also study their Instagram posts. Do they use a bunch of hashtags? Consider using them too. And most importantly, check to see if they offer a hashtag that you can use for a chance to be featured on their account. If so, start using it! More details on leveraging Instagram hubs over in

    For example, an account focusing on food photography might look up Instagram handles for leading food publications such as Bon Appetit and Food and Wine. Follow these handles and also study their Instagram posts. Do they use a bunch of hashtags? Consider using them too. Most importantly, check to see if they offer a hashtag that you can use for a chance to be featured on their account. If so, start using it! More details on leveraging Instagram hubs over in this article.

    Instagram followers Instagram hashtags

    Pro tip

    It’s totally fine to reuse the same hashtags on your posts, as long as they are relevant to each photo. But instead of typing in your hashtags over and over, consider keeping them in your note-taking app (ie. Evernote) and simply copying and pasting them into your new Instagram posts. Yes, it’s time-consuming, but it is much more efficient than typing in your 30 hashtags to every new post.

    3. It’s all about engagement

    When it comes to Instagram, you have to give a little in order to receive. While experimenting with my brand new Instagram account, I noticed that simply adding hashtags to my photos simply wasn’t enough. My very first Instagram posts had a bunch of hashtags, but only gained 6 or 7 likes. Suddenly, my third post jumped up to 39 likes. What changed?

    Instagram likes

    One of my first Instagram photos, posted before doing any interaction.

    Immediately after I published that post, I spent five minutes scrolling through my Instagram feed and interacting with as many posts that caught my eye. The interaction was simple in the form of adding likes and a quick comment or emoji. This not only gave me new ideas of accounts to follow but also seemed to bring more people to my profile since the number of likes on my posts immediately skyrocketed. The bottom line; be an active Instagrammer, not only by adding new posts, but also interacting with your followers or new people you discover.

    Instagram

    Another Instagram photo, posted the same week with many more likes thanks to interaction with other Instagrammers.

    4. Attend InstaMeets and Meetups

    The absolute best way to organically grow your Instagram followers is to meet them in real life. Thankfully, Instagram has picked up on this and has a section on their site where you can find local InstaMeets or even coordinate one for your area. Also, consider checking Meetup for local Instagram meetups or photography clubs that might hold an Instagram-specific meetup. Attend these events to connect with local photographers, and be sure to follow each other on Instagram and interact with each others’ posts.

    5. Cross post on other platforms

    One of the best ways to get more viewers (and hopefully follower) of your Instagram account is to put it in front of as many people as possible. There are many ways to do this. Here are a few ideas:

    Cross publish to other social networks

    When you make a new Instagram post, cross-publish it to other networks such as Facebook, Twitter, Tumblr or Flickr by selecting the respective icons when you create a new post.

    Instagram Linked Accounts

    Setting up linked accounts on Instagram.

    Instagram

    Add an Instagram widget to your website or blog

    If you have a website or blog, there’s a good chance that you attract brand new visitors via search engines on occasion. Make it easy for these website visitors to connect with you on social media platforms like Instagram by embedding your feed into your website. For websites hosted on WordPress, there are many free Instagram embed plugins that can do this for you.

    Instagram

    Add Instagram to your email signature

    Whenever you send emails, there’s an opportunity to get your Instagram in front of the email recipient via your email signature. Use a service such as WiseStamp to include a link to your profile or even embed your feed into your email signature. Just make sure that your Instagram feed is full of images and content that you don’t mind being seen by people you email.

    Instagram feed

    6. Try out Instagram’s newest features

    Like most other social networks, Instagram occasionally rolls out new features. While not all of these features may stick around or be worth your while, you could certainly experiment with them to see if they can work to your advantage. At the time of this writing, here are two brand new features worth trying out.

    Instagram Stories

    Instagram Stories is like Snapchat where you can post a photo or video that can only be viewed for a limited period of time before it is deleted. What’s the point? For professional photographers or brands, Instagram Stories can be great for posting behind-the-scenes shots from photo shoots. They’re also great for posting mediocre photos that might not be worth permanently adding to your Instagram portfolio but assist in building your brand’s personality.

    Instagram stories

    Multiple Photos

    Finally, Instagram is allowing users to post up multiple photos at a time. If you’re thinking, “Wait, Instagram already lets me do this with the Layout By Instagram Collage app,” this is slightly different. Instead of displaying photos in a collage format, you can view up to ten photos in a slideshow This gives you greater flexibility in publishing longer form visual stories and not having to choose just one photo out of a batch.

    Instagram collage app

    Posting multiple photos via Layouts by Instagram Collage app.

    Instagram multiple photos

    Posting multiple photos via the multiple photos feature.

    Bonus Tip: Enable your Instagram Business Profile

    Another new feature Instagram recently rolled out is the ability to convert your personal account into a business profile. Currently, this feature is only enabled if you link your Facebook page to your Instagram account; after doing so, a button should appear at the top of your profile asking if you want to switch to a business profile.

    Why switch to a business profile? Well, you’ll get some enhanced features that can help you craft a better Instagram strategy such as:

    • The ability to add custom buttons to your Instagram profile that allow visitors to go directly to your website, call you, or find directions to your location.
    • Get Insights or stats on your most popular Instagram posts, total impressions, and basic demographics about your followers.

    Instagram business profile

    In Conclusion

    Organically growing your Instagram followers isn’t as difficult as it may seem. But don’t expect it to happen overnight. Craft a consistent, long-term approach that incorporates some of the tips above and your Instagram interaction will slowly but surely start to increase!

    Do you have any tips for growing your Instagram following? Please share them in the comments below! Follow dPS on Instagram here too.

    The post How to Organically Grow Your Instagram Following by Suzi Pratt appeared first on Digital Photography School.


    Digital Photography School