RSS
 

Composition in Photography: A Complete (and Modern) Guide

16 Mar

The post Composition in Photography: A Complete (and Modern) Guide appeared first on Digital Photography School. It was authored by Ana Mireles.

composition in photography: a complete (and modern) guide

If you’re looking to learn about composition in photography, you’ve come to the right place.

In this article, I’ll cover what composition is, and I’ll explain how to use it to make your images eye-catching and unique.

So whether you’re a beginner photographer learning the basics or a more experienced shooter who wants to improve, read on to find out some of the most effective composition tools, concepts, and guidelines available!

What is composition in photography?

Composition in photography refers to the position of elements inside the frame and how they interact with each other.

Ultimately, composition is about the visual structure of your image.

Why is composition important?

The composition of your photograph impacts the way it’s perceived by others. When you choose what to fit inside the frame and what you leave out, where to position each element and so on, you’re capturing a scene with your unique vision.

That’s why it’s important to carefully compose your photos!

Basic techniques and concepts for composition in photography

We are instinctively attracted to images with a good composition.

Why?

Because we find them harmonious or interesting!

However, we are not as naturally skilled at creating stunning compositions.

That’s why photographers have developed basic compositional guidelines and concepts that can quickly improve photo compositions – without requiring years of experience.

Starting with:

The rule of thirds

You’ve probably heard about the rule of thirds – or at the very least, you’ve seen it. That’s because most cameras, including the one on your smartphone, have a rule of thirds grid overlay.

The rule of thirds grid is formed by four lines – two vertical and two horizontal – placed at an equal distance from each other and the photo edges (so the frame is divided into thirds).

Like this:

rule of thirds

But what actually is the rule of thirds?

It’s a guideline stating that you should position compositional elements along your gridlines – and that the focal point of your composition should sit at one of the gridline intersection points.

You can follow this rule in both portrait and landscape orientation, and it works for all types of photography. For example, if you are doing a full-body portrait, you should often place the subject toward one of the gridlines and not in the center.

And when you’re photographing a landscape, you should put the horizon toward the top or bottom third of the image and never in the middle.

Note that the rule of thirds is a guideline, not a true rule. Once you’ve mastered it, I recommend trying to violate it with other concepts – such as symmetry, or with even more complex techniques such as the golden ratio (discussed below).

Leading lines

Leading lines direct the viewer through the image, like this:

leading lines in photography

When you read a text in English, you automatically start at the top left. Then you continue toward the right until the end of the line.

The same thing happens in photography. When we see an image, we also “read” it. Your eye goes from one element to the next – in order to view details and understand the story that’s being told.

That’s where the leading lines come into play: They guide the eye through the image.

Leading lines can be present or implied, and they can be straight or curved. For example, a leading line can be a curvy road getting lost in the mountains. This will compel viewers to follow the road, pulling them into the image.

Texture

texture of cloth

Texture is often overlooked as an element of the composition. You can use it to create contrast between two elements – one that is smooth and one that is rough, for example.

You can also use texture to create interesting shapes and leading lines, or to add interest to an otherwise dull subject.

To work with textures, you need to consider the type and direction of the light. A hard light that comes from the side will emphasize the texture. A soft light coming from the front flattens the surface.

Color

color wheel

Color is a key consideration for composition in photography. There are so many color harmonies that you have endless possibilities!

You can use complementary colors to create contrast and make your subject stand out. And you can bring together apparently unrelated elements that are united via a color scheme.

A good way to learn and understand color palettes is Adobe Color. You can use this tool even if you don’t have an Adobe subscription.

Simply select a color wheel with different color harmony rules, such as monochromatic, complementary, etc. You can also upload a photograph to extract the color scheme or gradient. And to stay updated, you can browse trends based on Adobe Stock and Behance.

Use color composition in photography

My favorite tool in Adobe Color is Explore, where you can input a concept or a mood and see the colors that represent it (with multiple examples from the visual arts).

Shape

use shapes to compose your photography

As photographers, we’re used to thinking of ways to add depth to a two-dimensional surface.

Because of that, it’s easy to overlook the importance of shapes. Yet when you’re composing your images, you can use shapes to establish a careful arrangement.

Think of a cake being photographed from the top; that’s a circle. If you cut out a slice, then you’re adding a triangle to the composition.

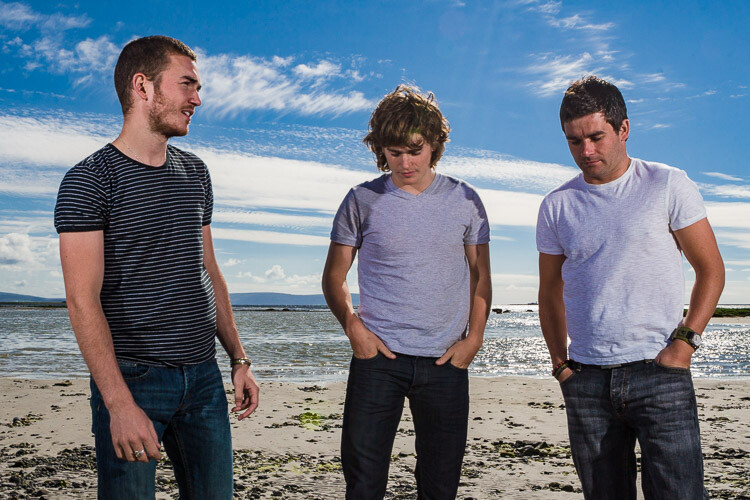
Every shape gives a different feel to our photographs. For example, squares convey stability, while circles make you think of movement and energy.

That’s why posing a group for a corporate portrait usually means forming squares or rectangles, whereas family portraits are often posed in triangles or dynamic shapes.

A good way to practice shape-based composition is by using shadows or shooting silhouettes. That way, you take out any three-dimensionality and focus only on the shape of objects.

Symmetry

Symmetry is defined as something that is exactly the same on both sides, such as a mountain peak or a tree trunk.

And it can work great in art – as long as you use it carefully.

Note that, in art, a scene is rarely 100 percent symmetrical. Instead, you’ll end up with scenes that are almost symmetrical and are well-balanced on both sides.

Like this lake photo:

symmetrical composition in photography

The trees and water aren’t perfectly symmetrical, but they’re close, and the overall scene has a feeling of balance.

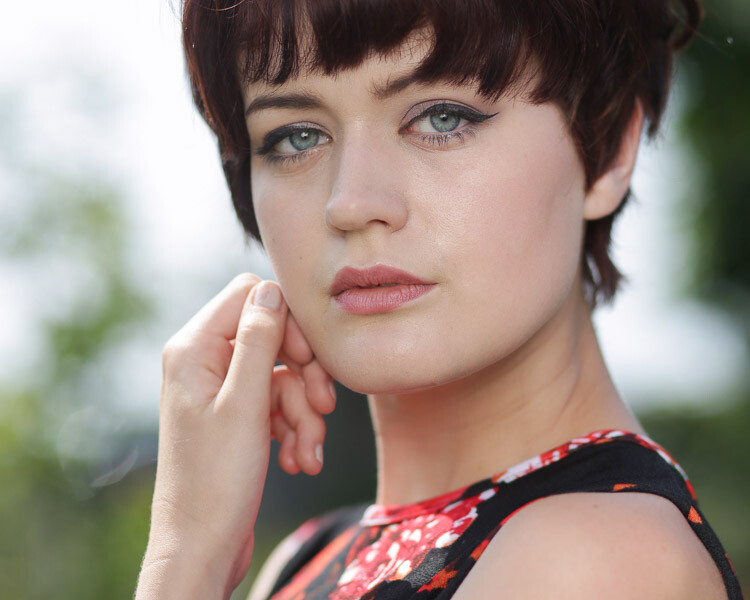
Take a portrait as another example. If you photograph a face perfectly centered in the frame, your image will be symmetric. It won’t matter if the subject has a birthmark on one of their cheeks, or that one of their eyes is slightly lower than the other – the symmetry will dominate.

One of the reasons we find symmetry so appealing is because we often find it in nature. And psychologically speaking, symmetry offers a sense of order that makes us feel at ease.

(A great way to play with symmetry in your photography is by shooting reflections or patterns!)

Contrast

fire burning contrast

Another important concept that can enhance your composition is contrast.

Since we are talking about photography, the first thing that comes to mind is contrasting light, such as low key photography. Here, you capture a very dark image where only a small detail is highlighted (which makes for a highly dramatic result).

However, tonal contrast is not the only type of contrast you can use to improve your compositions. You can also use color contrast (as discussed earlier), juxtaposition, and conceptual contrast (which pairs opposite ideas or aesthetics).

Advanced composition in photography

Once you’ve mastered the basics of composition, it’s time to challenge yourself and move on to more advanced techniques.

Here are some of the most popular tools to consider:

The rule of space

The rule of space tells you to leave space in front of the subject, especially if it’s a moving subject. The idea is that the viewer needs enough room to imagine the subject carrying on the action that it’s performing.

For example, if a duck is paddling away, you would put significant space in front, like this:

rule of space

And according to the rule of space, if you photograph a person who’s running to the right, you should place them on the left side of the frame (and vice versa).

rule of space person walking with a cart

But remember that there’s an exception to every rule, especially when it comes to composition. So if you want to add tension or intrigue the viewer, try violating the rule of space!

The complicated thing about composition is that you must choose to apply or break the rules depending on the message you want your image to convey.

The rule of odds

rule of odds

The rule of odds is based on the principle that people find it more interesting to see odd numbers. While even numbers show stability and work well for symmetric compositions, odd numbers allow the eye to flow through the image.

So according to the rule of odds, you should include odd numbers of items in your compositions.

I recommend you use this rule when it fits the situation, much like you would with shapes. If you want a dynamic composition, you use triangles, diagonal lines, and odd numbers. And if you prefer stability, you can choose straight lines, squares, and even numbers.

In any case, the important thing is to use the rules to your advantage and take control of your compositions.

When you’re shooting food or products, it’s often easier to follow the rule of odds.

But following the rule of odds isn’t as easy when you’re photographing a family of four; you can’t just decide to exclude one of them!

(Though when you’re facing this situation, you can arrange the group so the viewer sees one plus three instead of four.)

Triangular composition

In the first part of the article, I talked about using shapes to compose your images.

But did you know that the most popular shape in composition is the triangle?

You can create triangles with poses in portraits, mountains in a landscape, or a church tower on your travels.

However, if you want to up your game a bit more, you can use golden triangles. This composition technique divides the frame first with a line that connects one corner with the opposite one, then adds two smaller lines coming out from each of the remaining corners.

Like this:

triangular composition in photography

Ideally, you would place the most important elements of the composition where the lines intersect. To achieve this, you may have to tilt your camera; this is called a Dutch angle (aka the Dutch tilt, German tilt, or Batman angle).

That’s why it’s not always possible to use the golden triangle guideline (or, at least, it’s not always the best choice!).

The golden ratio

The golden ratio is a mathematical term that was later applied to art and eventually photography. It equates to 1.618, and there are two ways it can be applied to photographic composition:

As a grid or as a spiral.

The golden grid (aka the Phi Grid)

The Phi Grid divides the frame into nine blocks, just like the rules of thirds.

However, this grid doesn’t follow a 1:1:1 ratio – which means the blocks are not the same size. Instead, the grid is 1:0.618:1, so you get smaller blocks toward the center, like this:

Phi grid photography

This composition tends to be more natural, as the golden ratio is also found in nature. It also has a better reputation than the rule of thirds, which many consider to be amateurish – a first step that should be quickly outgrown for more complex techniques.

The golden spiral (aka the Fibonacci spiral)

For this composition tool, you should follow a spiral whose growth factor is the golden ratio.

It looks like this (though note that it can begin at any corner of the frame):

golden spiral composition in photography

This spiral is found in natural structures such as sunflowers, pine cones, seashells, etc. You can also find it in many artworks and buildings because many artists have used it throughout the centuries.

To train your eye, you can print or draw a golden spiral, then use it to study the photographs from Irving Penn or Henri Cartier-Bresson, who both used the golden spiral to achieve astonishing results.

composition in photography tulip center

Composition in photography: conclusion

Now that you know most of the popular composition tools, you can use them to dramatically improve your images!

I know it’s a lot of information, but composition in photography will become more intuitive as you get more practice.

My suggestion is to keep it simple at first and practice the tools one by one.

Once you get comfortable with each composition guideline, you can combine them to achieve a more complex result.

And remember:

These are just guidelines you can use as you see fit to find your own artistic vision.

Now over to you:

Which of these composition techniques is your favorite? Which do you plan to use in the future? Share your thoughts in the comments below!

Composition in photography FAQs

How do I emphasize my subject?

To emphasize an element in your photograph, you need to draw the viewer’s attention to it. You can use composition techniques, such as leading lines, to achieve this.

Is the rule of thirds the most important composition rule in photography?

No, the rules of composition don’t have a hierarchy. Instead, rules work better in different situations, and the best technique for one photograph can be wrong for the next one.

Can I improve my composition by photographing with a smartphone?

Yes, these rules apply to all types of photography, including mobile and video. If you want some help getting started, most camera phones have a grid overlay that follows the rule of thirds. You can enable/disable it in the settings section. Alternatively, you can install a camera app that supports different types of grids (such as A Better Camera).

How can I improve my composition in Lightroom?

You can use Lightroom’s overlays to improve the compositions of your photos. To use these, select the Crop tool from the Develop panel. Make sure that the Overlay is enabled. Then press the “O” key to toggle between all the available overlays.

Can I break the rules of composition?

Absolutely! Even though some of them are called rules, they are only guidelines, tools, and techniques to help you achieve better results. There’s always flexibility to experiment. It’s important to know the rules before you break them, though!

The post Composition in Photography: A Complete (and Modern) Guide appeared first on Digital Photography School. It was authored by Ana Mireles.


Digital Photography School

 
Comments Off on Composition in Photography: A Complete (and Modern) Guide

Posted in Photography


Nikon Z7 II review

15 Mar

Introduction

$ (document).ready(function() { SampleGalleryStripV2({“galleryId”:”5855925593″,”isMobile”:false}) })

Sample photoSample photoSample photoSample photoSample photo

Product shots: Dan Bracaglia

Silver Award

89%
Overall score

Late last year, Nikon announced the Z7 II, the second iteration of its (for now) range topping high-resolution full-frame mirrorless camera. As the name implies, this is a refinement rather than a reimagining; and while the updates may not knock your socks off, we really enjoyed the original Z7 and this new model builds on an already successful formula.

The Z7 II still has a 45.7MP full-frame BSI sensor, but it’s now backed up by dual processors compared to the single processor in its predecessor. The exterior of the camera is largely unchanged, which is fine by us: Nikon’s Z-series cameras offer some of our favorite ergonomics on the mirrorless camera market. Blessedly, though (especially for those of us that moderate online comment sections), Nikon has included dual card slots in the Z7 II for users that need immediate backup or want to easily separate their still images and video clips. See? Something good came out of 2020 after all.

Out-of-camera JPEG.
ISO 200 | 1/160 sec | F2.8 | Adapted Nikon AF-S 70-200mm F2.8E
Photo by Barney Britton

Key specifications:

  • 45.7MP BSI-CMOS sensor with native ISO 64
  • 4K/60p video with 93% coverage of the sensor (a ~1.08x crop)
  • 5-axis in-body stabilization (3-axis with adapted F-mount lenses)
  • 10 fps burst shooting with single-point AF
  • 3.69M-dot EVF, 3.2″ 2.1M-dot rear screen
  • -3EV focusing with F2.0 lens
  • 1 CFExpress / XQD card slot, 1 UHS-II SD card slot
  • New EN-EL15c battery, CIPA rated to 420 shots (LCD), 360 shots (EVF)
  • Compatible with new MB-N11 battery grip with vertical controls

The Z7 II, being the high-resolution model in Nikon’s mirrorless lineup, is all about outright image quality. It remains one of the only cameras on the market that provides a low native ISO of 64: this helps maximize dynamic range for high-contrast scenes like sunset or sunrise landscapes.

The Z7 II is priced at $ 2999 body-only or $ 3599 kitted with a 24-70mm F4 lens. The new MB-N11 battery grip with duplicate vertical controls will cost you $ 399.


What’s new and how it compares

Ask, and ye shall (sometimes) receive: The Z7 II now has one SD card slot and one CFExpress / XQD card slot. All control points shown are identical to those on the original Z7.

The big story in the Z7 II (if you don’t count the new card slot) is its dual Expeed 6 processors – so what exactly do those give you?

To start with, the Z7 II is a more credible action camera than its predecessor. Its burst speed tops out at 10 fps with continuous autofocus instead of 9 fps (albeit with a single AF area, and not subject tracking), and the buffer is up to three times deeper, giving you a total of 77 12-bit Raw images before slowing down. Helping you follow the action is a claimed reduction in blackout in the viewfinder, which is welcome, though we would have liked to see a boost in EVF resolution as well. Maybe next time.

Autofocus modes

New AF modes have also been added and are accessible in the main and ‘i‘ menus. They include the addition of face / eye detection in the ‘Wide area AF’ mode instead of just ‘Auto Area AF’; this means you can place an AF box over a person’s face to tell the camera to focus on that particular person’s eyes, which is especially handy if there are multiple people in a scene. An equivalent mode is available that prioritizes animals.

The new processors also allow the camera to focus in light as low as -3EV with a lens at F2 (and you can still push this even lower for static subjects by enabling the ‘Low Light AF’ feature).

Video and other updates

For video, the Z7 II is rather more competent than its predecessor, and now includes 4K/60p capture with a slight (1.08x) crop. It will also output 10-bit N-Log or HDR (HLG) footage to a compatible external recorder, and you can output Raw video in 1080p if you’re using the full sensor and 4K if you’re using a cropped APS-C sized region. We’d expect good video quality, but hardcore video shooters should set their sights on the Z6 II and its oversampled 4K video which should offer much better fine detail.

And of course, there’s those dual card slots. One supports CFExpress (Type B) and XQD cards, and the other is a UHS-II compatible SD slot. The Z7 II also includes a new EN-EL15c battery, which boosts battery life to a CIPA-rated 420 shots using the rear LCD with energy saving modes disabled. In response to customer feedback, the Z7 II is compatible with a new MB-N11 vertical grip, which allows for the use of two batteries and has portrait-orientation controls built-in. Finally, from a power management point of view, you can now power the camera over its USB-C port, as well as charge it.

Lastly, we’re pleased to see that Nikon has added support for firmware updates over Wi-Fi through its SnapBridge app. This will make it easier for everyday users to get the most out of their cameras, as Nikon has been diligent about updating its camera in the past with new functions and features.

Compared to…

Let’s take a look at how the Nikon Z7 II stacks up against some other stabilized, full-frame cameras on the market. Of particular note is just how competitive the Z7 II’s MSRP is right at launch.

Nikon Z7 II Canon EOS R5 Sony a7R IV Panasonic Lumix S1R
MSRP (body) $ 2999 $ 3899 $ 3500 $ 3699
Sensor res. 45.6MP 45MP 61MP 47MP
Image stab. 5 stops 8 stops 5.5 stops 6 stops
LCD type Tilting Fully articulating Tilting Two-way tilting
LCD size/res 3.2″ / 2.1M-dot 3.2″ / 2.1M-dot 3″ 1.44M-dot 3.2″ 2.1M-dot
EVF res / mag
(equiv.)
3.69M-dot
0.8x
5.76M-dot
0.76x
5.76M-dot
0.78x
5.76M-dot
0.78x
Burst w/AF 10 fps (single AF area only) 12 fps / 20 fps mech/
e-shutter
10 fps 6 fps
Video res. 4K/60p
(1.08x crop)
8K/30p 4K/30p 4K/60p
(1.09x crop)
Mic / headphone socket Yes / Yes Yes / Yes Yes / Yes Yes / Yes
Battery life (rear LCD) 420/360 shots 320/220 shots 670/530 shots 380/360 shots
Weight 675g (23.8oz) 738g (26oz) 665g (23.5oz) 898g (31.7oz)

Return to index


Body and handling

Put the Z7 II next to the original Z7 and you’d be hard-pressed to tell the difference between them. Indeed, the only differences of any consequence are the slightly taller memory card door to accommodate the dual slots and the small ‘II’ on the front plate.

But we’re not going to complain too much, because we really didn’t find much fault with how the original Z7 handled. And you can expect the same experience from the Z7 II: a deep, very comfortable grip, well-placed buttons and control dials, an easily readable top display and a satisfyingly ‘clicky’ mode dial.

Okay, but we’re going to nitpick a bit just because we can. Being the high-res, stills-focused camera in the range, the Z7 II wouldn’t necessarily benefit from a fully articulating mechanism that video shooters prefer, but a ‘two-way tilting’ design such as that found on the Fujifilm X-T3 and Panasonic S1R would have been welcome. And though the front two function buttons are well-placed, some of us on staff find them a bit ‘mushy’.

Other than that, though, the Z7 II feels incredibly solid in the hand and is a supremely comfortable camera to hold and use for extended periods of time. The touchscreen interface is responsive, and it’s easy to switch between stills and video quickly. The arrival of a new battery grip with duplicate controls (!) will make for a more comfortable experience for use with larger lenses, like the Z 70-200mm F2.8 and adapted F-mount telephotos.

Return to index


Image quality

Out-of-camera JPEG.
ISO 450 | 1/50 sec | F9 | Nikon Z 24-70mm F2.8 S
Photo by Barney Britton

The Nikon Z7 II’s 45MP sensor is unchanged from its predecessor, and that’s just fine by us: image quality is absolutely outstanding in a broad range of scenarios, and Raw files are eminently flexible. In files from the original Z7, we did see some minor banding in the deepest shadows, but Nikon appears to have cleared that up with the new model.

Our test scene is designed to simulate a variety of textures, colors and detail types you’ll encounter in the real world. It also has two illumination modes to emulate the effects of different lighting conditions.

$ (document).ready(function() { ImageComparisonWidget({“containerId”:”reviewImageComparisonWidget-12173051″,”widgetId”:801,”initialStateId”:null}) })

In terms of Raw detail capture, the Z7 II puts up a really strong showing against its competition. The Canon EOS R5 looks just a bit softer than the others here, but that’s likely due to a weak anti-aliasing filter, but this is of little practical impact other than saving you some time with the moiré tool in post. We find that 45MP is plenty of resolution$ (document).ready(function() { $ (“#icl-5317-2087802529”).click(function() { ImageComparisonWidgetLink(5317); }); }) for almost any purpose; though, of course, the Sony and Panasonic offer you more resolution in their pixel shift modes$ (document).ready(function() { $ (“#icl-5318-93135894”).click(function() { ImageComparisonWidgetLink(5318); }); }) assuming your photographic subjects are static enough to take advantage of them.

At the highest ISO values$ (document).ready(function() { $ (“#icl-5319–1749990159”).click(function() { ImageComparisonWidgetLink(5319); }); }), the Nikon Z7 II pulls ahead of Panasonic handily with respect to noise levels, outstrips the Canon EOS R5 by a hair and looks to be pretty much neck-and-neck with the Sony a7R IV. But really, all cameras look solid at the more realistic ISO values$ (document).ready(function() { $ (“#icl-5320–1228588540”).click(function() { ImageComparisonWidgetLink(5320); }); }) that you might consider shooting at.

Onto the JPEGs, we find the overall color palette$ (document).ready(function() { $ (“#icl-5321-455437219”).click(function() { ImageComparisonWidgetLink(5321); }); }) from these cameras to be excellent but the Nikon’s yellows look to be just a bit richer and golden, and the greens a tad warmer (we think those are good things). The slightly more magenta pink patch could impact caucasian skin tones, though. JPEG detail$ (document).ready(function() { $ (“#icl-5322-1670928541”).click(function() { ImageComparisonWidgetLink(5322); }); }) is likewise good, though the Sony (with its resolution advantage, admittedly) looks a bit better$ (document).ready(function() { $ (“#icl-5323–1434692408”).click(function() { ImageComparisonWidgetLink(5323); }); }) as the Nikon is using clumsier, larger-radius sharpening that doesn’t reveal fine detail as well. As ISO values climb$ (document).ready(function() { $ (“#icl-5324-995412158”).click(function() { ImageComparisonWidgetLink(5324); }); }), the Nikon and Canon leave behind less luminance noise than the Sony and Panasonic but also retain less low-contrast detail$ (document).ready(function() { $ (“#icl-5325-1460628746”).click(function() { ImageComparisonWidgetLink(5325); }); }).

Dynamic range

As we mentioned, the Z7 II’s sensor is essentially the same as its predecessor; it uses a dual-gain design to minimize read noise above ISO 320, so that high ISO settings have lower visual noise. As a result, the ISO 100 and 200 settings (below the higher gain step which would lower dynamic range) are a little noisier in the shadows compared to higher ISO settings – above ISO 320 – using the same aperture and shutter speed. The difference is impressively small, though, and so the sensor is adding really low amounts of noise to the final image, even in the lower gain state used at low ISOs. This also means that you can save four stops of highlight detail by shooting at ISO 400 instead of ISO 6400, with the same exposure settings, and brighten selectively – while protecting highlights – in post. You’ll pay little to no extra image noise cost in doing so.

Our standard Exposure latitude test really emphasizes how little noise the camera itself is adding to your images. Even if you reduce exposure significantly, which again helps you capture additional highlight information, the Z7 II puts up a really impressive performance. We also don’t see any of the banding that could sometimes occur in the very deepest shadows with the original Z7 when exposures were pushed.

A key thing to note is that ISO 64 mode allows camera to capture more light before clipping than its rivals can. This, combined with the very low noise performance seen above, means the Z7 II can capture images with cleaner tones, all the way down into the deepest shadows. And, now the banding in the darkest tones has been resolved, this results in higher image quality and greater flexibility than its peers in situations where it’s practical to use ISO 64.

Return to index


Autofocus

The Z7 II’s autofocus system is a match for that of the Z6 II, which in turn is a continuation of the improvements introduced during the lifespan of the preceding models.

The major change is that the human and animal detection features are now built into variants of the ‘wide-area’ and ‘auto-area’ AF area modes. This means they don’t have to be selected from a separate i-menu option, and they can be easily accessed if you have one of the camera’s buttons set to ‘Focus mode/AF area mode.’

The provision of a Wide-Area AF (L-people) mode provides a way to predetermine where in the frame you want the camera to look for its subject, which provides a way to pre-select which person the camera is going to focus on. On the previous Z models you had to use ‘auto-area’ mode, meaning you had to wait to see who the camera focused on, before being able to select a different subject if required.

Unfortunately, unlike the latest Canon and Sony AF systems, human and animal detection system separate modes from the camera’s subject tracking function. This means that you have to make the decision whether to use a simple AF area, subject tracking or face/eye detection, and then select the appropriate mode.

AF performance

Face/Eye detection autofocus performance tested using firmware v1.10

Generally we’ve found that the Z7 II’s autofocus system is very good, but not up there with the very best of its peers. Face and eye detection work well, successfully finding subjects even when they’re quite distant, though the Z7 II’s higher resolution makes it a little clearer that the camera is focusing a fraction in front of the iris than was apparent with the Z6 II.

Subject tracking is, again, good, but not quite on the same level as the best in its class. It is better at tracking a distinct, moving subject than it is at sticking to the part of a larger subject that you’ve pointed the camera at. This means subject tracking doesn’t always work as a means of precisely placing your AF point, as an alternative to moving it with the joystick. We also encountered occasional instances where the camera would attempt to refocus, even when ‘tracking’ a static subject.

We conducted our standard AF tests, first checking the camera’s ability to refocus on an approaching subject (the camera turned in a 100% hit rate in this scenario), then asking the camera to identify a weaving subject and choose an appropriate AF point, seen below. These tests were shot using the Nikkor Z 70-200mm F2.8 VR S.

The Z7 II appears to have had little difficulty in identifying and following the subject around the scene but, as with many cameras, it will occasionally slightly misjudge the focus distance as the rate of the rider’s approach changes. The Z7 II doesn’t offer any settings to adjust the responsiveness of the autofocus (only how it responds in the event of an obstacle appearing between the camera and the subject).

Overall the autofocus on the Z7 II is very good. In a couple of respects it falls behind the very best of its peers but if compared with most older cameras, particularly DSLRs, it’s able to focus very effectively with minimal need for user input. It’s not necessarily going to offer flawless performance for sports shooting but for landscape, studio or portrait work, it’s more than good enough. The implementation, which requires you to change in and out of different area modes for different types of subject, isn’t as slick as Canon and Sony have become but it’s rarely too onerous.

Return to index


Video

The Z7 II is a less video-focused camera than the Z6 II but still offers some pretty competitive specs. The Z7 II also does a good job of letting you specify different parameters to stills and video modes, including exposure values, white balance, color mode and even ‘i’ menu configuration. This means it can be set up to allow quick jumps back and forth between modes without carrying inappropriate settings from stills to video or vice versa.

$ (document).ready(function() { ImageComparisonWidget({“containerId”:”reviewImageComparisonWidget-66007578″,”widgetId”:809,”initialStateId”:null}) })

With its higher pixel count, the Z7 II isn’t able to read out its whole sensor quickly enough to create its video output, and instead appears to skip some lines and only use the remainder. The effect is video that’s a little less detailed$ (document).ready(function() { $ (“#icl-5394-1526146656”).click(function() { ImageComparisonWidgetLink(5394); }); }), with higher risk of moiré and more noise in low light, since the whole sensor isn’t being used.

The camera’s 4K 60p footage$ (document).ready(function() { $ (“#icl-5395-1815008918”).click(function() { ImageComparisonWidgetLink(5395); }); }) appears to be skipping even more lines, which will exaggerate each of these shortcomings. However, it does at least mean that you can capture 60p footage without having to crop too far in, so you can still shoot wide-angle video. If you are willing to crop in, the Z7 II’s APS-C (Super35/DX format) video$ (document).ready(function() { $ (“#icl-5396-1168884176”).click(function() { ImageComparisonWidgetLink(5396); }); }) is a touch more detailed. This uses all the pixels in a 5.5K sensor region but still comes up short when viewed side-by-side with the Sony a7R IV$ (document).ready(function() { $ (“#icl-5398-1533746214”).click(function() { ImageComparisonWidgetLink(5398); }); }) in a comparable mode. The further downside is that the noise performance will be that of an APS-C camera, and it’s harder to find wide-angle lenses for the cropped region.

This is a pretty decent result for a high-resolution camera but, if you’re shooting short clips (and don’t need to use the camera between those clips), the Canon EOS R5 is capable of producing incredibly detailed 4K footage$ (document).ready(function() { $ (“#icl-5399–224543785”).click(function() { ImageComparisonWidgetLink(5399); }); }) from its 8K capture.

There’s also a paid upgrade option to allow Raw video to be output from the camera. This can now be encoded either as ProRes RAW or Blackmagic Raw, depending on which brand of external recorder you attach. The latest firmware ensures the resulting files are suitable for Raw-level editing of white balance and ‘ISO’ when you get them to edit.

Sadly, we’ve not had access to a camera with the Raw upgrade applied, so have been unable to test this feature.

Return to index


Conclusion

What we like… What we don’t…
  • Excellent image quality and dynamic range
  • ISO 64 can give IQ advantage over peers
  • Good video quality and features for such a high resolution camera
  • Excellent ergonomics with well-placed controls
  • Effective in-body image stabilization
  • Decent battery life and some backward compatibility
  • USB charging and separate charger included
  • Dual card slots provide flexibility
  • Auto shutter mode avoids the need to manually switch in different situations
  • SD, XQD and CFexpress compatibility
  • Viewfinder is detailed
  • AF features not as well integrated as in its rivals
  • AF tracking not as dependable as best systems
  • Eye AF still appears to fractionally front-focus
  • Battery life lags behind its peers
  • Tilting screen not as flexible as two-way tilt or fully articulated
  • Non-matched card slots demands purchase of multiple formats
  • Viewfinder isn’t as high resolution as the best of its peers
  • Requires external recorder for best video quality (10-bit Log or Raw)

The Nikon Z7 II may appear to be a relatively subtle refresh of the original Z7 but the improvements that have been made, such as the second card slot, the option to add vertical control grip, and boosted AF performance will all increase its appeal to the kind of photographers it’s aimed at.

We were impressed by how polished Nikon’s first generation of full-frame mirrorless cameras were, so it’s no surprise that the Z7 II works well. It’s responsive in its operation and, though we’d love to see the reintroduction of Nikon’s combined AF switch/AF mode button, offers an experience that Nikon DSLR users will immediate feel at home with. There’s a good degree of customization without it being necessary to completely reprogram its operation.

The main shortcomings (and they’re only really shortcomings in comparison to some very capable opposition) relate to autofocus. The tendency for Eye AF to slightly front-focus and the subject tracking’s habit of focusing somewhere on the subject you selected, rather than tracking that precise point are the only real grumbles in terms of performance.

Nikkor 24-70mm F2.8 | ISO 64 | 1/640 sec | F6.3
Processed in Adobe Camera Raw. Straightened, whites raised, highlights reduced. One dust-spot cloned-out with heal tool.
Photo: Richard Butler

More of an issue is the way AF area modes, face detection and subject tracking interact. Both Canon and Sony have tracking modes that will use face/eye/person focus as needed, whereas on the Z7 II, you’ll need to cycle between modes and engage and disengage functions to get the most out of the camera. Most photographers will find a way to make it work for the subjects they shoot, but it’s not as slick as it could be and it can eat into precious custom button availability.

The rest of the cameras’ ergonomics remain amongst our favorite of the current full-frame mirrorless options.

Out-of-camera JPEG
Nikkor 24-70mm F2.8 | ISO 90 | 1/160 sec | F2.8
Photo: Richard Butler

The best news is that it maintains the image quality the original camera. We’ve seen advances in other aspects of camera performance since the original Z7 was launched but, particularly in circumstances where you can use its ISO 64 mode, there haven’t been many that beat it in terms of IQ.

The Nikon Z7 II is not a cutting edge camera and it doesn’t have many exciting new features to dazzle with, but it’s hugely competent, very usable and noticeably less expensive than its peers. It’s hard to imagine anyone being disappointed with the Z7 II, which earns a solid Silver award. It only misses out on a Gold because it doesn’t really out-do its rivals in any specific respect.

How it compares to its peers

The Sony a7R IV is a very credible competitor to the Z7 II, offering a boost in resolution for an increased price tag. The a7R IV’s autofocus is quicker and easier to use, and offers greater precision, in our experience. It also offers significantly better battery life and a more detailed viewfinder. However, the Nikon offers a better video shooting experience and arguably better ergonomics. Lens choice is probably the most critical factor in deciding between the two.

The Canon EOS R5 is a significantly more expensive camera than the Nikon, and delivers a performance boost in return. Again, the Canon’s AF interface is rather simpler than that of the Z7 II and its performance a little better. The Canon can also shoot faster, has a higher resolution viewfinder and can capture truly excellent-looking 8K and 4K footage. However its battery life is noticeably worse, and it’s not able to shoot its best video for extended periods, especially in the midst of heavy photographic usage, making it less dependable than you’d hope. At ISO 64 the Nikon has the edge in terms of image quality.

Finally, the Panasonic Lumix DC-S1R promises much of what the Nikon does, for a little more money. It’s either much more substantial or simply more bulky, depending on your perspective. It offers a multi-shot high-res mode made more practical by its motion correction option. The S1R offers a nicer viewfinder and more flexible screen than the Nikon but its autofocus interface and the in-viewfinder flutter while using it leaves the Panasonic a little behind. It shares the mis-matched card slots of the Nikon, but in the end, the noticeably lower battery life leaves us preferring the Nikon in most situations.

Return to index


Nikon Z7 II sample galleries

Please do not reproduce any of these images without prior permission (see our copyright page).

DPReview sample gallery

$ (document).ready(function() { SampleGalleryV2({“containerId”:”embeddedSampleGallery_1957757583″,”galleryId”:”1957757583″,”isEmbeddedWidget”:true,”selectedImageIndex”:0,”isMobile”:false}) });

DPReview TV sample gallery

$ (document).ready(function() { SampleGalleryV2({“containerId”:”embeddedSampleGallery_9134434139″,”galleryId”:”9134434139″,”isEmbeddedWidget”:true,”selectedImageIndex”:0,”isMobile”:false}) });

Return to index


Nikon Z7 II scoring

Scoring is relative only to the other cameras in the same category. Click here to learn about the changes to our scoring system and what these numbers mean.

Nikon Z7 II
Category: Semi-professional Full Frame Camera
Build quality
Ergonomics & handling
Features
Metering & focus accuracy
Image quality (raw)
Image quality (jpeg)
Low light / high ISO performance
Viewfinder / screen rating
Performance
Movie / video mode
Connectivity
Value
PoorExcellent
Conclusion
The Z7 II is a very capable all-rounder, boosted by the addition of twin card slots and the option to add a battery grip. It offers superb image quality, solid autofocus and good video specs. But it's only really its slightly lower price that makes it stand out from a very competitive group. Thoroughly likable.

Good for
Landscape photography and portraiture

Not so good for
Demanding action shooting, regular changes of subject type
89%
Overall score

RegularScoreCompareWidget({“mainElementId”:”scoringWidget”,”mainProduct”:”nikon_z7ii”,”scoringSchema”:{“id”:”SLRs”,”variables”:[{“id”:”BuildQuality”},{“id”:”ErgonomicsAndHandling”},{“id”:”Features”},{“id”:”MeteringAndFocusAccuracy”},{“id”:”QualityRaw”},{“id”:”QualityJpeg”},{“id”:”LowLightHighISO”},{“id”:”ViewfinderScreenRating”},{“id”:”Optics”},{“id”:”Performance”},{“id”:”Movie”},{“id”:”Connectivity”},{“id”:”Value”}],”categories”:[{“id”:”EntryLevel”,”label”:”Entry Level Interchangeable Lens Camera / DSLR”,”shortLabel”:”Entry Level”},{“id”:”MidRange”,”label”:”Mid Range Interchangeable Lens Camera / DSLR”,”shortLabel”:”Mid Level”},{“id”:”EntryLevelFullFrame”,”label”:”Entry Level Full Frame Camera”,”shortLabel”:”Entry Level Full Frame”},{“id”:”MidRangeFullFrame”,”label”:”Mid Range Full Frame Camera”,”shortLabel”:”Mid Range Full Frame”},{“id”:”SemiProfessional”,”label”:”Semi-professional Interchangeable Lens Camera / DSLR”,”shortLabel”:”Semi-professional”},{“id”:”SemiProfessionalFullFrame”,”label”:”Semi-professional Full Frame Camera”,”shortLabel”:”Semi-professional Full Frame”},{“id”:”Professional”,”label”:” Professional Interchangeable Lens Camera / DSLR”,”shortLabel”:”Professional”},{“id”:”LargeSensorCompactEntry”,”label”:”Entry Level Large Sensor Compact Camera”,”shortLabel”:”Entry Level Large Sensor Compact”},{“id”:”LargeSensorCompactEnthusiast”,”label”:”Enthusiast Large Sensor Compact Camera”,”shortLabel”:”Enthusiast Large Sensor Compact”},{“id”:”VideoCamera”,”label”:”Video Camera”,”shortLabel”:”Video Camera”}]},”helpText”:”Choose one or more cameras from the drop-down menu, then roll your mouse over the names to see how their scores compare to the camera on review.”})

Return to index

Articles: Digital Photography Review (dpreview.com)

 
Comments Off on Nikon Z7 II review

Posted in Uncategorized


How to Make Beautiful Portraits Using Flash and High-Speed Sync

14 Mar

The post How to Make Beautiful Portraits Using Flash and High-Speed Sync appeared first on Digital Photography School. It was authored by Sean McCormack.

how to use flash and high-speed sync for stunning portraits

The scene: Outdoors with full sunlight.

The gear: Your camera, lens, and flash.

The problem: You find that your flash only works at 1/200s or below, so you need to be at f/16 or f/22 to get a well-exposed shot. And at f/16-f/22, everything is in focus, including all the cars and other distractions in the background. (Those dust spots you keep meaning to clean are also perfectly visible.)

Why can’t you shoot with a higher shutter speed so you can have a wider aperture?

Well, it’s all down to the issue of sync speed.

More specifically, it’s about using flash and high-speed sync.

Generally speaking, to overpower the sun and stay below your camera’s sync speed, you’re forced to use a narrow aperture. Here I’m at f/20 just to stop the backlight overpowering the hair and the sky from blowing out:

Woman shot with off-camera flash

The resulting aperture means that everything is pretty much in focus, leaving the background looking cluttered.

(This shot is for example only; you should generally make a point of choosing clutter-free backgrounds.)

What is sync speed?

Sync speed is the fastest shutter speed for which the camera can expose the whole frame at once.

It’s a bit technical, but when you fire any shot below the sync speed, the first shutter curtain opens fully, revealing the entire sensor to light. At the end of the exposure time, the second shutter curtain moves across the frame to finish the capture.

(Generally, the sync speed varies between 1/125s and 1/250s; it depends on your camera.)

When you go above the sync speed, the second curtain starts to move before the first one has completed its journey. As your shutter speed gets shorter and shorter, the gap between the curtains narrows to a tiny slit. Despite this, all parts of the sensor receive light and a full exposure is made. On a bright day with a prime lens, you can easily shoot at 1/8000s at f/1.4 and have a perfect exposure. All parts of the frame still receive light, because ambient (non-flash) lighting is continuous throughout the exposure.

So why does the sync speed actually matter?

The sync speed problem

It’s when you introduce flash that you start to have problems.

You see, when a flash is fired (which usually happens when the first curtain is opened), all the light from it comes out in a very short space of time (in the order of milliseconds).

When you go above the sync speed, the position of the curtains doesn’t reveal the entire frame at the time the flash fires. So the shutter curtain blocks part of the flash and prevents it from reaching the sensor.

Any ambient light will expose normally, but the flash gets hidden in part of the frame. As your shutter speed gets faster and faster, more and more of the flash is blocked until it’s no longer visible in the shot (i.e., your exposure is what you’d get if you never fired the flash at all).

Below is a set of images taken at 1/3-stop increments with a flash. The first photo is at 1/250s, the native sync speed of my Fujifilm X-T2 camera. The other shutter speeds are, in order from left to right (and top to bottom): 1/320s, 1/400s, 1/500s, 1/630s, 1/800s, 1/1000s, and 1/1250s. Note that 1/320s is potentially usable if the subject is away from the edge of the frame.

portraits with flash and no high-speed sync

Everything in focus

Normally, when you use flash outside in daylight, you end up having everything in focus.

Remember the Sunny 16 Rule? If your subject is in direct sunlight during the day, you can set your aperture to f/16 and your shutter speed will be one over your ISO value.

So if your ISO is set to 100, your shutter speed would be 1/100s (at f/16). If your ISO is 200, then the shutter speed would be 1/200s.

Now, to get a darker, richer sky while using flash, you’d really need to be at f/22. Because you can’t get faster than 1/250s (remember, it’s the sync speed!), you have to increase the aperture to expose the shot correctly.

portraits with flash and no high-speed sync
I shot at f/20 and 1/160s to get a richer sky for this band promo shot. It’s quite an old photo, so there were limited options for widening the aperture at the time. Even the hills in the background are in clear focus. The beach isn’t exactly pretty, either.
portraits with flash setup
A behind-the-scenes shot showing my two flashes set to full power.

As you can see from the photos above, this is a huge problem. Shooting at an f/22 aperture just doesn’t give you the creamy bokeh that portrait photographers love, and it can leave you with unpleasant, distracting backgrounds.

So what do you do?

The solution: high-speed sync

There is a solution: high-speed sync, also known as focal-plane sync.

No, it’s not perfect, but it does work. You see, instead of firing the flash at the start of the shot, high-speed sync pulses the flash throughout the whole exposure, trying to simulate the effects of a continuous light.

flash set to high-speed sync
My flash set to high-speed sync. Usually, there’s a single-button hold or a double-button combination to turn HSS on.

It looks good, but it comes at the expense of power and heat, because HSS works the flash really hard. After a few shots, the flash may even shut down for cooling.

Now, for high-speed sync to work, you need the camera to transmit a signal to the flash and for the flash to have high-speed sync built in. Cactus Image makes a trigger called the V6 II, which allows you to use any HSS flash with any camera.

a flash trigger
The Cactus Image V6 II offers power and zoom control over a wide range of speedlights, and it also offers high-speed sync capabilities.

The look of high-speed sync

You can use high-speed sync to go over the sync-speed barrier, so settings like 1/4000s at f/1.4 are achievable with flash. You get complete control over the light, but while using the wide apertures you usually associate with natural-light photographs. Yes, please!

By shooting wide-angle photos with a shallow depth of field, you can even create images that look like stills from a movie.

Settings for high-speed sync

Let’s look at a typical setup and settings for a photo using high-speed sync. This particular shoot was done in the evening when the light was relatively low, but I really wanted a shallow depth of field – and therefore required high-speed sync.

I set my camera to f/1.4 for a super-shallow depth of field. To get the clouds properly exposed, I had to boost the shutter speed to 1/4000s. To get the flash to work, I had to set it to high-speed sync. Using a Cactus V6 II trigger, I could easily get my Fujifilm X-T10 to shoot with high-speed sync.

portraits with flash and high-speed sync
An evening HSS photo shot at 1/4000s, ISO 200, and f/1.4. Notice the shallow depth of field.
portraits with flash and high-speed sync behind the scenes
The behind-the-scenes shot, showing an octabox in front of a model (photo by my assistant, Ola).
close-up portrait
Using high-speed sync, I captured this shot at about 3:00 in the afternoon with the sun high in the sky. I worked with an 85mm lens at 1/2000s, f/2.5, and ISO 100 on a Canon 5D III. The sun acted as a second light in the shot. Again, the background is nicely out of focus.

Another high-speed sync portrait example:

portrait with high-speed sync
An issue with shooting outdoors on overcast days is that your shutter speeds can be low enough to cause camera shake. By bumping up the ISO, you can get a faster shutter speed, keeping you safe from blur. Using high-speed sync then lets the flash do the work. Here, I’ve shot to keep the flash looking as natural as possible.
1/1000s | f/4 | ISO 800

The alternative

Note that high-speed sync isn’t the only way to shoot with a wide aperture and flash.

For one, you can always head out at the beginning or the end of the day when the light is pretty low; then the ambient lighting won’t add much to the shot, and you’ll be able to get a nice exposure at 1/200s. Plus, you can get great sky color and you won’t be fighting against strong sunlight.

portrait with high-speed sync flash
A shot of the band Drown for Thin Air magazine. The evening light made the shot. I needed a higher aperture to get the whole band in focus, so I opted not to use high-speed sync here.

Of course, if you’re doing any photoshoots with clients, you often have to work with the subject’s schedule rather than your own. So you may have to shoot at midday to suit them.

And that leads to the next option.

Using a neutral density filter

If you shoot landscape photography, you will be familiar with neutral density (ND) filters. This filter type allows you to slow the shutter speed down to get nice, silky water.

Neutral means that it adds no color, while density refers to blocking light. You can get ND filters in a range of values from 1 stop to 16 stops.

For portraits, neutral density filters allow you to widen the aperture instead of dropping the shutter speed. So a 4-stop ND filter would take you from f/16 to f/4.

The drawback is that, as you block light, focusing can become harder.

Another potential issue is that not all ND filters are actually neutral. Some tend to have a color cast. (I have a Firecrest 10-stop ND for landscapes, which is neutral, but the older 4-stop filter I own – also from Firecrest – is slightly pink.)

portrait without a neutral density filter
Without the ND filter applied, I was forced to use a narrow aperture; note how the entire scene is in focus.
1/250s | f/16 | ISO 200
portrait with flash and high-speed sync
With the 4-stop ND filter applied, the background can be rendered out of focus. The flash is still at the same power as the unfiltered shot above. The filter does have a color cast, which is hard to remove completely.
1/250s | f/4 | ISO 200

Flash and high-speed sync: conclusion

As you now know, you can make outdoor portraits even when the sun is bright – simply by using flash and high-speed sync.

So make sure you get a flash that has HSS capabilities.

And start practicing!

Now over to you:

Have you ever used high-speed sync? Have you ever struggled to get nice bokeh in bright sunlight? Share your thoughts (and high-speed sync images!) in the comments below.

The post How to Make Beautiful Portraits Using Flash and High-Speed Sync appeared first on Digital Photography School. It was authored by Sean McCormack.


Digital Photography School

 
Comments Off on How to Make Beautiful Portraits Using Flash and High-Speed Sync

Posted in Photography


Tamron 17-70mm f/2.8 for Sony Review: A Versatile Lens for a Great Price

13 Mar

The post Tamron 17-70mm f/2.8 for Sony Review: A Versatile Lens for a Great Price appeared first on Digital Photography School. It was authored by Suzi Pratt.

Tamron 17-70mm f/2.8 for Sony review

In December 2020, Tamron announced an exciting new lens: the 17-70mm f/2.8 for Sony.

The Tamron 17-70mm is small, lightweight, and designed for APS-C cameras – plus, it offers two excellent features often lacking on Tamron lenses.

But how does it function in the real world? And is it worth the $ 799 price tag?

Let’s find out in this hands-on Tamron 17-70mm for Sony review!

Tamron 17-70mm for Sony: overview

A 24-105mm lens offers one of the most popular focal length ranges available, thanks to its wide-to-telephoto reach. It’s a versatile pick used by casual and professional photographers alike.

And the 17-70mm is Tamron’s version of this lens because its focal length translates to 25.5-105mm on an APS-C body.

The Tamron 17-70mm is made for Sony APS-C (crop-sensor) cameras, so it’s ideal when combined with the popular Sony a6000 (or any of its recent variations). The lens can also be used on Sony full-frame cameras like the Sony a7S III – as long as the APS-C mode is selected.

Constant fast aperture

The 17-70mm f/2.8 for Sony is Tamron’s first fast-aperture zoom lens for APS-C cameras.

The lens maintains a constant f/2.8 aperture throughout the entire zoom range, while other APS-C Tamron zooms use variable apertures (i.e., apertures that shift as you zoom).

A constant aperture, especially a fast f/2.8 aperture, makes the 17-70mm great for shooting in low light. And at f/2.8, you can capture shots with creamy bokeh, like this one here:

Tamron 17-70mm f/2.8 for Sony sample photo
1/1000s | f/2.8 | ISO 640

Vibration compensation

The 17-70mm also comes with Tamron’s image stabilization (Tamron calls this VC, or Vibration Compensation) to reduce camera shake.

Note that VC is often missing on Tamron lenses, especially those with constant apertures, so it’s certainly a welcome bonus on the 17-70mm.

Lenses with VC make it easier to shoot handheld photos and videos, especially at slow shutter speeds. That’s how I was able to pull off this handheld long exposure:

waterfall Tamron 17-70mm f/2.8 for Sony sample photo
Handheld shooting at low shutter speeds is made possible by Vibration Compensation.
1/6s | f/13 | ISO 320

(Speaking of video: the 17-70 is a great video lens, thanks to the flexible zoom range, constant aperture, and inclusion of VC!)

Build and handling

If you’ve tried any recent Tamron lenses, the 17-70mm will look and feel very similar.

The lens is made mostly of plastic, which helps keep the weight down (it comes in at 1.2 lb/525 g), though you also get rubber zoom and focus rings.

The lens physically extends and retracts when the zoom ring is twisted. With dimensions of 2.9 x 4.7 in (74.6 x 119.3 mm), the lens can feel a bit large and off-balance when attached to a smaller camera like the Sony a6000. It definitely feels more balanced when used with a Sony full-frame camera.

The Tamron 17-70mm f/2.8 for Sony is moisture resistant and also has a front element with a fluorine coating to protect it from smudging.

And speaking of the front element, the lens has a filter size of 67 mm, common among Tamron’s recent lenses.

Tamron 17-70mm f/2.8 for Sony sample photo of woman with dough
1/250s | f/4 | ISO 640

Performance

I used the Tamron 17-70mm in outdoor hiking and indoor restaurant settings, and the autofocus worked well for photos and videos.

The lens has quiet focusing thanks to an RXD stepping motor. This works wonderfully with Sony mirrorless cameras, which still offer the best autofocus on the market.

It’s easy to switch to full manual focus simply by twisting the focus ring. Also, with a minimum focusing distance of 7.5 in (19 cm), the lens has decent macro capabilities (and close-up shots look great with that gorgeous f/2.8 bokeh).

Tamron 17-70mm f/2.8 for Sony sample image close-up
1/200s | f/4 | ISO 640

Image quality

Constant-aperture lenses tend to produce sharp, crisp images. You pay for it, though, because constant-aperture lenses – especially zoom lenses – don’t come cheap.

But while the Tamron 17-70mm is priced well under $ 1000, image quality is tack sharp across the entire focal length range, even at f/2.8. If Tamron can make more lenses like this at similar price points, they’ll win over many photographers and videographers.

At times, the 17-70mm does produce chromatic aberration and excessive vignetting, especially when shooting scenes with high contrast. Luckily, these are problems that can easily be solved in most photo editing programs, including Lightroom or Photoshop.

Tamron 17-70mm f/2.8 for Sony forest sample image
1/60s | f/2.8 | ISO 2000

Tamron 17-70mm alternatives

There are no true competitors to the Tamron 17-70mm f/2.8, at least not at its price point. When looking at similar lenses, the price goes up dramatically – or you sacrifice certain features.

Sony lens choices

The closest Sony competitor is the Sony E 16-55mm f/2.8 (24-82.5mm on APS-C cameras), which offers the constant f/2.8 aperture but is 15mm short on the telephoto side. The 16-55 also lacks image stabilization and will set you back $ 1,300.

The Sony E 18-105mm f/4 is a more affordable choice, coming in at around $ 600. This APS-C zoom lens offers a wider focal range than the Tamron plus image stabilization. However, the constant aperture is f/4, which is a lot slower than the Tamron’s f/2.8.

Tamron 17-70mm f/2.8 for Sony bridge to a forest
1/320s | f/10 | ISO 640

Who should buy the Tamron 17-70mm for Sony?

Considering the price and features of this lens, the Tamron 17-70mm is suitable for both professional photographers and videomakers alike, especially for those on a budget.

The lens’s features are typically found on glass that costs twice as much, including the constant f/2.8 aperture and the Vibration Compensation. It also offers remarkably sharp image quality considering its cost.

And given the relatively accessible price, the Tamron 17-70mm is also appropriate for beginner or amateur photographers and videomakers looking to increase their skills.

Using a constant f/2.8 aperture is a treat, and this lens will help budding photographers take better images in low light with nice, creamy bokeh.

So grab the Tamron 17-70mm f/2.8 for Sony right here!

Now over to you:

What do you think about the Tamron 17-70mm f/2.8? What do you like about it? What do you dislike? Will you consider buying it? Share your thoughts in the comments below!

Tamron 17-70mm f/2.8 sample images

The post Tamron 17-70mm f/2.8 for Sony Review: A Versatile Lens for a Great Price appeared first on Digital Photography School. It was authored by Suzi Pratt.


Digital Photography School

 
Comments Off on Tamron 17-70mm f/2.8 for Sony Review: A Versatile Lens for a Great Price

Posted in Photography


Weekly Photo Challenge – Sunrise

13 Mar

The post Weekly Photo Challenge – Sunrise appeared first on Digital Photography School. It was authored by Sime.

It’s 2021 and it’s simply time to see your sunrise, wherever you are in the world! This week, simply post your sunrise photograph and roughly where it was taken (which town are you in or near?) in the comment section. #dPSSunrise

Don’t forget, you can go back and try ALL of our CHALLENGES over HERE!

A sunrise can show many things, quality of light, silhouette, rays of sun, clouds, water… Whatever, as long as it’s a sunrise! Tag your post on social – #dPSSunrise

Share on Instagram and tag us so we can repost you! @DigitalPS

federico-respini-sYffw0LNr7s-unsplash
Photo by Federico Respini on Unsplash

Remember! Note down where you made your photograph and share it in the comments!

Share on Instagram or Twitter and use the hashtag #dPSCars so we can see them!

How do I upload my photo to the comments?

Simply upload your shot into the comments field (look for the little camera icon in the Disqus comments section) and they’ll get embedded for us all to see. Or, if you’d prefer, upload them to your favorite photo-sharing site and leave the link to them.

Weekly Photography Challenge – Looking Up

The post Weekly Photo Challenge – Sunrise appeared first on Digital Photography School. It was authored by Sime.


Digital Photography School

 
Comments Off on Weekly Photo Challenge – Sunrise

Posted in Photography


21 Family Portrait Ideas for Gorgeous Photos

11 Mar

The post 21 Family Portrait Ideas for Gorgeous Photos appeared first on Digital Photography School. It was authored by Simon Ringsmuth.

21 family portrait ideas for gorgeous photos

Preparation is key to any successful photoshoot, and having plenty of family portrait ideas will help ensure your session goes as smoothly as possible.

Whether you’re working with friends, repeat clients, or new customers, you want to make your family portrait sessions fun and engaging, because this will always lead to better pictures.

So if you’re stuck in a rut or just looking for something new to try, check out these 21 ideas. They’ll stimulate your creativity and get you thinking about fun ways to take pictures of families.

Let’s get started.

1. Standing together

This one won’t win any awards for creativity, but it’s a classic. It just works.

Position everyone close together, with those on the outside turned slightly inward. Kids can stand on the ground or be held by an adult.

family portrait ideas standing
Nikon D750 | Nikon 70-200mm f/2.8 | 200mm | 1/400s | f/2.8 | ISO 1400

I always like to start with shots like this to cover my bases before I try new and creative ideas. That way, you can always deliver a classic posed image your clients will love, in case your other ideas don’t quite work out.

2. Look for interesting backgrounds

While the focus of your family photos should always be the people, it can help to use different locations – especially if you find yourself working with repeat clients.

Introducing new background elements or other scenery can dramatically alter the look and feel of an image, and will give your clients pictures they will remember forever.

family portrait ideas background
Nikon D750 | Nikon 50mm f/1.8G | 1/250s | f/4 | ISO 100

3. Group hug!

Family portraits should be a celebration of love and togetherness.

So find ways to use that in your images!

Get the kids to snuggle up with the parents so everyone’s near each other.

Let the family, and others who see the photos, remember the love that can barely be contained in a single image.

family portrait ideas group hug
Nikon D750 | Nikon 70-200mm f/2.8 | 200mm | 1/350s | f/4 | ISO 800

4. Go for a walk

Tell everyone to stand back, get in a line, and slowly walk toward you.

Here’s an example:

family walking
Nikon D7100 | Nikon 85mm f/1.8 | 1/500s | f/2.8 |ISO 200

This type of shot is a classic for a couple of reasons. For one, families love it. Plus, it’s the type of photo you can’t get with a mobile phone.

I recommend using a zoom lens, because you can zoom from telephoto to wide as the group gets closer.

It also helps to have a camera with a fast continuous shooting speed and a deep buffer, so you can take as many shots as you need to nail the perfect one.

5. Go for a run!

This one works great if you have children involved. Just tell everyone to back way up and then run toward the camera.

(Kids love doing this type of shot!)

family running
Nikon D750 | Nikon 70-200mm f/2.8 | 135mm | 1/200s | f/4 | ISO 360

Make sure everyone is holding hands; otherwise, the speedier ones will end up ahead.

Also, quick tip:

Use your camera’s high-speed shooting functionality combined with a fast shutter speed to freeze the action.

6. Showcase the generations

When doing a multigenerational family portrait session, it’s a good idea to get at least one shot showing the eldest couple plus the family.

Put the eldest couple in the middle and surround them with their children, grandchildren, and other relatives. This creates a sense of closeness and family bonding that’s immediately apparent to anyone who looks at the photo afterward.

family portrait ideas generations
Nikon D750 | Nikon 70-200mm f/2.8 | 130mm | 1/180s | f/4 | ISO 280

7. Headshots of each person

This might seem like cheating because a single headshot isn’t the same as a family portrait.

But I love taking headshots for my family clients since they require almost no extra effort on my part and the families always enjoy the results.

(I’ve found that most people aren’t expecting individual headshots when you do a family portrait session. So they’re seen as a fun bonus and will keep clients calling for repeat business.)

young man headshot
Nikon D750 | Nikon 70-200mm f/2.8 | 200mm | 1/250s | f/2.8 | ISO 360

7. Use backlighting

It’s always important to look for the light any time you’re taking photos, and it’s especially true for family portraits.

Normally I like the light to be behind me, but it’s fun to play around with backlighting and see how it can dramatically alter your images.

In this example, the fountain behind the couple adds a brilliant shine to the shot, thanks to the power of backlighting:

family portrait ideas backlighting
Nikon D7100 | Nikon 85mm f/1.8 | 1/2000s | f/2.4 | ISO 100

The sun also adds a nice rim light to the newly engaged couple. See how they shine in the late afternoon sun?

The couple was thrilled with the result, and your clients will be, too.

8. Group the genders

Grouping the genders isn’t exactly new or groundbreaking. But it’s a tried-and-true formula for success – one that your clients might not think about in advance but will greatly appreciate afterward.

So put all the women together and take some shots, then do the same for the men.

My clients always have fun doing this, and it gives them some great photos to hang on their wall.

family portrait ideas genders
Nikon D750 | Nikon 70-200mm f/2.8 | 175mm | 1/180s | f/4 | ISO 220

9. Show playfulness

Kids love to laugh, play, and run around.

So why not embrace that during a photoshoot?

Ditch the poses for a minute and let your clients just have fun. This works especially well with young kids; parents will pick them up, swing them around, and have a great time just enjoying the day.

But have your camera ready to capture those moments!

father and child playing
Nikon D750 | Nikon 85mm f/1.8 | 1/200s | f/1.8 | ISO 400

10. Build photo benches

I did many family photo sessions that left me frustrated. You see, I didn’t have a great solution for a very basic problem:

I didn’t have a spot for people to sit.

If you’re in a controlled studio environment, you can deal with this easily. If you like to shoot out in nature, however, you might not be so lucky.

Thankfully, with a few cheap pieces of wood from any home improvement store, along with some tools and a free afternoon, you can build your own photo benches (and solve this problem once and for all!).

I now have three benches in different sizes that I use to accommodate a variety of families. They can be used separately or placed together as one long bench. It doesn’t even matter if they get scuffed or dirty, since imperfections add to a sense of character.

And the results are amazing, plus I no longer worry about finding a spot for my clients to sit comfortably.

family portrait ideas photo benches
Nikon D750 | Nikon 70-200mm f/2.8 | 200mm | 1/250s | f/4 | ISO 640

11. Just the kids

Amidst the joy and chaos of a family photoshoot, it’s easy to overlook this classic pose – but it’s one that you’ll regret leaving out.

Parents love shots with their kids together, and even when not all the kids are happy and cheerful, I still get positive comments. Pictures like this show the unique personalities of each child, and I usually get one or two kids smirking, grinning, or doing their own thing, to which their parents say, “Yup, that’s just who they are!”

family portrait ideas kids
This old coffee table was what I used before I built my own photo benches.
Nikon D750 | Nikon 70-200mm f/2.8 | 200mm | 1/200s | f/4 | ISO 250.

12. Involve the pets

Bringing pets to a photoshoot can be a mixed bag. When you introduce a four-legged friend to a formal family photo session, you add a lot of uncertainty, and it’s almost impossible to make the animal do what you want it to.

Even so, there’s a host of important benefits: It puts your clients at ease, helps them remember their pets fondly, and can make for some genuine smiles.

I find this works best if you do your photo session at your clients’ house. But if you do go out, make sure the clients bring a portable kennel or some treats to keep the furry friend occupied when it’s not in the shot.

family portrait ideas pets
Nikon D750 | Nikon 70-200mm f/2.8 | 200mm | 1/250s | f/4 | ISO 100

13. Use structures

I like going out around town to do family photo sessions (preferably to a handful of places I have scouted in advance and used many times before).

The nice thing about some of these spots is that they have built-in structures and other accoutrements that allow you to take fun, sometimes unplanned, pictures of your clients.

So don’t be afraid to include these! Embrace the structures around you and use them to add flair to your photos.

kids on a structure
Nikon D750 | Nikon 70-200mm f/2.8 | 200mm | 1/180s | f/4 | ISO 280

14. Show affection

This one is a little tricky, but the results can be absolutely heartwarming.

Just be careful how you talk with your clients and direct them during the shoot. You don’t want signs of affection to be forced or uncomfortable, and unless you are good friends with your clients, you might not know where to draw the line.

That being said, I’ve had nothing but positive results just by asking parents to give a quick hug or kiss to their little children. These simple signs of affection often end up being my clients’ favorite shots.

family portrait ideas affection
Nikon D750 | Nikon 70-200mm f/2.8 | 200mm | 1/500s | f/4 | ISO 2200

15. Read a book

Any time you do a family photo session with kids, particularly younger ones, you have to be willing to accept a degree of uncertainty.

After all, the kids might be hungry, fussy, or defiant – and it’s your job to make the best images possible in spite of these obstacles.

I don’t recommend handing out sweets or treats to children, as this can introduce even more unwanted uncertainty. But if you want to get the kids to cooperate, ask your clients to bring along some of their child’s favorite books. This helps them relax and can lead to some very special pictures.

parents reading to daughter
Nikon D7100 | Nikon 35mm f/1.8 | 1/320s | f/2.8 | ISO 200

16. Use their home

I do almost all of my work for clients outdoors. But sometimes I’m invited inside their homes, and this can make for some very special sessions.

If you schedule a shoot at your clients’ house, ask if you can arrive early. Assuming you get the go-ahead, come before the session and politely look for good spots to take pictures. Look for furniture, toys, and large windows that will let in plenty of light.

Ideally, you want to schedule a pre-consultation with your clients to discuss the session. Treat these at-home opportunities with the respect and dignity your clients deserve, and they will be glad to ask you for future photo sessions.

family interacting at home
Nikon D750 | Nikon 35mm f/1.8 | 1/90s | f/4 | ISO 5600

17. Show context

I sometimes get asked to photograph singular events in my clients’ lives: birthdays, graduations, and other milestones.

And while you can always use these opportunities to capture the same types of portraits you would normally shoot, what really matters is context.

So find ways of incorporating visual elements from the event into your photos, as I did in this image:

family portrait ideas context
Nikon D750 | Nikon 70-200mm f/2.8 | 70mm | 1/4000s | f/4 | ISO 560

My friend asked if I would take pictures when he received his Ph.D., and I made sure to include campus buildings in the frame to serve as a reminder of his time in graduate school.

18. Capture candids

Sometimes the best shots of a photo session are completely unplanned. While posed pictures are nice, it’s also fun to get pictures of your clients just walking around, laughing, talking, and enjoying one another’s company.

In other words:

When photographing a family, show them being a family!

And it’s okay to cheat a bit here, too. For the shot below, I asked the couple to walk across the veranda, then I caught them in a candid moment of joy.

family portrait ideas candids
Fuji X100F | 23mm | 1/125s | f/5.6 | ISO 400

19. All hands on deck

When taking pictures of a large family, especially one that spans multiple generations, make sure to get an image with hands.

Clients love seeing mementos like this, and they can instantly pick out which individuals were present just by looking at the hands.

Plus, an image like the one below captures myriad details that are missing in headshots and full-body portraits: wedding rings, the weathered hands of the grandparents, and the small hands of children next to their mother’s and father’s hands. It’s a touching image that speaks volumes about the family without showing any faces at all.

hands together
Nikon D750 | Nikon 70-200mm f/2.8 | 86mm | 1/500s | f/4 | ISO 280

20. Use their ideas

Any time I do a family session, I make sure I’m well prepared. I have a clear idea of my goals for the session, where I want to be, what kinds of images I want to get, and of course, plenty of spare batteries.

But you have to be willing to adapt and incorporate your clients’ ideas, too. They might want to try something different, go to a new location, or pose in a way you hadn’t considered.

Don’t shut these ideas down! Even if the images aren’t your personal favorites, your clients might love them, and they will certainly appreciate your willingness to listen to their suggestions.

couple on a bridge
Nikon D750 | Nikon 50mm f/1.8 | 1/4000s | f/1.8 | ISO 100

21. Use a silly noise-maker

This idea is last because you have to use it carefully. If you know your clients well, and if there are young children in the family, then one fun thing to consider is a remote-controlled fart machine.

Yes, I know that seems absolutely ridiculous, but nothing sends kids into a gleeful bout of giddiness quite like an unexpected breaking of wind.

These little gadgets are inexpensive and can be hidden underneath a bench, taped to a stool, or tossed behind a tree. Right as you prepare to take a shot, click the remote and watch the kids erupt with laughter.

Adults might roll their eyes, but the kids will love it, and you’ll get some of your favorite shots of the session.

family portrait ideas noise machine
If you want to get genuine smiles and laughs from kids, this can definitely help. But don’t use it with new clients. Make sure you have a good relationship with clients and their kids first.

Family portrait ideas: Final words

There’s no guarantee that these family portrait ideas will result in perfect pictures. Any number of things can go wrong on a family shoot, but any number of things can also go right.

The point here is to fill your mind with possibilities. That way, you can do everything in your power to get the best possible shots.

And above all else, try to relax, have fun, and enjoy the session!

Your clients will love the results…

…and they’ll soon be asking you to come back for more pictures.

Frequently asked questions

What should my clients wear for a family session?

I recommend solid colors in matching groups (such as some people wearing blue, others wearing green, etc.). But remember that the photos are for your clients, and even if they show up in clothing you wouldn’t recommend, your job is to take good photos regardless.

Do I need a tripod for family photos?

Absolutely not! You can use one if you prefer, but I find that tripods and even monopods are more of a hassle than a help. You need to move around, especially if you’re shooting pictures of kids – and if you are tied down to a tripod, you won’t be nearly as flexible and adaptable.

You do a lot of outdoor family photos. What’s the best type of location to look for?

I try to avoid popular spots like botanical gardens and college campuses (which often have beautiful landscaping) and look for spots that are off the beaten path. My primary consideration is light: I like spots with tall trees and even lighting, even if there aren’t flowers or fountains. Choose your locations so the emphasis in your images will be on the people, not their surroundings.21 Family Portrait Ideas for Gorgeous Photos

What camera is best for family portraits?

You can use almost any camera for family photos, but I recommend one with a large buffer and the option for a battery grip. The former will prevent you from wasting time waiting for your camera while photo opportunities slip by. The latter will give your camera enough battery power to last for hours, which means one less thing for you to think about during the shoot.

Do I need an expensive portrait lens?

No, but if the only lens you have is the kit lens that came with your camera, I would recommend at least investing in a single prime lens. A 35mm or 50mm lens won’t be expensive and can yield amazing results, especially for family photos.

The post 21 Family Portrait Ideas for Gorgeous Photos appeared first on Digital Photography School. It was authored by Simon Ringsmuth.


Digital Photography School

 
Comments Off on 21 Family Portrait Ideas for Gorgeous Photos

Posted in Photography


A Guide To Camera Lens And Humidity: Protecting your Equipment

11 Mar

Are you struggling to capture incredible shots in a humid atmosphere? This is the story of almost every photographer. If you have worked in sweltering temperatures, you might be familiar with the preparations and care your camera needs to prevent condensation. Humidity and your camera are rivals. Photographers need to store their cameras and lenses in an ideal storage humidity Continue Reading
Photodoto

 
Comments Off on A Guide To Camera Lens And Humidity: Protecting your Equipment

Posted in Photography


How to Create Panoramas in Affinity Photo

10 Mar

The post How to Create Panoramas in Affinity Photo appeared first on Digital Photography School. It was authored by Kevin Landwer-Johan.

how to create panoramas in Affinity Photo

Want to create a stunning Affinity Photo panorama? It’s easier than you might think!

In fact, Affinity has a built-in, automated feature specifically designed to make creating panoramas easy and fun.

And in this article, I’m going to share with you the step-by-step process for both capturing and editing panoramas – so you can get beautiful results.

Let’s get started.

Affinity Photo Panorama of rice fields
A panorama created from 15 individual photos.
Nikon D800 | 105mm | f/8 | 1/640s | ISO 400
© Kevin Landwer-Johan

Taking photos for your Affinity Photo panorama

If you don’t have a lens wide enough to capture the vista before you or the skyscraper above you, then creating a panorama is a great option.

Panoramas are often made of wide scenes, but you can also create vertical panoramas of very tall subjects.

Alternatively, you can create an Affinity Photo panorama with images taken in a grid. That way, rather than making a wide or tall panorama, you can stitch together photos to capture an image both taller and wider than you could shoot with your widest lens.

Note that you can make a panorama of anything; it doesn’t have to be a wide or tall scene.

Lahu man Affinity photo panorama
Nikon D800 | 85mm | f/1.4 | 1/200s | ISO 400
© Kevin Landwer-Johan

Hardcore pano photographers will insist a tripod is necessary. Personally, I prefer not to use one when I make panoramas, with one exception: when I need a slow shutter speed and want to keep my camera steady.

Include overlap

When you take photos for a panorama, you must include a reasonable amount of overlap from one image to the next.

Without this overlap, Affinity Photo can’t seamlessly stitch the photos together.

But how much overlap should you include? Generally, I’d recommend around 25% or 30% overlap for great results.

When I take photos for a panorama, I look at an element in each frame about 25% from the edge. I then include that element in the next frame (also about the same distance from the edge). As I move my camera across or up and down while taking pictures, I am careful to line up the non-joining edges as evenly as I can. Trying to keep a straight line helps to make a panorama that will crop well.

Using a standard focal length lens or longer is best. If you use a wide-angle lens, you will run into problems lining up the images due to edge distortion.

cactus plants in a pot
I created this panorama using six shots (two columns of three horizontal photos).
Nikon D800 | 75mm | f/4 | 1/125s | ISO 400
© Kevin Landwer-Johan

Affinity Photo panoramas: the basics

Once you have a series of photographs for your panorama, open Affinity Photo.

If your photos are in RAW format, edit the colors and tones so the images look their best. Try to give each photo similar tones and color temperatures, because if your photos are different exposures or color temperatures, this will be noticeable.

I generally create a resized set of images for each new panorama. I make sure to reduce the file size, especially when I’ve taken a lot of photos. This makes it easier for Affinity Photo to manage many files at once.

(If you leave your images at full size and full resolution, you’ll be waiting a long time for your panorama to render.)

Affinity Photo panorama of rice growing
© Kevin Landwer-Johan

Import photos for your panorama

Once you’ve resized and saved your photos, go to the top menu in Affinity Photo.

Select File>New Panorama. This will open up a dialog box.

Click on Add, then navigate to the folder where you saved your images for the panorama.

Affinity Photo screen grab

Select every file, then click Open. The photos will be imported into Affinity Photo.

Then select Stitch Panorama. Once you’ve clicked this, you will see a preview of your panorama on the right and the individual files on the left.

Affinity Photo screen grab

If there are any images that Affinity Photo cannot stitch with the others, they’ll appear below the preview. 

Click OK. Affinity Photo will render your panorama and open it as a new document. This may take a while, depending on:

  • The number of images you have
  • How large each image is
  • How powerful your computer is

Tweaking your panorama in Affinity Photo

Once your panorama is rendered, you will most likely have some blank space around it. There are a few ways you can edit this. 

Cropping is the easiest. When you click on the Crop tool, a new menu bar will appear above your document. If you select the option to Crop to Opaque, Affinity Photo will automatically adjust the crop bounding box to exclude any areas that are blank. 

You can also rotate your panorama if your horizon or verticals are not straight. And you can freehand crop your panorama.

Another option is to Inpaint Missing Areas. You’ll see an icon in the middle of your screen above your document (though you’ll need to deselect the Crop tool first; otherwise, the icon won’t be visible).

When you click Inpaint Missing Areas, Affinity Photo will use its AI technology to autofill the blank areas around your panorama. This works best when there is not much detail along the panorama edges.

As you can see in my example below, Affinity has managed to fill in the sky very well. But at the bottom, the inpainting is not good because there’s too much detail in the rice field:

Affinity filling in blank areas

With the Inpaint Missing Areas tool selected, click Apply. Affinity Photo will render your panorama and present it as a single image file.

For this example, I chose to use the automatic inpainting because it filled in the sky nicely. Once my panorama rendered, I then cropped the funky area from the bottom where Affinity did not extend the rice field well.

Affinity Photo panorama of a rice field

Creating Affinity Photo panoramas: conclusion

Affinity Photo panoramas are very easy to create, especially if you’re careful to add plenty of overlap when taking your photos. 

If you haven’t tried creating a panorama, give it a go. Experiment with a simple series of images to start with. You can make a panorama with two to five photos to keep things less complicated. Then, once you have a feel for the process, start to include more images in each series.

Try using different focal lengths to see which you prefer. If you want to make a very detailed panorama, use a long lens and take lots of photos.

Remember, though: The more photos you include, the longer it will take to render your panorama!

Now over to you:

What types of panoramas do you want to create with Affinity Photo? Share your thoughts – and photos – in the comments below!

The post How to Create Panoramas in Affinity Photo appeared first on Digital Photography School. It was authored by Kevin Landwer-Johan.


Digital Photography School

 
Comments Off on How to Create Panoramas in Affinity Photo

Posted in Photography


How to Reduce Camera Shake – 6 Techniques

09 Mar

The post How to Reduce Camera Shake – 6 Techniques appeared first on Digital Photography School. It was authored by Natalie Norton.

6 simple techniques to reduce camera shake

Are you struggling with camera shake? Do your photos turn out blurry whenever you hand-hold the camera?

You’re not alone.

Camera shake is a huge problem. It’s the reason why beginners (and even experienced photographers!) end up with soft, blurry, unwanted photos.

Fortunately, there are a few simple techniques you can use…

…to ensure that your photos never suffer from camera shake again!

So here are six simple techniques for avoiding camera shake and achieving crisp, delicious images – no matter what.

Let’s dive right in, starting with the very first technique:

1. Tuck your elbows in

This technique is simple, yet it really works.

Just pull your elbows in toward your body and let them rest against your chest.

(You can press your elbows firmly into your chest for even greater stability.)

Like this:

avoiding camera shake with your elbows tucked in

It will give your arms a rock-solid foundation to work with so that your hands are utterly motionless.

And when you press the shutter button, you’ll have no camera shake to speak of.

Another quick tip:

Once you have your elbows tucked in, exhale completely before hitting the shutter.

Why?

Because even the slightest movement can cause unwanted shake, especially as you increase your shutter speed.

2. Raise your left shoulder

If you’re a right-eyed photographer, then you’ll need to shift to your left eye to use this technique. If you’re a left-eyed photographer, then you won’t need to change a thing!

Here’s what you do:

Raise your left shoulder high. Then brace your left elbow against your ribcage.

For further stability, you can pull your right elbow into your chest (as discussed in the previous technique).

raise your left shoulder to cut down on camera shake

Also, make sure you exhale completely before pressing the shutter button to avoid introducing additional camera shake.

3. Create a tripod with your knee

If you’re taking a photo low to the ground…

Or you don’t mind getting a little dirty…

Then this is the camera shake reduction technique for you!

And it’s pretty darn easy to pull off.

Simply sit down.

Bring your knee up.

Then rest your elbow on it, like this:

use your knee as a tripod

Again, bring in that other elbow for greater support.

You’re essentially creating your own tripod – so you have solid support wherever you go.

4. Lie down on the ground

In general, this is the most effective way to avoid camera shake without a tripod.

All you do is lie flat and let the lens sit directly on the ground.

To prevent any downward tilt of the camera, you can put a hand underneath the lens barrel or lens hood.

(If that doesn’t do the trick, you can always create a fist.)

In the first image, you’ll notice that I placed my hand flat against the cement and balanced the lens on top to give myself some height:

lying down on the ground to prevent camera shake

In the second image, I created a fist with my hand to give myself even more room to shoot.

Of course, this technique isn’t always feasible. If your subject is high off the ground, you’re probably not going to want to shoot from such a low angle.

(Imagine doing an engagement session while lying flat against the ground!)

Plus, lying on the ground can be uncomfortable, especially if you’re shooting on cement, in mud, in water, etc.

So work with this technique when you can, but don’t be afraid to use one of the other options on the list if need be.

5. The machine gun hold

This next technique is sometimes referred to as the machine gun hold, because you hold your camera like, well, a machine gun.

Personally, I don’t use this technique much. I find it awkward and difficult to maintain for more than a second or two.

But just because it doesn’t work for me doesn’t mean it won’t work for you. So give it a try and see what you think!

Here’s what you do:

Hold your camera to your eye with your right hand. Then raise your left elbow until your lens barrel can rest on it comfortably.

For added stability, place your left hand on your right bicep.

Like this:

using an elbow to prop up the lens

6. Cradle your camera

Here’s your final technique for reducing camera shake:

Cradle your camera!

Like this:

the camera cradle hold

As you can see, I crouched down and placed my left elbow on my knee.

Then I created a sort of cradle for the lens between my shoulder and my wrist.

It’s a pretty solid hold. Unfortunately, it’s tough to change positions once you’re cradling your lens, so the hold works best if you’re shooting an unmoving subject (e.g., a model during a portrait session).

Six techniques to reduce camera shake: conclusion

Well, there you have it!

You now know six simple techniques for reducing – or eliminating – camera shake.

And I can assure you that they work well; they’re the exact techniques that I myself use to avoid “The Shake.”

Now over to you:

Which of these techniques is your favorite? Have you tried any of them? Share your thoughts on camera shake – and camera shake reduction techniques – in the comments below!

Get more daily tips like this one by subscribing to Digital Photography School.

The post How to Reduce Camera Shake – 6 Techniques appeared first on Digital Photography School. It was authored by Natalie Norton.


Digital Photography School

 
Comments Off on How to Reduce Camera Shake – 6 Techniques

Posted in Photography


OnePlus announces 3-year partnership with Hasselblad, reveals 9 Series smartphone launch details

08 Mar

Smartphone manufacturer OnePlus has announced it’s partnering with Swedish camera manufacturer Hasselblad to ‘co-develop the next generation of smartphone camera systems’ inside OnePlus’ mobile devices, including the new OnePlus 9 Series, which will launch on March 23.

The partnership is a three-year deal that will see Hasselblad work alongside OnePlus to improve the camera technology inside its flagship smartphones. OnePlus says the partnership will start ‘with software improvements including color tuning and sensor calibration, and extending to more dimensions in the future.’

OnePlus says the first fruits of the partnership is a new color science technology it calls ‘Natural Color Calibration with Hasselblad.’ OnePlus says it’s worked for months with Hasselblad to fine-tune the color science of its smartphone images to deliver more perceptually-accurate and natural-looking colors to images taken with flagship OnePlus devices.

Another improvement already in the works is a revamp of the camera interface in OnePlus devices. New OnePlus smartphones will eschew the previous first-party camera app design for a new experience called ‘Hasselblad Camera for Mobile,’ which ‘allows for an unprecedented amount of control for professional photographers to fine-tune their photos, with the ability to adjust ISO, focus, exposure times, white balance, and more,’ according to OnePlus.

Within the new Hasselblad Camera for Mobil will be ‘Hasselblad Pro Mode, which is effectively a 12-bit Raw capture mode. It’s unknown at this time whether this will be a standard Raw capture or a more AI-powered approach akin to Apple’s ProRAW technology.

OnePlus isn’t the first smartphone manufacturer Hasselblad has teamed up with over the years. Unfortunately though, despite Hasselblad’s impressive legacy as a camera manufacturer, its mobile partnerships haven’t resulted in any ground-breaking technology — although its True Zoom Moto Mod was a unique offering.

OnePlus hasn’t revealed all the specifications of its forthcoming 9 Series devices, but has confirmed it will use a customized variant of Sony’s IMX789 sensor, which OnePlus calls ‘the largest and most advanced main camera sensor ever on a OnePlus device.’ The first 9 Series devices will be announced on March 23 at 10am ET on OnePlus’ launch website.

Articles: Digital Photography Review (dpreview.com)

 
Comments Off on OnePlus announces 3-year partnership with Hasselblad, reveals 9 Series smartphone launch details

Posted in Uncategorized