RSS
 

Weekly Photography Challenge – Panoramas

03 Nov
Gorge Heritage Walk Panoramas by Caz Nowaczyk

Gorge Heritage Walk in Mt Buffalo National Park, Victoria in Winter on a sunny day by Caz Nowaczyk

This week’s photography challenge topic is PANORAMAS!

Panoramas are a fantastic way to capture the vastness and detail of the subject that you are shooting. Whether it’s a dynamic landscape or cityscape, panoramas always have an impact.

Check out some of the articles below that give you tips on how to take panoramas and how to edit them together for the final product.

Tips for Shooting Panoramas

How to Shoot and Stitch a Panorama Photo

21 Tips to Help You Create Better Panoramas

How to Shoot Really Big Panoramas


Tips For Stitching Panoramas in Post

How to Match Exposures when Stitching Panoramas in Photoshop

Step by Step Using Merge to Panorama in Lightroom

Weekly Photography Challenge – Panoramas

Simply upload your shot into the comment field (look for the little camera icon in the Disqus comments section) and they’ll get embedded for us all to see or if you’d prefer, upload them to your favorite photo-sharing site and leave the link to them. Show me your best images in this week’s challenge.

Share in the dPS Facebook Group

You can also share your images in the dPS Facebook group as the challenge is posted there each week as well.

If you tag your photos on Flickr, Instagram, Twitter or other sites – tag them as #DPSPANORAMAS to help others find them. Linking back to this page might also help others know what you’re doing so that they can share in the fun.

New England Highway by Caz Nowaczyk - Panoramas

Winter sunrise on the New England Highway, Llangothlin, NSW by Caz Nowaczyk


The post Weekly Photography Challenge – Panoramas appeared first on Digital Photography School.


Digital Photography School

 
Comments Off on Weekly Photography Challenge – Panoramas

Posted in Photography


Luminar 2018 gets new AI Sky Enhancer tool for creating dramatic skies

02 Nov

Skylum has released a Luminar 2018 update that brings its new AI Sky Enhancer filter to the image editing software. The new tool works “almost instantly” to improve the sky in photos, only requiring the user to adjust a slider, according to the company. AI Sky Enhancer replaces the masks and filters that would otherwise be used to enhance skies.

The new tool was created by Skylum’s AI Lab and is powered by a deep neural network that was trained using hundreds of thousands of images. Luminar uses the enhancer to detect and adjust only the skies in images, including ones that are cloudy, partly sunny, bright blue, and more.

Skylum offers a long look at how AI Sky Enhancer works in a new blog post, where it explains that the tool relies on semantic segmentation, in part, to separate an image into layers based on detected objects. By doing this, AI Sky Enhancer is able to adjust the sky independent of other image elements while keeping issues like noise and halos to a minimum.

The software automatically applies a mask to the sky in these images, working to selectively adjust elements like brightness and contrast as the user moves the tool’s slider. “Every parameter is applied selectively, as if you were doing it yourself using masking and layers,” the company explains in its post.

The AI Sky Enhancer update is free for Luminar 2018 and arrives ahead of Luminar 3 with Libraries, which will be available starting December 18. Skylum will offer all of its new Luminar features for free to current Luminar 2018 owners until “late 2019,” it explains on its website. The application is available to purchase through Skylum for $ 59/€59/£53.

Articles: Digital Photography Review (dpreview.com)

 
Comments Off on Luminar 2018 gets new AI Sky Enhancer tool for creating dramatic skies

Posted in Uncategorized


Why Limiting Free Users to 1,000 Photos on Flickr is a Smart Move

02 Nov

Tim O'Reilly

Yesterday Flickr made their first big restructuring announcement since recently being purchased by SmugMug. Beginning next year on January 8th, Flickr will limit free accounts to 1,000 photos. The previously offered free 1 terabyte of storage goes away. At the same time Flickr is returning their paid pro account to unlimited storage which had been their original offer before capping new Pro accounts at 1 terabyte back in 2013. If you were Pro before 2013 you were considered “old school” Pro and kept your unlimited storage, but new accounts were limited. Now all Pro accounts are back to being unlimited.

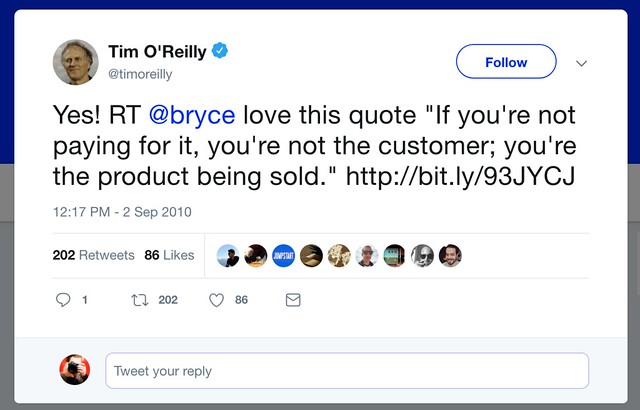
In 1973 the artists Richard Serra and Carlota Fay Schoolman broadcast a short video titled “Television Delivers People”. In that video a simple assertion was made: the product of television. commercial television. is the audience. Television delivers people to an advertiser. Since then, various influential individuals from Tim O’Reilly to Steve Wozniak to Apple CEO Tim Cook have all repeated the mantra: “if you’re not paying for it, you’re not the customer, you’re the product being sold.”

To put things more simply, there are two viable business models on the internet today to deliver service. There is a paid subscription model and there is a “free” model where business sell your data and make money on advertising everything from Butterfinger candy bars on Instagram to “brain force” pills via Alex Jones.

Personally I prefer to pay for an ad-free online experience which is one of the reasons why I’ve enjoyed Flickr so much where I’ve had an opportunity to pay annually since I joined the service back in 2003. Flickr delivers a clean user interface, full high res photos, a compelling app for my iPhone, unlimited storage, kick ass organizational tools, a social community to engage with, search tools, stats, and much more.

At $ 50/year (well technically $ 49.99 but I like to round up) I think Flickr delivers tremendous value. I have spent thousands of hours of my life on the site — thousands of ad-free hours not just for me, but for any of my friends or even strangers who happen to land on my photo page too. I am more than happy to pay this every year and will continue to do so until I die most likely. Hopefully I will figure out a way to even continue paying after I die as my personal life goal is to publish 1,000,000 photos before I die and then let that archive of work stand in all perpetuity after I am gone.

So obviously Flickr works for me, but what about all those people who don’t/haven’t paid and just want to use the service for “free.”

I believe that one of the reasons why Flickr was sold by Oath (who had purchased Yahoo’s content businesses) to Smugmug was because Oath realized that a hybrid subscription/free service doesn’t really work. It’s the same reason why Facebook is so resistant to offering a paid ad-free option to customers.

Oath is basically an advertising company and when you are advertising at people you need to be able to advertise to your most profitable customers to make the service work. When you give your most profitable customers (i.e. the ones with money) the option to pay to opt out of ads they do and will. What you are left with is a bunch of accounts by heavy users who are either poor Americans or more likely poor overseas accounts or very light users who can put up with ads but won’t see very many because they are only on your site 2 minutes a week. Whatever the case, you are basically providing a terabyte of enterprise storage, bandwidth, support, etc., to customers who cannot economically be supported by advertising.

In order for Flickr to survive it has to be a long-term profitable business. SmugMug knows a thing or two about how to do this as their primary model for over a decade has been entirely subscription based. As someone who wants to be able to host my photos on Flickr for the 50 remaining years I likely have left on this planet (and even after my death) in order to publish 1,000,000 photos, it’s important to me that Flickr has a long-term viable business model. This means that strongly encouraging free users (who are not currently paying their way) to migrate to paid Pro is important.

I do think it is important for Flickr to offer a free account in order to give people an opportunity to try out the service to see if it is for them. 1,000 photos gives you plenty of opportunity to do just that. It gives you hundreds, even thousands, of hours to explore and enjoy the service without paying — but if you are a heavy user of the site and are using over 1,000 photos of space, at some point you ought to pay.

By the way, Flickr’s original deal when I started with them was that they would only show your most recent 100 photos if you were a free account and the Pro account cost $ 60 (or $ 59.99) per year. So you might say the current account that gives you 10x that or 1,000 is 10x more generous than the original Flickr from way back.

Besides the obvious business model reasons why this is a smart decision for Flickr and their users, there are other important reasons this makes Flickr better as well. One of the things I noticed after Flickr began offering 1 terabyte for free to users was that many users simply began using Flickr as a backup site for all of their photos. Instead of sharing their best photos with a community, they simply dumped everything on their hard drive to Flickr and left and went away. These photos were then indexed for search and populated the service littering it with low quality content (screengrabs, 1,000 bad photos in a row of fireworks, 3,000 poorly composed photos in a row of somebody’s sister’s wedding, etc.). By focusing Flickr’s vision on photo sharing and community rather than simply another online photo backup dump this makes the visual experience better for those of us who are actually there to share photos and engage with each other.

Also, if people are willing to pay for something they tend to put more effort into it. If you are paying for something and perceive it’s value you’ll care more, contribute more and be a part of something. These are the accounts that I value on Flickr the most.

Yesterday morning I had an opportunity to talk to Don MacAskill (SmugMug/Flickr CEO) about this most recent decision that Flickr is making on the phone. Don is someone who cares deeply about Flickr and its community. How many CEOs do you know that spend an entire day interacting with users in an online forum about a big change like this?

I truly believe that yesterday’s decision not only paves the way to make Flickr viable for many years ahead, but that it paves the way for Don and his team to continue to spend money growing and building out the site for the community that is there and loves the service so much.

There are still so many great things that can be done with Flickr going forward. Groups need work. Search needs work. Community needs work. The app needs work. All of these things do cost money though and by getting rid of the massive storage/bandwidth demands of 1 terabyte free accounts and gaining more paid subscribers, this will allow Flickr to do this important work to continue making Flickr the best photo sharing site on the internet for all of us who are a part of the Flickr community and love the site so much.

I do understand that people don’t always want to pay for things, but I think that the right people will pay for Flickr because it provides them tremendous value. I pay for my Adobe Lightroom subscription. I pay for my Netflix account. I pay for these things because they provide me value. This is also why I pay for Flickr and will continue doing so many years into the future.

Unfortunately as we have seen with services like Friendfeed (purchased by Facebook) or even Google+ (in the process of being killed by Google) social networks oftentimes get shut down. It is very important to me that Flickr remains profitable for the long-term so that I can count on it being there many, many years from now. I think yesterday’s decision helps make Flickr more economically viable and sustainable many years into the future.

You can find me on Flickr here.

[disclosure, I know people and have friends that work at both Flickr and SmugMug]


Thomas Hawk Digital Connection

 
Comments Off on Why Limiting Free Users to 1,000 Photos on Flickr is a Smart Move

Posted in Photography


7 Tips For Planning the Perfect Photography Trip

02 Nov

?

Are you planning your next photography trip? This video from Nigel Danson outlines 7 tips for planning the perfect photography trip.

In this awesome video, Nigel covers in some detail the following points:

1. Ensure You Take the Right Gear

Use Adobe Lightroom (or other post-processing applications you may use) to check out your favorite shots so you can see what lens you used. Chances are, you will find a trend towards one or two lenses, helping you to rule out the ‘just-in-case’ lenses. Try to stick to just 2 or 3.

Tripod – something that is lightweight, yet durable is a good choice.

Lens cloth – helpful for drying and cleaning your camera.

Portable hard drive – to download your images from your camera.

USB Battery Charger – If you run out of battery power on-location you can recharge via the USB.

Handwarmers (if in cold locations) – great for warming hands (and batteries) when in cold or icy climates.

2. Be Sure To Test All New Gear.

Check all the settings on any new camera gear to both make sure they work the way you expect, and so you know how to use them!

3. Understand Your Location

Research the location beforehand. Use tools like Google Earth to allow you to visualize a place in 3D. With Google Earth, you can get an idea of the scenic points that you can see from particular positions..

Check maps for routes, trails, and locations to narrow down where you would like to visit.

Make a google map of that area and plot your locations.

4. Focus on Fewer Locations

Plan out the best locations, so you don’t end up with just lots of holiday snaps. The more time you spend in a particular location, the more you can explore the light and angles, and get much better images as a result.

5. Understand the Time of Year in Detail

Understanding the time of year in detail means you have a better understanding of when the sun rises and sets in that place and its position in the sky. Where the sun sits dictates the composition of your shot. A good app for checking these things is Photopills. Also, check the weather forecasts.

6. Research the History and Culture of the Location

You want to tell a story about the location you are visiting. You want to let people know what it was like there (to accompany your photos either via blog or in person). Having a background to your images is excellent for these reasons. It is also great to have conversations with locals about the area.

Employ a local guide while you are there to find out the best spots and to get background information.

7. Explore Social Media and the Web

Take a look at what other people are photographing in that location, and look to take photos in spots that are covered least. That way you aren’t just making the same images as everyone else!

Be sure to follow some of Nigel Danson’s tips for planning the perfect photography trip.

If you have any tips of your own that you would like to share, please let us know in the comments below.

You may also find the following articles on our site useful:

Beginner’s Guide to Natural Light in Landscape Photography

5 Landscape Photography Mistakes That Keep Your Images From Standing Out

Using Layers and Foreground Interest for Better Landscape Photography


The post 7 Tips For Planning the Perfect Photography Trip appeared first on Digital Photography School.


Digital Photography School

 
Comments Off on 7 Tips For Planning the Perfect Photography Trip

Posted in Photography


Hands-on with the Red Hydrogen One

02 Nov

Red Hydrogen One hands-on

The story of a flagship smartphone launch in 2018 typically goes like this: “This is a phone. It’s the same as the phone that came before it, only it has a new processor and bigger screen. It’s screenier. Also, the camera hardware is mostly the same but software improvements give it a better Portrait Mode and HDR capabilities. Something something artificial intelligence. Oh, and it costs about $ 1000.”

That’s not the story of the Red Hydrogen One – the long anticipated smartphone debut from the highly regarded cinema camera maker. From the first teasers in July 2017 the device’s marquee feature was clear: a holographic ‘4V’ display that would be able to show 3D photos and video (no special glasses required) as well as traditional 2D content. Several delays later, the Hydrogen One is officially here and thanks to our friends at Glazer’s Camera in Seattle, we’ve had a chance to check out this display we’ve heard so much about.

Display

It’s a 5.7″ 1440 x 2560 screen bordered on the top and bottom by a significant bezel. It’s a perfectly nice, bright screen for viewing 2D content, but any old phone can do that. So what of its signature feature? Well, we don’t have a lot of great things to say about it. Neither does the rest of the internet.

A Content Experience

The 3D effect when viewing photos and videos ranges from passable to downright bad. Images pre-loaded onto the device and the photos on Holopix, Red’s version of Instagram for 3D images, so far look decent. But even when it’s good, the 3D effect looks more gimmicky (remember Magic Eye? Like that) than photo-realistic and is a distraction unto itself. When it’s bad, as it has been in many of the photos we’ve taken ourselves, it’s actually sort of nauseating.

Three-dimensional elements jump around on the screen as you tilt the display, and the device struggles with complex subjects like dog fur – some random bits seem “sunken” into the background that shouldn’t be. Worse, 3D content appears a bit fuzzy. It’s just… not good.

Rear camera

The Hydrogen One uses two rear-facing cameras but they’re not a dual camera system like we’re used to seeing on an iPhone or Samsung device. Red’s phone uses the same two 12MP F1.8 cameras in order to create the stereoscopic effect in photos and video. They also need to be side-by-side horizontally, meaning you can only capture 3D images with the rear cameras in landscape orientation (likewise the front-facing cameras must be used in portrait orientation).

Camera app

The Red camera app offers a Manual shooting mode with access to ISO and shutter speed, and despite the unorthodox dual-camera there’s still a Portrait Mode available (and it’s not half bad in our limited use). There’s a small, red button that acts as a physical shutter release.

When shooting in 2D mode the screen brightens momentarily to indicate when you’ve taken a photo, but there’s no such feedback when you take a 3D photo aside from the small gallery thumbnail image refreshing, which is a disconcerting experience. That is, unless you leave the comically exaggerated shutter sound on, and if that’s the case, just know that you’re a monster.

Front-facing camera

Two 8.3 megapixel cameras are on the front side of the device, meaning you can take 3D selfies (again, only in portrait orientation). I find the very concept of a 3D selfie horrifying, but one of my colleagues took one wearing her Halloween costume and it really is one of the better examples of the 3D effect in all of our time using the phone.

General handling

The Hydrogen One doesn’t adhere to the minimalist design principles of most modern smartphones. It’s unapologetically big, heavy, and rugged as heck (though not actually water-resistant). It says MEDIA MACHINE on the back plate around the logo. The edges feature curved indentations for fingers to grip, but I found these made the phone more awkward to handle. Plus, volume and power buttons are nestled into those indentations and I’ve lost count of how many times I accidentally pressed a button.

System potential

It’s probably evident by now that we aren’t big fans of the Hydrogen One, at least in its current state. But setting the disappointing 3D effects aside, there are good reasons why the phone could be genuinely useful to filmmakers. For example, Red has indicated that the Hydrogen One will interface with the company’s line of professional video cameras, and chances are good it will provide a unique level of utility to users of the company’s cameras.

What’s potentially more interesting, however, is the future of the Hydrogen One as part of a cinema camera system. Red has touted an upcoming module with a sensor and interchangeable lens mounts (connecting via the pins pictured above), and has even suggested that image quality would only be surpassed by Red’s bigger cameras. That’s a big claim, and if Red delivers we’ll be impressed.

A new hope

In the same way that smartphone companies have transformed the photo industry by turning the camera in your pocket into something even a pro would use, we’d like to believe that Red may be on the verge of doing the same for cinema cameras. As a standalone device the Hydrogen One is pretty disappointing, but there’s hope in the expansion of the system.

Articles: Digital Photography Review (dpreview.com)

 
Comments Off on Hands-on with the Red Hydrogen One

Posted in Uncategorized


Pixelmator Photo AI-powered image editing app for iPad will launch this year

02 Nov

Pixelmator has announced plans to release an image editing app called Pixelmator Photo for the Apple iPad. The new app utilizes Apple’s Core ML machine learning technology to power multiple features including ML Fix, an algorithm trained using 20 million professional images.

Pixelmator Photo is an AI-powered app offering non-destructive image editing with desktop-class adjustments on the iPad. The software features ML Fix, ML Crop, and ML Presets, all features that utilize machine learning to enhance images. ML Crop’s algorithm offers crop suggestions that fit the user’s desired aspect ratio, for example, while ML Fix intelligently adjusts color, white balance, and exposure.

The ML Preset feature, meanwhile, offers film emulation presets enhanced using machine learning. The presets are designed to imitate film products that include Ilford HP5, Kodak Porta, and Fujifilm Superia. The feature works by first adjusting an image’s colors and lighting, then applying the film preset.

Other Pixelmator Photo features include adjustment tools like Curves, Levels, Saturation, Exposure, and Brightness, as well as support for raw images from more than 500 cameras, cropping, grain adjustment, and the inclusion of a Repair tool.

The app will launch in the Apple App Store this year as an iPad exclusive. The price hasn’t yet been revealed.

Articles: Digital Photography Review (dpreview.com)

 
Comments Off on Pixelmator Photo AI-powered image editing app for iPad will launch this year

Posted in Uncategorized


iOS 12.1 arrives with ‘beauty filter’ fix and real-time Portrait depth control

02 Nov

Apple has released iOS 12.1 for iPhone and iPad on Tuesday. As promised, the update brings a fix for the “beauty filter” issue that resulted in soft selfies and debate. The new version also adds the ability to preview Portrait mode depth of field in real-time before capturing the image.

The ability to adjust Portrait mode depth of field post-capture remains, but users now have the option to adjust that depth of field before capturing the image, as well, with a real-time preview of the background blur for more control over the process.

Camera updates aside, iOS 12.1 also brings dual SIM support to the newest iPhone models, more than 70 new emoji, and Group FaceTime for chatting with up to 32 people.

You can download iOS 12.1 by going into Settings > General > Software Update.

Articles: Digital Photography Review (dpreview.com)

 
Comments Off on iOS 12.1 arrives with ‘beauty filter’ fix and real-time Portrait depth control

Posted in Uncategorized


Understanding Tonal Range in Photography

02 Nov

Understanding tonal range in photography can be the last thing on a photographers mind.

As we progress on our particular paths, there can be times when even the most mindful of us take some things for granted. The simple elements are sometimes overlooked first – such as a sloppy tripod setup or assuming our cameras settings are where we last left them.

In the same vein, the steadfast technical concepts of our photo work are misunderstood, misinterpreted or worse – completely forgotten. This malady spans every level of skill and afflicts both pros and hobbyists alike.

Understanding Tonal Range in Photography 1

Take as an example the most basic building block of any photograph; light. In our weirdly flexible digital age of post-processing, we can sometimes forget what is happening with the luminance values of our images.

Our photographs are displays of contrast between light and dark, but the distance between the two are virtually limitless.

A Brief Word on Tonal Range

All that we’re talking about here today is the measure of brightness from complete dark to complete light. The range between the different brightness levels within our photos determines its degree of contrast. Take a look at this tonal scale:

Understanding Tonal Range in Photography 2

We move from complete darkness on the left (black) to complete light (whites) on the right. This scale applies for both color and black and white photographs. Now, let’s talk about each of these values and how they relate to your photography.

Highlights

Traditionally, I’ve always thought of highlights as the brightest portions of an image, which is not the case. At least not the case to the utmost extent. In truth, highlights can be considered the areas of a photograph which consist of high luminance values yet still contain discernible detail. Here’s an example of highlight luminance values:

Understanding Tonal Range in Photography 3

Notice that even though these areas are bright, there is still some discernible texture and detail to be made out within the bright spots. If we were to increase the exposure, in camera or with post-processing, it would become so bright that it would lose detail entirely, which brings us to our next point.

Whites

If we increase the brightness to the extent that our highlights become ‘blown out’ (where details are invisible), we have complete white.

Even if the white area doesn’t appear white, it may be considered a total ‘white area’ due to the lack of detail. The following is an example of luminance considered total white:

Understanding Tonal Range in Photography 4

Depending on your photograph, it may or may not be desirable to push the exposure to the point of white-out. We’ll talk more about this as we discuss the relevance of tonal range in regards to constructing your images.

Midtones

A mid-tone is precisely that – all luminance values that are not dark or light are considered to be mid-tones. Most of the time our camera meter will attempt to expose for this average brightness when in ‘Automatic Mode.’

Understanding Tonal Range in Photography 5

While mid-tones help to ensure much information is contained in an image, a photograph consisting of only mid-tones lacks dynamics.

Shadows

Areas that appear as shadows are closely related to highlights albeit in the opposite direction. Shadows are the areas of a photo that are dark but still retain a level of detail.

The above photo is a perfect example of more information in the shadow areas, so let’s use it one more time:

Understanding Tonal Range in Photography 6

These darker areas still possess information seen by the viewer. However, if we darken them to the point where that detail gets lost or ‘burnt out,’ then…you guessed it, they become a completely black luminance value.

Blacks

Any portion a photograph that has zero luminance is considered to be black. Much like the complete white areas earlier, these points within our images don’t have to be utterly devoid of color to be regarded as pure black.

Let’s look at some shadows that are completely burnt out and retain no detail whatsoever:

Understanding Tonal Range in Photography 7

Completely black areas are so dark that you can see nothing. Consider them the ‘dark abyss’ within a photograph. Having these areas within your image isn’t necessarily a bad thing, so let’s talk about that now.

Luminance Values and You

If you ever open a conversation among a group of photographers about the suitability of brightness levels within a photograph, you’d see that the schism is split. Some photographers feel that images should contain no areas of complete black or complete white – that all portions of the photograph should present some level of detail for the viewer.

Understanding Tonal Range in Photography 8

Still, others contend that it’s perfectly fine to either burn or blow out some luminance values for the sake of contrast. Doing this means that there is an area of complete black and complete white so that all the other luminance values fall somewhere between those two absolutes.

While it’s true that it is often desirable to deliver the maximum amount of visual information to your audience, this is not always the case. There are times when a crushed and burnt out shadow or a super-bright highlight are just what you need to bring a photograph home.

Understanding Tonal Range in Photography 9

Final Thoughts

I’m happy to profess my opinion that there is no such thing as a set technique for each photograph you make. It might seem like a simple thing to remember, but it’s easy to overlook the importance of how different levels of brightness affect an image. Let’s take a quick run back through what we’ve learned about luminance values:

  • Highlights – Bright areas within a photo that still maintain detail
  • Whites – Areas of extreme brightness where there is absolutely no information(detail) remaining
  • Midtones – These are neither shadows or highlights but rather a middle value of luminance
  • Shadows – Darker areas of the image that still maintain detail
  • Blacks – Completely ‘burnt out’ portions of a photo that contains absolutely no detail

Like most concepts in photography, it’s essential to have a full understanding of the tonal range falling within your photos. You should use this knowledge to strive for technical excellence and also so you know when to break the rules in favor of fulfilling your creative vision.

How do you make use of tonal range in your images? Share with us your thoughts and images in the comments below.

The post Understanding Tonal Range in Photography appeared first on Digital Photography School.


Digital Photography School

 
Comments Off on Understanding Tonal Range in Photography

Posted in Photography


DJI drones temporarily banned in UK after reports of them falling from the sky

01 Nov

The UK’s Civil Aviation Authority has banned a number of DJI drones from flights over human beings as investigations are carried out into the cause of some models falling out of the sky. Matrice 200 series models and the Inspire 2 have had temporary flying restrictions applied to them as they use the DJI TB50 and TB55 battery packs that are suspected of failing mid-flight.

The authority states that “a small number of incidents have been recently reported where the aircraft has suffered a complete loss of power during flight, despite indications that there was sufficient battery time still remaining.” While the drones in these incidents themselves have suffered damage from the incidents no third-party persons or property has been affected as a result.

The cause of the fault remains unclear at the moment, and not all of these models of drone seem to suffer from it, but investigators believe the common link is the batteries in use. DJI itself is advising customers to ‘fly with caution’ when using drones that use these batteries as it says they can show incorrect power levels. The company suggests users follow the guidance of the CAA ‘out of an abundance of caution’, and say they are working on firmware to fix the problem.

In addition to the temporary ban on flights over people the CAA has also suspended permissions to fly these models:

  • over or within 150 metres of any congested area;
  • within 50 metres of any persons;
  • within 50 metres of any, vessel, vehicle or structure which is not under the control of the SUA Operator or remote pilot of the SUA;
  • over or within 150 metres of an open air assembly of more than 1,000 persons; or
  • using EVLOS

DJI seems to have suspended sales on its website of the Matrice 200 series models. For more information see the DJI newsroom, and the CAA website.

CAA Safety Notice:

Civil Aviation Authority
SAFETY NOTICE
Number: SN–2018/009

Small Unmanned Aircraft

Issued: 31 October 2018

DJI Battery TB50 and TB55 In-Flight Power Failures

This Safety Notice contains recommendations regarding operational safety.
Recipients must ensure that this Notice is copied to all members of their staff who need to take appropriate action or who may have an interest in the information (including any ‘in-house’ or contracted maintenance organisations and relevant outside contractors).

2 Introduction
2.1 This Safety Notice supersedes and revokes Safety Notice SN–2018/008.

2.2 This Safety Notice applies to operators of multi-rotor small unmanned aircraft utilising DJI battery model TB50 or TB55, including all DJI Matrice 200 series (which includes the 200, 210 and 210 RTK platforms) and the DJI Inspire 2 (the “Affected SUA”).

2.3 A small number of incidents have been recently reported where the aircraft has suffered a complete loss of power during flight, despite indications that there was sufficient battery time still remaining. In each case, this resulted in the aircraft falling directly to the ground due to the immediate loss of lift with the remote pilot unable to control its subsequent flight path. The small unmanned aircraft were damaged upon impact, but the CAA has not received any reports of injuries to people or other property.

2.4 Investigation by the manufacturer has confirmed that this issue is not confined to any specific firmware version and is thought to be related to the batteries TB50 and TB55. The full details of the occurrences are still being investigated.

2.5 The purpose of this Safety Notice is to highlight the requirement for the SUA operator and/or remote pilot to be reasonably satisfied that the flight can be safely made (Air Navigation Order 2016 (ANO) article 94(2)), restrict overflight of persons at any height and to temporarily limit the scope of any operational authorisations issued to operators of the Affected SUA.

Civil Aviation Authority Safety Notice SN–2018/009

3 Compliance/Action to be Taken
3.1 This Safety Notice requires the following actions to be taken:

a) Provisional Suspension of Operations

i) In accordance with Air Navigation Order article 257 and 257(2)(c) operators of Affected SUA are hereby directed not to permit any flight that involves overflight of any persons at any height until further notice.

ii) In accordance with Air Navigation Order article 253, any element of a permission based on an Operational Safety Case (OSC), issued by the CAA to an SUA operator which permits the operation of an Affected SUA to be operated:

* over or within 150 metres of any congested area;
* within 50 metres of any persons;
* within 50 metres of any, vessel, vehicle or structure which is not under the control of the SUA Operator or remote pilot of the SUA;
* over or within 150 metres of an open air assembly of more than 1,000 persons; or
* using EVLOS

is provisionally suspended until further notice.

iii) These limitations will be subject to regular review. As soon as further updates have been obtained from the manufacturer, and the CAA is satisfied that this has been addressed in a satisfactory manner, the CAA will then issue a further update via the SkyWise alerts portal on the CAA website.

b) Emergency Services Operations

i) Due to the unique nature of emergency services operations, the privileges contained within General Exemption E 4506 (ORS4 No. 1233) may continue to be exercised whilst using the Affected SUA, provided that the potential risks highlighted in this Safety Notice have been considered within the decision to proceed and the overflight of uninvolved persons is minimised.

4 Queries
4.1 Any queries or requests for further guidance as a result of this communication should be addressed to the following e-mail address: uavenquiries@caa.co.uk, with the subject line ‘Safety Notice – DJI Battery TB50 and TB55 In-Flight Power Failures’.

5 Cancellation
5.1 This Safety Notice will remain in force until further notice

Articles: Digital Photography Review (dpreview.com)

 
Comments Off on DJI drones temporarily banned in UK after reports of them falling from the sky

Posted in Uncategorized