Blog

  • How to Photograph Architecture as Sculpture

    The post How to Photograph Architecture as Sculpture appeared first on Digital Photography School. It was authored by Herb Paynter.

    Architects design buildings based on form as much as functionality. Many of these creative structures serve as works of art as well as mere brick and mortar buildings. Viewing subjects for their form as well as their function, and capturing that beauty with creative eyes and a little careful planning, can deliver stunning results. In this article, you’ll learn how you can photograph architecture as sculpture.

    Photograph-Architecture-as-Sculpture

    A statue of Wilbur Wright stands in front of the Student Union building on the campus of Embry Riddle Aeronautical University in Daytona Beach, Florida.

    Rule One: Observe before you shoot

    Too often we are struck with the initial appearance of a subject and immediately start shooting. However, this knee-jerk snapshot approach rarely provides the kind of result that it could if we took our time. Take the time to walk around the subject and observe it from several different angles. Those angles will provide different vantage points, reflections, and shadows that will change and influence the framing you use for each shot.

    Investigate the uniqueness that each structure presents and appreciate the visual statements the architect is making. Structures are more than a collection of connected boxes with passageways and windows. They are the physical housing of the community. We should study the features that make each structure unique. Throughout time, architects have designed structures that reflect social attitudes and serve the full spectrum of cultures from very conservative and business-like to modern and avant-garde.

    Image: London’s amazing architecture along the Thames.

    London’s amazing architecture along the Thames.

    If you carry optional lenses in your bag, consider how each will render the scene. Don’t hesitate to stop long enough to find out. Lenses not only provide a distance variable, but they also change the dynamics of dimension. Longer lenses tend to compact the range much more than wider lenses.

    Remember, backgrounds play a large role in the process. It is easy to get carried away with the subject and not see the effect that items in the foreground and background have on the final result. You can shorten major post-production chores, and even eliminate, by carefully seeing and shaping the background.

    Rule Two: Think before you shoot

    Digital cameras tend to override the cardinal rules of photography by allowing us to haphazardly capture dozens of shots without thinking them through. Remember, photography is a discipline and technical science as much as it is a process of documentation. Don’t allow yourself to excuse sloppy shooting.

    The basic tradeoffs of exposure should run through your mental checklist as you think through each shot. Here’s where “Auto” settings can work against you as a photographer.

    Briefly weigh the big three factors behind correct exposures before you click the shutter: Shutter speed, ISO, and Aperture each contribute to the shot, and each affects the result.

    Photograph-Architecture-as-Sculpture

    Interior of Student Union at Embry Riddle University

    The most important of these three variables in architectural photography is the aperture. Aperture controls the depth of field (DOF), particularly in long lenses. Since buildings rarely move around and daytime outdoor lighting is usually ample, shutter speed is of little consequence in the final analysis. As is ISO, but your choice of framing and DOF will make all the difference.

    Rule Three: Plan your shot before you shoot

    Make it a point to develop specific intent for each shot and develop at least a mental shot list of the project. Without this exercise, you’ll end up with a multitude of lookalike shots that you’ll have to cull through. Ask yourself if you want to capture the entire scene or just highlight a particular aspect of the scene?

    Image: The 19th century stone structure of the Chicago Water Tower stands in contrast to the gleamin...

    The 19th century stone structure of the Chicago Water Tower stands in contrast to the gleaming metal surface of the Trump Tower, also in Chicago.

    Rule Four: Account for Keystoning

    Buildings are always taller than the camera lens and thus always distort the parallel nature of the vertical lines. The only way to avoid this is to keep the camera axis parallel to the horizon. The moment you shift the lens skyward, the vertical lines will keystone. This is both normal to the human eye and advantageous to adding drama to tall buildings, but the camera lens can exaggerate it.

    If you’re fortunate, and a bit creative, you can shoot the building from the inside (or atop) another structure. This will allow you to keep the vertical surfaces parallel.

    Image: Seeing this domed rooftop from an adjoining property delivered a unique view. If I’d ca...

    Seeing this domed rooftop from an adjoining property delivered a unique view. If I’d captured this dome from the ground, the actual shapes and features would have been distorted.

    The other option, and the one most utilized, is to adjust these angles in post-production. Almost all imaging software provides the ability to straighten the lines by either automatically or manually stretching the image using the software’s Transform function. However, be aware that every time you distort an image’s shape, you reassign pixel values which can affect the sharpness of your image.

    Rule Five: Assess White Balance

    The general assumption is that you should capture outside photos in Daylight mode. But this isn’t always the case. Outdoor lighting changes constantly. Images captured either in the shade or in mixed lighting (dusk with street lighting, windows illuminated with tungsten lighting, or interior shots that include sunlight coming from outside) can create problems. The best way to address this issue is to capture your images in RAW mode. Doing so, allows you the latitude to experiment with the color temperature during post-production.

    Photograph-Architecture-as-Sculpture

    Even after extensive damage suffered in World War II, Dresden, Germany still hosts a great number of historical and cultural buildings.

    Rule Six: Carry a tripod

    There are many good reasons to carry a travel tripod when shooting architecture. Exposures can vary greatly, and a tripod eliminates the possibility of camera shake during longer exposures or shooting to match precise angles of structures.

    Since buildings don’t move much, a tripod allows you to lock down the focus and the steady the camera even at strange angles. Tripods also allow you to use your camera’s timer for hands-free exposures.

    Image: Genoa Archway

    Genoa Archway

    Rule Seven: Choose the right lens for the shot

    Wider-angle lenses allow you to capture larger buildings in areas of limited access. However, extreme wide-angle lenses (both zoom and non-flat field) can also introduce undesirable issues like barrel distortions that bow straight lines. Moderately wide-angle lenses and reasonable distances from the subject will most times address these issues.

    Rule Eight: Pay attention to textures and geometry

    The array of interesting textures, colors, fixtures, and surfaces used in building materials is quite diverse and makes for very interesting detail shots. Textures are the fabric of life and vary wildly both inside and outside modern architecture.

    Architects are perfection artists who love geometry, and good geometry is the foundation of good structure.

    From the earliest days of piling and arranging huge stones into pyramid shapes to today’s massive sports arenas, you can see the mathematical beauty of creative geometry everywhere. Look for geometric design in the biggest and smallest elements of architectural structures.

    Photograph-Architecture-as-Sculpture

    The Interior of the Frauenkirche cathedral in Dresden, Germany is graceful in structure and beautifully finished in pastel colors.

    Rule Nine: Break the rules

    Don’t be scared to see your subject from very strange vantage points. This includes looking both straight up from the floor and straight down from balconies. You may look a little silly to passersby, but chances are you’ll never see those people again, and they may well marvel at the photos you produce. The result of your creative vantage point will let your viewers see life from a fresh angle.

    Almost everybody takes pictures from eye height (which is quite boring), and most of us are between five and six feet tall, so this means that most photos appear…average and “normal.” Get un-normal and show people life from a fresh viewpoint.

    Image: Many of the European cultural and government buildings include beautiful cultural symbols and...

    Many of the European cultural and government buildings include beautiful cultural symbols and statues sculpted with old-world craftsmanship.

    Rule Ten: Look for contrast and balance

    This applies to subjects as well as tone curves. Today’s buildings are focused on issues that reflect environmental and social issues. Pay attention to the juxtaposition of natural and human-made elements that are designed to coexist in total harmony. Colors and textures emphasize cooperation between human achievement and nature. The balance of the practical and artistic aspects of modern engineering reflect a renewed sense of respect between progress and responsibility in today’s world.

    Conclusion

    Most of all, take the time to appreciate the marvel and beauty of human creativity. The more you look, the more you’ll appreciate the ingenuity and genius of today’s architectural masterpieces.

    Don’t rush through this process. Exercise the same level of care and skill that you observe in the design and structure of the buildings and interiors that you capture, and you’ll produce some amazing pictures. Shoot inspired.


    photograph-architecture-as-sculpture

    The post How to Photograph Architecture as Sculpture appeared first on Digital Photography School. It was authored by Herb Paynter.


    Digital Photography School

  • Weekly Photography Challenge – Hands

    The post Weekly Photography Challenge – Hands appeared first on Digital Photography School. It was authored by Caz Nowaczyk.

    This week’s photography challenge topic is HANDS!

    Weekly Photography Challenge – Hands

    Perry Grone

    Hands can say so much about a person! So go out and take some fab photos of hands! They can be wrinkly, newborn, working, dirty, or clean. They can be color, black and white, moody or bright. Just so long as they include hands! You get the picture! Have fun, and I look forward to seeing what you come up with!

    Image: Quino Al

    Quino Al

    Weekly Photography Challenge – Hands

    Akira Hojo

    Image: Liv Bruce

    Liv Bruce

    Check out some of the articles below that give you tips on this week’s challenge.

    Tips for Shooting HANDS

    6 Tips for Posing Hands in Wedding and Portrait Photography

    26 Expressive Images of Hands

    Handiwork: How to Pose Hands

    How to Pose Hands in Portraits

    Black and White Portraits a Set of Images to Admire

    How to Photograph Close-Up Details of Newborns and Infants

    Weekly Photography Challenge – HANDS

    Simply upload your shot into the comment field (look for the little camera icon in the Disqus comments section) and they’ll get embedded for us all to see or if you’d prefer, upload them to your favorite photo-sharing site and leave the link to them. Show me your best images in this week’s challenge.

    Share in the dPS Facebook Group

    You can also share your images in the dPS Facebook group as the challenge is posted there each week as well.

    If you tag your photos on Flickr, Instagram, Twitter or other sites – tag them as #DPShands to help others find them. Linking back to this page might also help others know what you’re doing so that they can share in the fun.

    The post Weekly Photography Challenge – Hands appeared first on Digital Photography School. It was authored by Caz Nowaczyk.


    Digital Photography School

  • Video: Incredible timelapse shows Earth’s rotation relative to the Milky Way

    Photographer Aryeh Nirenberg has shared an incredible timelapse from a trip to Northeast Colorado that shows the Earth’s axial rotation in relation to the location of the Milky Way Galaxy in the night sky.

    The timelapse, which was captured nearly two years ago, but only now uploaded to YouTube, was captured with an astro-modified Sony a7S II with a Canon 24-70 F2.8 lens attached via an adapter. Approximately 1,100 10-second exposures were captured at 12-second intervals to create the 55-second timelapse.
    In speaking with DPReview, Nirenberg said:

    I was trying to shoot a regular Milky Way timelapse at a reservoir, but access to it was blocked on the side of the reservoir that I needed to be at to face the Milky Way. So, instead of just shooting the Milky Way with the boring field in the foreground, I thought I’d try doing it with my iOptron portable equatorial mount to make it more interesting and I [photographed] until most of the sky was out of the frame.

    The resulting images were processed in Lightroom and the timelapse was rendered using LRTimelapse. You can find more of Nirenberg’s work on his website, Instagram profile and YouTube channel.

    Articles: Digital Photography Review (dpreview.com)

  • How To Take Better Headshots: The Complete Guide

    Headshot photography is a huge sub genre of portrait photography right now and is becoming bigger and bigger as time passes. So many people need to get headshots done and they should be going to you for this service! I want to talk about how we can all make our headshot photography so much better and thus provide our clients Continue Reading

    The post How To Take Better Headshots: The Complete Guide appeared first on Photodoto.


    Photodoto

  • Unreal Engine’s Project Spotlight uses LED walls for real-time in-camera visual effects

    Epic Games has showcased Project Spotlight, an Unreal Engine-powered way to capture real-time visual effects in-camera. The company has detailed the work in a new video showing off the system, including its ability to track the camera’s position in space in real-time for a realistic and customizable background.

    Rather than filming in front of a blue or green screen for post-production later on, the Project Spotlight system enables filmmakers to shoot in front of LED walls showing the virtual environment in real-time. Creators can digitally manipulate this 3D virtual scene when necessary and the LED walls adjust the on-set lighting for realistic ambient light.

    ‘No matter what the project is,’ Lux Machina chief technology officer Philip Galler said, ‘creatives always want to see the closest representation to the final product as early on in the creative process [as possible].’

    Experts featured in the video explain that because the virtual environment can be adjusted in real-time, the project saves critical time that may otherwise be wasted waiting for changes. As well, people from different departments can work together to determine how the virtual world is portrayed.

    The technology was demonstrated at SIGGRAPH 2019 by Epic Games in partnership with Magnopus, Lux Machina, Quixel, Profile Studios, DP Matt Workman and ARRI. Future plans for the system are unclear at this time.

    Articles: Digital Photography Review (dpreview.com)

  • Slideshow: Winners of the 2019 Australian Geographic Nature Photographer of the Year

    2019 Australian Geographic Nature Photographer of the Year Winners

    The South Australian Museum has announced the 2019 Australian Geographic Nature Photographer of the Year and also shared the winning images from each of the ten categories offered in this year’s contest.

    In total, 2,219 images were submitted and judged by Justin Gilligan, Glenn McKimmin and Tui De Roy. In the end, the 2019 Australian Geographic Nature Photographer of the Year award was handed out to Mat Beetson of Western Australia for the above image of a beached Fin Whale being circled by sharks on Cheynes Beach in Albany, Western Australia. The winning image was captured with a DJI Phantom 4 Pro drone, marking the first time a drone-captured photograph has won the competition.

    ‘It was unreal, arriving at a peaceful coastal town with a pristine beach and then seeing this huge whale not even five metres from shore – we then noticed the thrashing close by and realised that a few sharks had also stopped by,’ Beetson told the Southern Australian Museum about the capture. ‘I launched the drone to see the aerial view and captured a sequence of photographs, this shot was one of the last ones I took and I was very lucky that the shark came back for a look.’

    Beetson received a $ 10,000 cash prize as well as a Coral Expeditions cruise for winning.

    The remainder of the images in this gallery are the ten winners in each of this year’s categories.

    You can find out more information about the Australian Geographic Nature Photographer of the Year competition and the South Australian Museum by visiting their respective websites.

    Above Image:

    Overall Winner

    Fin Whale, Balaenoptera physalus

    The fin whale is sighted regularly in this region; seeing one beached, however, is rare. The whale sits less than 5m from shore and 100m from residential homes, giving whale researchers access to an unusual occurrence for this species. Bronze whalers and great whites feasted over the remains before removal.

    Location: Cheynes Beach, Albany, Western Australia

    Gear: DJI Phantom 4 Pro Drone, 24mm, 1/500, f/5.6, ISO 100, 118m high, filmed with permission DPAW

    Photographer: Mat Beetson, Western Australia


    Photo credits: Images owned by their respective creators, used with the permission of the South Australian Museum.

    Winner, Animal Portrait

    Decorator crab, Achaeus spinosus

    Typically, decorator crabs attach pieces of sponge and seaweed to themselves to camouflage and hide from predators (which makes them very poor photographic subjects). However, Achaeus spinosus attaches stinging hydroids to itself to ward off potential predators (making it a very attractive subject for photography).

    Location: Lembeh Strait, North East Sulawesi, Indonesia

    Gear: Canon EOS 7D Mk II, Canon EF 100mm, f/2.8 macro USM, 1/250, f/16, ISO 200, INON Z240 strobe with Retra Pro light shaping device, handheld

    Photographer: Ross Gudgeon, Western Australia

    Winner, Animal Behaviour

    Humpback whales, Megaptera novaeangliae,
    Dolphins, unidentified species

    The heat run is the ultimate wildlife encounter – multiple whales competing for a female. The chase can last for hours or even days and males can display bubble netting, open mouth gulping, physical contact, loud acoustic sounds, and breaching. Even after 16 years documenting humpback behaviour in the region, it is still truly heart-thumping and adrenaline-pumping action.

    Location: Tonga, South Pacific

    Gear: Canon 1DX Mk II, Canon 8–15mm fisheye, 1/320, f/8, ISO 200

    Photographer: Scott Portelli, New South Wales

    Winner, Animal Habitat

    Commensal amphipod living in solitary ascidian

    I was searching for miniature pygmy seahorses on the reefs of West Papua when I happened across this tiny amphipod crustacean. Just 0.5–1cm long, this male is sitting at the mouth of the sea squirt to guard the females and young within. According to an amphipod expert, this is likely a new species.

    Location: Raja Ampat, West Papua, Indonesia

    Gear: Nikon D800, Nikkor 105mm macro, 1/125, f/14, ISO 100, twin INON Z240 strobes, handheld, Subal underwater housing

    Photographer: Richard Smith, United Kingdom

    Winner, Botanical

    Ghost fungus, Omphalotus nidiformis

    The elusive ghost mushroom show starts after dark, when the green light of its bioluminescence glows across the pine forest on the Bellarine Peninsula. It seems like magic but the glowing works to attract insects that then help disperse the spores and spread the mushroom.

    Location: Ocean Grove, Victoria

    Gear: Canon 5D Mk IV, Samyang 14mm, 30, f/2.8, ISO 3200, Manfrotto tripod

    Photographer: Marcia Riederer, Victoria

    Winner, Landscape

    When Barron Falls (Din Din) is in flood, the usually tranquil scene is transformed into a tumultuous cataract as huge volumes of water make their way to the coastal plain below. The sheer violence of this display, coupled with the deafening roar, makes it an unforgettable experience.

    Location: Barron Falls, Kuranda, Queensland

    Gear: Pentax X-5, 28.3mm, 1/320, f/5, ISO 100, handheld

    Photographer: Neil Pritchard, Queensland

    Winner, Monochrome

    Honeycomb moray eel, Gymnothorax favagineus
    Maze coral, Leptoria sp.

    I came across this amazing juxtaposition of a honeycomb moray eel and a textured brain coral. It screamed monochrome to me, but one of the significant disadvantages of shooting underwater is that you cannot just change your lens to suit the subject. Still, I slowly moved as close to the eel as possible, increased the depth of field, and adjusted my strobes to light up the coral and the eel.

    Location: Banda Sea

    Gear: Nikon D850, Nikonos 13mm RS, 1/200, f/16, ISO 400, Seacam housing, Ikelite 161s strobe

    Photographer: Tracey Jennings, United Kingdom/Malaysia

    Winner, Junior

    This night was the most amazing display of lightning that I have ever seen, with constant flashes of lightning lasting hours. For the composition, I decided to focus on a man standing at the edge of the water with an umbrella to add a sense of scale to the image.

    Location: Fingal Bay, New South Wales

    Gear: Canon EOS 5D Mk lll, Canon 17–40mm f4 L, 15, f/4, ISO 200, tripod

    Photographer: Floyd Mallon, New South Wales. Age 17

    Winner, Our Impact

    The Menindee Lakes were deliberately drained in 2016–17 and New South Wales has experienced a lengthy drought. Animals and birds desperately seek food and water and there is very little left due to these human-made and natural events. Lake Cawndilla is now just a drying lakebed scattered with the remains of our native animals.

    Location: Cawndilla Creek, Menindee, New South Wales

    Gear: DJI Phantom 3 Advanced, 20mm, 1/640, f/2.8, ISO 200, ND4 filter

    Photographer: Melissa Williams-Brown, South Australia

    Threatened Species Winner

    Winner, Threatened Species

    Mertens’ water monitor, Varanus mertensi

    STATUS: ENDANGERED

    Mertens’ water monitors are highly inquisitive. This extremely bold specimen ostentatiously approached me to investigate the good-looking lizard in my dome port while I observed another nearby pair engaged in courtship – sadly for him he was staring at his own reflection, not the mate of his dreams.

    Location: Adelaide River, Northern Territory

    Gear: Olympus OMD EM-1 Mk II, Olympus 8mm f1.8, 1/125, f/11, ISO 64, two Sea & Sea YS-D2 strobes, manual flash output, handheld, Nauticam underwater housing

    Photographer: Etienne Littlefair, Northern Territory

    Portfolio Prize

    Portfolio Prize (best portfolio of size or more images)

    Artist: Charles Davis, (NSW)

    Articles: Digital Photography Review (dpreview.com)

  • You can now search for images in Google Photos using text found within the image

    Google has confirmed Google Photos is adding the ability to search for images using the text featured in the content. This is different than searching for images based on their filename, instead using Optical Character Recognition (OCR) technology to identify words featured in photographs, such as from an image of a menu or sign.

    The feature was first spied by Hunter Walk, who shared the above screenshots of the new capability. The official Google Photos account responded to the tweet, confirming it’s rolling out the new search capability.

    Though apps that use OCR to copy text aren’t anything new, the ability to search through albums of uploaded photos for text located within the images will come in handy for many users, particularly those who use Google Photos for storing scanned copies of invoices and other business documents.

    According to The Verge, the new OCR-based search option is available on some Android devices at this time. Google indicated in its tweet that the feature is rolling out over the course of this month, so it may take a number of days or weeks to arrive for everyone.

    Articles: Digital Photography Review (dpreview.com)

  • Equipment and Camera Settings You’ll Need for Better Moon Photography

    The post Equipment and Camera Settings You’ll Need for Better Moon Photography appeared first on Digital Photography School. It was authored by Jeremy Flint.

    better-moon-photography

    Super Moon, Oxford, England

    As the brightest object in the night sky, the Moon has captivated people around the world for centuries. The Moon is simply fascinating, particularly with the recent 50th anniversary of the first humans landing on the Moon. It is also one of the most incredible subjects to learn to photograph. Everyone loves to observe the Moon, but have you ever looked up to the sky at night and thought, “how can I capture this magnificent phenomenon?” Well, as photographing the Moon can be a challenging undertaking, I have highlighted some information about the Moon and recommendations regarding equipment and camera settings you’ll need to consider to achieve better moon photography.

    It is initially worth considering what the Moon actually is. Well, in general, the term “moon” denotes an object that orbits something other than the star in a solar system. Earth’s Moon is an astronomical body that orbits the planet and acts as its only permanent natural satellite, orbiting the Earth every 27.3 days. It is the fifth-largest Moon in the Solar System and is an average of 384403 kilometers (238857 miles) from Earth.

    When you look up at the night sky to view the peaceful and tranquil Moon, you might notice that the Moon looks a little different each night. This is due to our Moon’s many phases and types.

    Phases of the moon

    better-moon-photography

    Partial lunar eclipse, England

    The amount of sunlight that reflects on the Moon’s surface that we can see from our point of view on Earth varies every day, and this is what we refer to as a Moon phase.

    Moon phases change during the lunar month from a New Moon (which occurs the moment the Sun and Moon are aligned, with the Sun and Earth on opposite sides of the Moon) to a Waxing Crescent moon (when a thin sliver of the Moon becomes visible after a New Moon), First Quarter Moon (the moment the Moon has reached the first quarter of its orbit around Earth), Waxing Gibbous Moon, Full Moon, Waning Gibbous Moon, Third Quarter Moon and Waning Crescent Moon.

    Different types of full moons

    Moon photography 02

    Super Blue Blood Moon, Oxford

    full moon occurs when the side of the Moon facing Earth is fully lit up by the Sun. There are several types of unusual full moons that look different in color and size due to its position to the Sun and Earth. These include blood moons (that appears reddish and occur during a total lunar eclipse, when Earth lines up between the Moon and the Sun); Supermoons (a moon that appears larger because it is closer to Earth), Blue Moons (the “extra” Moon in a season with four Full Moons or the second Full Moon in a calendar month) and Harvest Moons (the full, bright Moon that occurs closest to the start of Autumn), for example.

    The equipment

    When photographing the full moon or different phases of the moon, you will need some essential pieces of equipment. I recommend you use a tripod for stability. Whilst you may get away with hand-holding your camera, you will get better results by mounting your camera on a tripod and avoiding camera shake. In addition, a remote shutter release cable is a useful bit of kit to help prevent camera shake. It is not essential as you can use your cameras self-timer function.

    Which lens to use

    Moon photography 03

    Moon over the landscape, Dartmoor, England

    The type of lens you use largely depends on whether you would like to capture the moon in the landscape, or as a detailed close-up. Wide-angle lenses are great to photograph the moon as it moves over an interesting landscape. Alternatively, a telephoto lens is a great choice for getting closer to the moon to reveal its surface details. Consider using a long focal length lens with a range of 300-400mm.

    Which camera settings to use

    better-moon-photography

    Moonrise, England

    Once you have chosen a lens and set your camera on a tripod, you will need to select your settings. Firstly, I would recommend setting your ISO to 100 to prevent noise and grain in your images. Next, select an aperture in the region of f/8 – f/16 to achieve clearer and cleaner shots. In terms of shutter speed, 1/60th to 1/125th should be a great starting point.

    Focus on the moon

    Moon photography 05

    Moon and sky, England

    When you have applied the settings, all you now need to do is set the focus of your camera. I like to use my cameras manual focus to focus on the Moon. Once the focusing distance to the Moon looks sharp using manual focus, you are ready to shoot the Moon.

    In my experience, manual focus works better than autofocus as the Moon’s surface is sometimes too dark to be recognized by the camera’s autofocus and I find manual focus to be more reliable in obtaining sharper shots in low light. By using manual focus, if you’re camera settings aren’t spot-on for any reason, you will still have reasonably sharp photos that you can recover in your editing software.

    If you apply all of these tips, you’ll achieve better Moon photography and be equipped to photograph the Moon at the best time.

    Conclusion

    In summary, photographing the Moon is one of the most enjoyable subjects any photographer can learn. To achieve better photos of the different phases and types of the Moon, be sure to use a tripod. Also, consider a remote cable release, choose a wide-angle or telephoto lens, get your settings right, and focus your camera on the Moon manually.

    Do you have any other tips for better Moon photography? Alternatively, share your pictures of the Earth’s natural satellite or the Moon shining brightly over your chosen scene with us below.


    better-moon-photography


    The post Equipment and Camera Settings You’ll Need for Better Moon Photography appeared first on Digital Photography School. It was authored by Jeremy Flint.


    Digital Photography School

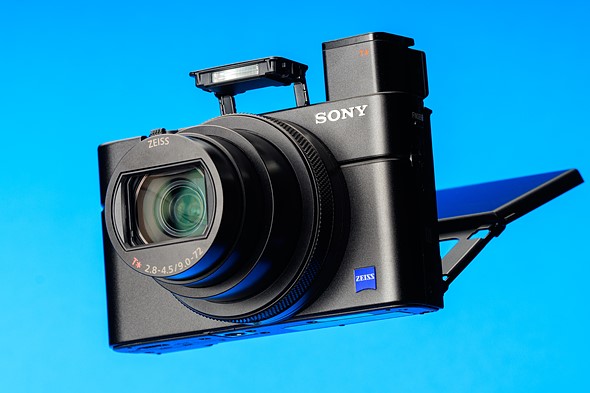
  • Sony Cyber-shot DSC-RX100 VII Review

    $ (document).ready(function() { SampleGalleryStripV2({“galleryId”:”9588852492″,”isMobile”:false}) })

    Sample photoSample photoSample photoSample photoSample photo
    Gold Award

    85%
    Overall score

    The Sony RX100 VII is the company’s latest pocketable 1″ sensor compact. It uses the same 24-200mm equivalent F2.8-4.5 lens as its predecessor but features a more capable, easier-to-use autofocus system.

    This comes in addition to the already impressive capabilities we saw in the Mark VI, including very fast continuous shooting and high-quality 4K video capture. And, for the first time in the series, the Mark VII has a mic socket for improved audio recording.

    The Mark VII can shoot at up to 20 frames per second with no viewfinder blackout: specs that are a match for the company’s flagship a9 sports camera. And it’s this capability, along with the enhanced AF, that prompts Sony to talk about ‘the power of an a9 in your pocket.’ To be clear, though, it does not share its hardware with that model.

    Key Specifications

    • 20MP 1″-type stacked-CMOS sensor with phase detection and built-in DRAM
    • 24-200mm equivalent F2.8-4.5 zoom
    • 20 fps continuous shooting with full autofocus and auto-exposure, and no blackout
    • Seven frame, 90 fps ‘single burst’ mode
    • Retractable 2.36M-dot EVF with 0.59x equiv. magnification
    • 3″ touchscreen LCD (flips up 180° or down by 90°)
    • Oversampled UHD 4K video (up to 5 min clips in standard temperature mode)
    • Combined lens and digital ‘Active’ stabilization mode in video
    • High speed video at up to 1000 fps
    • Intervalometer
    • Wi-Fi with Bluetooth and NFC

    The RX100 VII will be available in August 2019 at a recommended price of $ 1200. It’ll sell for around €1300 in Europe and £1200 in the UK, with both figures including tax. These are around the same prices as its predecessor was launched at, so we expect to see the Mark VI get re-positioned, to make room.


    What’s new and how it compares

    The RX100 VII looks like its predecessor but borrows know-how (though not hardware) from the pro-sports a9 model.

    Click here to read more

    Body and handling

    The RX100 VII is an evolutionary product but somehow finds room for a mic socket, as well as that massive lens.

    Click here to read more

    Operation and controls

    The control layout and logic is unchanged from previous models (for better or worse). There’s a good degree of customization available.

    Click here to read more

    AF and video performance

    The RX100 VII offers one of the best autofocus implementations of any compact on the market, video impresses too.

    Click here to read more

    Image quality

    Image quality from the RX100 VII is slightly improved over the VI. Check out our studio test scene to see how it compares to the competition.

    Click here to read more.

    Conclusion

    The RX100 VII receives our gold award and recommendation. Here’s why.

    Click here to read more.

    Sample gallery

    We’ve been shooting with a pre-production RX100 VII for a few days now. Have a look at what the new sensor can do.

    Click here to see the gallery.

    Articles: Digital Photography Review (dpreview.com)

  • Stunning Capture of Kingfisher Catching a Fish – Behind The Shot

    The post Stunning Capture of Kingfisher Catching a Fish – Behind The Shot appeared first on Digital Photography School. It was authored by Caz Nowaczyk.

    Stunning-Capture-of-Kingfisher-Catching-a-Fish-janet-smith

    Do you want to know how to photograph a Kingfisher catching a fish? Then read on!

    About this stunning capture of Kingfisher catching a fish

    Photographer: Janet Smith

    Camera Settings: 80mm focal distance, auto ISO, f5.6, 1/1200th. Camera set to manual and continuous silent shooting.

    Camera equipment: Canon 5D mark IV, Canon 70-200mm f2.8, Neweer remote trigger, Manfrotto tripod, and black bin bag as a rain cover.

    Where and when was the shot taken?

    Shropshire Photography hides, Market Drayton near Shropshire and Staffordshire borders, 6 July 2019, around 3:30 pm.

    What is the background behind getting the shot?

    This is my bucket list shot – a shot that I thought I’d never be able to take because I could not afford to buy a fast lens which I was told is required in this type of shot.

    Then almost a year ago, Brendan Van Son gifted me his old Canon 70-200mm f2.8 lens after learning I’ve wanted one but could not afford it. Having the lens opened up a whole new world for me. I saved and booked a hide day at Shropshire Photography Hides that got canceled three times because of bad weather and Minks decimating the Kingfisher nest and killing all the birds.

    On the 6th of July, I finally managed to get to the hide. The day was overcast, drizzly, and windy. I set up the camera at water level and wrapped in a black bin bag to keep it dry. Then I set the camera to manual, f5.6, auto ISO and 1/1200th, set up the remote trigger and waited.

    It took nearly six hours of waiting and shooting before I got this shot. I could not get the timing right, and this bird was super-fast. The light was also very low, and the drizzle persisted.

    I ended up with more misses than hits, but it was well worth it. One thing I learned is patience and determination pays off. And maybe nicer weather would have helped as well.

    What method or technique did you use to achieve the shot?

    I prefocused on the area where the bird was likely to enter the water with the camera set on silent continuous shooting to minimize noise.

    Describe any post-processing, including tools and techniques used

    There was very minimal post-processing. I did a close crop to show more of the water movement and the bird. Also, I lightened-up the shadows +25 on the photoshop slider, pulled up the vibrance to +15, and exposure to +5.

    What are your tips for others wanting to achieve a shot like this?

    My tip is to be patient, ask for advice from seasoned bird photographers and observe the bird’s behavior. I learned that this bird would move three paces either left or right and bob it’s head down before diving. As soon as it does that, I pressed the remote and continue pressing until it was back on the branch.

    You may also like:

    • 10 Must-Use Bird Photography Camera Settings for Beginners
    • 10 Common Bird Photography Mistakes and Their Solutions
    • 10 Surefire Tips for Photographing Birds in Flight
    • 5 Unforgiving Post-Processing Mistakes Every Bird Photographer Must Avoid
    • Review of the Nikon D500 for Wildlife and Bird Photography
    • 5 Secrets for Stunning Creative Bird Photography
    • 5 Tips for Better Forest Bird Photography
    • A Guide to Photographing Birds and Wildlife in a Wetland Area


    Stunning-Capture-of-Kingfisher-Catching-a-Fish-janet-smith

    The post Stunning Capture of Kingfisher Catching a Fish – Behind The Shot appeared first on Digital Photography School. It was authored by Caz Nowaczyk.


    Digital Photography School