Blog

  • Amazing Apartment Makeovers: 15 Brilliant & Beautiful Remodels

    [ By Steph in Architecture & Houses & Residential. ]
    apartment remodel fashion 2
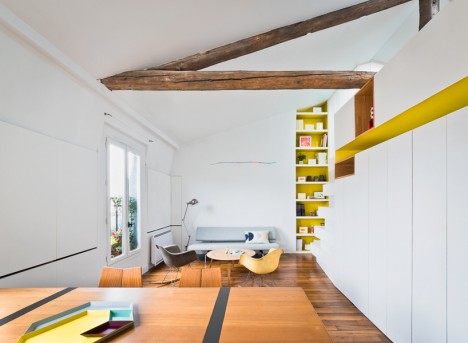
    Sometimes it’s hard to see the potential hidden behind a mess of drop ceilings, darkening partition walls and hideously dated kitchens, but the bones of a residential space can be more beautiful than you would have imagined. These 15 bright, spacious, modern apartment renovations open up cramped interiors, make use of vertical space and reveal long-forgotten historic features that add lots of character.

    Amazing Transformation in Istanbul
    apartment remodel istanbul 1

    apartment remodel instanbul 2

    apartment remodel istanbul 3

    apartment remodel istanbul 4

    apartment remodel istanbul 6

    apartment remodel istanbul 7

    apartment remodel istanbul 8

    apartment remodel istanbul 9

    apartment remodel istanbul 10

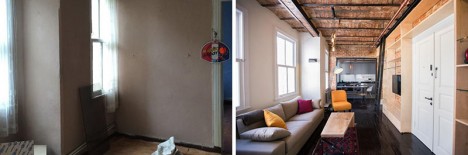
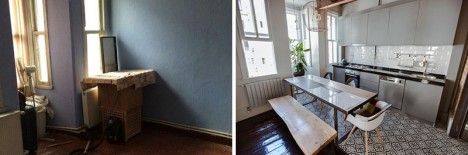
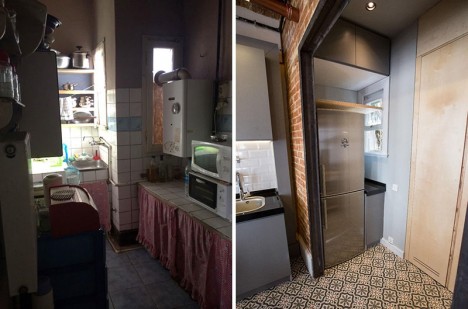
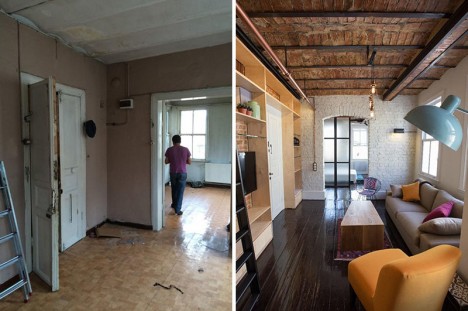
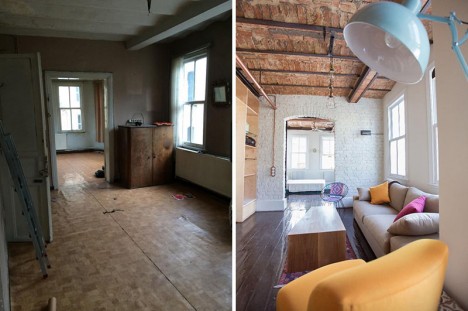
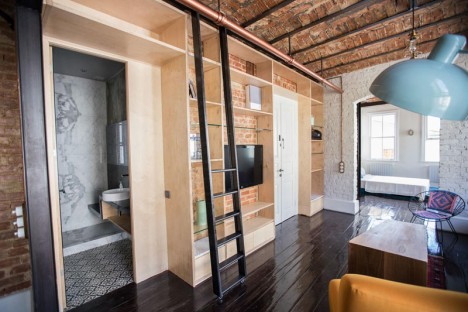
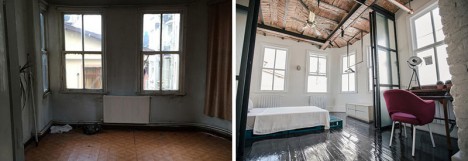
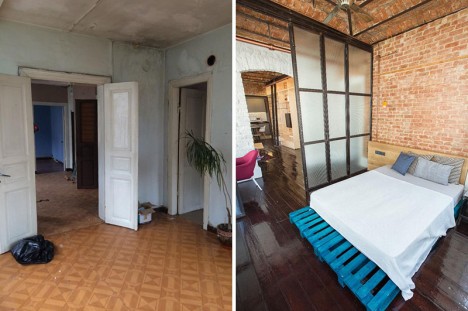
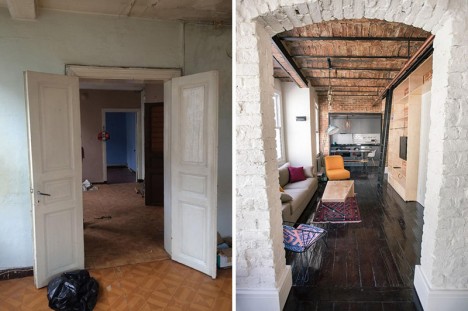
    Looking at the dim, depressing, highly ordinary ‘before’ photos of this apartment in Istanbul, would you ever have guessed at the potential it contained behind all of that plaster? SEA Architects saw the beautiful historical bones in brick and timber, tearing out most of the walls and ceilings to reveal what has been hidden for decades. The results are fresh, creative and highly unexpected.

    Formerly Frightening Basement in Barcelona
    apartment remodel barcelona basement 1

    apartment remodel barcelona basement 2

    apartment remodel barcelona basement 4

    apartment remodel barcelona basement 5

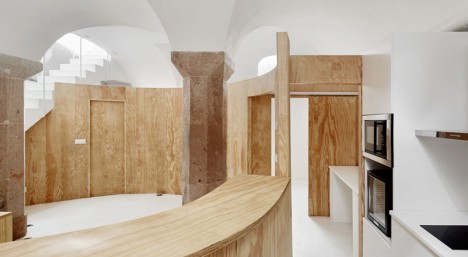
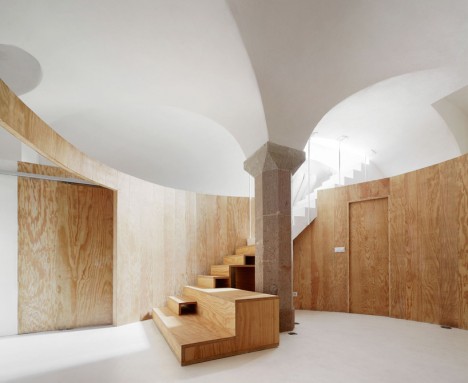
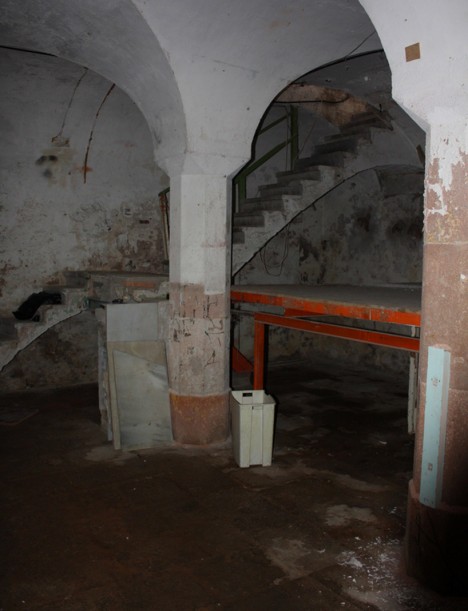
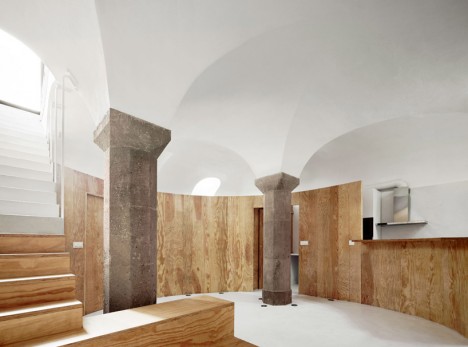
    Dark and dirty with stained walls and floors, this basement in Barcelona was legitimately scary before RAS architecture got their hands on it. ‘Apartment Tibbaut’ has a single entrance from above, one of three sources of natural light to the space, but octagonal stone pillars and a domed ceiling made it seem promising. These original elements were restored while new partition walls of laminated pine help define the new private areas.

    Maximizing a Tiny Parisian Apartment
    apartment remodel tiny paris 1

    apartment remodel tiny paris 3

    apartment remodel tiny paris 4

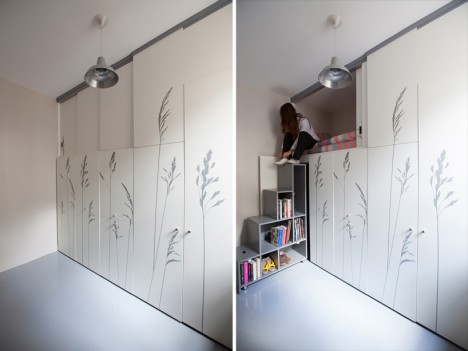
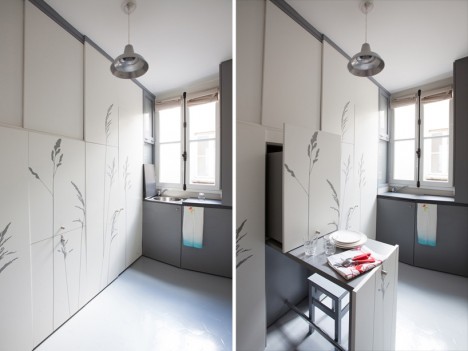
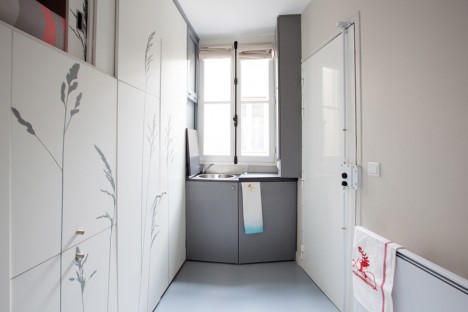
    How can you live in an ‘apartment’ that’s the size of a closet? Make the best possible use of every inch of space, like Kitoko Studio has done here with a maid room in Paris. A built-in inspired by swiss army knives takes up an entire wall, with the various components pulling out or folding down to reveal a bed, storage, a table, a wardrobe, a staircase, a kitchenette and more.

    Multifunctional Addition to Fashion Designer’s Apartment
    apartment remodel fashion 1

    apartment remodel fashion 2

    apartment remodel fashion 3

    apartment remodel fashion 4

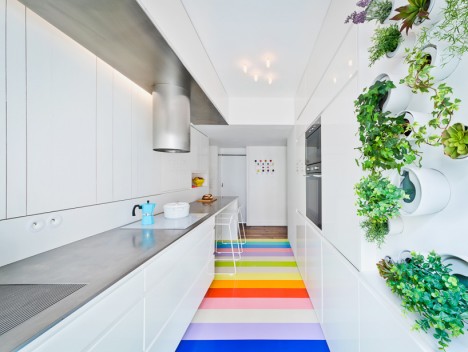
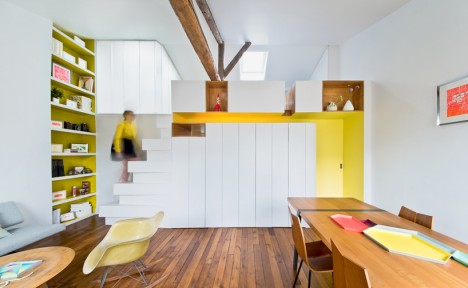
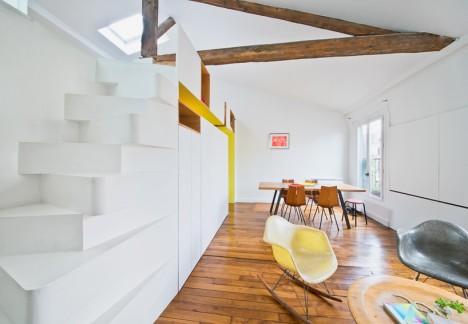
    A young fashion designer gets a bold and fun new apartment in a historic space within Paris’ Montmartre district courtesy of SABO project. A white built-in storage partition with alternating tread stairs leads to a sleeping loft and separates the living room and kitchen. The latter features a small green wall and vibrant flooring comprised of 25 natural rubber strips in 14 colors.

    Two-Level Play Frame in a Moscow Apartment
    apartment remodel moscow 1

    apartment remodel moscow 2

    apartment remodel moscow 3

    apartment remodel moscow 4

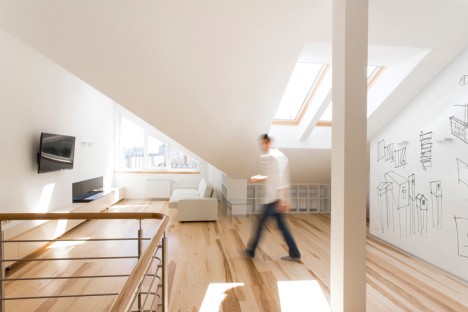
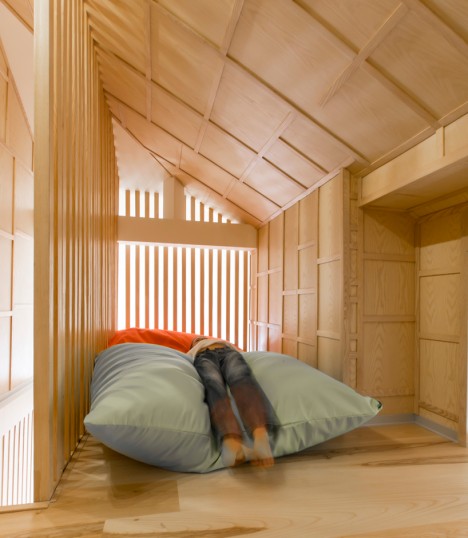
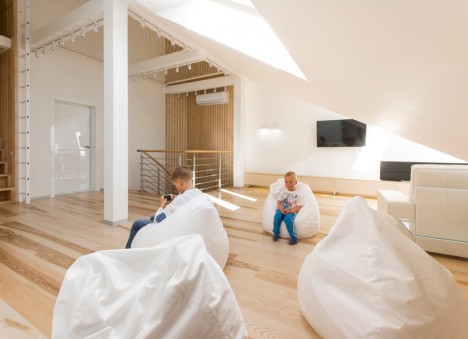
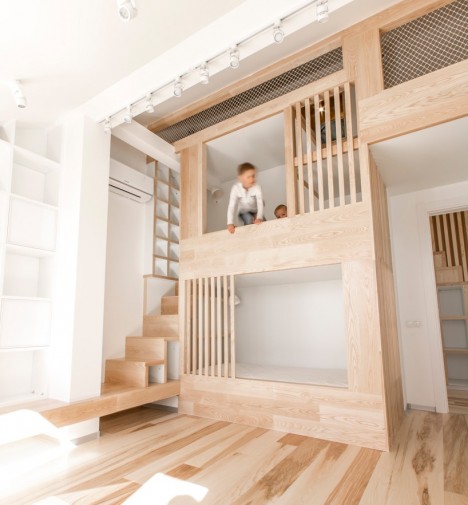
    The formerly uninhabitable attic of a Moscow apartment has become a fun two-story play space for the client’s children. Ruetemple added the timber structure with a nook for the kids, connecting the lower level to a playroom.

    Next Page – Click Below to Read More:
    Amazing Apartment Makeovers 15 Brilliant Beautiful Remodels

    Share on Facebook


    [ By Steph in Architecture & Houses & Residential. ]

    [ WebUrbanist | Archives | Galleries | Privacy | TOS ]

    WebUrbanist

  • Reducing the Stress of Group Photos at Weddings

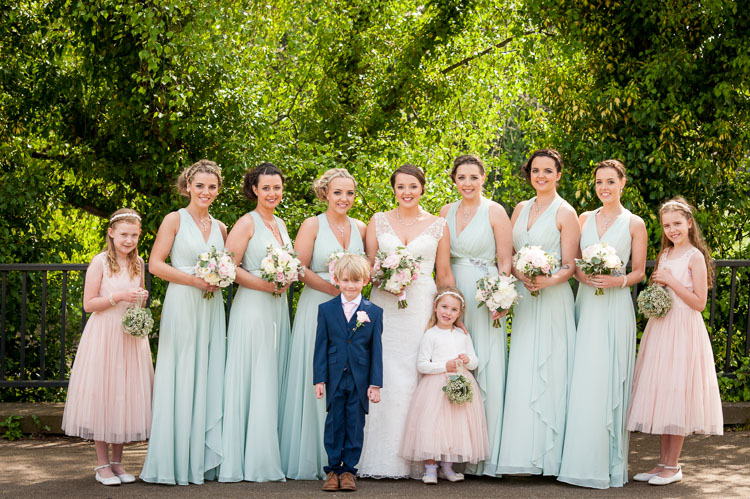
    I am sure you understand how important the family photos are on a wedding day. For me, they used to be the most stressful part of the day, I would almost dread them. Logistically they can be challenging, gathering all the guests and particular family members, organizing them into the right groups, then getting the shots right. There is a lot to do and think about.

    I have sure you’ve heard the age old story, about how the couple went to their friend’s wedding, and the photographer bossed them around, and spent ages doing countless group photos. None of us want to become that photographer, with the help of this short guide and bit of preparation, you can prevent that.

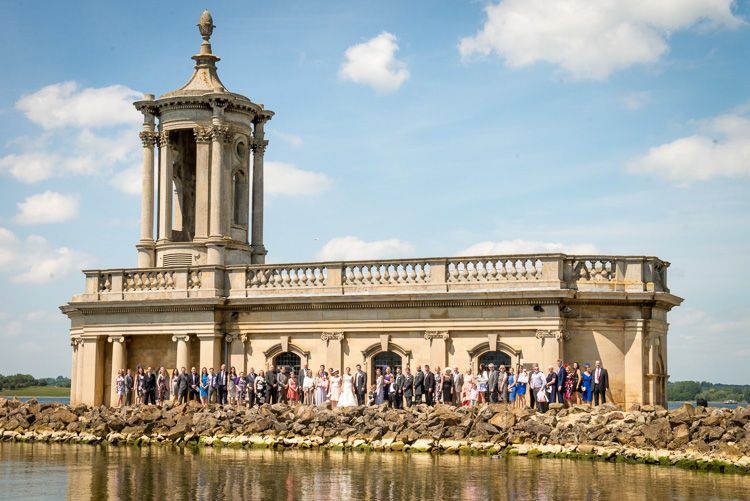
    Group photos robert sail 4

    After shooting over 100 weddings, I have I slowly figured out a sort of system, which helps me manage the process better. I have cut down the number of recommended family shots I do. This allows the couple to have time to relax during the reception, and gives me a little more time to shoot candid shots, or even spend a little bit more time with the bride and groom, creating something more creative.

    Some of the points within the article my be more relevant to wedding photographers in Europe, who tend to shoot the group photos after the ceremony during the cocktail reception, but you may still find some of the points useful if you are based in the US, and shoot them before the ceremony.

    Setting the scene – initial meeting with couple

    When you are in the process of booking a new wedding couple, I would suggest having a short chat with them about the group photos. It is good to discuss how many family formals they envision you will take on their day. It is also worth mentioning that you limit the number of family formals you take, to provide them with the best possible experience on their wedding day.

    Spending less time doing the family formals, will allow them to have more time relaxing during the cocktail reception with their friends and family. The last thing I would want a bride and groom to remember from their wedding day, was that we spent their whole cocktail hour standing around taking endless group photos.

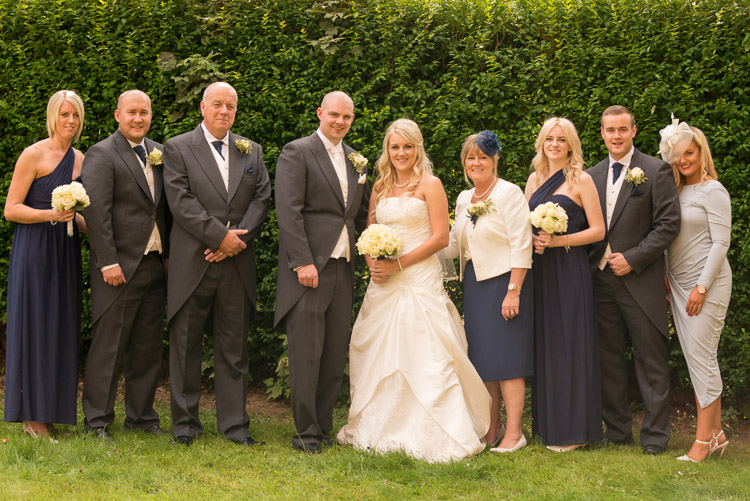
    Group photos robert sail 3

    Email to couple with booking confirmation

    To make the group photos as easy as possible on the wedding day, I would suggest that you email a recommended shot list over to the bride and groom beforehand, asking for them to fill in everyone’s names. This means that during the formal photographs you can call people by first name, which will make you much more amenable to the guests.

    Here is my sample list that I normally work from, which covers most of the bases:

    • Bride and groom with bride’s family (please confirm which family members)
    • Bride and groom with bride’s parents
    • Bride and groom all parents
    • Bride and groom with groom’s parents
    • Bride and groom with groom’s family (please confirm which family members)
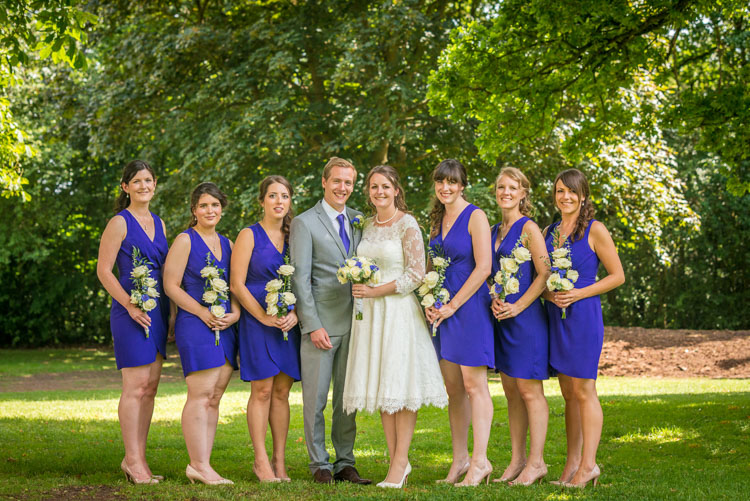
    • Bride and groom with bridesmaids
    • Bride and bridesmaids
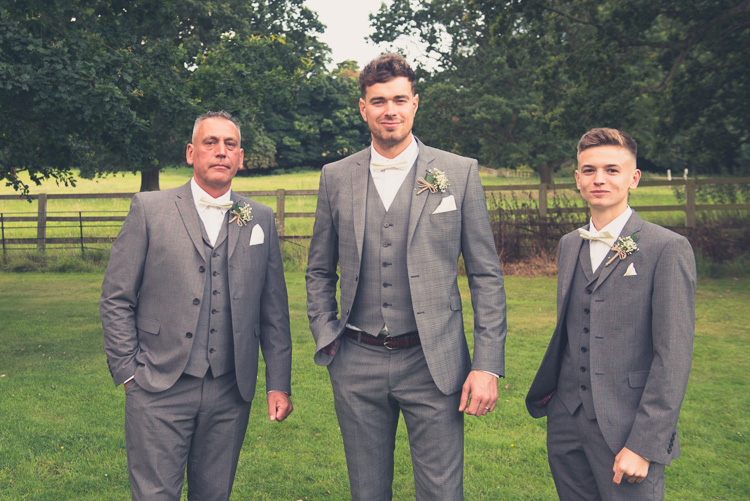
    • Groom and best man/ushers
    • Bride and groom and best man/ushers

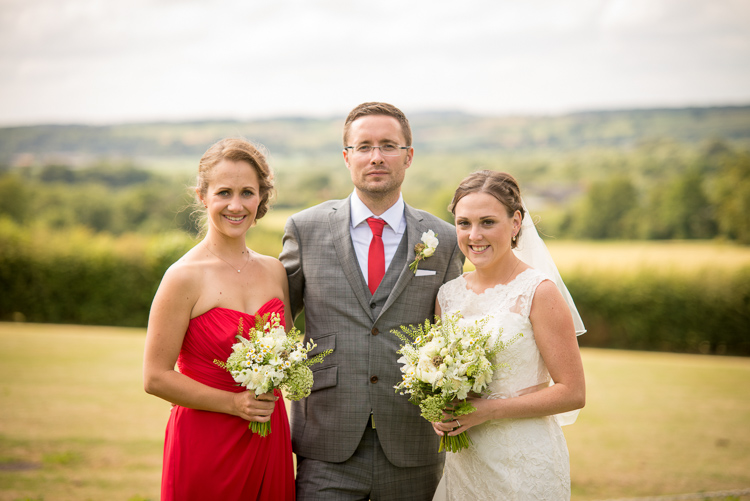
    Group photos robert sail 1

    If the couple email back a much larger list of shots to take, I will normally have a chat with them, discussing whether or not they are happy to spend potentially a large proportion of their reception doing group photos. In a lot of cases they will not want that, and will reduce their list slightly.

    Re-oder the list – largest groups first

    To make the process as easy as possible, I would recommend you shoot the largest group photos first. As chances are that the same guests/family members will also be in the smaller group photos.

    Here is the re-ordered list, in the way I would shoot them after adding additional requested photos:

    • Bride and groom with everyone (additional shot requested)
    • Bride and groom and friends (additional shot requested)
    • Bride and groom with bride’s family
    • Bride and groom with bride’s parents
    • Bride and groom all parents
    • Bride and groom with groom’s parents
    • Bride and groom with groom’s family (please confirm which family members)
    • Bride and groom with bridesmaids
    • Bride and bridesmaids
    • Groom and best man/ushers
    • Bride and groom and best man/ushers

    Group photos robert sail 2

    Bring several copies of the list to the wedding day and hand these out to ushers or groomsmen. It is very important that you clarify with them, how important it is that they help you. With them helping you organize the group shots, this will give the bride and groom the most time possible to relax and enjoy their day.

    Normally the ushers will help you, as they are often good friends, or related to the bride and groom. They can also help round guests up, preventing you from shouting, or raising your voice to get everyone’s attention. Thus it saves you from becoming that bossy photographer, which no one wants.

    Work through the shot list methodically

    Once the ushers have gathered the first grouping in the correct location, I will then get the bride and groom, working through all the group photos on the list.

    It is just a case of crossing them off as you go, so you don’t miss a shoot. For photos with six people or more, I tend to shoot those full length, and for smaller groups I will also shoot those at ¾ length, providing the couple with a bit of variety. Using a clipboard can also go a long way to making you appear professional, and prevent you from misplacing your list when the pressure is on.

    Group photos robert sail 5

    Arranging the groups

    Normally I will pose the bride and groom first, close in together, in the traditional V-style (turned slightly inward toward each other) pose. I will then pose the remaining family members in a single line, equal numbers on either side, getting the guests on either side of the bride and groom to turn in towards the centre.

    I will also ask the guests and family members in the photo to put down any; drinks, cameras, handbags, scarves, coats, etc., and for men to button up the middle button on their jackets. This just helps to make the photo as uniform as possible, by removing any distractions.

    After you have finished taking any of the group photos, always make sure to thank the guests and family members. I didn’t do this when I first started, as I was a little too distracted checking all my camera settings were correct. Definitely make sure you do this as it goes a long way to providing a good experience for the guests.

    Group photos robert sail 6

    Do you have any other tips that work for you when doing group photos at a wedding? Please share in the comments below.

    googletag.cmd.push(function() {
    tablet_slots.push( googletag.defineSlot( “/1005424/_dPSv4_tab-all-article-bottom_(300×250)”, [300, 250], “pb-ad-78623” ).addService( googletag.pubads() ) ); } );

    googletag.cmd.push(function() {
    mobile_slots.push( googletag.defineSlot( “/1005424/_dPSv4_mob-all-article-bottom_(300×250)”, [300, 250], “pb-ad-78158” ).addService( googletag.pubads() ) ); } );

    The post Reducing the Stress of Group Photos at Weddings by Rob Sail appeared first on Digital Photography School.


    Digital Photography School

  • How to Pose and Angle the Body for Better Portraits

    anglesfinalimageSM

    This is the final, edited image given to the client.

    One of the best ways to make a living with photography is to photograph people. People need photographs of themselves for their business, conferences, publications, acting, and more. When they come to you to have their photo taken, they trust you to make them look good. That is really one of the biggest parts of your job as a photographer, to make your subject look great.

    When someone hires you to take portraits or head shots of them, it’s important you understand how to pose them, and angle the body toward the camera. By understanding this, you will also be able to work more efficiently, which will benefit both you and the client. You have to remember that most people don’t like to have their photo taken, so you want the process to move along swiftly.

    I have compiled a series of photos, to give you a visual of the slight changes that can be made to create a more pleasing portrait. These are straight out of the camera, no post-processing or touch ups have been done. The model in the photographs had professional make-up done before we shot. I recommend if you are photographing a female client, that you refer them to a make-up artist you like to work with, to have their make-up done prior to the shoot. This will make a big difference in the final look.

    Okay, let’s get started.

    Shift their weight

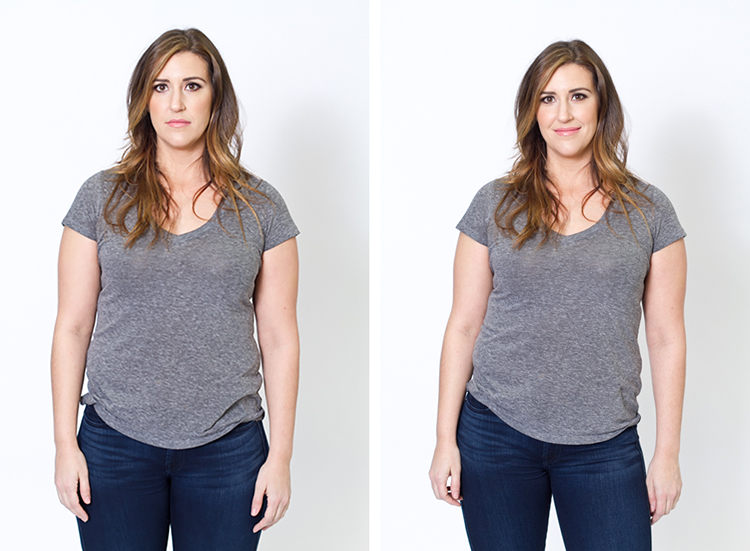
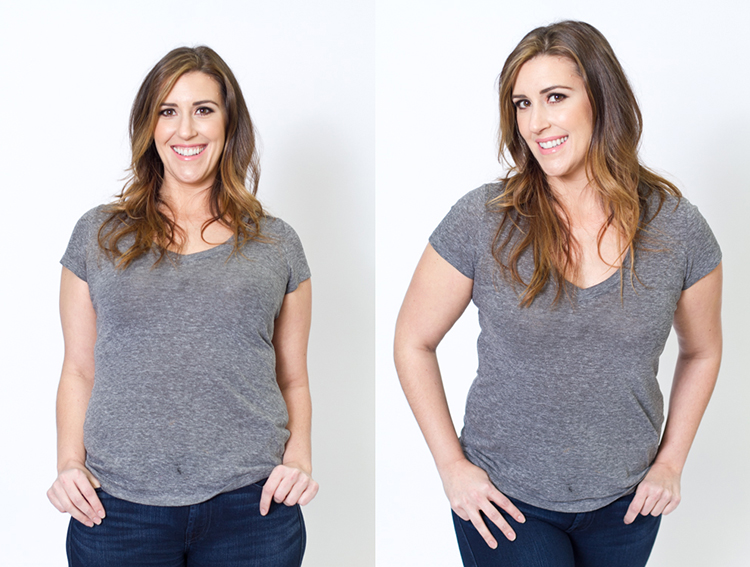
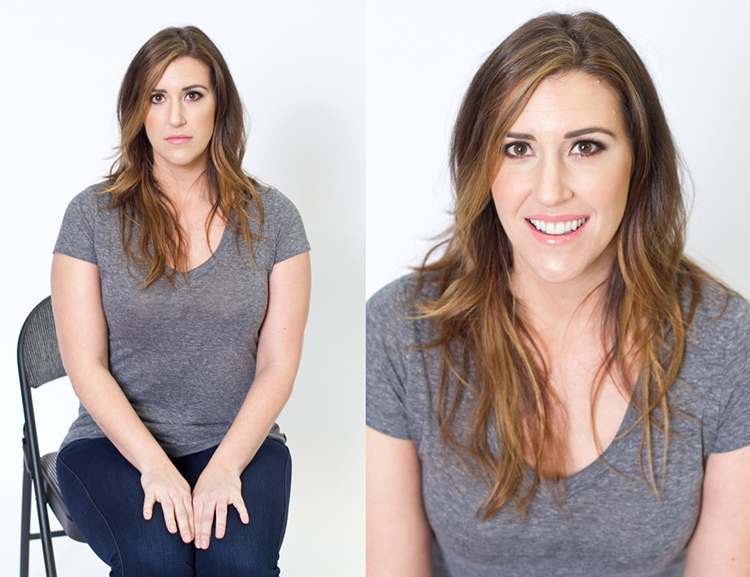
    With the first set of images the model on the left is standing straight on, or square to the camera. Her body weight is on both of her feet equally. As you can see with the image on the right, a subtle shift in her weight makes a difference. All she did was put the majority of her weight on her right leg. This immediately creates a subtle s-curve with her body. The model is still facing the camera straight on, but already looks slimmer.

    1 hippush

    Lean forward from the waist

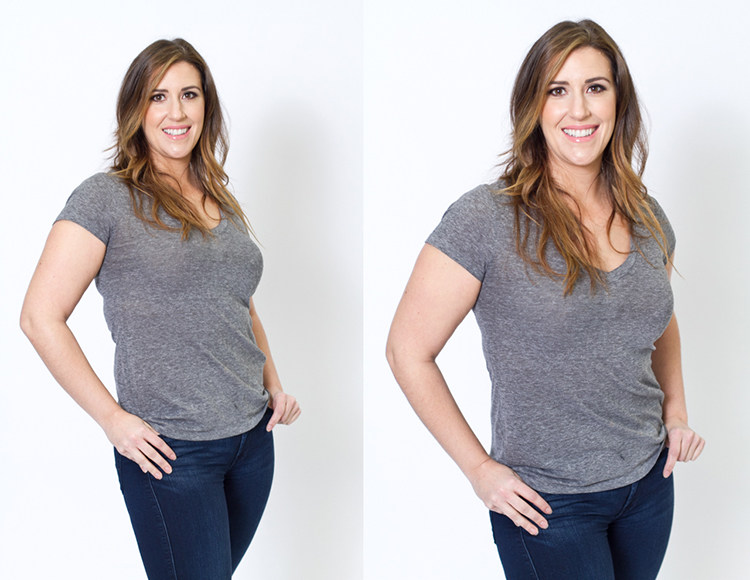
    The model is still facing you straight on or square but we will now have her lean from the waist. With the photo on the left she is leaning away from the camera or backwards, and it’s very unflattering. This angle creates a double chin, and makes her look heavy. Anytime a client does this, correct them right away.

    To make this photo better, just have them lean slightly forward from their waist, toward you. You can see when she did this, in the image on the right side, that she automatically angled her head and shifted her weight on her legs. You now have a much more flattering pose.

    2 leanback

    Weight on the back leg

    Now adjust the model once more. Have her shift her weight to her back leg. In the examples below the model shifts her weight to her left leg bringing the right one in front. With the image on the left you again see how when she leans backwards or away from the camera it looks awkward and unnatural. Have the model make the simple adjustment of either standing up straighter or have them add a bit of lean toward you as seen in the photo on the right.

    3 leanbackforward

    Cross arms

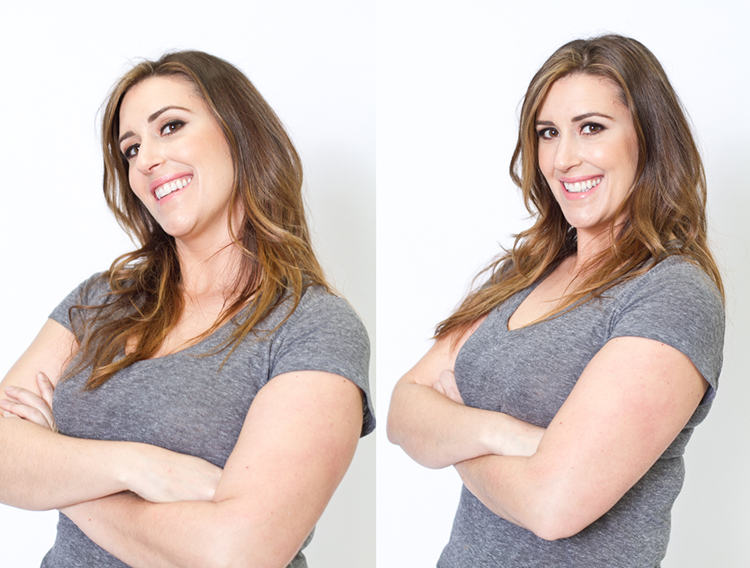
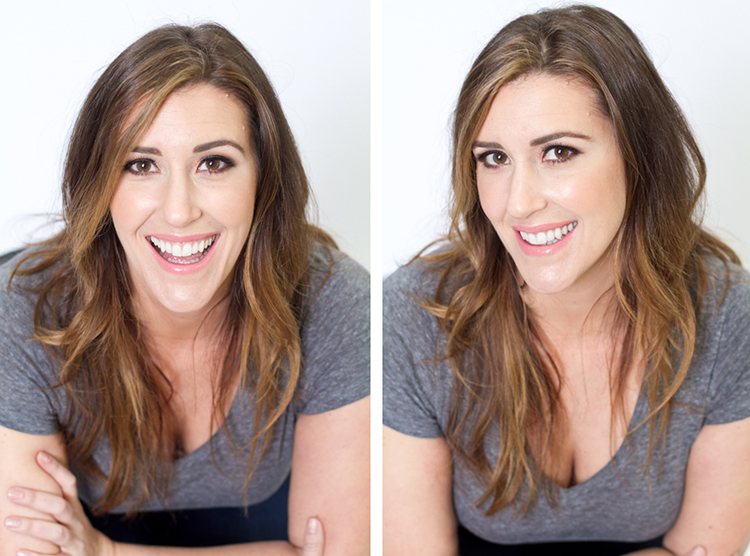
    A very popular pose for business head shots, is having your model cross their arms. This creates a feeling of confidence and strength for the viewer. It can go wrong though. With the image on the left side below, the model angles her head backwards. This mistake is more common in women since they seem to like to tilt their head for photos. Communicate clearly with your client/model to bring their chin down slightly and forward. This easy adjustment makes a big difference and is the shot your client will want.

    4 armscrossed

    Lean forward again

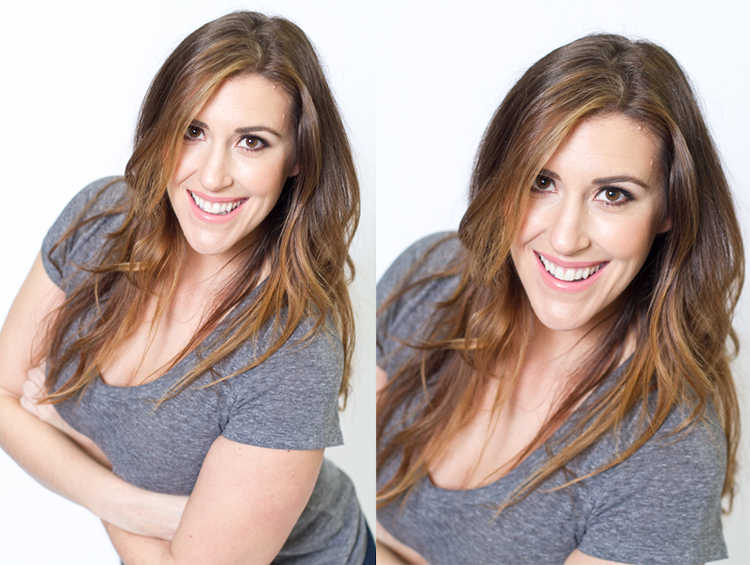
    From the crossed arm pose you can get a very nice close up headshot. The image on the left was shot wider to show you how, and where ,the model is angling her body. Ask them to lean forward from the waist. Most people will think this feels weird, just let them know that it looks great in the final image. Remember most people are insecure with how they look, so always take time to reassure them they look amazing! Then either zoom-in tight with your lens, or step in closer to get a beautiful portrait.

    5 leanforward

    Sitting poses

    Let’s move on to portraits while your model/client is sitting down. Having your model/client in this sitting position places you at the angle above them. That means you will be shooting at a downward angle, which is very flattering for most people.

    The first step you have to take, is to have your model sit on the edge of the chair. You do not want them to be sitting comfortably, where they lean all the way back. With the image on the left (below), the model is sitting on the edge of the seat, feet on the floor and shoulders square at the camera. Even though it is not the best angle, if you crop in tight, you can still create a nice portrait with the focus being on the eyes, as seen with the image on the right.

    6 chairpose

    With your model still sitting in the chair, have him or her place their elbows on their knees. Arms can be crossed or not, play around with both. This forces the model to have to look up at you, taking away any issues with the neck. Make the image better by having your model angle their face slighting to the left or right as shown with the right side image. Remember these are tight crops, focusing on the eyes and smile.

    7 sitandleanforward

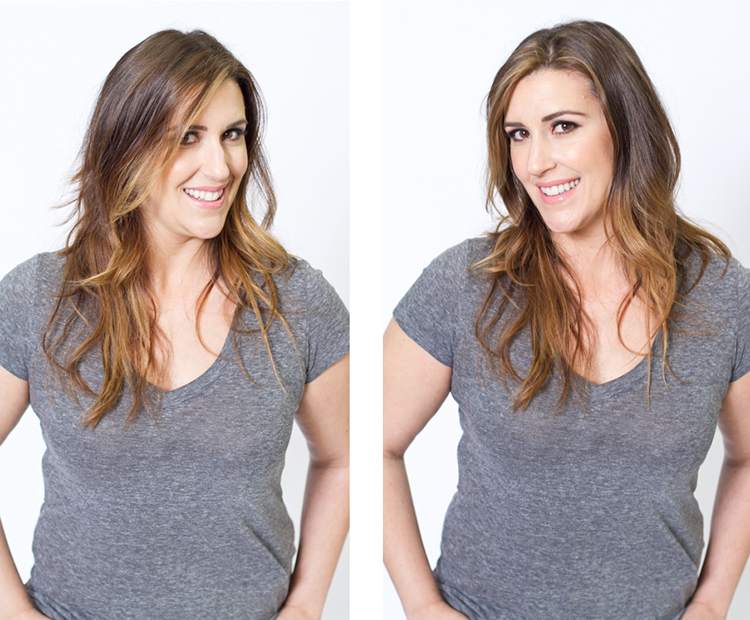
    The last example shows the model’s “good side”. We all have one side that is better than the other. It is not usually visible with the naked eye, so please be sure to always photograph your model from the left, and the right sides. This is clearly shown with the model below. Her good side is when she angles her face to the right, and her left side is more visible (the image on the right). You can see more of her face, her neck looks better, both eyes are visible, the hair falls naturally, and her nose has a more flattering angle.

    8 goodside

    When repositioning your model, remember to shoot that pose from each side. Until you get good at recognizing which is your client’s good side just by looking at image preview on the camera, always shoot from the left and the right.

    It’s easy to see how a simple adjustment of angling the body can result in better portraits. An good rule of thumb to remember, is to have the model angle one shoulder toward you, and have them place their weight on the back leg. This will immediately make them look slimmer. Of course, the best way to get better is to get out and practice, practice, practice!

    Have fun shooting! All images were shot in a studio with a 50mm lens, on a white paper backdrop, with one strobe light.

    googletag.cmd.push(function() {
    tablet_slots.push( googletag.defineSlot( “/1005424/_dPSv4_tab-all-article-bottom_(300×250)”, [300, 250], “pb-ad-78623” ).addService( googletag.pubads() ) ); } );

    googletag.cmd.push(function() {
    mobile_slots.push( googletag.defineSlot( “/1005424/_dPSv4_mob-all-article-bottom_(300×250)”, [300, 250], “pb-ad-78158” ).addService( googletag.pubads() ) ); } );

    The post How to Pose and Angle the Body for Better Portraits by Alexis Arnold appeared first on Digital Photography School.


    Digital Photography School

  • Sky Slide: L.A. Tower Adds Exterior Glass Chute 1,000 Feet Up

    [ By WebUrbanist in Architecture & Cities & Urbanism. ]

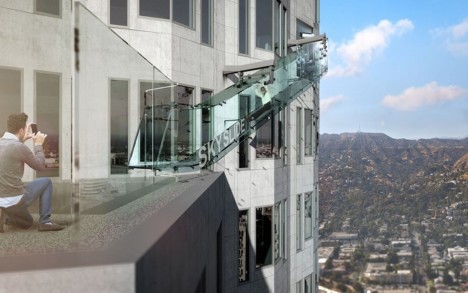
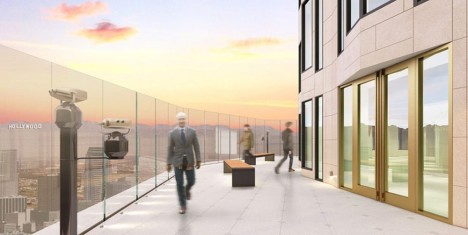
    This undated artist's rendering provided by Overseas Union Enterprise Limited shows a glass slide 1,000 feet above the ground off the side of the U.S. Bank Tower in downtown Los Angeles. The 45-foot-long attraction is part of a $  50 million renovation that will also put a bar and open-air observation deck on the top floors of the 72-story building. (Michael Ludvik/OUE Ltd. via AP)

    A new amusement offering on the 70th floor of the highest skyscraper on the West Coast is stepping up the game, going beyond glass viewing platforms, swimming pools and bridges to boast a fully-transparent outdoor slide for bold adventurers, all at a lofty 1,000-foot elevation.

    aerial sky slide

    Owners of the U.S Bank Tower are adding this extreme sightseeing measure to thrill (or terrify) visitors who wish to simulate the experience of jumping out of a skyscraper. The 36-foot Skyslide will take guests from the 70th down to the 69th floor.

    skyscraper glass slide viewing platform

    The so-called Skyslide is part of a new observation deck expansion that will charge $ 25 per ticket, or another $ 8 to ride the side of the scraper via a trap door.

    us bank tower

    Attached by minimal metal supports, the clear glass will give stunning views of the surrounding city, at least for those brave enough to keep their eyes open on the way down. Meanwhile, on the East Coast, visitors can experience a similar thrill in slightly less overtly-dangerous environs, touring 50 years of history in 1 WTC elevator ride.

    Share on Facebook


    [ By WebUrbanist in Architecture & Cities & Urbanism. ]

    [ WebUrbanist | Archives | Galleries | Privacy | TOS ]

    WebUrbanist

  • Outside The Blocks: 12 Coldly Abandoned Ice Factories

    [ By Steve in Abandoned Places & Architecture. ]

    abandoned-ice-factory-1a
    Ice ain’t all it’s cracked up to be and neither are these obsolete & abandoned factories that once made it, as these 12 examples coldly show.

    abandoned-ice-factory-1c

    abandoned-ice-factory-1b

    Judging by their architecture alone, many abandoned ice factories can be dated back to the late nineteenth and early twentieth centuries – an era before the advent of economical household and commercial refrigeration. Home iceboxes, icehouses, fishing boats and ice cream producers had to acquire ice from somewhere, and that somewhere was the local ice factory.

    abandoned-ice-factory-1d

    abandoned-ice-factory-fire-1a

    abandoned-ice-factory-fire-1b

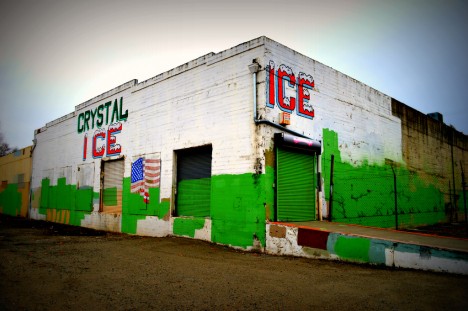
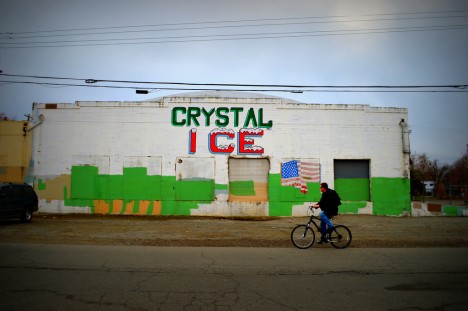
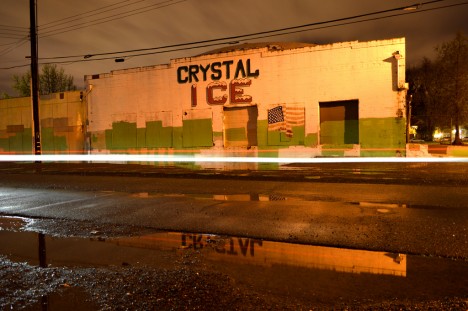
    Take Crystal Ice in Sacramento, California. Built in the early 1920s, the iconic local landmark was gutted by fire in November of 2015, likely derailing or at least substantially affecting extant plans for redevelopment as the Ice Blocks urban retail spaces project. Flickr user Jim Jackson (AxonJaxon) captured the former ice factory in comparatively better days – February of 2014 to be exact.

    Nice House

    abandoned-ice-factory-2b

    abandoned-ice-factory-2a

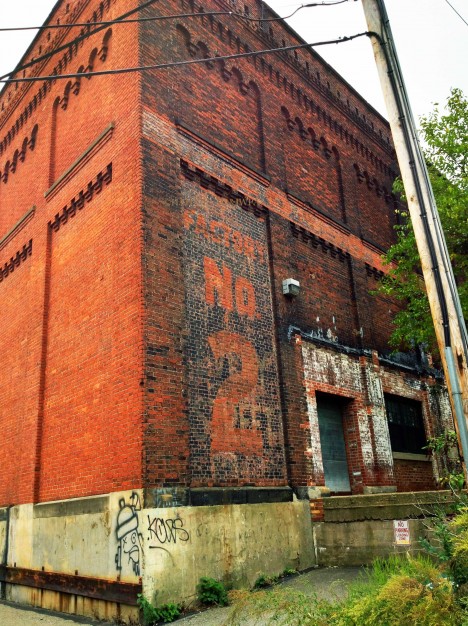
    The former Consolidated Ice Company Factory No. 2 located in Pittsburgh, PA’s Lawrenceville neighborhood opened in 1907 and closed in 1951. Hard to believe the factory wasn’t bought, demolished or re-purposed over the subsequent half-century but hey, such is life in the Rust Belt. On the bright side, the ice factory and its associated two-story office building was added to the National Register of Historic Places in the year 2000 and a portion is now being used by Ice House studios.

    Chilling

    abandoned-ice-factory-3a

    abandoned-ice-factory-3b

    abandoned-ice-factory-3c

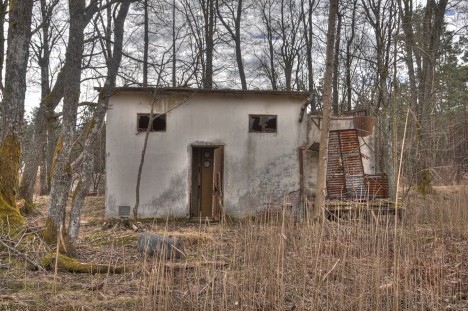
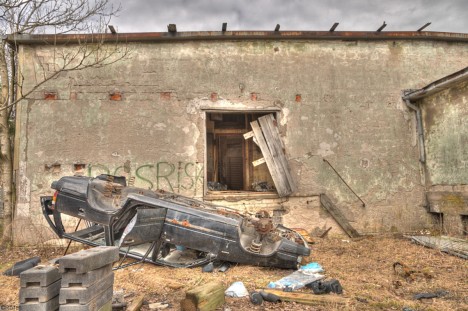
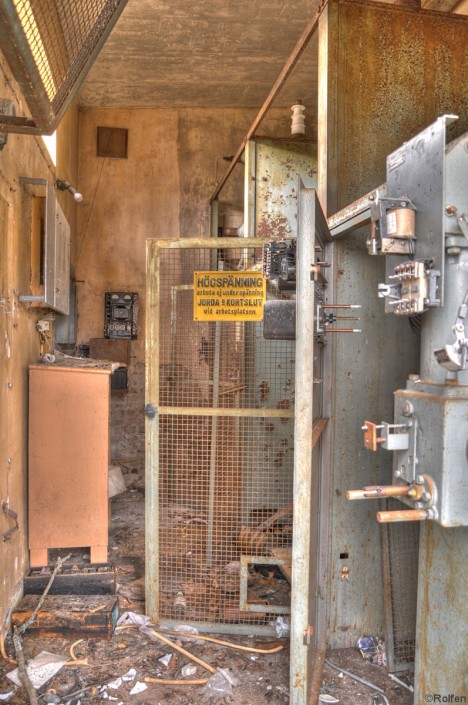
    Flickr user Rolfen captured the ruins of an abandoned ice factory in Öjersjö (near Gothenburg), Sweden in April of 2010. The photographer’s crisply detailed HDR images don’t detract from the overwhelming eeriness of the place – if anything, they enhance it!

    Icy Hot

    abandoned-ice-factory-4a

    abandoned-ice-factory-4b

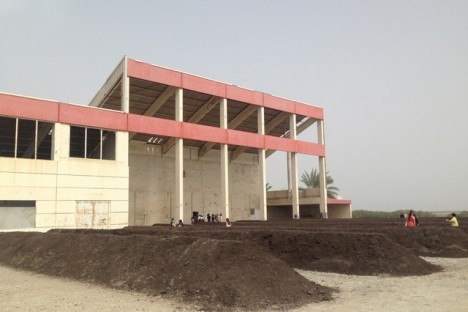
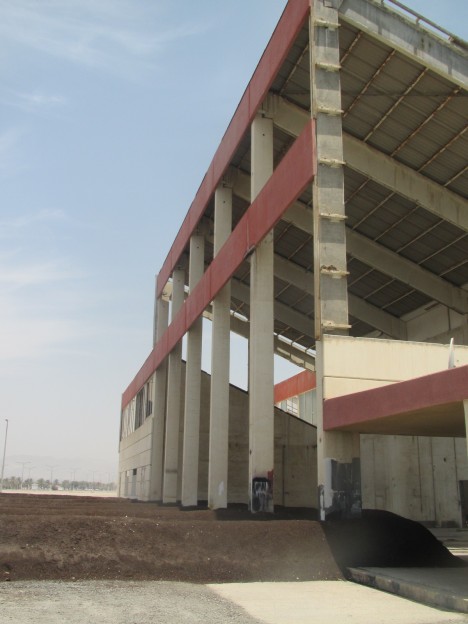
    You’d think a place like Sharjah in the blisteringly-hot United Arab Emirates would do whatever it takes to keep their ice factory functioning… well think again. The abandoned Kalba Ice Factory now functions as an art exhibit space, presumably air conditioned.

    abandoned-ice-factory-4c

    abandoned-ice-factory-4d

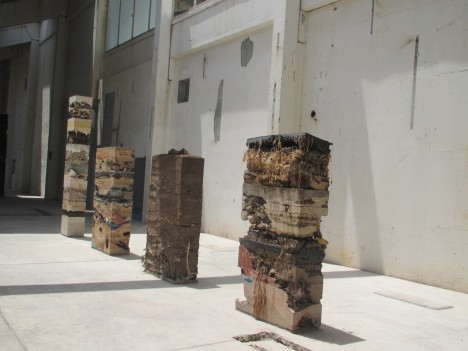
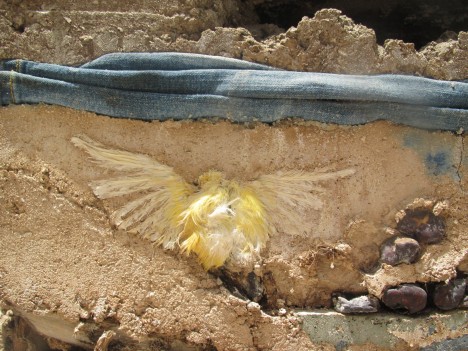
    The 2015 Sharjah Biennial 12 held at the abandoned ice factory featured a series of artificial columns composed of “natural elements such as leaves, bark, shells, coral and dead birds, alongside human consumer products in the form of plastics and deformed sport shoes.” Wait, dead birds??

    Next Page – Click Below to Read More:
    Outside The Blocks 12 Coldly Abandoned Ice Factories

    Share on Facebook


    [ By Steve in Abandoned Places & Architecture. ]

    [ WebUrbanist | Archives | Galleries | Privacy | TOS ]

    WebUrbanist

  • ‘Details matter’: Ian Goode on visual storytelling

    Ian Goode has over 12 years of experience working in advertising, and until recently owned a production company that specialized in photo illustration and compositing. He has a keen eye for the subtle influences that details can have on an image as a whole, and on the story that it tells. In his PIX 2015 talk, he brings his perspective from advertising to the creation of any imagery, stressing the importance of storytelling in photography and the elements of a photo that can contribute to a strong narrative. 

    Articles: Digital Photography Review (dpreview.com)

  • How to Use the Hue Saturation Adjustment in Photoshop – a Video Tutorial

    Learning to understand and master the hue/saturation settings in both Lightroom and Photoshop can help you take your editing to the next level. If you want to see how it’s done in Lightroom check out: Understanding the HSL Panel in Lightroom for Beginners.

    Hue Saturation Adjustments in Photoshop

    If you prefer Photoshop, watch this video from Phlearn on how to use the Hue/Saturation adjustment tools in Phtoshop to change colors both globally, and locally in your image. He also goes over the Colorize function, and painting on your image with a color.

    Have you experimented with Hue Saturation in Photoshop? Tell us what you’ve learned, and you’ve applied it to your images. Share the in the comments below as well.

    googletag.cmd.push(function() {
    tablet_slots.push( googletag.defineSlot( “/1005424/_dPSv4_tab-all-article-bottom_(300×250)”, [300, 250], “pb-ad-78623” ).addService( googletag.pubads() ) ); } );

    googletag.cmd.push(function() {
    mobile_slots.push( googletag.defineSlot( “/1005424/_dPSv4_mob-all-article-bottom_(300×250)”, [300, 250], “pb-ad-78158” ).addService( googletag.pubads() ) ); } );

    The post How to Use the Hue Saturation Adjustment in Photoshop – a Video Tutorial by Darlene Hildebrandt appeared first on Digital Photography School.


    Digital Photography School

  • Searching for Paddling Water in Southern Colorado – Part 1

    I paddled all winter in Fort Collins and northern Colorado: Horsetooth Reservoir, South Platte River, St Vrain Creek. One day in late February I decided to check some paddling waters in southern Colorado for a change. Paint Mine Interpretive Park […]

    paddling with a camera

  • The 3Pod P3COR Tripod and SH-PG Ball Head Review

    In one of my previous articles, while reviewing the Nitz Strap heavy-duty camera strap, I mentioned that straps fall into the category of accessories most of us photographers hate to spend money on. We know that we need them, and we know that we usually get what we pay for, but our minds don’t connect the piece of hardware that doesn’t technically take the image we’re capturing, and the image itself.

    Tripods seem to fall in that category as well. We know that a sturdier tripod can lead to a sharper, clearer image, yet we cringe at the thought of dropping $ 200, or more, on one. My first tripod was a wobbly Velbon50 that I picked up for $ 10 at a local garage sale. It helped me along through my first landscape images, but I didn’t actually think about the fact that my images could suffer from using unsturdy equipment.

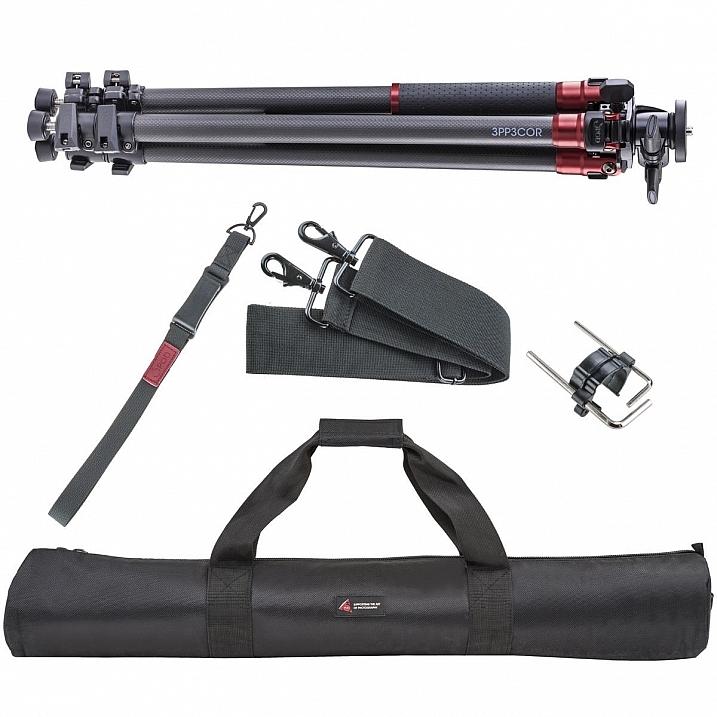
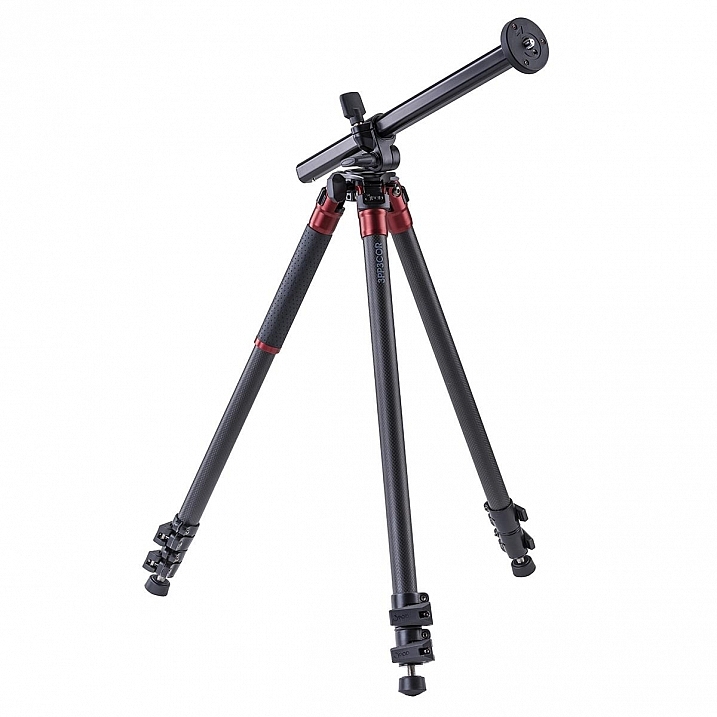
    3pp3cor_12

    Image courtesy Adorama and 3Pod

    Of course, the images from less sturdy tripods can be perfectly acceptable, and you can make the argument that there are some excellent tripod setups to be had for $ 100 or less. But, once you’ve used a beast of a piece of hardware, such as the 3Pod Orbit 3 Carbon Fiber setup I’ll be discussing here (see photo above), it’s really hard to go back, and makes you wonder why you didn’t buy something this solid in the first place.

    When I received my tripod (Orbit 3 Section Carbon Fiber, P3COR) and head (Pistol Grip Ballhead, SH-PG) from 3Pod, the first thing I noticed was the heft. Pulling the tripod itself out of the box, I got the feeling I was handling a piece of military equipment – tough and rugged.

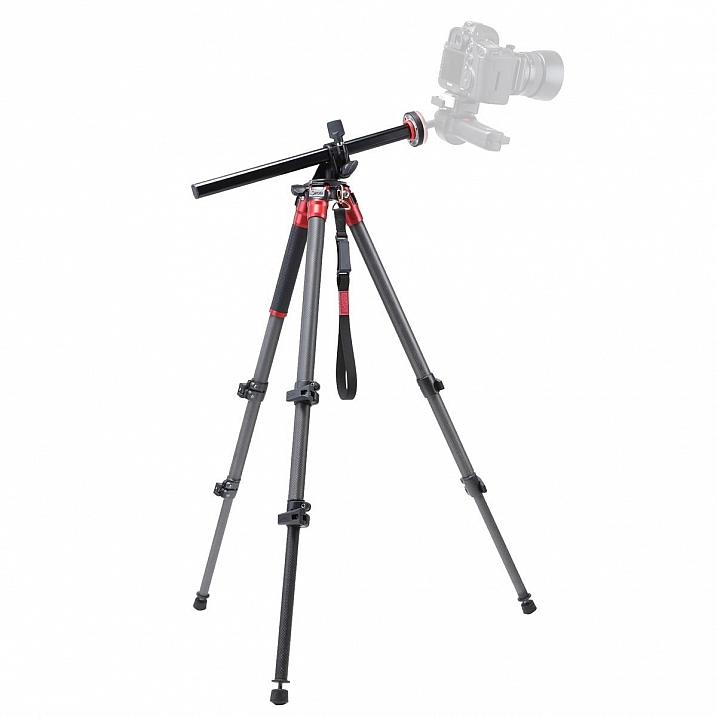
    3pp3cor

    Image courtesy Adorama and 3Pod

    The tripod weighs in at 4.25 lbs. (1.9kg), while the head was a considerable 1.85 lbs. (0.84kg) so it’s clear from the beginning, this isn’t a nimble photographer’s setup. The P3COR is meant to be an absolute oak, to mount heavy camera and lens combinations on top of, without so much as a wobble. Carbon fiber is the material choice (lighter and sturdy, but more costly) for this tripod, as opposed to the usual aluminum setup.

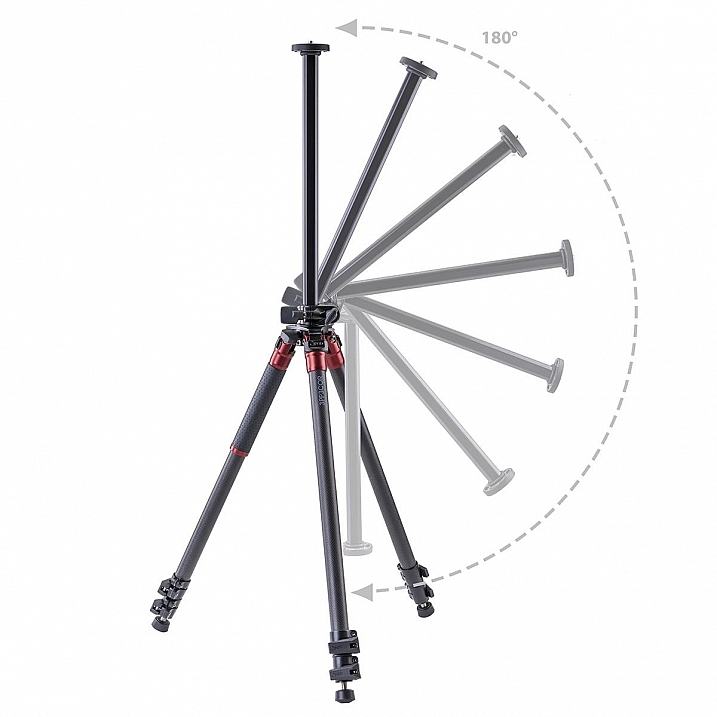
    3pp3cor_2 3pp3cor_4

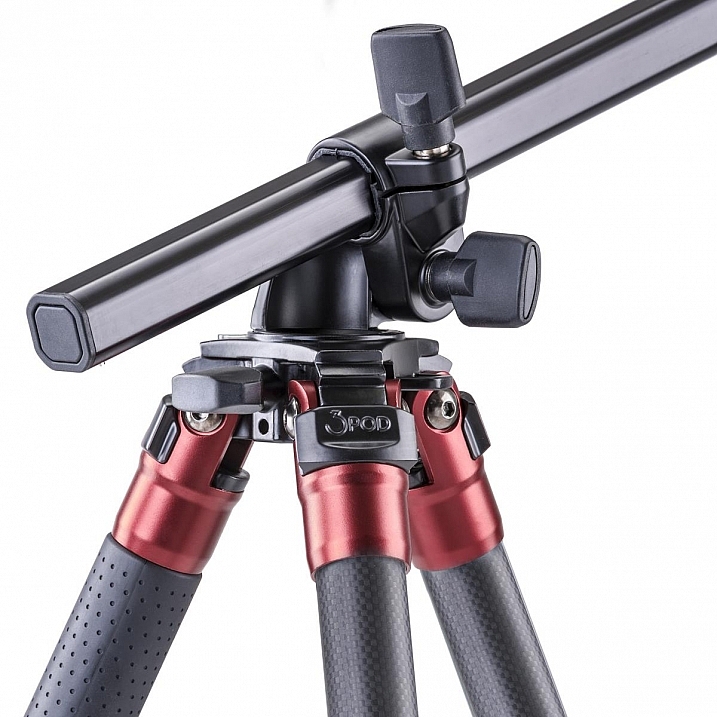
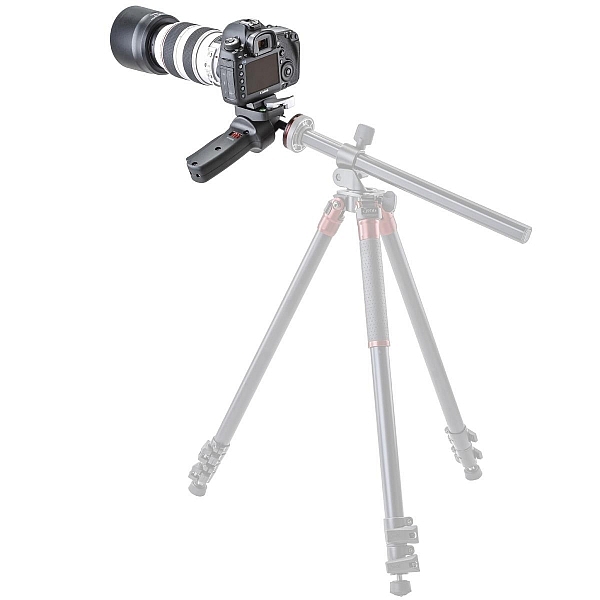
    The tripod features the Orbit Overhead Shot System, which means the vertically-adjustable center column, and its accompanying standard direct-mount plate, can be pivoted at almost any angle (see photos above, images courtesy Adorama and 3Pod), allowing for some interesting composition possibilities.

    013016__myshot-600

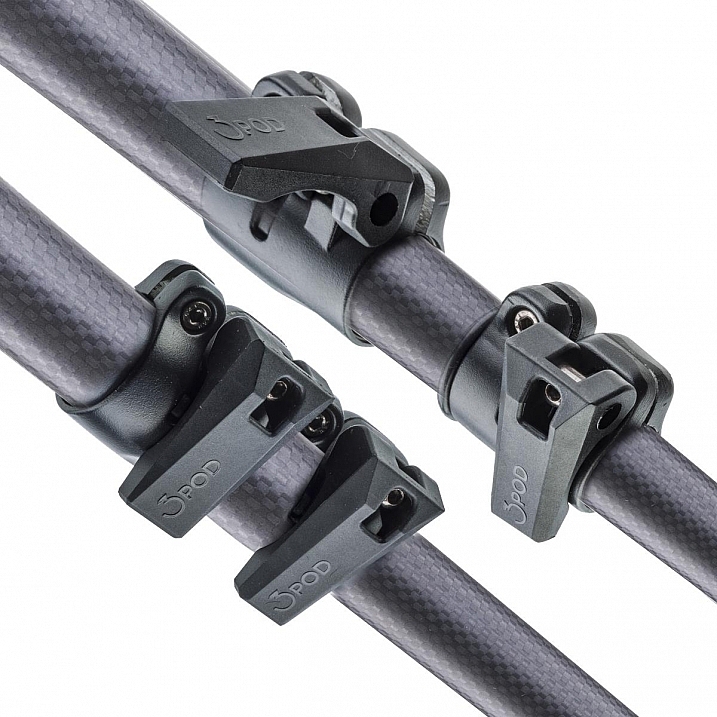
    The three carbon fiber legs are rated to hold 18 lbs. (8.16kg), and the unit can be extended to a maximum usable height of just over 69 inches (1.75m), while collapsing to a very manageable 28.5 inches (0.72m). The legs use a standard flip lock, for raising and lowering, and they work very well. The locks aren’t too simple to disengage, but don’t take a ton of strength either, making them easy to manage while giving you peace of mind.

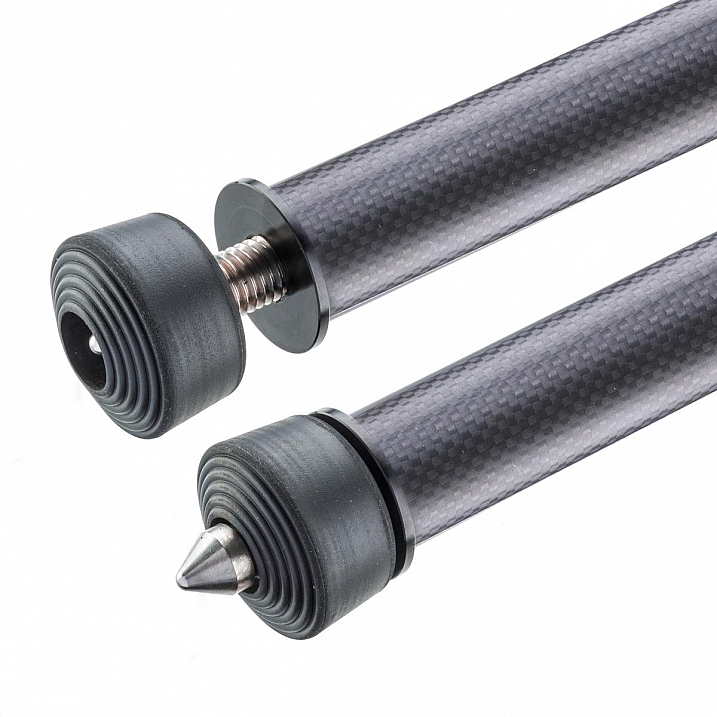
    The screw mount itself is reversible from 3/8″ to a 1/4″  variety, by flipping the mount block upside down. I found the mount easy to remove and lock, and my Canon 60D felt very sturdy when locked into the mount. Coverable foot spikes allow you to ensure stability in any situation, from dirt, rocks and sand, to smooth indoor floors, without worrying about damaging any sensitive surfaces.

    3pp3cor_6

    Attractive appearance (Image courtesy Adorama and 3Pod)

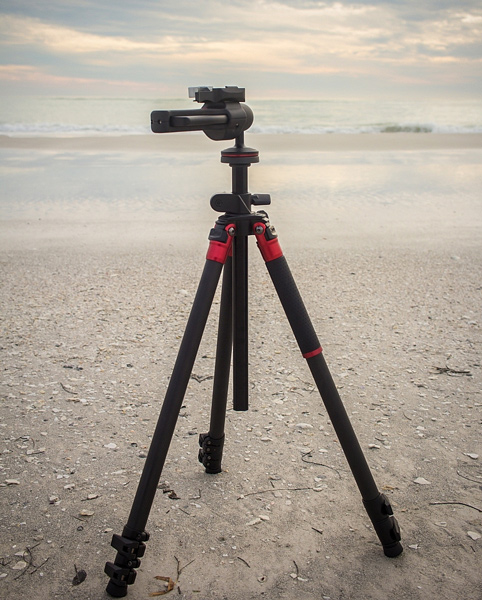
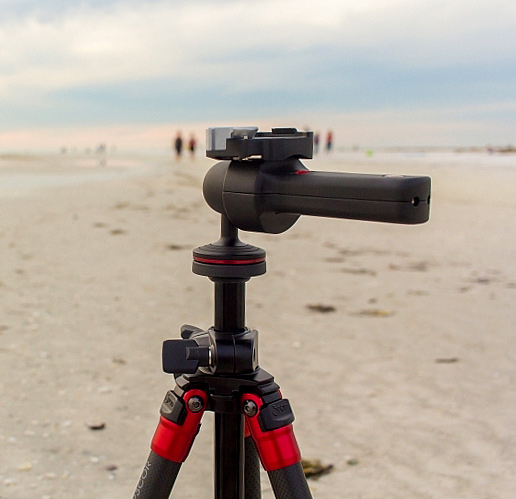
    With appearances having absolutely no impact on the functionality of a tripod, it must be said that this particular 3Pod model is beautiful, with metallic red color accents, against dark carbon fiber pieces. An attention-getter at the local beach, let me tell you!

    013016__myshot-3-cropped

    013016__myshot-4

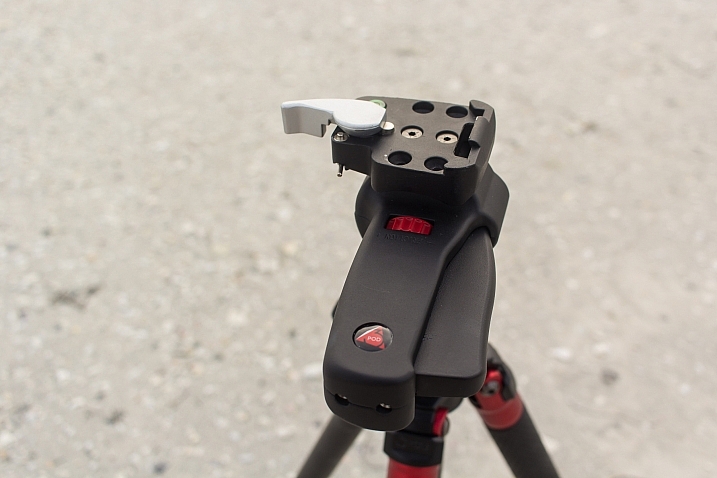
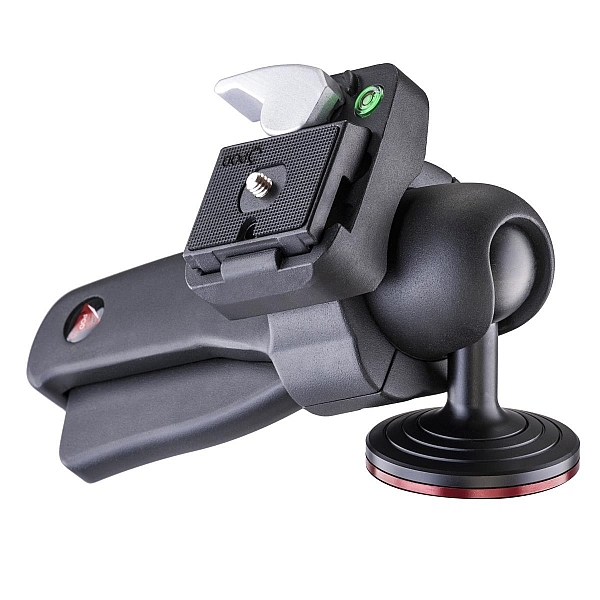
    This was my first experience with a pistol-grip type tripod head, and let’s just say I’m sold on the concept. The 3Pod SH-PG is a delight to use. No more hassling with various screws on various planes of movement to get the perfect horizontal and vertical positions; simply squeeze the trigger on this unit, adjust to the desired angle, and release. The position is set in stone, and you’re free to concentrate on your primary focus, taking a great picture.

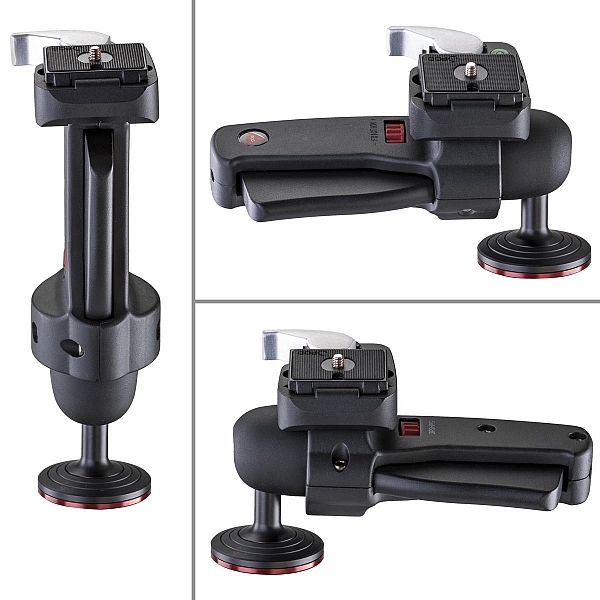
    The advantage of this setup, is the ability to compose your image with one hand, freeing up the other to operate the camera itself. The mount is situated directly on the ball, and can be moved to allow for several configurations, including left-handed, right-handed, and traditional joystick orientation (see example photos below). A thumb-operated dial on the grip allows for modifying tension within the handle; lighter camera setups can use less tension, for more precise adjustments.

    3pshpg_11

    Image courtesy Adorama and 3Pod

    3pshpg_04

    Image courtesy Adorama and 3Pod

    The rotation of the ball head is a full 360 degrees, with -20 to 90 degrees of tilt. The head features the expected quick-release plate, and a bubble level, separate from the tripod body. The head itself weighs in at 1.85 lbs. (0.84kg), and supports up to 11 pounds (4.99kg) of camera body and lenses, although it feels as if it would support more weight.

    I tested the head and tripod legs at a couple of different locations, as well as indoors. I was pleased at how well the unit gripped all surfaces. The legs predictably sank and settled perfectly into beach sand, as well as a grassier area just inland. I place the tripod in a rather sandy/muddy situation as well, and again, found the support for my camera to be very sturdy. Finally, covering the adjustable leg spikes allowed me to use the tripod indoors in a carpeted area, with no worry of damage to the fibres.

    3pp3cor_10

    Carbon fiber legs with flip lock mechanisms (Image courtesy Adorama and 3Pod)

    3pp3cor_11

    Spikes and covers on the legs (Image courtesy Adorama and 3Pod)

    I was met with the usual high winds on the beachfront, and found I was able to capture standard shots, as well as long exposures without any issue. Images were crisp and clear. As solid and hefty as the unit is, I was able to collapse it down to its smallest size, and carry it over my shoulder with my 60D still attached, for the long walk back to the parking lot, fairly easily.

    This particular setup will set you back $ 249.95 USD for the tripod and $ 39.95 USD for the pistol-grip head. Many photographers won’t scoff at a $ 300 USD entry price for a very solid piece of hardware, but some beginners/enthusiasts may not feel such a price is doable for their first tripod. As we discussed in the beginning of this article, some accessories have qualities that reflect their price point, and we see that here with 3Pod’s offerings.

    3pshpg_1

    Image courtesy Adorama and 3Pod

    At the end of my review period, I boxed up the 3Pod with a bit of a heavy heart, as I had no desire to send it back. For me as a photographer with a focus on landscape and nature, the Orbit 3 and pistol grip head are the perfect combination, and I can see how owning this particular setup will make my photography immensely easier, and therefore more enjoyable and satisfying. Which means one thing – I’ve got a new spot in my budget for a purchase this year.

    Have you used 3Pod tripods and heads before? What has your experience been? Sound off below and let us know how these quality pieces of hardware have helped your photography.

    Editor’s note: these products were loaned to our author by Adorama at no cost, but in no way influence Tim’s review and opinion of this tripod and head combination.

    googletag.cmd.push(function() {
    tablet_slots.push( googletag.defineSlot( “/1005424/_dPSv4_tab-all-article-bottom_(300×250)”, [300, 250], “pb-ad-78623” ).addService( googletag.pubads() ) ); } );

    googletag.cmd.push(function() {
    mobile_slots.push( googletag.defineSlot( “/1005424/_dPSv4_mob-all-article-bottom_(300×250)”, [300, 250], “pb-ad-78158” ).addService( googletag.pubads() ) ); } );

    The post The 3Pod P3COR Tripod and SH-PG Ball Head Review by Tim Gilbreath appeared first on Digital Photography School.


    Digital Photography School

  • What a view: Aukey Super Wide Angle lens quick review

    Aukey is a mobile device accessory maker that has been in the clip-on lens business for quite some time. We’ve had a chance to try out one of the company’s latest models, the ‘Super Wide Angle’ lens which at 238 degrees offers quite an extreme angle of view. Read more

    Articles: Digital Photography Review (dpreview.com)