Samsung has announced a new smartphone image sensor that offers 12MP resolution, 1.4μm-pixel-size and Dual Pixel technology for fast focusing. Interestingly, those are very similar specifications to that of the Sony IMX260 sensor that has been found to be used in Samsung’s new flagship smartphones S7 and S7 edge. Read more
Blog
-
How to Prepare for a Portrait Session: A Few Things Your Photographer Wishes You Knew
Portrait photography is all about the face and can be really intimate and feel a little obtrusive for subjects that aren’t used to being photographed. But the end result can be beautiful and produce a photo that really captures the person. For the photographer there are a few aspects of different types of portrait photography that they wish their subjects Continue Reading
The post How to Prepare for a Portrait Session: A Few Things Your Photographer Wishes You Knew appeared first on Photodoto.
-
Designing for Disaster: 15 Ideas for Preparedness & Response
[ By Steph in Design & Products & Packaging. ]
Aesthetics may not be the first consideration when it comes to emergency items like survival kits, post-disaster housing and relief supplies, but good design can make the difference between clunky, inefficient objects that hamper adequate response and the items that save as many lives as possible, as quickly as possible. Often created after designers witnessed disasters close to home, many of these solutions attempt to build preparedness into our daily lives, making it easy to grab a minimalist kit by the door or pack up a panicked pet at the last minute.
Pet Earthquake Emergency Bag
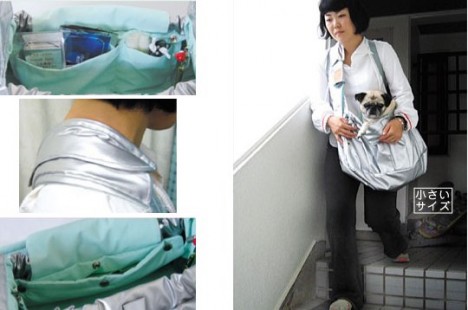

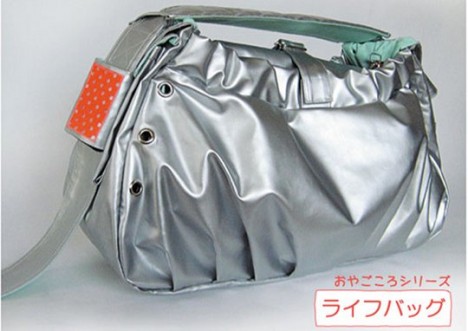
Have you thought about what you’d do with your cat or small dog if a disaster hit and you had to flee on foot? Transporting them in a standard pet carrier would be cumbersome and maybe even impossible. Enter the Pet Earthquake Bag Kit, created in response to the last major earthquake in Japan. Special pockets and straps make it possible to carry up to two household pets. It come sin two sizes and includes a human/pet emergency kit with water, treats, bandages and calming oils.
Minim-Aid Emergency Kit
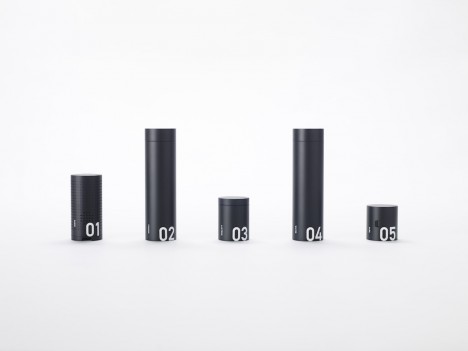
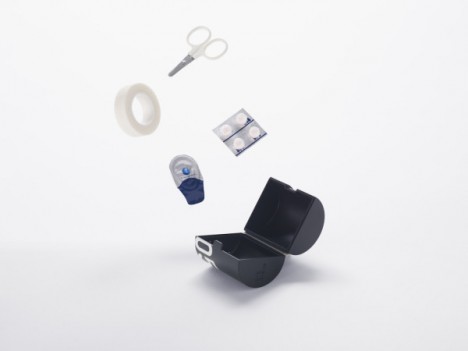
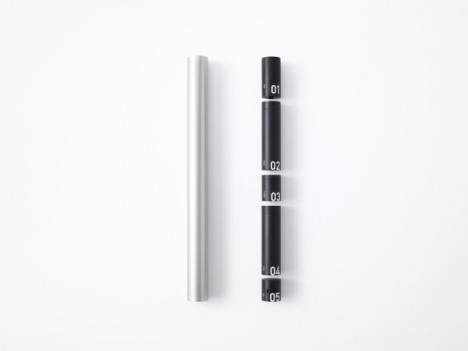
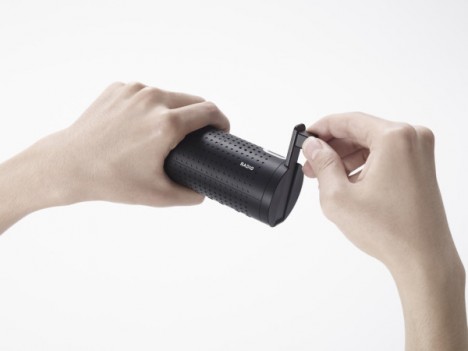
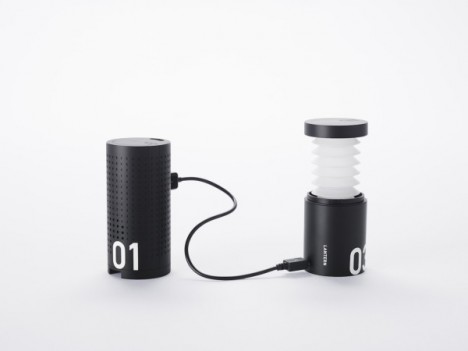
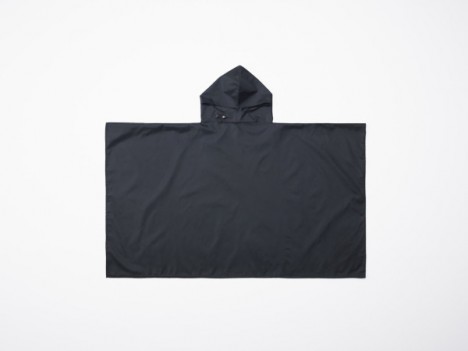
This slim and minimalist stainless steel tube kit by Nendo takes up very little space hanging in a closet or on a hook by the door, but contains a raincoat, radio with gadget charger, lantern, drinking water and whistle. Waterproof and capable of floating, it would be easy to grab and carry at the last minute.
Reaction Housing System Flat-Pack Emergency Shelters
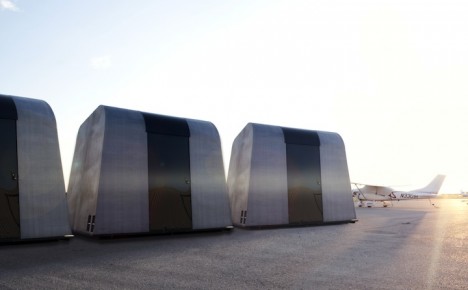
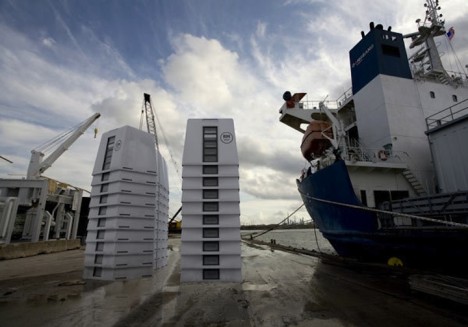
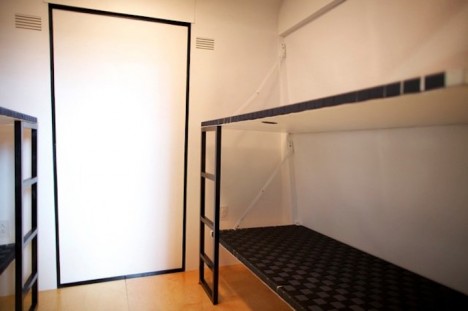
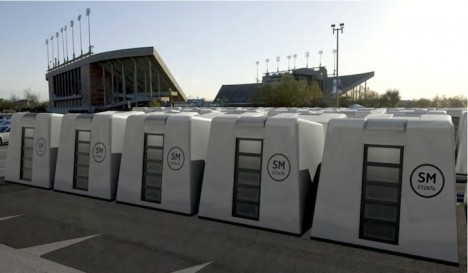
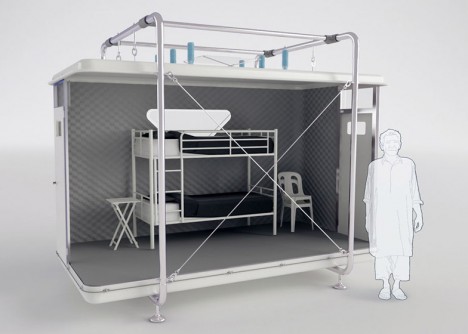
Stackable and easy to ship, the Reaction Housing System is made up of two easy-to-assemble pieces that can be used alone for a single unit or connected to multiple units. Each one can be configured as a living space or office and contain single beds that fold down from the wall and portable power generators. Twenty of them can be stacked on one semi-truck or C-130 Hercules plane, and 1,940 could be moved across the country on a freight train to house 7,760 survivors as quickly as possible. At $ 5K each, they’re far cheaper than most other solutions, like the ones FEMA currently uses.
Life Desk
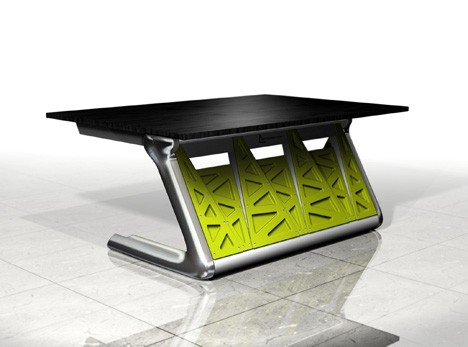
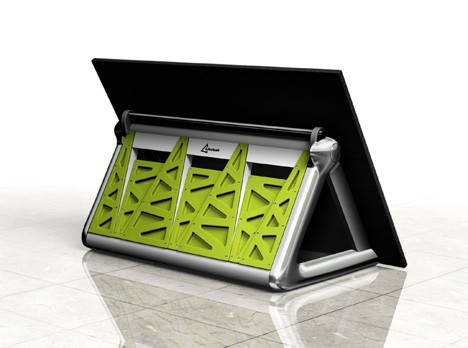
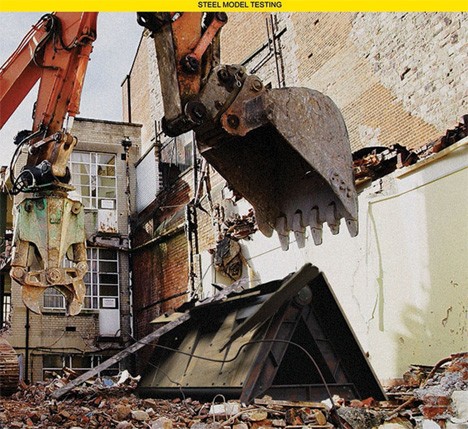
The Life Desk was developed after a number of students were seriously injured or killed by the tables they were hiding under during earthquakes in China. The heavy duty high-strength-steel and nylon desk provides a long-lasting work surface for students and can be quickly folded for shelter in an emergency.
PATCH Urban Survival Kit
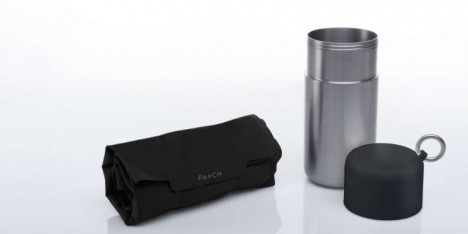
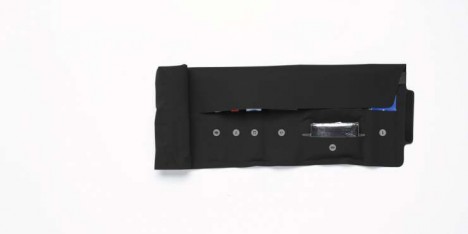
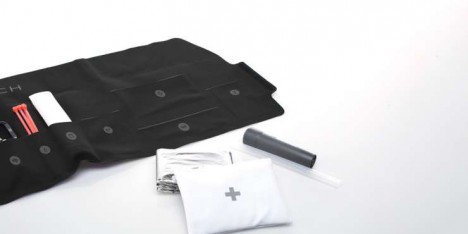
Looking like a small thermos on a key fob, PATCH is an urban survival kit designed specifically for city dwellers in the 21st century, containing all the core elements of a first-aid kit and adding a phone charger, multi-tool, zip ties, emergency blanket and other items you’d be likely to need if some kind of disaster made your surroundings unsafe.
Next Page – Click Below to Read More:
Designing For Disaster 15 Ideas For Preparedness Response
Want More? Click for Great Related Content on WebUrbanist:
Flat-Pack Emergency Shelters Slot Together Like Puzzles
In times of emergency, displaced people need a safe place to live quickly. These emergency shelters could be assembled in just one day by one or two people.
Click Here to Read More »»
16 Lifesaving Temporary Emergency & Disaster Shelters
When disaster strikes, homes are often lost and people left homeless. These temporary shelters provide a place for refugees to sleep until order is restored.
Click Here to Read More »»
Details & Diagrams: $ 1,000 IKEA Flat-Pack Refugee Shelter
Emergency shelters are designed to be short-term solutions, and many cannot withstand rain, wind and sun for more than six months. Yet the average stay in …
Click Here to Read More »»


[ By Steph in Design & Products & Packaging. ]
[ WebUrbanist | Archives | Galleries | Privacy | TOS ]
-
Action packed: Shooting the Sony a6300 in Miami
Sony a6300 shooting experience
by Dan Bracaglia

Shot during an 8 fps burst. Check out the video below for a view through the electronic viewfinder of this burst being captured. Note: image has been cropped in to taste. ISO 250, 1/1250 sec at F5.6. Shot using the Sony FE 70-200mm F4 G OSS at 200mm.
Sony invited us to come out to Miami and field test the company’s new a6300 mirrorless camera. With 4K video capabilities, an overhauled AF system and a new 24MP APS-C sensor, I was more than eager to put the a6300 to the test.
The release of the Sony a6300 further chips away at the advantages DSLRs hold over mirrorless cameras. New sensor and AF system aside, one of the camera’s most noteworthy features is the ability to shoot an 8 fps burst with a live feed of what you are shooting (as opposed to the stop-motion playback of images typically associated with fast burst rates on mirrorless cameras). This live feed during continuous shooting, and the relatively short associated blackouts, are mirrorless firsts and should make it easier to follow the action while you shoot.
As I packed for Miami, I couldn’t help but wonder just how easy it would be to shoot a burst with the a6300 compared to say, a Canon EOS 7D (which also uses an APS-C sensor and can fire 8 fps bursts). If the image above is any indication, my experience shooting bursts with the a6300 were largely quite positive!
First night in Miami, First Impressions
The Sony a6000 was a massive hit. Not only is it the best selling mirrorless camera of all time, but also the best selling digital interchangeable lens camera of all time. These two bits of information were presented to a group of about 30 journalists (including myself) at the start of our first evening in Miami. And regardless of what parameters were considered when the above conclusions were drawn, one thing is clear: Sony anticipates the a6300 to be another top seller.
In terms of design, the body of the a6300 looks nearly identical to its predecessor. But there are several small, yet important changes to the construction. What was previously an assignable AE-Lock button on the back of the a6000 is now a button/toggle combination, allowing for twice the amount of customization. By default, the two positions are AF/MF and EA-Lock. The first thing I did when handed the camera was reassign these two positions to be ‘AF On’ and ‘Eye AF’ (more on that later).
The other notable change is in the material which the a6300 is constructed. Sony moved away from the shiny plastic of the a6000 to magnesium alloy on the a6300, with a finish reminiscent of the a7R II’s construction. The new material certainly adds a more robust-feeling quality to the camera. That said, I suspect it still wouldn’t handle a fall from several feet with much grace.

The a6300 features a new JPEG engine compared to the a6000. ISO 100, 1/320 sec at F5.6. Shot using the Sony FE 70-200mm F4 G OSS at 101mm.
One easily overlooked improvement on the a6300 is the ease of selecting one’s AF point. I like to shoot using the flexible spot. Previously, on the a6000, to move my spot around I needed to first hit the center button on the back click wheel, before hitting any of the direction keys. On the a6300, the center button functions as a toggle. By default a press of one of the direction keys brings up its assigned function. But hit the center button once and the direction keys function as your AF point selector. Whichever function you have the direction keys set to, your choice is sticky (unlike on the a6000), so even if you turn off the camera or pop into the menu, it will default to the last function set (unless you change the mode).
Shooting bursts
The a6300 can shoot bursts as fast as 11 fps with AF or 8 fps with both AF and a live feed. As I mentioned, going into this shooting excursion, what I was most curious about was how easy it would be to follow very fast moving action with the a6300 while firing a burst at 8 fps. I’ve shot sports, both extreme and team, on DSLRs over the years. And while I thoroughly embrace mirrorless cameras and the benefits they offer over DSLRs, I’ve found them difficult to use for sports photography.
Fortunately, the very first shooting event in Miami was at a wakeboard park, the perfect place to put burst shooting and the a6300’s 425-point on-sensor phase-detection AF system to the test.
In the video below, I rigged a Sony RX100 IV up to shoot 120 fps video through the EVF of the Sony a6300 while I fired several series of bursts (incidentally, the a6300 can refresh the EVF at 120 fps as well, bringing it closer to an OVF experience). This should give you an idea of just how easy it was to follow the action, especially considering the fact that I was framing the subject using the RX100 IV’s LCD as I rolled video.
The above video demonstrates the a6300’s live feed during 8 fps shooting, shot through the EVF.
Of course, once I ditched the RX100 IV rig and used the a6300 with the EVF to my eye, I found following the action to be even easier. Nearly as easy as following action with a DSLR, except for the fact that in bright daylight, as a glasses-wearer, even the nicest EVF’s can be difficult for me to keep an eye to for an extended period of time (as is often necessary when shooting sports or action).
Still, the a6300’s live feed during burst shooting is a massive improvement over every other mirrrorless camera I’ve ever used.
Autofocus
Though it took some time to figure out the best AF settings for wakeboarding, I was largely impressed with the a6300’s hit rate of in-focus images at 8 fps. Sony’s subject tracking system (‘Zone’ in the video above) also meant I didn’t need to keep a tight AF point precisely over my subject: the camera automatically chose appropriate points to maintain focus on my subject.
I found keeping my focus area set to either the ‘Flexible Spot’ (Medium or Large) or ‘Zone’ gave me the best results. With the camera set to Continuous AF, I simply panned and kept my AF point or cluster of points over the subject. The larger AF areas gave me some room for error in placement, and the camera took care of the rest by automatically picking appropriate AF points within my selected region to stay on the subject.
Assuming I locked focus at the beginning of the burst, which the a6300 often did, my hit rate was good. I also briefly tried using lock-on AF, where the camera uses a more sophisticated pattern matching system to identify and track a subject around the frame. In my few attempts, the a6300 did a decent job maintaining focus while also tracking wakeboarders through a relatively simple scene (though I wonder whether the a6300’s pattern matching system is specific enough for more complicated scenarios, a problem we’ve encountered before).

Eye AF is very useful for portraiture. This image was shot the second day of the press excursion, when I was concentrated on field testing the G Master 85mm F1.4 and 24-70mm F2.8 lens. ISO 400, 1/50 sec at F2.8. Shot using the Sony FE 24-70mm F2.8 G Master lens at 24mm. As I mentioned earlier, one of the very first things I did when handed the camera was re-assign the AF/MF button to ‘Eye AF’ and the ‘AEL’ button to ‘AF On’. A small toggle on the back of the camera lets you choose which of the two functions the button executes. So when I had a human subject, like in the portrait above, I simply flipped the toggle to ‘Eye AF’ and held the button down until the a6300 locked focus on the model’s eyes (Eye AF – and the camera in general – is far more useful in AF-C, by the way). For non-human subjects, I flipped the switch back to ‘AF On’ and went back to shooting with my selected AF point or area.
When using E-mount lenses, Eye AF performed extremely well, on par with the excellent performance we observed from the Sony a7R II. And like the a7R II, in scenes with multiple faces, you can simply hold down the Eye AF button while placing your selected AF point over your desired subject to prioritize that person (you can even recompose freely if you’re in AF-C). However it is worth noting that Eye AF performance (ability to find an eye) and accuracy on the a6300 seemed to drop slightly when I tested it using the 85mm F1.4 G Master lens.
Low light frustrations (saved by the G Master)

G Master flex: ISO 1000, 1/400 sec at F1.8. Shot using the Sony FE 85mm F1.4 G Master lens. Our second stop on the shooting excursion was an indoor parkour park. Parkour, for those who do not know, is in a sense, urban acrobatics — it requires an incredible amount of gymnastic ability and physical strength and has a dare-devil, DIY-like culture surrounding it.
The park consisted of all sorts of colorful obstacles, foam pits, ramps and gymnastic bars. Unfortunately, being indoors, I had to crank my ISO very high to have a fast enough shutter to capture the action. And because the only E-Mount (non-FE) lens Sony issued each journalist was a 16-70mm F4, shooting wide open still was not all that fast.
Most of what I shot using the 16-70mm was up at ISO 6400 or beyond and frankly, looked pretty noisy and unappealing. Also a problem: Despite cranking the ISO, I still was not quite getting shutter speeds fast enough to freeze the action. So about half way through the shoot, I switched out the 16-70mm for the much faster 85mm F1.4 G Master (which is an FE mount lens). This not only gave me the ability to bring my ISO back down (by opening the lens up), but allowed me to change my perspective on what was happening in front of me. Instead of shooting wide shots of peak action, I instead looked for details.
In retrospect, I wish I had pushed my ISO just a bit further when shooting with the 85mm G Master and stopped down the lens just a little more (especially in the image above). But had it not been for the fast aperture of the G Master 85mm F1.4, I’m not sure I would have gotten any usable action shots at the parkour park.
As an everyday shooter

Tilt and shoot: I much prefer tilting LCD’s to fully articulating ones. It’s a matter of personal taste and one that video shooter may disagree with. But as a primarily stills-shooter, tilting LCD’s are far more unobtrusive as they don’t flip out to the side, doubling the camera width and potentially drawing attention. ISO 6400, 1/160 sec at F2. Shot using the Sony Carl Zeiss Sonnar T* E 24mm F1.8 ZA lens. As day turned to night, I swapped out the the 16-70mm F4 for a 24mm F1.8 (which I forgot to bring to the parkour park). Our final destination for the evening: Miami’s Little Haiti.
Here I wandered around using the a6300 as I would a personal camera, and by that I mean: not trying to test features, but simply looking for interesting compositions and using the camera to the best of my abilities). With the 24mm affixed, the a6300 is a rather nice size, and weighs a mere 626 grams, which is about the same as an a7R II, body only.
While the Sony a6300 is not nearly as lovely to look at or hold as an Olympus PEN-F or Fujifilm X-E2S, it easily out specs both those cameras in every capacity. And honestly, I’ve been hard on Sony design in the past, but the a6300 is no slouch. Between the new customizable toggle on back, the function menu and ample additional customizable buttons, it’s pretty easy to set up the a6300 exactly to your liking. And frankly, having a camera that people aren’t going to “oooh and ahhh” at might mean an easier time getting the shot.
Of course, a front-facing control dial would make a world of difference (the a6300, like the a6000, has a rear control dial as well as a control wheel on the back of the body, but no control dial on front). Furthermore, especially considering the camera’s video-centric features, a touchscreen would be hugely useful. As would the ability to customize buttons for stills vs. video shooting (certain stills functions, like Eye AF or E-Shutter or Drive, are unavailable when shooting movies, so if you’ve assigned buttons to such functions, they all become literally useless in video).
Still, it didn’t take me long to completely forget about what camera I was shooting, and just take pictures. I think this fact is more telling than anything else I experienced in regard to the a6300. Too often cameras can overwhelm a user with options and settings. But a day of shooting with the a6300 got me comfortable enough with the camera, that by evening, we were humming along in unison, each doing our part to make the best image possible, without stepping on each others’ toes.
As a video shooter
Video quality from the Sony a6300 looks quite good. I’m especially eager to further try out the camera’s continuous AF during video capture (be sure to select ‘4K’ quality in YouTube for best viewing).
I didn’t shoot a ton of video over the course of my time in Miami, but I did shoot a few low light clips in Little Haiti. After all, the a6300 can shoot 4K video with full pixel readout and no binning. What does that mean exactly? Good quality, very good quality.
Furthermore, the a6300 offers ample tools to assist in video-making. Like recent a7 cameras, the a6300 offers three AF Drive speed options (slow to fast), and a toggle to adjust AF tracking sensitivity during video shooting. While I did not mess around with subject tracking during video, which still requires you use the antiquated ‘Center Lock-on AF’ function (seriously, c’mon Sony), I did try using face detect during video capture, as well as continuous AF. In both cases, I had the AF Drive speed set to normal, and found the a6300 able to lock focus in a smooth manner, without hunting.
Final thoughts
It’s pretty clear that Sony set out to create a future-proof camera in the a6300, one who’s specs will likely look impressive, even two years down the road. The camera has a lot of fire power, both in the AF and video departments, and initial impressions indicate that everything works as it should. Which is to say, the a6300 is a really impressive little camera.
It’s certainly not going to turn any heads with it looks, but it should give you everything you need to instead turn heads with your images. Which for most, is a much more worthwhile goal.

Making a splash: ISO 320, 1/12500 sec, F5.6. Shot using the Sony FE 70-200mm F4 G OSS at 200mm. -
13 Snow Photography Tips: A Beginner’s Guide
Does your heart jump a little on a beautiful winter day?

Are you ready to run outside and start shooting? I know how you feel, I love snow photography too. Here are a few things to keep in mind:
13 snow photography tips: a beginners guide
The tips in this article will help you get some great photos in the snow, and keep your camera safe.
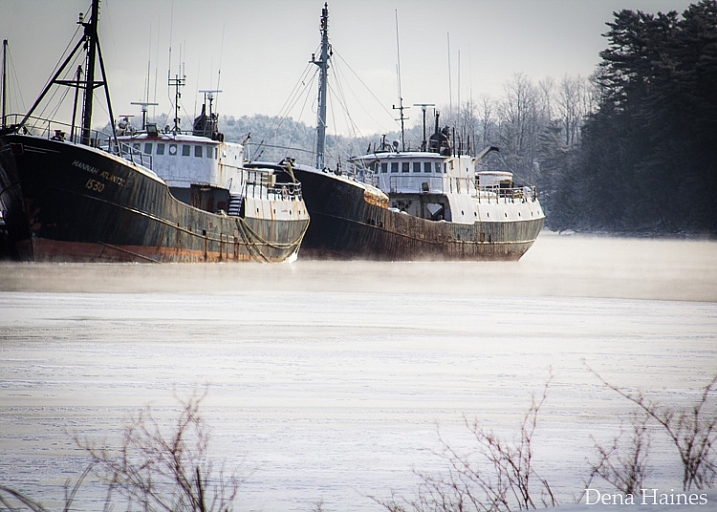
1. Focus on contrast
Autofocus can have a hard time locking on, when everything is white. It helps to focus on something dark, like the bark that’s just below a lump of snow on a tree branch. Your camera’s autofocus system needs contrast to focus on, so a plain white mound of snow may cause issues.

Press your shutter half way. If the focus won’t lock on, move your focusing point to a darker area of the subject, and try again. This usually does the trick.
2. Camera settings
Set your camera to shoot in RAW. When you take photos in RAW, you will have more to work with in editing. JEPG files are already condensed, and don’t allow for much editing. Learn about 5 reasons to shoot in RAW.
Choose Evaluative (Matrix for Nikon) metering. Evaluative metering will do a good job. That’s what I used for all the photos in this post. If it’s really sunny, you may also want to try Spot or Partial metering to see if it handles the light better.
Exposure Compensation – Your camera will try to make snow look gray, so set your exposure compensation to +1 or +2. That will keep the snow looking white. You can also adjust exposure compensation while editing.
3. Shoot in Aperture Priority Mode
Aperture Priority (AV on Canon, A on Nikon) will allow you to quickly change your depth of field. When shooting in Aperture Priority the camera will choose the ISO, (if the camera is set to auto ISO) and the shutter speed, so all you have to do is switch between aperture settings. This is great in cold weather, and allows for a lot of creativity.
4. Capture it fresh
There’s noting like a fresh snowfall.

If you want footprint free snow, you might want to plan which photos you’re going to take, and what order you’ll take them in. This might also mean going out early, before the kids get up.
5. Keep your batteries warm
In cold weather your batteries won’t last long. Charge two, and keep one in an inside pocket. When the one in your camera runs low, replace it with the warm one. Then put the drained one in your pocket, you may be able to use it again once it warms up.
6. Bag your camera
Condensation can form on the outside, and inside of your camera, when you bring it in from the cold. That’s scary, but it’s easy to avoid.
When you are heading out, just bring along a large zip-lock bag. I usually keep one in my camera bag or jacket pocket. When you are ready to go inside, put your camera in the bag, and make sure it’s sealed tight. Then, once you’re in the house put your camera somewhere it can warm up slowly. Once it reaches room temperature, you can take it out of the bag and use it normally.
I leave my camera bag in the car while I’m taking photos. Before getting back into the car, I put my camera in the zip-lock bag, then in the camera bag. This way the camera comes up to temperature slowl,y and condensation doesn’t form.
7. Don’t let the weather stop you
Snowy landscapes look good, in both sunny and cloudy weather.
On cloudy days, when everything is white, include elements that will break up the white, and add interest to your photo. If it’s snowing, use an umbrella to protect your camera. Or if it’s too cold to go out, roll down your car window, grab your shot, and roll it back up.
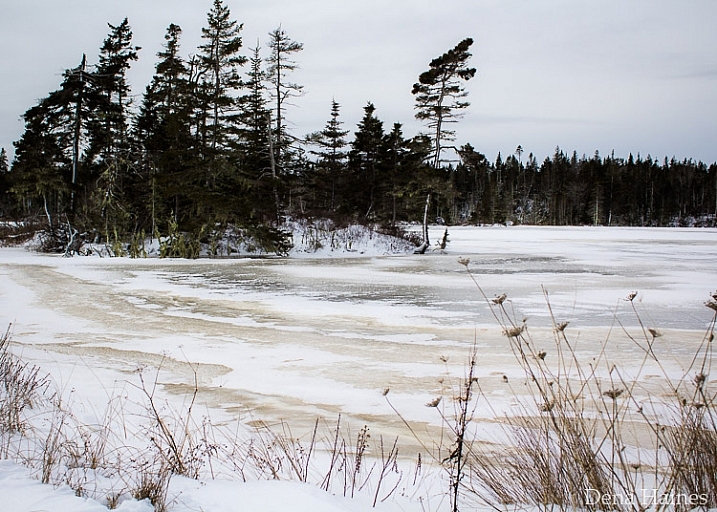
While I don’t take my camera out in super cold weather, some people do. Read more about protecting your camera and yourself in cold weather (by David Shaw who’s in Alaska and knows about cold weather!)
8. Act fast
Snow can change quickly. It can start, or stop falling in an instant. When the sun comes out, snow can start melting really fast too. Those beautiful trees can go from dazzling to drab in no time.

Don’t wait. Get out there and photograph it.
9. Be patient
Light can also change really fast. The sun can go behind a large cloud and totally change how the snow looks. You may need wait for the sun to come out again. This can be hard when it’s cold, but it’s worth it!

Sunshine and shadows, add beauty and drama to a snowy scene.
10. Keep all your images
Don’t delete any photos from your camera, wait until you’re warm and comfy, sitting in front of your computer. You’ll be able to see your photos more clearly, and your fingers won’t freeze.
11. Play with perspective
Shoot from different perspectives. Try to show the way snow blankets the ground, weighs things down, and clings to everything.

Watch out for falling snow. It’s not so nice to have a clump land on your camera.
12. Play with shutter speed
Shutter Priority allows you to choose your shutter speed, while the camera takes care of the rest. With a fast shutter speed, you can freeze falling snow in mid air. With a slow shutter speed, you can turn those flakes into long white streaks.
13. Capture some Bokeh
A sunny winter day, is a great time to create bokeh. With all that sparkling snow and ice, it shouldn’t be too hard.
To create bokeh in your photos, look for a subject that has something bright or shiny in the background. This could be the light reflected off of ice, melting snow or some sunspots. Use a wide open aperture (a small number like f/3 or f/5), and make sure there is some distance between your subject, and the shiny background objects.

With a shallow depth of field (from the wide aperture), your subject will be in focus, but the objects in the background won’t. This will create bokeh. See 28 wintery white snowy images.
Let it snow
Will you be out experimenting on the next snow day? I’m planning on it. Have fun with your snow photography. Experiment with different settings on your camera. Just remember to dress for the weather, and bag your camera.
If you have some snowy photos to share, I would love to see them. I hope you’ll share your tips too. Please add to this article by commenting below.
googletag.cmd.push(function() {
tablet_slots.push( googletag.defineSlot( “/1005424/_dPSv4_tab-all-article-bottom_(300×250)”, [300, 250], “pb-ad-78623” ).addService( googletag.pubads() ) ); } );googletag.cmd.push(function() {
mobile_slots.push( googletag.defineSlot( “/1005424/_dPSv4_mob-all-article-bottom_(300×250)”, [300, 250], “pb-ad-78158” ).addService( googletag.pubads() ) ); } );The post 13 Snow Photography Tips: A Beginner’s Guide by Dena Haines appeared first on Digital Photography School.
-
Samsung NX500 shown as discontinued

The Samsung NX500, which launched in the U.S. early last year, is shown as discontinued on B&H Photo, which may indicate that the camera is no longer being manufactured. However, it’s still available from Samsung’s website and Amazon. If the NX500 has indeed reached the end of its life, it would mark Samsung’s latest move away from the camera market following the company’s recent discontinuation of the NX1 model in Germany and the UK.
Late last year, rumors surfaced claiming Samsung had discontinued its NX1 mirrorless camera model in Europe. Soon after, Samsung representatives confirmed the model has been discontinued in the UK and Germany, citing a ‘gradual decline in demand for standalone digital cameras.’ Adorama now shows steep discounts for the NX1 model, marking the body-only unit down $ 450 to $ 1,049 and the NX1 with 16-50mm power zoom lens a full $ 500 cheaper at $ 1,199.
We’ve reached out to Samsung for confirmation and will update this story when we hear back.
Via: Photo Rumors
-
Sigma 30mm F1.4 DC DN Contemporary real-world sample gallery

Among all its releases at CP+ 2016, Sigma’s 30mm F1.4 DC DN Contemporary lens is the smallest in size, but its wide aperture should help it pack an image quality punch. Designed for Micro Four Thirds cameras and Sony E-Mount, the Sigma 30mm F1.4 uses a stepping motor for quiet autofocus, weighs in at a feathery 265g (9.3oz), and will retail for $ 339 when it’s released later this month.
During a visit to the Sigma factory in Aizu, Japan, we had a chance to test it out in a snowy winter wonderland. The lens is a pre-production sample, and the images were shot on a Sony a7R II in crop mode. We’ve included JPEGs processed from Raw using Adobe Camera Raw (some with and without manual distortion correction), and original Raw files as well, for your viewing pleasure. Check them out and see how the lens stacks up.
See our Sigma 30mm F1.4 DC DN Contemporary real-world sample gallery
-
Review: Think Tank Modular Component Set V2.0
If you’re a photographer who frequently carries lots of gear, and needs it easily accessible to you during a shoot, it’s time to start thinking like Batman! That doesn’t mean donning a cape and mask, but rather making use of a utility belt that allows you to attach various accessories to it, for easy access. Luckily, you need not look any further than the Think Tank Modular Component Set, a customizable waist belt that holds you gear close to you, while taking the weight off your neck and shoulders.
In this review, I’ll take a closer look at the Modular Component System V2.0, and why it’s essential for on-location photographers.
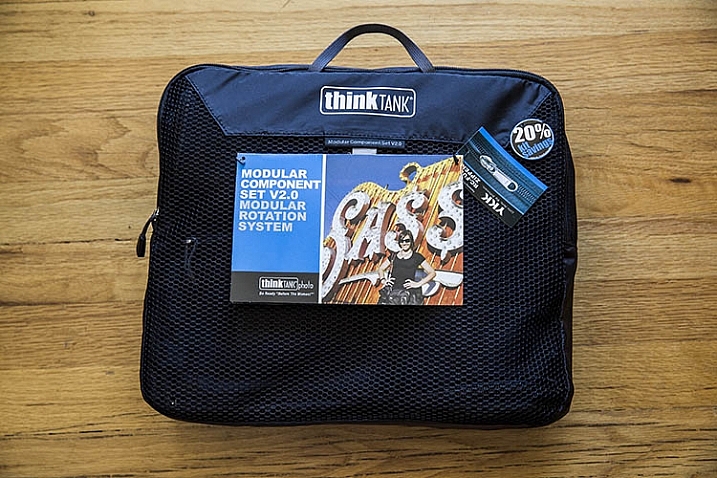
What’s in the Box
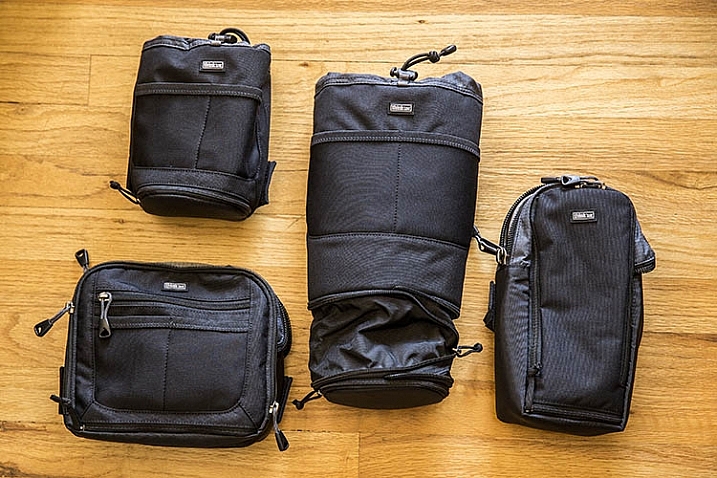
One of the best parts of this product, is that it includes the following modular components that can be used separately, or in conjunction with each other:
- Lens Changer 50 V2.0
- Lens Changer 75 Pop Down V2.0
- Strobe Stuff
- Speed Changer V2.0
Everything arrives neatly packaged in a zippered travel pouch.
What Fits
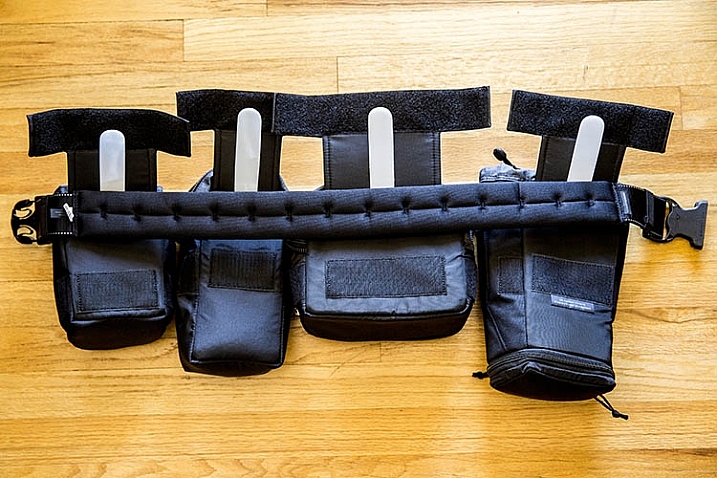
As you can probably tell by the product photo above, two of these modular components are pouches with drawstrings, while the other two are zippered mini bags. Let’s look first at the pouches.
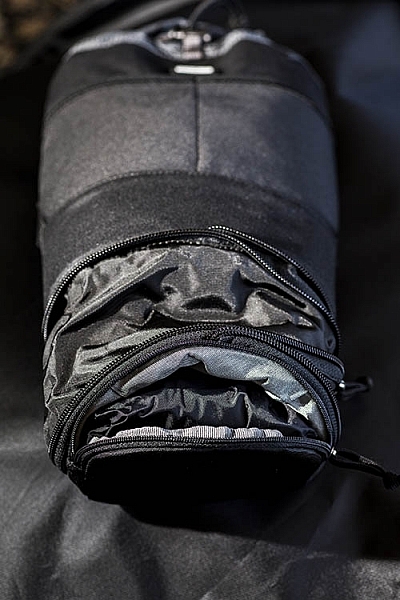 Pretty much any wide-angle or standard zoom lens will fit in the Lens Changer 50 pouch. The larger Lens Changer 75 pouch can unzip to extend its length, to be able to carry a lens as large as a 70–200mm f/2.8, or Canon EF 100-400mm f/4.5-5.6, with the lens hood reversed. Both of these pouches have wide, flexible openings, and drawstring cords that can be easily loosened or tightened with one hand. These two qualities make it very easy to quickly access the contents of the pouches. Each pouch also has a low-profile zippered bottom, that holds a rain cover.
In addition to the drawstring pouches, there are two mini bag components, one that can hold a large speedlight flash, and the other is quite a bit larger for holding extra small to mid-size lenses, or even a professional DSLR camera body without a lens attached.
Together, these modular components can hold quite a bit of gear if you use all of them, or you can slim down your pack by being more selective about the components you add to your belt. Speaking of that belt…
What isn’t included
If you purchase the Think Tank Modular Component System V2.0, you will also need to purchase one piece of gear that holds them all together: the actual utility belt itself. Think Tank offers three different versions of their Speed Belt. The main differences between them is the thickness of the material, with the thinnest being the Think Tank Thin Skin belt, and the thickest the Steroid Speed Belt. The middle option is the one that was used during this review: the Think Tank Pro Speed Belt, which has just the right amount of padding without too much added bulk.
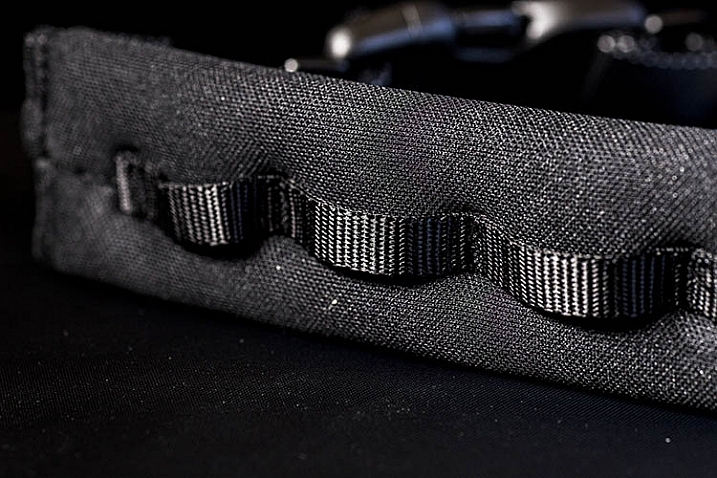
The Speed Belt can be used in conjunction with the Modular Component System, by attaching the pouches and mini bags to the belt via thick, secure velcro. Alternatively, you can also purchase larger holster bags, that can also be attached to the Speed Belt.
Pros
This Modular Component System is very valuable for event or wedding photographers, who need quick and easy access to a wide repertoire of gear, while constantly shooting on the go. Wearing your gear as a utility belt, gives you a slimmer profile to weasel through crowds, while capturing photos of an event without accidentally hitting people with a bulky shoulder bag. Also, shooting with the Modular Component System gives you the polished look of a professional photographer, with the bulk of your gear on display. With that said, there are some cons to using this product.
Cons
As mentioned above, wearing your gear on full display makes it more accessible to you during a shoot, but it also exposes the fact that you have lots of valuable camera gear. If you’re a street or documentary photographer, you probably won’t want to use this product, as you don’t want to attract unwanted attention. Additionally, while it can be tempting to load up the components with a ton of gear, this can quickly become overly bulky and heavy, so it’s important to be selective about how much you actually want to carry.
Over to you
Have you used the Think Tank Modular Component Set, or a similar belt system before? What was your impression of it? Let us know in the comments below!
googletag.cmd.push(function() {
tablet_slots.push( googletag.defineSlot( “/1005424/_dPSv4_tab-all-article-bottom_(300×250)”, [300, 250], “pb-ad-78623” ).addService( googletag.pubads() ) ); } );googletag.cmd.push(function() {
mobile_slots.push( googletag.defineSlot( “/1005424/_dPSv4_mob-all-article-bottom_(300×250)”, [300, 250], “pb-ad-78158” ).addService( googletag.pubads() ) ); } );The post Review: Think Tank Modular Component Set V2.0 by Suzi Pratt appeared first on Digital Photography School.
-
Anxious Anticipation: Photos Made to Pump Up Your Adrenaline
[ By WebUrbanist in Art & Photography & Video. ]

Comprised of hair-raising scenes designed to keep you on the edge of your seat, this series of photos leads your mind to jump forward in time, picturing the catastrophes about to unfold.

Photographer Aaron Tilley worked with art director Kyle Bean to create the sequence for Kinfolk Magazine’s “adrenaline” issue. Their collaboration, titled In Anxious Anticipation, evokes a sense of expectant dread, all through still shots that simply lead the brain to fill in the blanks.

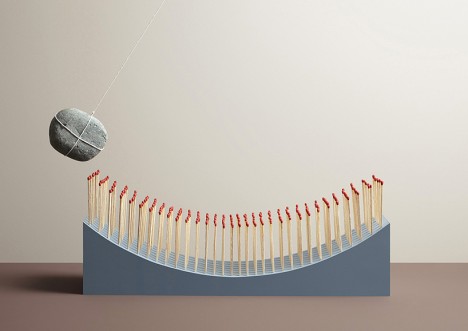
In one, an ink pen is poised to drip on a clean white shirt below. In another, a rock looks ready to light a fire, prepped to swing across a set of strike-anywhere matches.
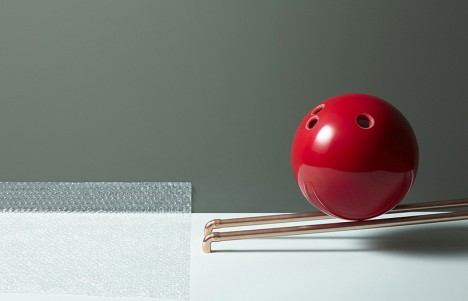
Each picture cues to viewer to complete the sequence, imagining the sight and sound, for instance, of a bowling ball running along and popping an unrolled sheet of plastic bubble wrapping.
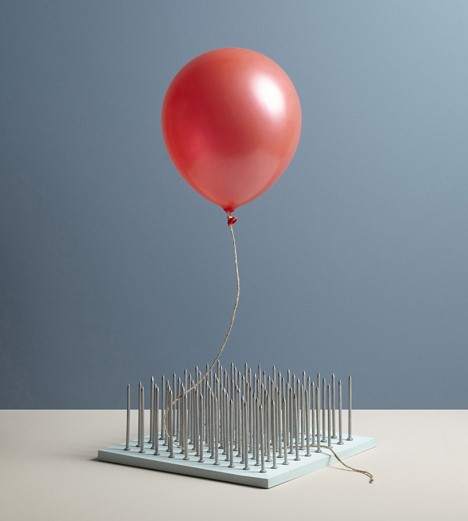
From the magazine: “The connection between what the mind perceives and how the body reacts is a curious relationship. Adrenaline flows into our autonomic nervous system when it anticipates that something bad is about to happen—not because something bad is already happening. This hormonal offensive was an essential survival tool for our earliest ancestors that came with our fight-or-flight response, which defends us against immediate threats.”
Want More? Click for Great Related Content on WebUrbanist:
10 Pimped Out Pump Jacks Give The Nod To Urban Oil Art
Mechanical “nodding donkeys” are usually found grazing on oil fields but in urban settings they can look crude. So, how can I pimp your pump jack today?
Click Here to Read More »»
Top of the World: Photos & Videos from Atop Tallest Towers
First he presented a photo-edited version (carefully stitched together) to show what the view would look like without the building he on top of which he took …
Click Here to Read More »»
Worlds on End: Geometrically-Rotated Photos Twist Landscapes
In a smooth and simple motion, a single section of each image in this series is utterly transformed, this piece rotated until it sits precisely upside down …
Click Here to Read More »»
[ By WebUrbanist in Art & Photography & Video. ]
[ WebUrbanist | Archives | Galleries | Privacy | TOS ]
-
Laser Precision: 3D Site Scan Enables Architectural Intervention
[ By WebUrbanist in Architecture & Houses & Residential. ]
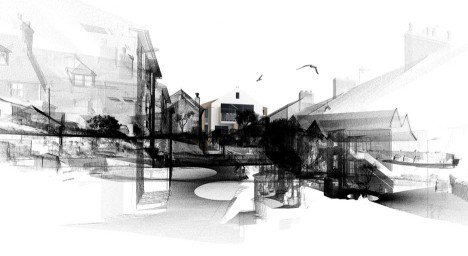
Incredibly accurate laser-scanning technology, precise down to a hundredth of a millimeter, has helped British architects not only plan a new structure but also secure permission from a local planning commission. Their proposed Rock House, now approved, preserves both natural and architectural features currently on a government-protected site.

Cornish firm Poynton Bradbury Wynter Cole (PBWC) Architects enlisted CESurveys to lidar scan the existing property, located in a conservation area. Their scanner system fires tens of thousands of lasers per second to get precise distance readings on complex terrain. Compared to traditional surveying and site-mapping strategies, this approach is much faster, cheaper and more effective.


The results are translated into a three-dimensional model that can be manipulated, showing the effects of site changes or interventions. Scans from around sites are stitched together to form a complete picture.


The resulting models have an array of benefits, including the ability to show approving parties what the impacts of additions and remodels might be to a given property. They also helped the architects, in this case, maintain key lines of site, such as views out to the sea, and limit the cost of revisiting the site frequently to document additional features. Slices of the scans also make it easy to generate sections and elevations, sliced directly out of the models.

Applications of lidar scanning goes well beyond architecture, too, including the ability to document historic infrastructure and preserve 3D models of fresh crime scenes.
Want More? Click for Great Related Content on WebUrbanist:
X-Ray Urbanism: Laser Scans Record & Reveal Sub-City Spaces
Produced from over 200 laser scans, this remarkable 3D representation covers surface features as well as subterranean spaces of it’s London subject, …
Click Here to Read More »»

Architecture for the Apocalypse: NYC as a Heritage Site
As the seas rise, New York City’s future is in doubt. This proposal turns it into a heritage site with a large sand barrier and towering concrete wall.
Click Here to Read More »»

Baked In: Laser-Etched Rolling Pins Imprint Edible Patterns
Laser engraving wraps all the way around these clever and customizable pins, creating anything from robots and dinosaurs to mazes and words to liven up your …
Click Here to Read More »»
[ By WebUrbanist in Architecture & Houses & Residential. ]
[ WebUrbanist | Archives | Galleries | Privacy | TOS ]